A lot of you wanted the step by step tutorial on this DIY shiplap fireplace makeover that Kevin and our friend Joe did (in Joe’s home). It turned out really amazing. They did such a good job. I had a basic vision of taking the existing fireplace mantle completely off, (it was very traditional and really too small for the space) and coming up with something that we could DIY. It had to not take too much time and not cost a ton of money.
Sounds like a simple request right? “I don’t want this to take too much time or money!” haha! Famous last words.
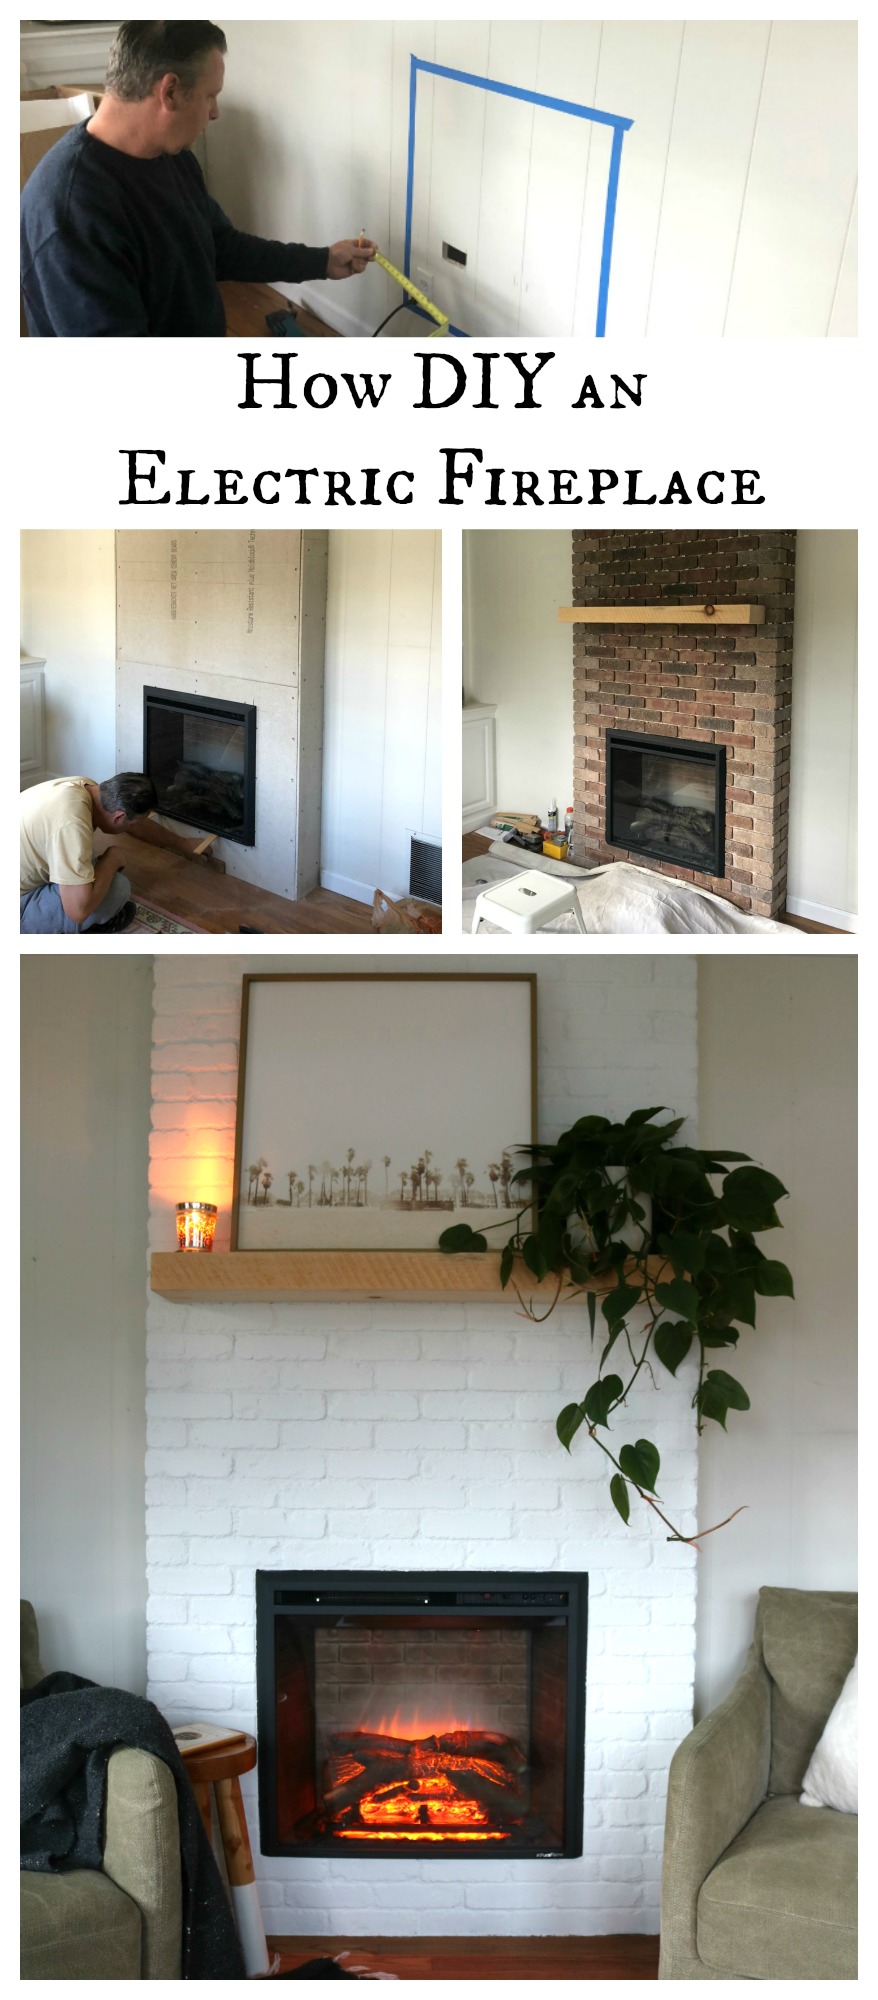
In our home we added an electric fireplace to a wall that had nothing on it. I had a similar vision for Sarah and Joe, but instead of brick do shiplap. Brick takes WAY more time and costs A LOT more money. We only had one day and we wanted to share something the anyone could DIY too!
I felt that shiplap would look the best in Joe and Sarah’s home anyways. We actually hired someone to do our fireplace, but I watched the process and knew we could easily duplicate it and for 1/4th of the time that ours took by just doing shiplap.
We have the steps written out below so you can DIY your own fireplace (thanks to Joe!) But first let’s talk about the time and money…..
Shiplap Fireplace Makeover Time Spent-
Actual time working on the fireplace was probably around 10 hours if you include painting. Not included was all the time they spent measuring, shopping for supplies and us hashing out what we were going to do. So add in about another 3 hours (and less in your case, since we did a lot of that for you!). Kevin worked on the fireplace with Joe for about 6 hours, then Joe did the last steps.
Shiplap Fireplace Makeover Budget-
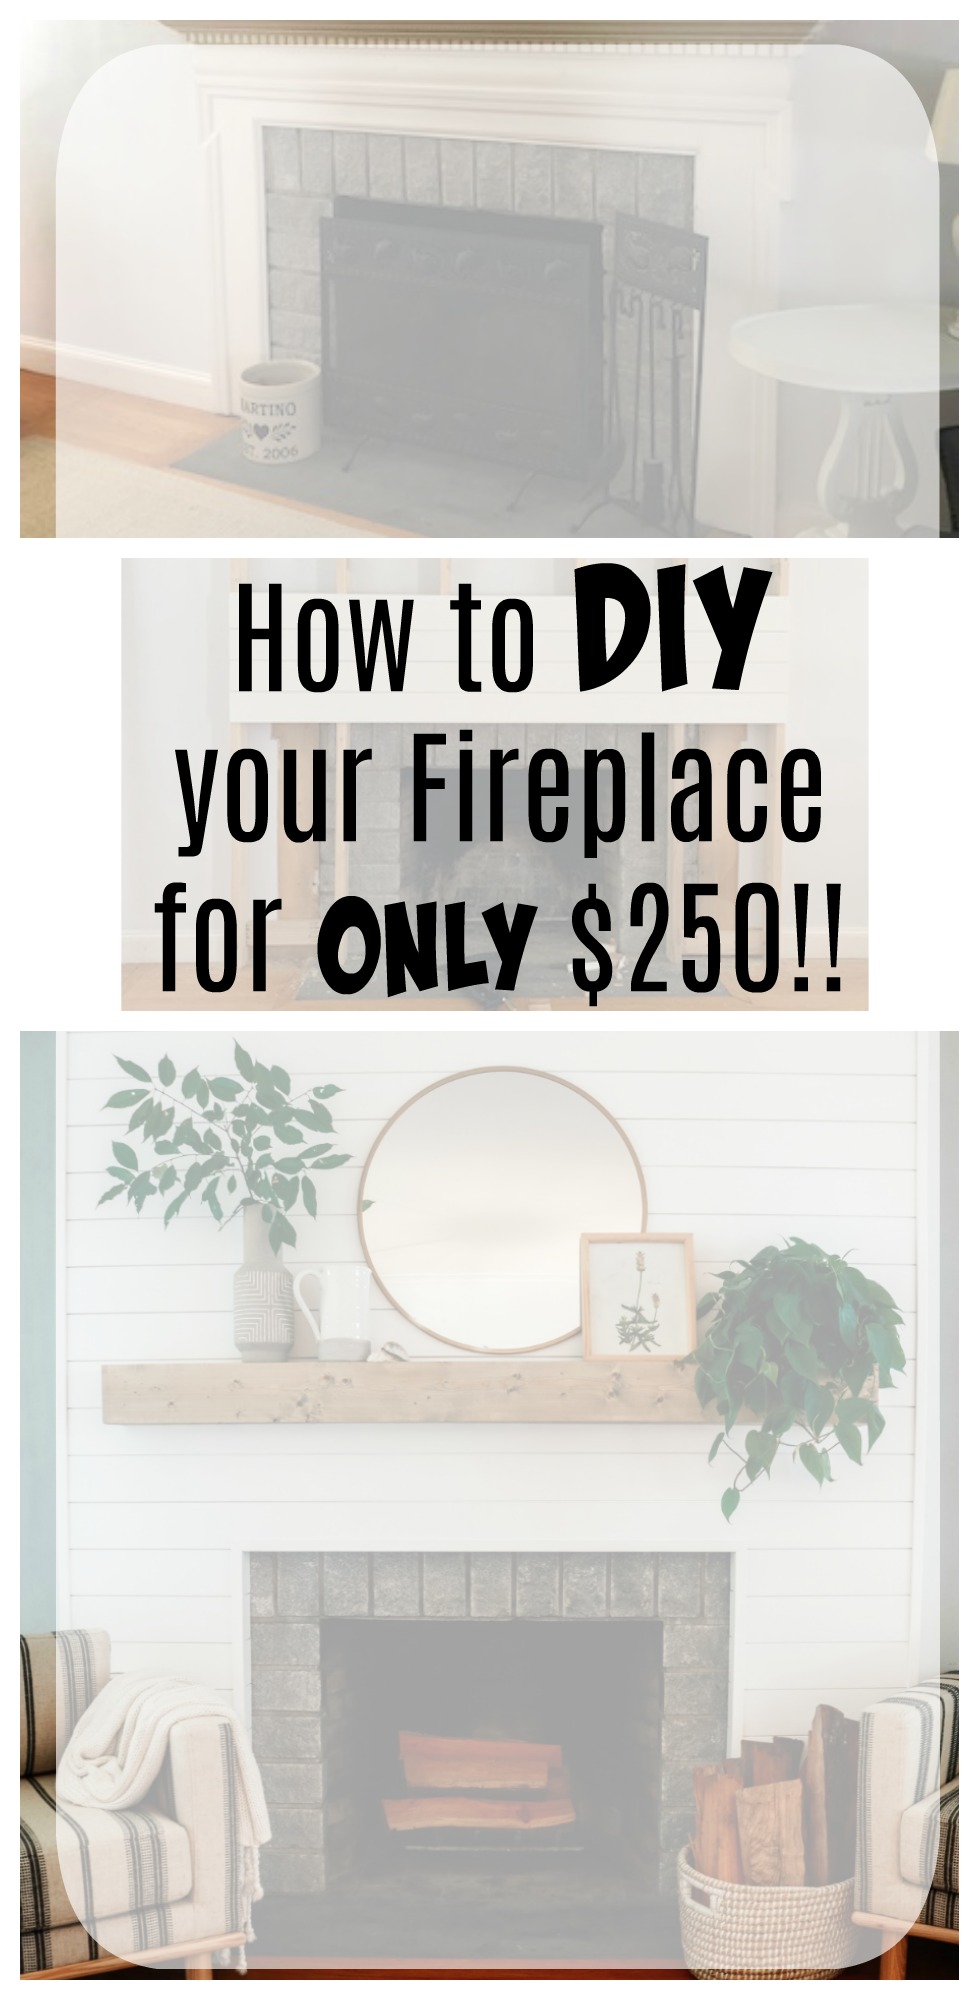
Supplies cost about $250 for all the 2×4’s, shiplap, paint, trim, wood for the mantle and stain. NOT bad at all!!! Considering your mantle alone would cost that much to buy. The DIY mantle was probably around $25! ***We already had a saw and nail gun, so if you don’t have those you will have to add in the cost to rent them.
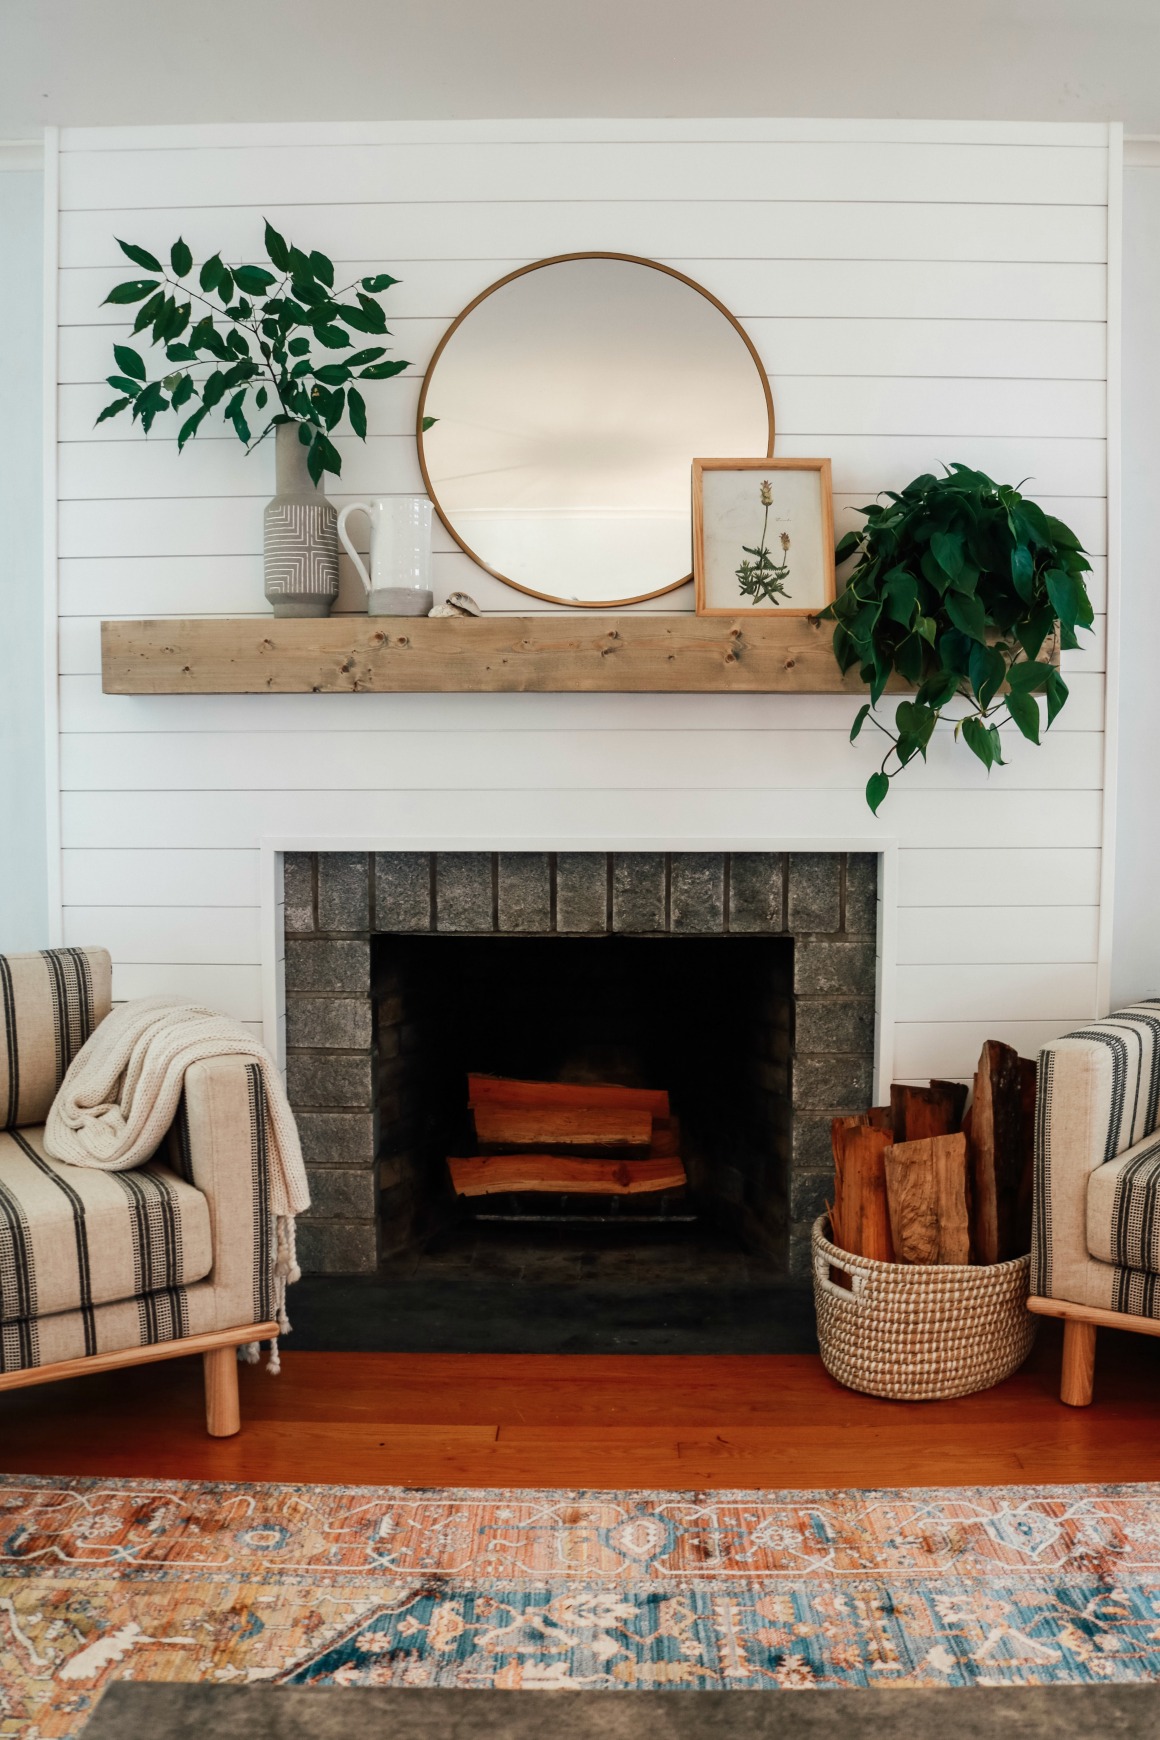
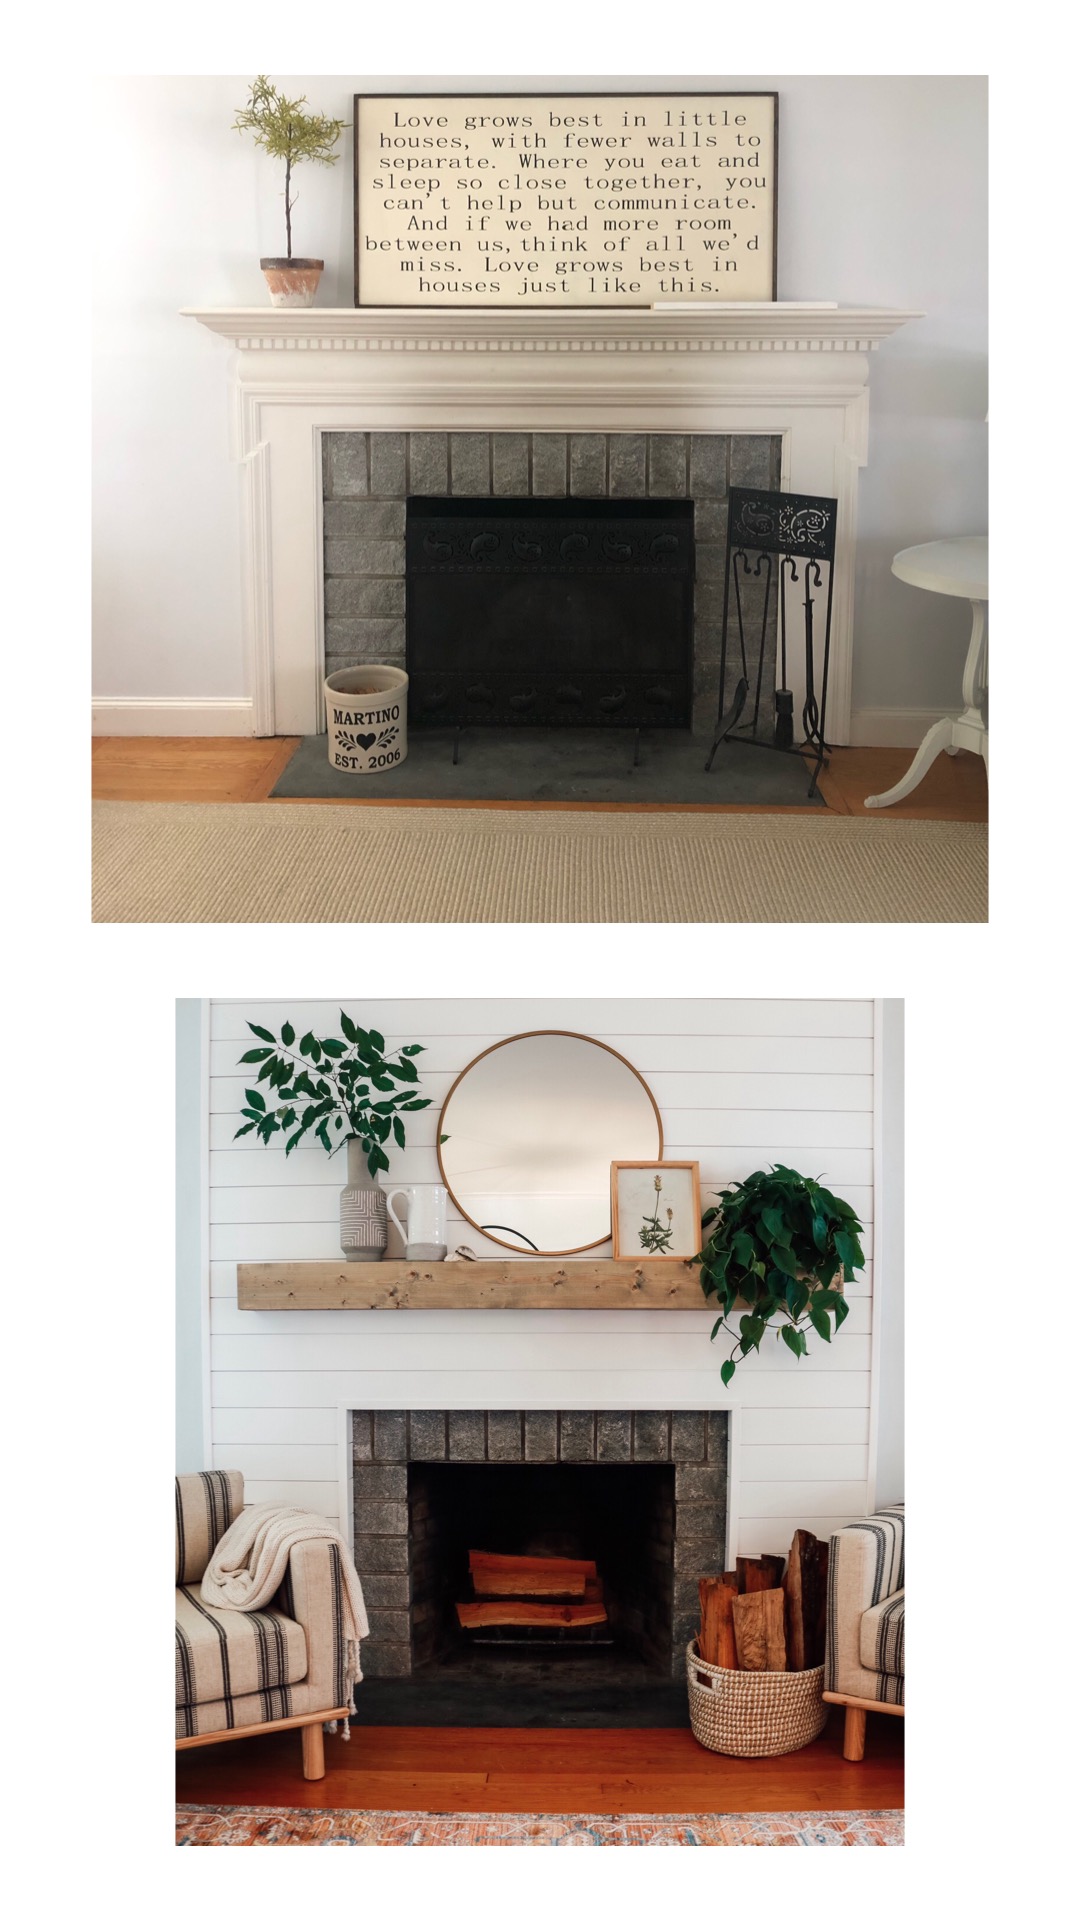
Fireplace Before-
Shiplap Fireplace and Mantle Tutorial-
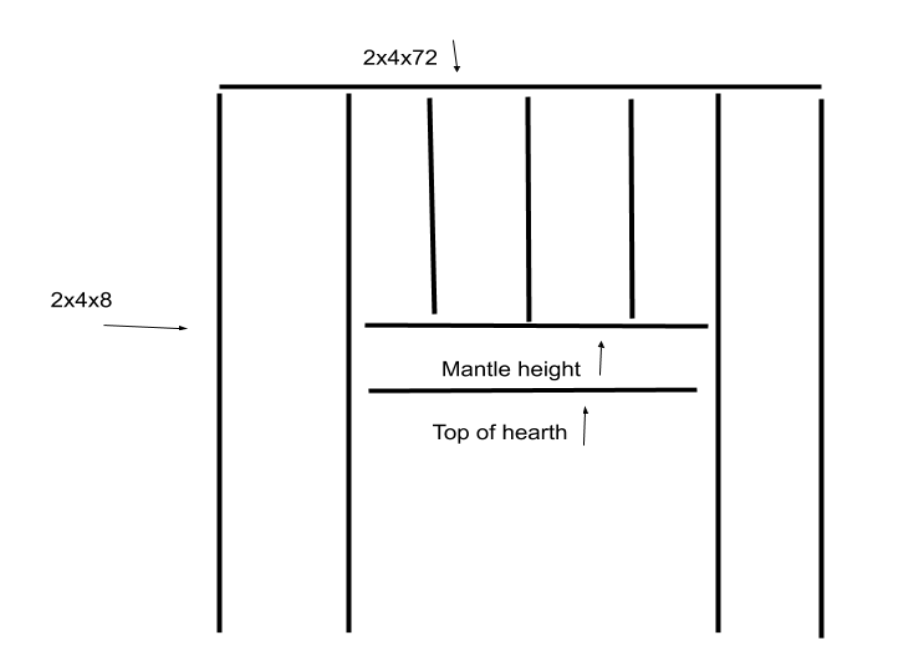
Frame
- All 2×4’s are secured against a wall on their edge using 5 inch screws and all vertical boards are attached to the header using construction nails.
Face
- 8 foot primed shiplap boards are cut and tacked to the frame using 2 inch finish nails with a nail gun. Starting at the lowest whole board closest to the hearth and working up. Tacking the boards on the section of board that gets covered by the other. Once you get to the ceiling, start working down the sides of the hearth. When the front is complete, small pieces will get tacked to the sides.
Trim
- I used white primed 1⅛ “outside corner” for all edges of the fireplace. Be sure to use a miter cut 45 degree angle when fitting around the hearth. All trim is held with 1 inch brad nails using a nail gun.
Paint
- All nail holes are filled with wood putty and painted two coats of Behr interior satin enamel in ultra pure white. Non mixed right off the shelf (this is the same color for all interior trim of the home).
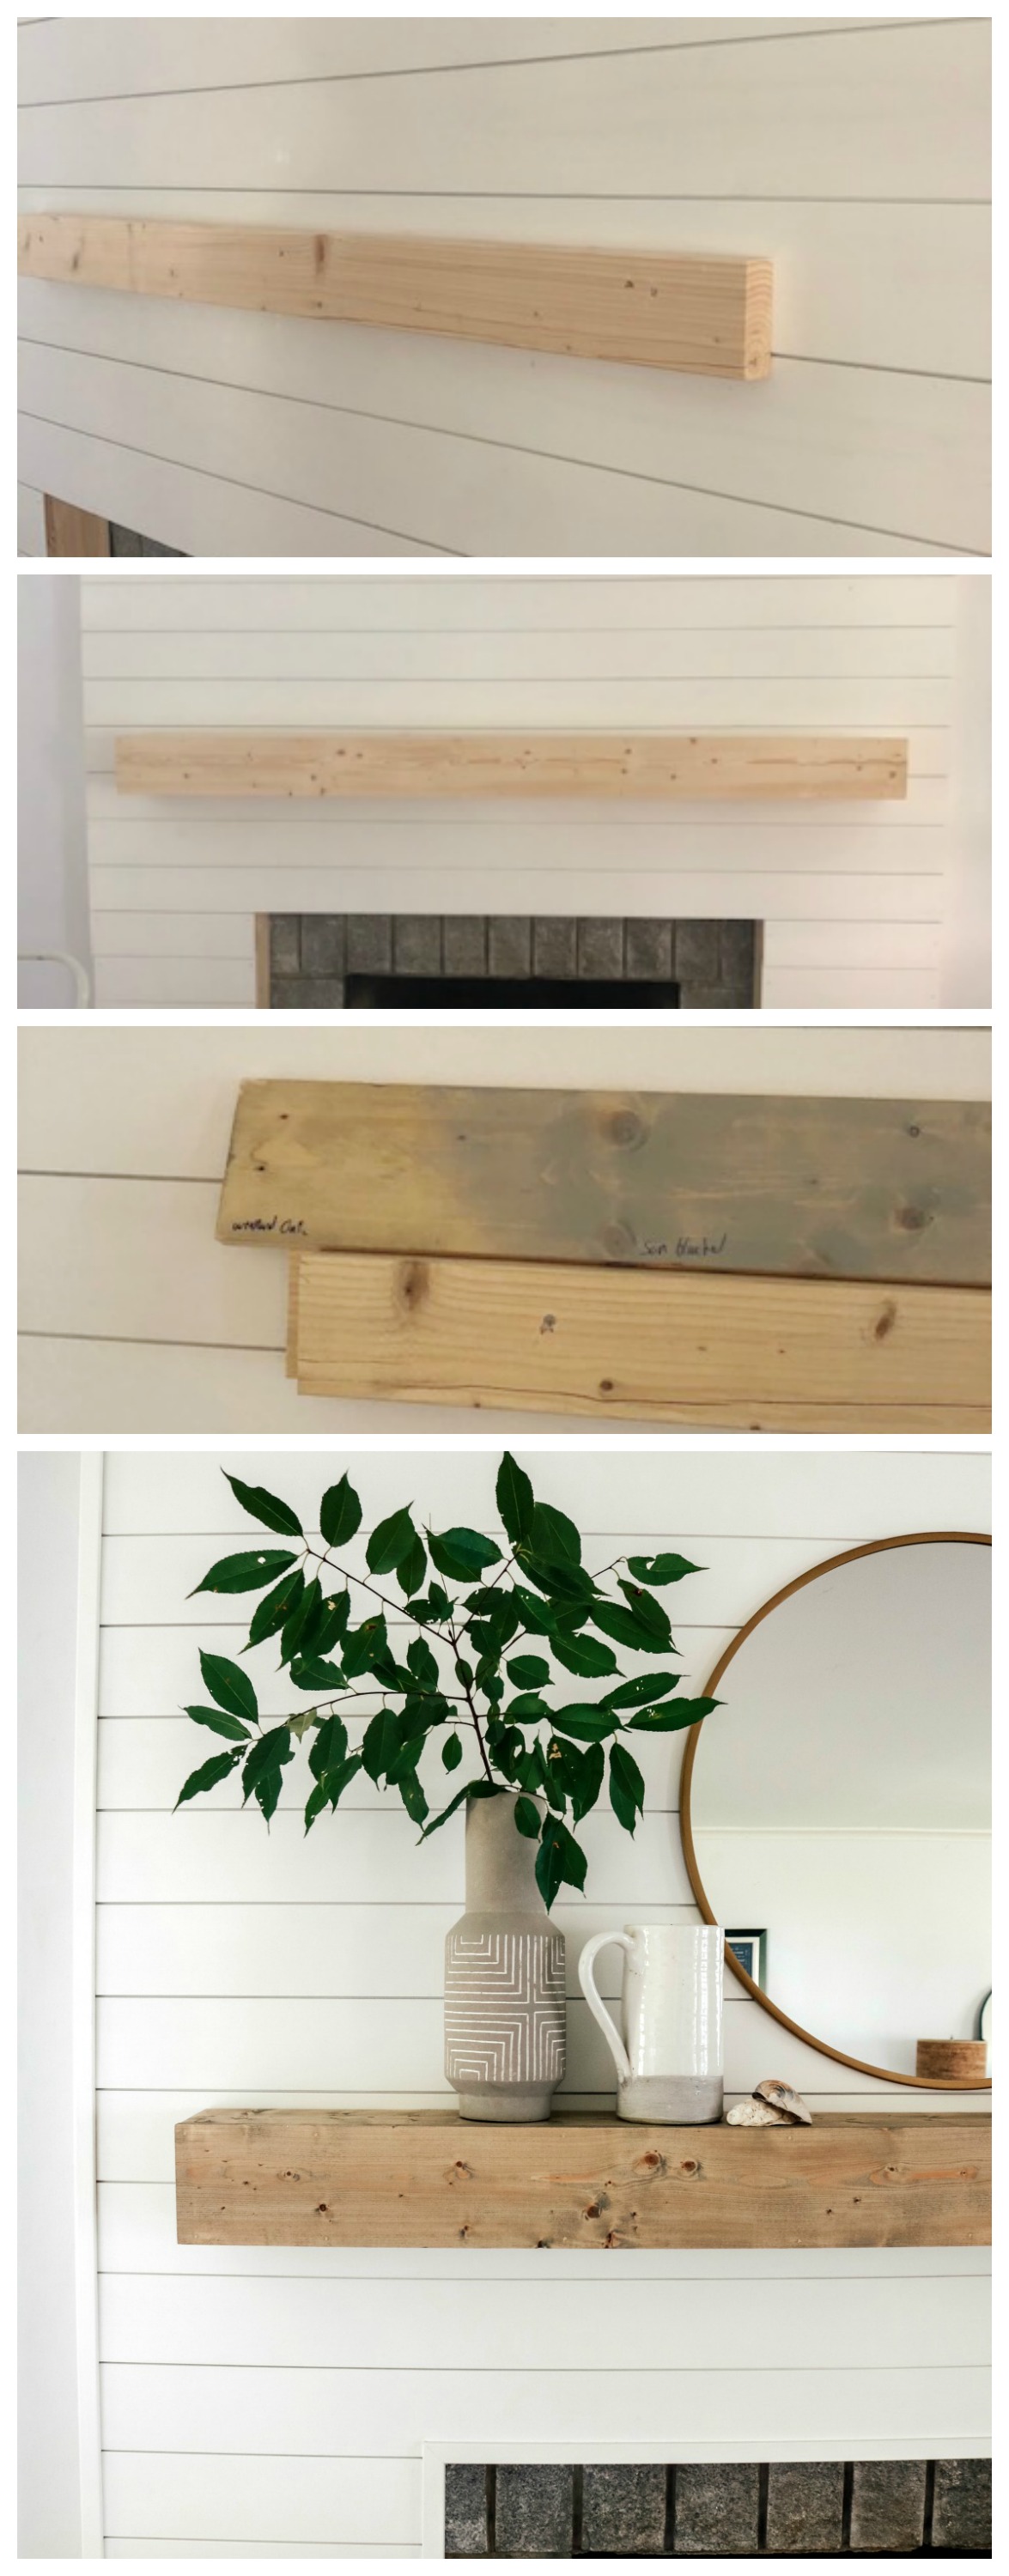
Mantle
- Three 1”x6”x6’ common pine boards. Common has knots and select don’t. Three boards were tacked together to form a box which is open in the back. End caps are scrap pine. Boards are stained with varathane classic wood penetrating stain in Weathered Oak (I really wanted the stain to lean more towards a white wash or gray vs the orange colors that are in their floor).
- Boards were stained with three coats using a foam brush and wiped down with a clean lint free cloth after 5-10 minutes or before they dry. The longer the stain sits, the darker it gets.
- There are two pine 2×4’s nailed to the shiplap at the desired height. Open section of mantle fits over boards and then screwed into top of mantle to hold in place.
Below are photos of the fireplace makeover I snapped along the way-
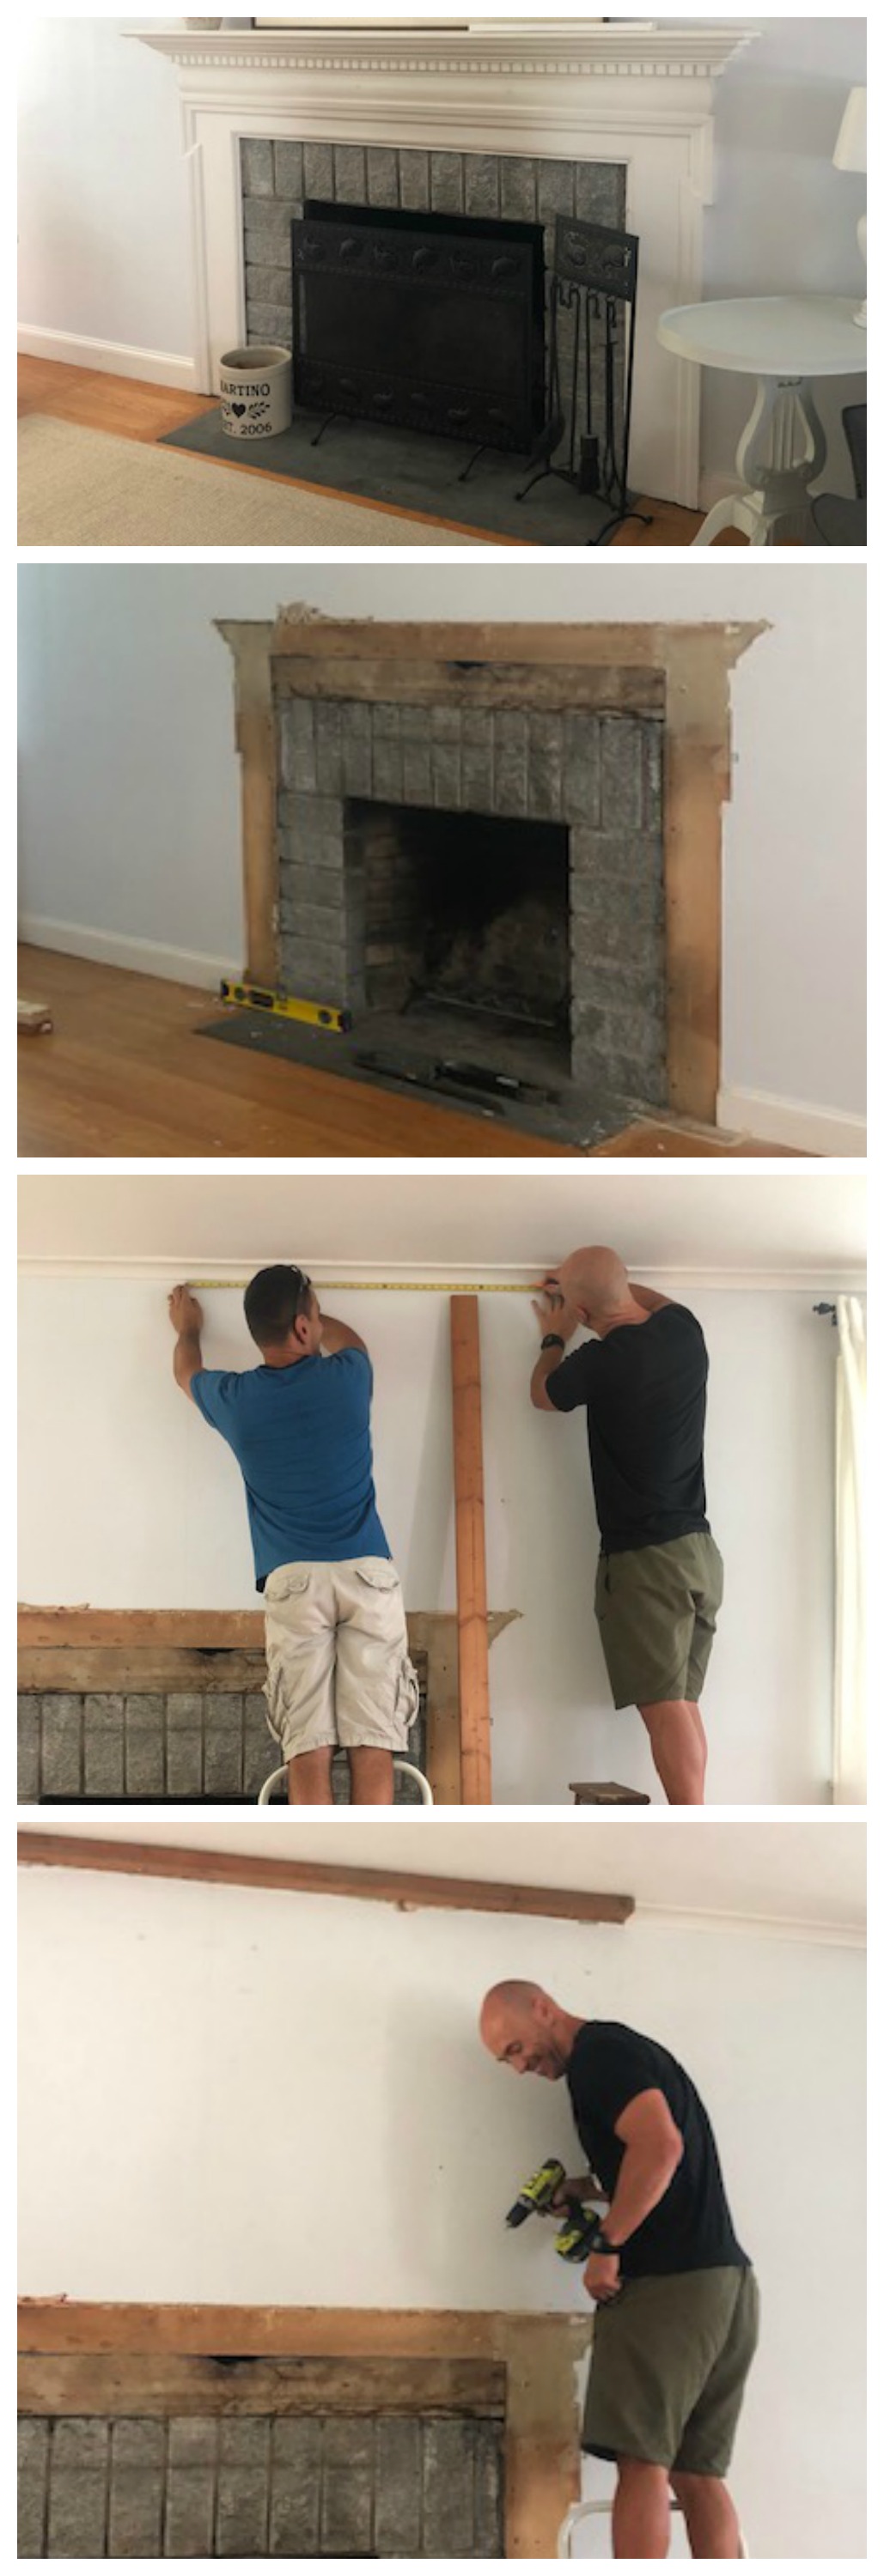
Photos above- first remove the original fireplace and the molding on the ceiling and begin to frame-
- Use a sharp utility knife to cut through the layer of paint where the fireplace or molding meets the wall.
- Next, tap a thin pry bar between the fireplace and the wall (or molding).
- Work your way along the molding using the pry bar and shims to loosen the molding.
- They added a piece of 2×4 to the ceiling the width we wanted the fireplace to be (keep in mind the width the shiplap comes in and also the scale of the fireplace opening and hearth).
***I didn’t get photos of them removing the trim and fireplace. But you can see photos of what I described above HERE
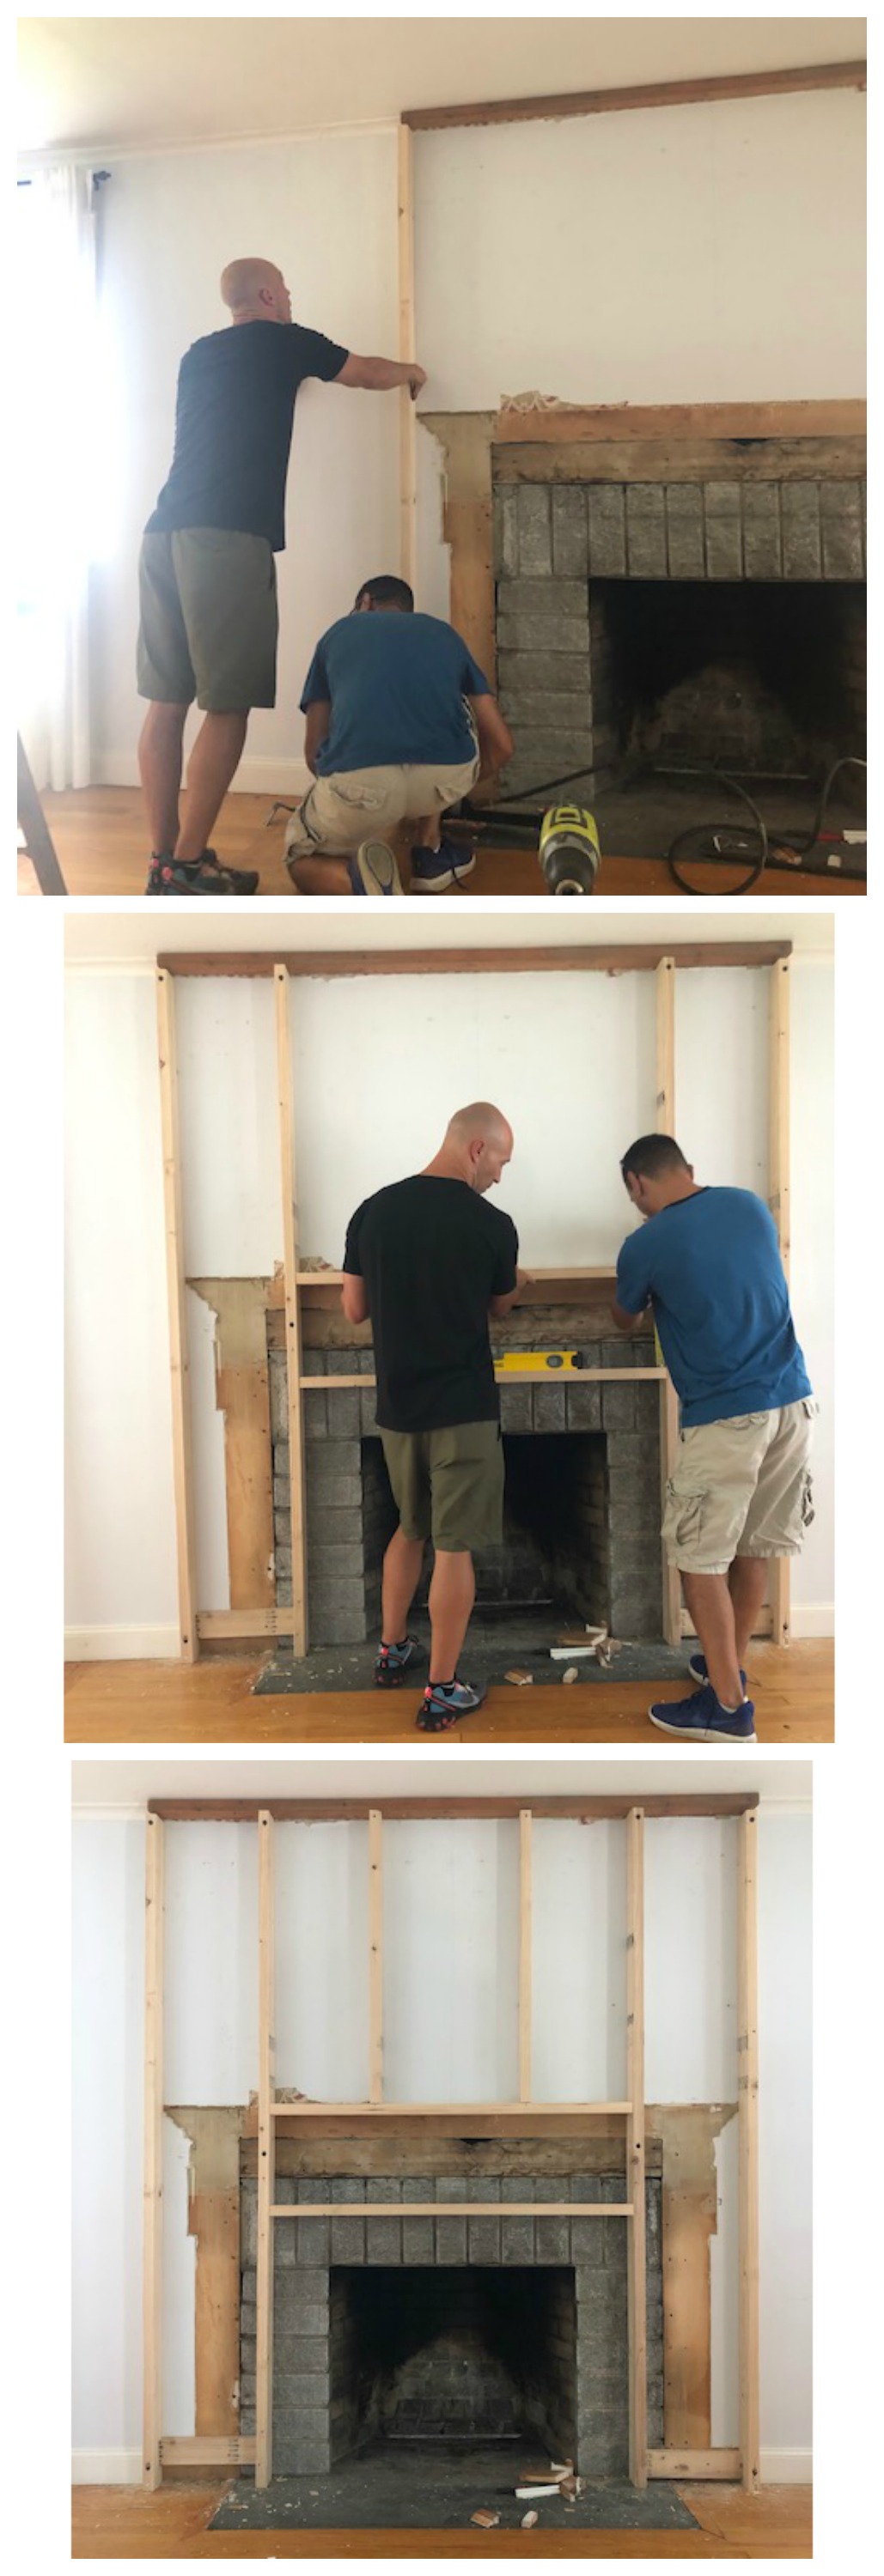
Photos above show how they framed out the fireplace. The 2×4’s are what they attached the shiplap too with a nail gun. We made sure to place the 2×4’s exactly where we wanted to cover up some stains or cracks that were on the stone. Also they placed a 2×4 exactly where we would hang the mantle, knowing it needed to go into a stud for support.
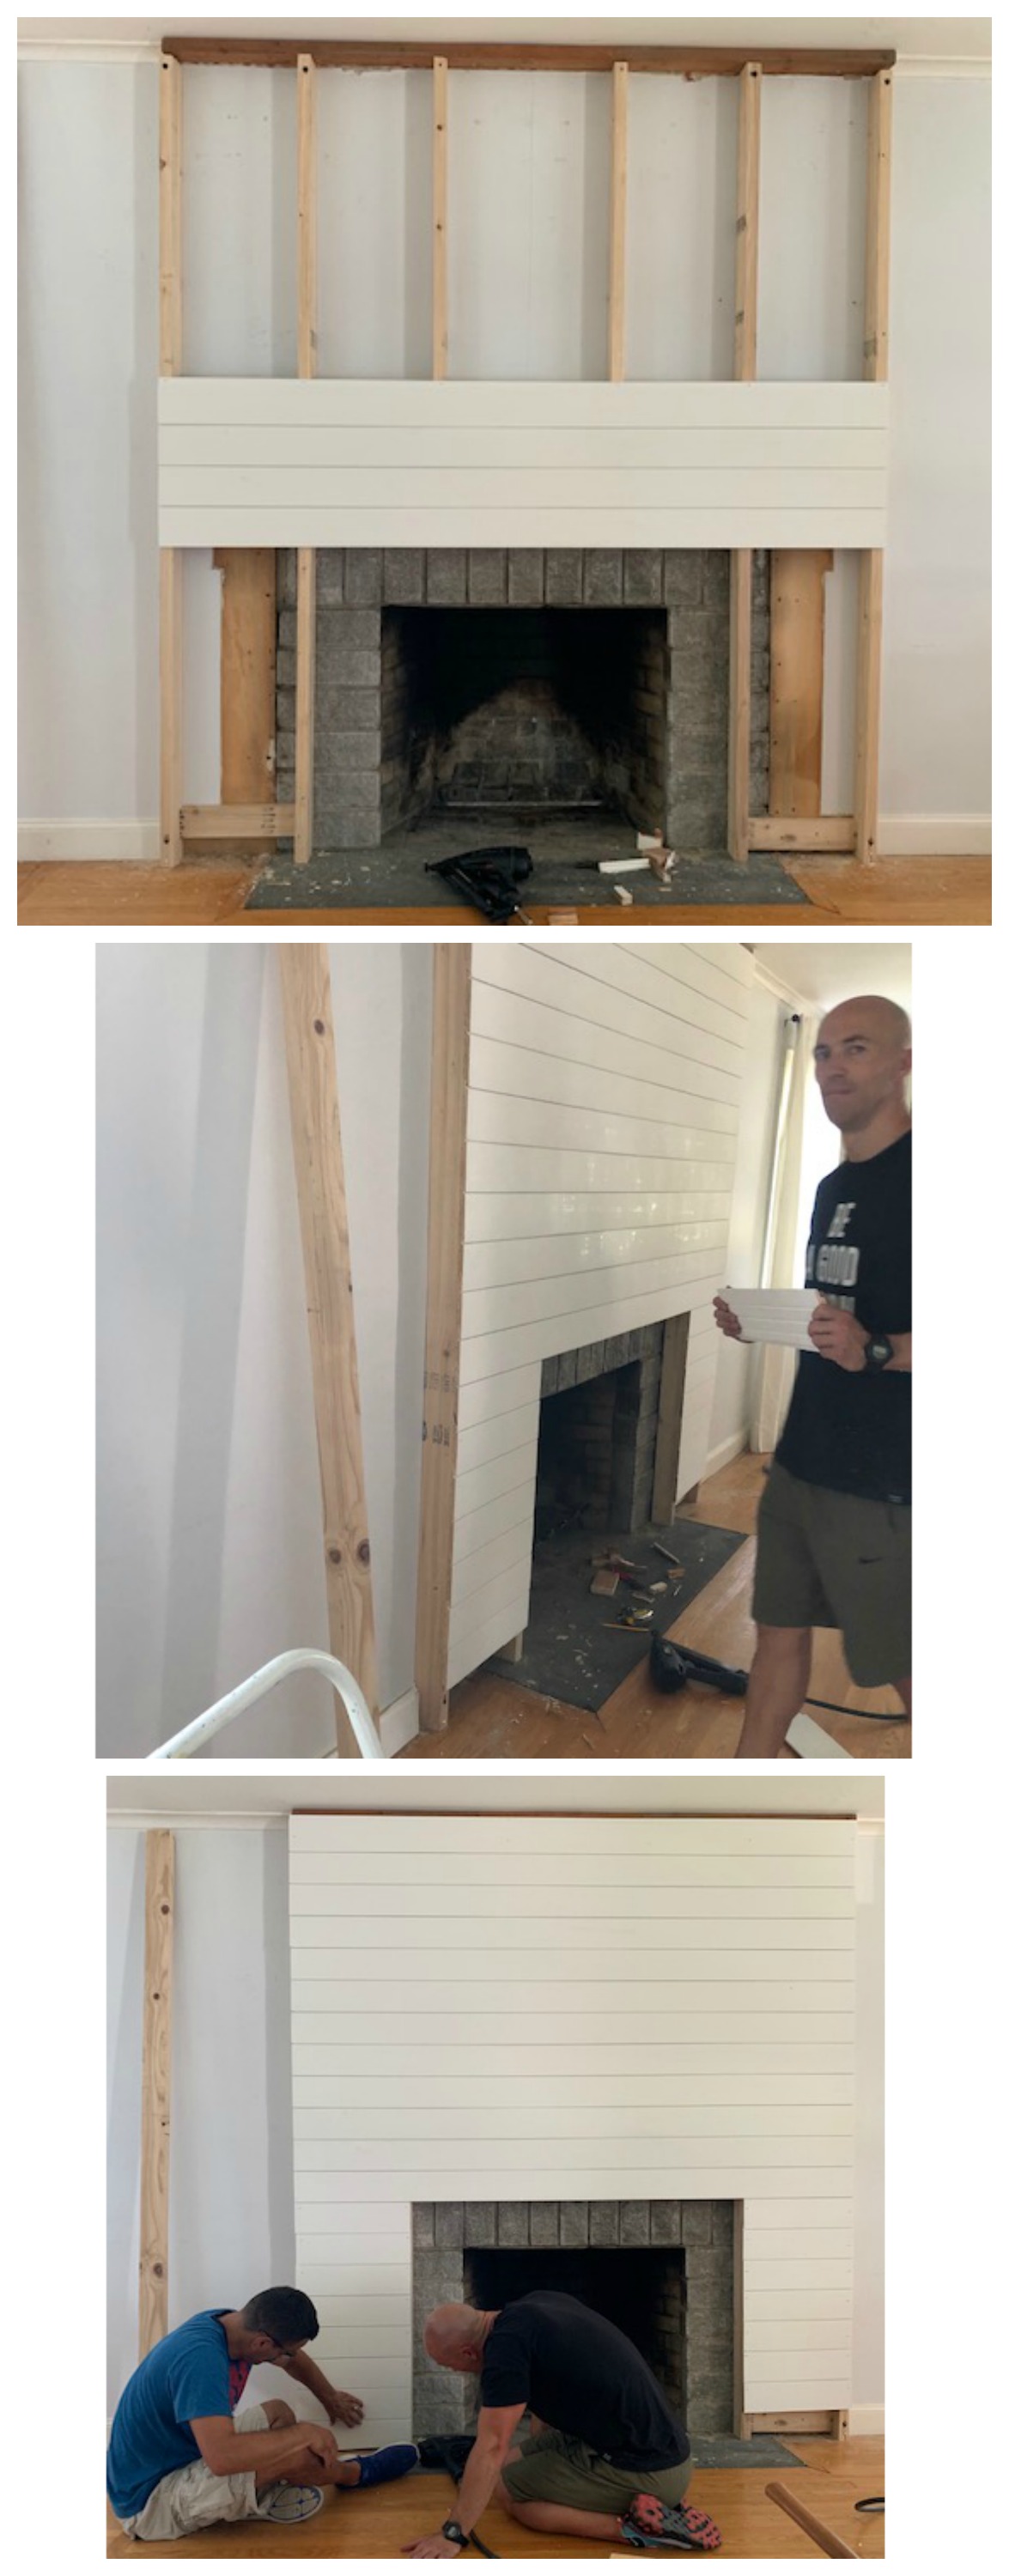
Hardest part of installing the shiplap was getting those last bottom pieces in. There was a gap that they caulked to hide! Easy enough. You can read above exactly how they installed the shiplap, starting at the lowest whole board closest to the hearth and working up.
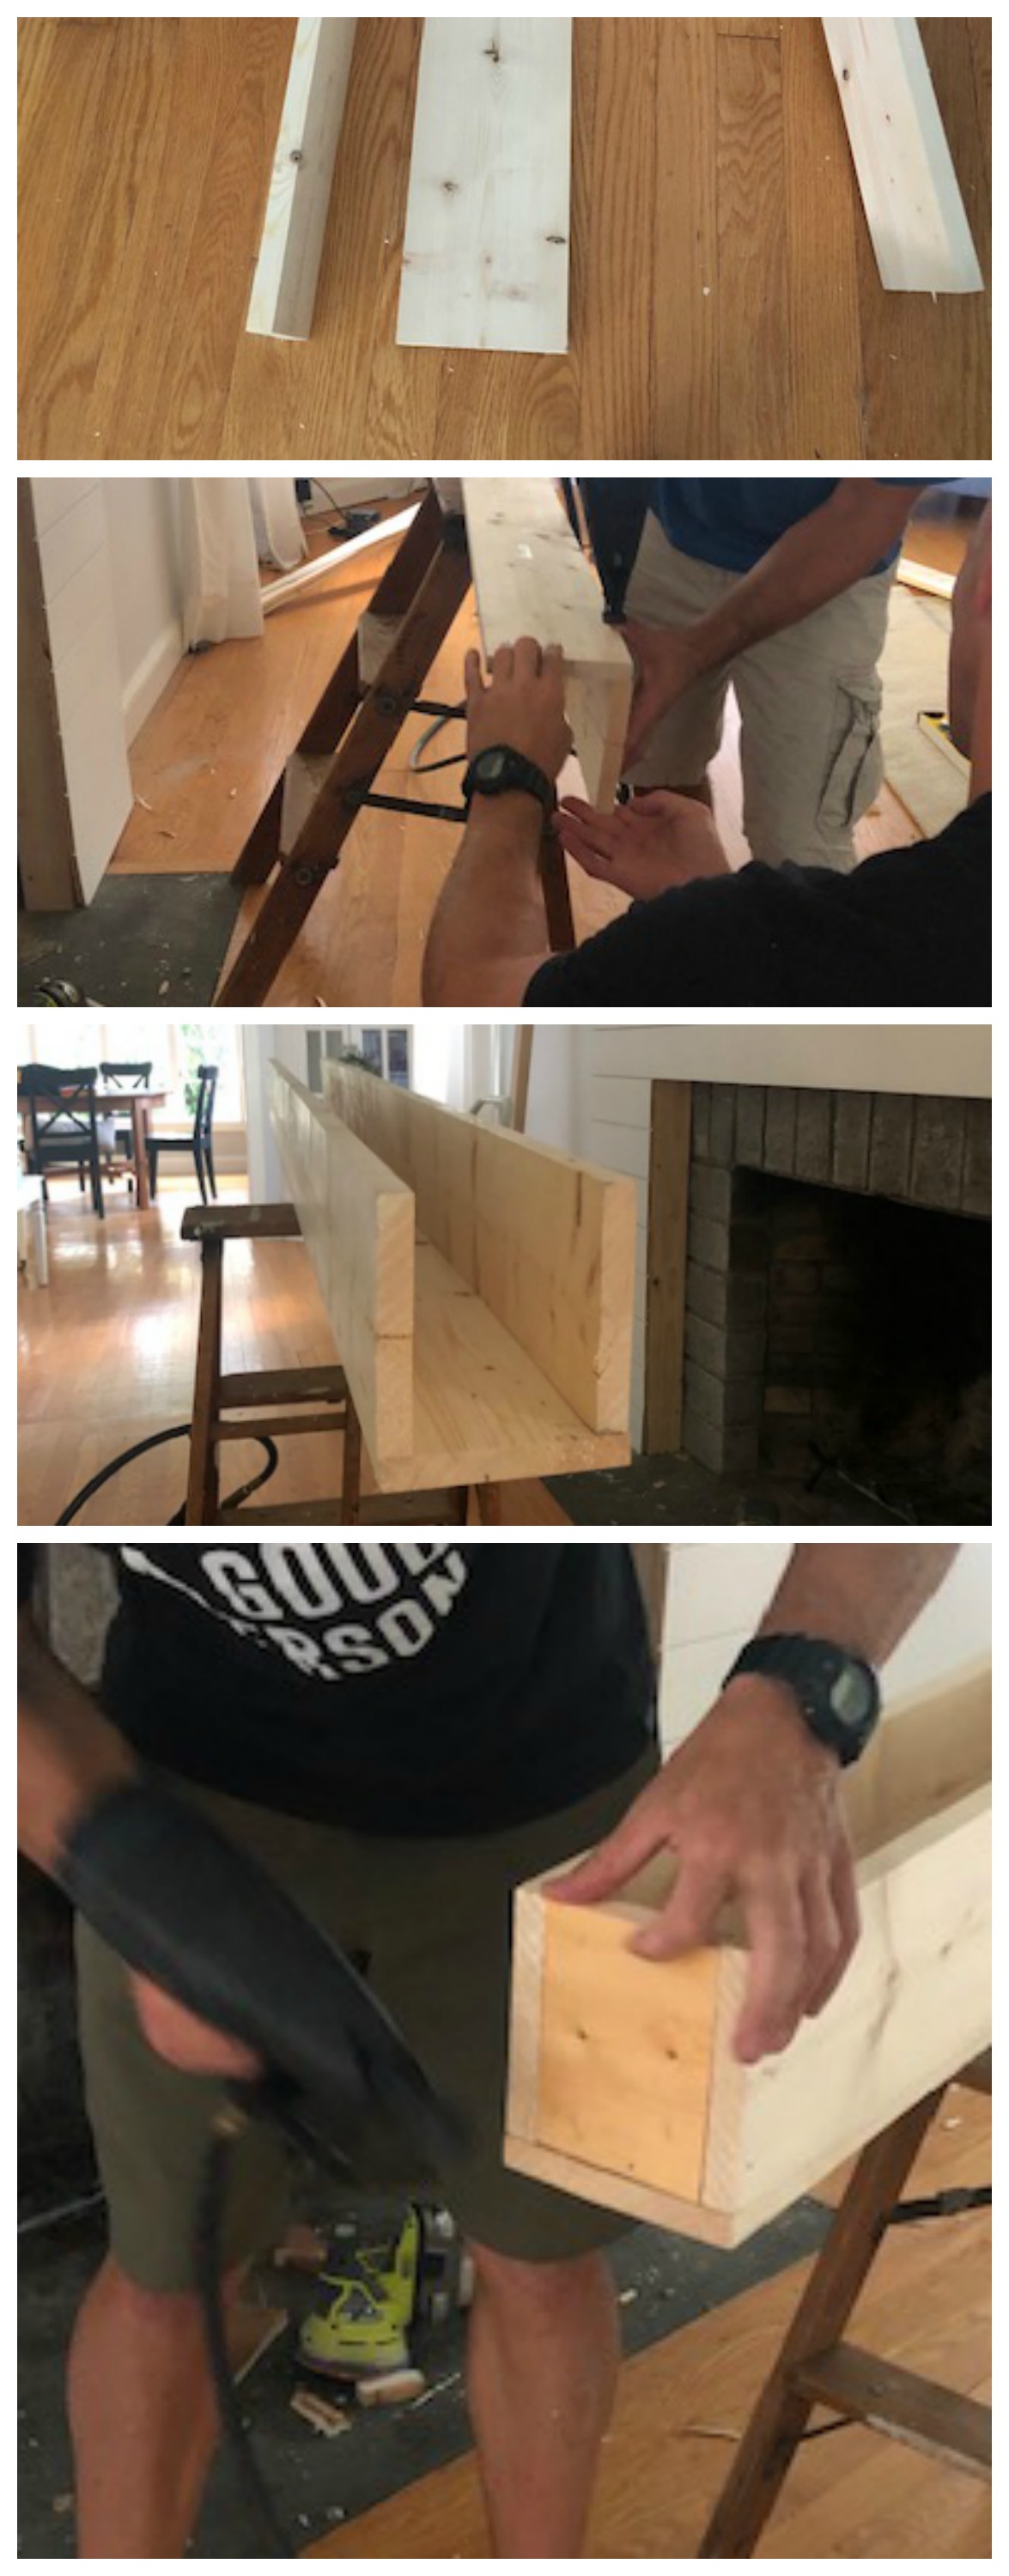
Above you can see how easy it is to build the mantle and follow Joe’s Tutorial above. And Below show the 2×4 that they attached to the shiplap wall into studs. Then they screwed in the mantle to the top of this 2×4 (they actually did two 2×4’s to make sure it could hold a lot of weight).
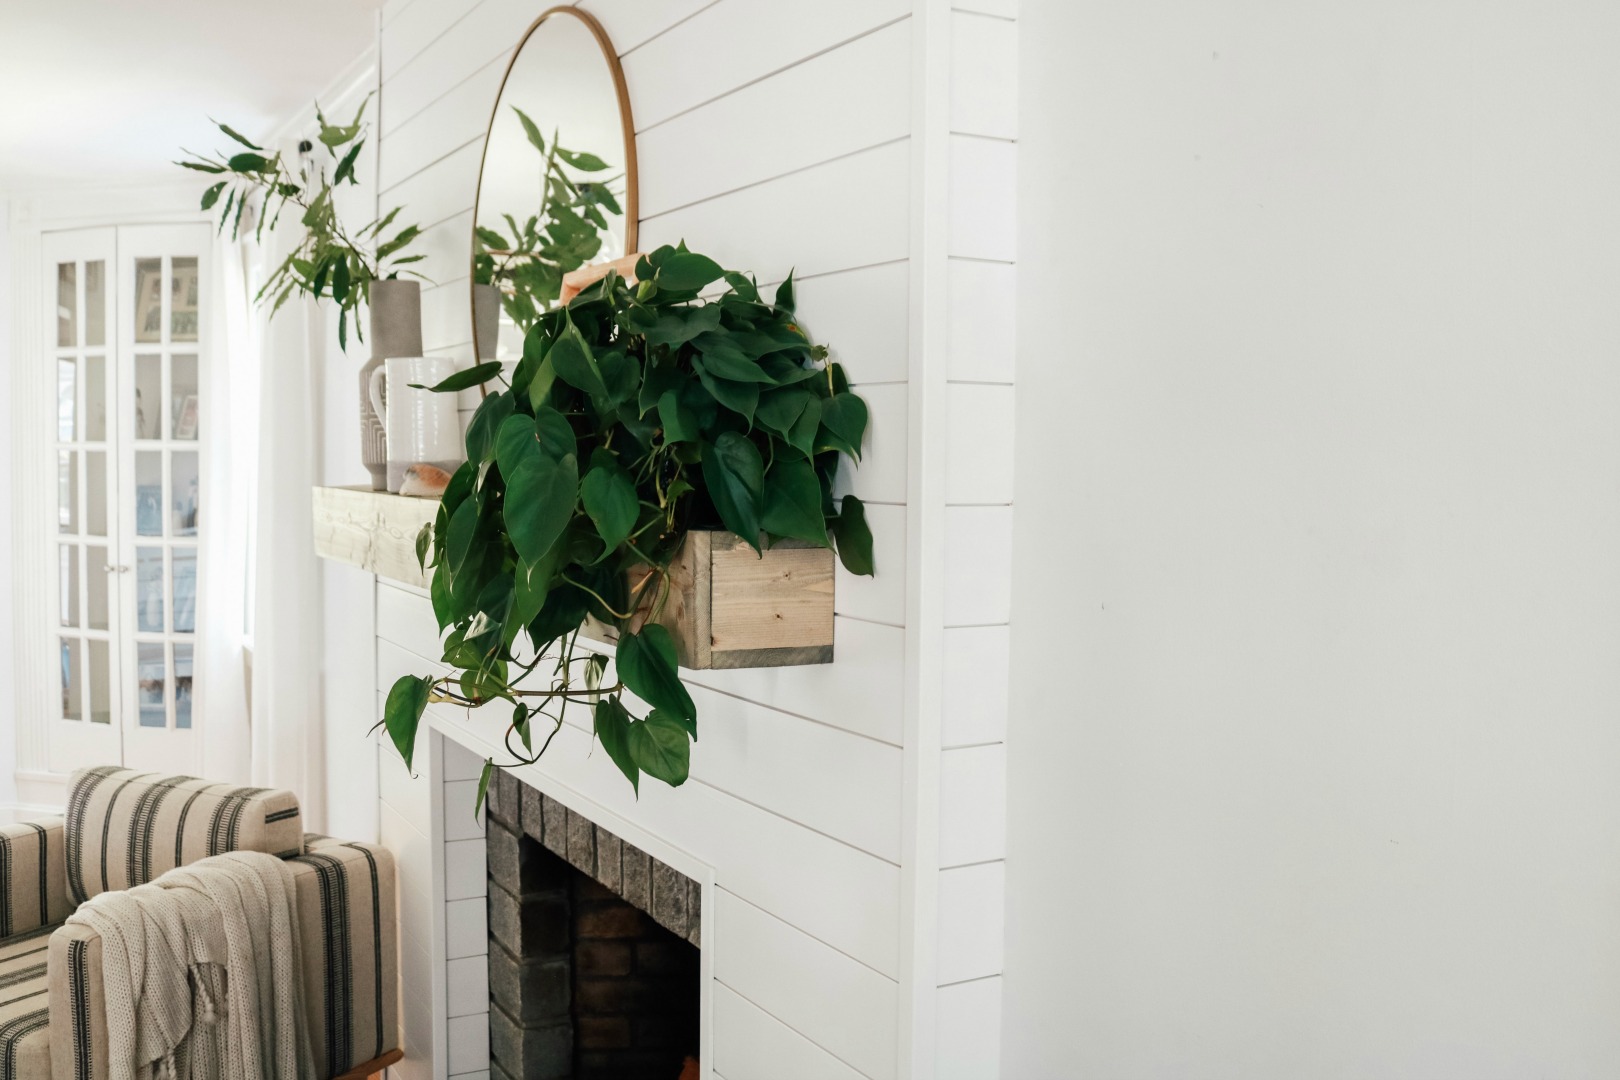
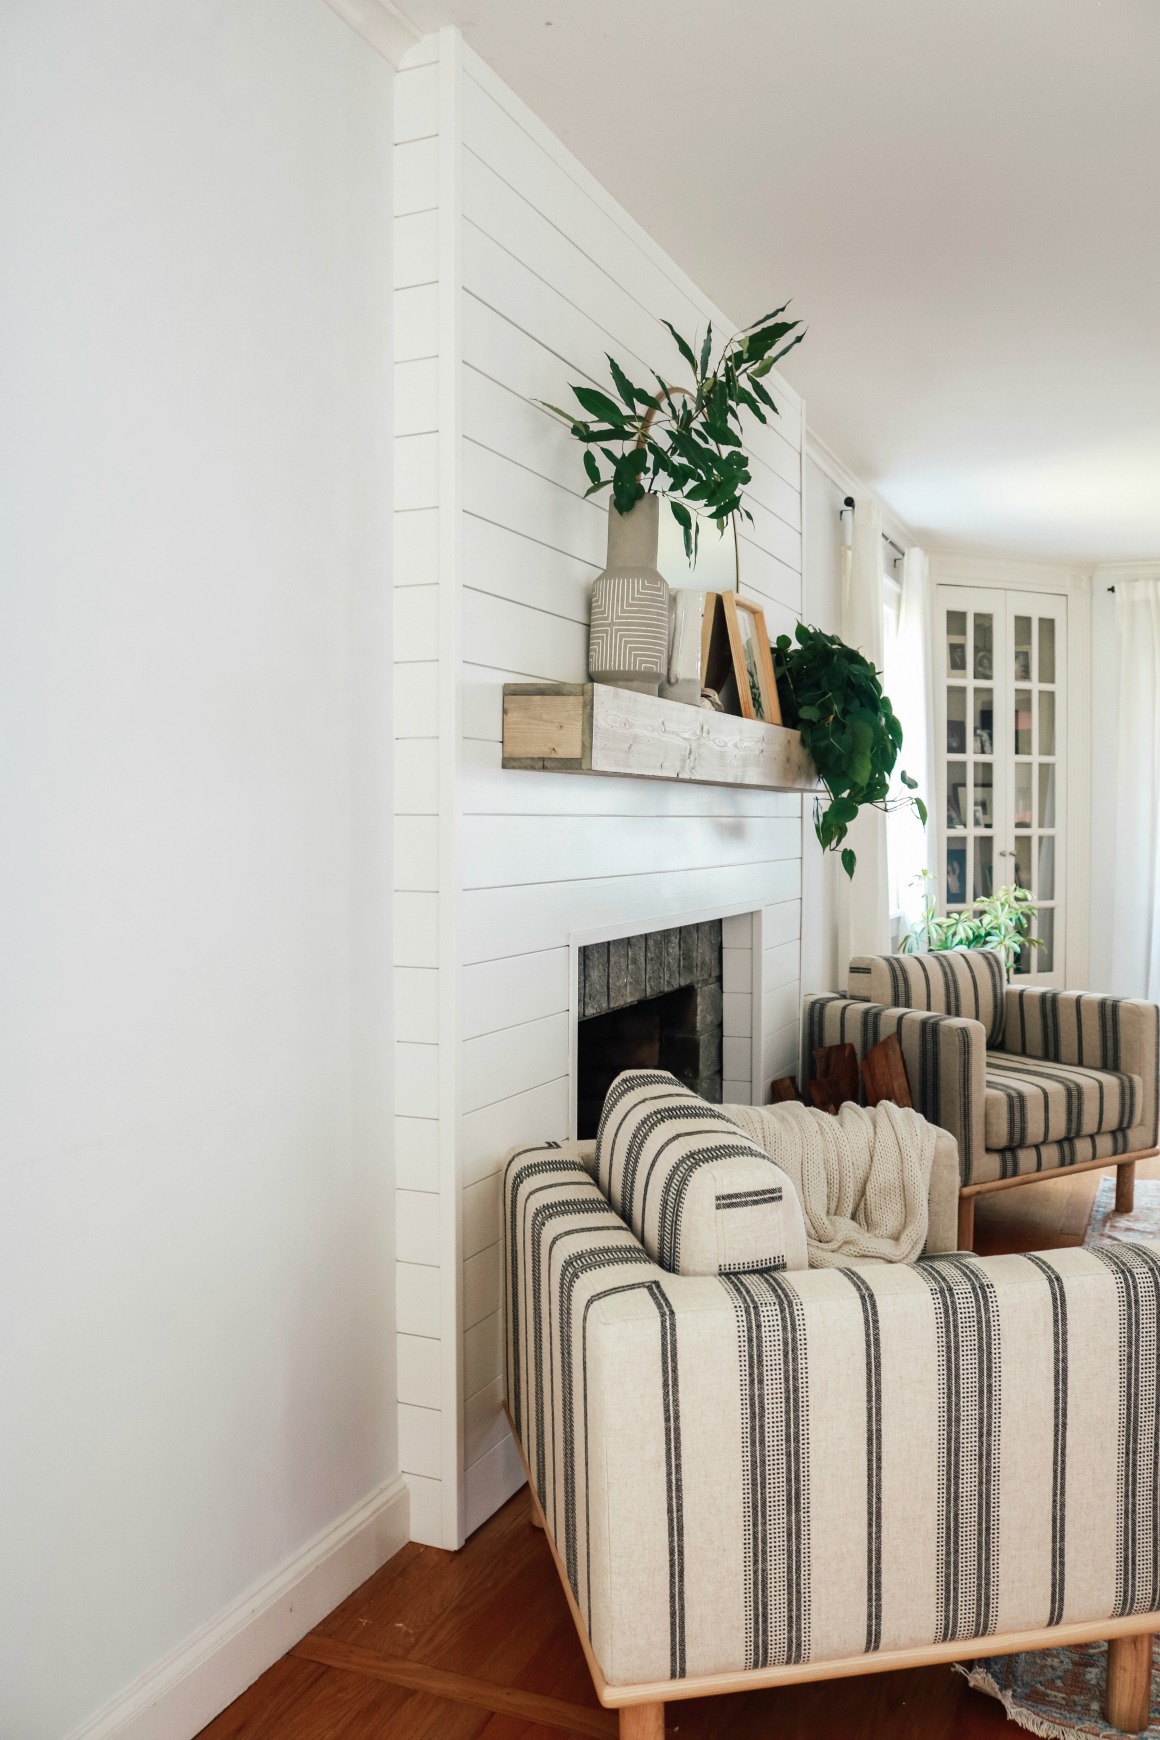
Hope that was helpful!!! You can see the entire room makeover HERE and keep reading for more DIY Fireplace ideas……

Shop the post-


What stain did you use for the mantle itself?
the color? It is written in the post- Boards are stained with varathane classic wood penetrating stain in Weathered Oak
Where are those gorgeous chairs from? I didn’t see them linked anywhere
They are linked on the other post. But here you go-
https://rstyle.me/n/dqzphab5qwf