I asked for your input on this family room that I recently made over for my friends. We had an overwhelming response on Social Media about what chair to choose! I gave 4 options and the funny thing is the chair that got the most votes was one I added last minute because I loved the pattern and needed another option, not thinking it would be the winner. Since we were finishing the room my friend asked me to do a gallery wall up her stairs for family photos.
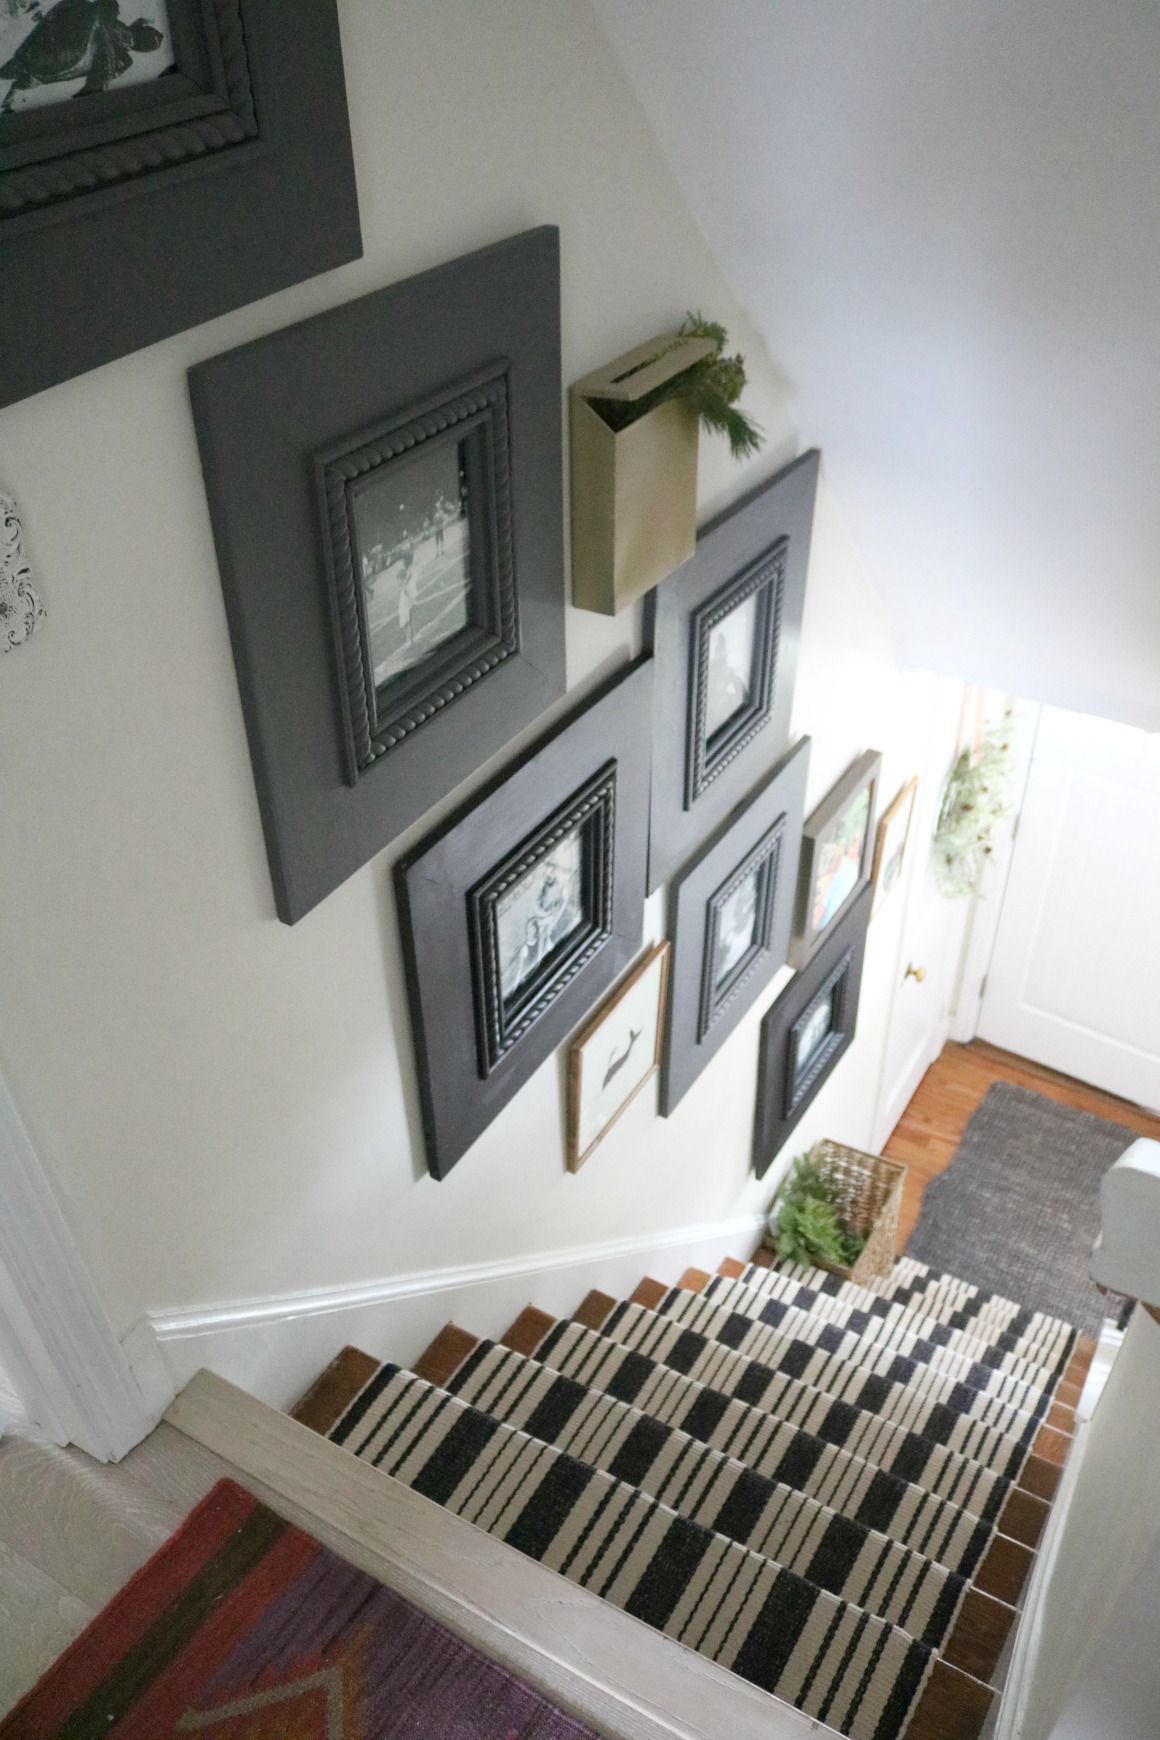
First up let’s take a look at the Staircase BEFORE the Gallery Wall….
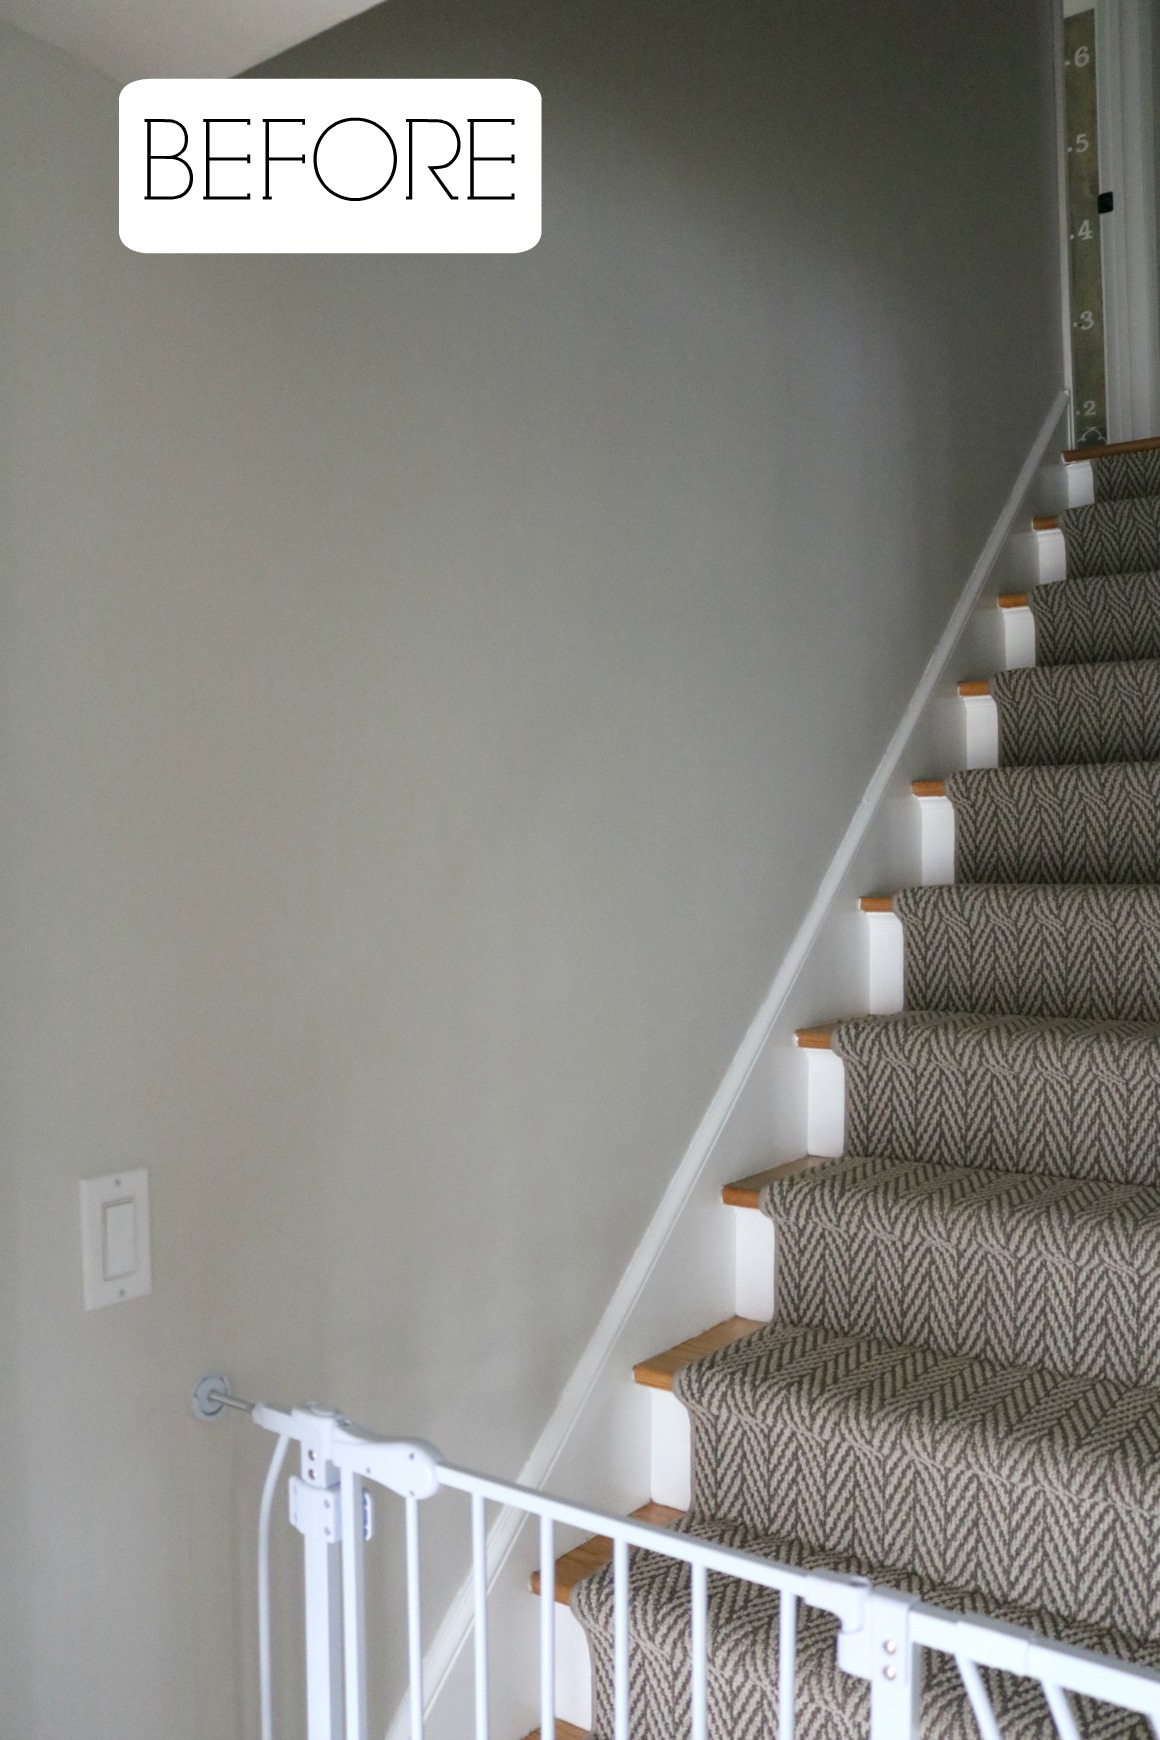
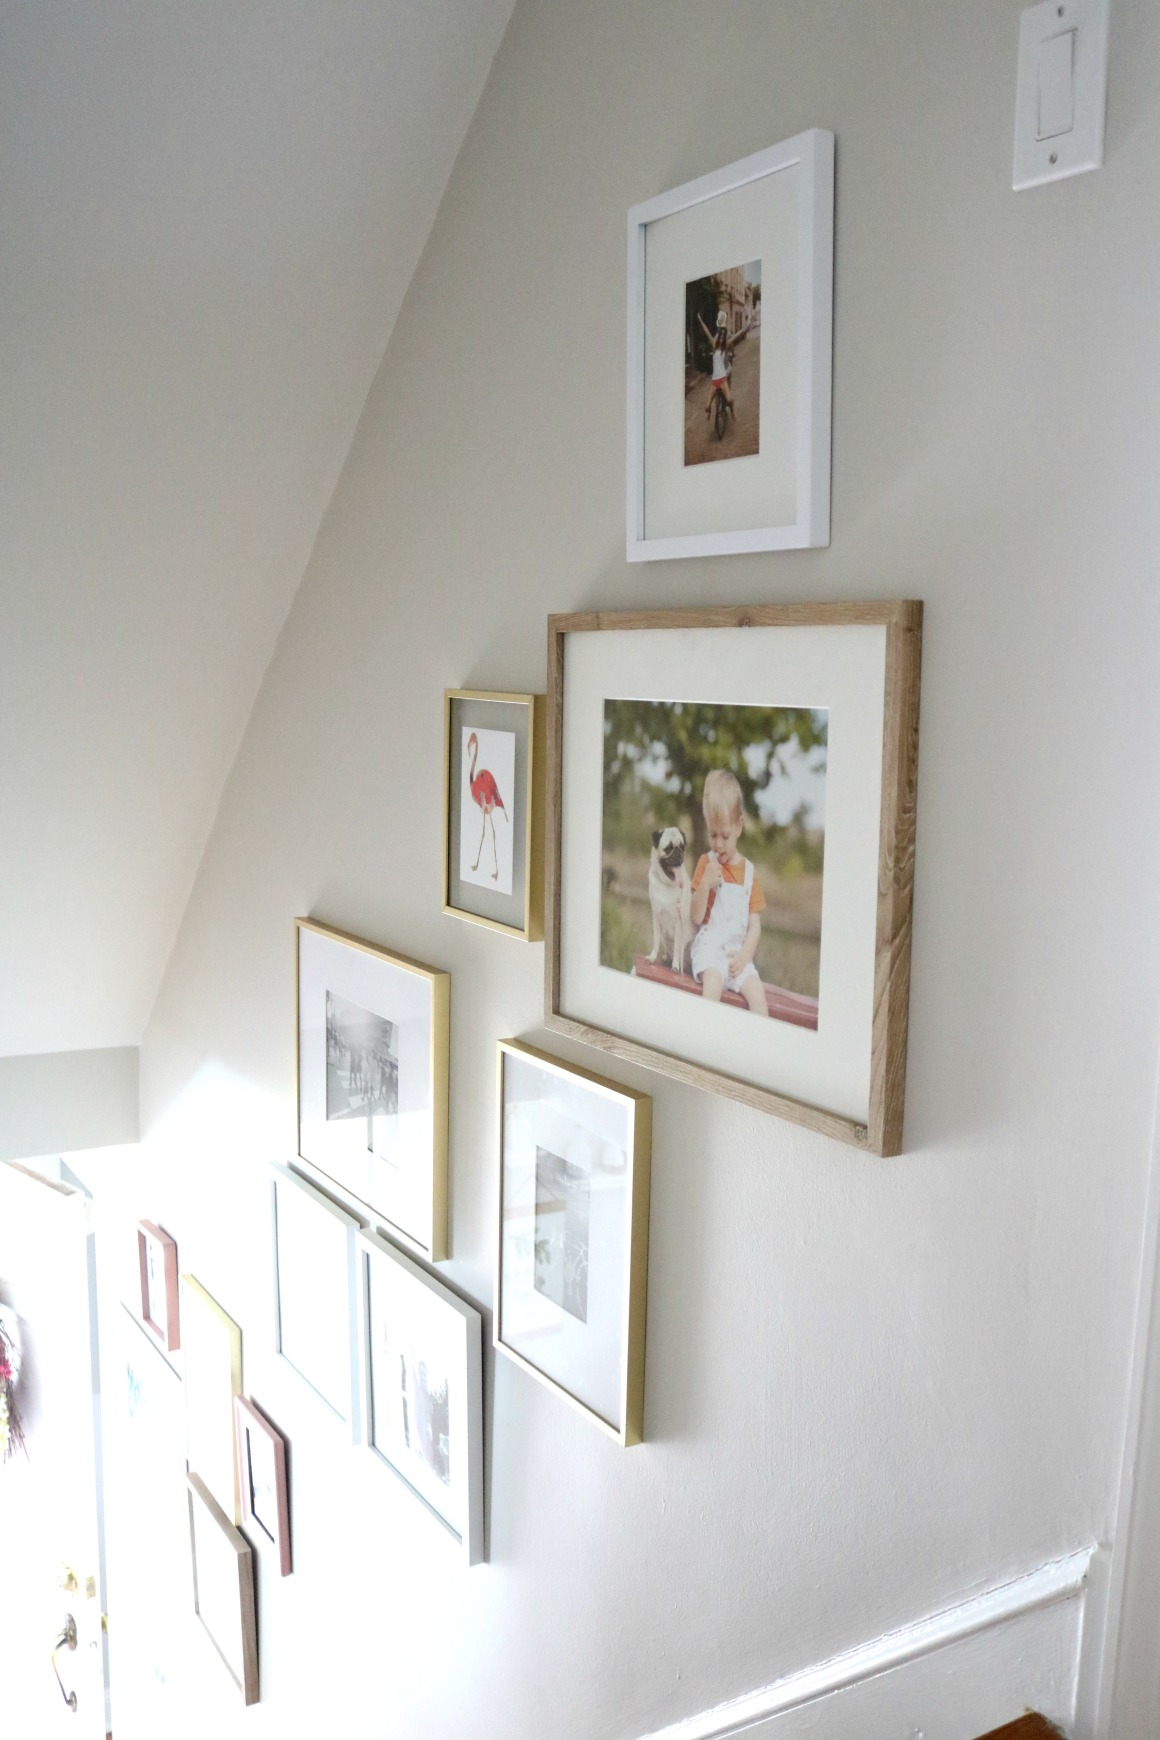
Nothing much to it making it not feel connected to the front room. Here are the steps I go thru when creating a Gallery Wall-
Gallery Wall Creation-
-
Pick out your frames-
-
You could do all the same frames and larger in size for a simple look. For larger frames I would measure your wall and see how many you can fit. I have this look up our stairs and have large 8×10 frames shown HERE
-
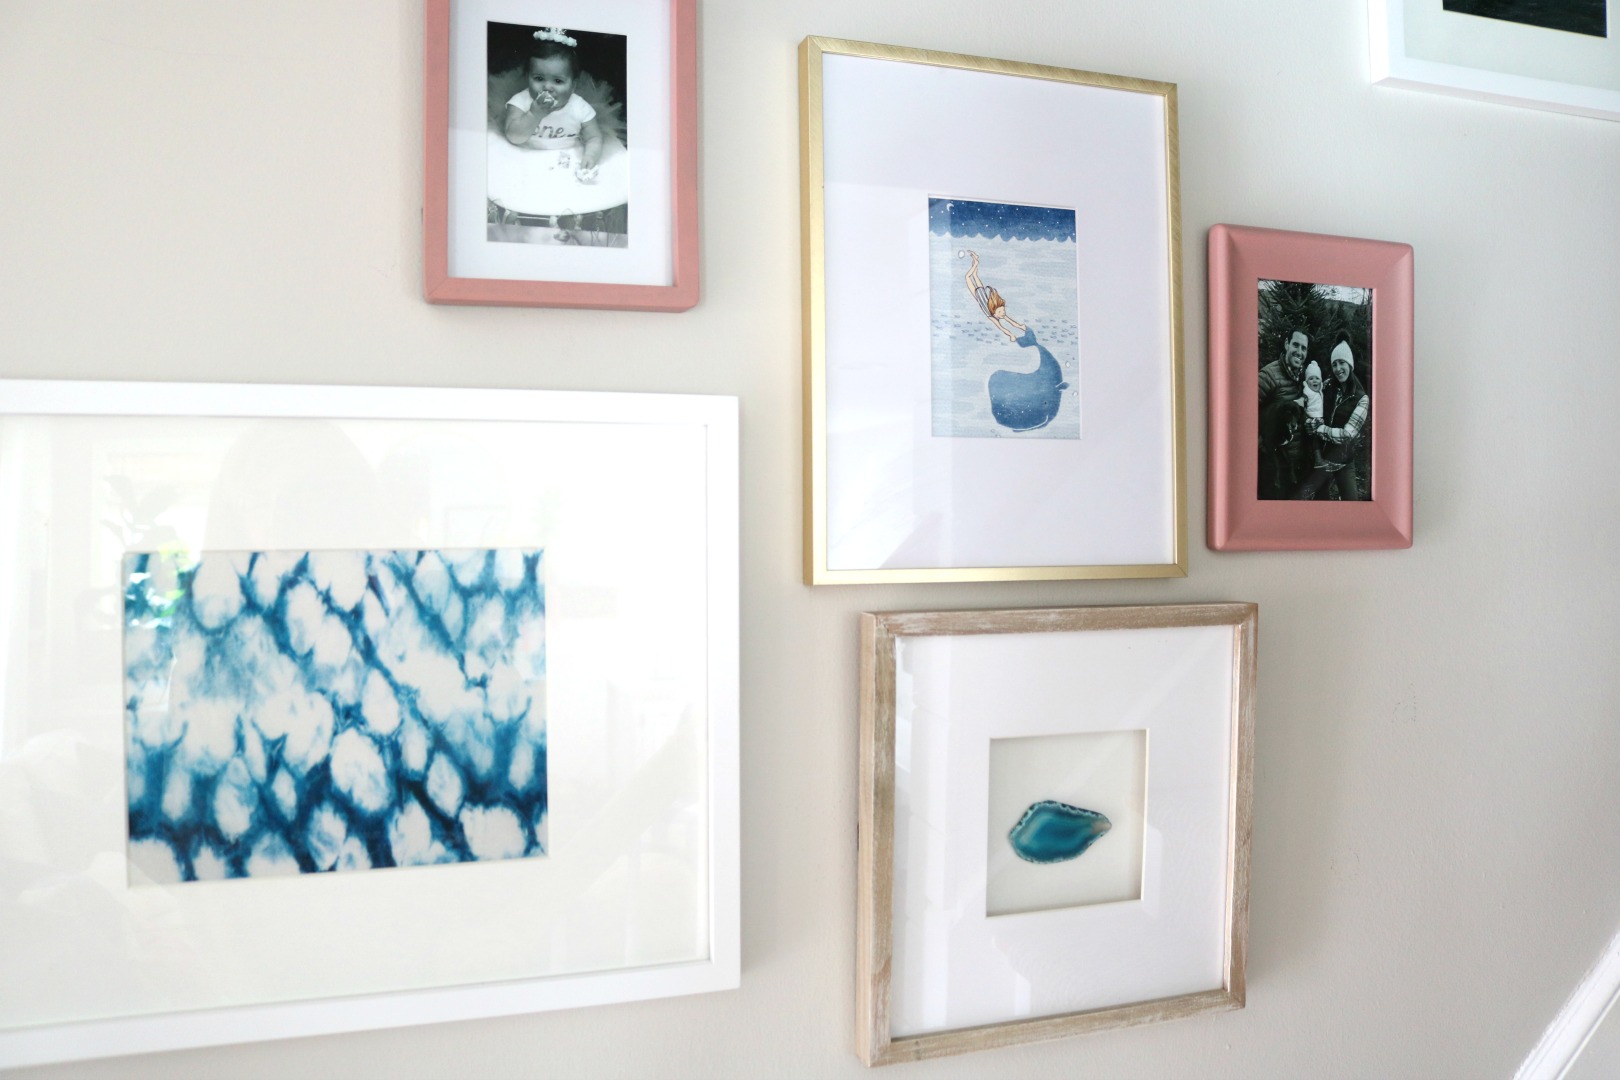
Or you could do an assortment of frames and sizes like we are doing today. For this look I suggest buying more frames than you think you might need. You can always return after. I ended up using 12 frames.
-
-
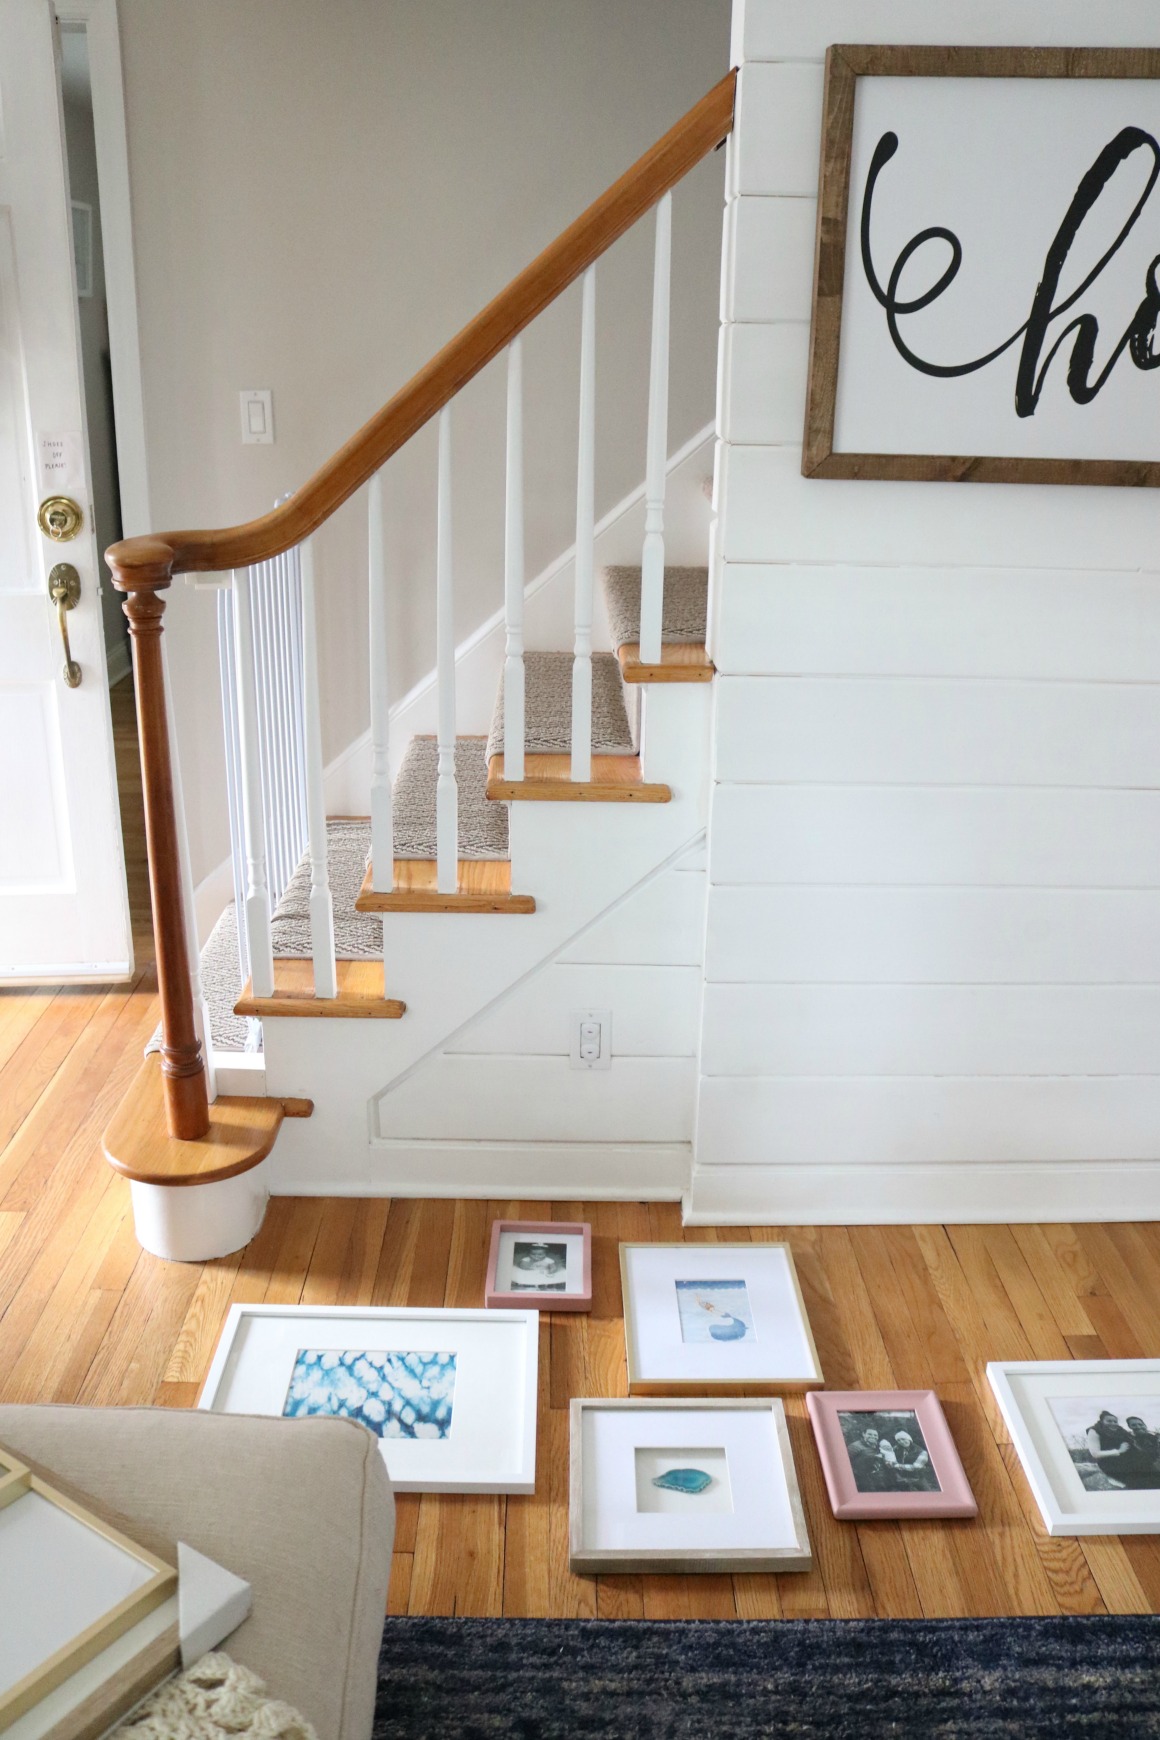
Layout your frame grouping on the floor. I actually did this at the store before I bought them to get a idea of how many I would need. Then lay them out at home again by the area you plan on hanging them.
-
Recruit an assistant, or a cute daughter in my case. Hold up the first frame and the one next to it that is the lowest. Make sure that you keep your starting frame about eye level when you are on the first step. The second lower frame you don’t want too low that it is below the railing or getting obstructed too much.
-
Group about 5 frames together then leave some dead space before starting the next grouping. And change up the frame arrangement with each grouping.
-
Order your photos after you have your arrangement set and hung. If you don’t have enough photos to choose from you could fill the empty frames with wallpaper or wrapping paper until you find the right photo. I also like to mix in art with all my gallery walls.
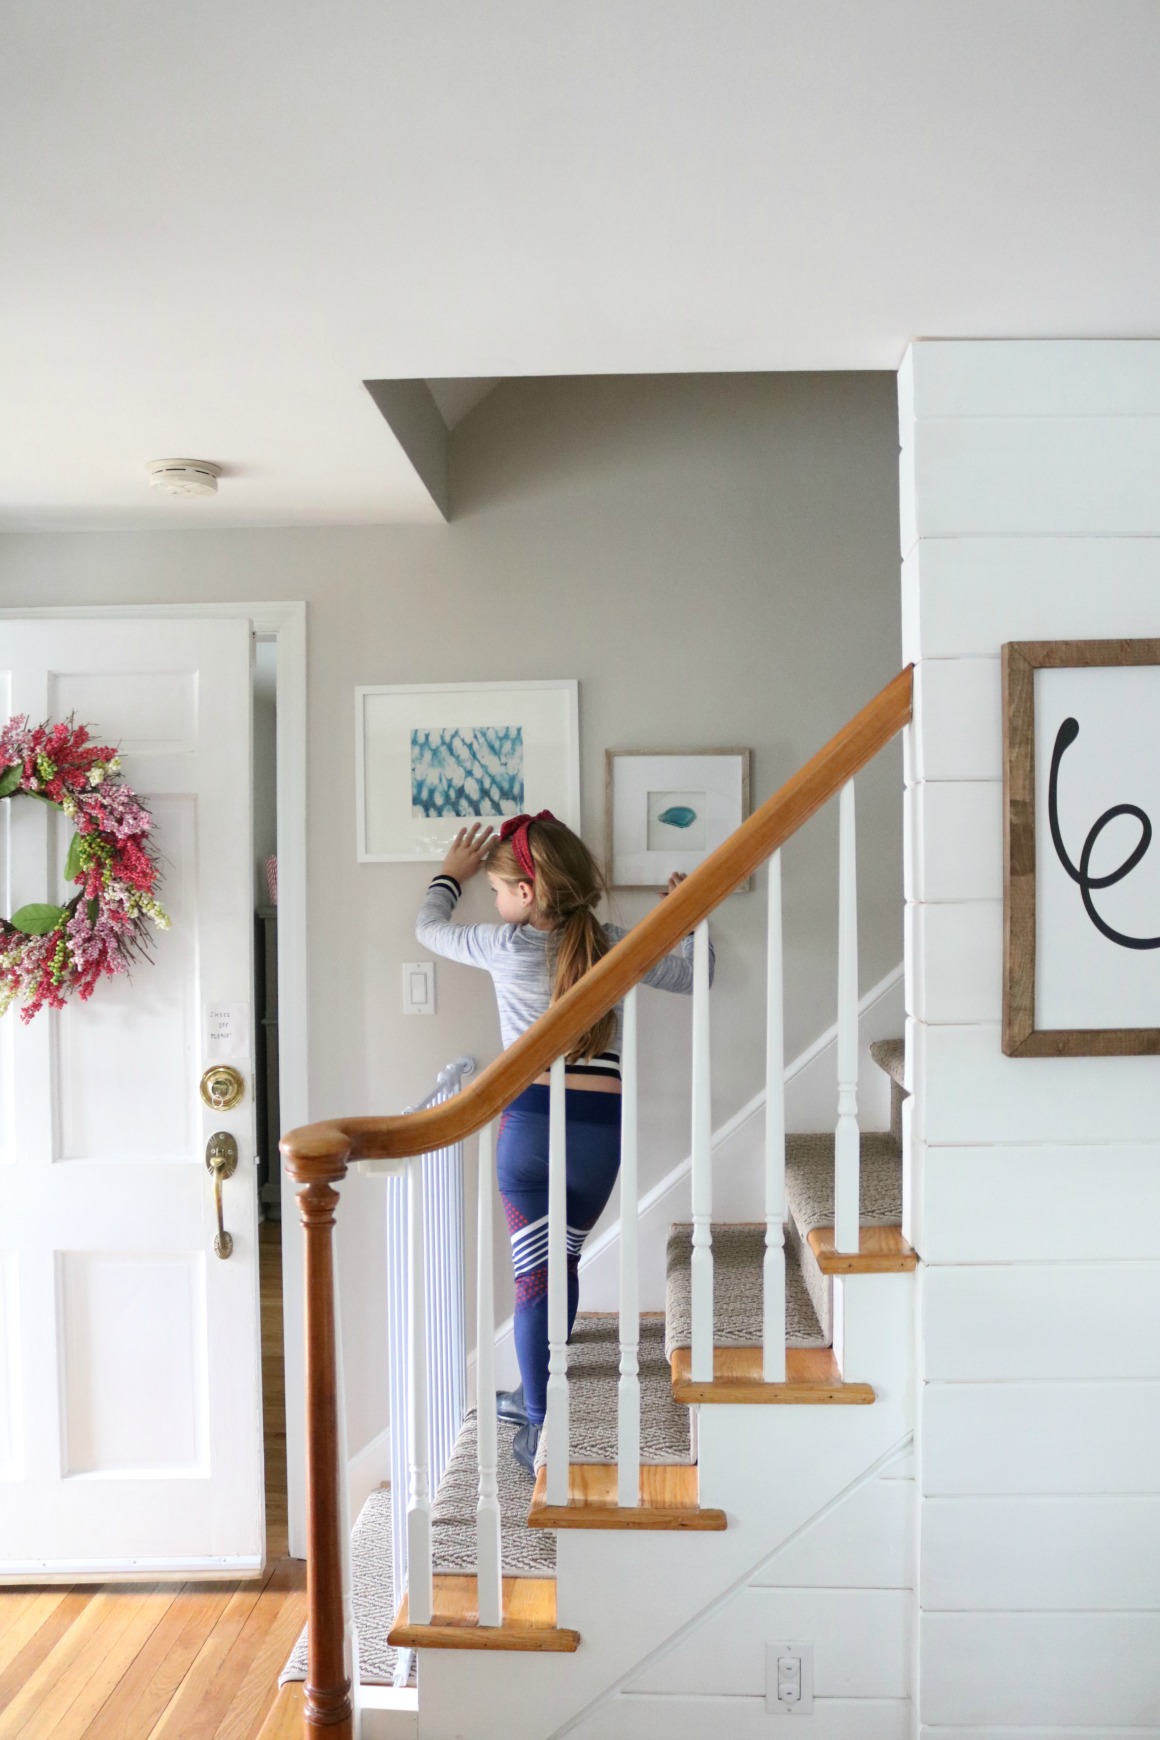

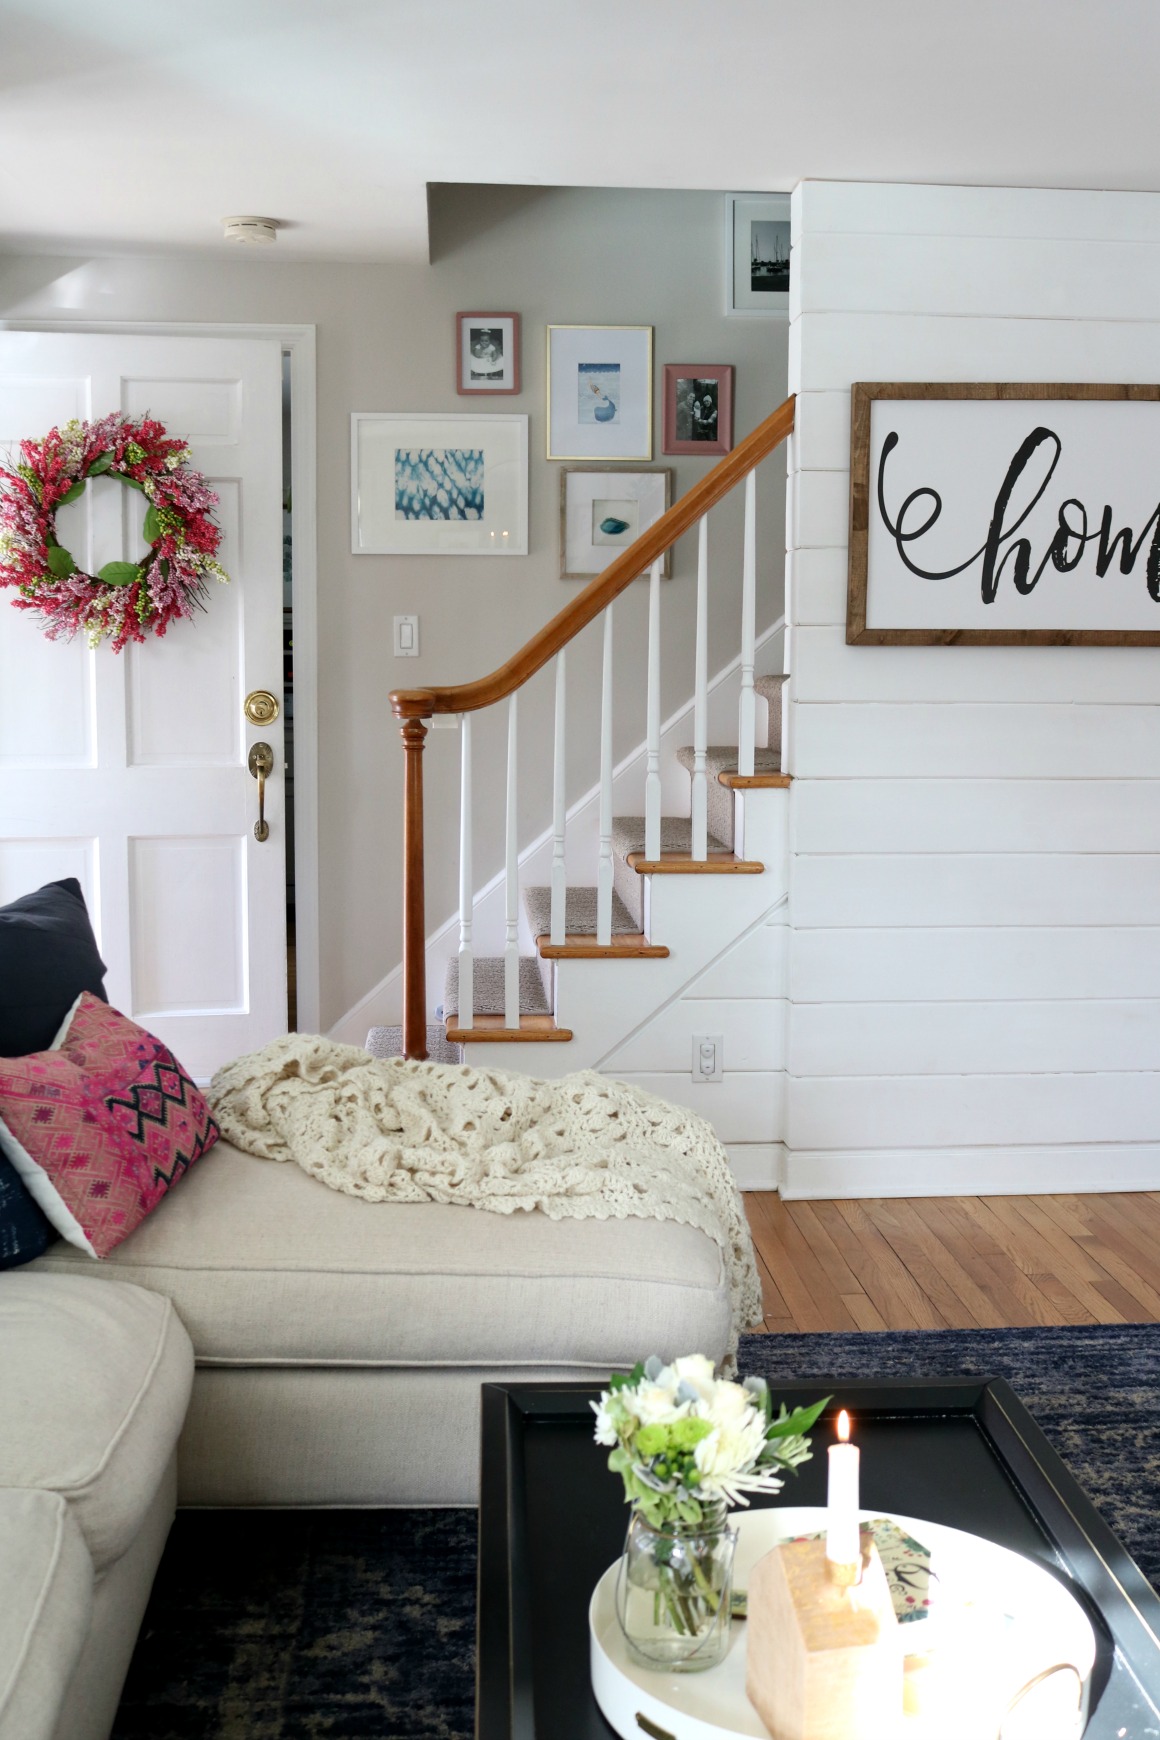
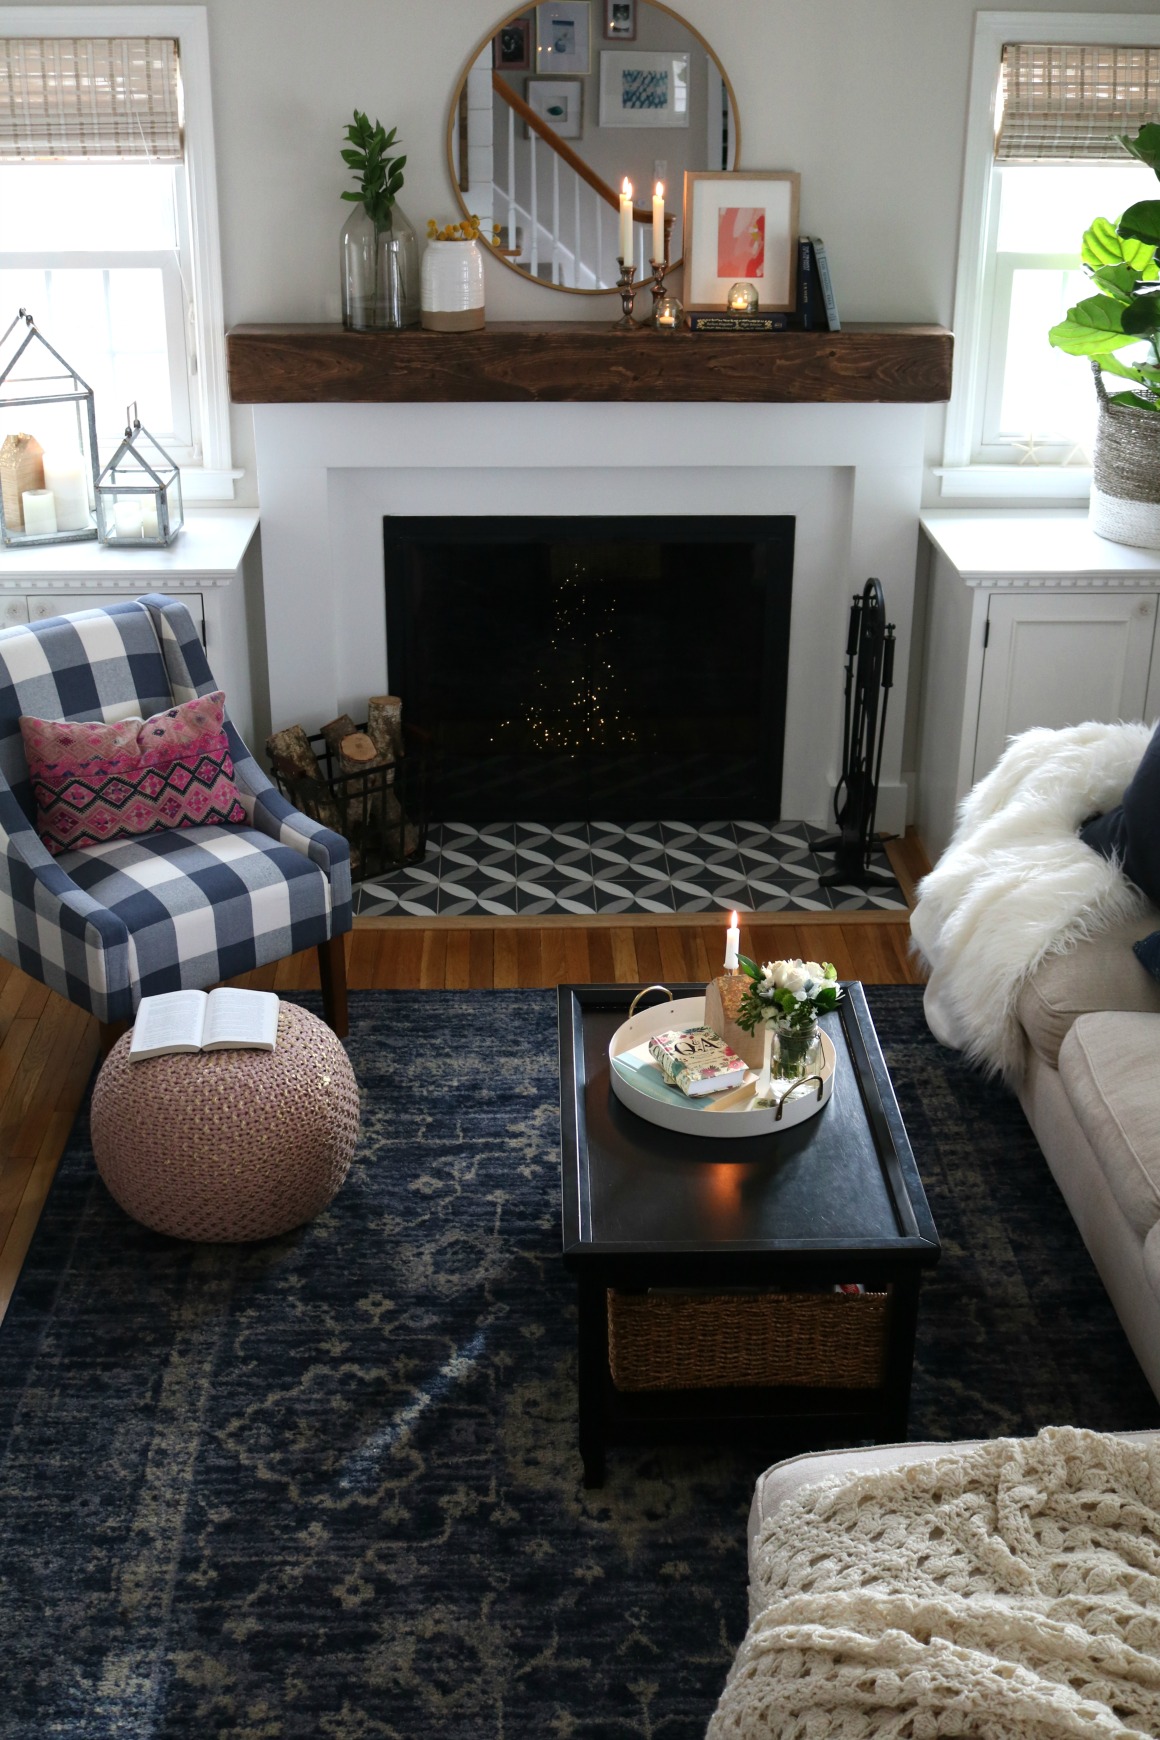
I love how the Staircase feels like part of the room now. It really makes the room look bigger.
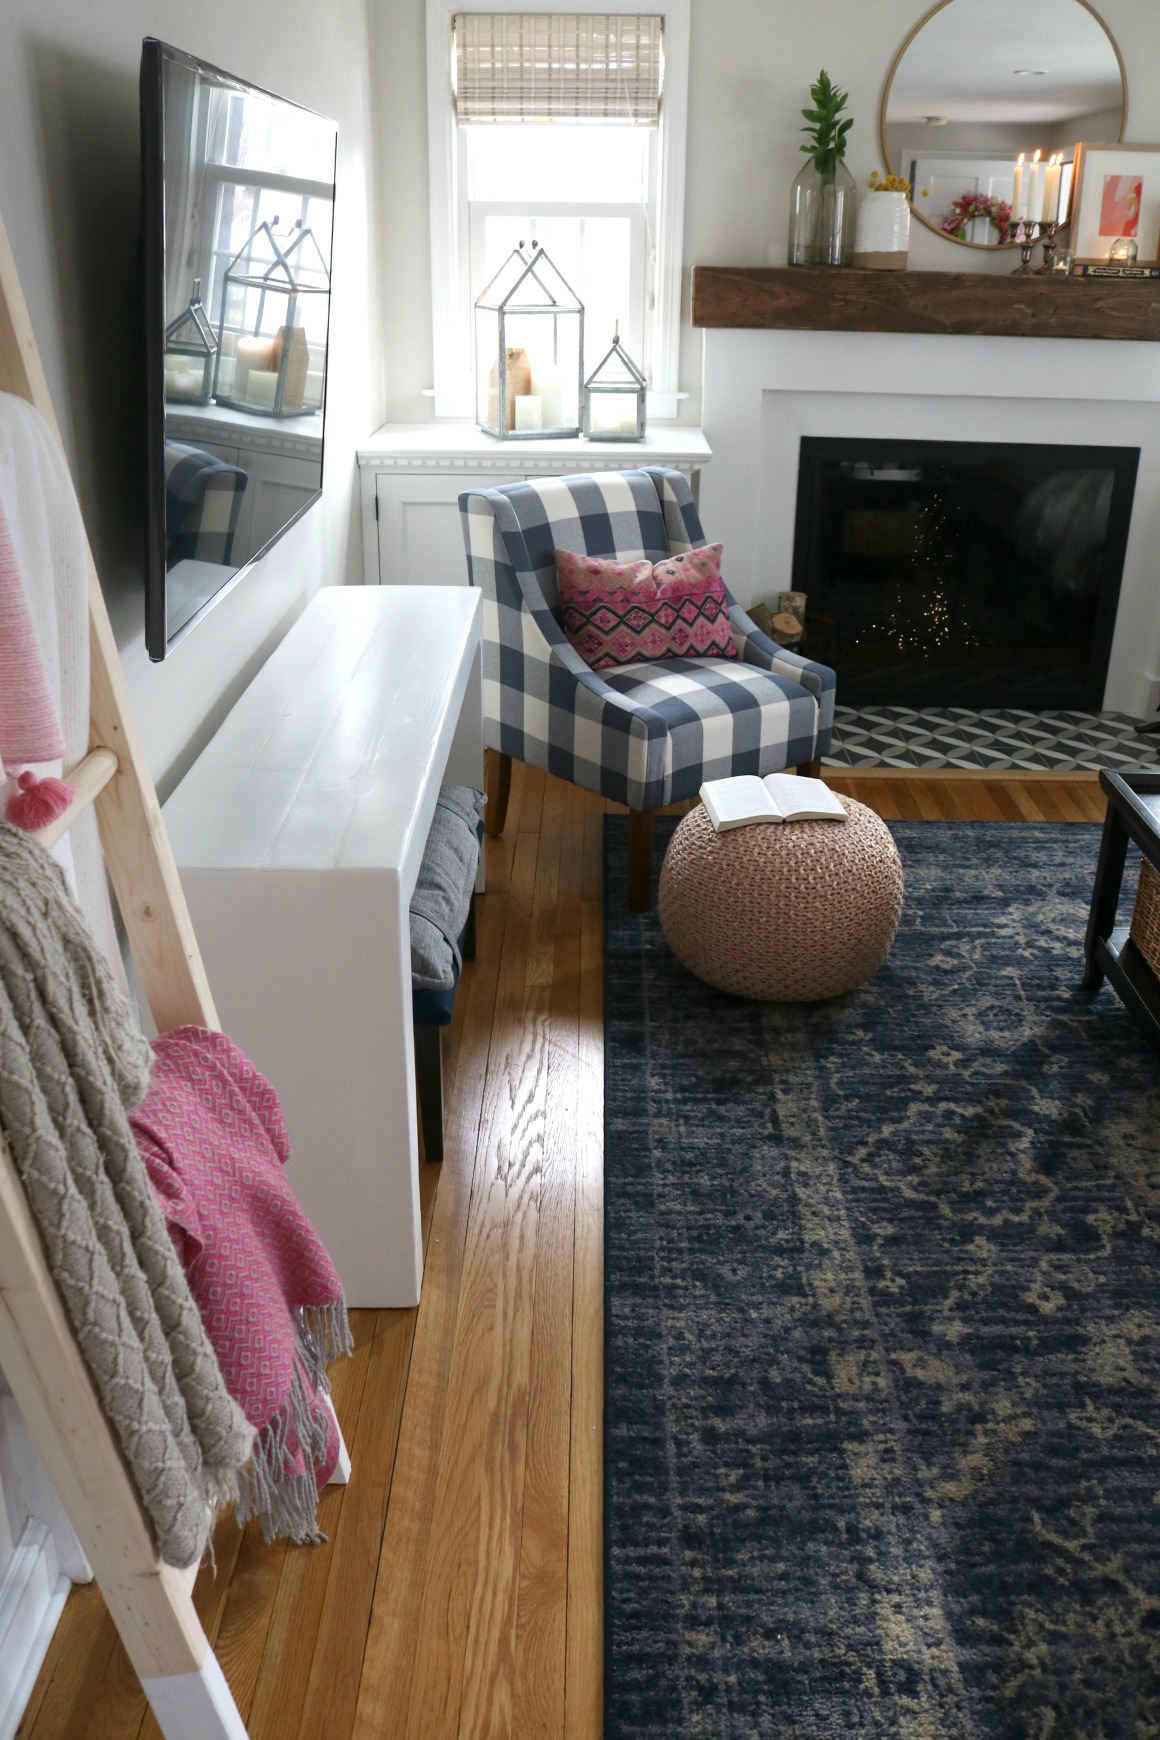
Now let’s talk about the new chair, but let me back up a little. When I shared this home on my blog and the reveal of the makeover of this room, I received a comment. It said something a long the lines of “the room feels off balance with the couch in front of the window and the tv just hanging on the wall. I know that is the homeowner’s decision.”
She was right that it did feel off balance. And I should have mentioned on the original post that we had plans for a chair and a console under the TV but it wasn’t in the budget at the time, or rather they didn’t think it was important. Funny thing is after the homeowner read the comment on my blog he was like “what chair would you do and what console?” Ha! So the comment was another good bug in their ear! BUT they did still take their time and budget it in. We also took our time deciding on the last pieces for the room.
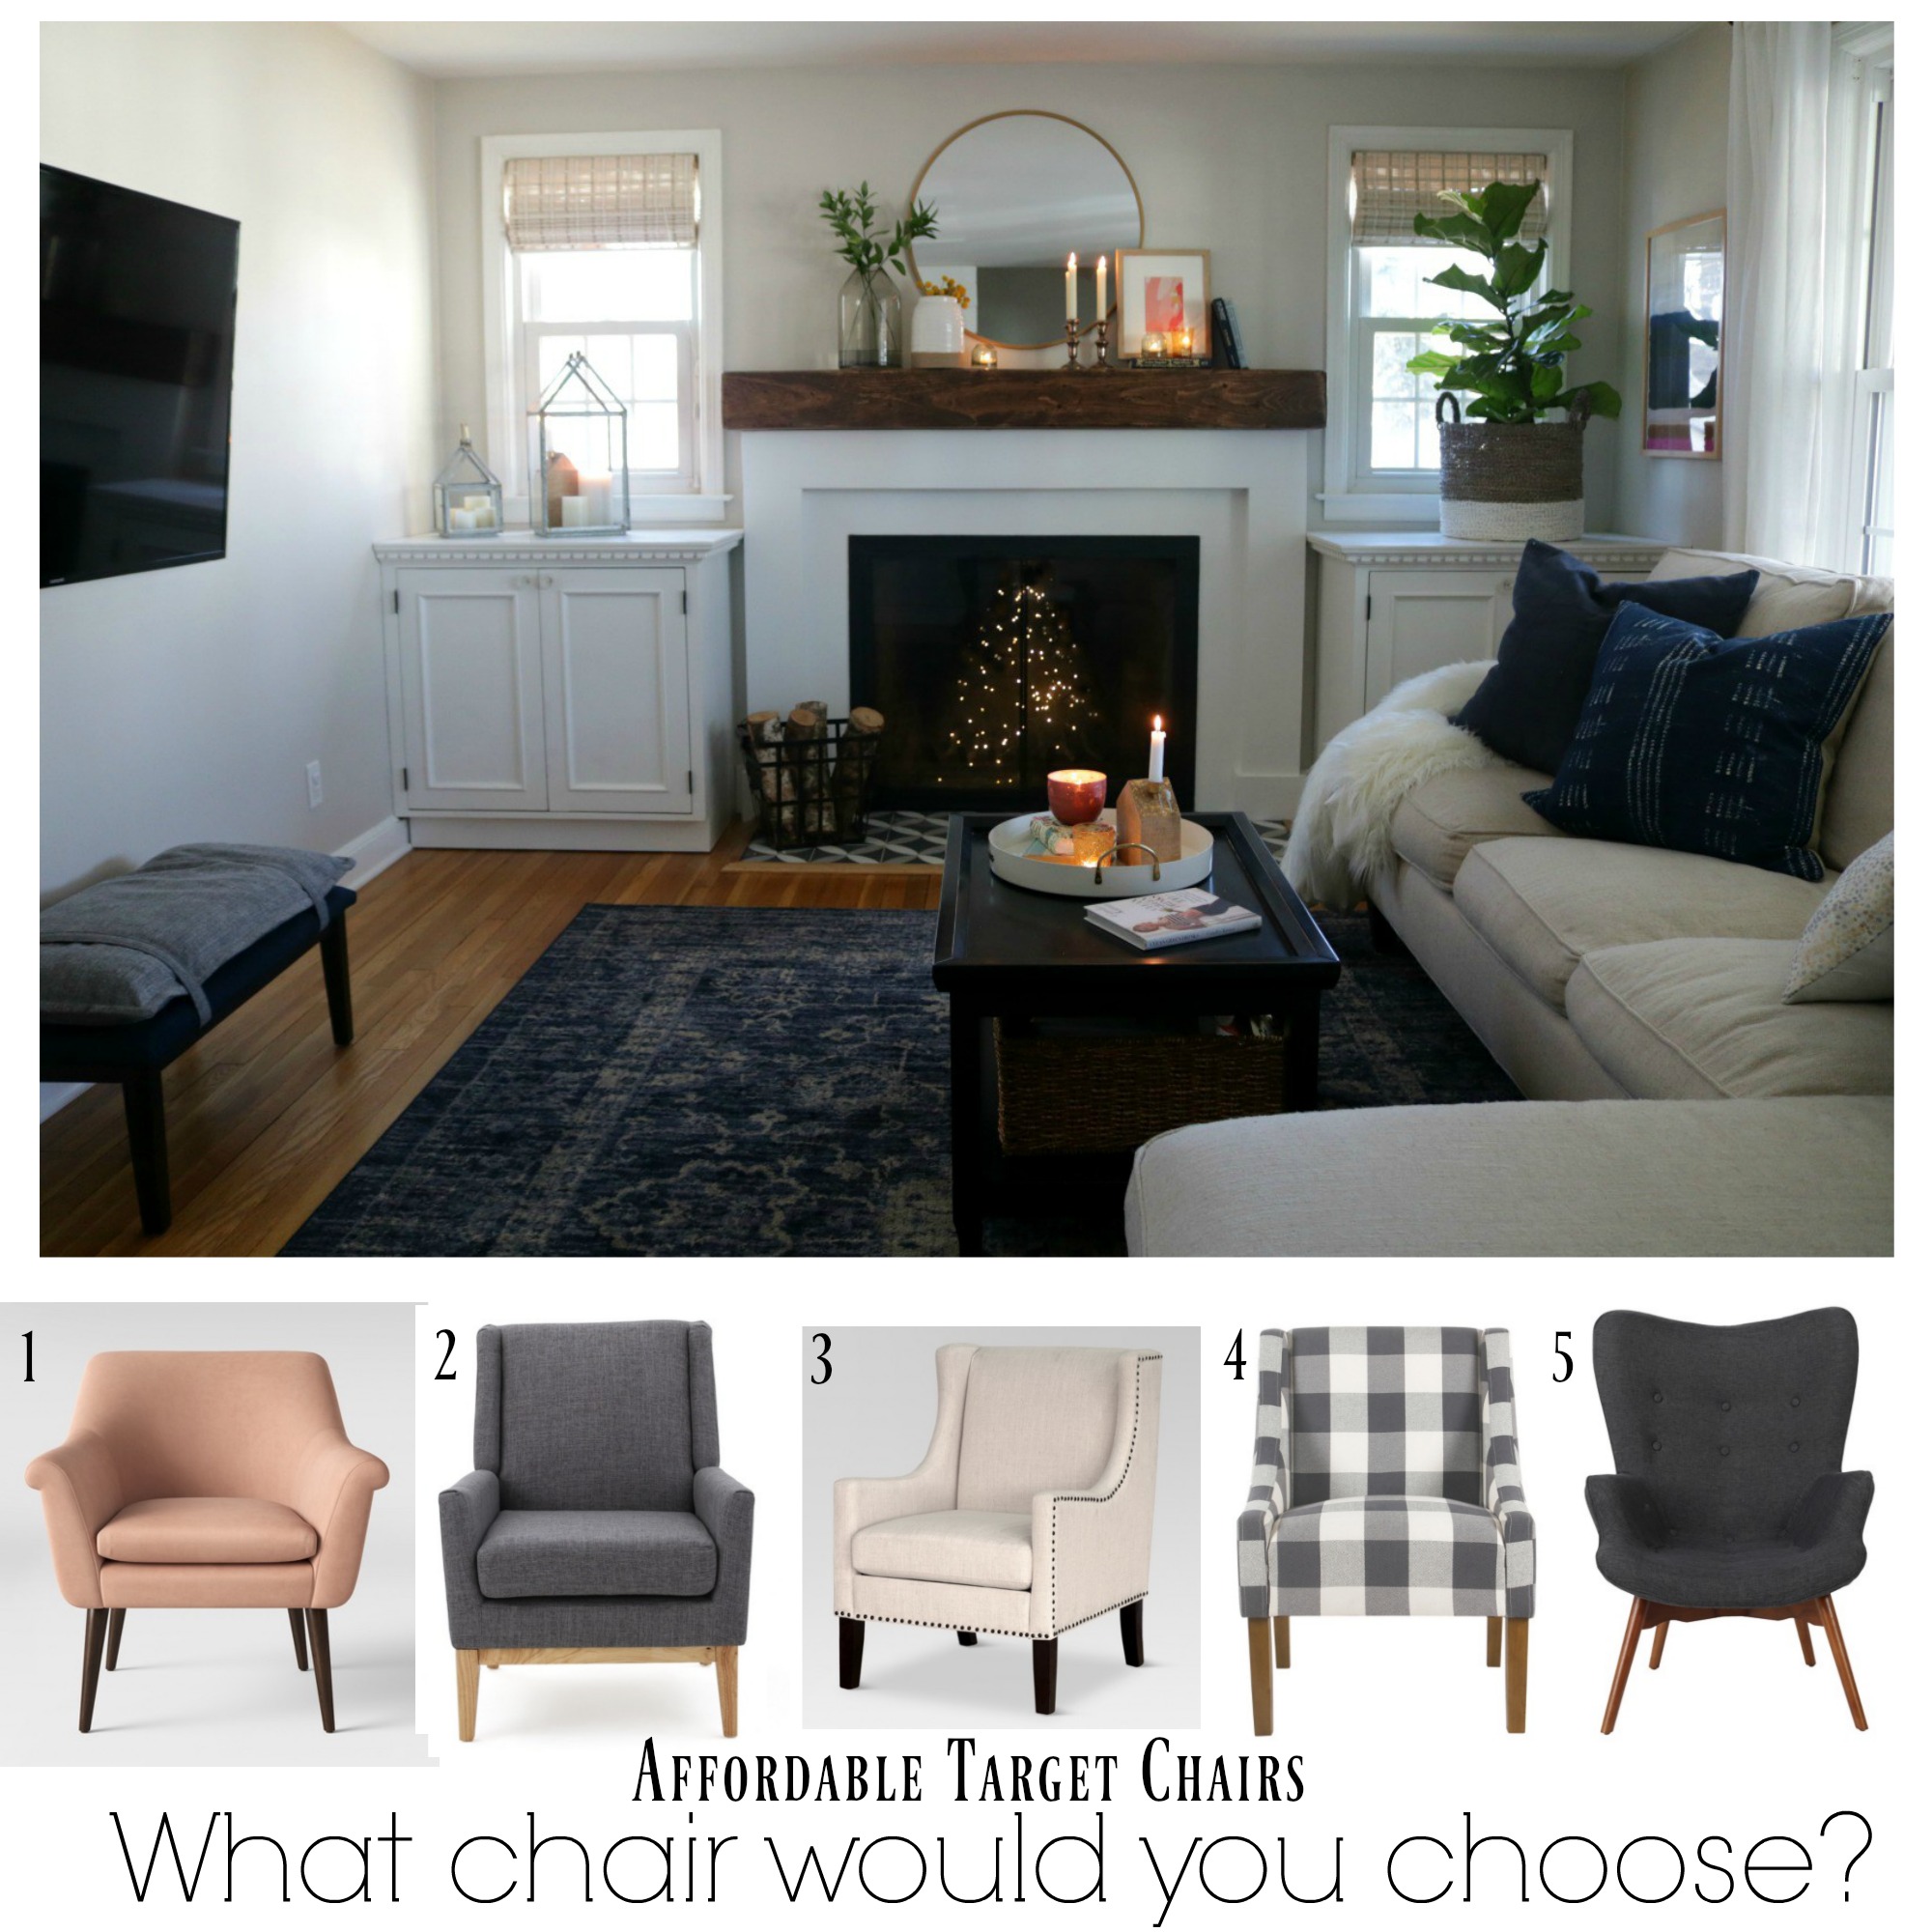 That is the photo above I shared across my social media here are the votes….
#1- Blush 3,256 votes
#2 or #5- Gray 3,161 votes
#3- Cream 1,938 votes
WINNER….. #4- Buffalo Check 4,395 votes
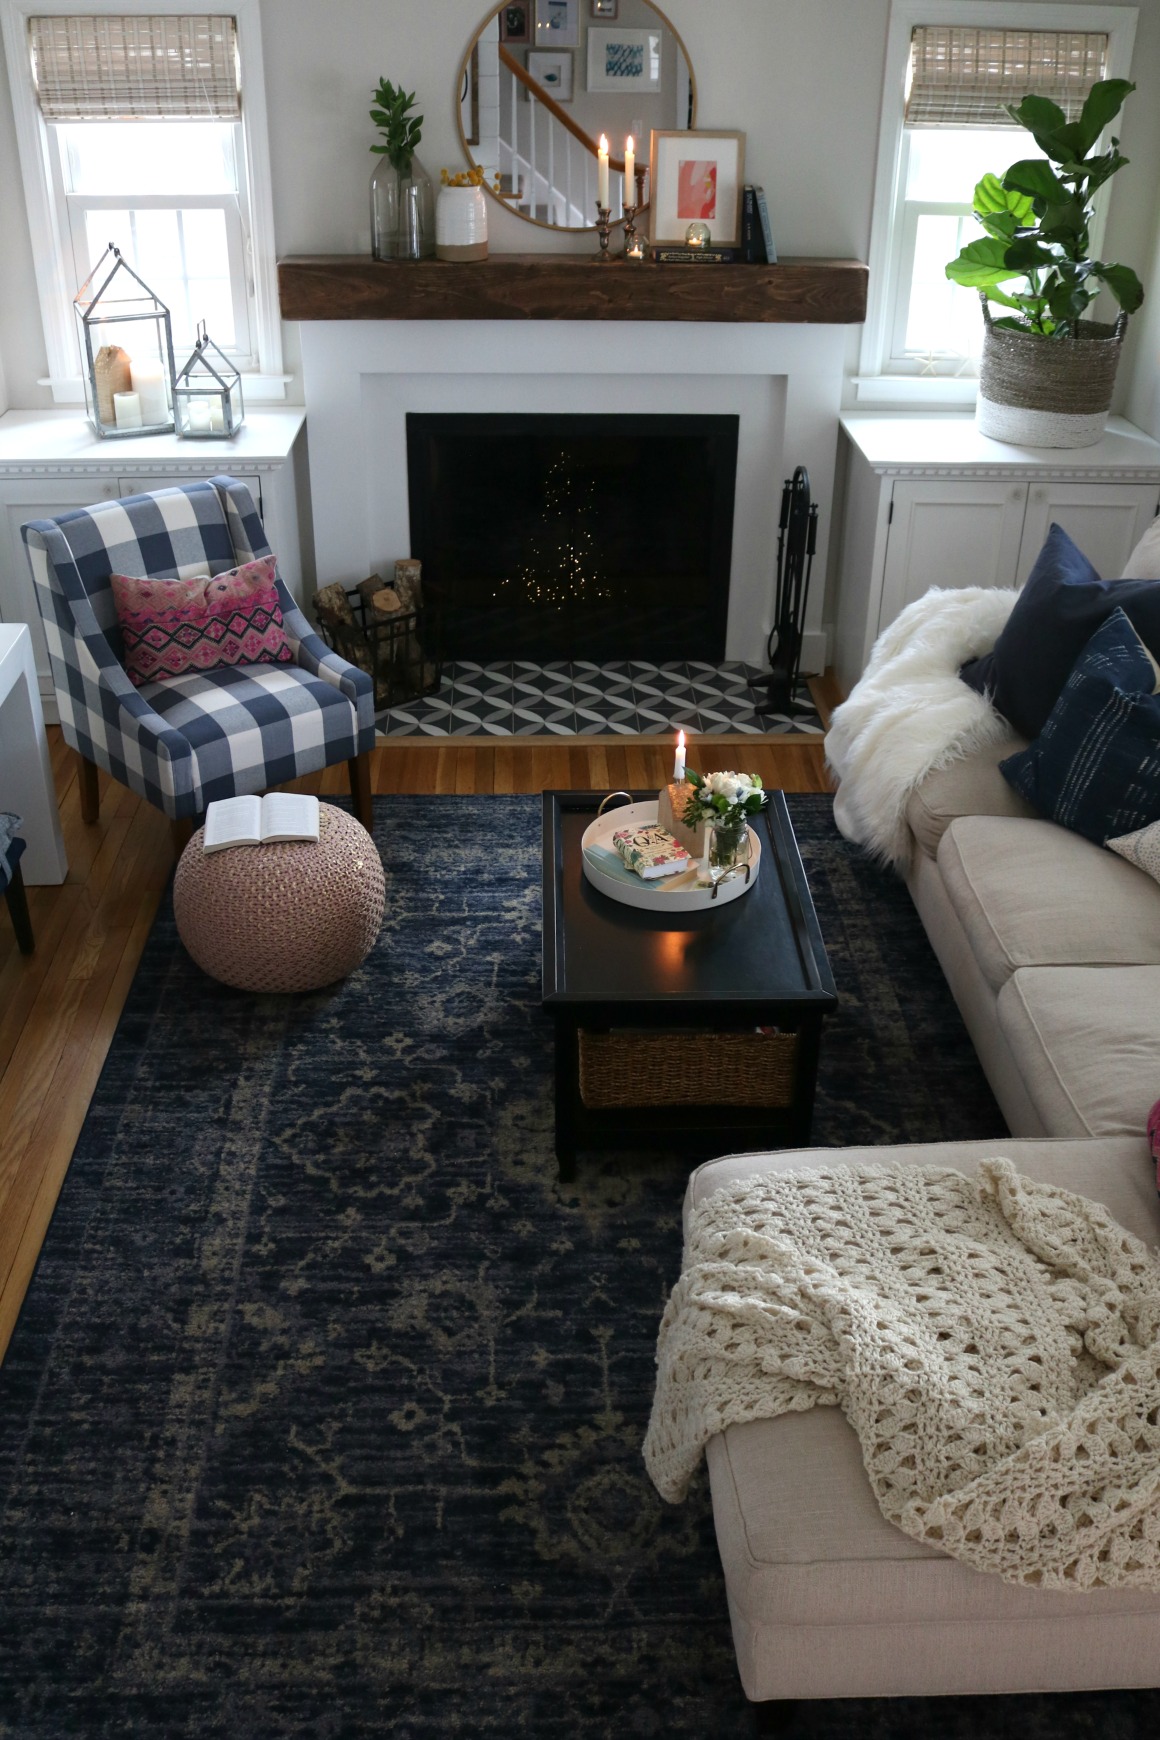
Obviously we went with the winner! My friends were on board, although Scott did like the blush chair the most. I thought I did too, but after talking it thru we thought the blush might be too washed out with the floor. And we could add a pink pillow to make everyone happy. We did compare the sizes and they were all pretty similar.
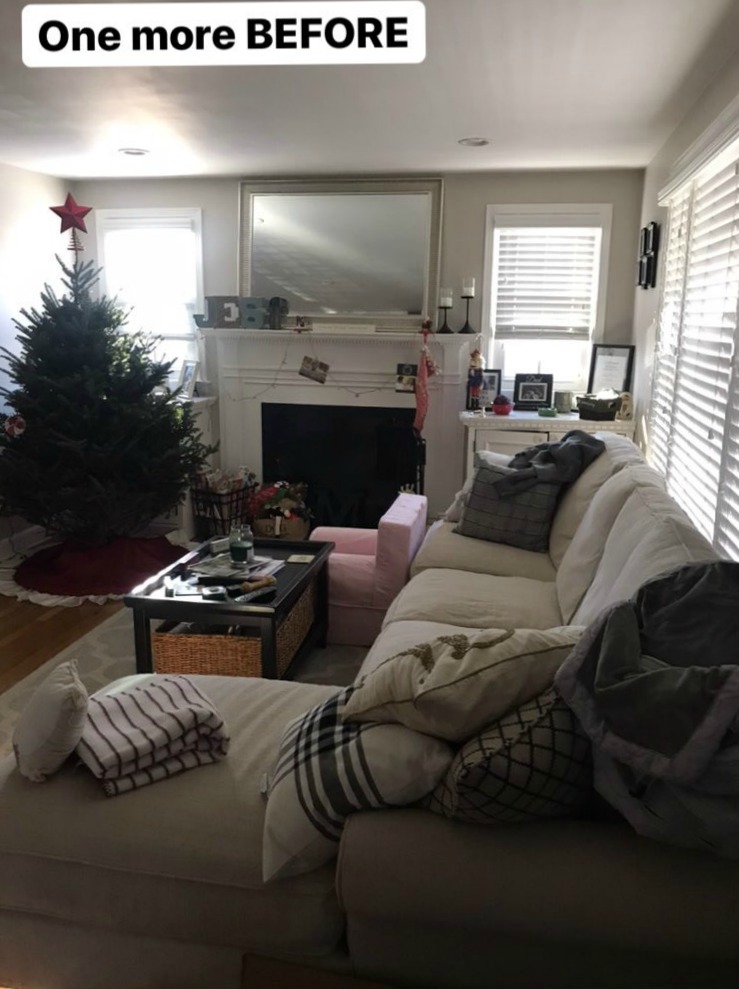
And for a reminder what the room looked like BEFORE…
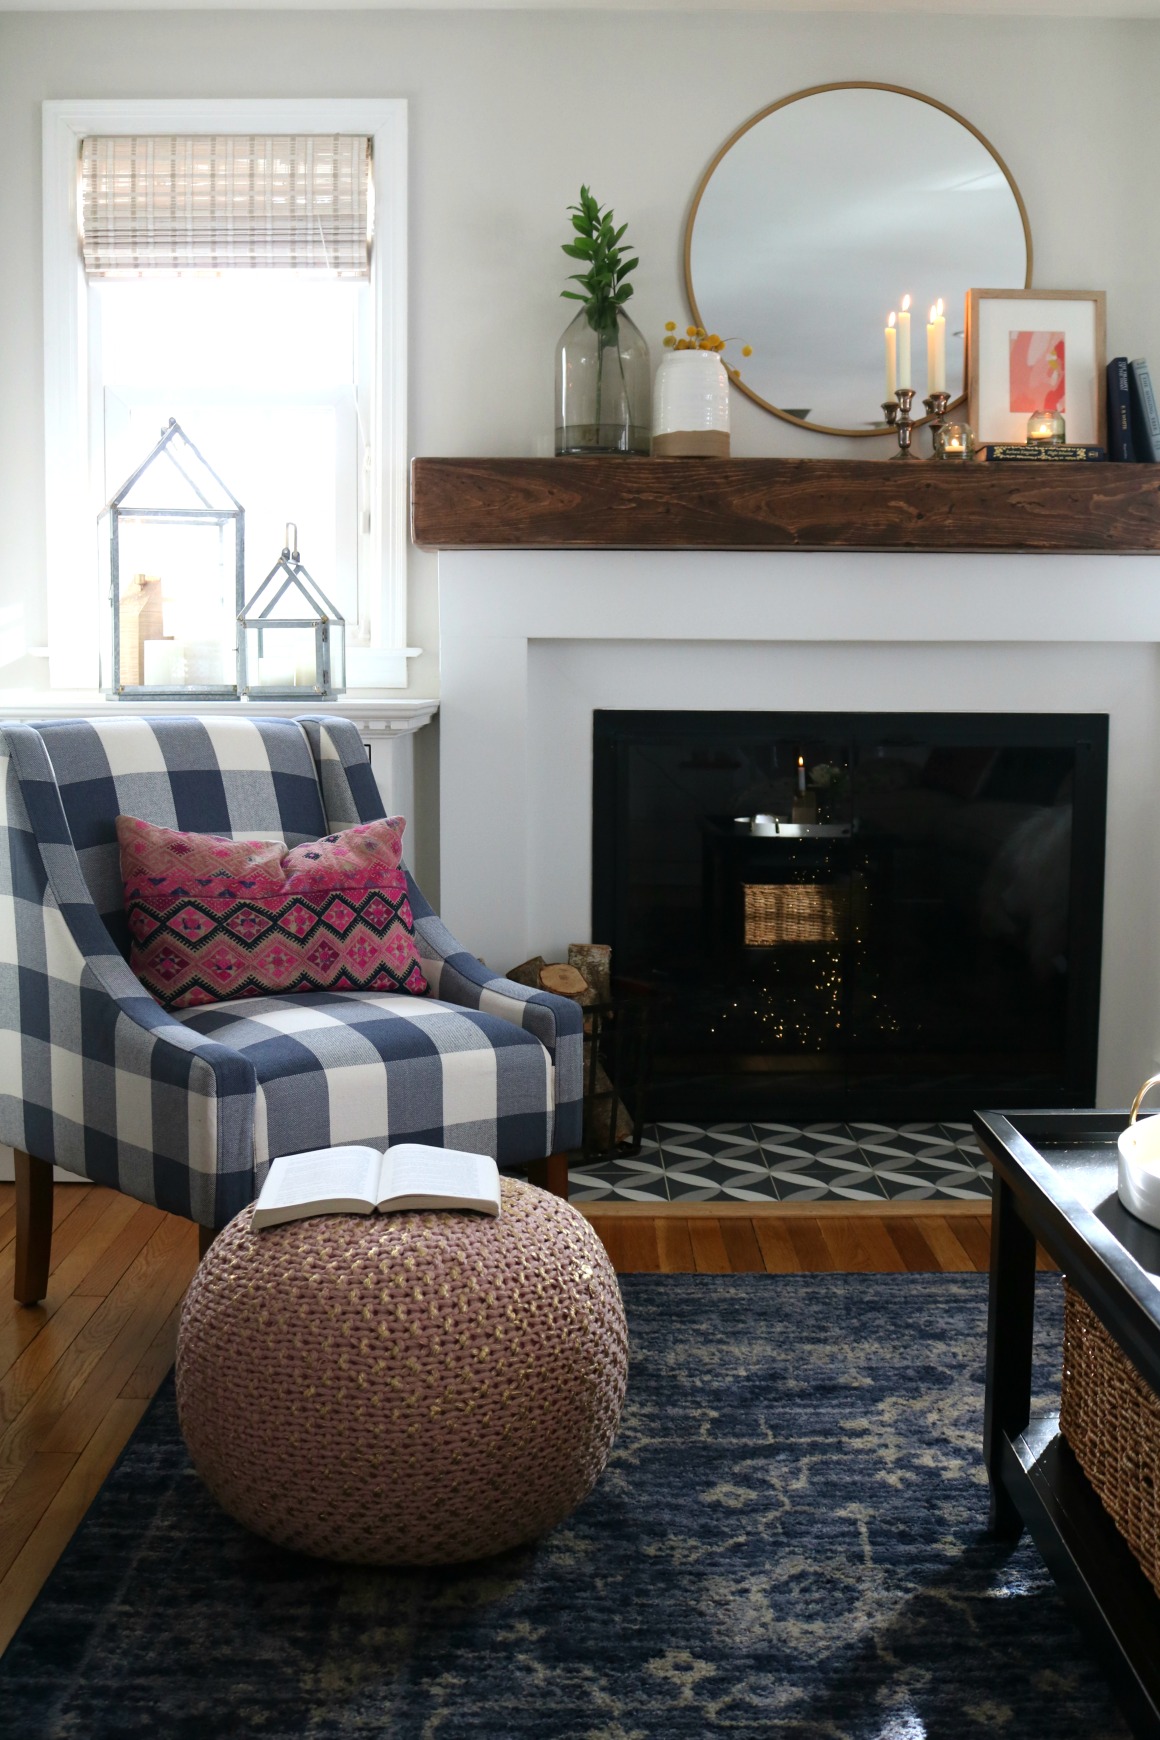
Buffalo Check Chair HERE /// Gold Round Target Mirror HERE /// Pouf Home Goods /// Woven Blinds HERE /// Rug HERE
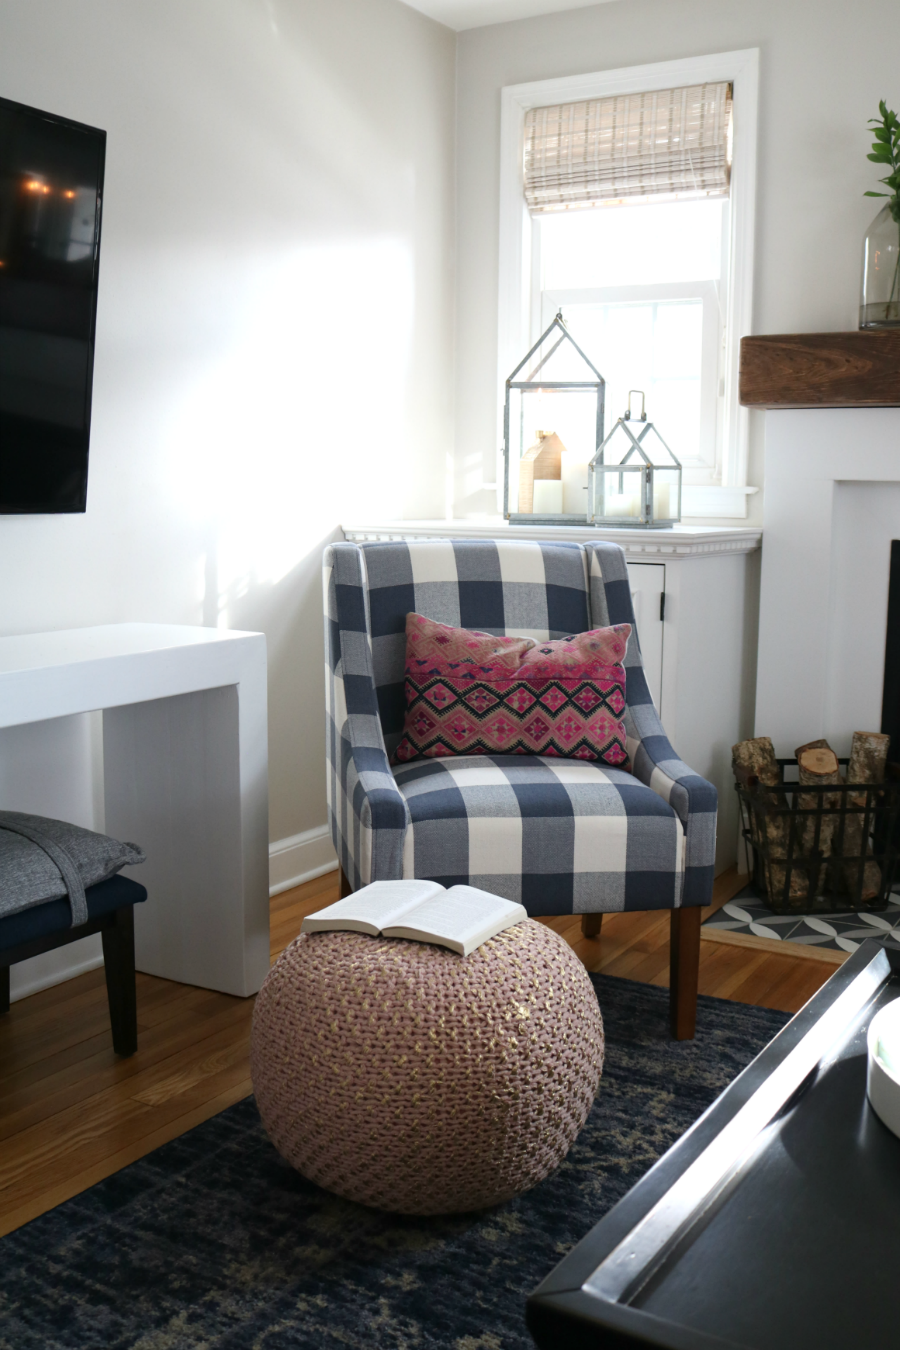
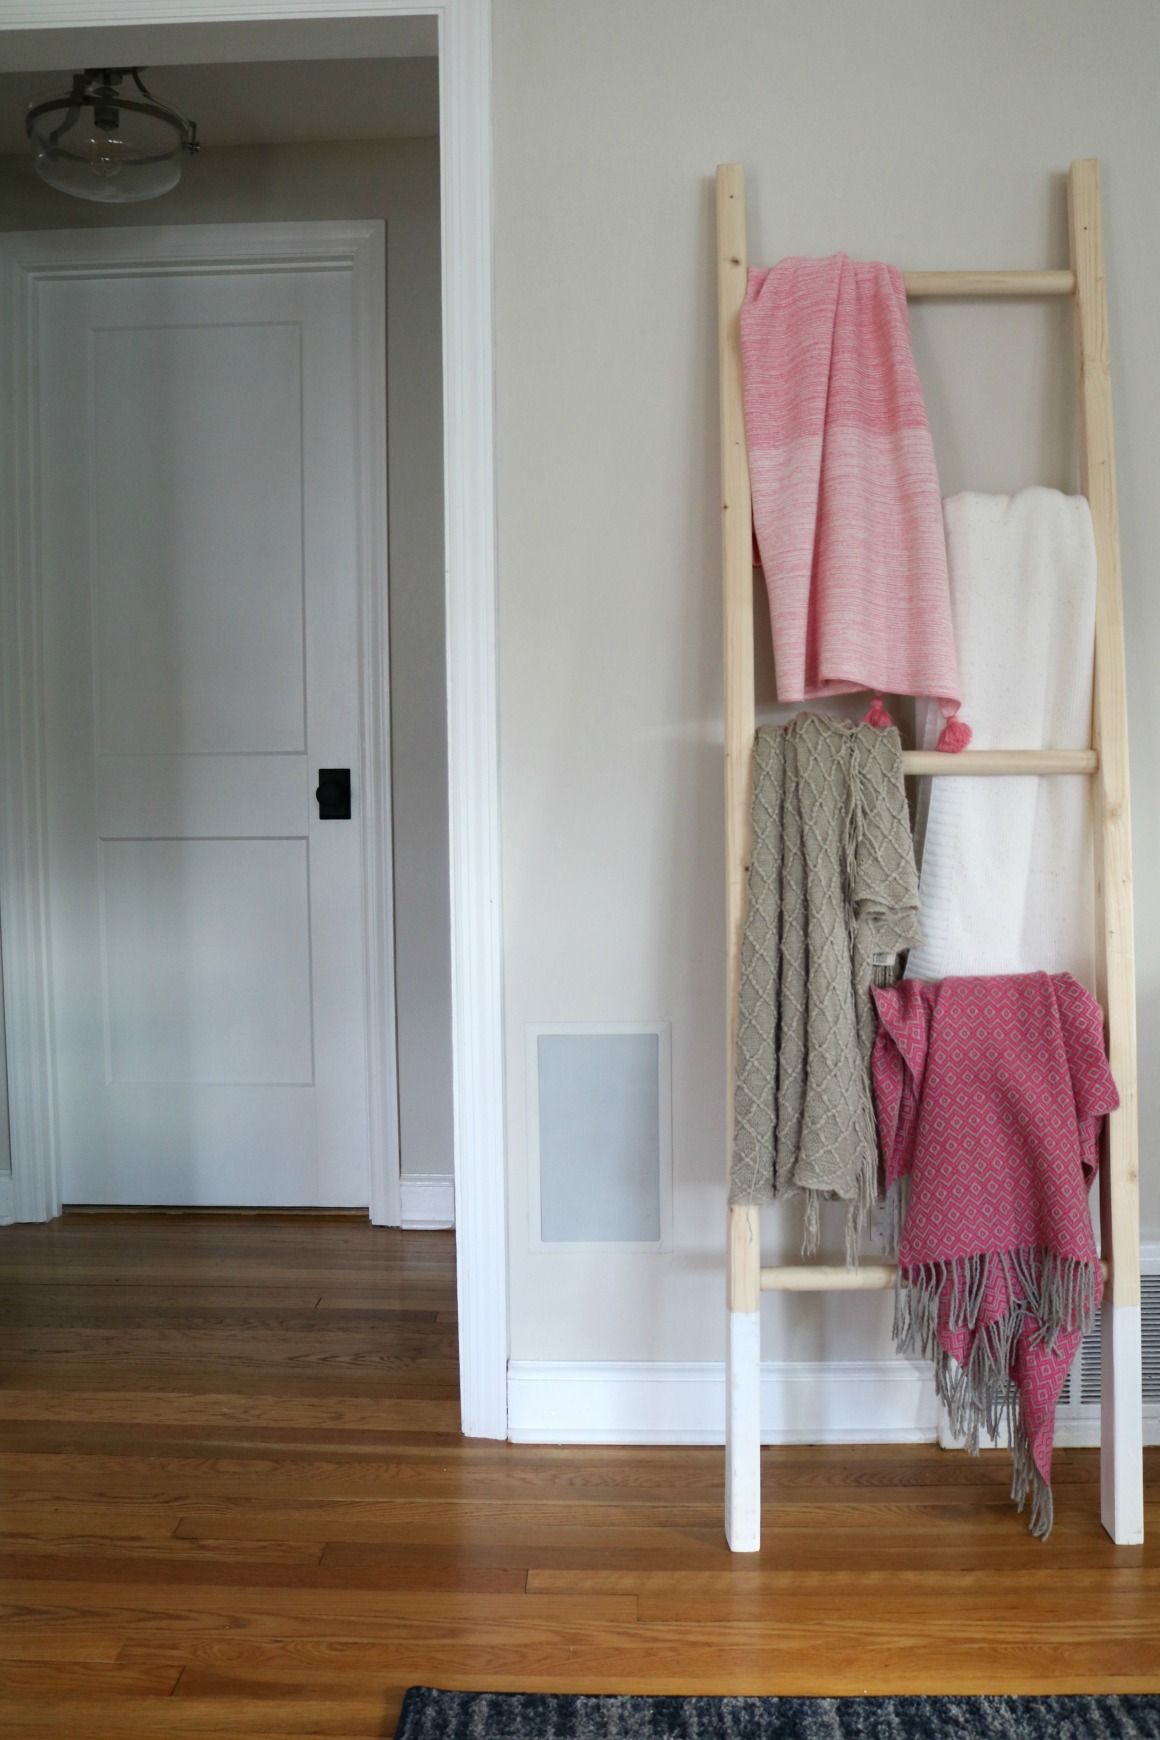
Scott also made the TV console. Just something simple to anchor the TV. I couldn’t find anything online to buy that was wider than the TV and had an opening for the ottoman. So he made it! And painted it in a bright white rather than competing with the wood mantle and floors. He made a blanket ladder while he was at it!
If you voted on social media or here, thanks for helping us decide! I also listed all the sources below…

Sources-
All the frames for the Gallery Wall were bought HERE
Blog post on Fireplace Makeover and complete room Sources HERE
Rug HERE
Gold Round Target Mirror HERE
Buffalo Check Chair HERE (All other chairs listed HERE)
Pink Pillows HERE
Sofa is older from Lillian August
Carpet on the stairs can be found HERE they used the same guy to cut it to size for stairs and install that I used for mine
See how I created my Gallery Wall by our Stairs HERE


Looks Great!!!
Love how it turned out! Knew the casual plaid would look great!
Oh that room is so cute and cozy. I love the chair. Everything turned out great with Scott’s expert craftsmanship! Lovely room!
This room turned out great. I love the format of the gallery wall too. the ‘chunks’ of pictures are way more interesting than if they had all been put in one continuous group. Great idea!
Looks so great!! The console table & ladder look fantastic!! Great finish to a beautiful space!!
Source of pink pouf please
Home Goods (not a helpful answer!)
I will look for a source!
from Home Goods!
Love the new balance that the room has now. The blue check is great with the rug. Happy homeowners!!!
Yay! That’s the chair I voted for! Love everything you do. I swear at some point I read about your undercabinet lighting – i’ve Gone back through all your kitchen posts and shop my home, and can’t find it! If you see this and I didn’t imagine that post, would you please provide a link to what you used? Sorry to be off topic! Thank you!
Thanks Wanda! I wrote a post about it here- http://nestingwithgrace.com/top-5-bang-buck-ideas-home/
Absolutely love! Truly is amazing how some simple changes can make the whole room feel different. Lucky homeowners to have a friend like you!
thank you Melissa!
thank you! I am lucky to have friends like them!
My gosh, I am a buffalo check freak! My husband is beginning to put the Kabah Shawn too much of it in our house, but at least he lets me have it on some of the pillows and a big blanket on our bed! I just have anamazingly positive reaction to Buffalo check!
Haha! Kabash!!! Kabah Shawn????
love that a “positive reaction”!!
You make it look so easy!!! Haha 🙂
Where is your friend’s stair runner from?
Yes here you go- http://www.carpet-wholesale.com/item-343657/rolls-of-carpet/tuftex/only-natural/atmosphere.php
Thanks so much Brooke❣️
Nice job! I wish you were my friend and would style my house. You have a gift 💝
This is so incredible! Please come to my home and help lol!
Hi, I love your style! Can you share the color of your friends walls, it’s seems like the perfect neutral .
Thanks!
Looks amazing! You are so talented!
I have a cape (in CT too!) with a room similar in size and always debate whether to hang the TV like your friend did or over the fireplace? My fireplace has built in shelves on either side of it, not sure if that matters or not.
I like this set-up then you can put pretty things on the fireplace and have the focal point not be a TV….
Love the throws over the ladder…where did they get them?
Looks beautiful! love to see that you were able to do it with all different frames and make it so pretty! gives me hope 😉
thanks Heather!!
Brooke, I love your blog! It’s one of the only ones I bother to read anymore because we too have a small (but mighty/and packed full of love) house and as a designer even I sometimes need someone else to give me some good inspiration for our little space. I’ve been trying to find a good fireplace makeover that was similar to our current fireplace so I could really envision it before pulling the trigger and this was it. Too good! However, I gave these “instructions” to my hubby to get it done over the weekend and it was comical trying to follow. They are a little vague. I know you didn’t set out to put this out as a fireplace “tutorial” but for anyone else wanting to do this project, there is a lot more to it. Doesn’t it always end up that way with DIY though? Our mantel is looking amazing and I’m so excited for it to be done. Thanks for the inspiration! This room looks amazing!
Thanks! I totally agree! I should mention that I tried to get him to give me as much as he could haha….and I realize isn’t a complete tutorial. I wish I would have documented the entire thing! I am glad it worked out and you have a handy hubby!