I feel like I have seen every light fixture there is online. So much time browsing lights. But finally selected and ordered the lights for our Remodel, I think I am going to have a lot of free time on my hands now that is done! Ended up ordering over 50 lights! Entry, bedrooms, bathrooms, exterior, kitchen, hallways, etc.
One thing that really helped me decide on lights was putting them in the room…. not REALLY “in the room”, but via computer magic.
I shared a video on Instagram how to try something on for size HERE. I will walk you through it on this post, keep reading! One of the biggest things to keep in mind is the light size and scale for the room. Below are my tips…
How to Choose Light Fixtures- Right Size and Where to Hang-
- Deciding Light Fixture Width– Size can be personal preference, some like oversized and some like more minimal. I have heard this tip and it does work well- add the length and width of the room (in feet) then convert to inches. For example my daughters room is 13′ x 14′, so that means I need a chandelier that is 27″ wide, which is about what I ordered. Keep in mind over a dining table and kitchen island you want at least 6″ from edge.
- Deciding Light Fixture Height- The higher the ceiling, the taller the chandelier. The rule of thumb is to figure 3 inches of chandelier height for each foot of ceiling height. For example an 8-foot ceiling requires a chandelier that is about 20-24 inches in height. Make sure everyone can walk comfortably under the light, at least 7′ from bottom of light fixture to floor.
- Deciding where to hang over table- Light fixtures should be hung 30-34 inches from top of table or island to base of light, (based off about 8′ ceilings). For taller ceilings you could go up to 40 inches (I like how lights can make a large room feel cozy if you keep light low).
Favorite Lights-
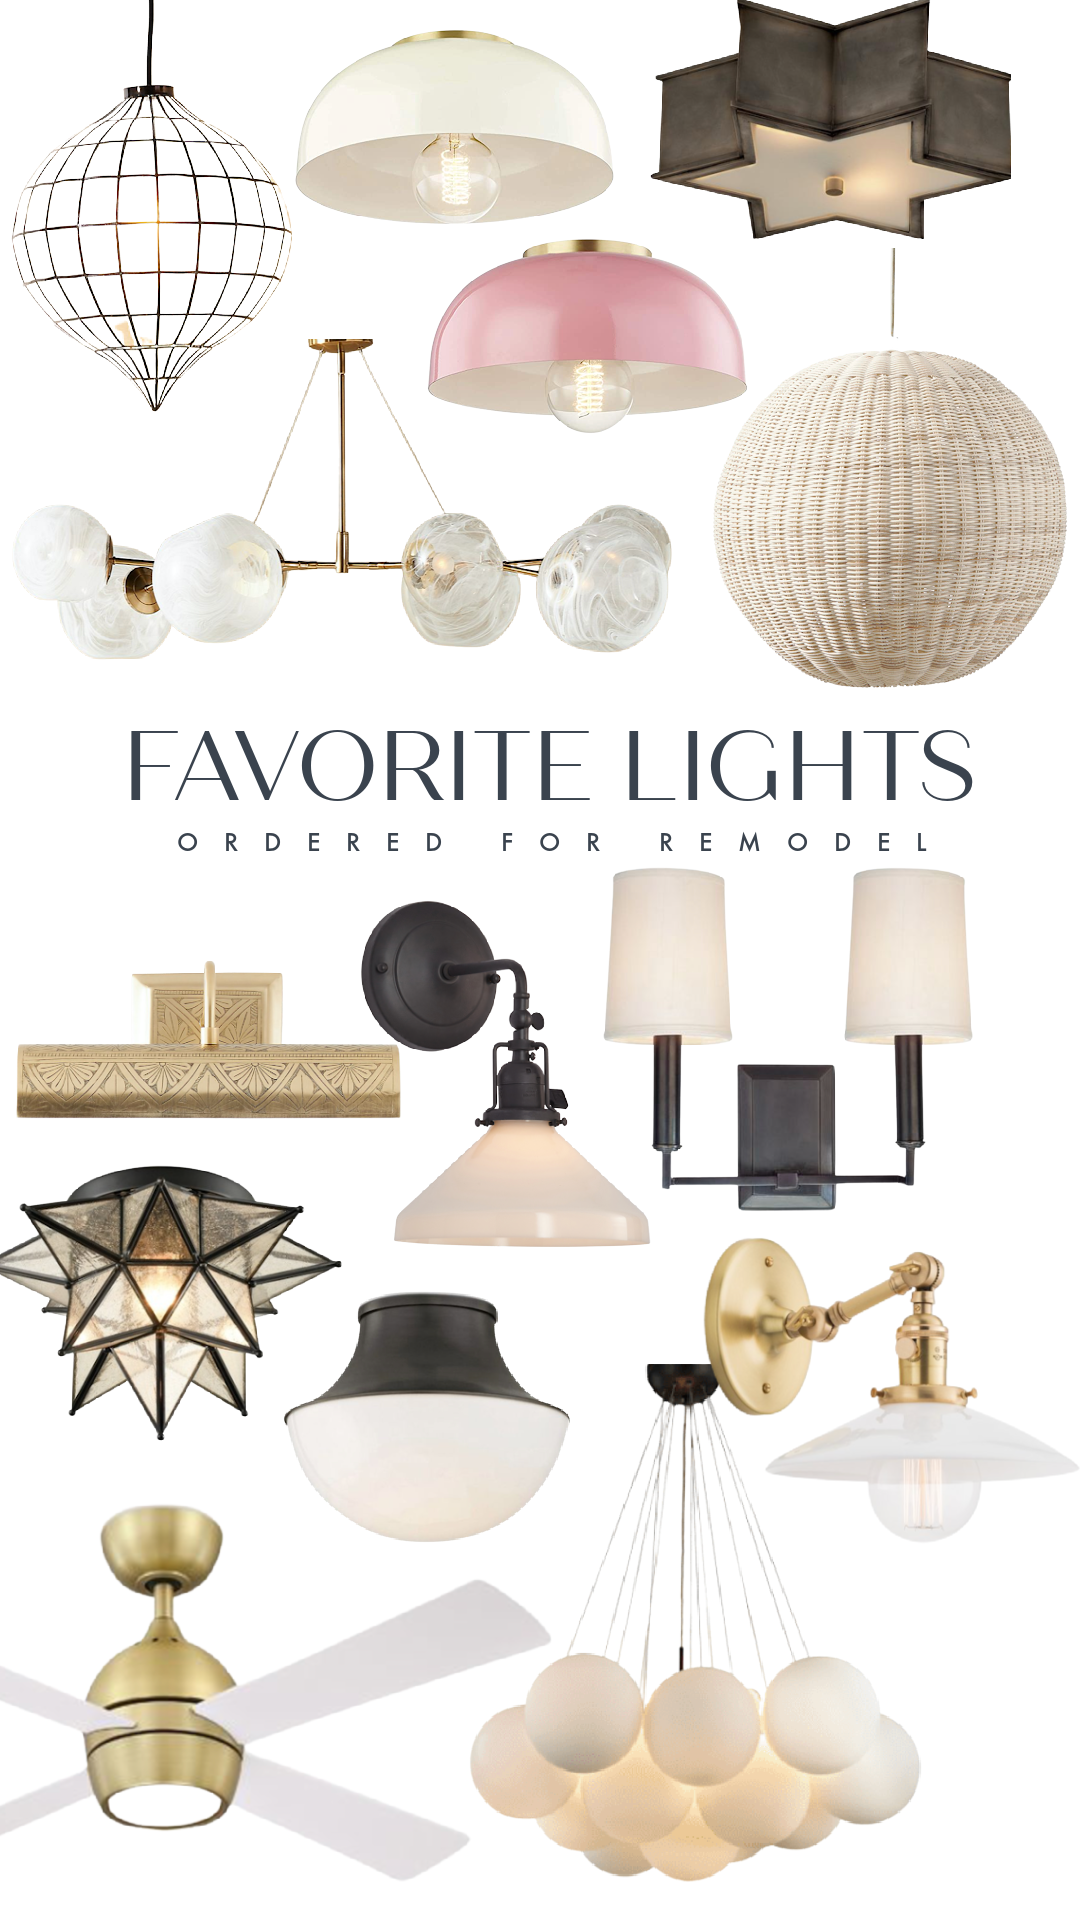
- Capiz Pendant– I did three of these for down the hall on our second floor addition.
- Avery Flush Mount (Cream)– two of these for the girls Jack and Jill bathroom.
- Avery Flush Mount (Pink)– got these fun pink lights for the girls walk-in closets.
- Star Flush Mount– this is going to be so fun in our entry! Our ceilings are 8′ so flush mounts are a must.
- Cloud Chandelier– this was one of the first lights I ordered! I knew I would put it somewhere. It will go over the kitchen island.
- Driftwood Rattan Pendant– two of these for our family room.
- Joselin Sconce (gold with etching) (another option here)- I ordered one of these to do over a piece of art at the end of the hall.
- Fairview Sconce (oil rubbed bronze with glass shade) (another option here)- doing two of these in our family room, leading to our dining room.
- Double Sconce with Shades– for our entry going up the stairs.
- Moravian Star Flush Mount Ceiling Light (much cheaper than what I paid!) This will go in our mud-room.
- Randi Flush Mount (black with domed glass)– we have a long hall into our bedroom, did two of these and one right outside our room.
- Princeton Sconce (budget option here)- for the girls bedrooms over their window seat. I made it easy and did the same for both of their rooms.
- Bubble Light Fixture– this bubble fixture was a must on my list! This one is going over our dining room table.
- Indie Ceiling Fan– I had ordered two lights for the girls ceiling, but second guessed myself that I should do ceiling fans for the second floor. Probably a good idea!
Trying Lights in the Room with Computer Magic-
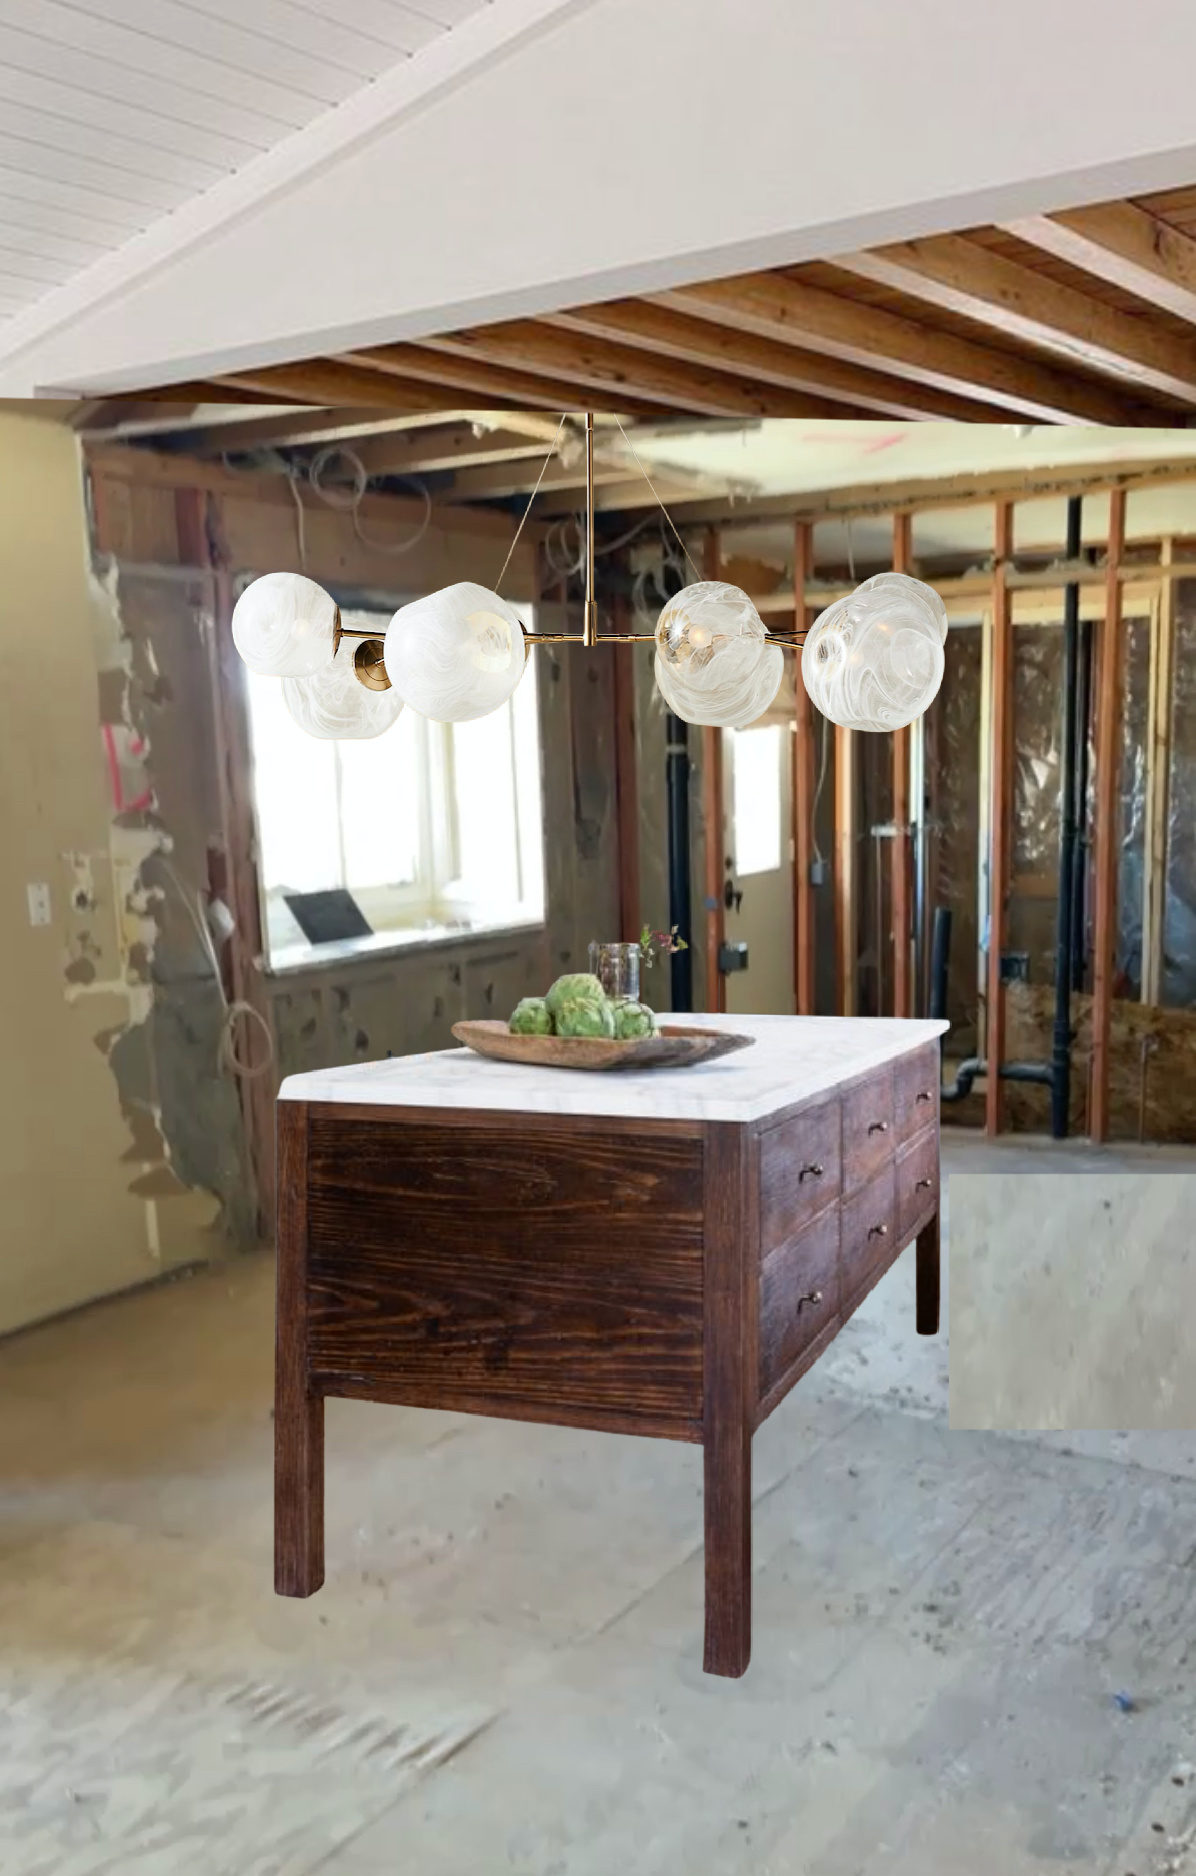
It is really easy to try something in the room, like a did above, you can even do it from a phone. I have a video HERE that you can pause and slow down to see how I do it.
- Open the app Canva (free version)
- Select a blank canvas (I just pick instagram story because size is good- you can find these under templates then social media)
- Exit out of the ready-made templates to just a blank canvas
- Then upload your images from your media library
- If you are layering images like I did above you will want to remove the background. You can remove a background for FREE via remove.bg
- You can layer images via “positions”. You can see where I made the background our kitchen then I layered a light fixture and island by moving from backward or forward.
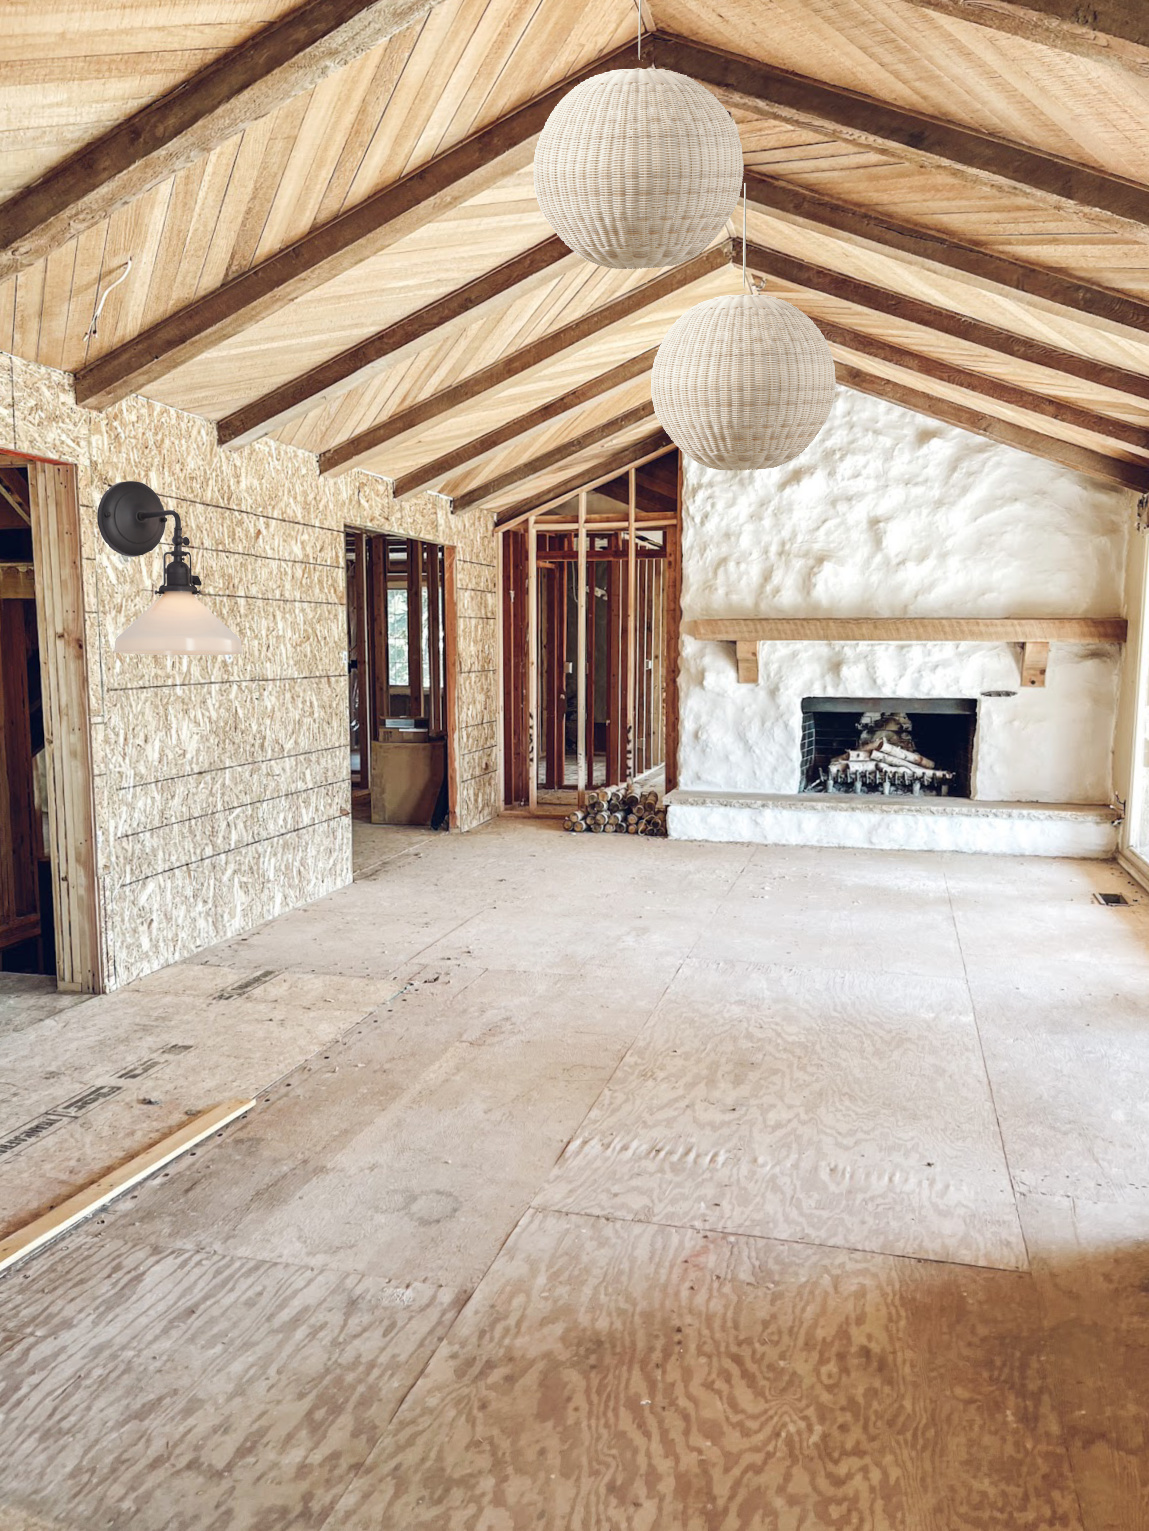
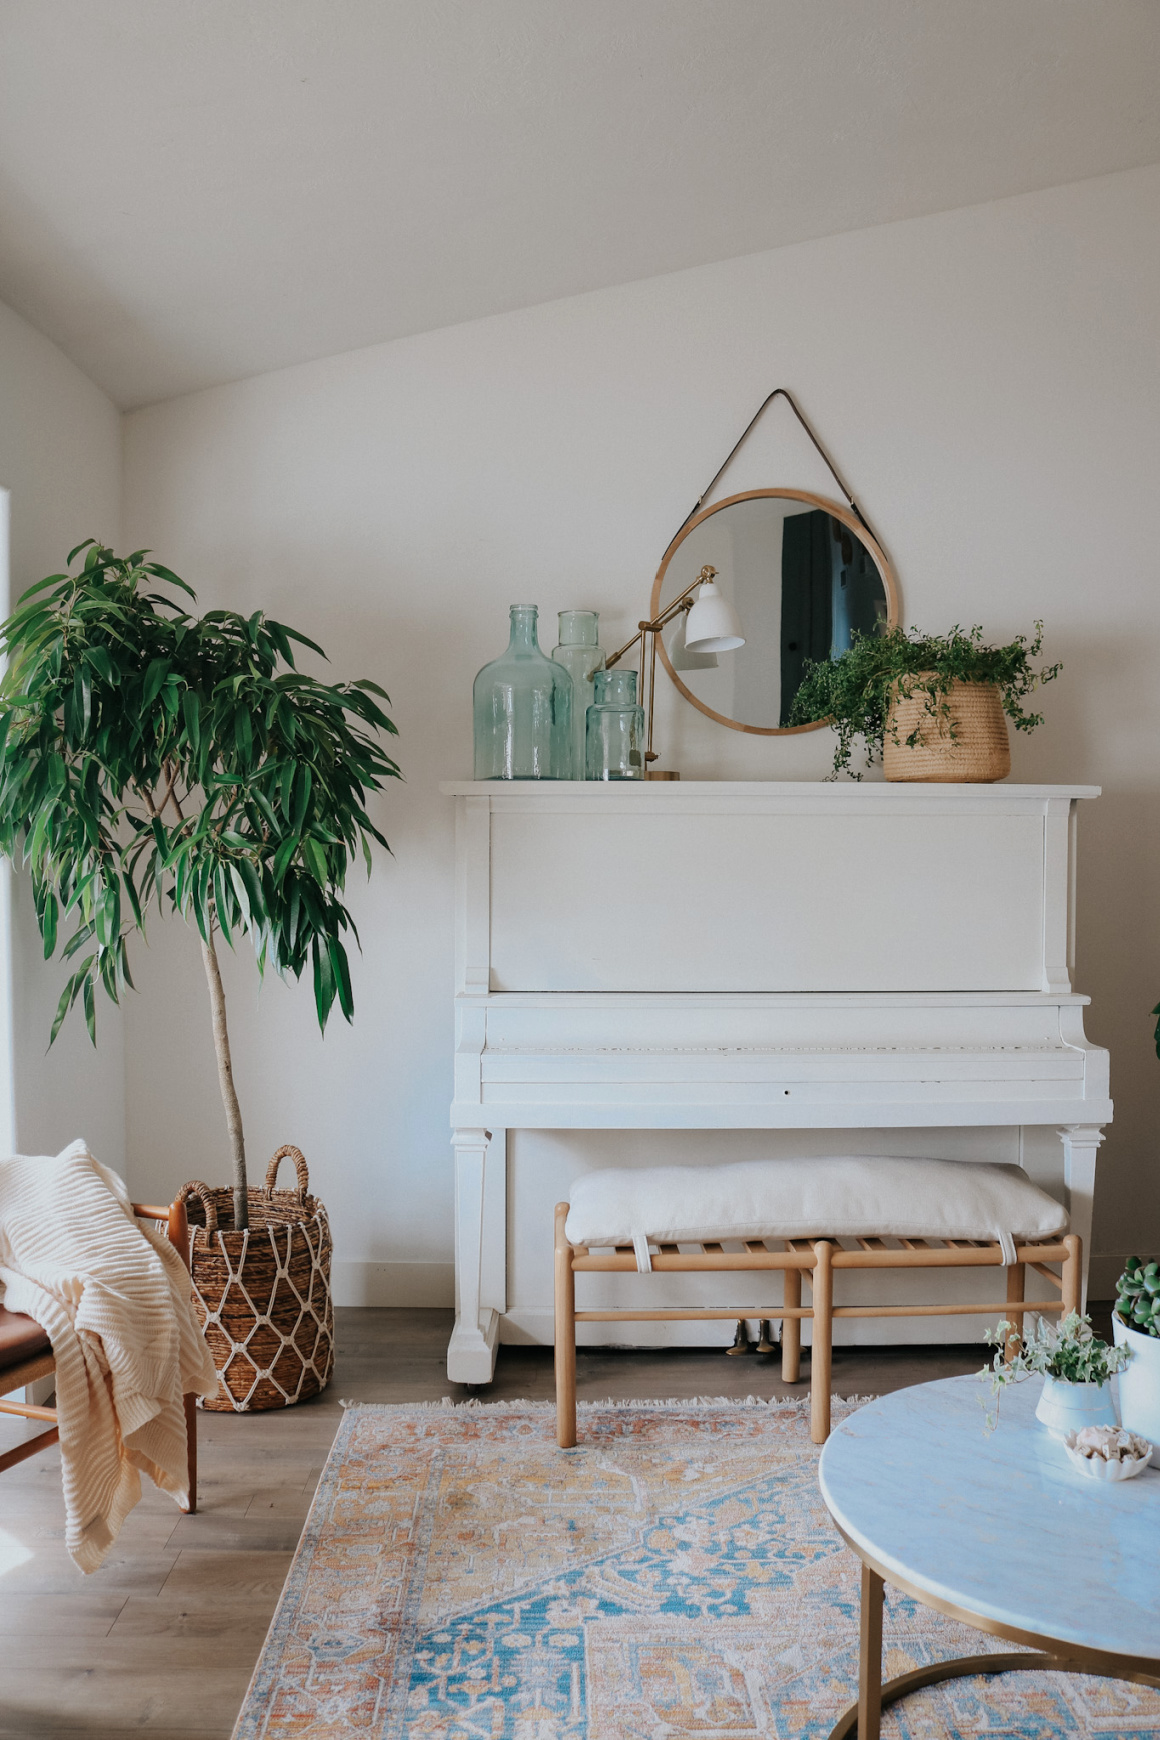
In our family room we are doing to large round lights, in a lighter color to brighten up the wood. I just needed to decide on the wall sconce, but after I put them in the room, I could easily eliminate other options and decide on this sconce.
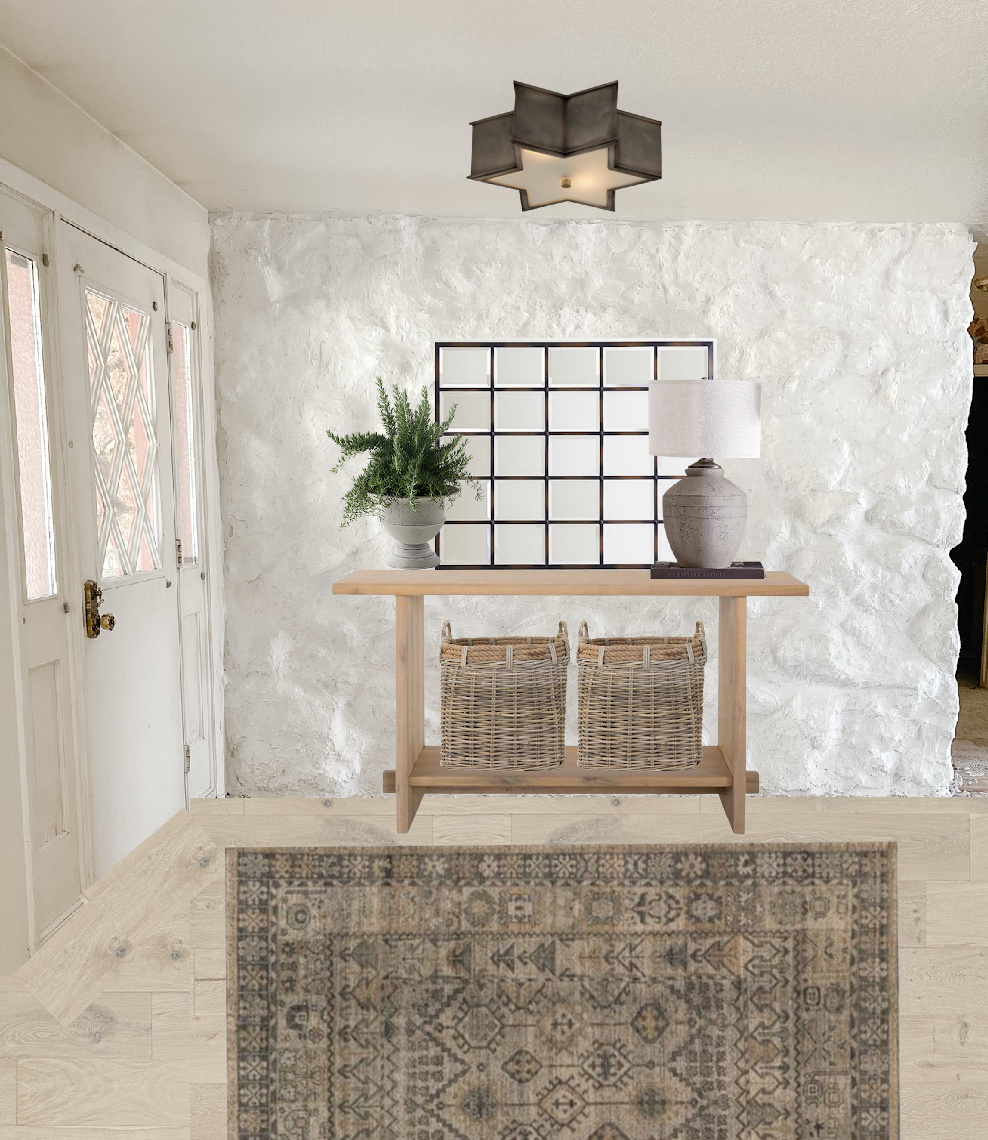
For our entry light I was having a hard time deciding on a light, there were so many lights I liked and yet none of them were immediately a yes, until I found that large star light. I wanted to make sure the entry light was a WOW, fun light that set the tone for our entire home. (ps- see the different entry ideas here).
Excited to share all the lights installed….hopefully sooner than later!


Just what I needed! I’m gearing up for some new light fixtures and needed some inspo! Thanks so much!