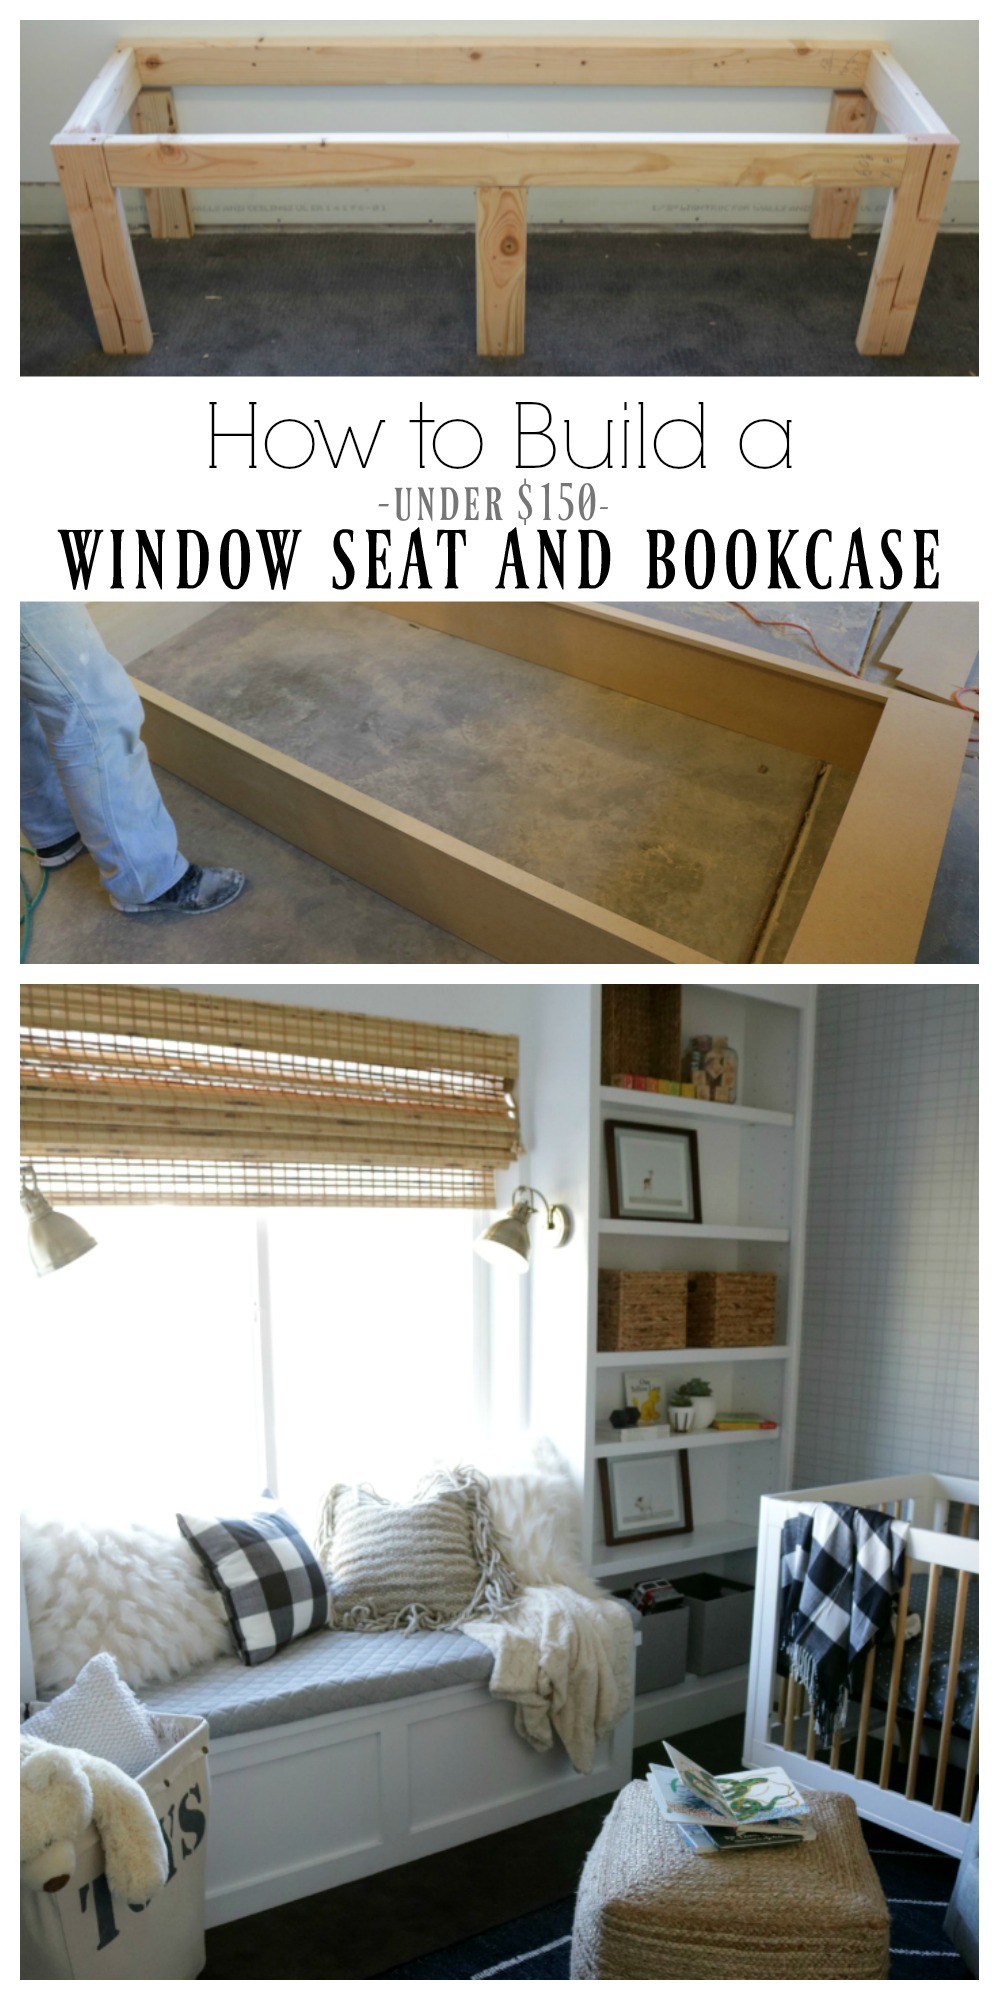
We have a window seat and it seemed WAY too complicated to attempt ourselves. Until my brother-in-law showed us how it easy it was! Just fascinating how it all comes together to actually be SOMETHING! If you caught my last post on the big Nursery Reveal that we completed this window seat and built-in bookcases AND decorated the room in just TWO DAYS! This is a follow up post to that post.
My favorite home improvement store, Lowe’s sponsored this post. Everything you see on this window seat and bookcase DIY tutorial is from Lowe’s and the best part is you can build one too…for under $150!!! YES! It is true. I actually think after watching my brother-in-law complete this I could actually duplicate it. And a huge thank you to him, he is teaching all of us so much!
I shared a video at the end of this post. It is not a professional video nor is this a professional project, just a DIY project that anyone can do! The videos are taken from my Instagram Stories.
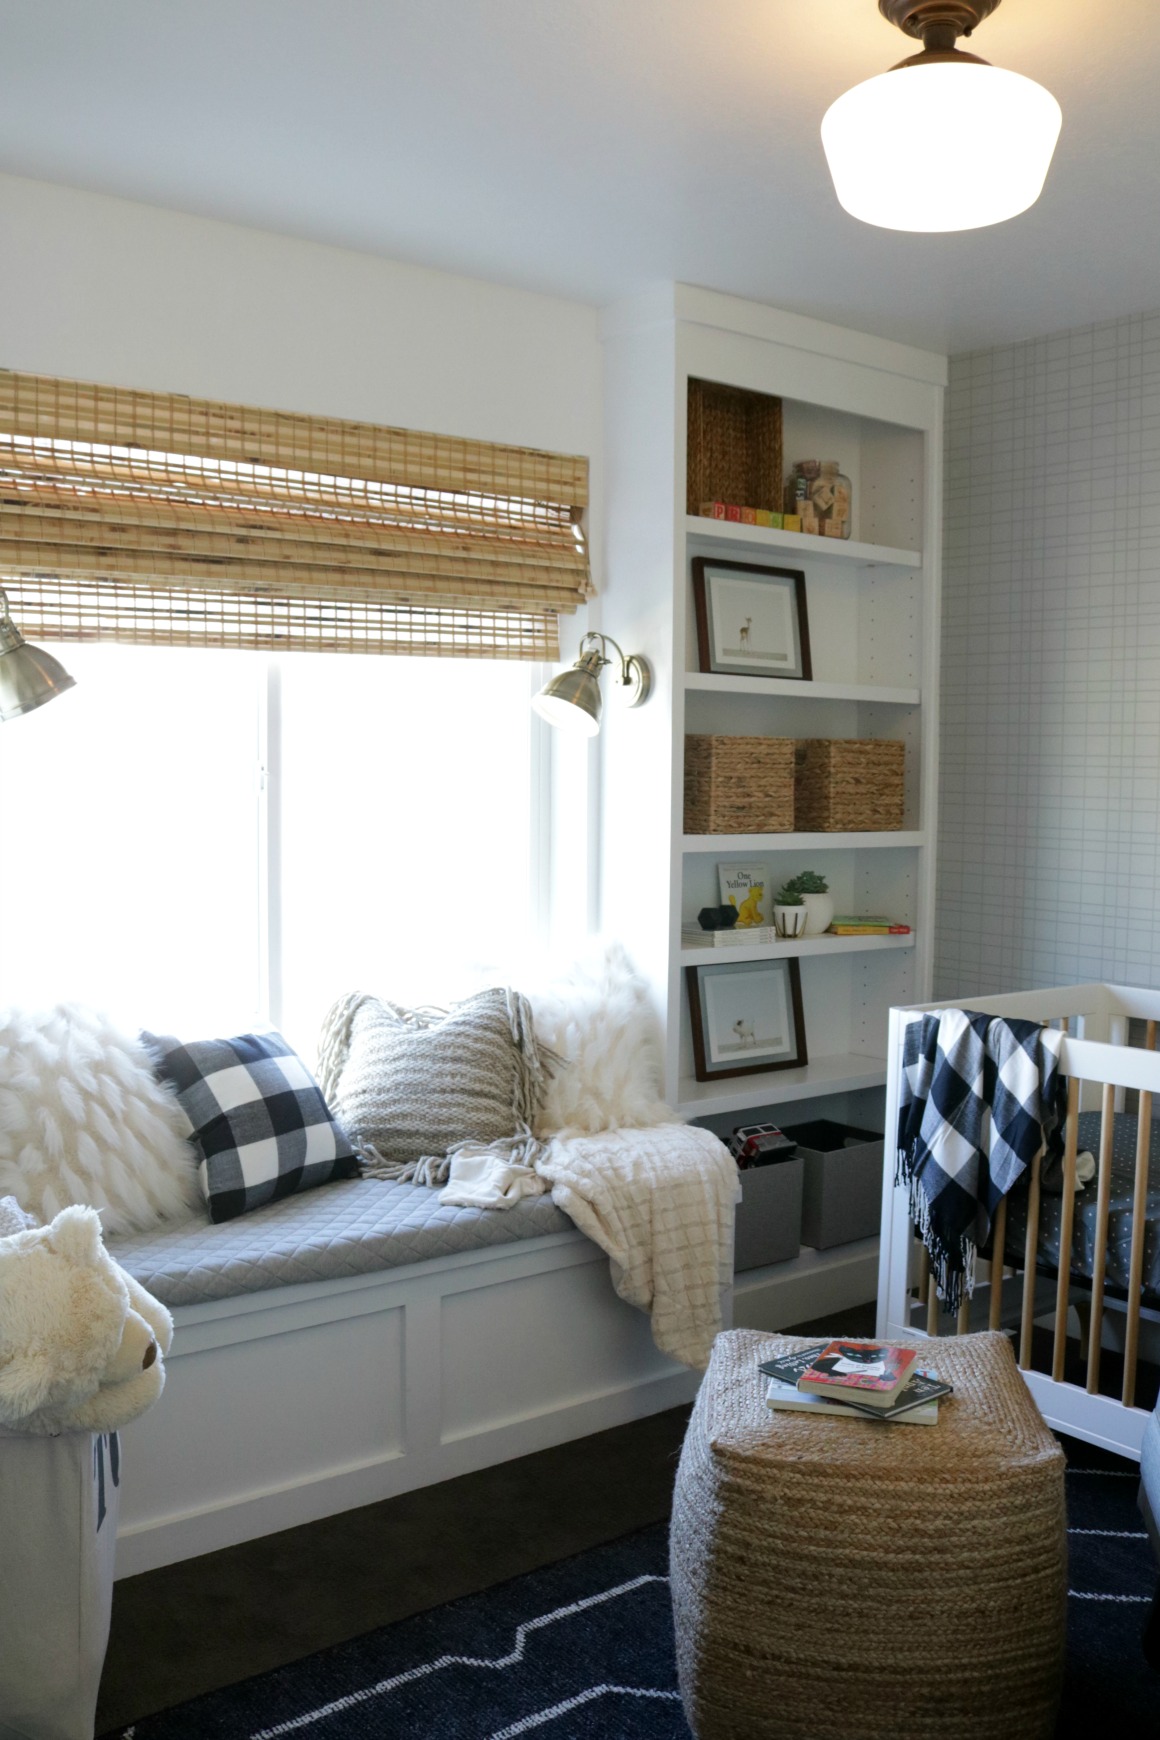
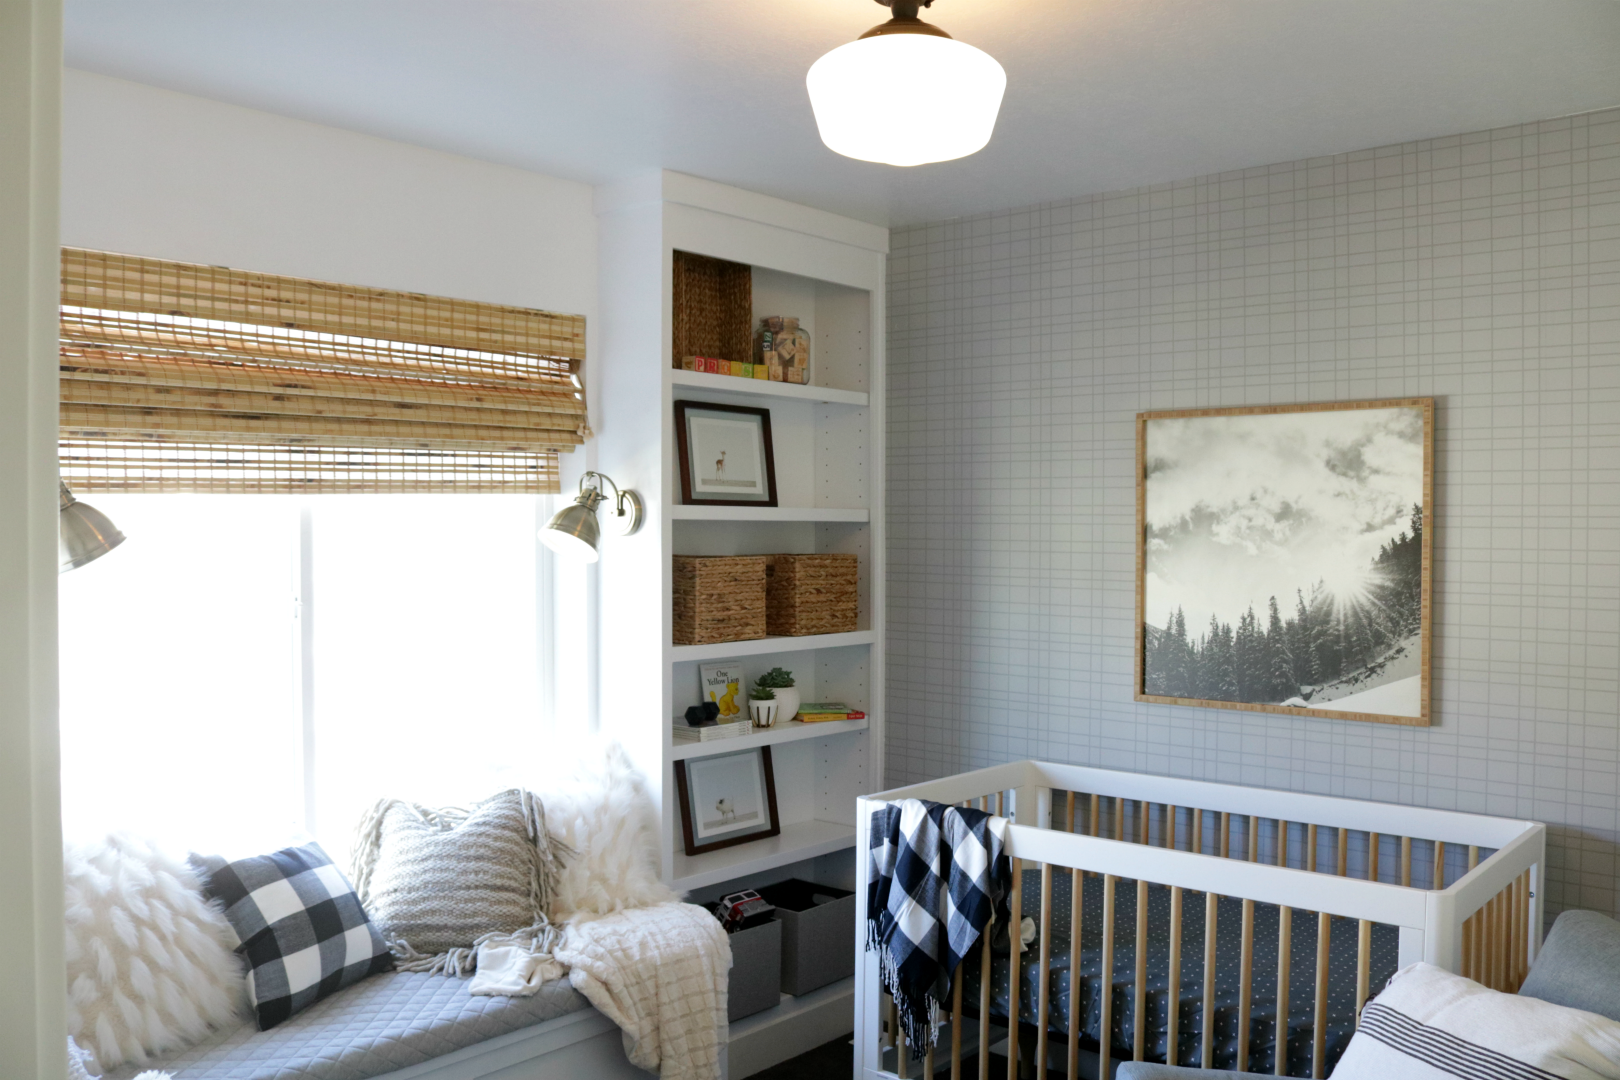
Let’s take a look at the AFTER first, the completed nursery…
Window Seat and Built-in Bookcase-
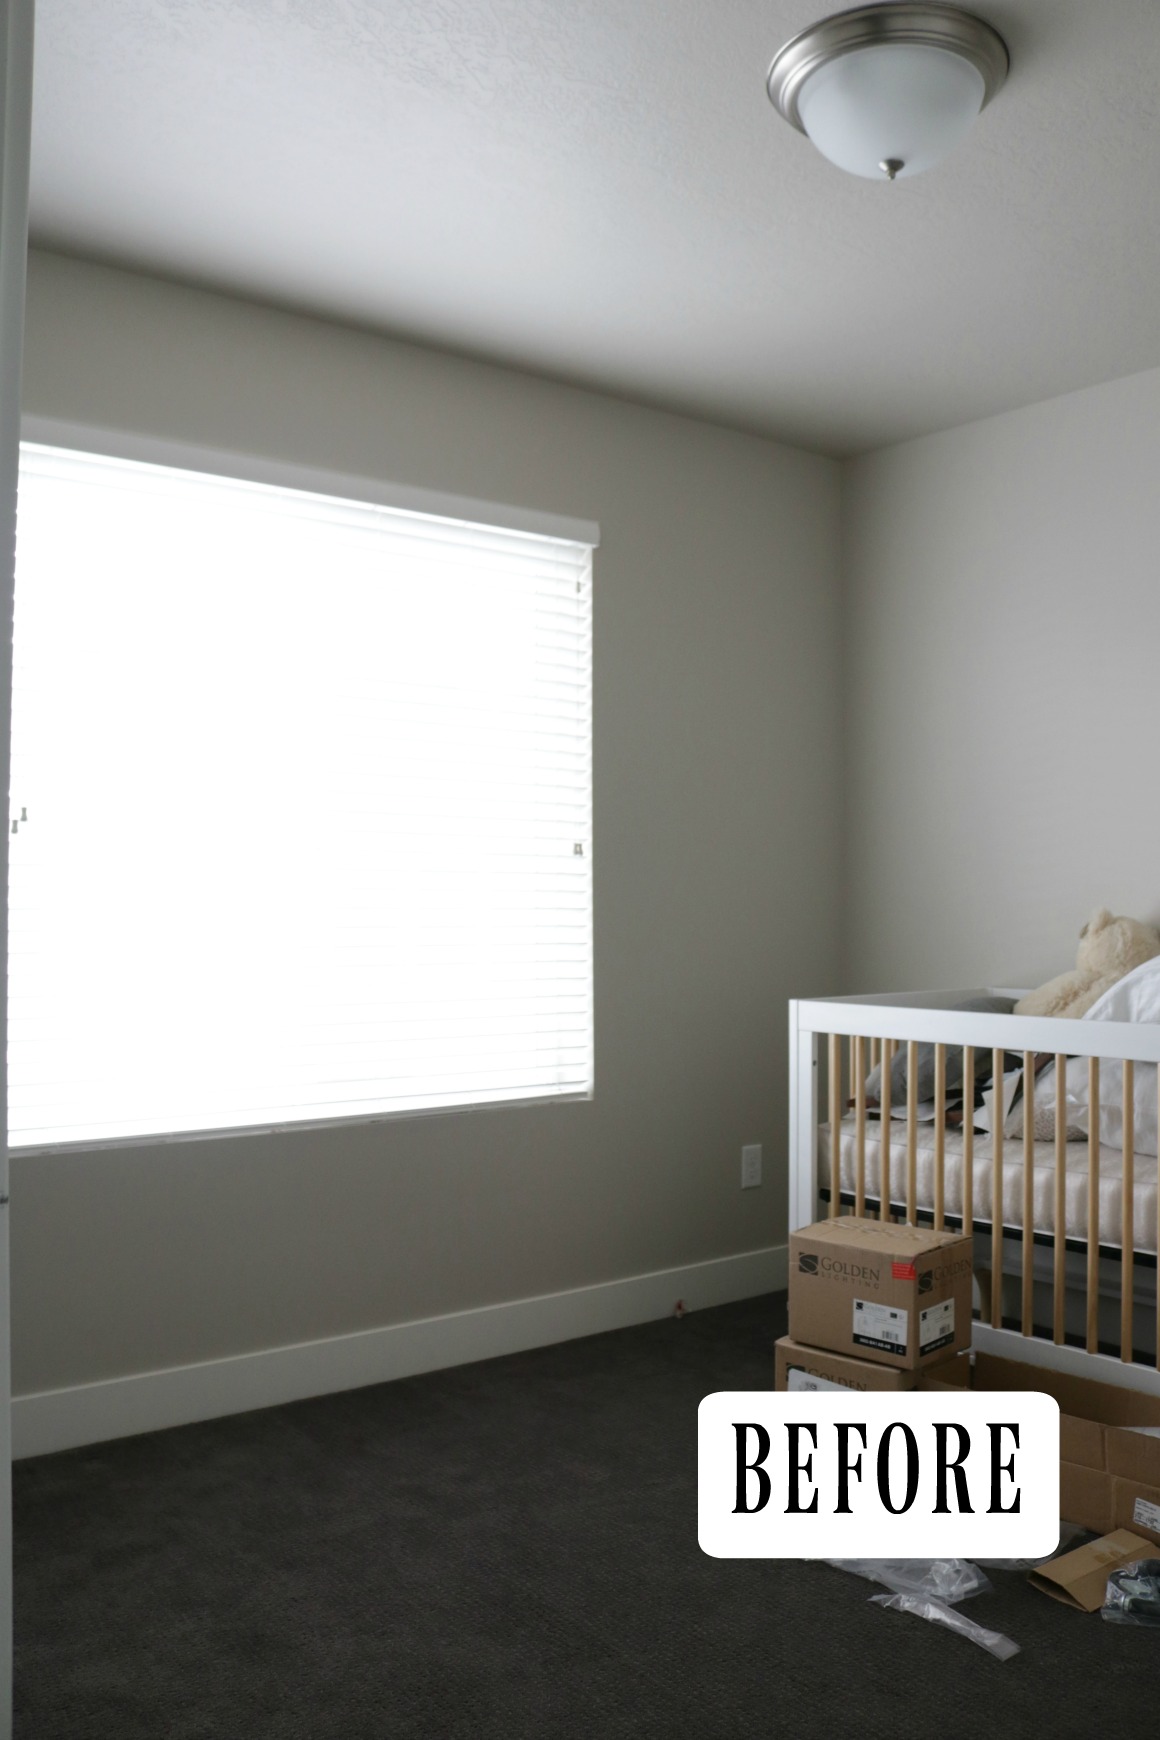
Nursery BEFORE Window Seat and Bookcase-
Below is a list of supplies and tools you will need to build a window seat and a bookcase of your own!
Window Seat and Bookcase Tools Needed:
- Speed square or tri-square
- Level
- Table Saw and/or circular saw
- Metal saw guide with c-clamps
- Miter Saw
- Air compressor
- Air hose
- 18 Gauge Nail Gun (1 1/2″ nails or longer)
- Cordless drill
- Driver bit for screws
- 1/2″ drill bit
- 3/32″ drill bit
- 5 mm drill bit for shelf pins
- 80 grit sandpaper
- 80 grit sandpaper block
- Orbital Sander *optional
- Caulk gun
- Putty knife
- Painting supplies
- Tape Measure
- Pencil
- Hammer
Window Seat and Bookcase Supplies Needed:
- 2x4s (2-3 depending on size of seat)
- 3/4″ sheet MDF (we used about 3.5 sheets)
- Wood glue
- 2″ wood screws
- 1 1/2″ brad nails for nail gun
- Piano Hinge (we used a 30″ one)
- Shelf pins (4 per shelf)
- Latex caulk
- Spackling
- Primer
- Paint (Our bookcase, the back of the bookcase- that is just the wall and the window seat in Oxford White (semi-gloss) from Sherwin Williams)
Keep in mind that you can call your local Lowe’s and check what tools are available for rent.
DIY Window Seat Tutorial-
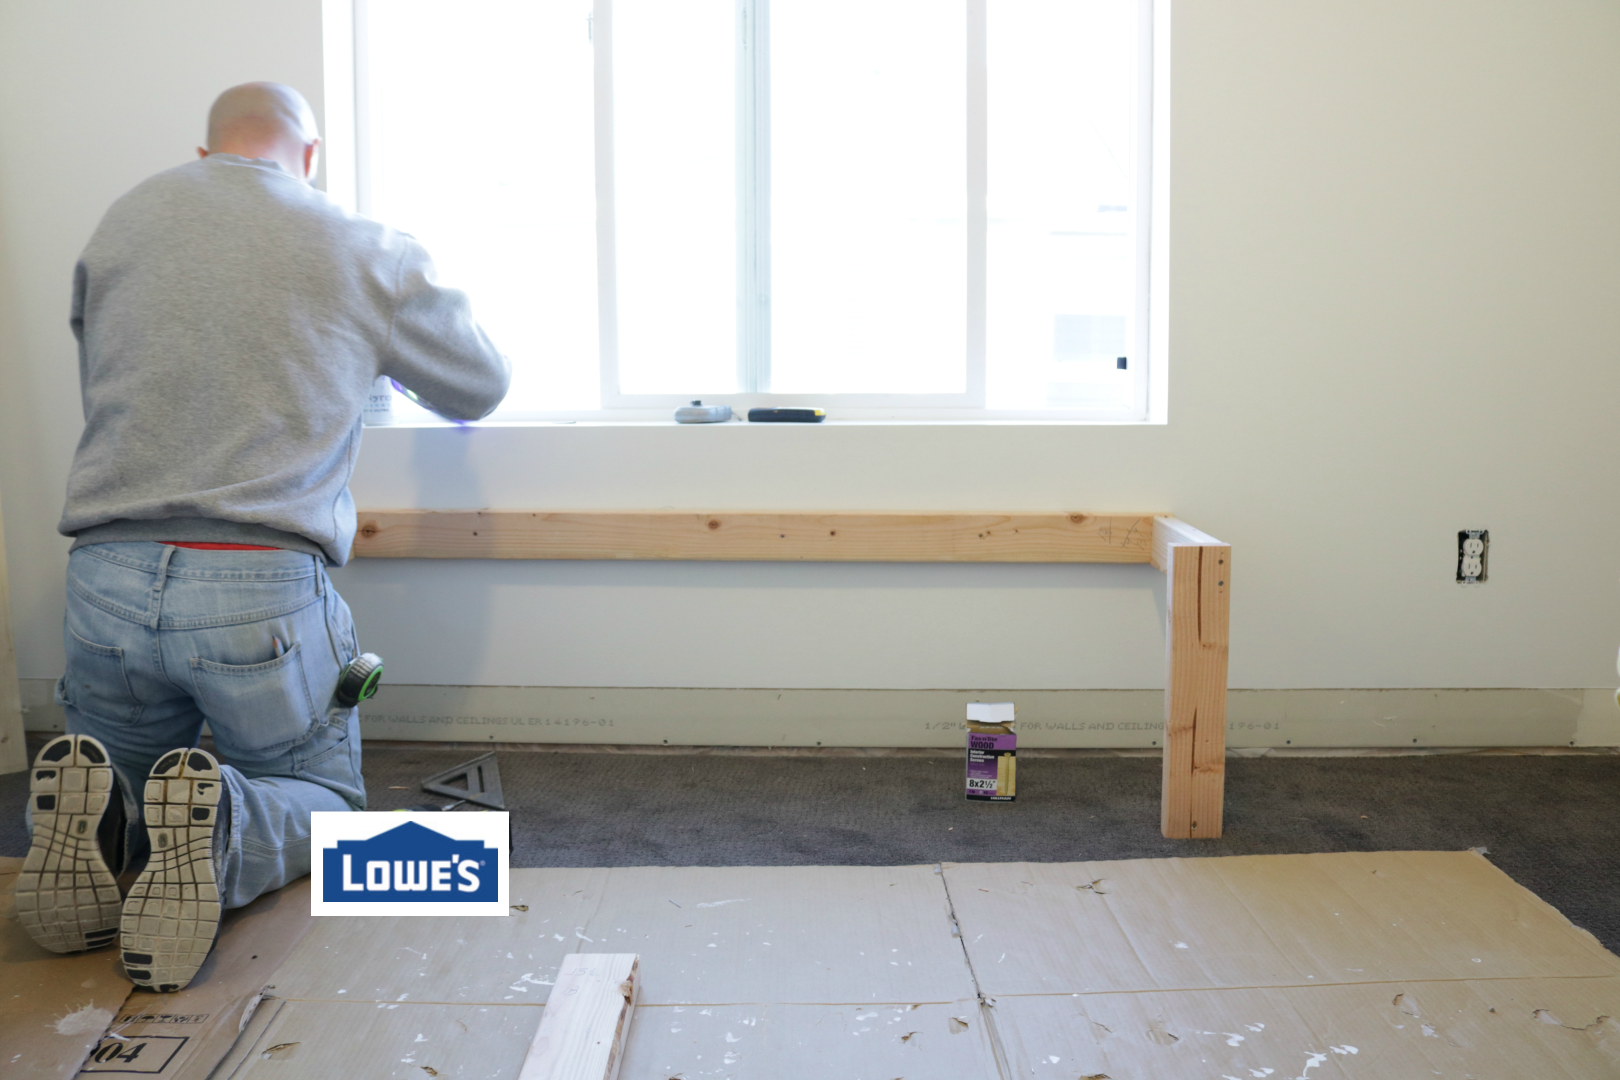
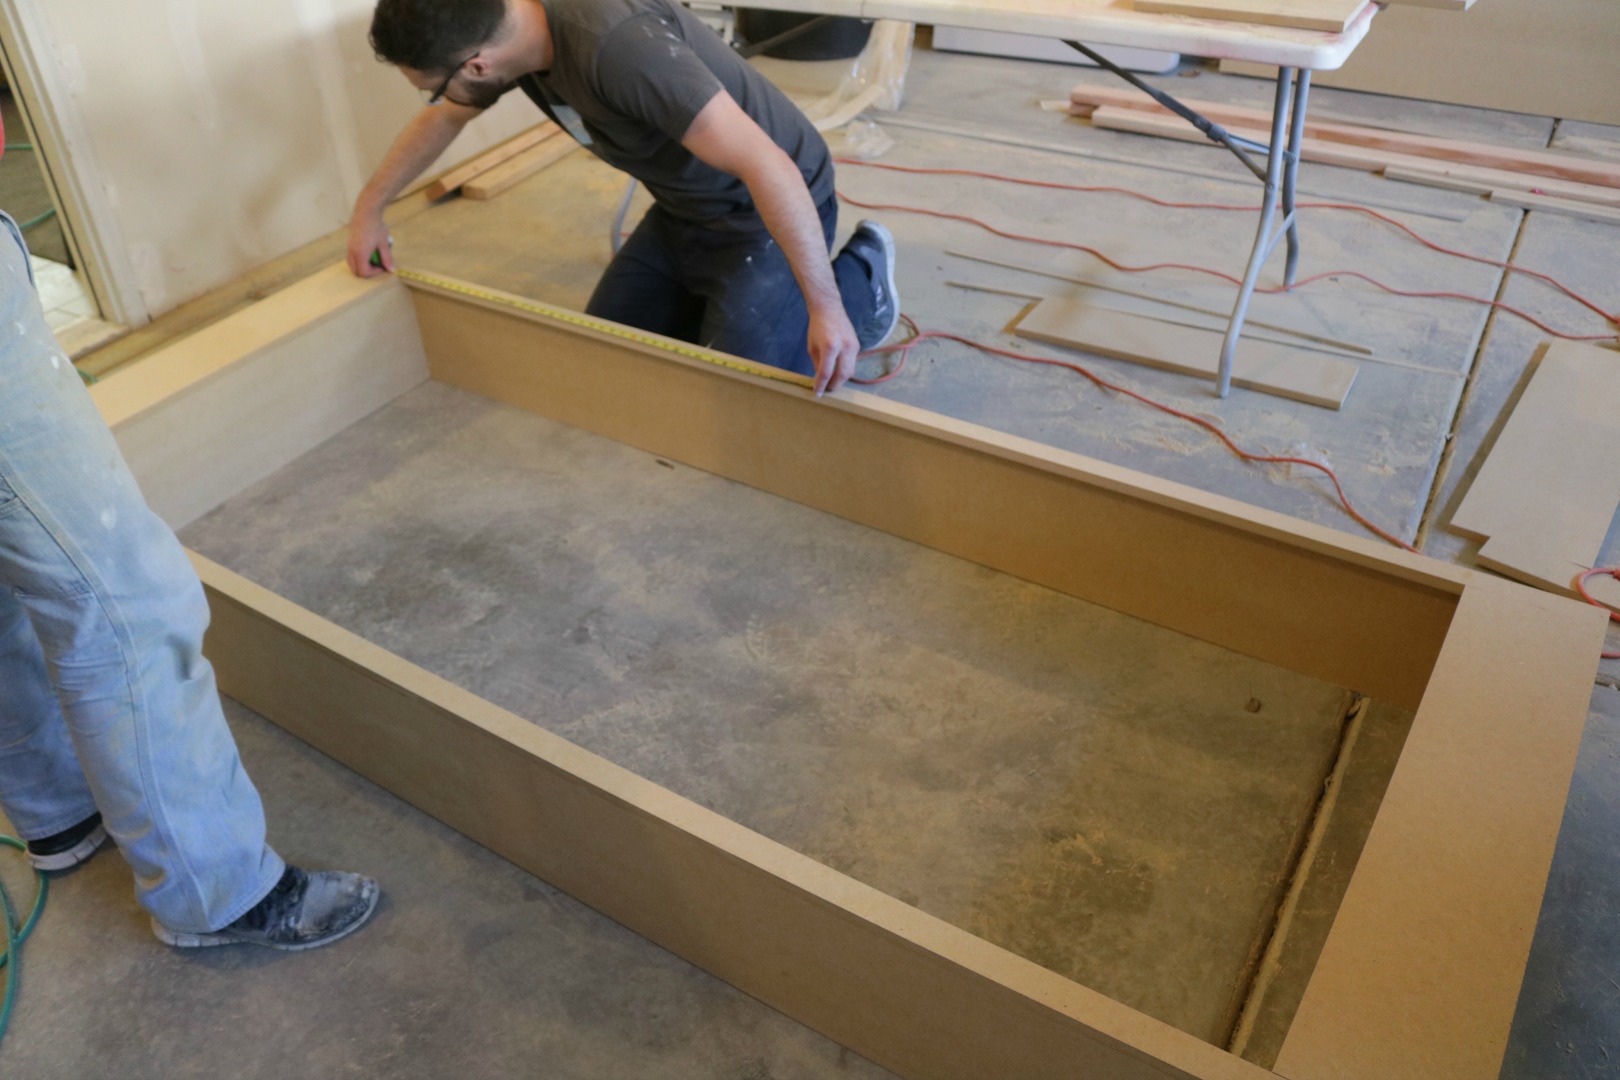
Decide the size of your window seat. We built this window seat 17″ tall.
Things to keep in mind when selecting the seat height- Are you adding a cushion and how thick will it be. Will the height work if there is a window. The location of the window seat, if it is for a dining table 16″ is a better height if you are adding a cushion (but keep in mind your cushion height) most dining chairs are 18″ heigh so with a cushion you wouldn’t want it taller than that.
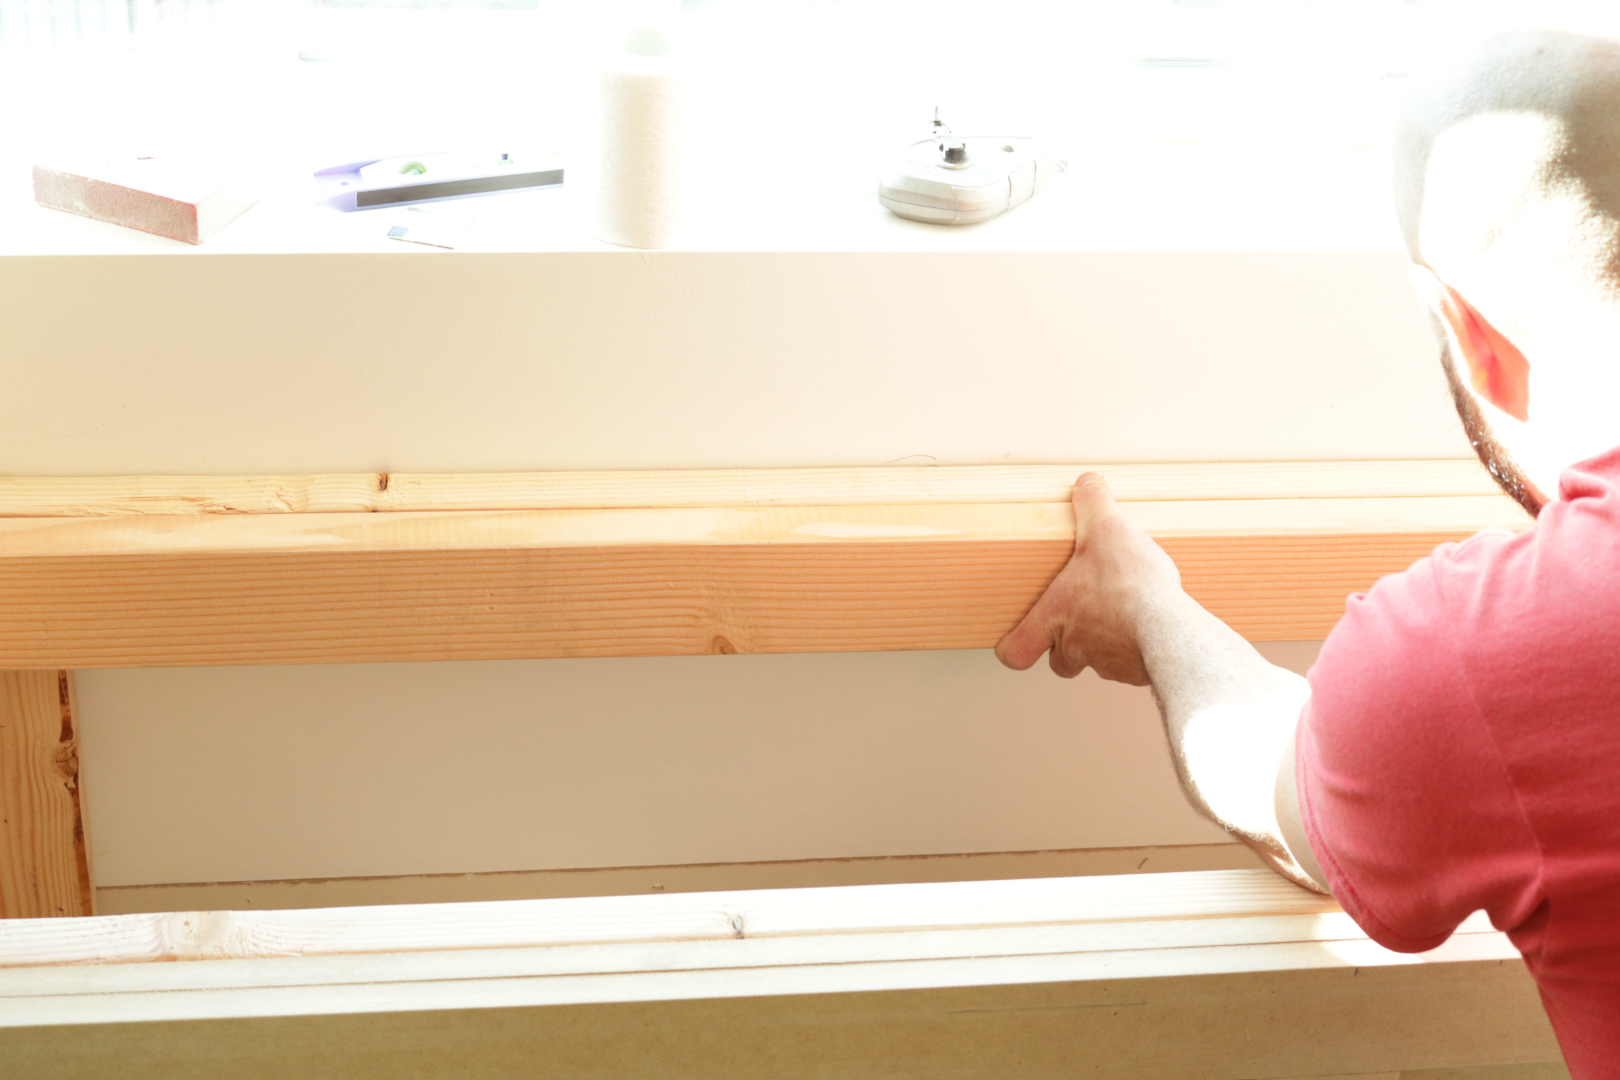
Window Seat Tip- Use a level and go off of that not the window. For instance the framers did not frame this window level. If we measured off of the window it would have been out of level.
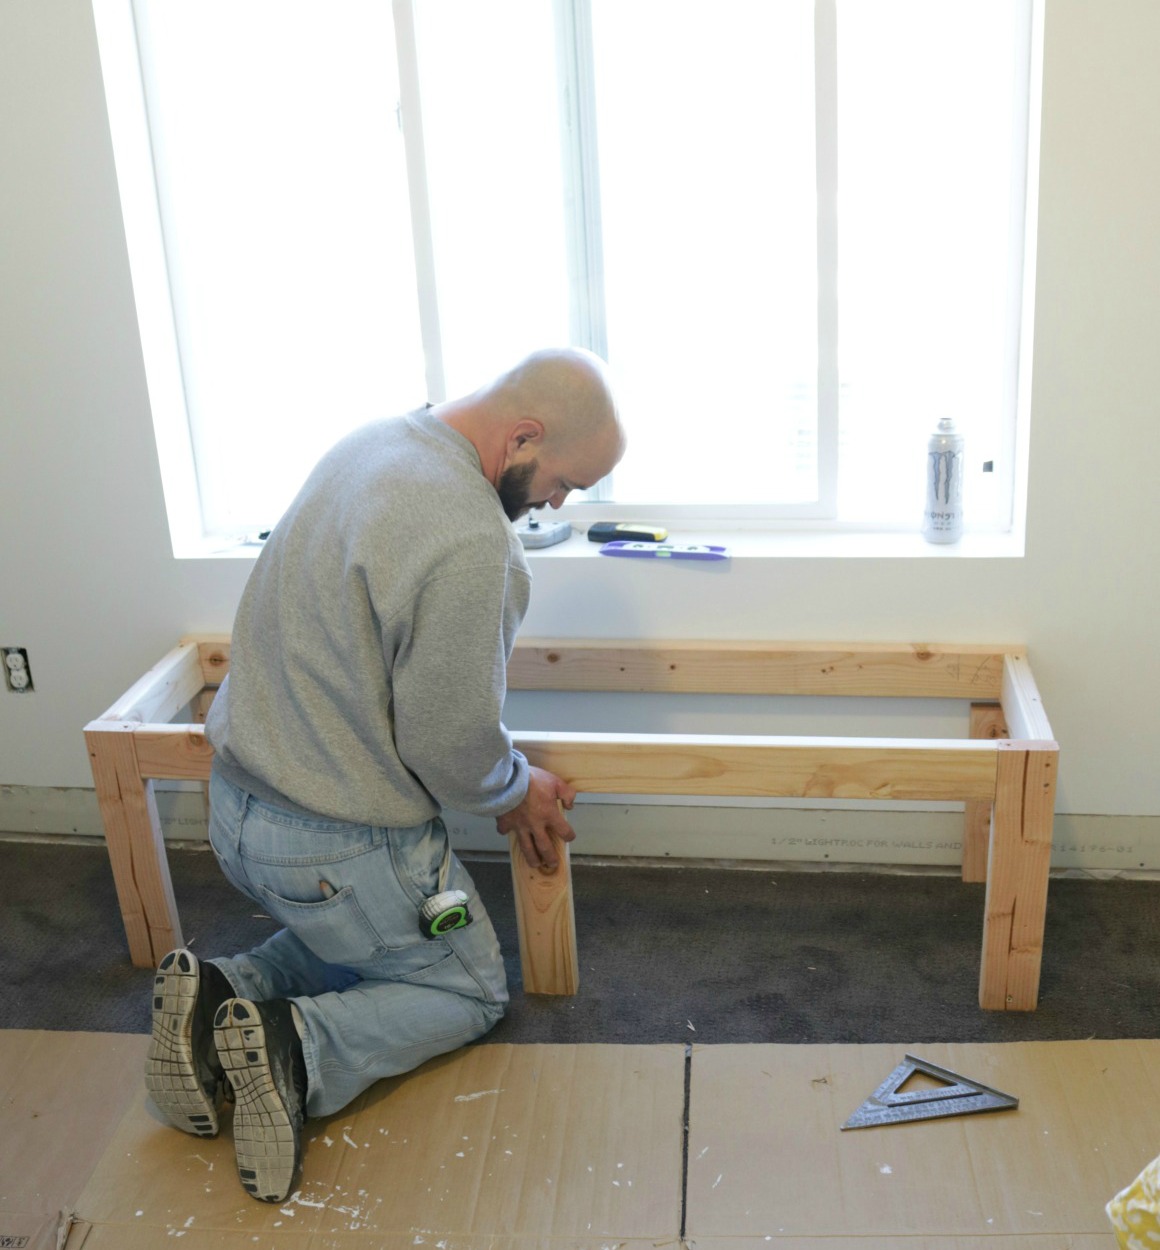
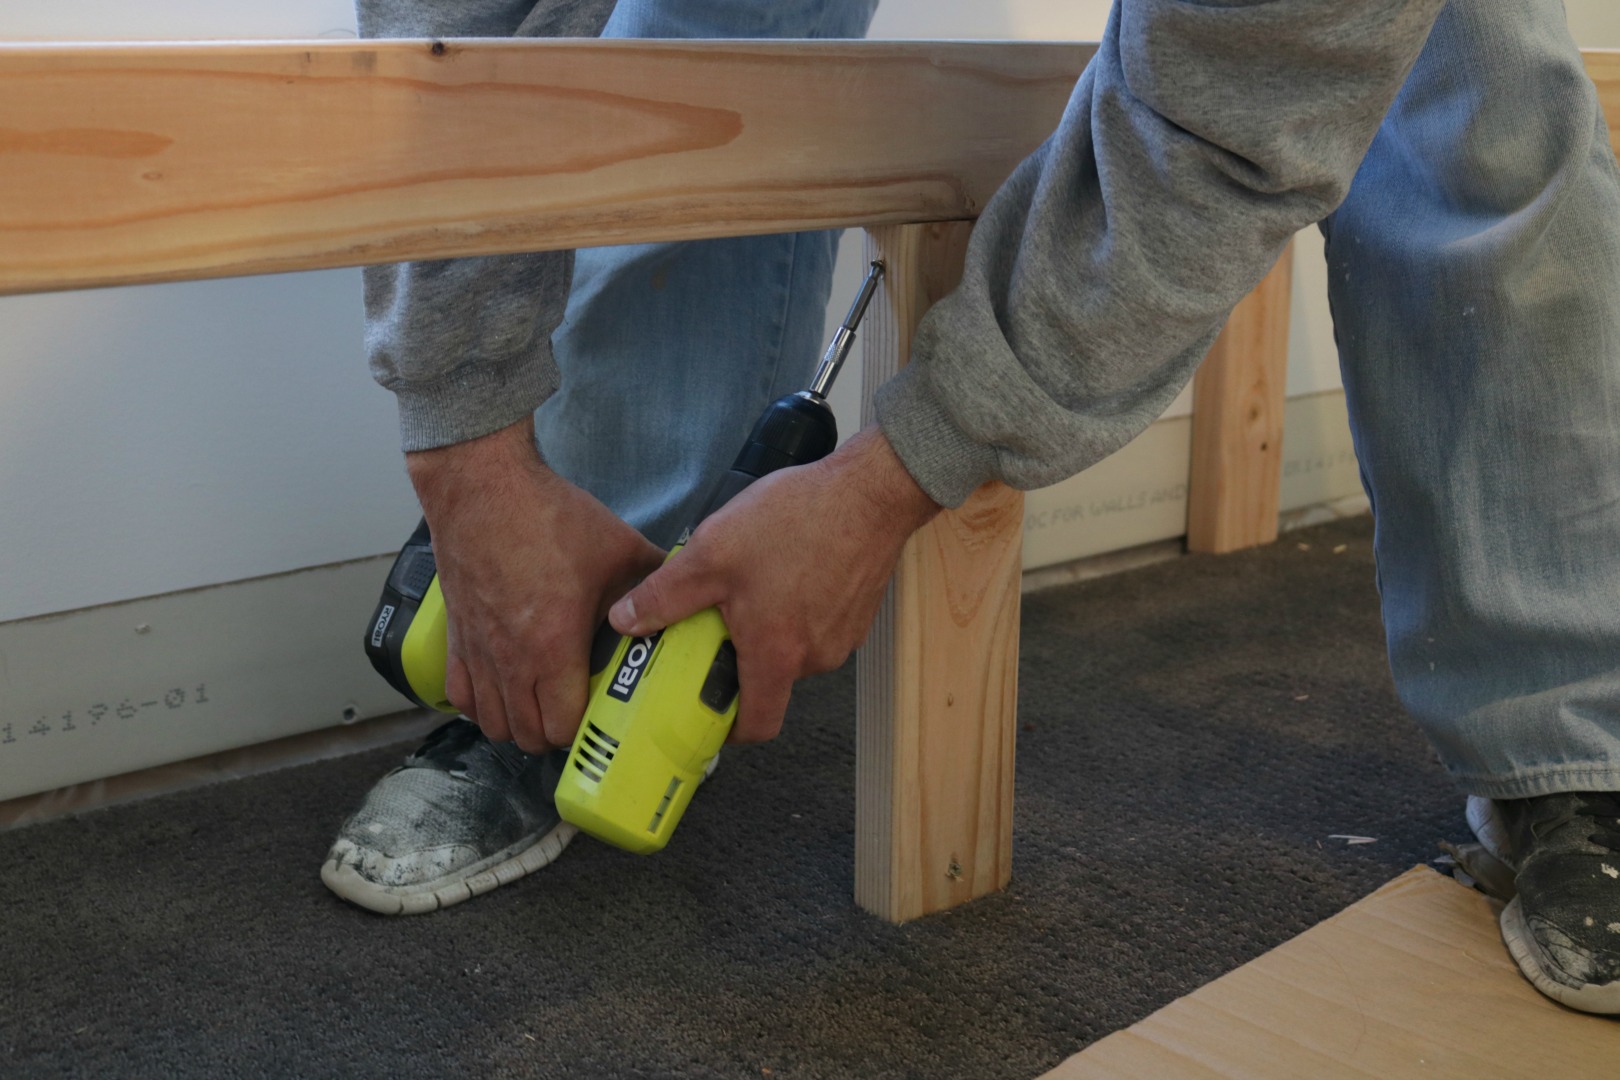
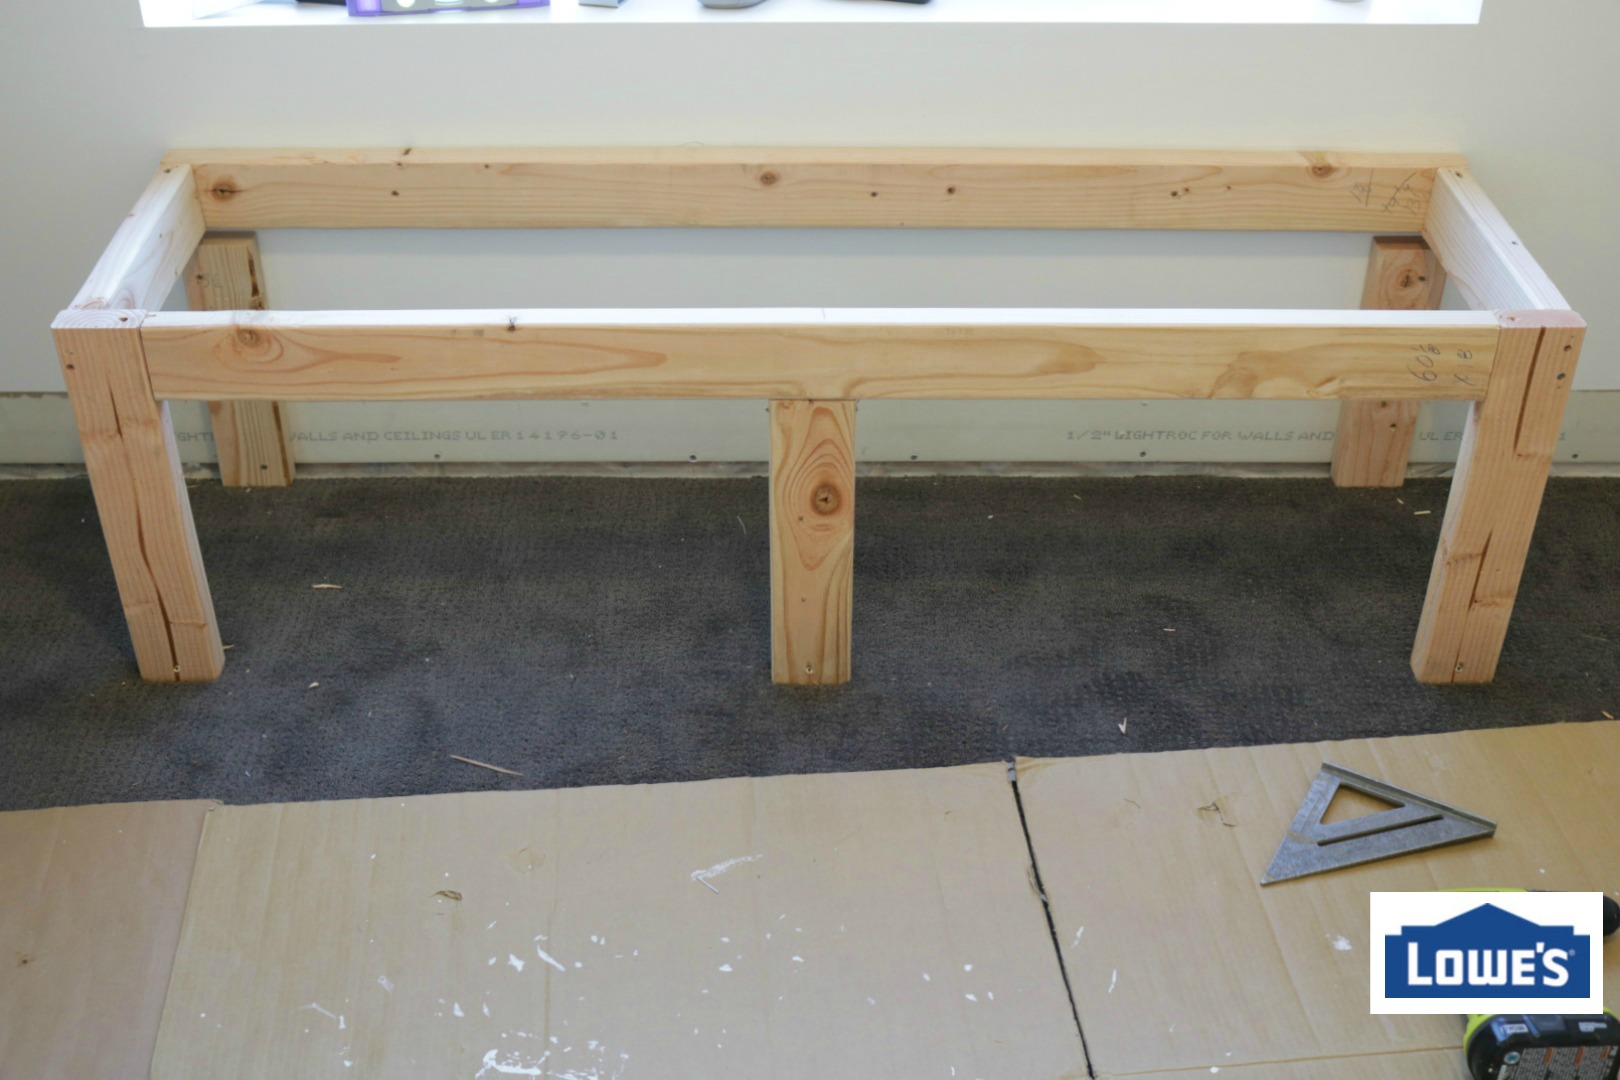
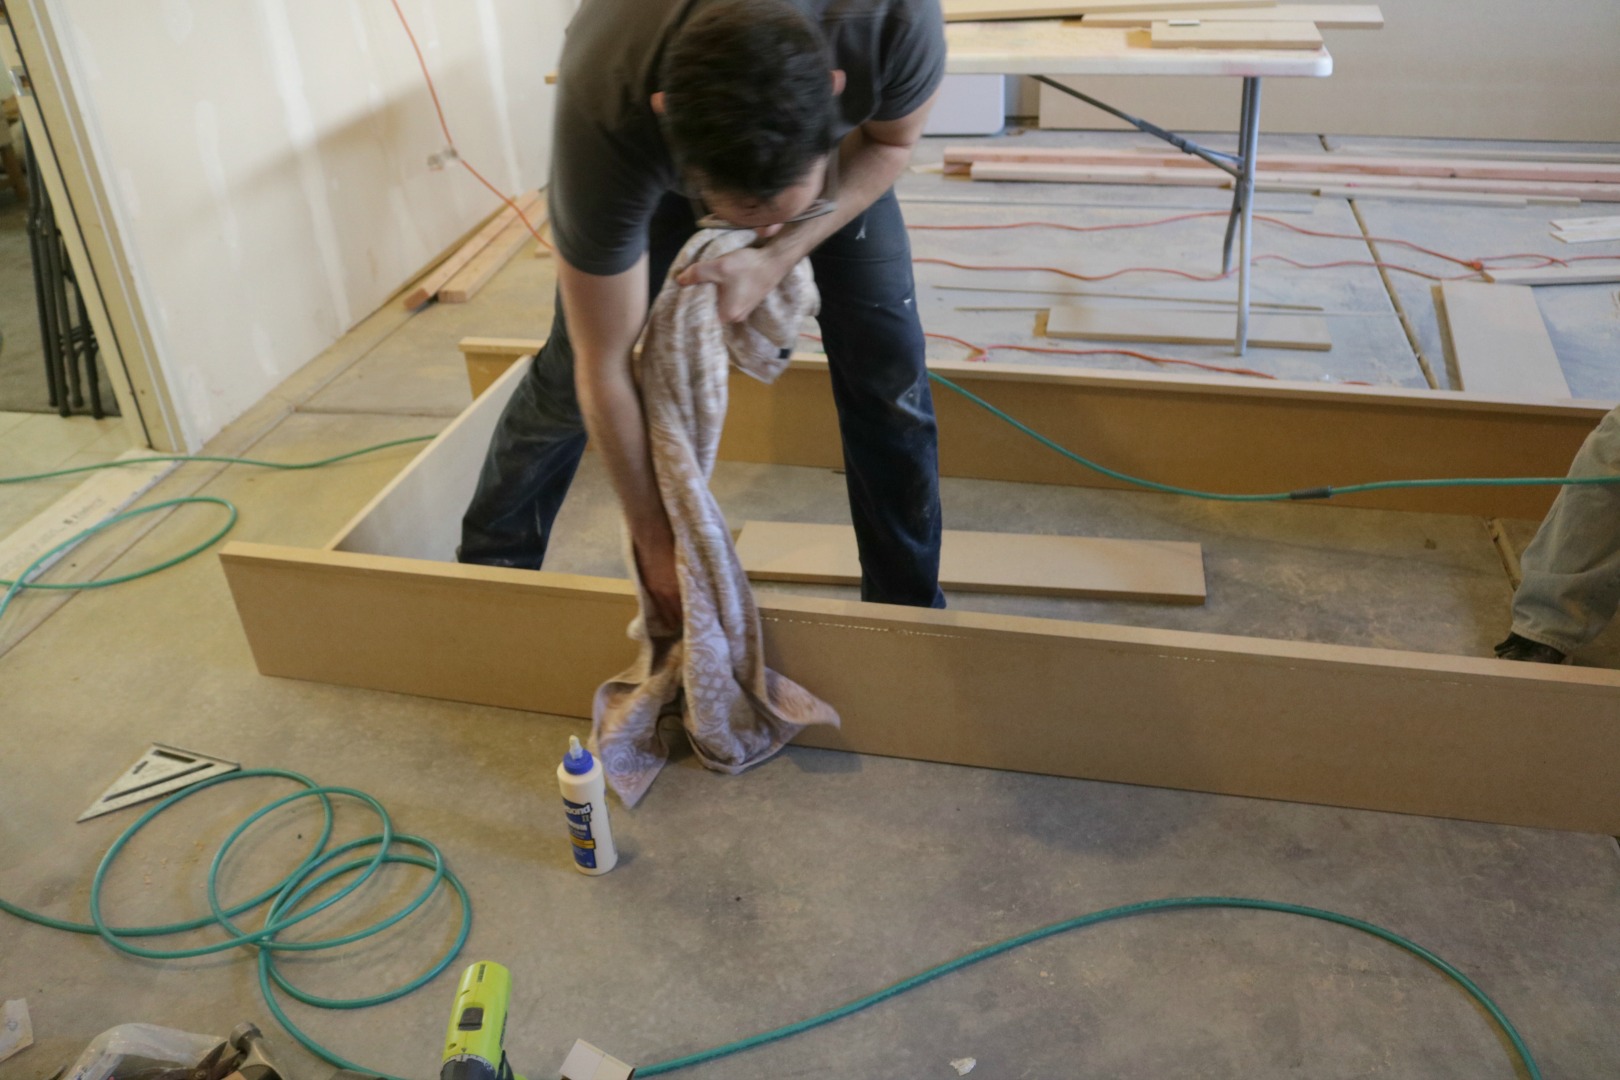
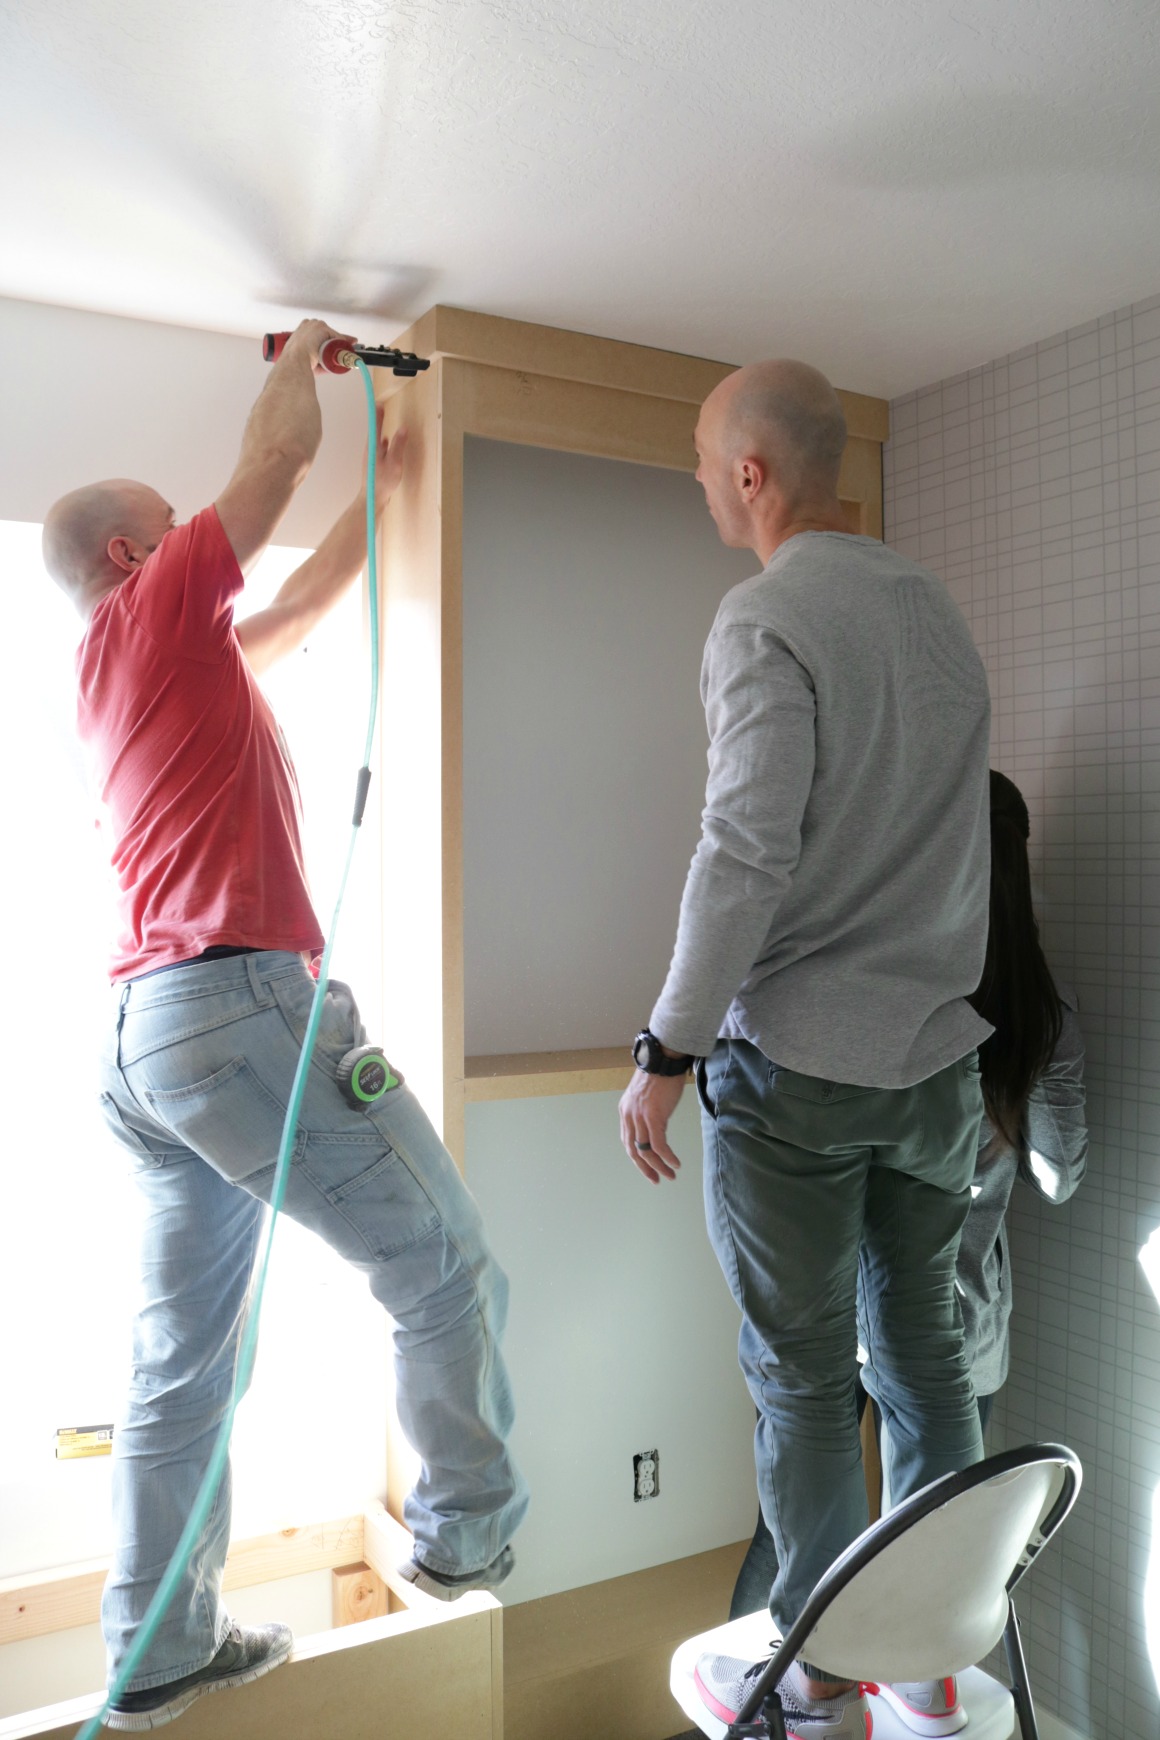
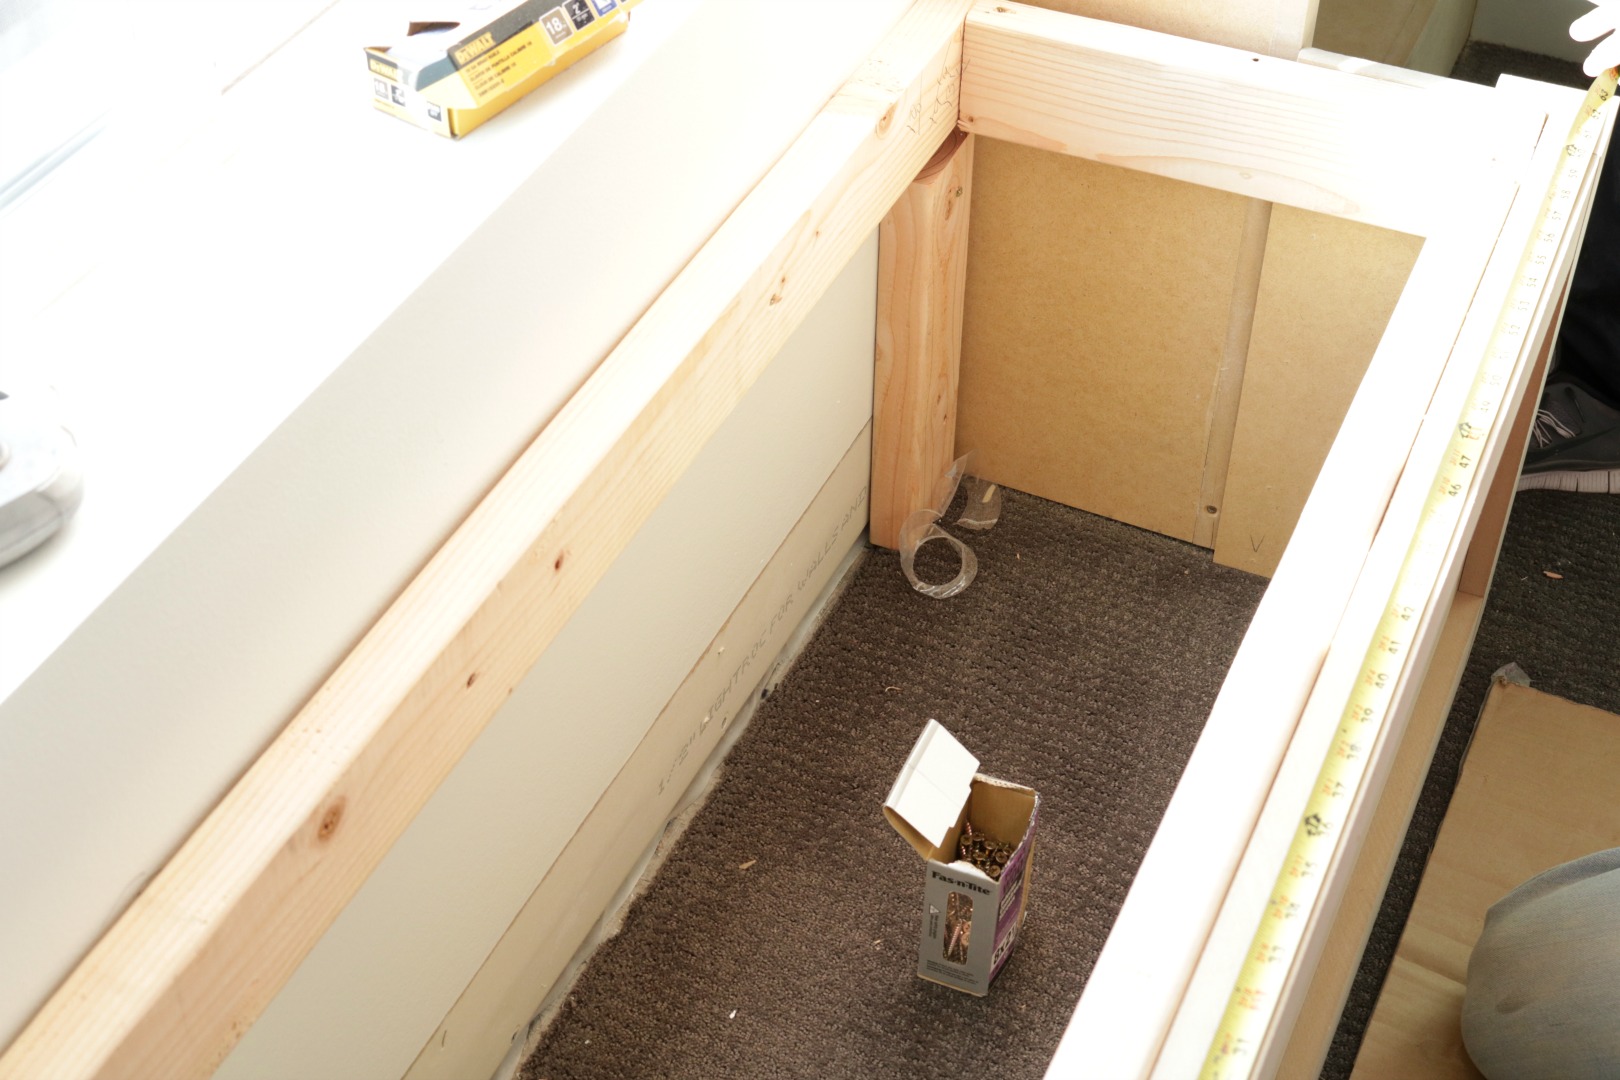
Find the studs, make sure the 2×4 is level then screw a 2×4 to the wall and start to build the frame. We have 5 2×4’s running vertical and 4 running horizontal.
We screwed the 2×4’s directly through the carpet into the sub-floor for support. If you are placing a window seat on tile you could use construction adhesive to glue your supports to the tile.
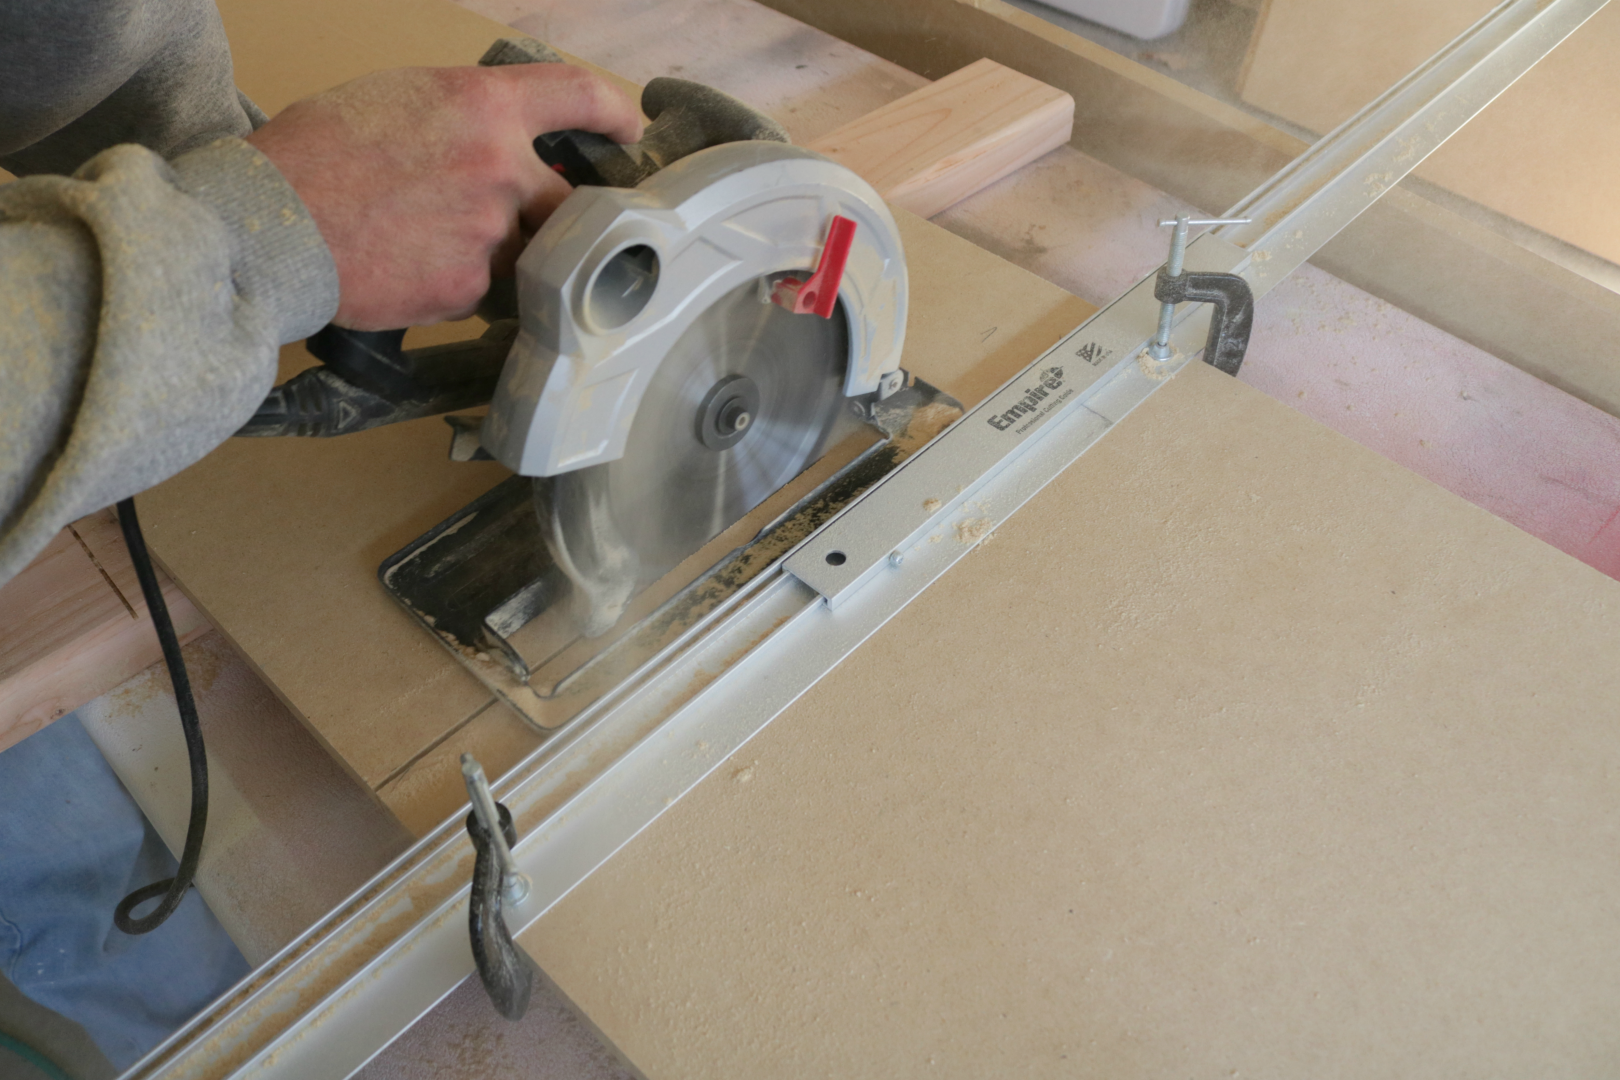
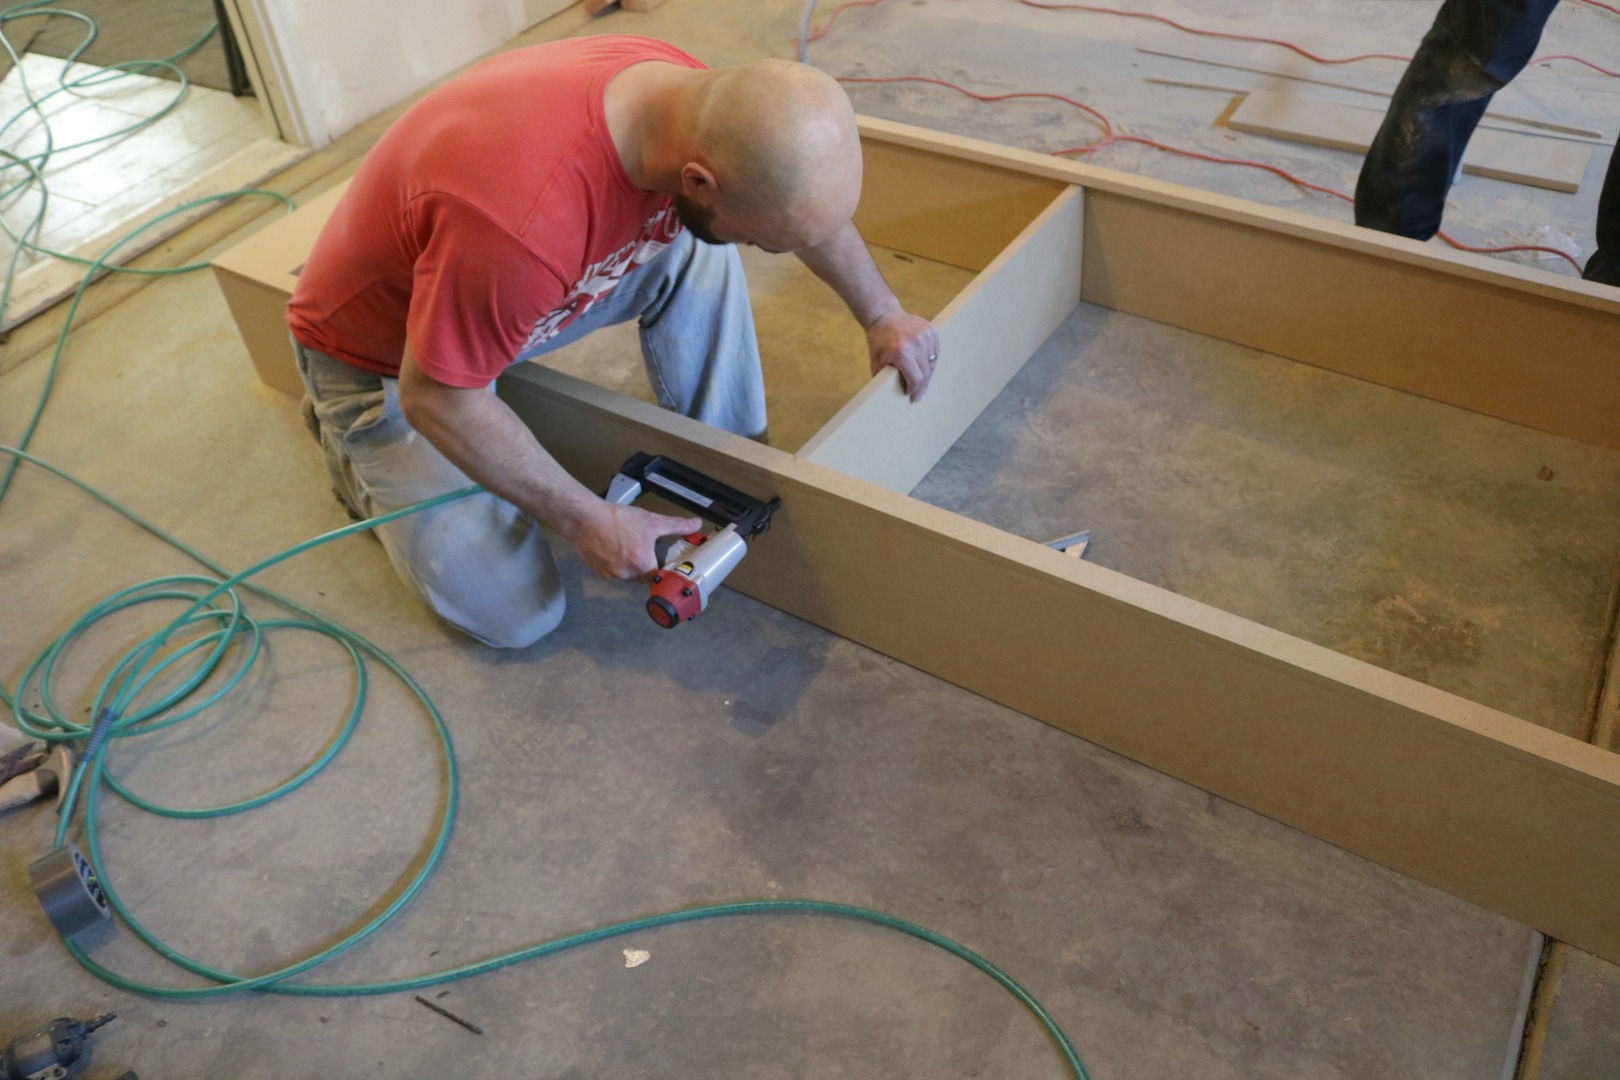
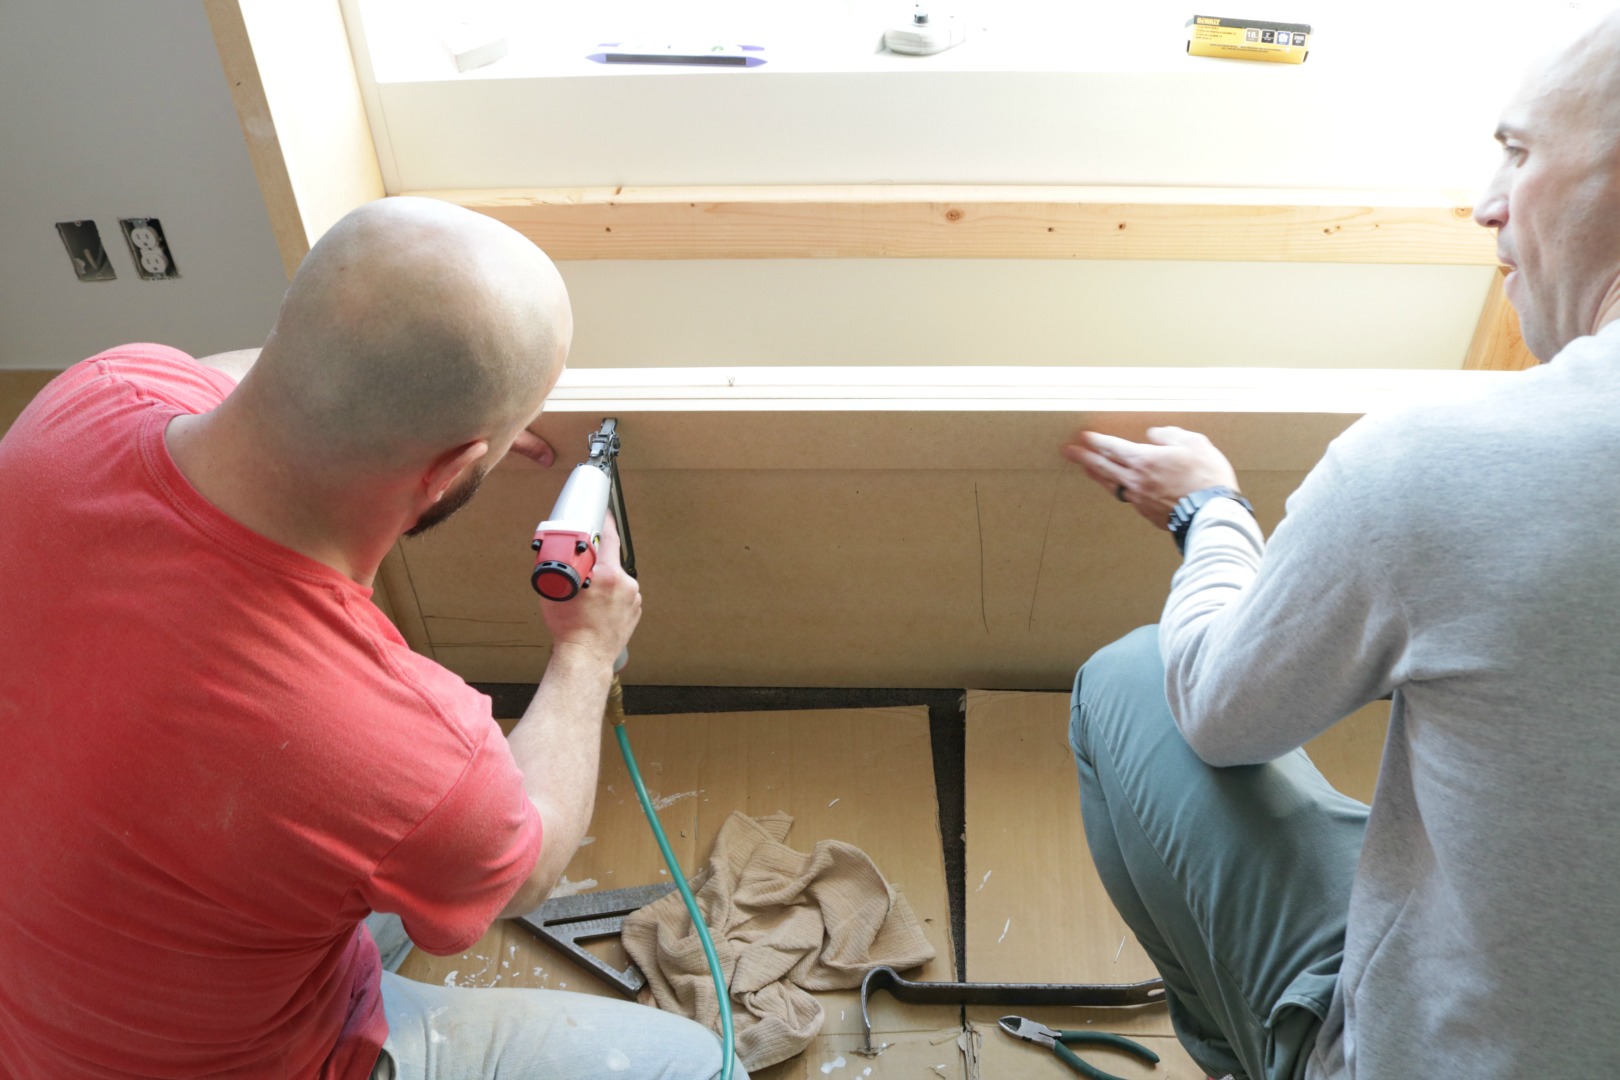
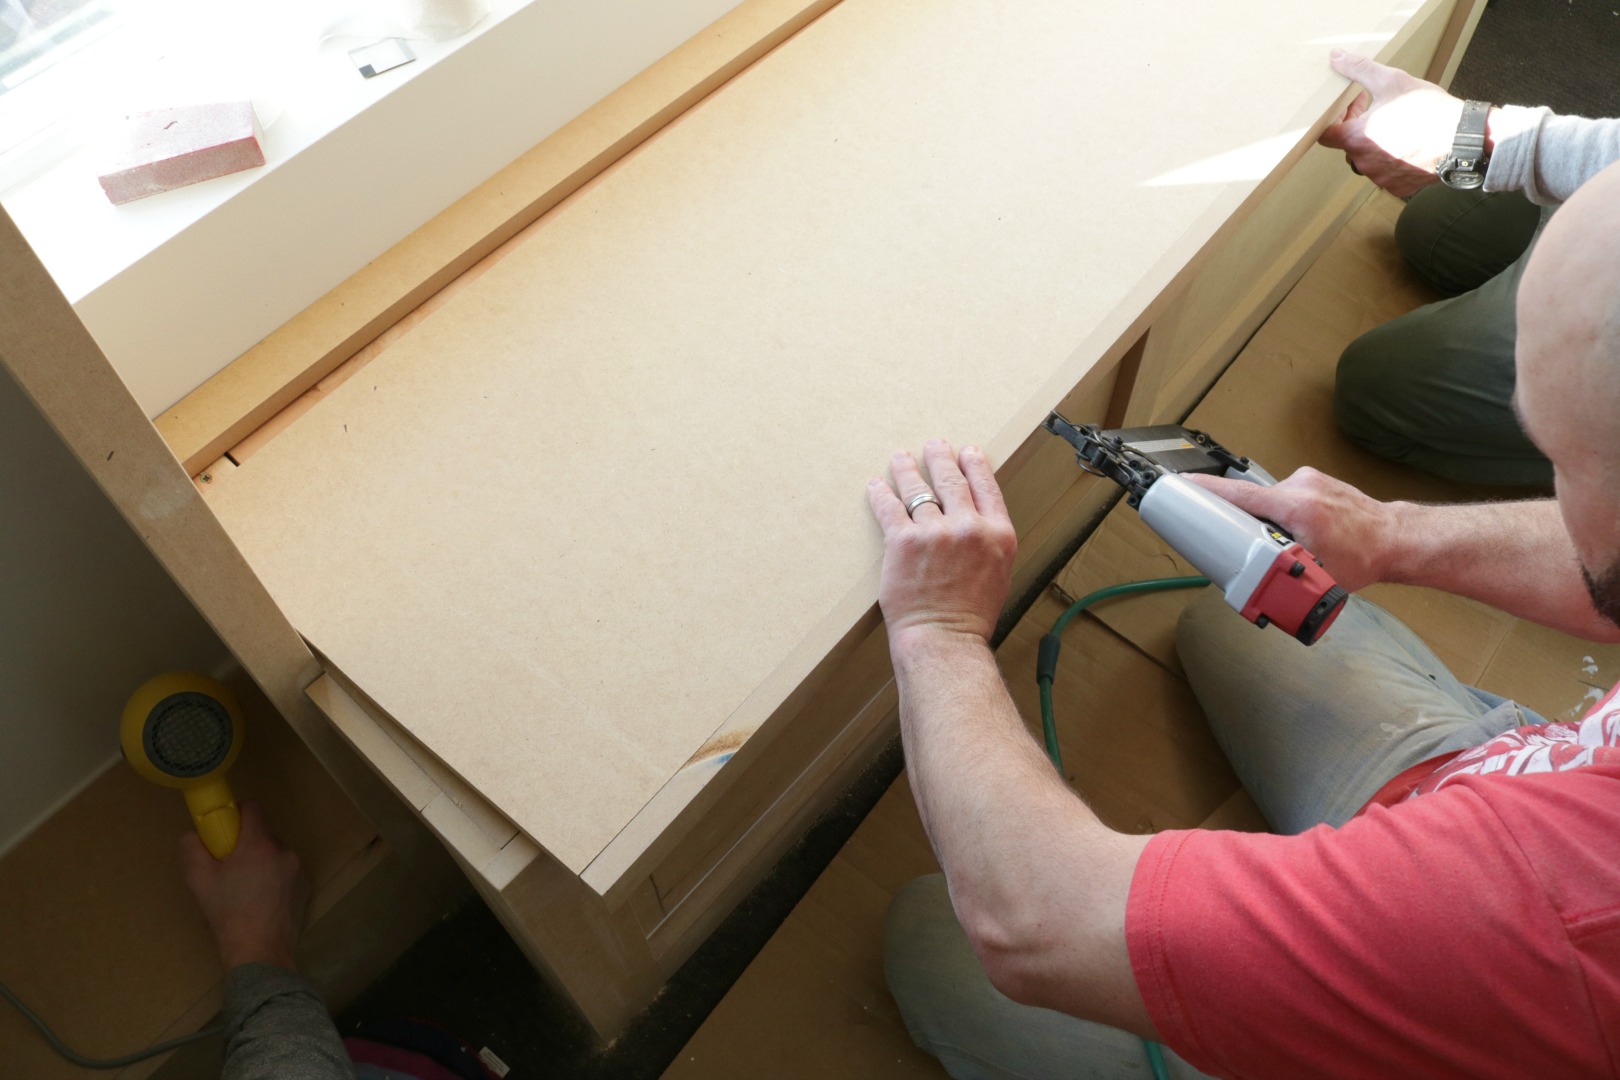
After your frame is built. It is now time to “skin it” with MDF. This is when you will want to use your Metal saw guide with c-clamps this will guide your Circular Saw.
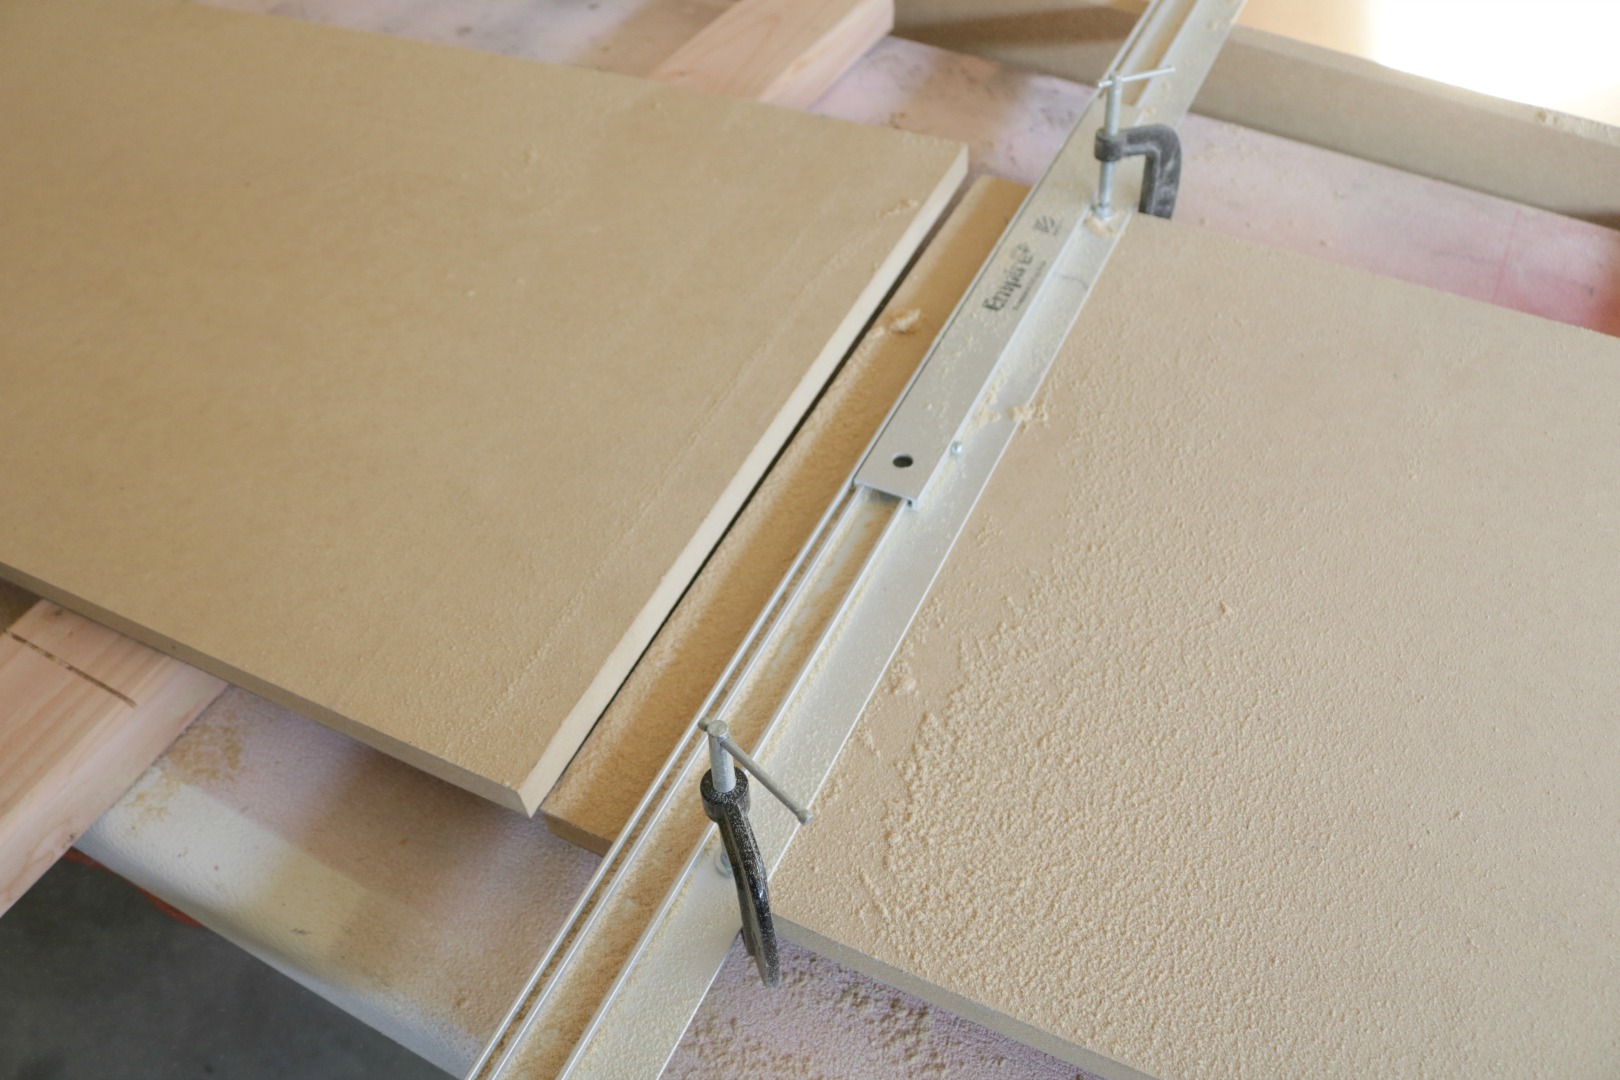
Attach the MDF to the frame of the window seat with your nail gun.

We paused building the window seat and moved onto the bookcase. The bookcases need to slide into place before the window seat is finished. If you are not adding bookcases. Skip down to the next window seat steps.
DIY Bookcase Built-in Tutorial-
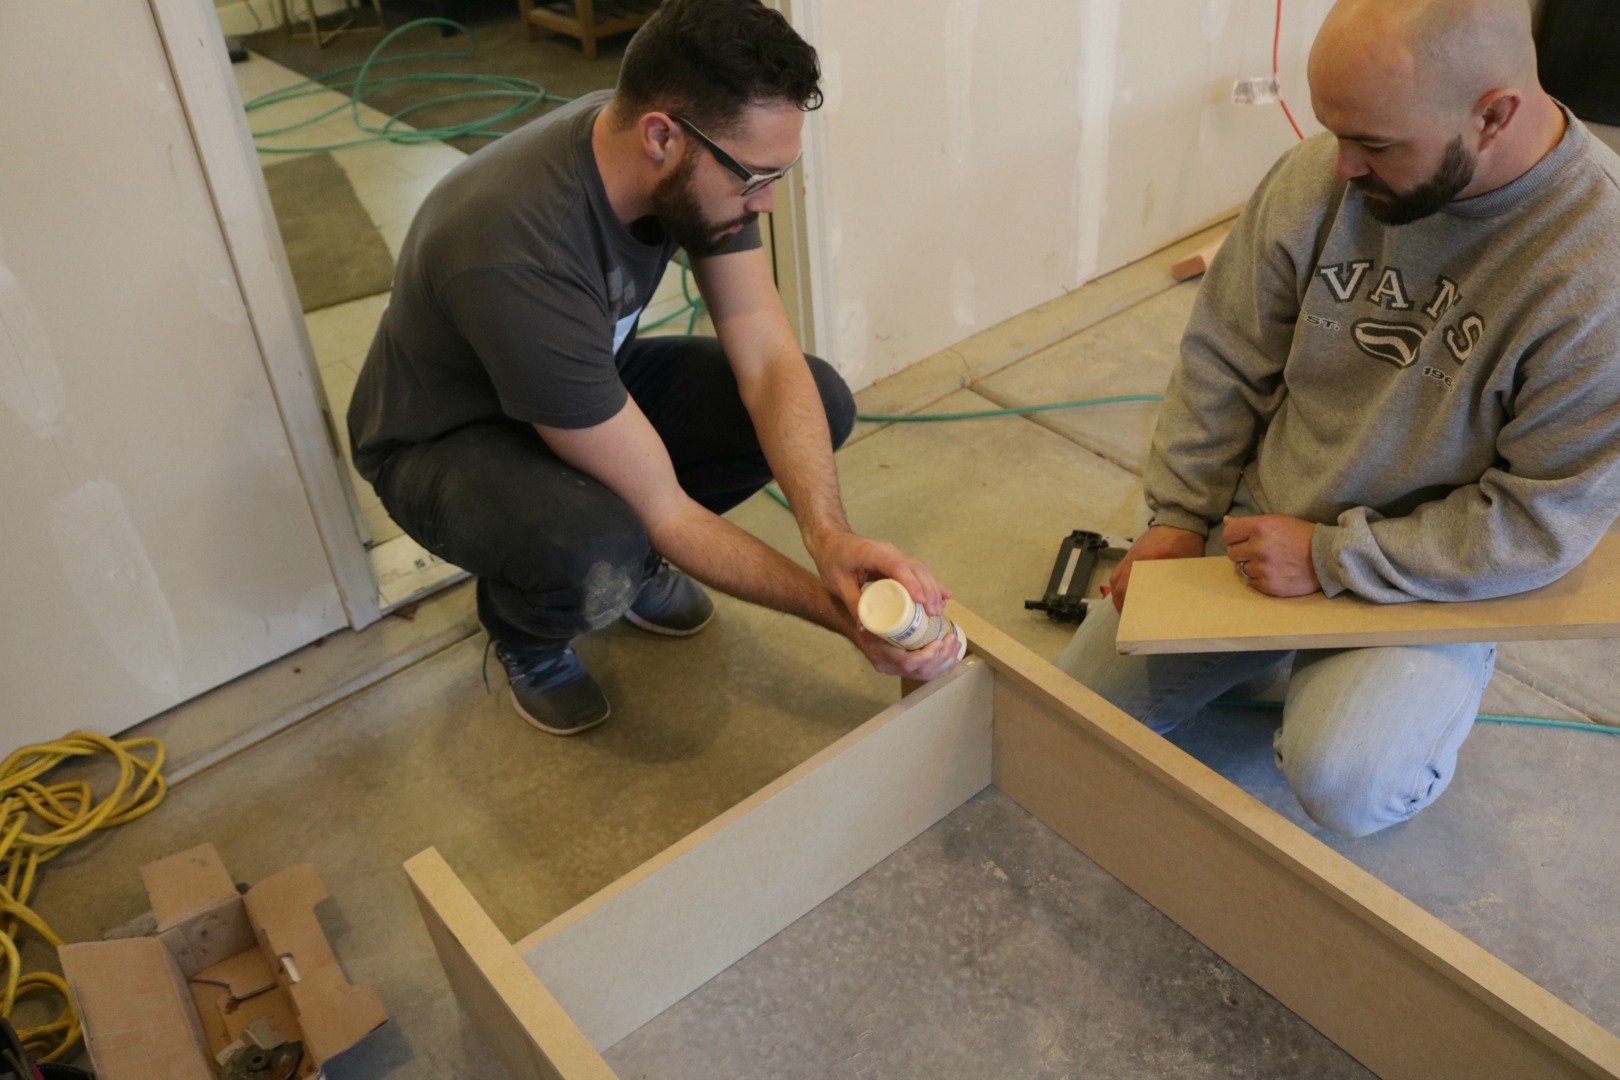
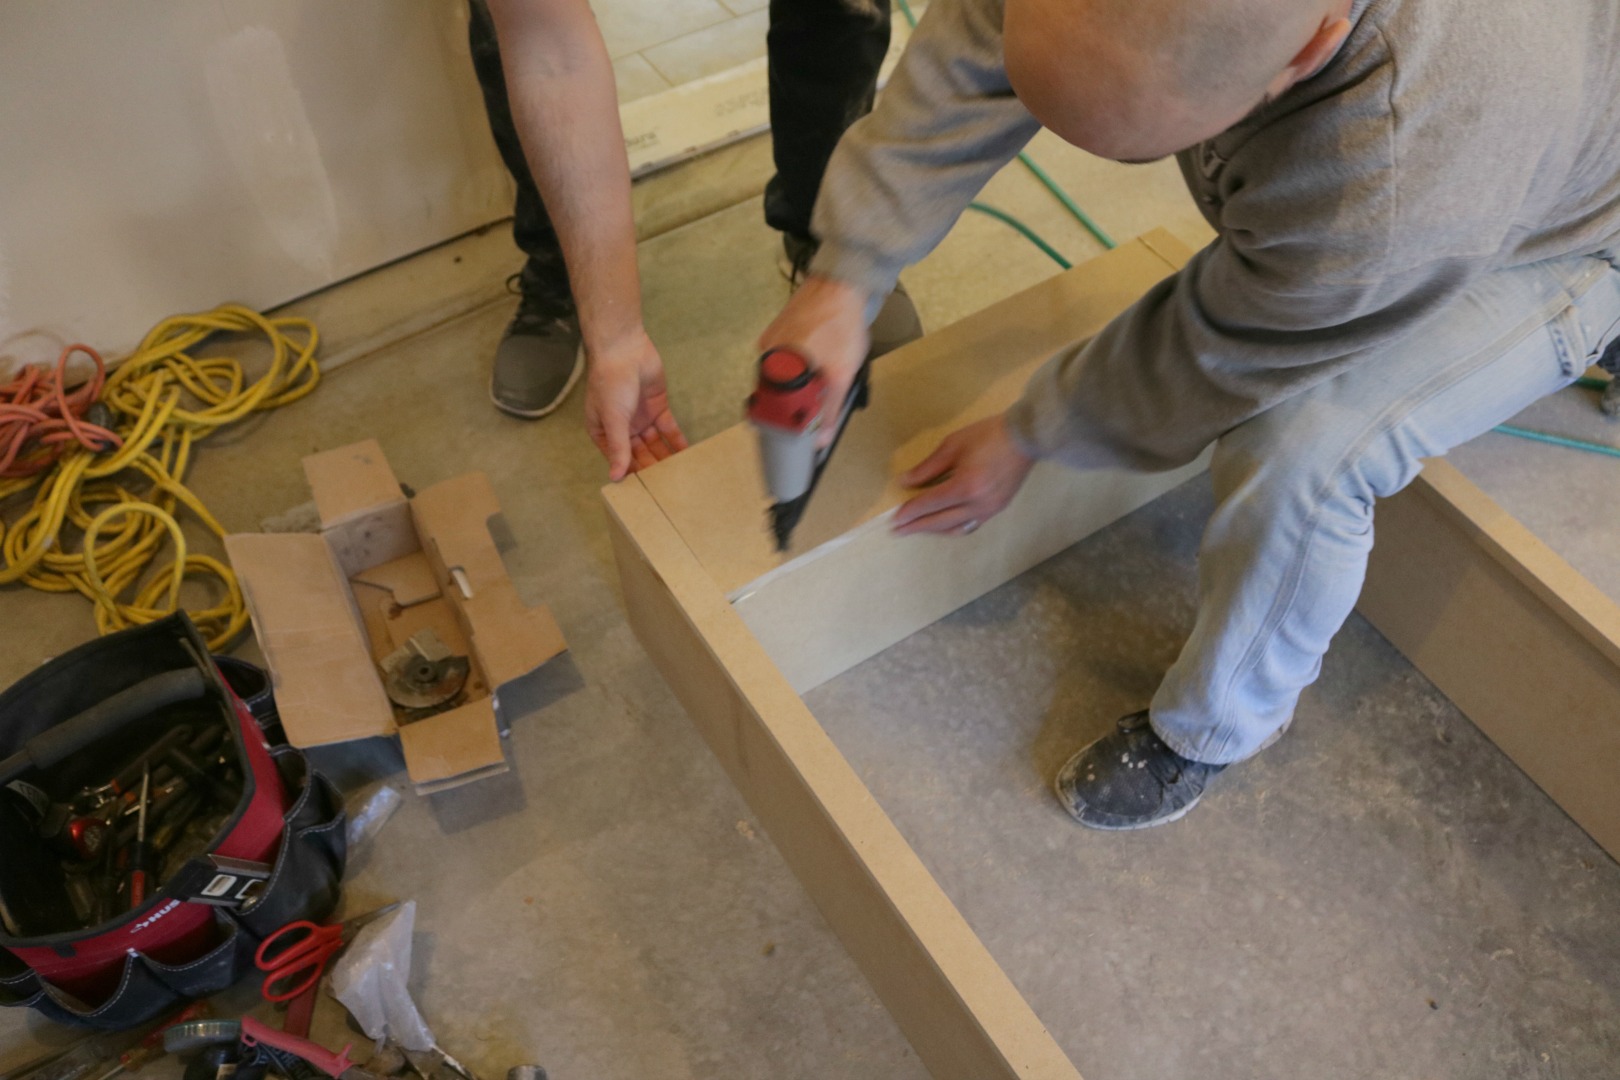
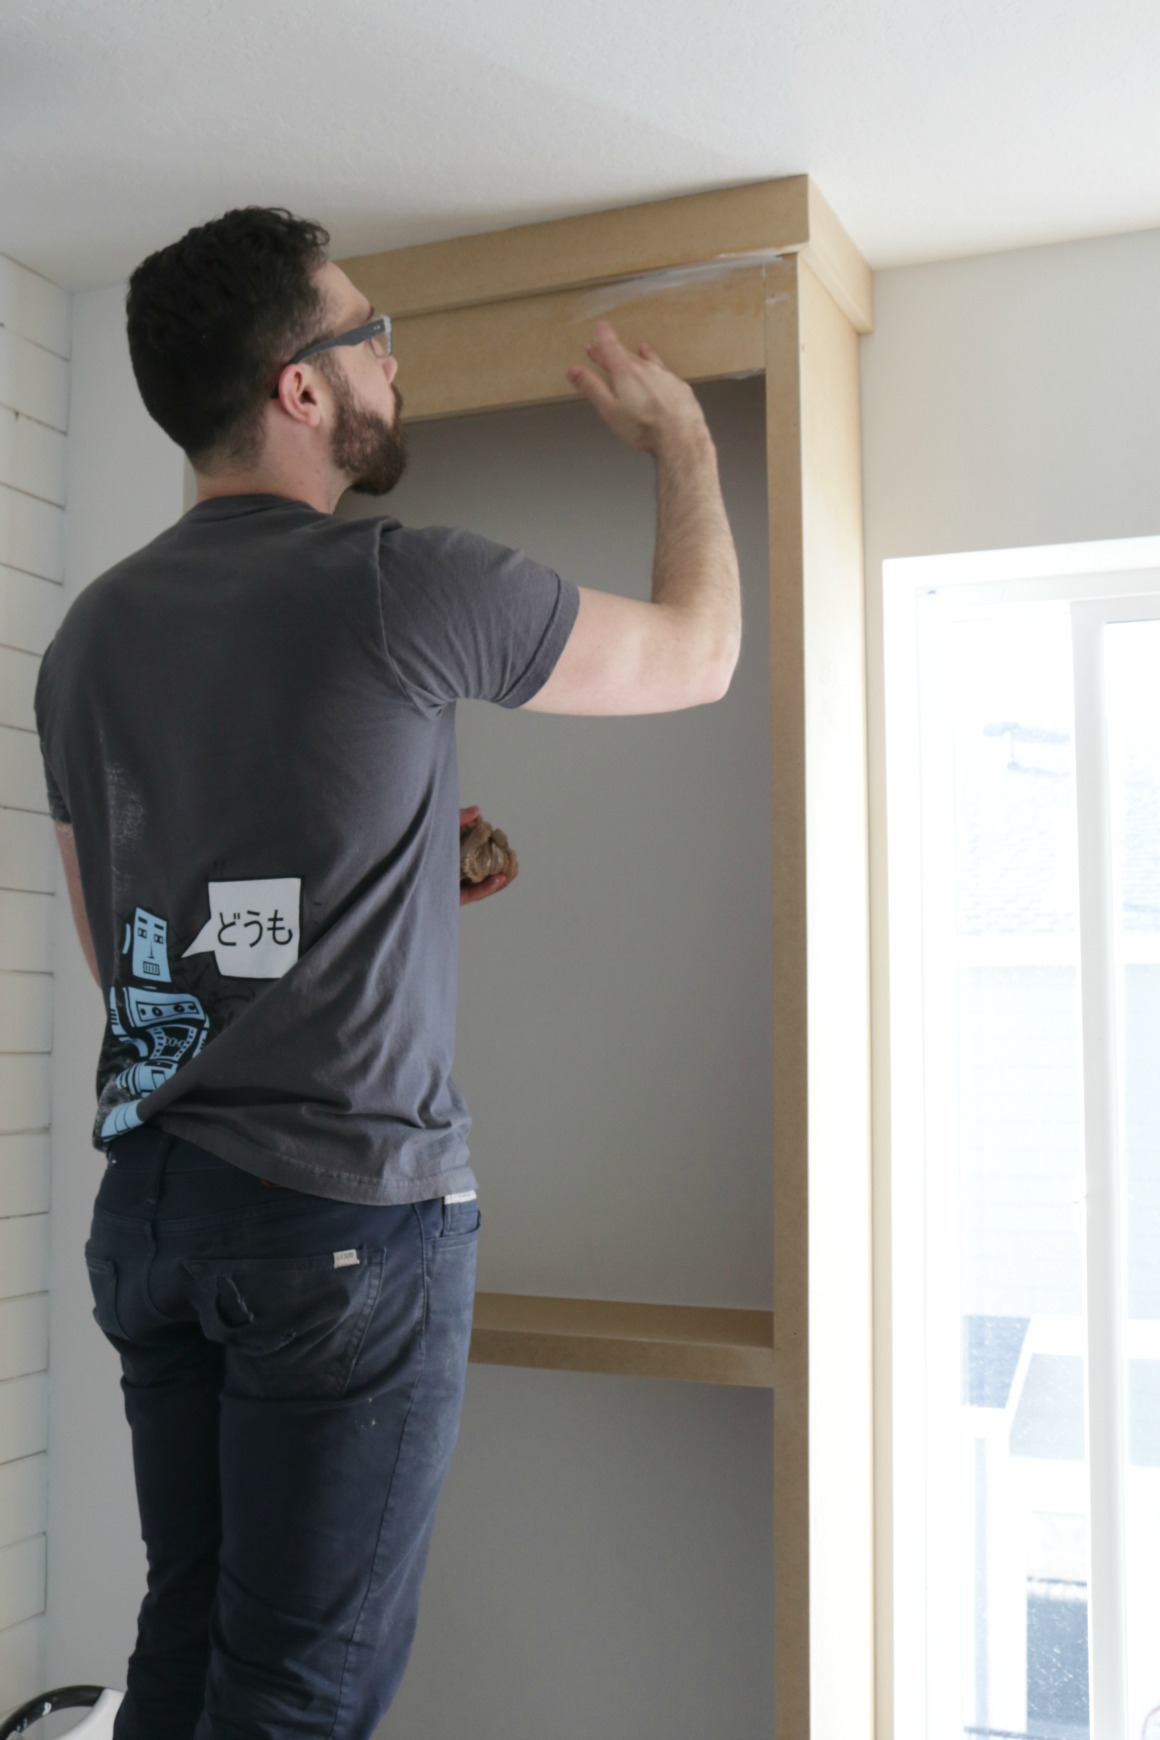
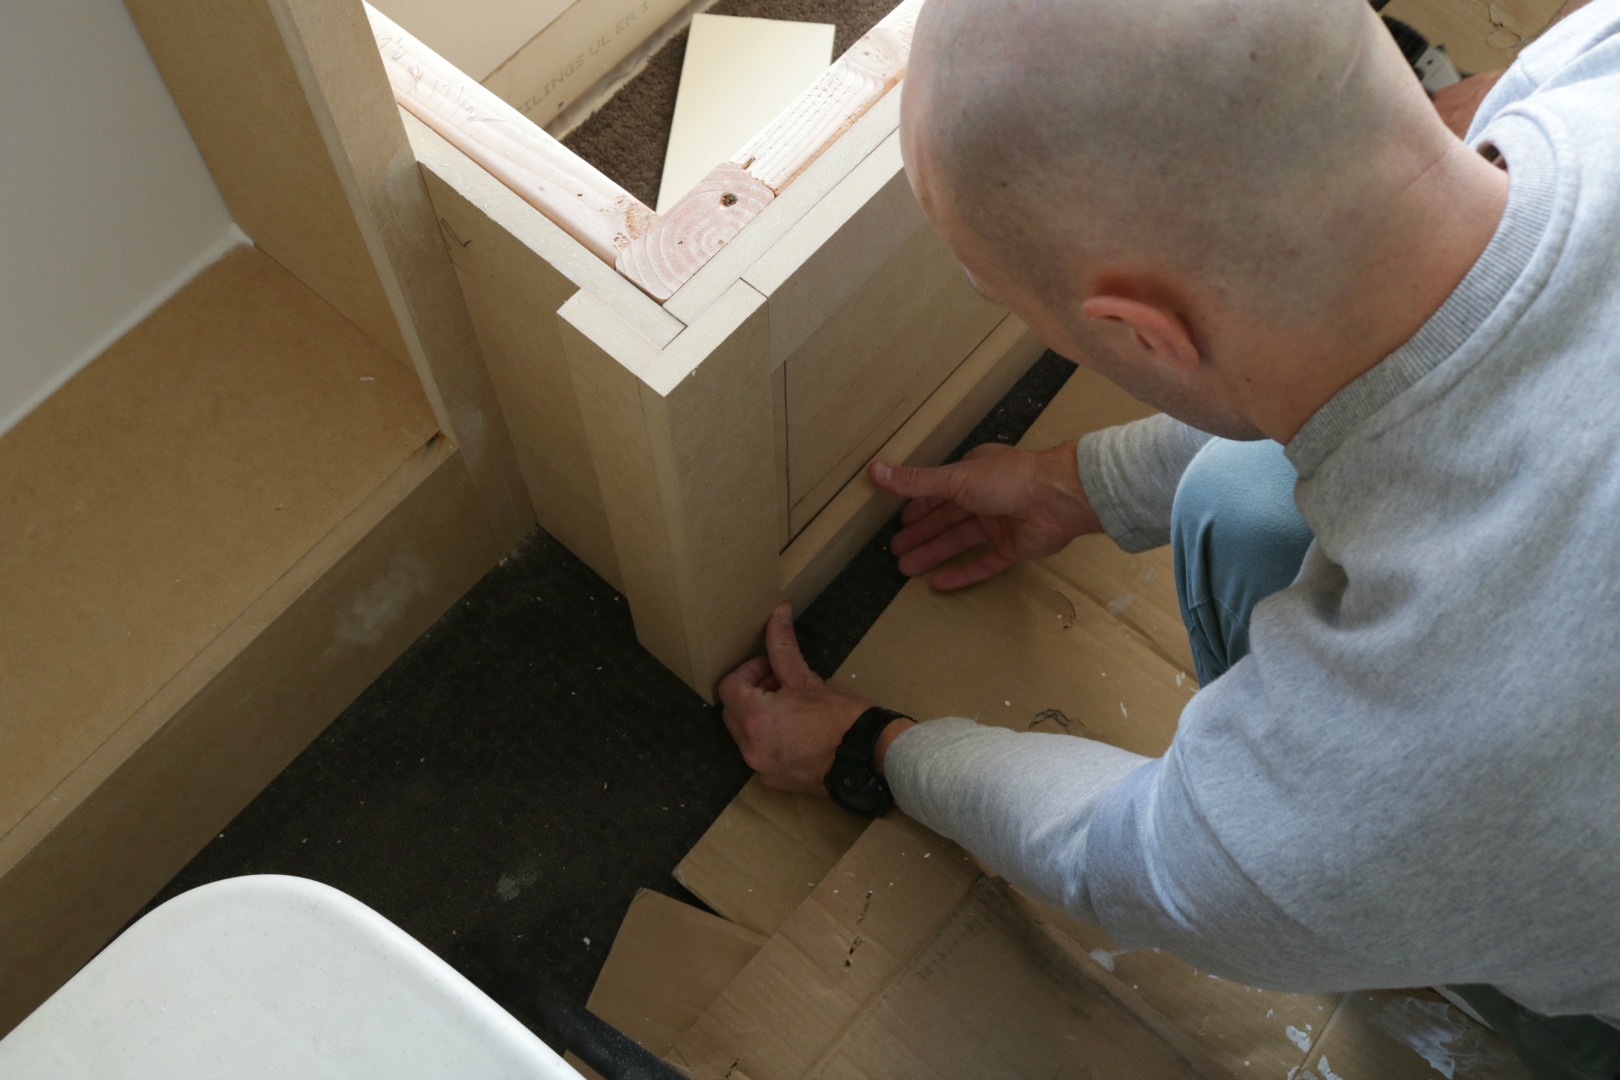
The bookcase process was a lot easier than I imagined. Basically you just “build a box”. Decide on the size of your bookcase and cut four pieces of MDF to build the box. Then, create a face frame for the box by cutting 1 ½” strips of MDF for the sides and center rail, and 7” for the top and bottom and nailing them to the edge of the box. Attached each piece with wood glue and a nail gun. Notice how the bottom piece does not start at the very bottom, we built the bottom piece 7″ up.
Bookcase Tip-
Don’t build your bookcase to the exact height of your space. Leave some room to slide in the bookcase. Remember you will be adding molding at the top and bottom.
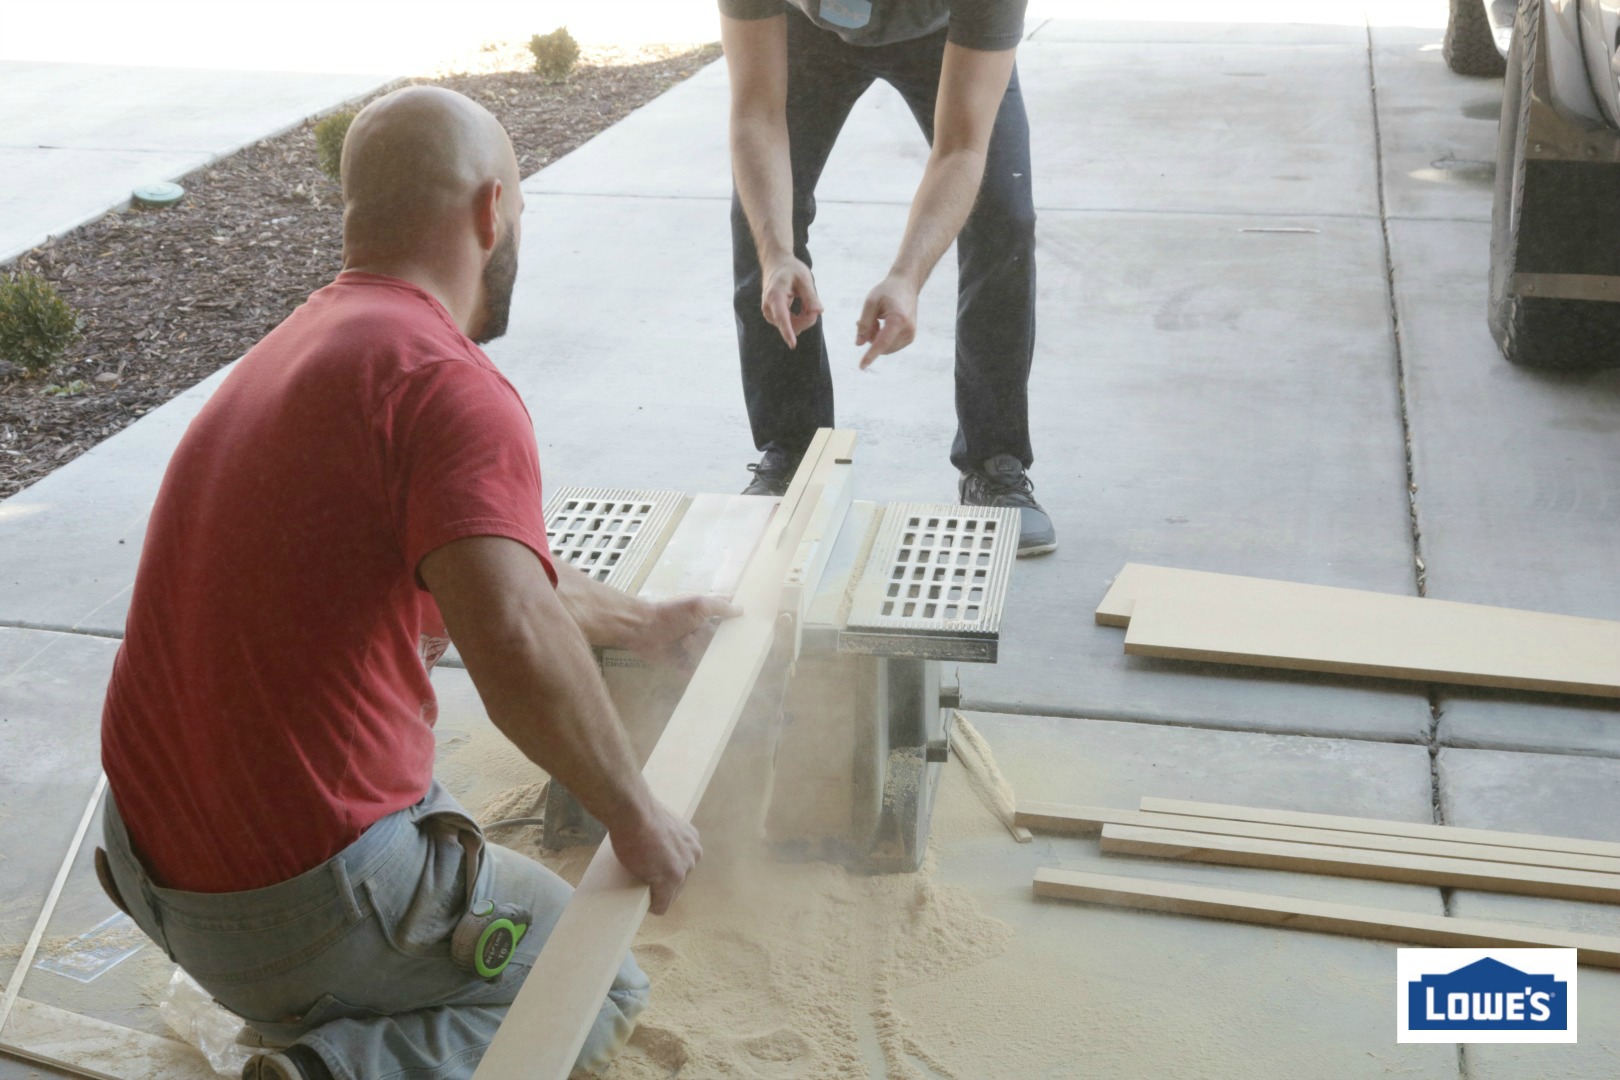
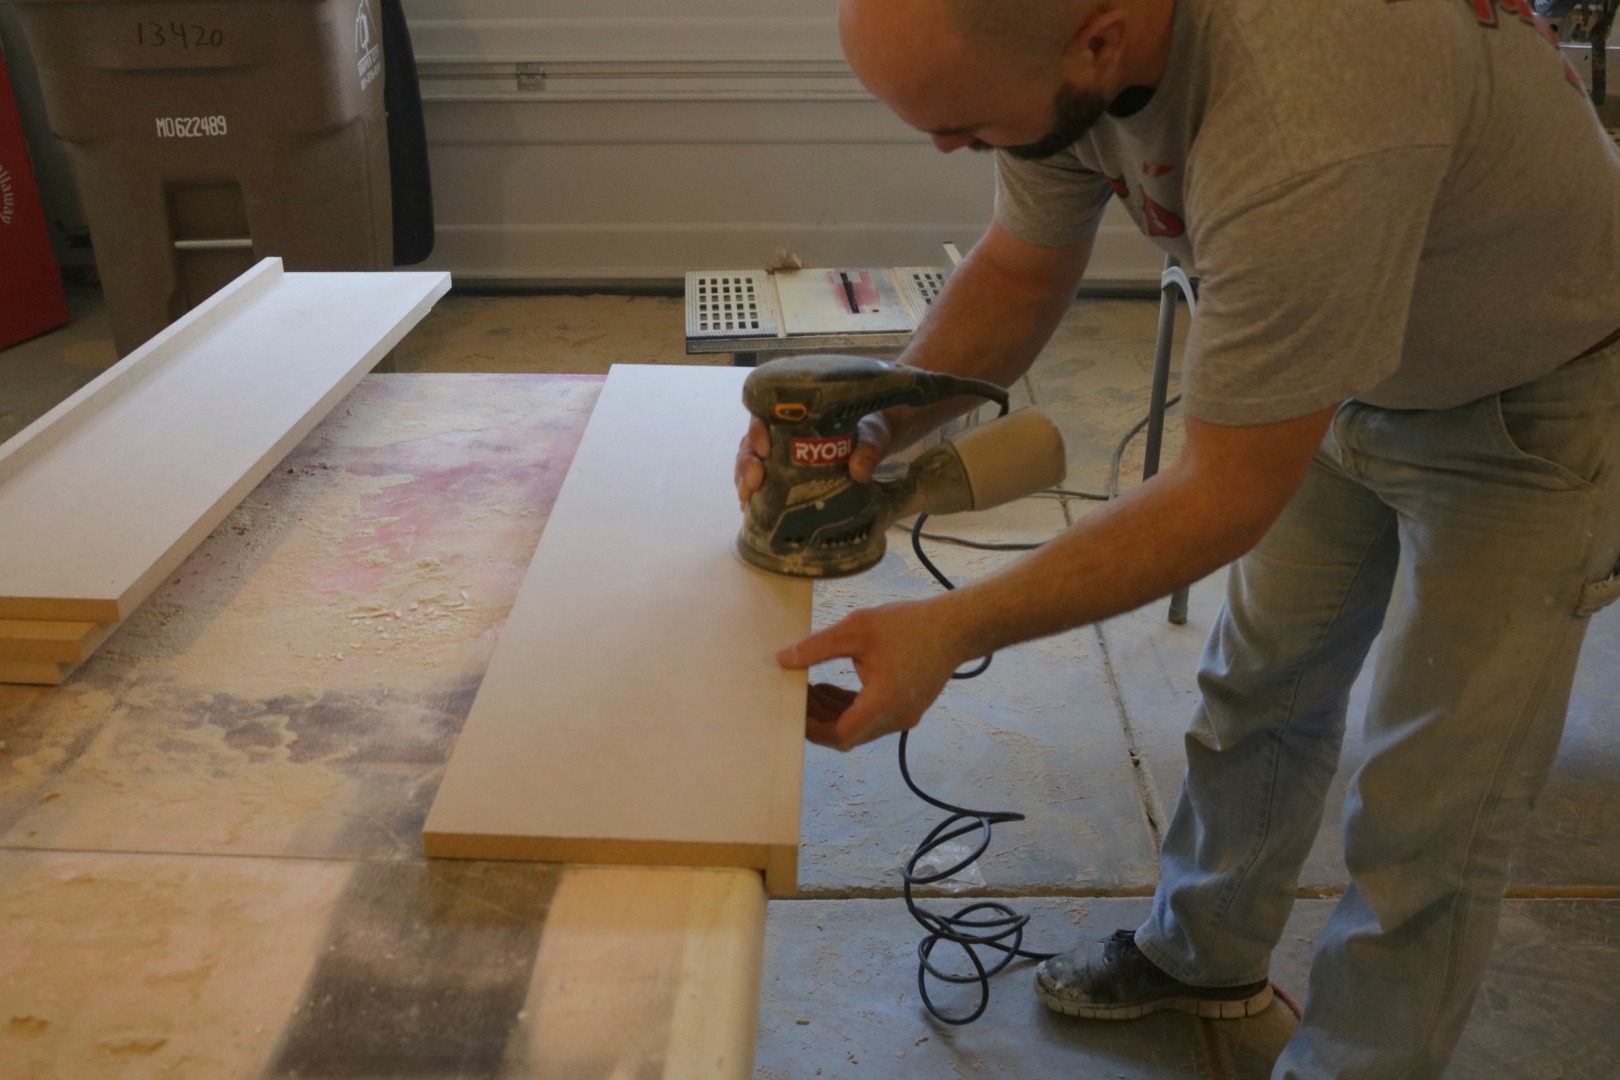
We cut these pieces with a table saw because they were so long. Then we attached it to the bookcase with wood glue and nail gun.
Make sure to clean off an excess glue at that point, to avoid sanding it off later.
We added bottom piece to cover the gap that was 7″ off of the bottom for support and a nice custom look.
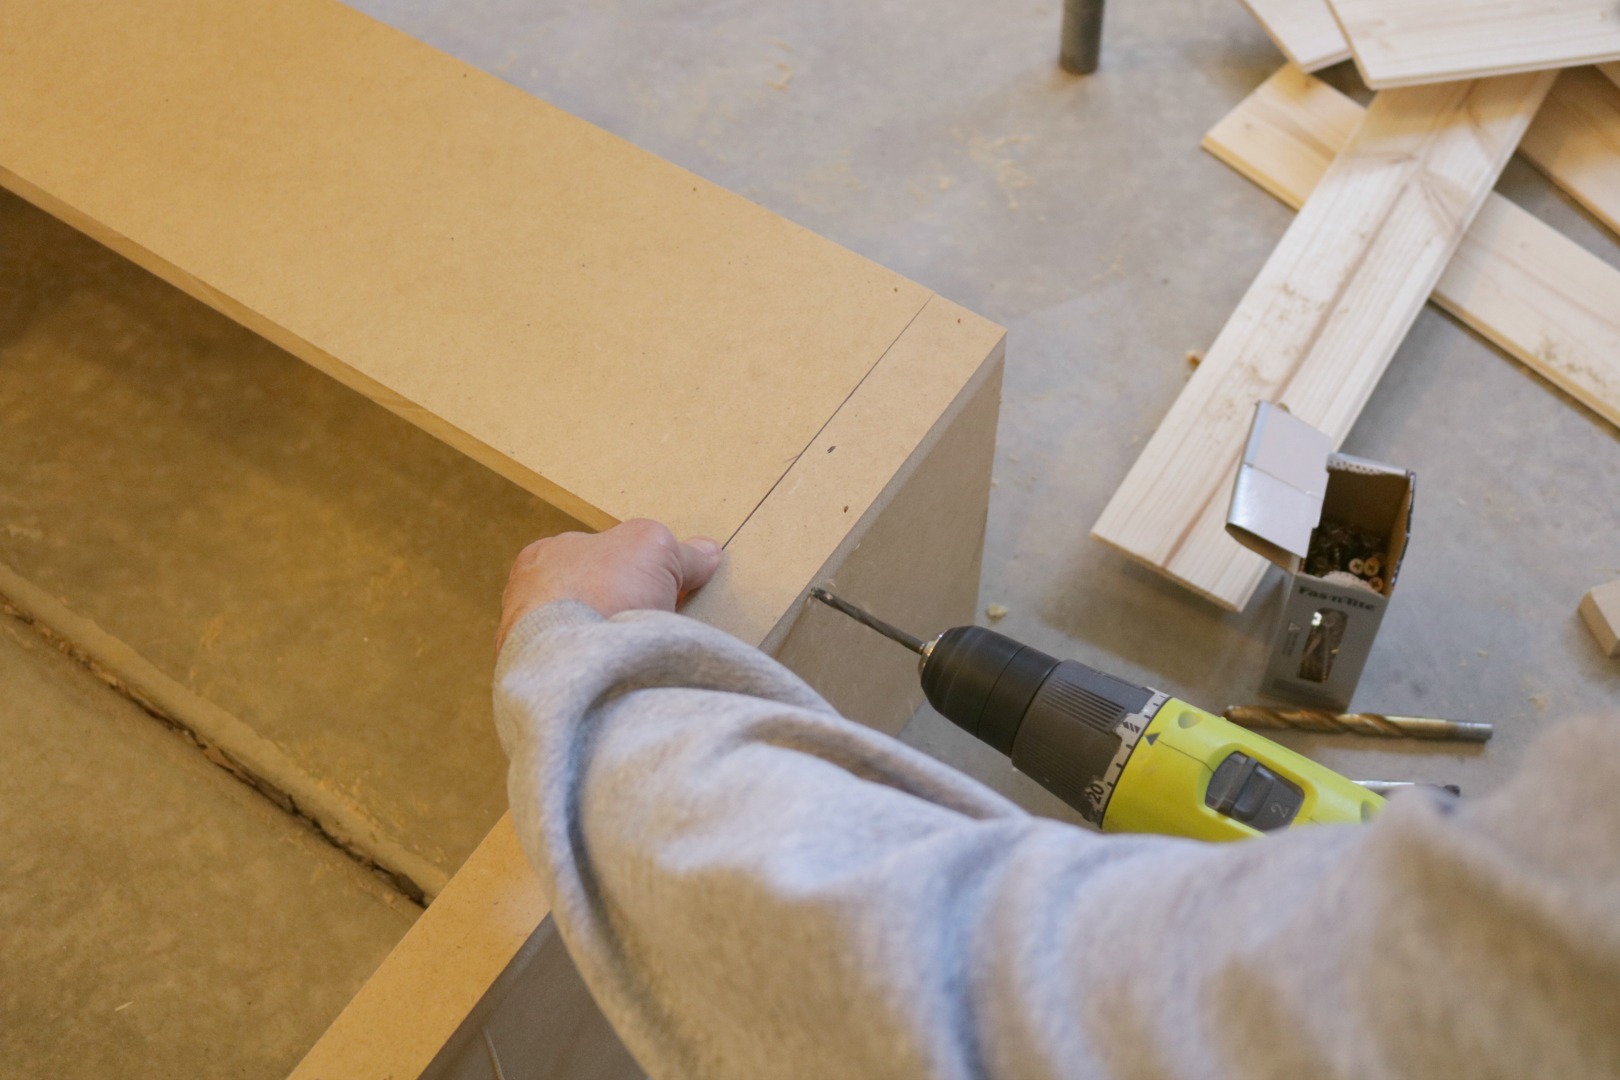
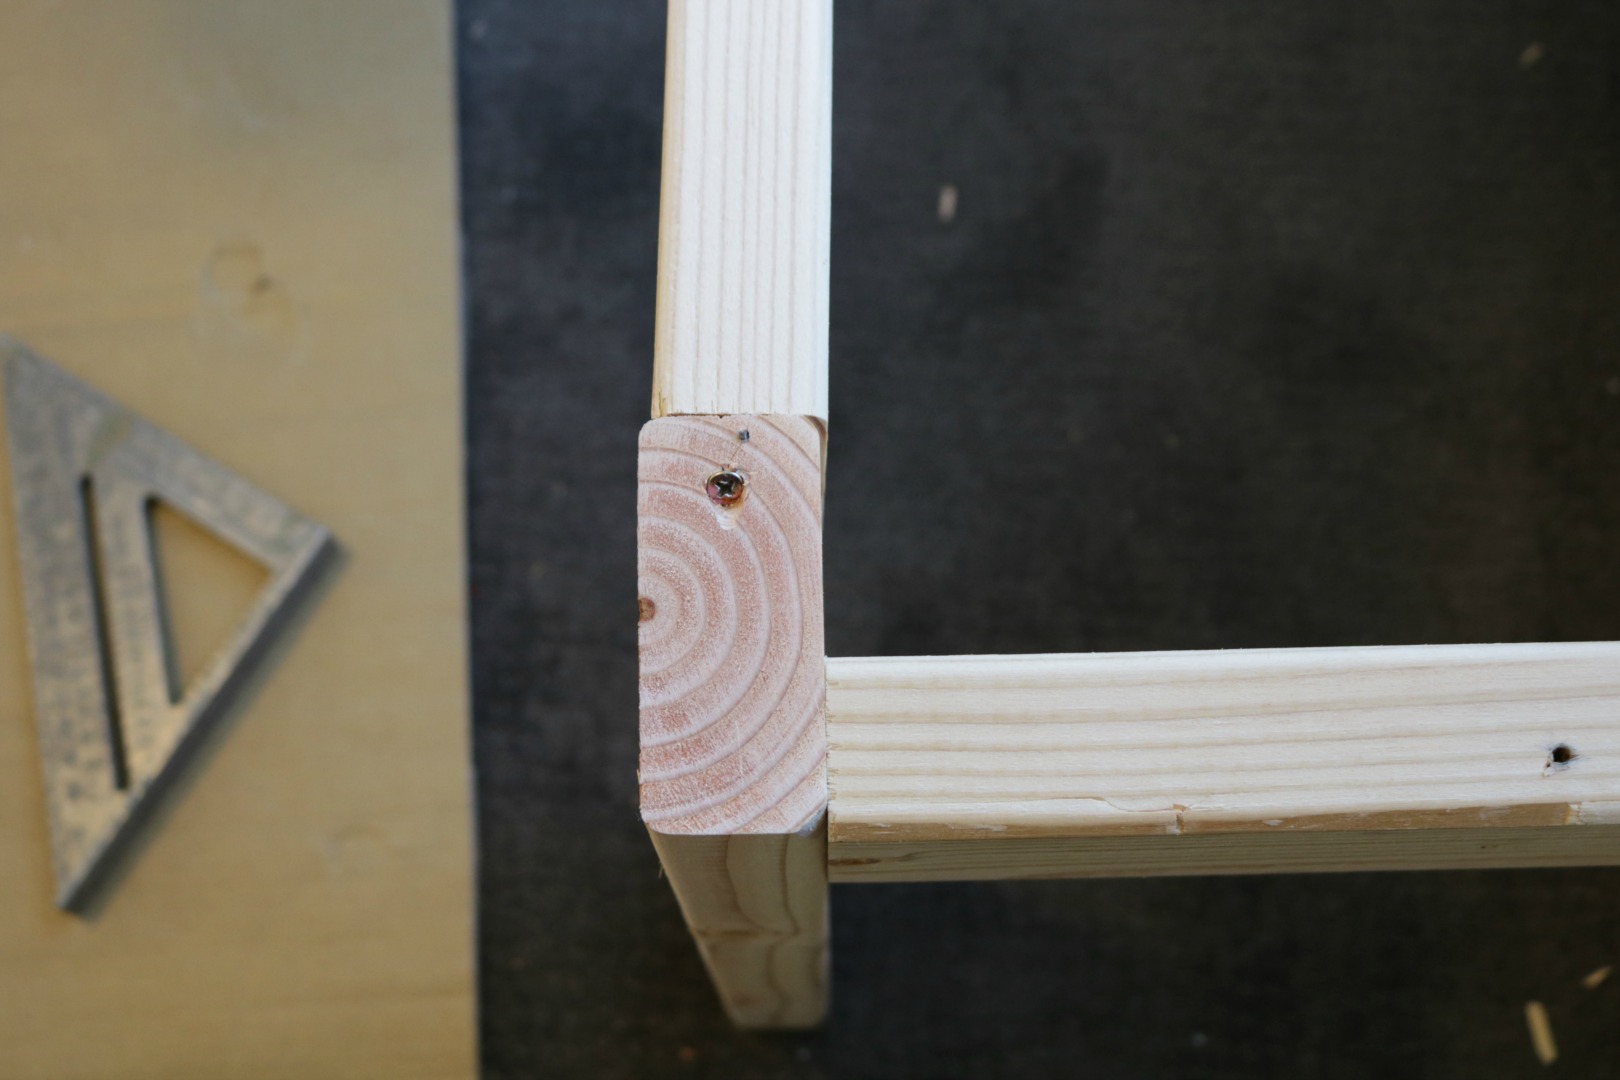
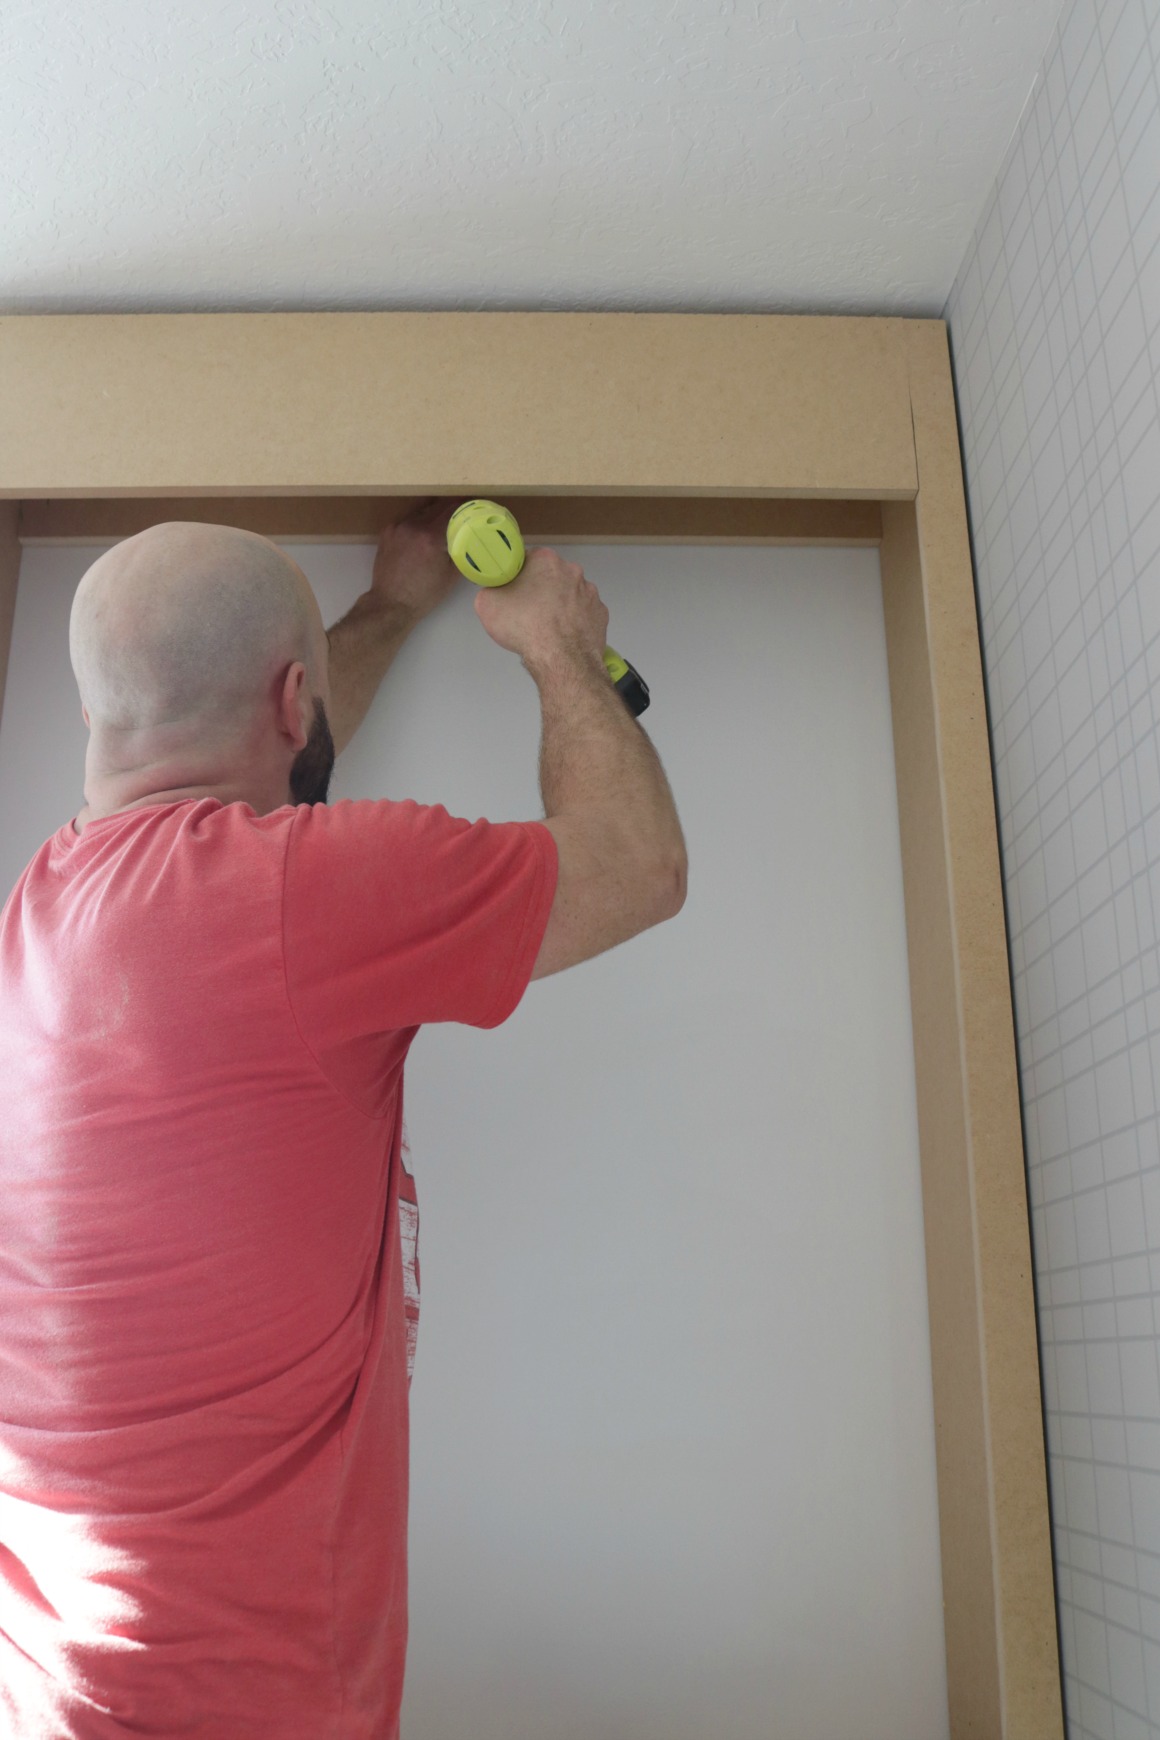
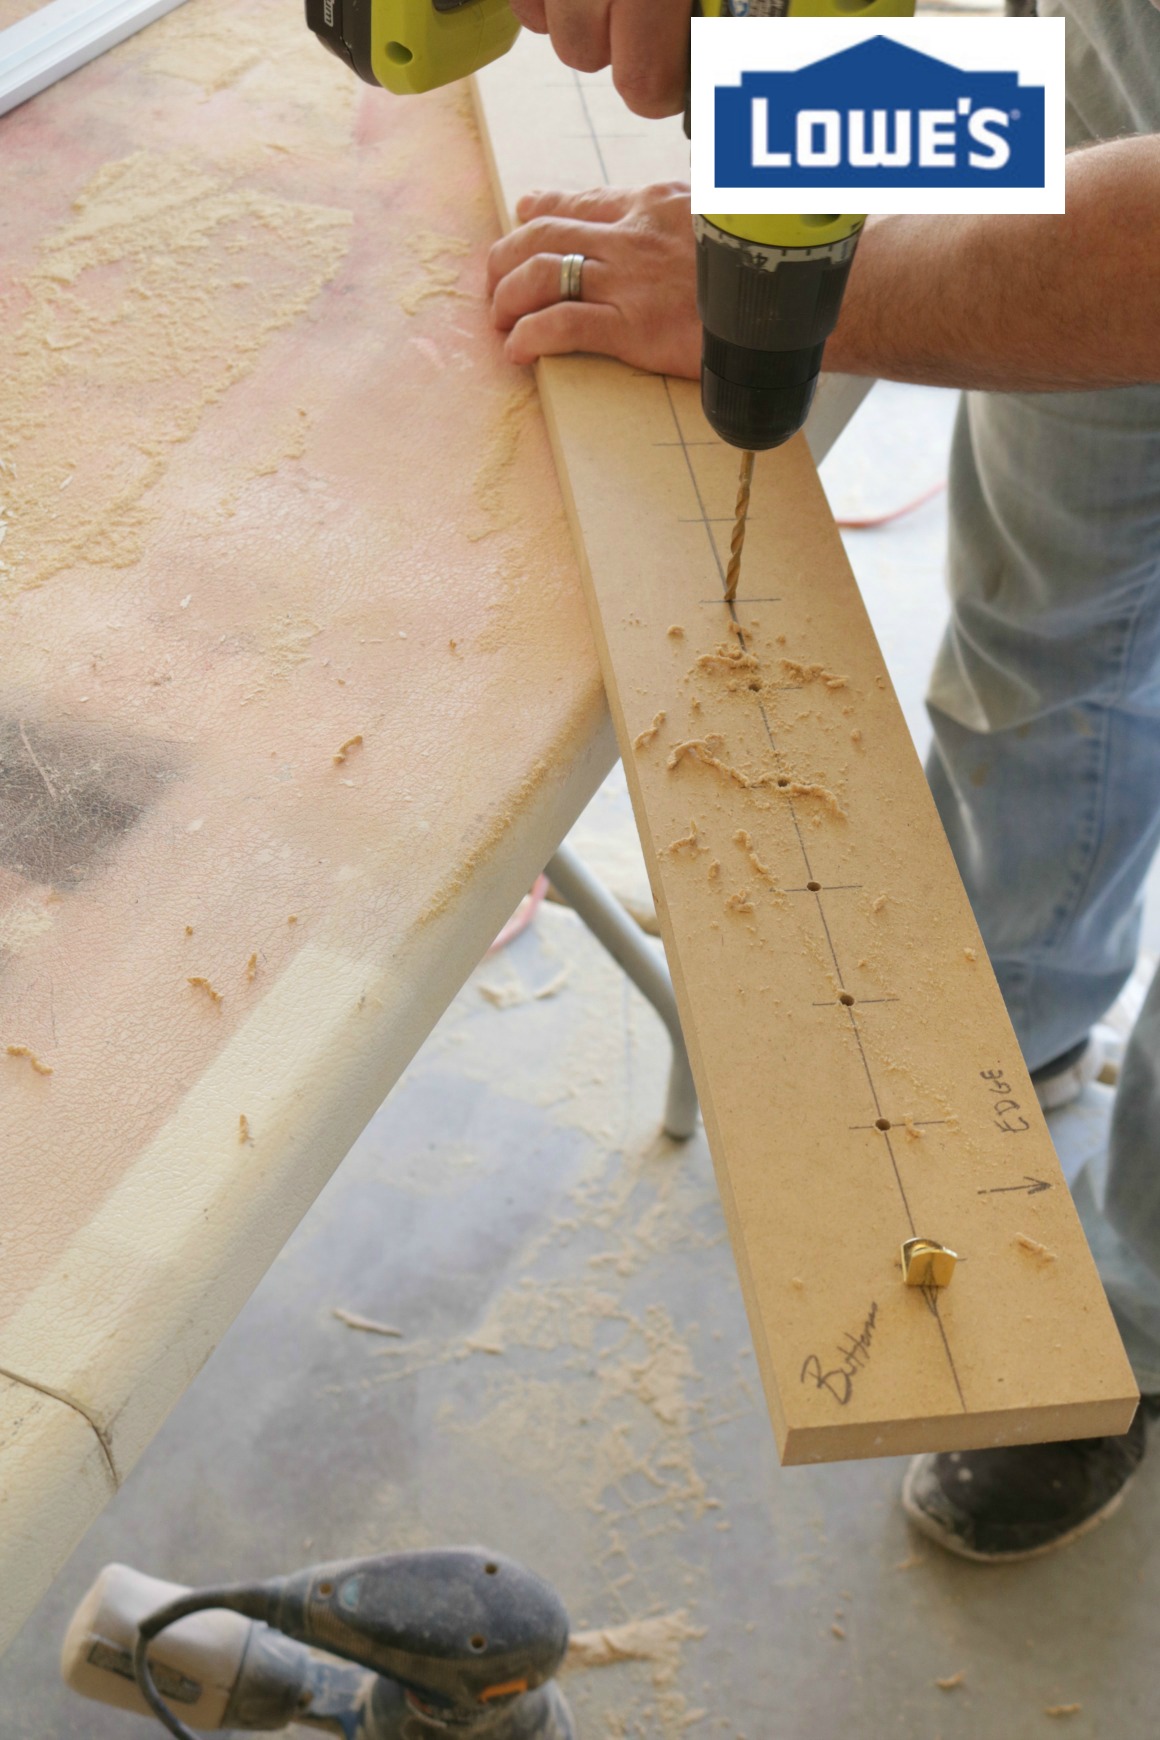
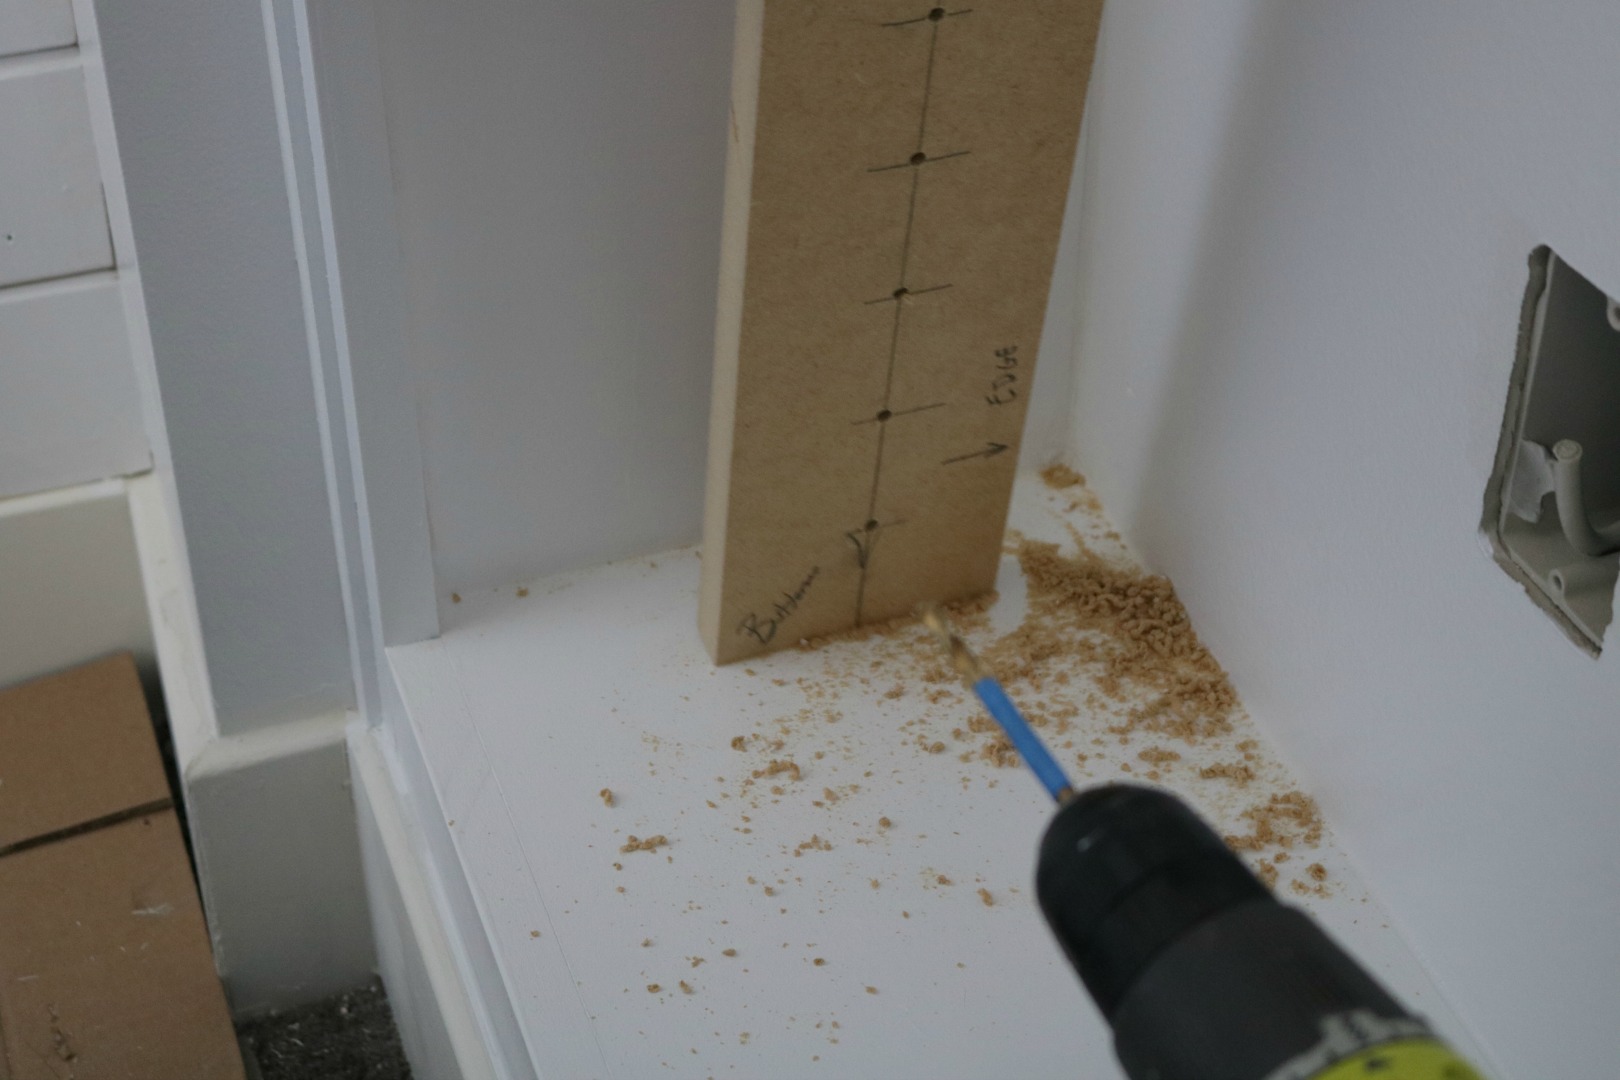
To attach your header piece- First drill a hole (picture above)…

Then countersink it from the outside. When you countersink it this makes it so the screw drops down to the height of the wood.
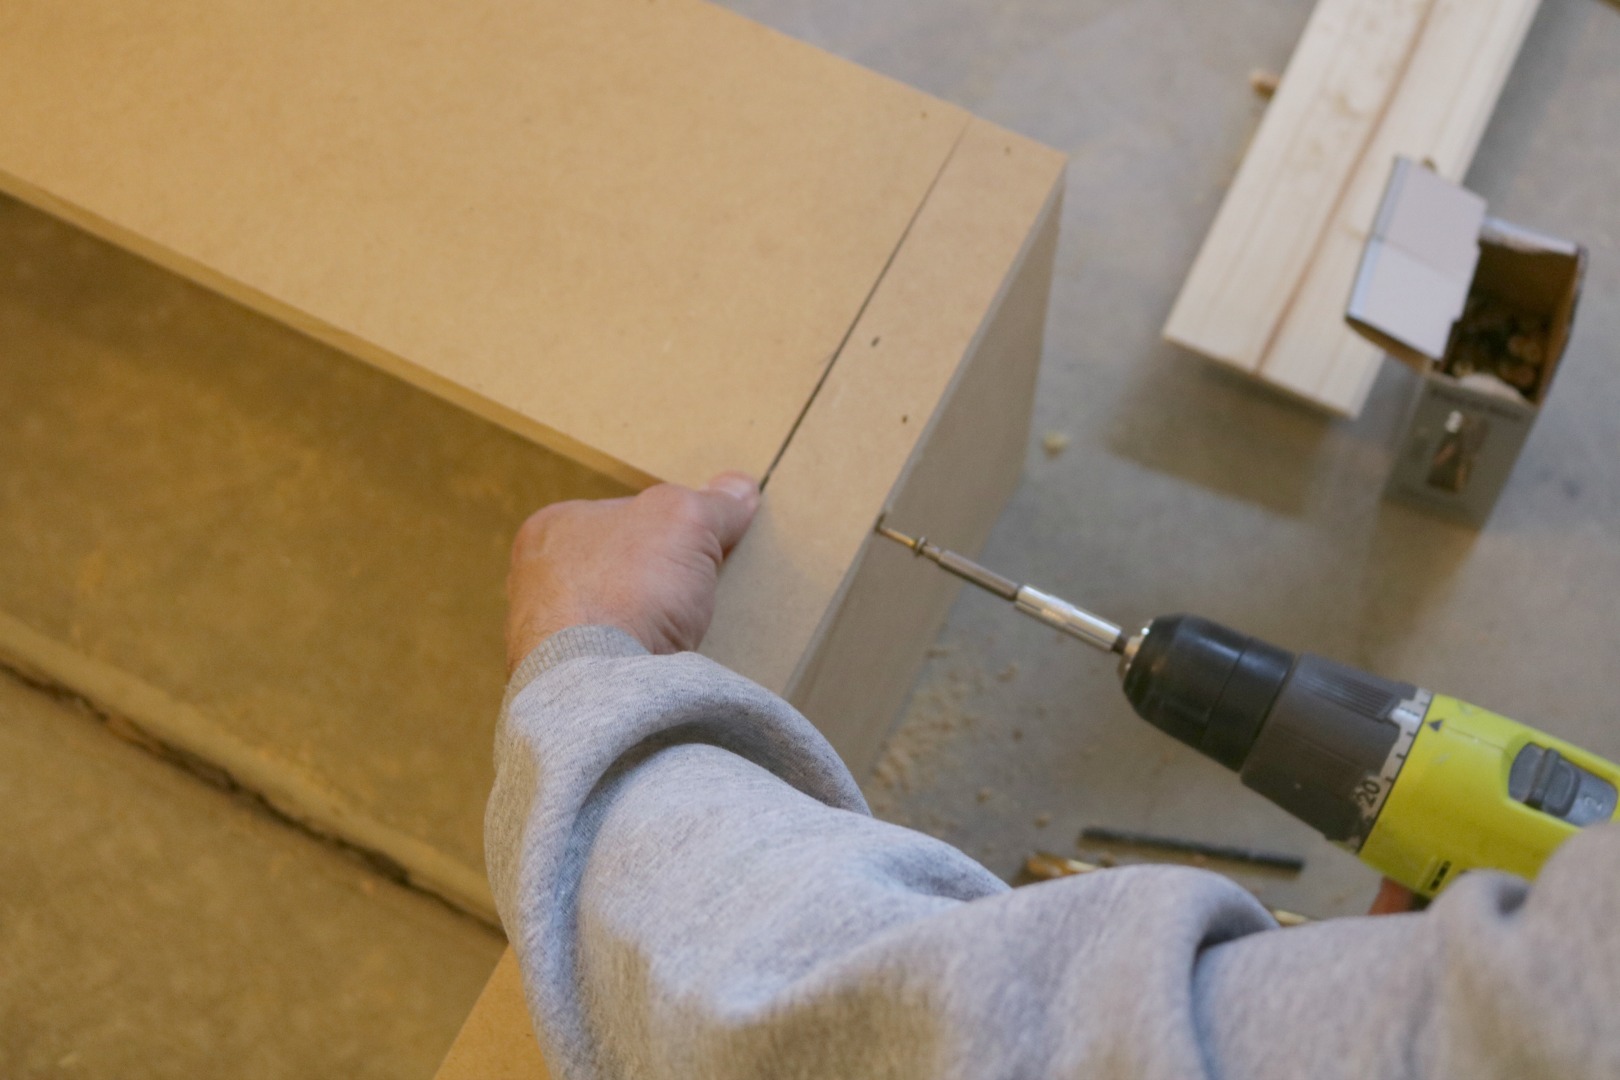
Lastly put in a grabber screw from the outside. Then cover the screw with some spackle.
Next find the center and add your one fixed shelf. Again attach it with wood glue and your nail gun. We made adjustable shelves for the rest and will show that later….
Make sure to add a piece of MDF to the inside of the back of the bookcase that is shorter than your header. This is the piece that will attach the bookcase to the wall.
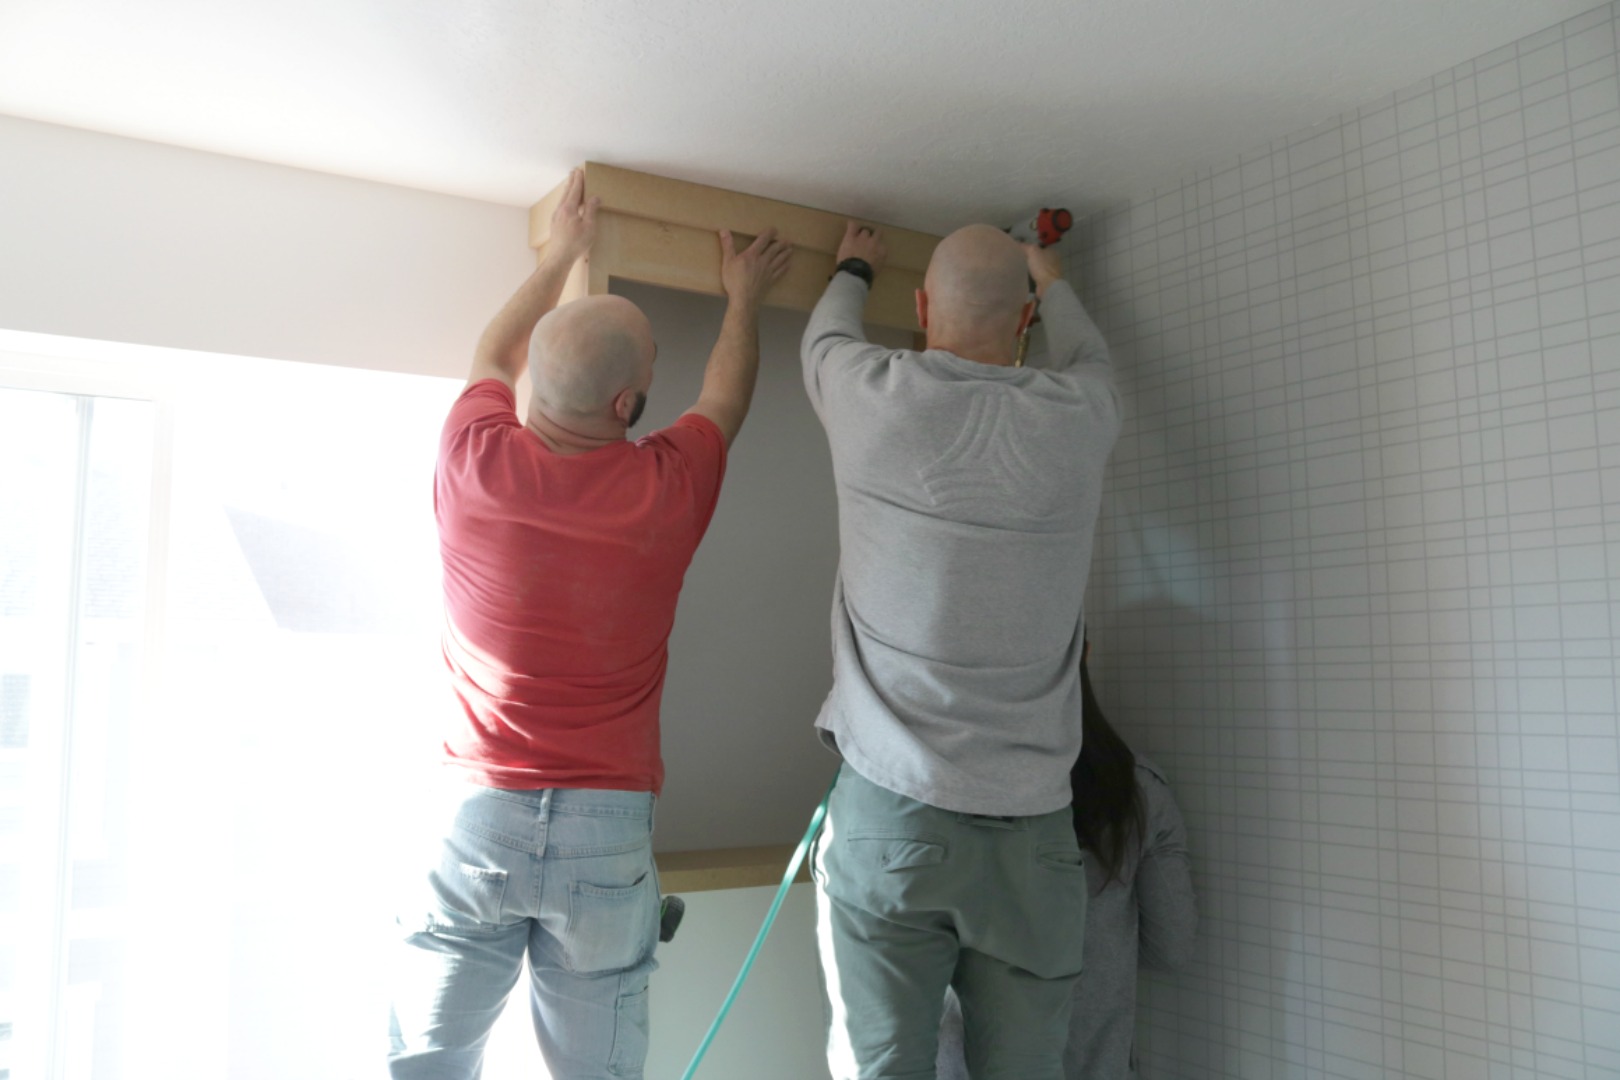
Once bookcase is in place and attached to the wall you can add your molding piece to the top and the sides that are seen. We mitered the two pieces so they would connect on the corner. We just used a nail gun and no glue.
Once everything is set you will want to putty the holes and use caulk on the larger gaps, like the top molding. Fill in all the nail holes with putty, once dry sand until smooth and ready to paint.
Ok this good tip for the adjustable shelves….they seemed like they would be way harder before I learned about this-
Create a guide for your adjustable shelves. We used an extra piece of MDF the height of the open space, where the adjustable shelves will go. Measured out 2″ apart and drilled a hole where each shelf could go. Drill all the way through the guide.
Bookcase Tip-
Before you drill into your bookcase make sure to PAINT the bookcase to avoid having to clean out the paint out of the holes after.

Create a “stop” on your drill with tape so you do not drill too far through the bookcase. You can see the drill only goes the depth of the shelf clip.
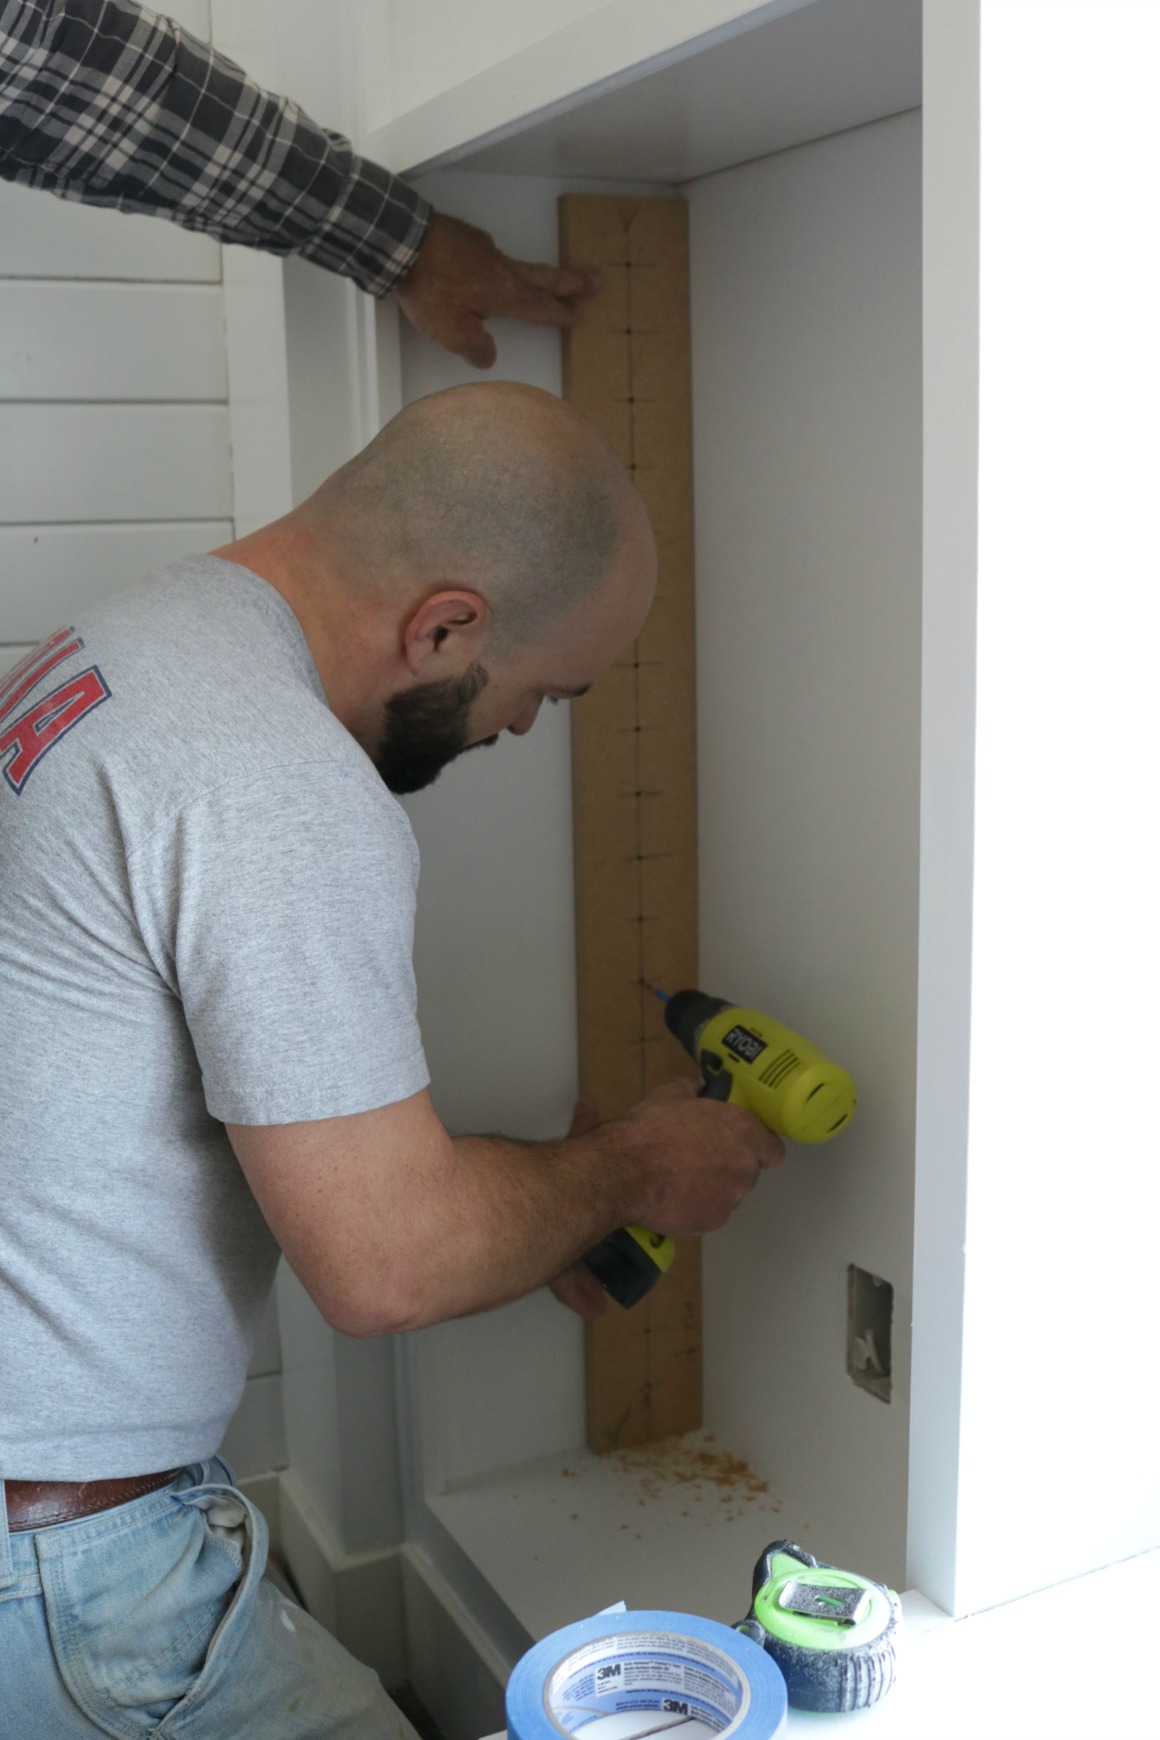
You can quickly drill each hole at a time- then flip your board over keeping the bottom of the MDF guide on the bottom of the opposite side. Writing “bottom” on the front and back of the MDF.
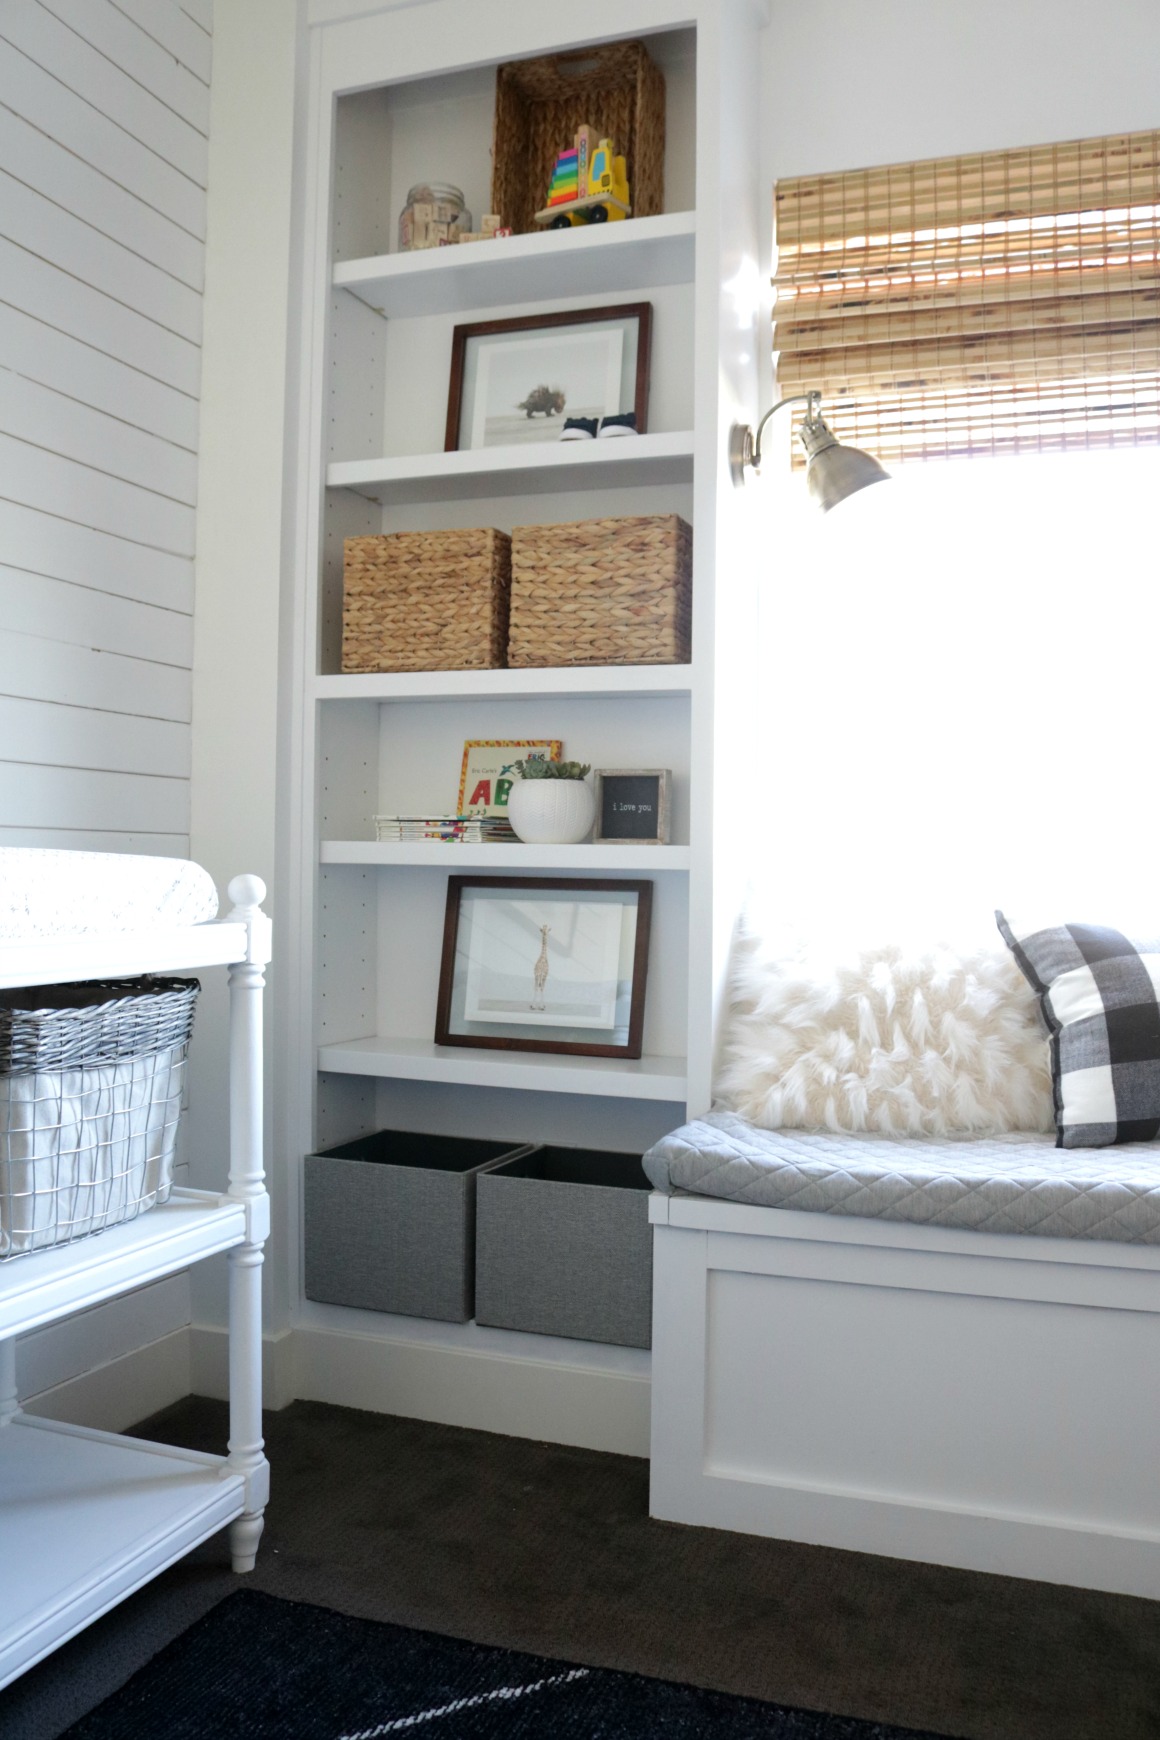
See how great they look finished!
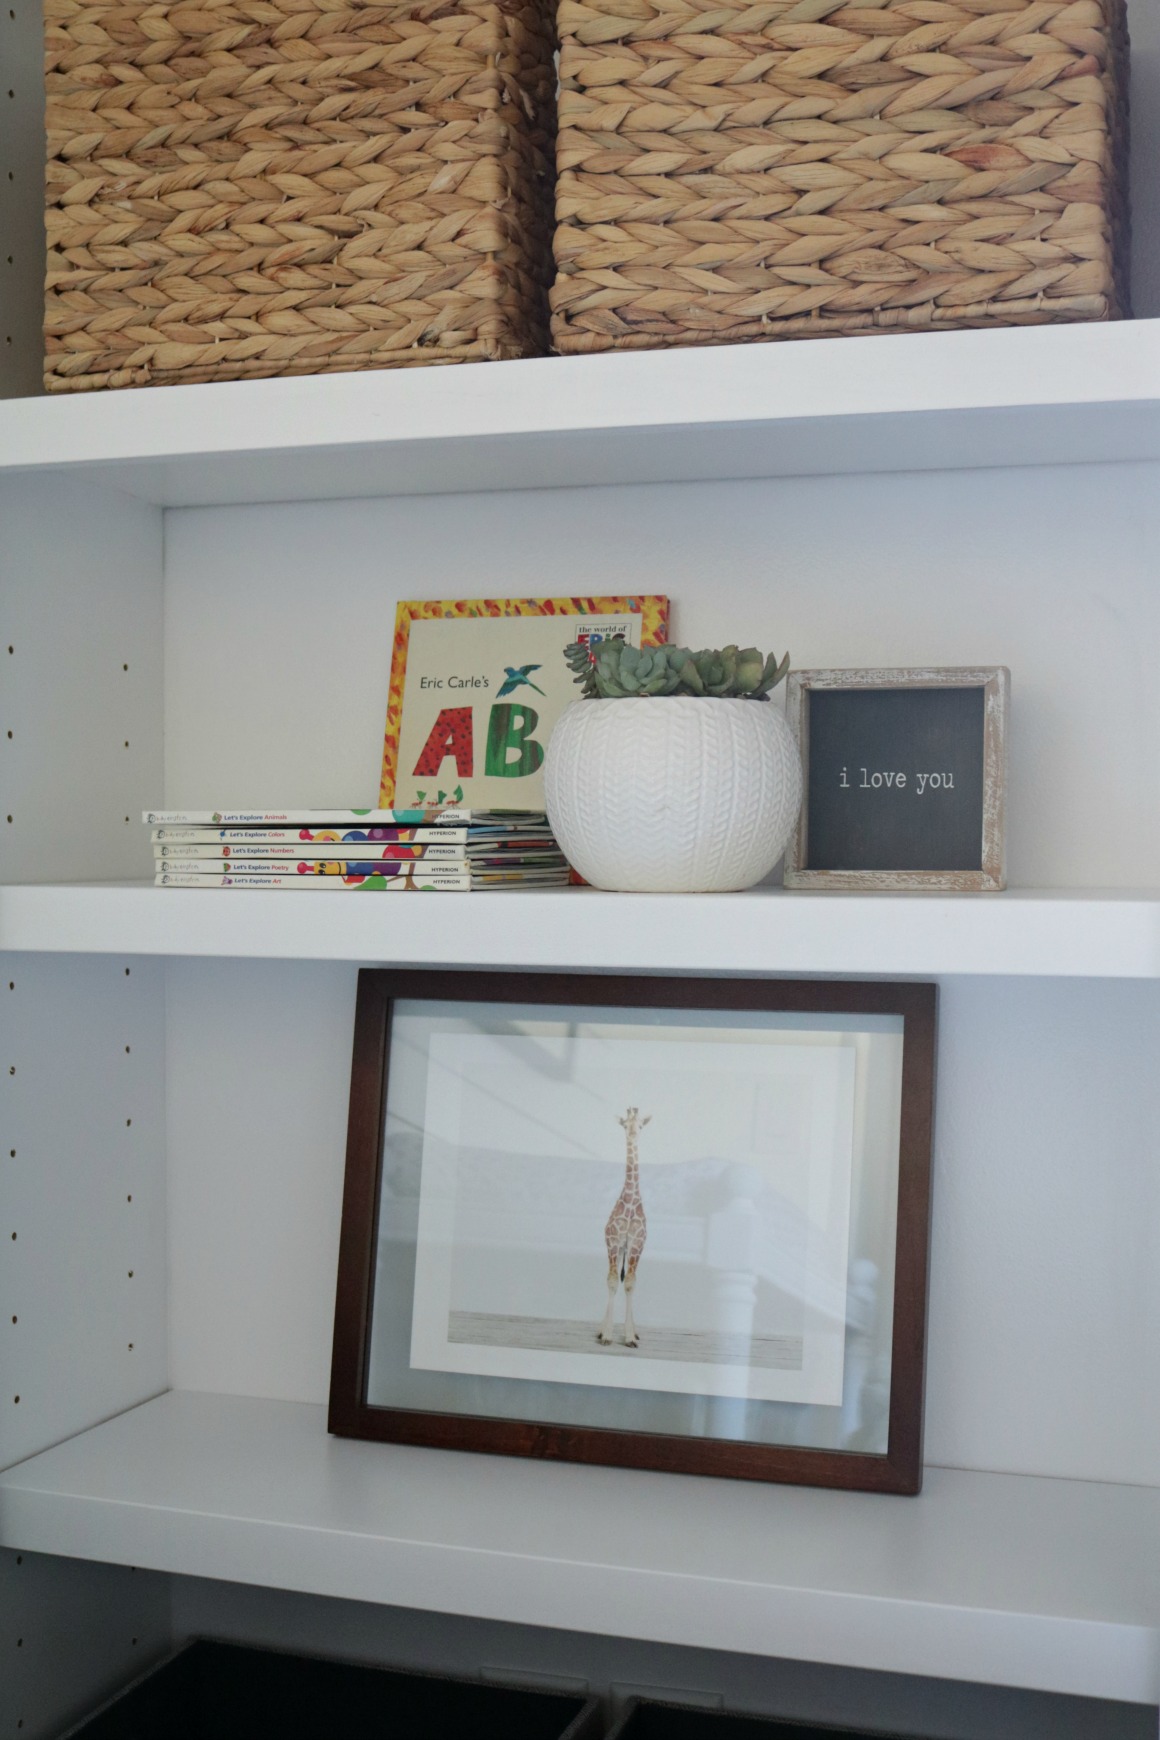
After the holes are drilled we worked on the shelves. Cut them the width of the bookcase and the depth. We added a piece of trim to the front of each shelf with wood glue and nail guns that was thicker than the shelf, 1 1/2″ in size. This makes the shelf appear thicker and more custom.
Back to the Window Seat Tutorial
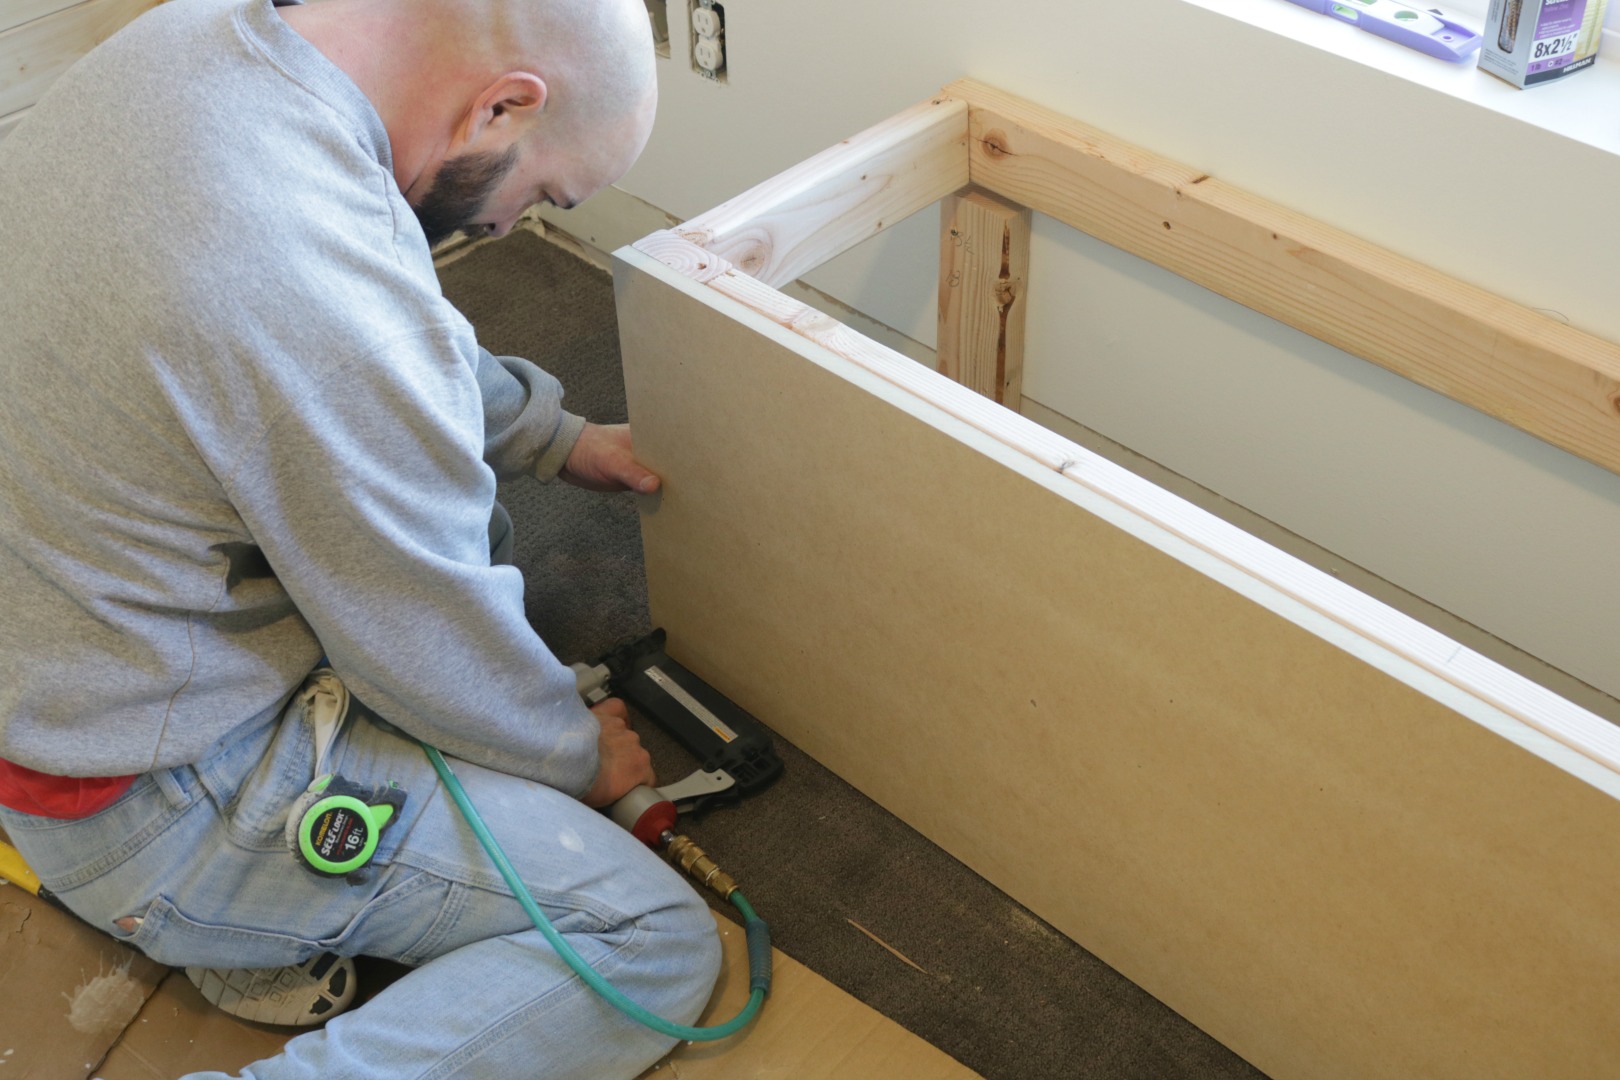
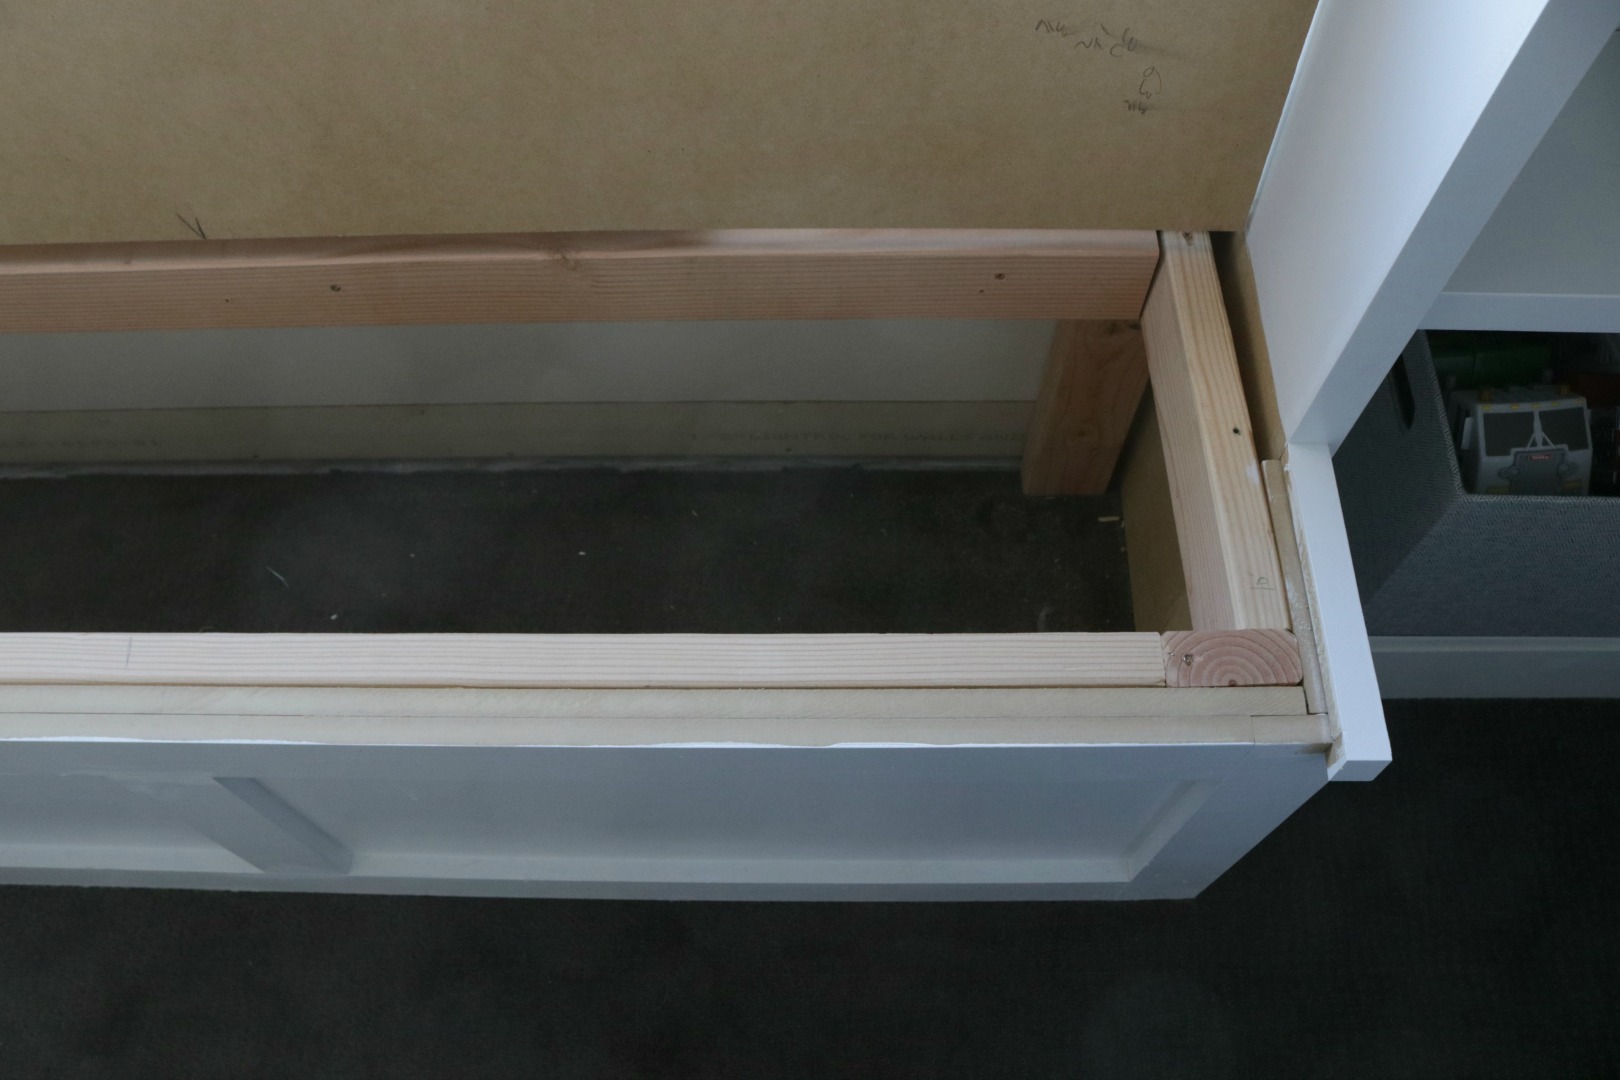
Now that both our bookcases are installed we can add the trim to the window seat. This detail really makes it look custom. We added a 3″ trim piece on all four sides. And one piece down the center. Just attach these pieces with a nail gun.
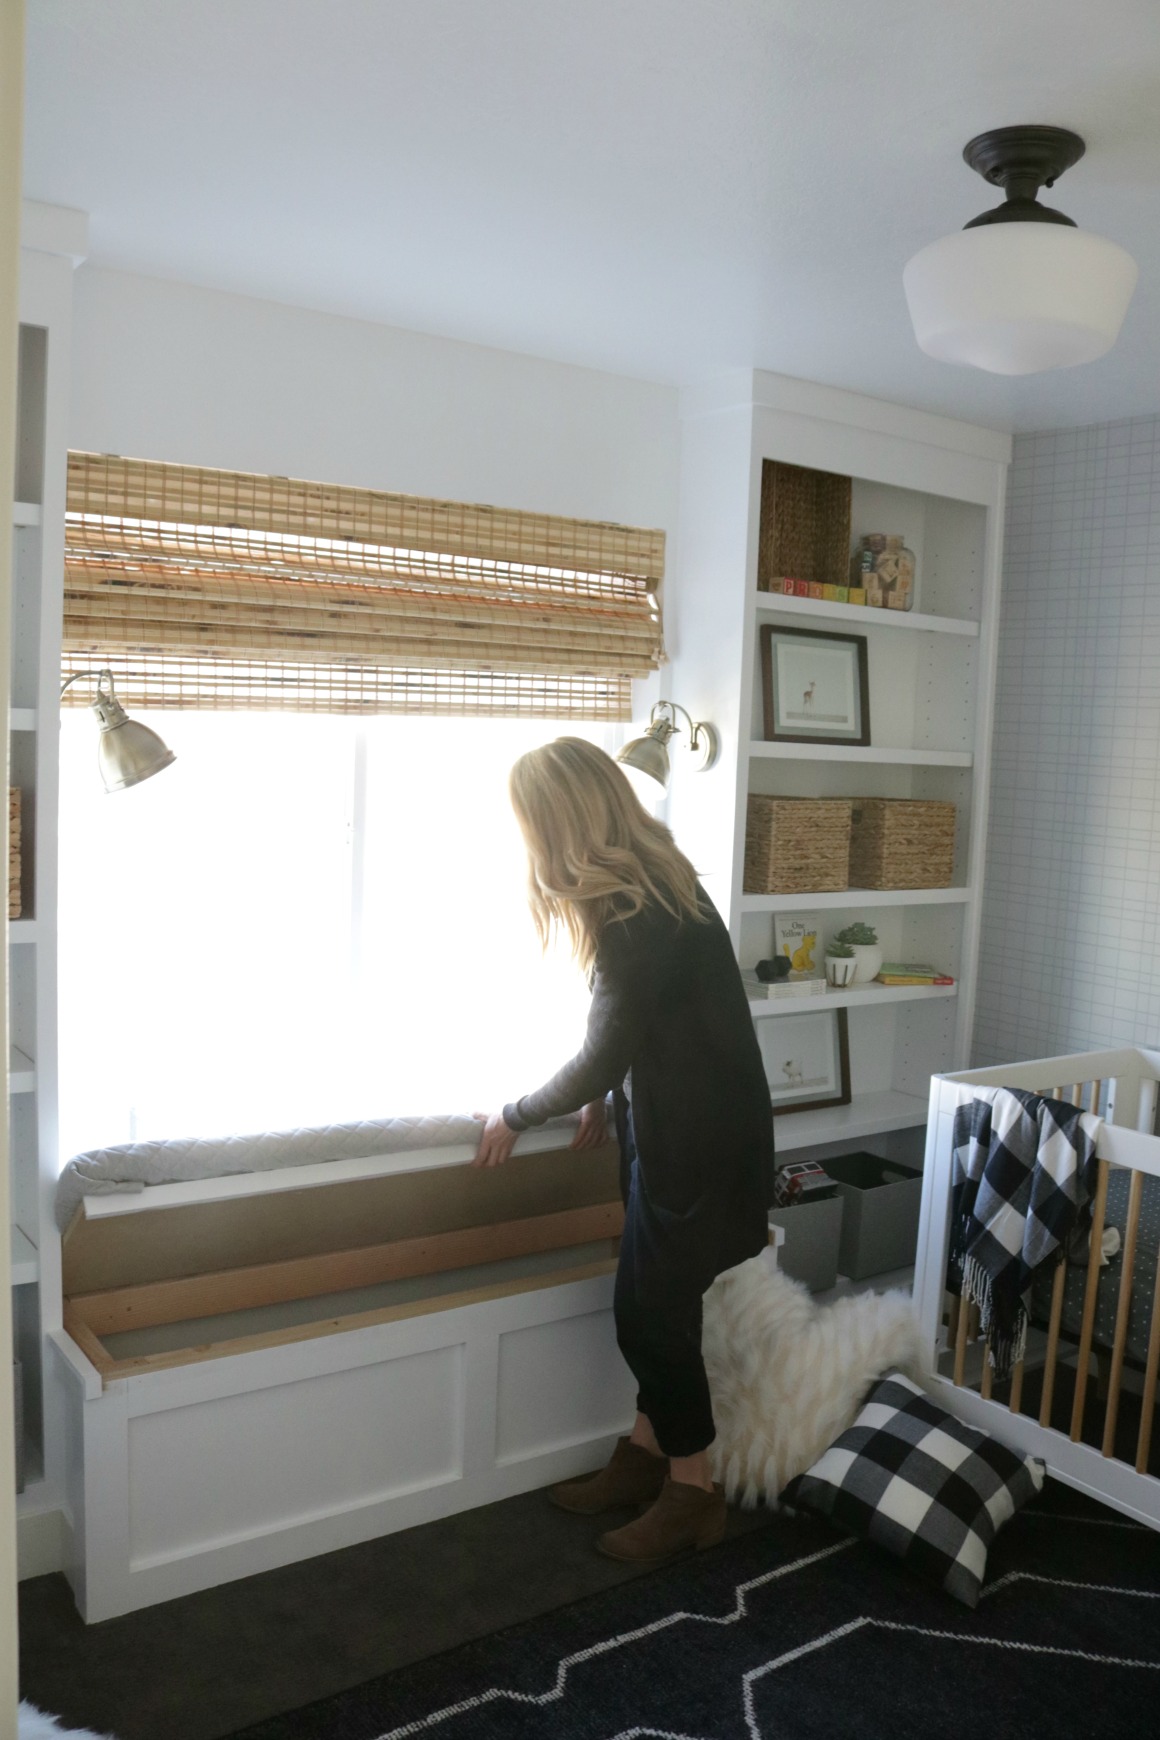
After the trim was added we could measure the actual size for the window seat top.
Also added another piece of MDF to the piece attached to the wall for more support with the window seat lid.
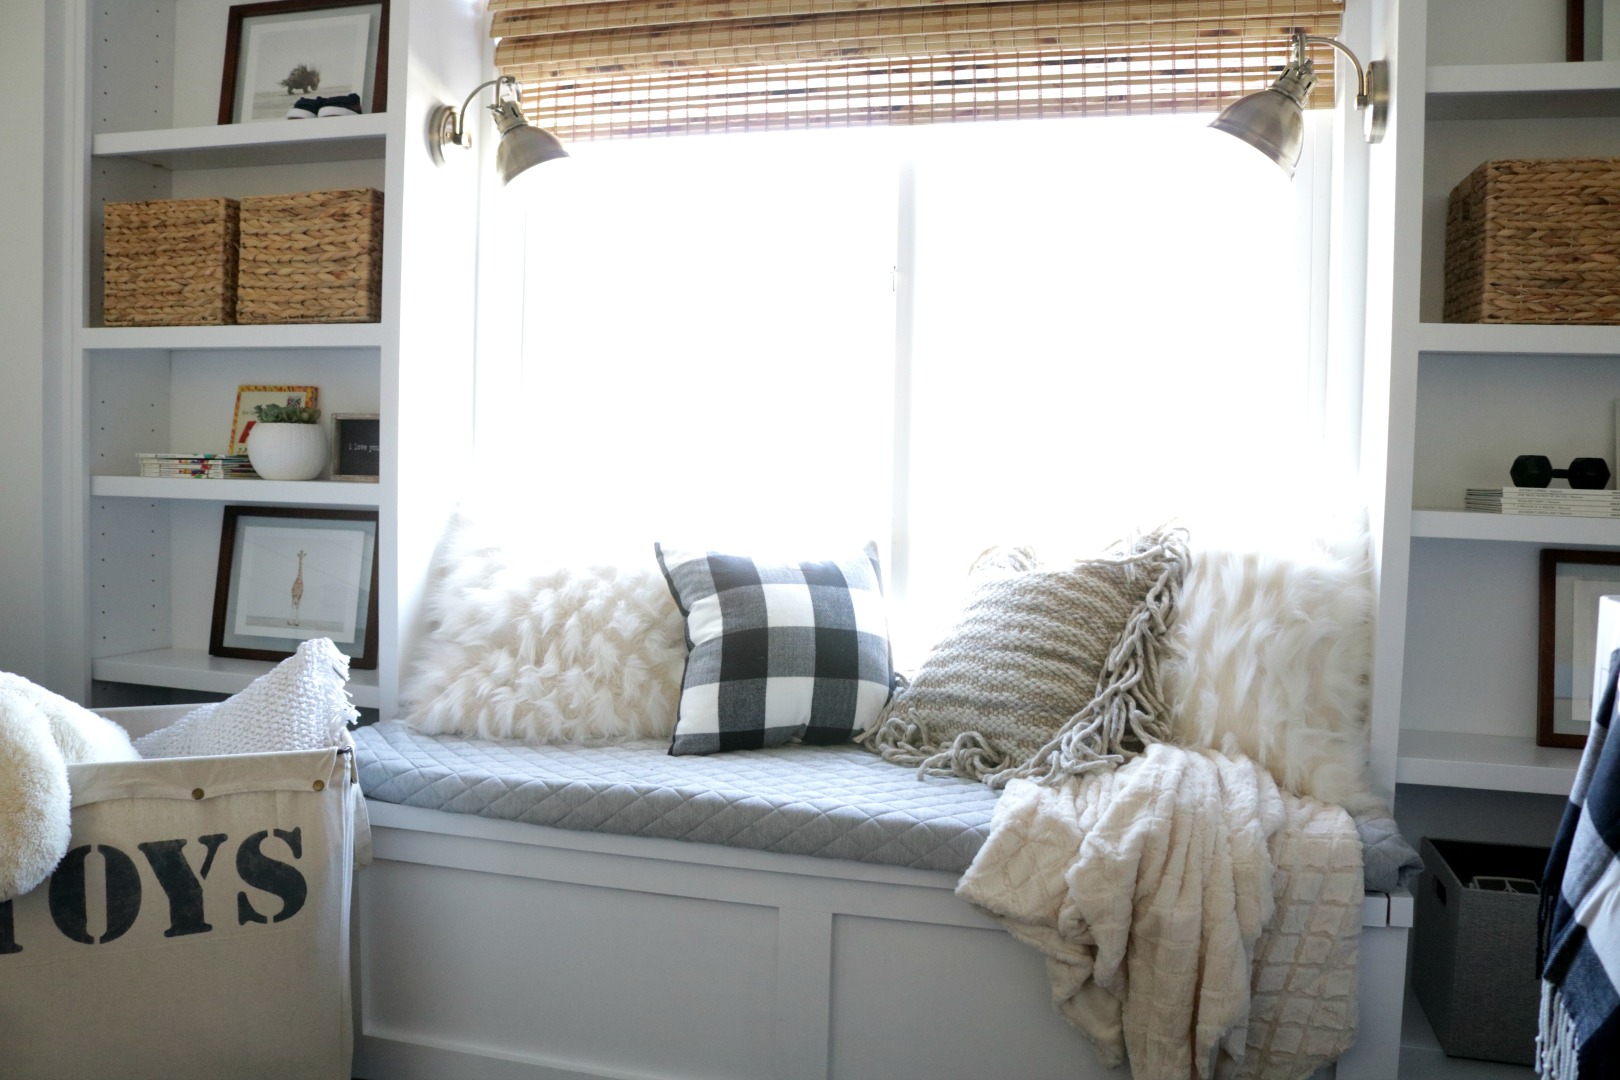
Cut one piece of MDF that is about 2″ thick for the very back of the bench to attach the piano hinge to, allowing the lid to open. Also added a piece of trim to the front of the MDF lid for a ledge to grab onto, making the lid deeper than the window base.
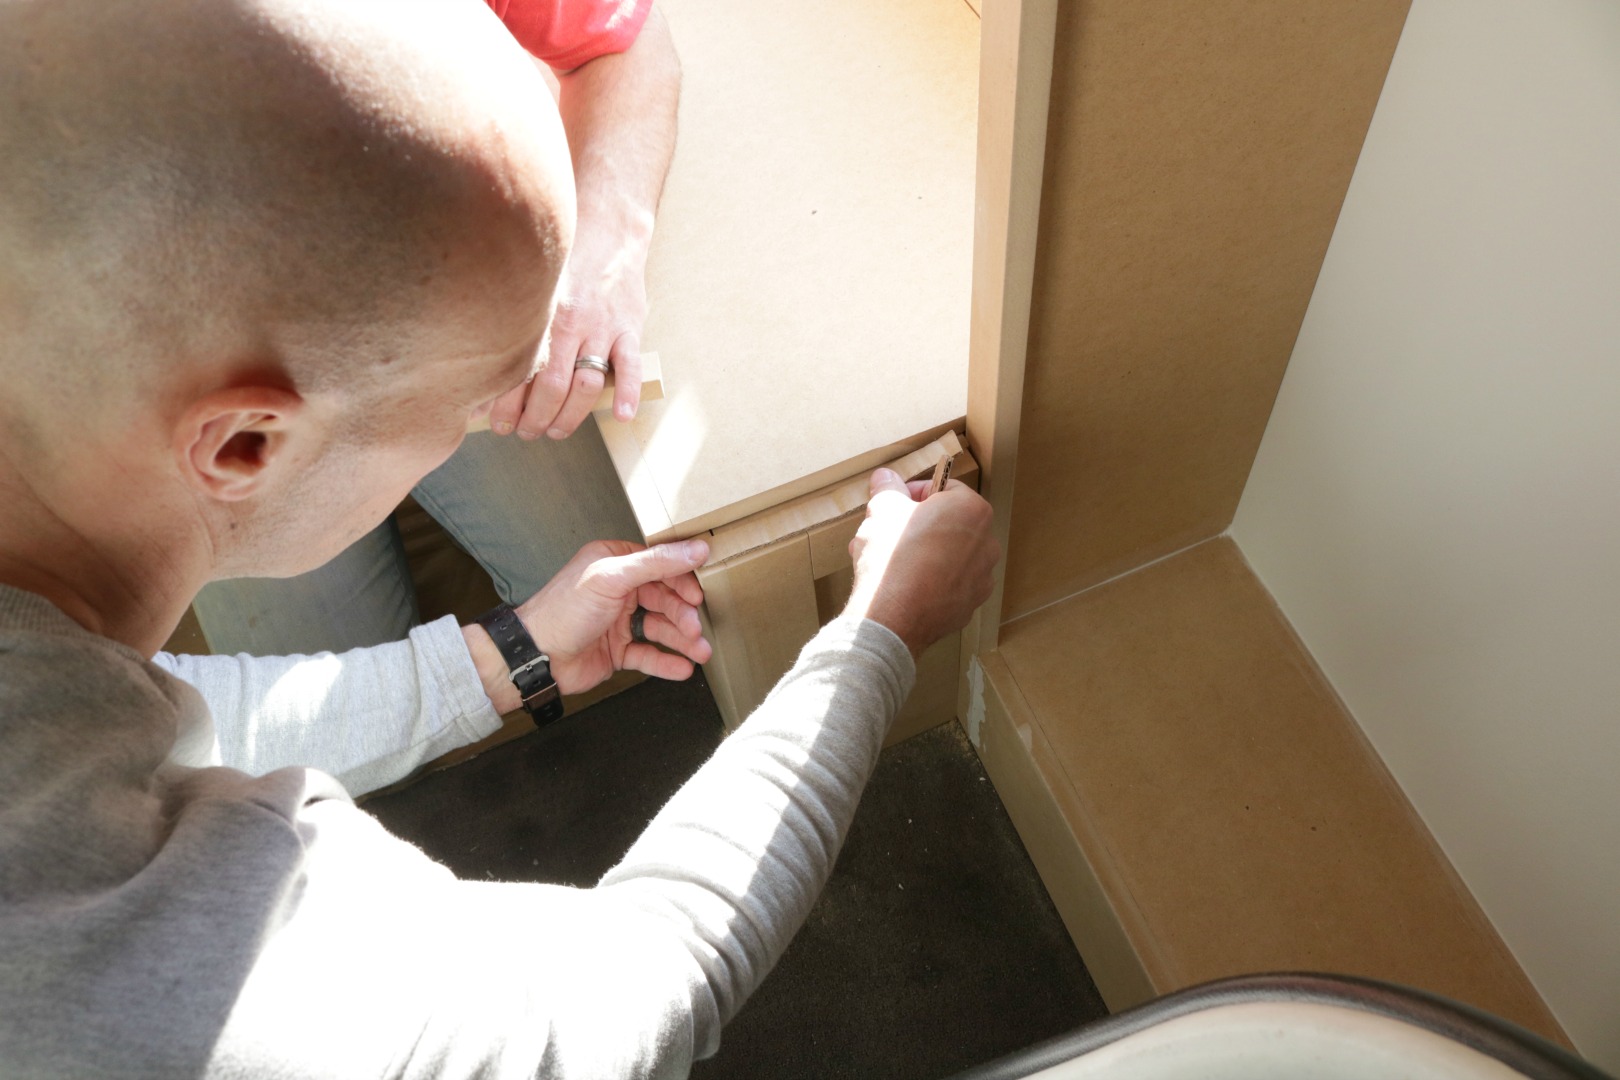
Our window seat had a little jig out once the molding was added to the window seat. In order for the top to open this little jig out had to be separate. We added a piece of molding to the top so it would be the same height as the lid. (Our piece of molding was dropping down a little so we just just a little piece of cardboard as a “shim” to raise to up to the height of the lid. It did the trick and you can’t tell at all).
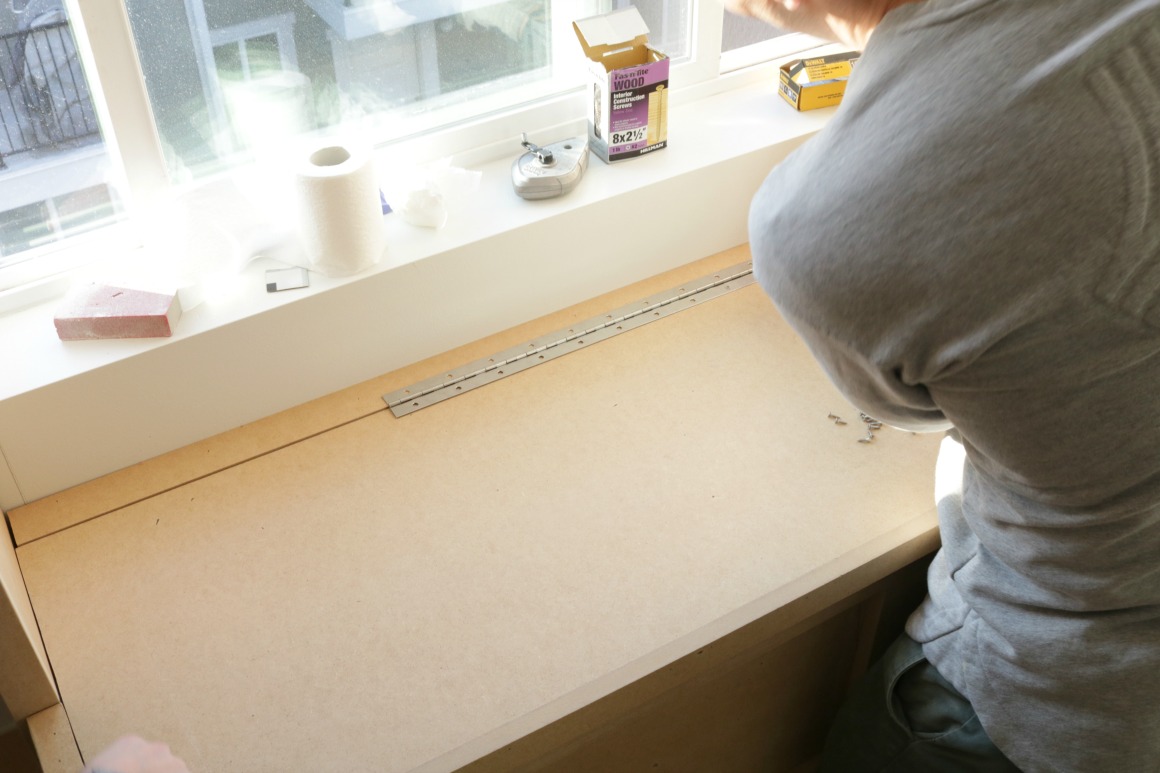
We discussed a lot of options to make the lid open. We came to the conclusion this piano hinge on the top of the lid worked best. (This is exactly what we had to do on the banquette in our kitchen). We just painted right over the top of the hinge the same color as the window seat, looked great and it is hidden with a cushion in the end.
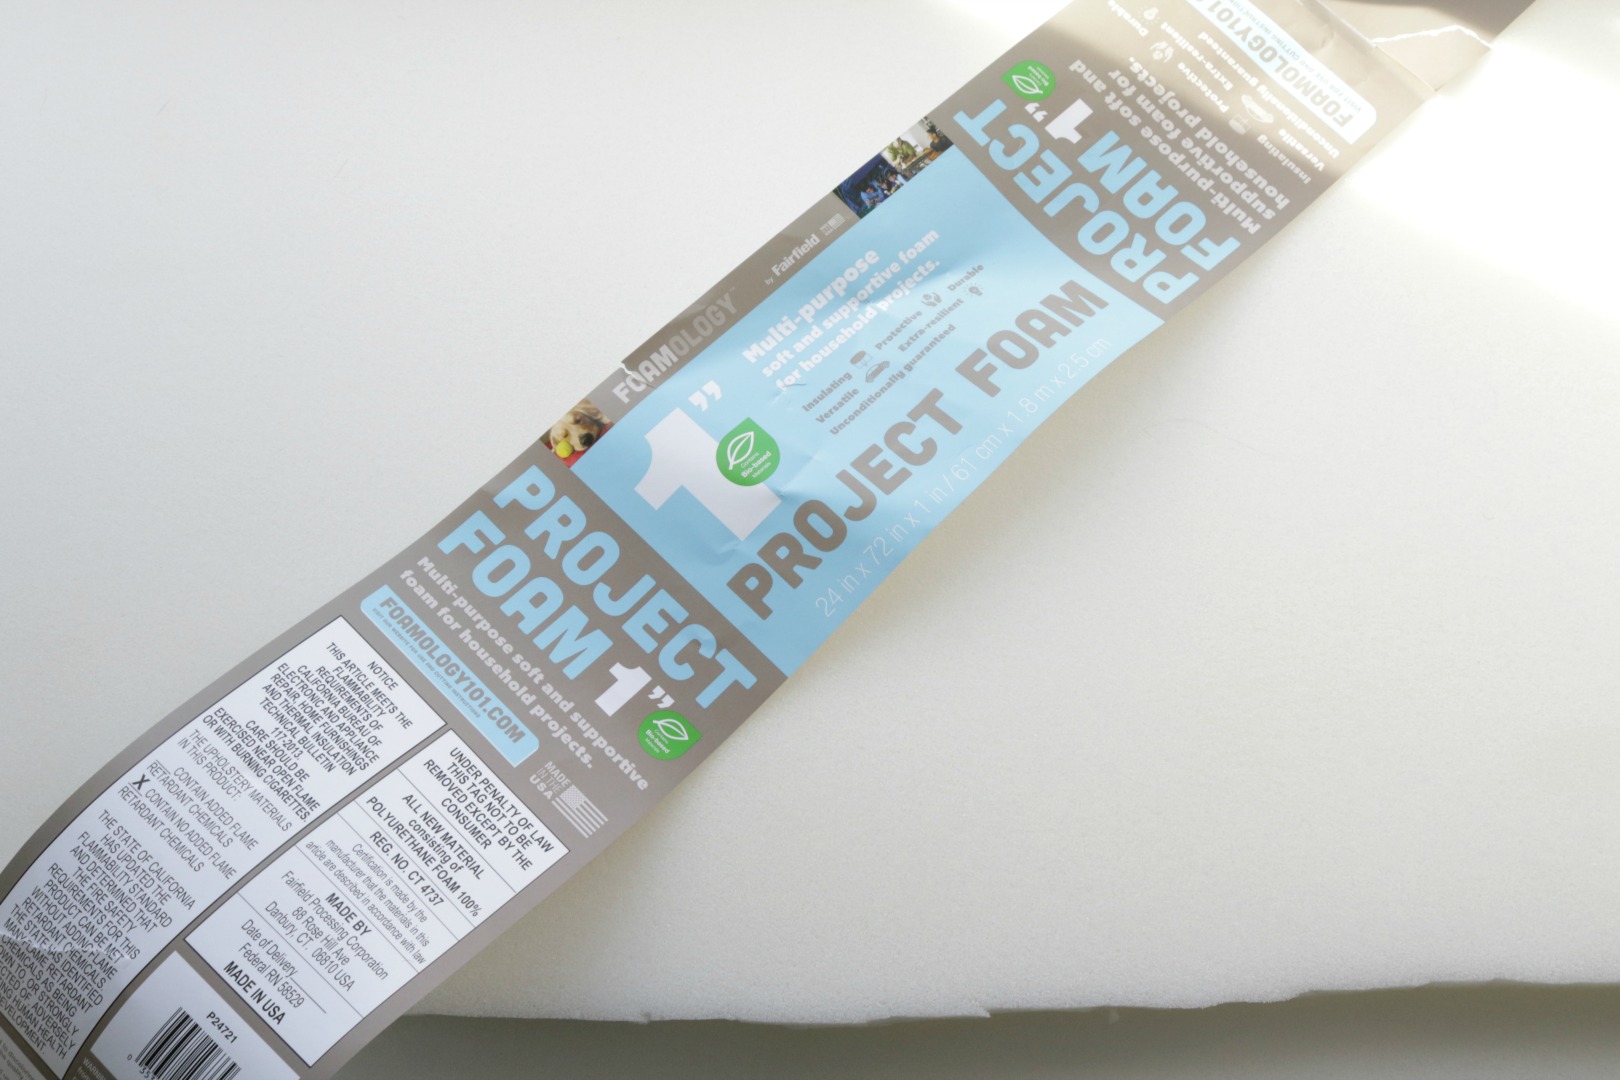
I picked up two rolls of this 1″ project foam at Wal-Mart and cut it to size. I layered two pieces and hot glued them together for a thicker cushion. (The cushion isn’t sewed yet, but plan on completing that. (Found the fabric at Joann’s fabric store).
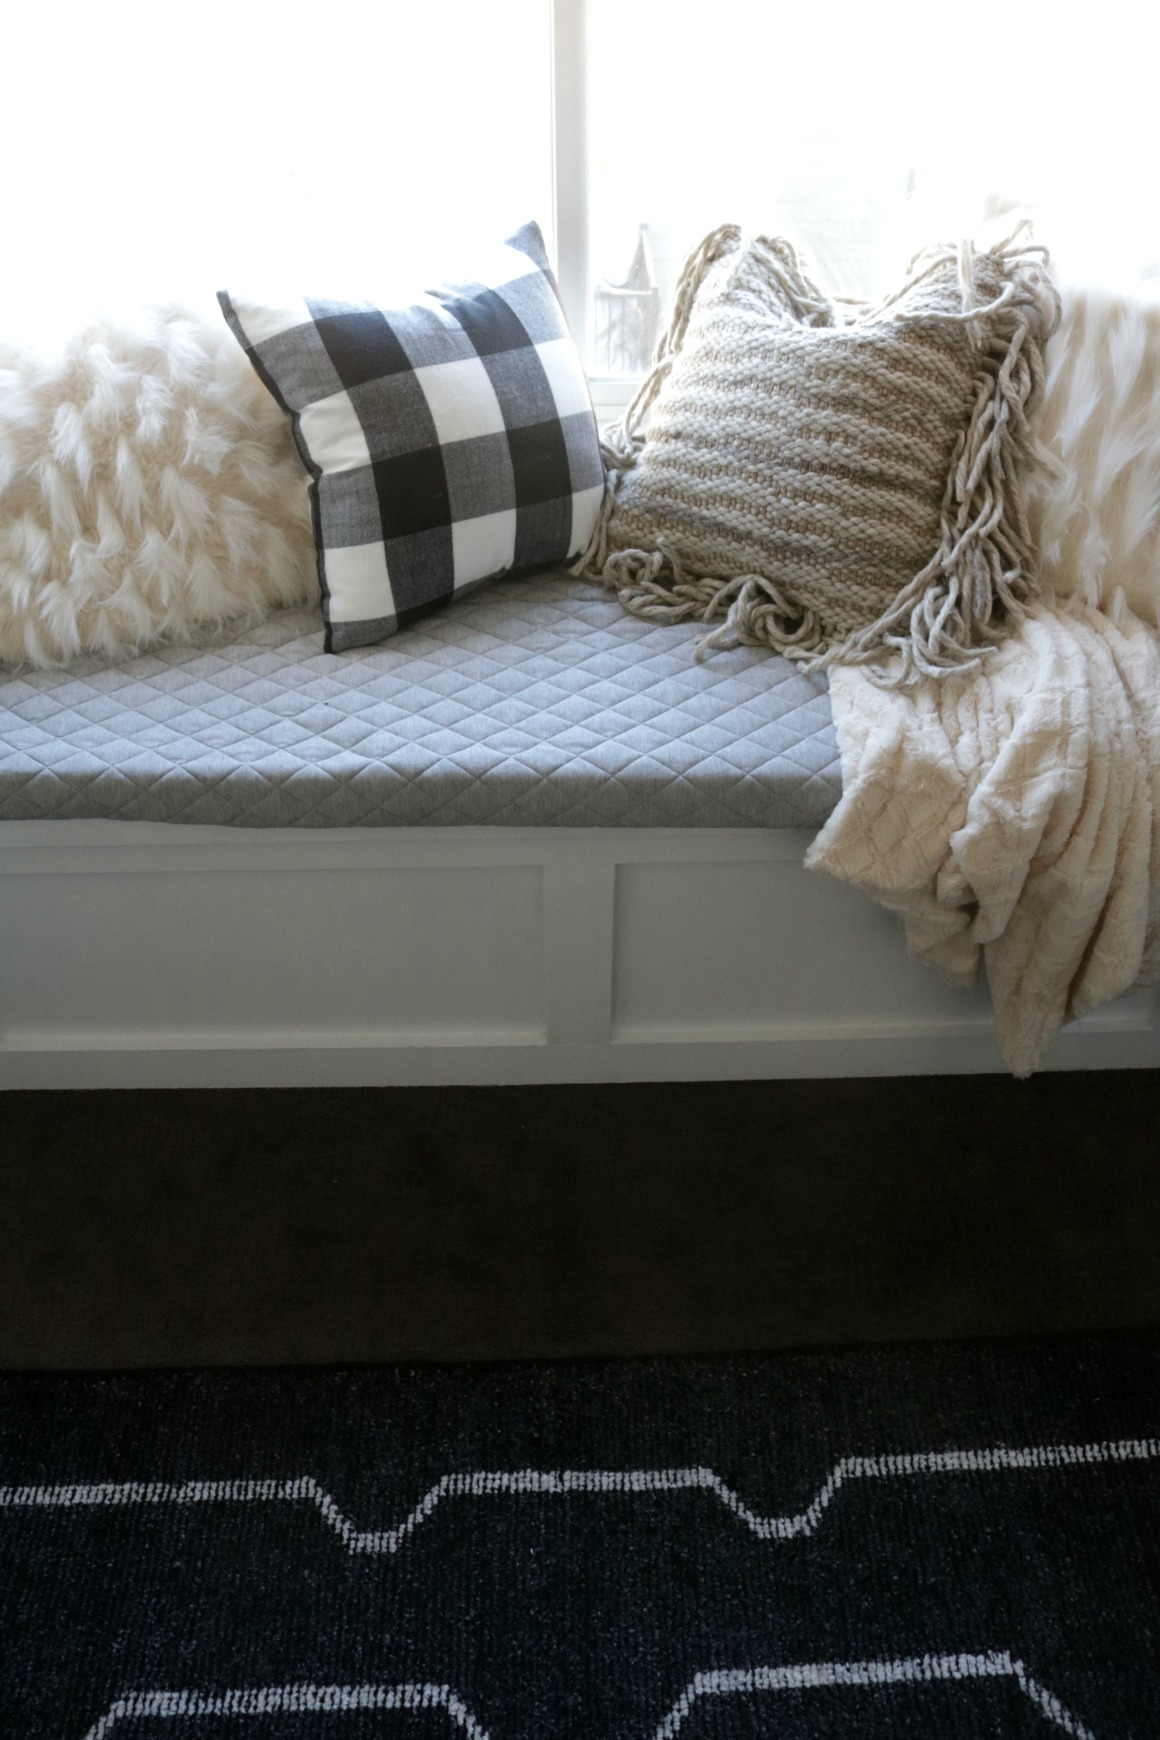
Here it is completed! Can you believe that Window Seat and Bookcase cost under $150??
You can see the complete Nursery Room Reveal and a list of all the sources HERE.
Video Clips taken from Nesting with Grace Instagram Stories over the two days it took to create the custom window seat and built-in bookcases!
Nursery Room Reveal and a list of all the sources HERE.


Thank you for the amazing tutorial!!!! Somloved how yours turned out and hoping I can add one to our downstairs office/playroom/ guest room!
Thanks Kelly! I hope it was easy to follow!
YES!!!! I have been waiting for this post! Ever since I was a kid I have dreamed of having a window seat in the kitchen/dining area. It would work perfect in my home but I don’t want to spend the money to hire out. It’s funny, I’ve ben asking my husband to do it, thinking it’s a man’s job, but this makes me think hey I can do it! Thanks so much for sharing :).
OH good! I sure hope it was helpful!! It IS something you could do!
I AM SO IN LOVE WITH WINDOW SEATS! I had one at my old house and really miss it at my current house. I get so frustrated because it seems like no matter how easy and affordable a project is, (like this one) I always have a unique circumstance that makes me think it can’t be done. At least, not without spending a ton of money. For example, I would love to have these, but my heating/air vents are directly under the windows in every single room of my house. Could you ask your brother-in-law if there’s a work around for them? I’m assuming if they have to be moved, it would be too costly. Thank you so much Grace.
Love the way this turned out! How did you manage to hide the wiring for the two sconces on either side?
ohhhh you just wait for that post!! Coming soon!!
Would love a tutorial on how to sew the fabric on to the seat cushion!
I’d love to know how you managed electricity and the cords for the sconces.
The window seat and bookcases look amazing — what a great nest to curl up in as your child grows!
post coming tomorrow!!
Love love this! Do you think the window seat tutorial can be used for a banquette in a kitchen X 2 to make an L shape. I’ve been begging hubby to make one for our tiny kitchen!
yes 100%!!
Thank you for this post, I’m hoping to put my husband on this project asap! I did have a question though, do you know the measurements of that bedroom? I’m just wondering if the built ins and window seat would take too much room out of the small room I have for a nursery…I’m sure there are ways to make it work, just simply wondering.
Thank you!
It is only about 10×11~ small room! The bookcase is only like 12″ deep and window seat was about 18″
Thanks! That’s about the size I’m working with too, glad to know it works in a smaller room!
Love this window seat and how the nursery turned out!! The window seat looks a lot like your dining area, are they built the same? I may have missed it, but what is the depth of the seat? Thanks! 🙂
They are really similar styles! The seat depth was about 17″ (mine are deeper closer to 20″)