Remember the Nursery Project Plan I shared? Well we did it! We completed an entire nursery makeover in just TWO DAYS! It was so much fun to work on this FOR family WITH family.
Lowe’s sponsored this project, I really enjoy working with them and all their products. We completed the entire nursery in just two days because we were visiting Utah for Christmas and that is where my sister-in-law lives, who we did this nursery for. We had a lot of help to get this project done and a lot of encouragement from all of YOU over on my Instagram Stories. I am going to share the entire reveal today and I plan on doing a follow up post with the tutorial on how we built the window seat, hung the wallpaper, installed the plank wall (shiplap) and how we got the sconces to glow without being hardwired. Alright let’s first see the darling couple. My sister-in-law (Kevin’s sister) and her cutie hubby Blain oh and their current babies…
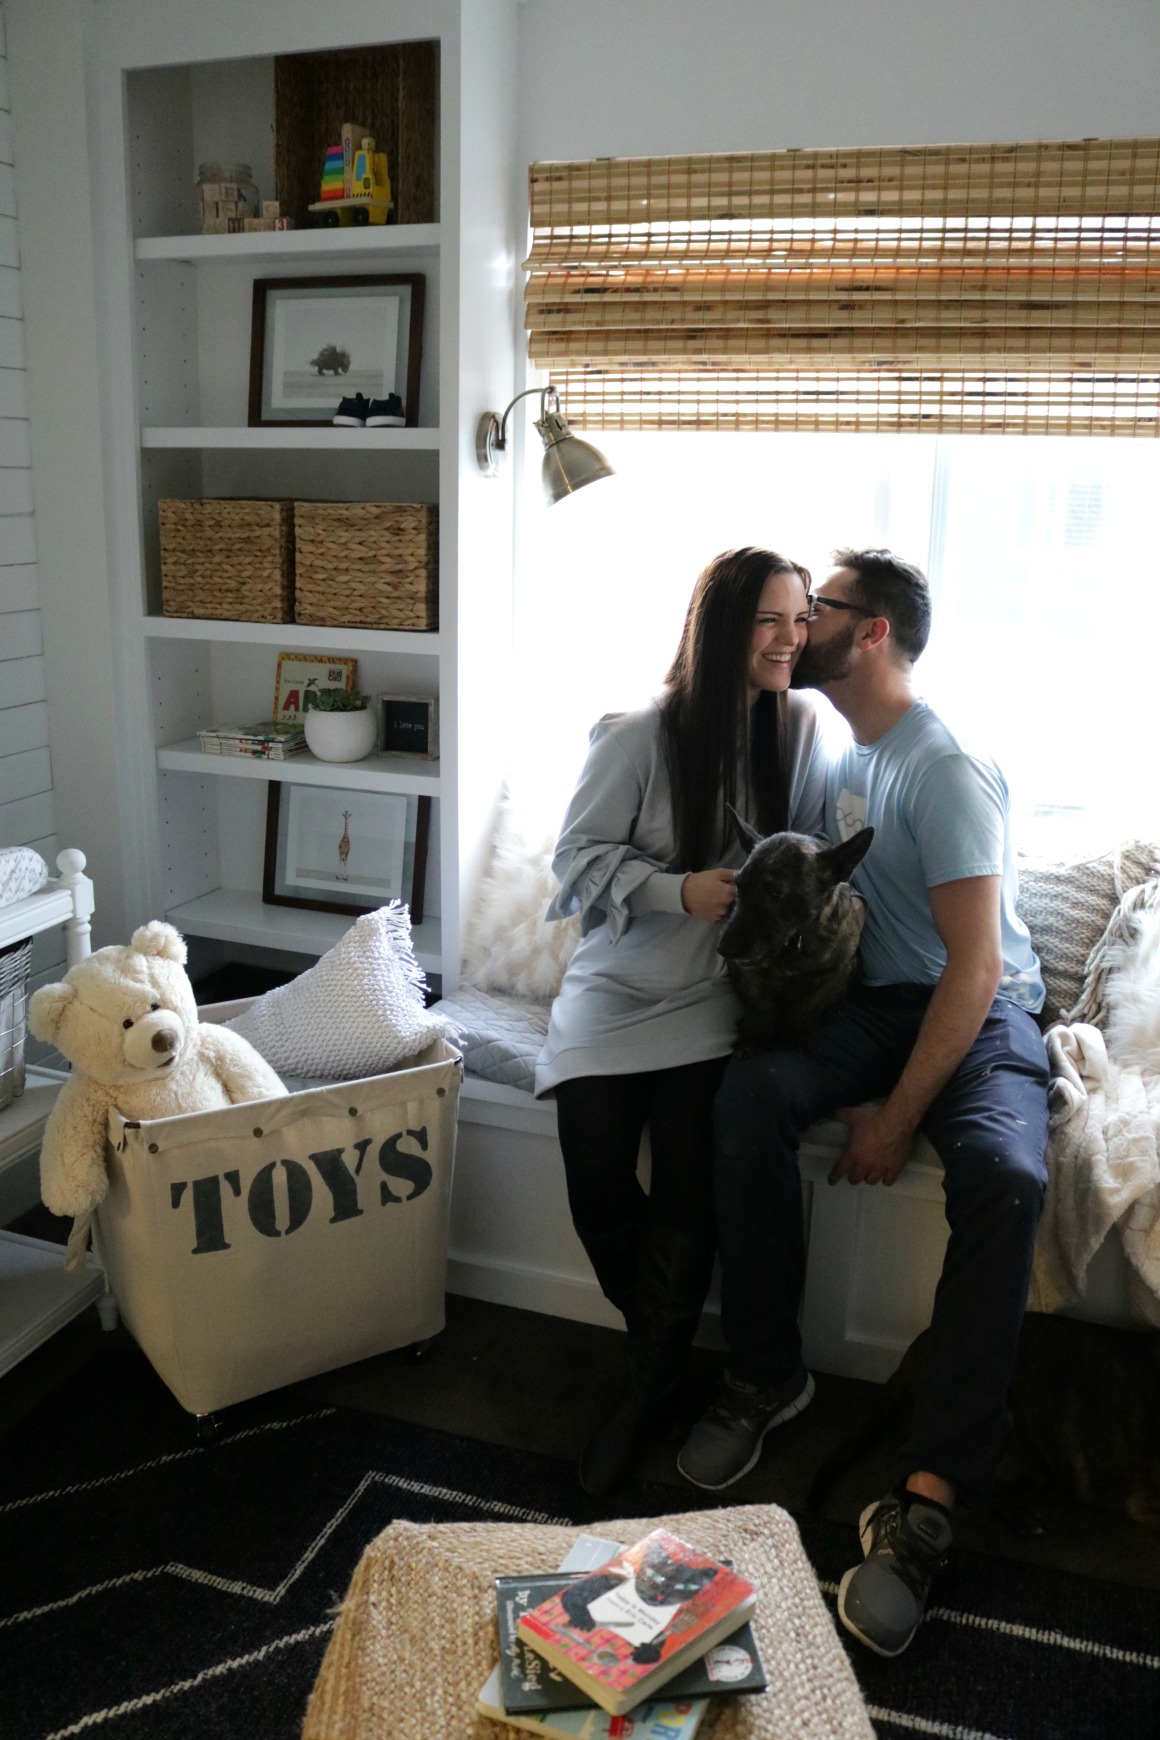
Aren’t they so cute? This is their first baby and it is a boy! She is due in April. Below is the design plan for the nursery. So fun to see the idea and how it came together.
Everything will be linked at the end of the post along with a Highlight Video from my Instagram Stories of the process
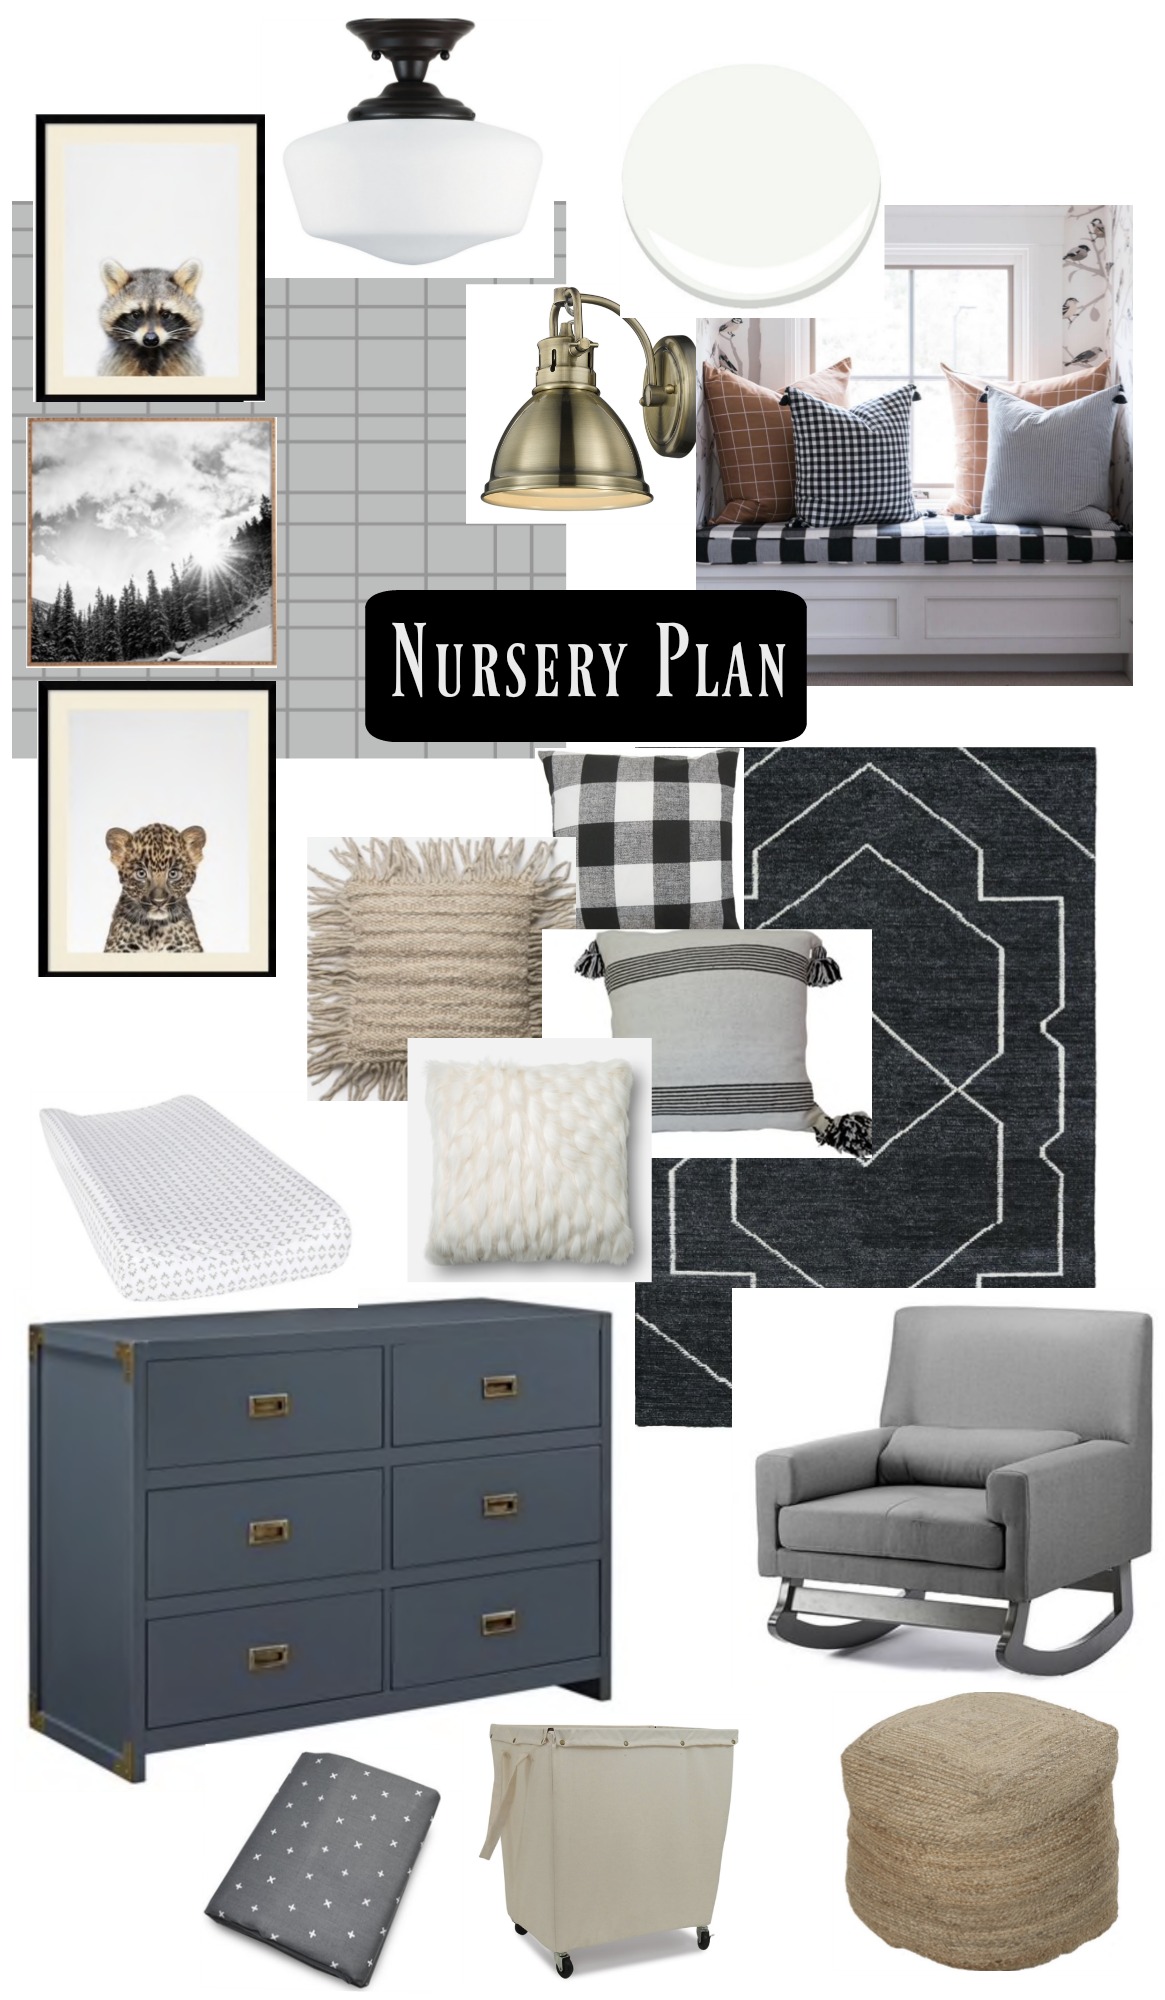 I ordered everything for the room from Lowe’s the first part of December. Everything arrived except for the dresser (which was due to my mistake). So we used something that they already had in another room for the photos. (She already had THIS crib).
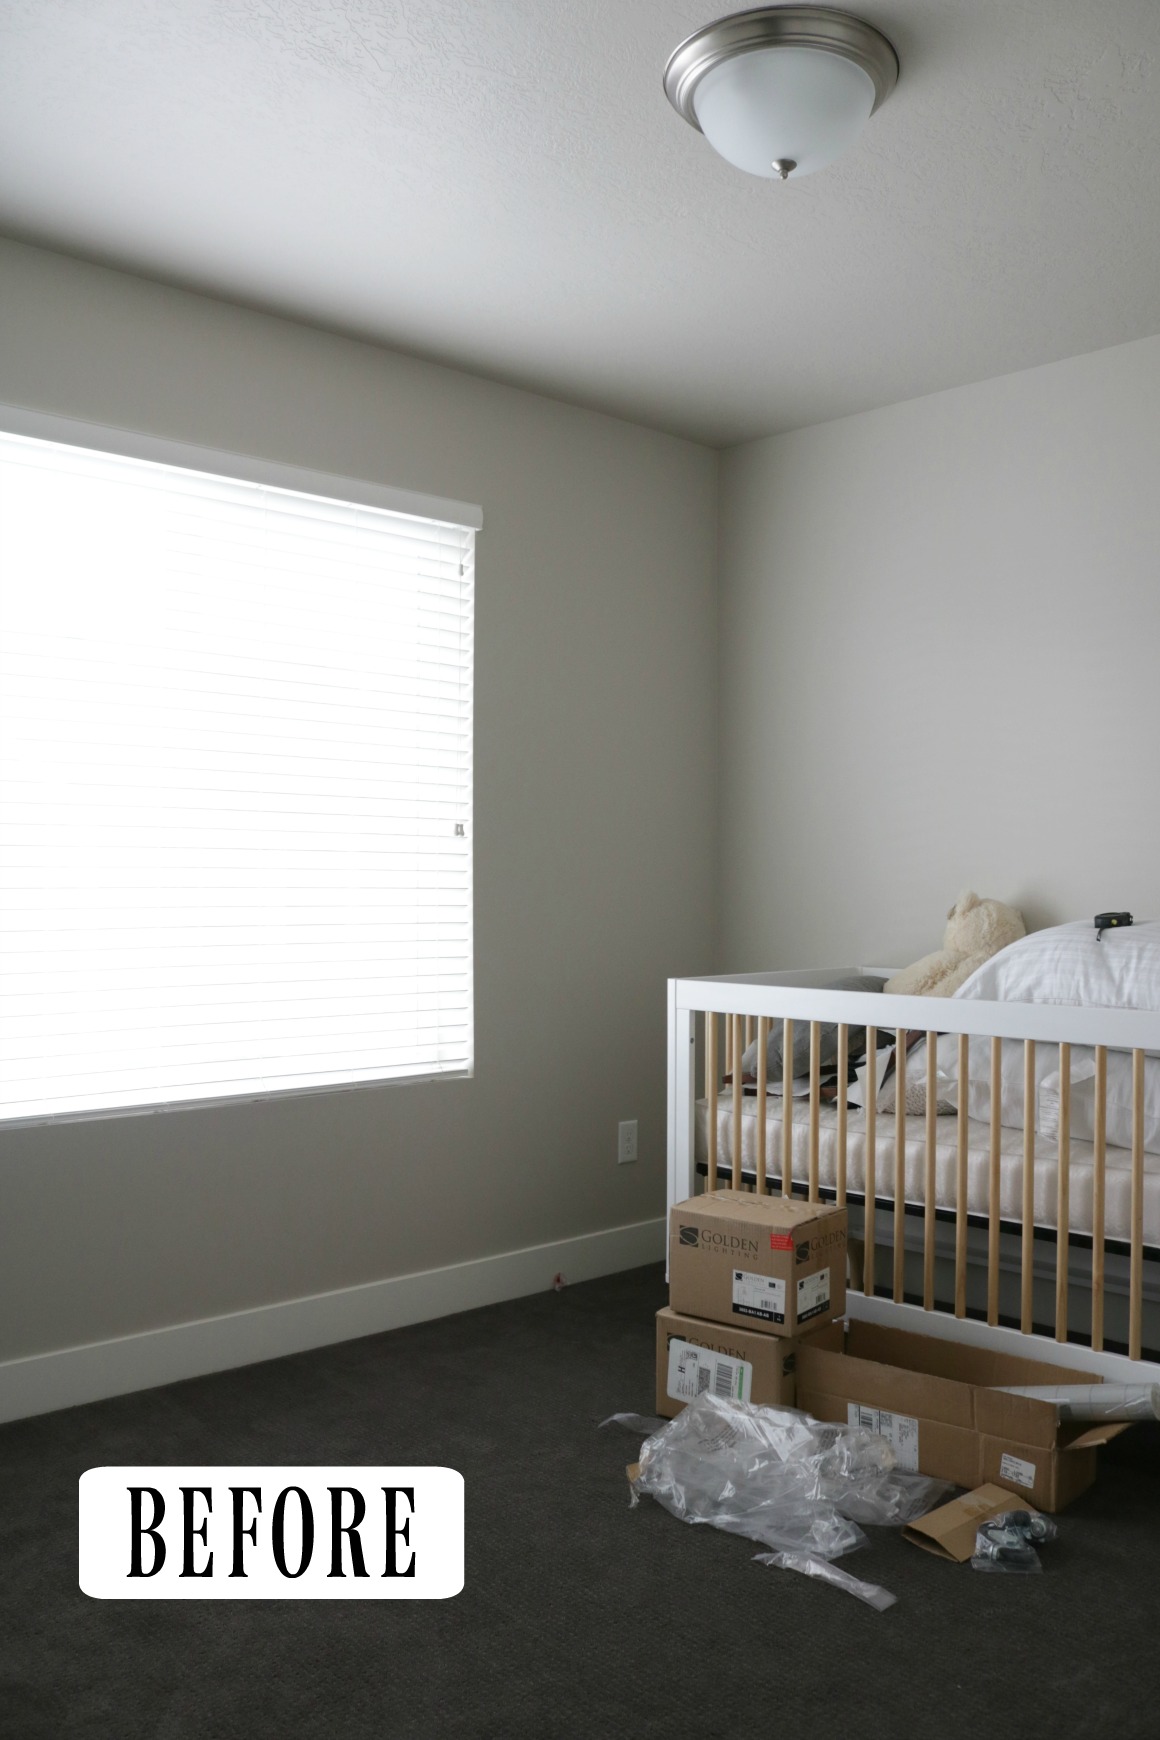
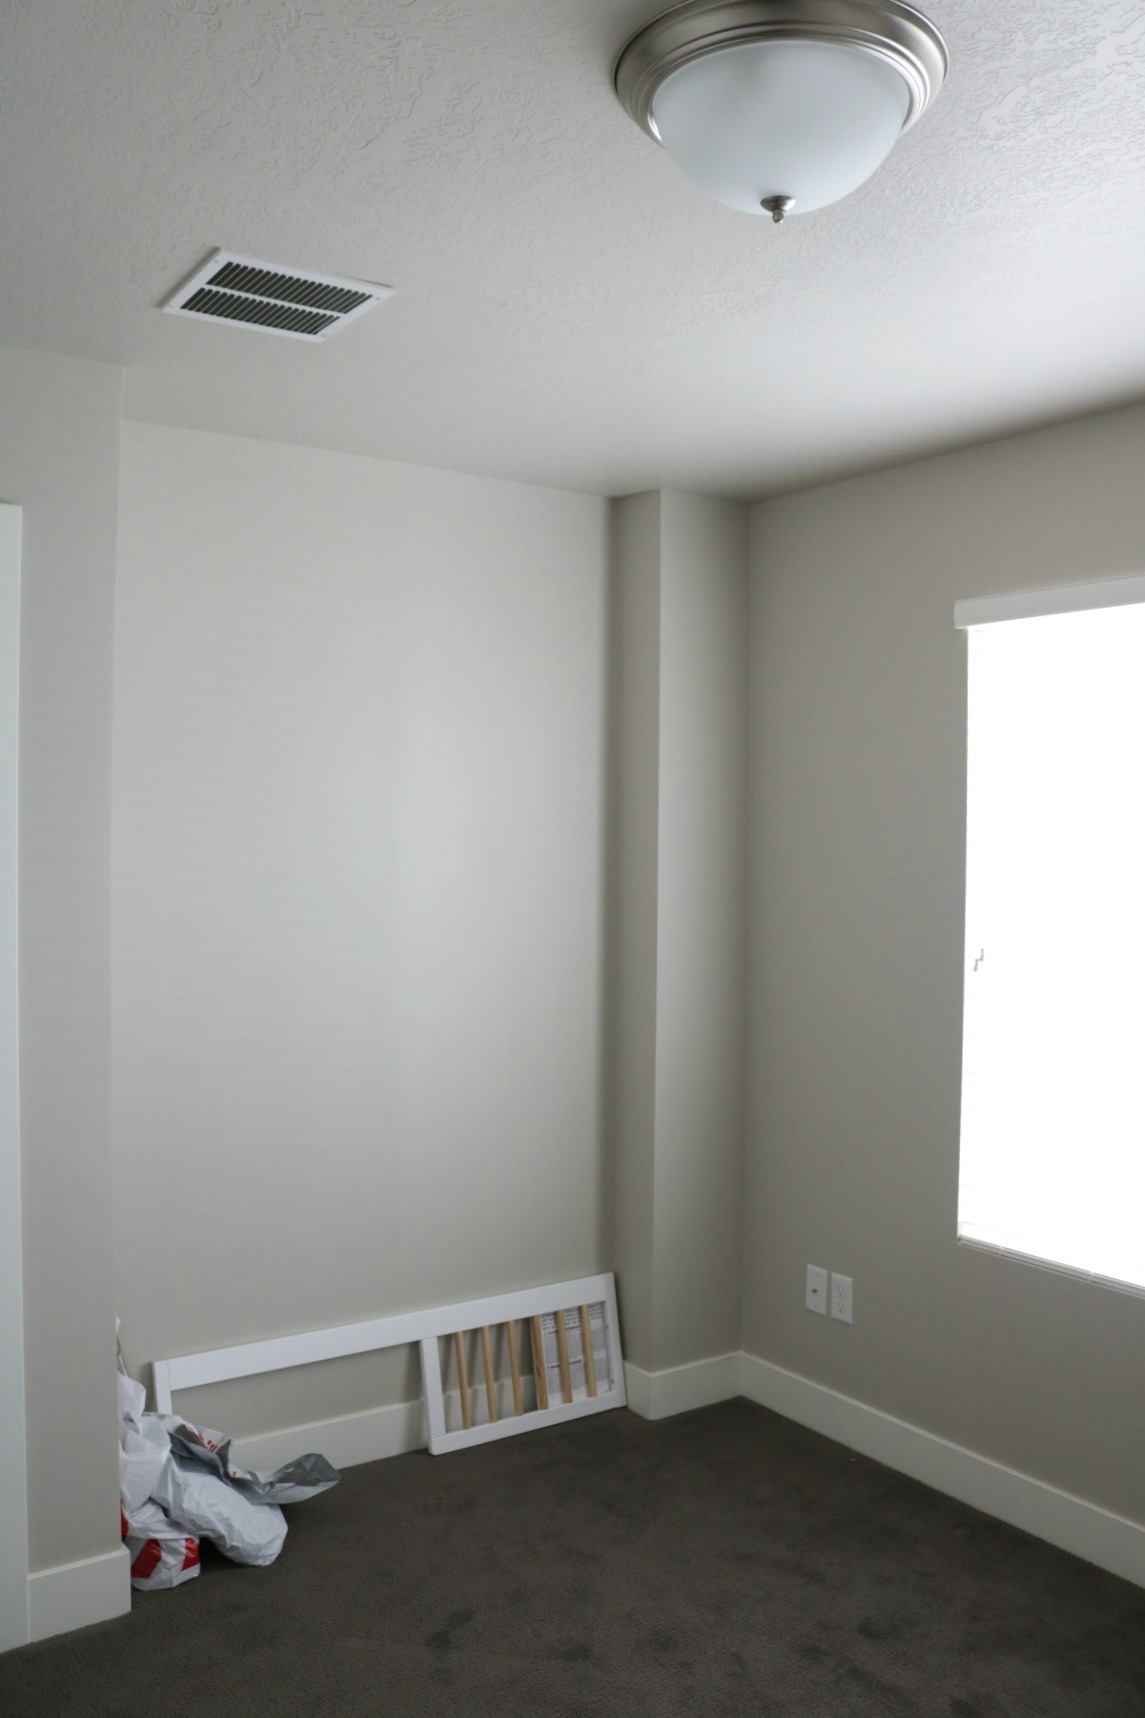
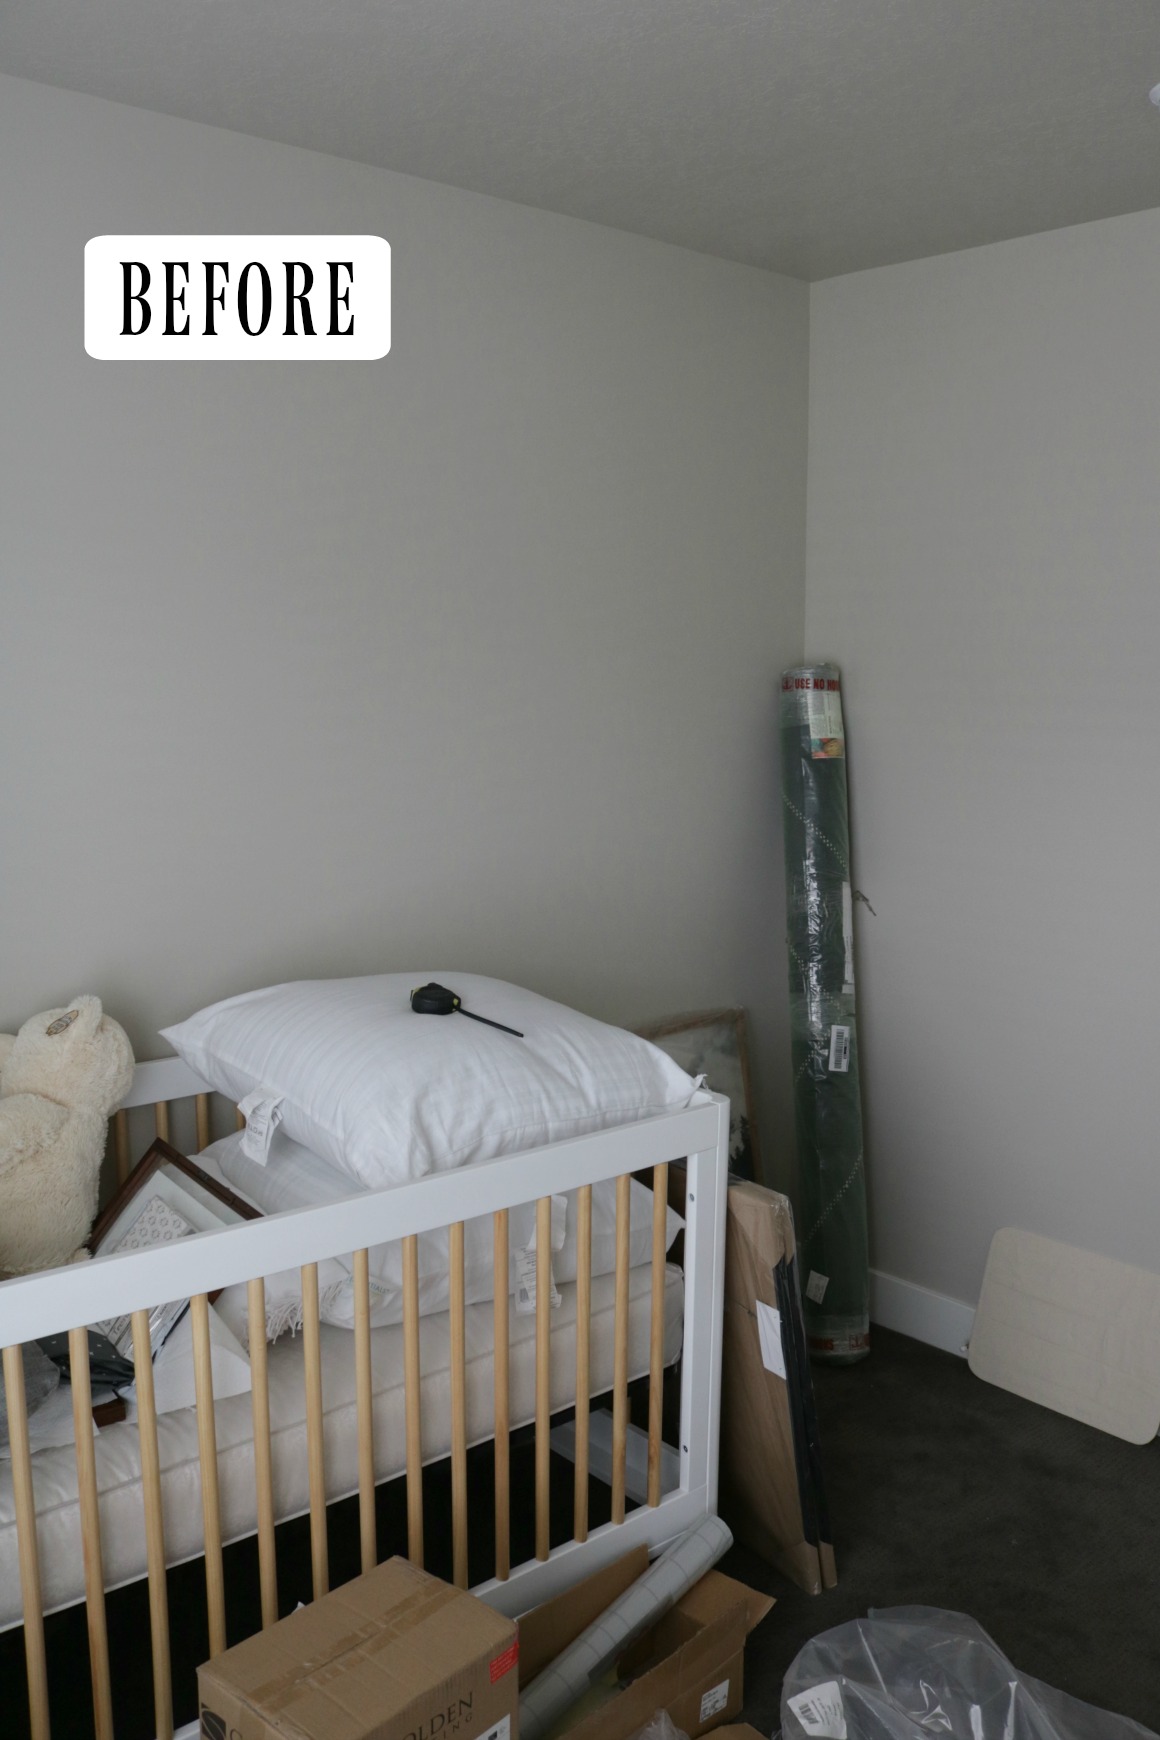
Nursery BEFORE…
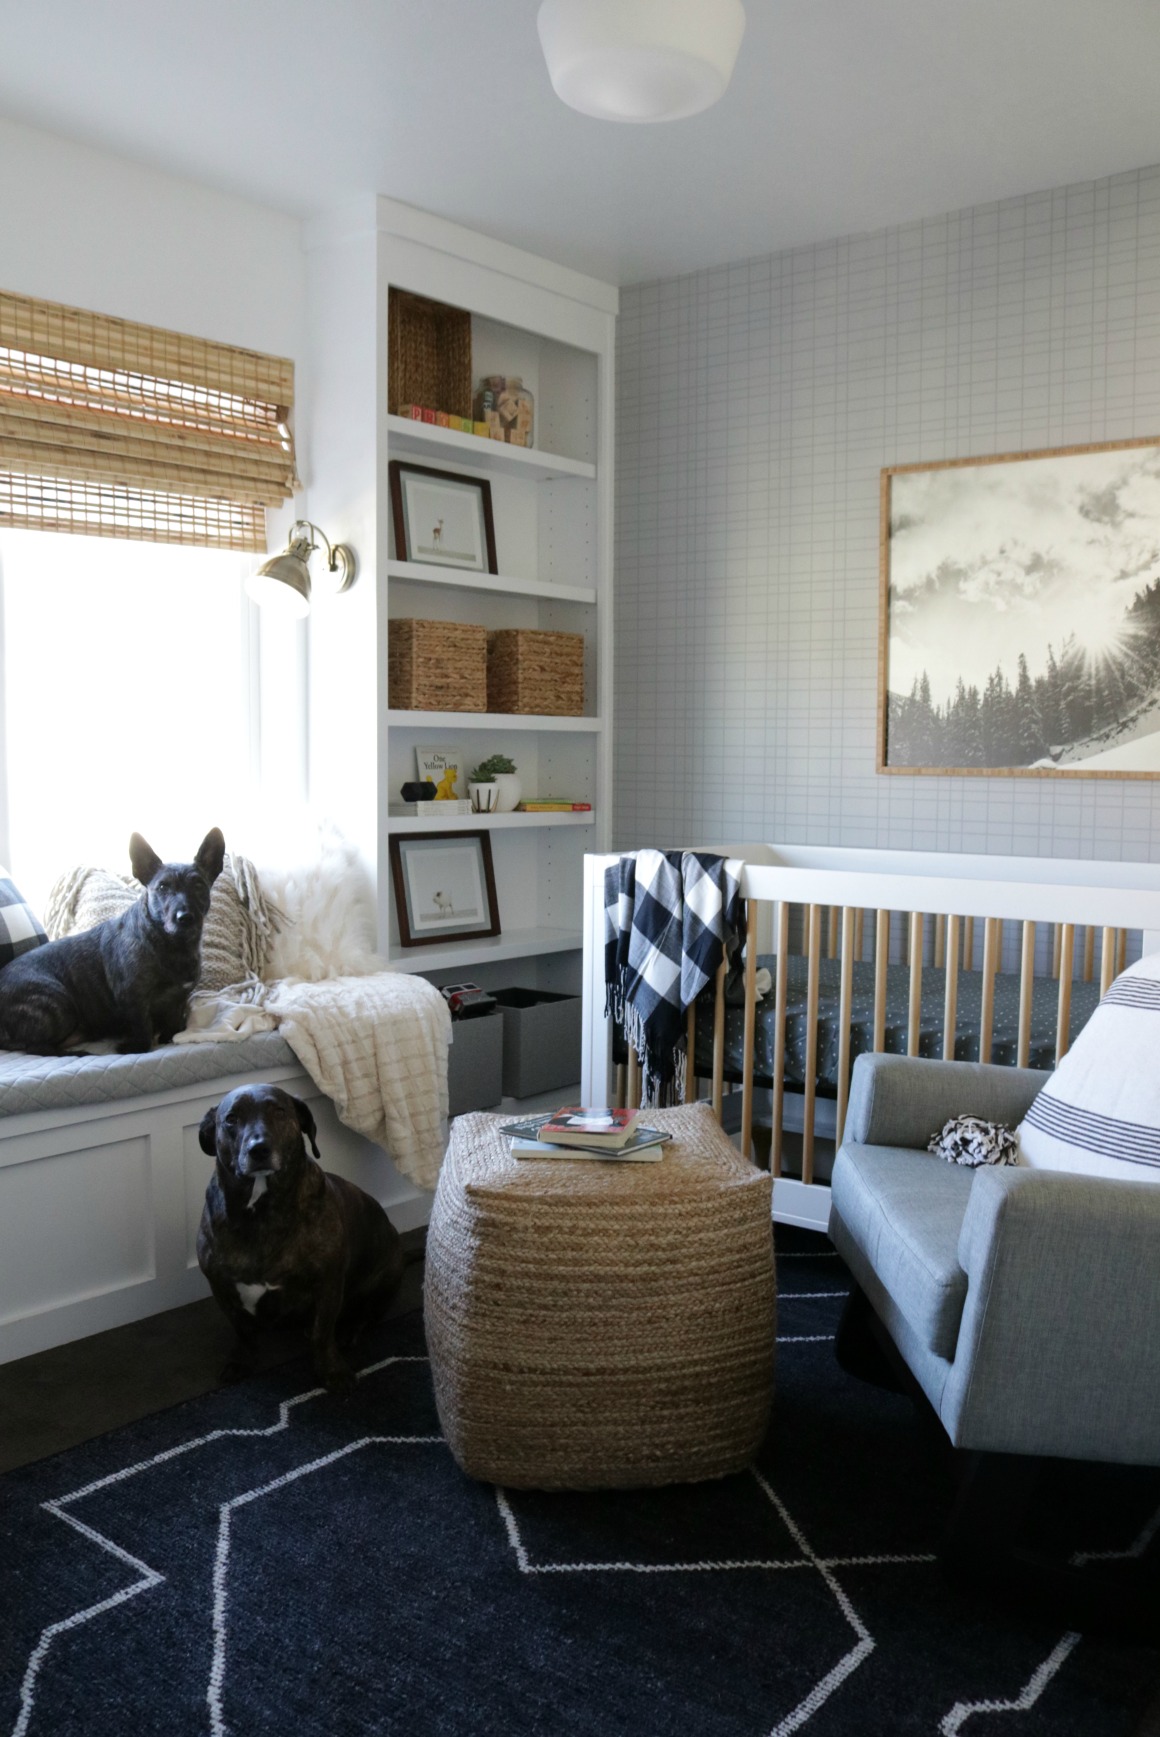
Nursery AFTER…
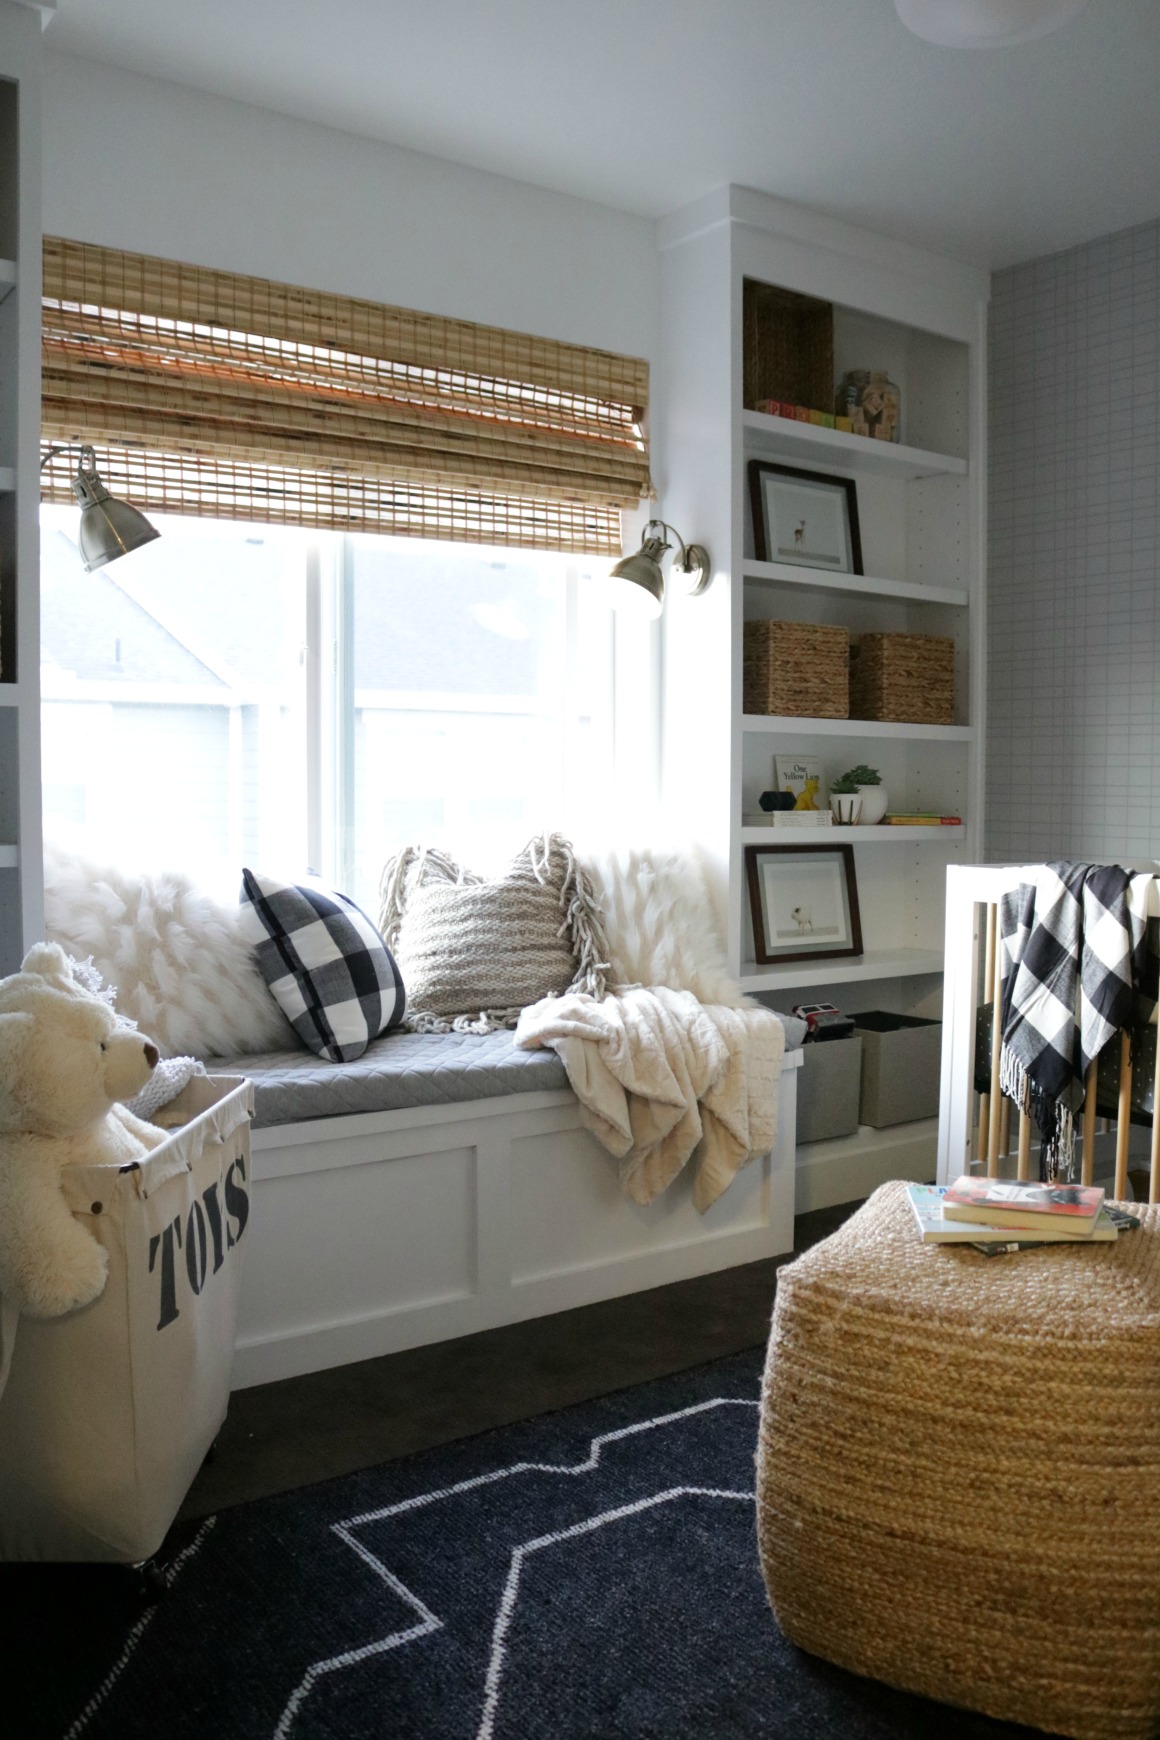
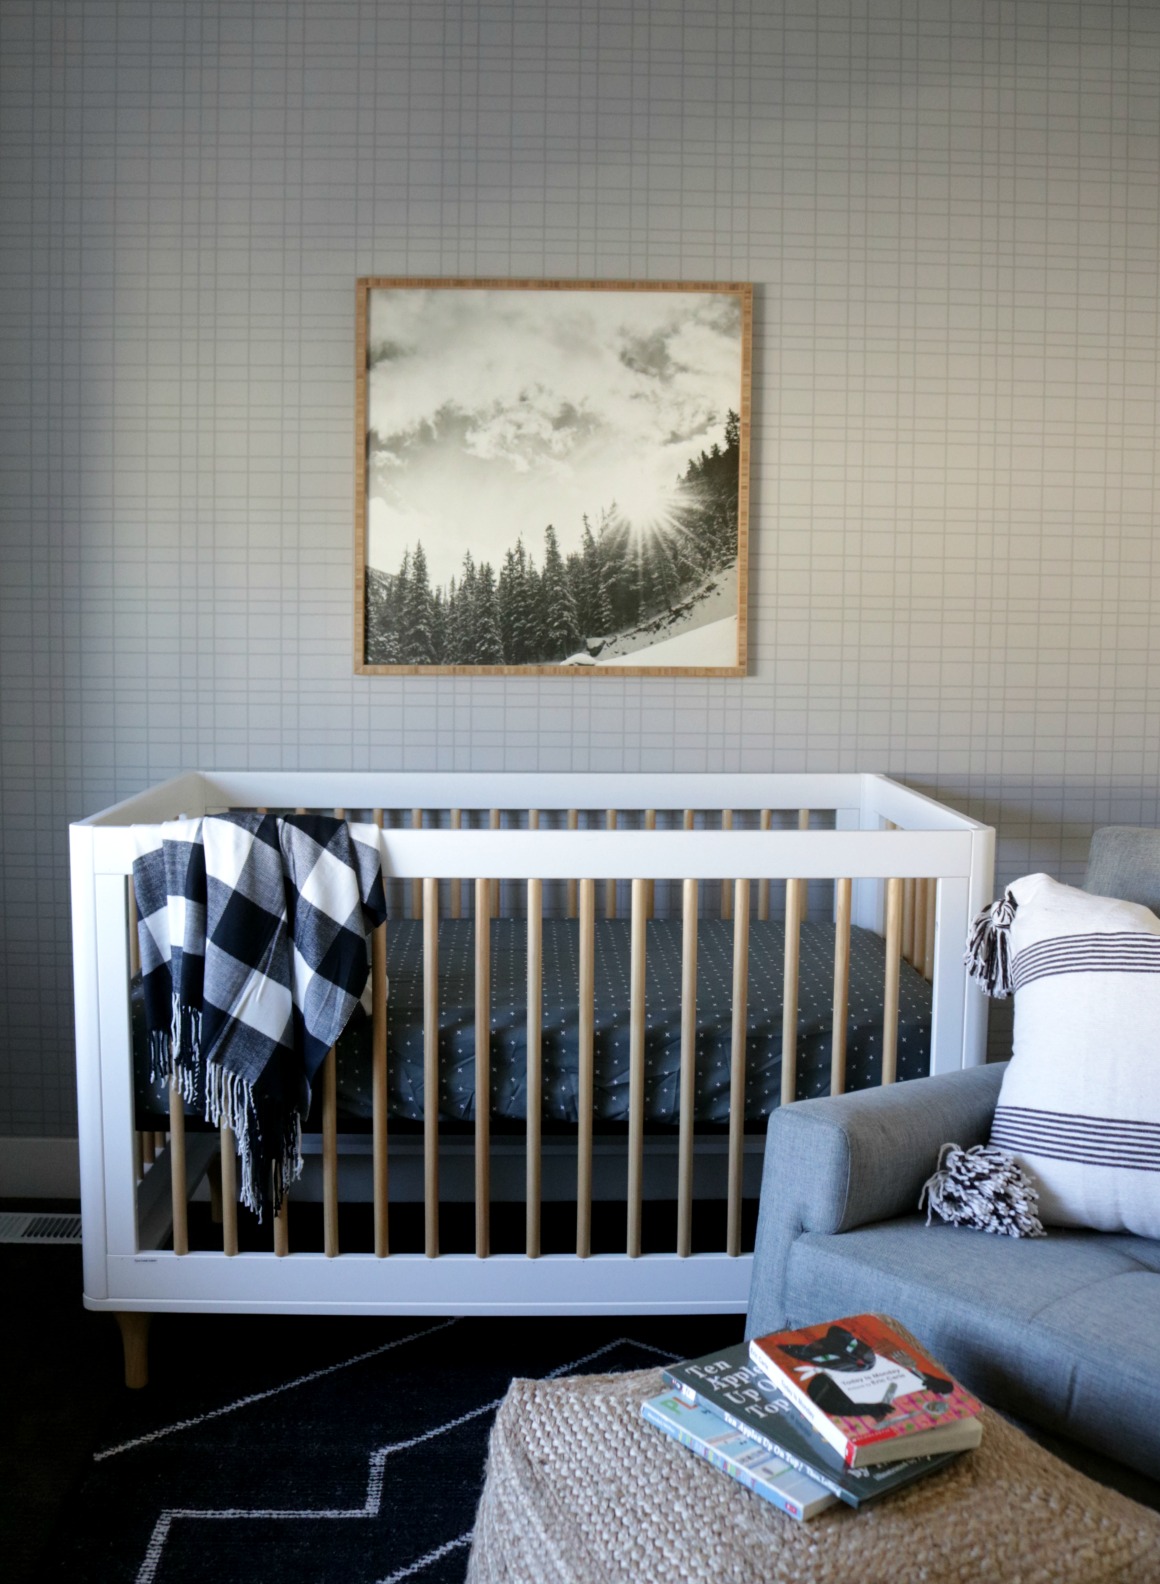
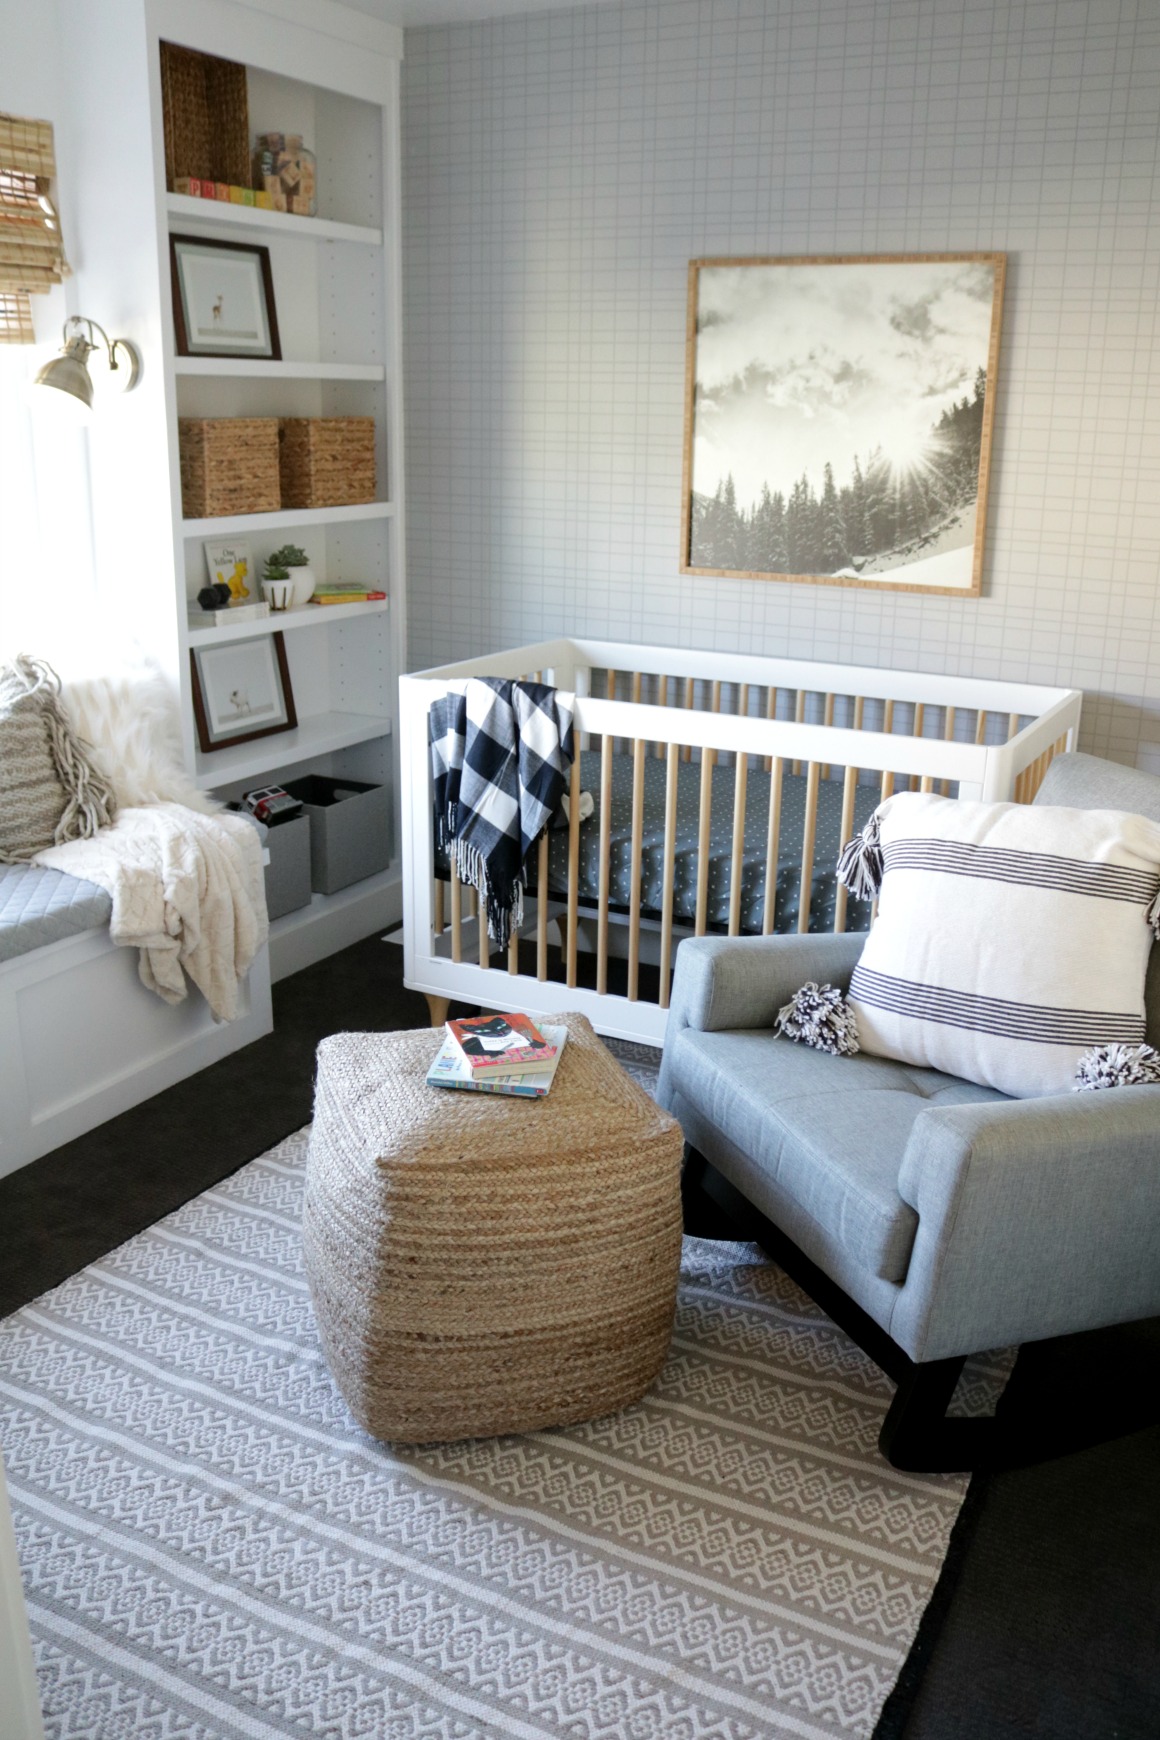
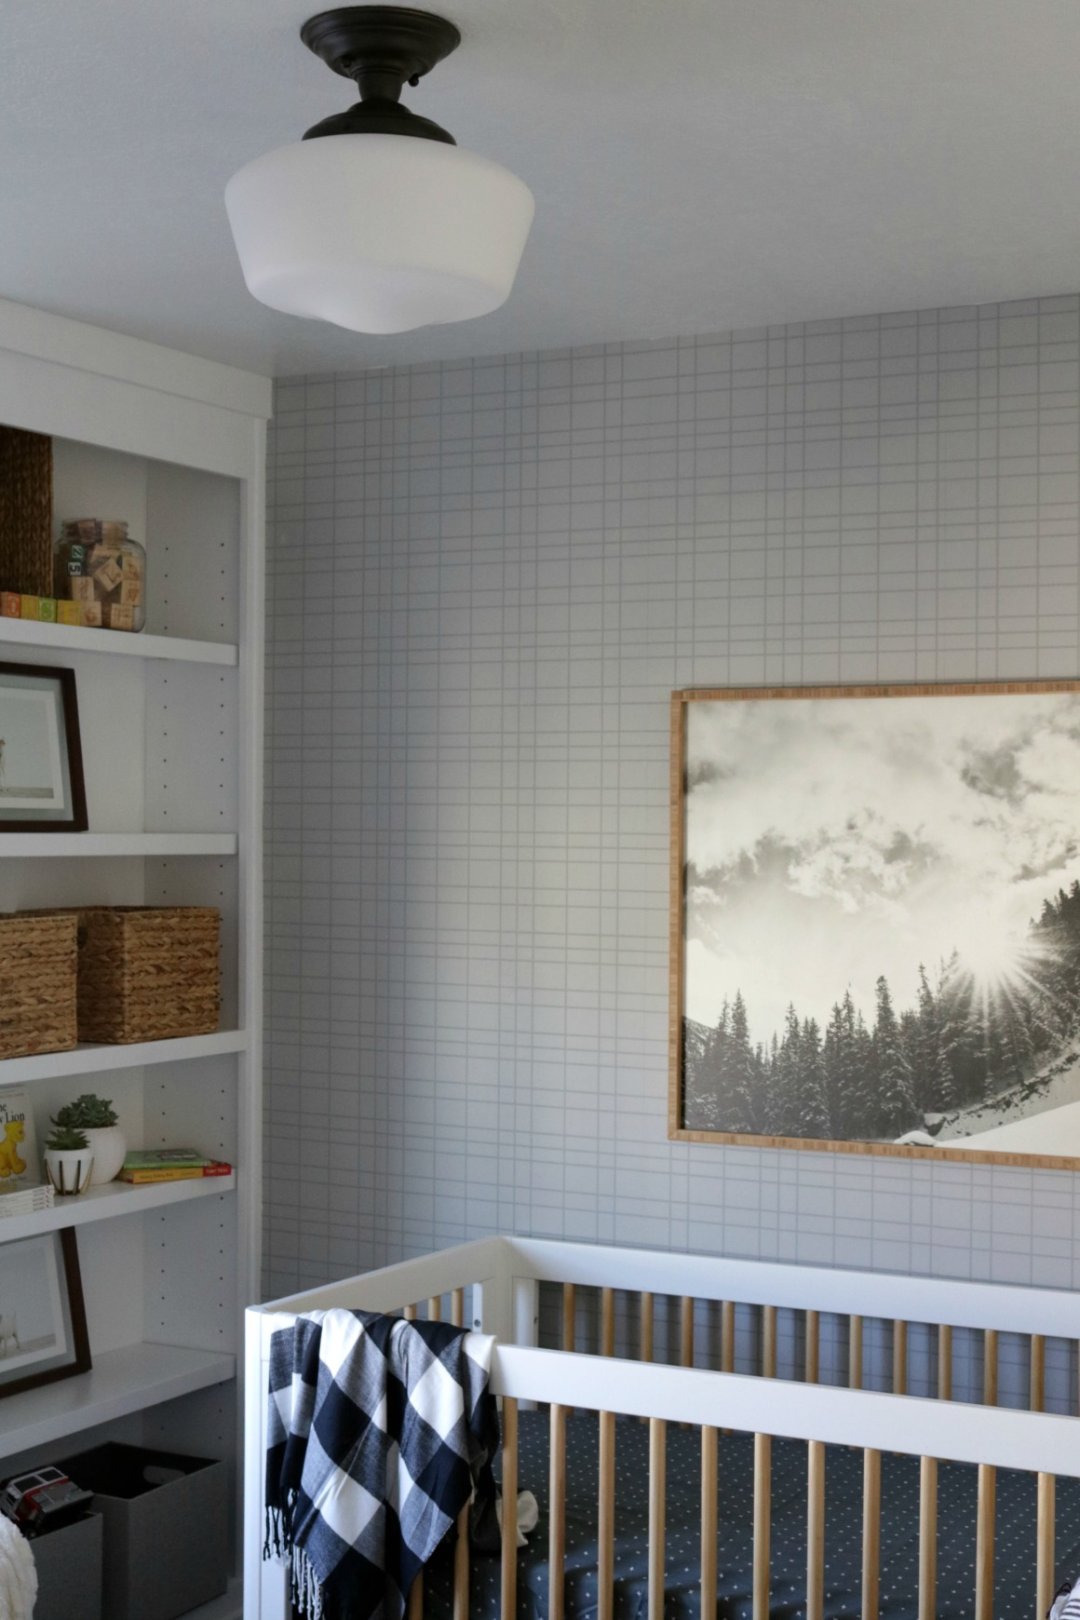
First thing, we painted the room in Pure White from Sherwin Williams and the ceilings (both in satin). It immediately brightened up the room. Then we wallpapered one wall with THIS wallpaper. It has a modern plaid pattern in a light smoke grey. This wallpaper would look so great in so many applications. I loved it for the nursery because it could grow with him and doesn’t seem like a nursery wallpaper at all. Really everything in this nursery, besides the crib could go in any space! (I will share a detailed tutorial on how easy it was to wallpaper on a separate post.)
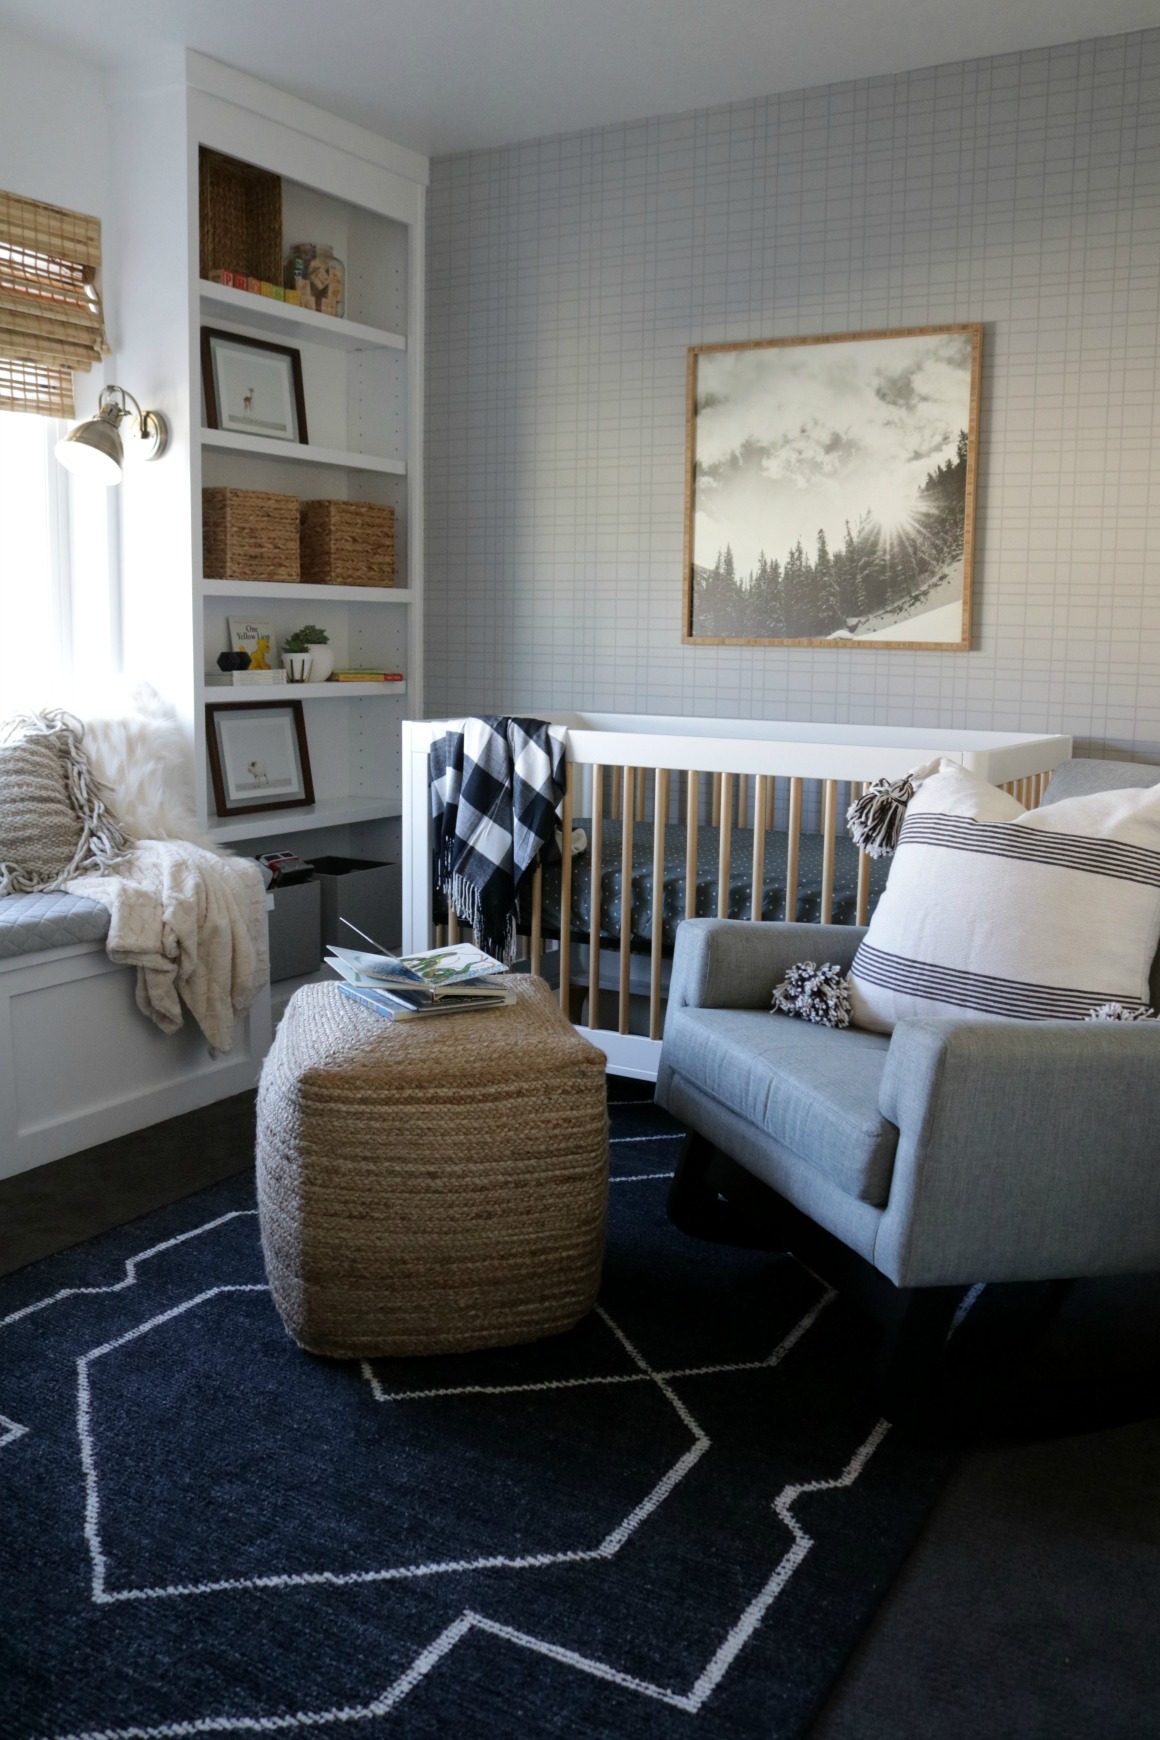
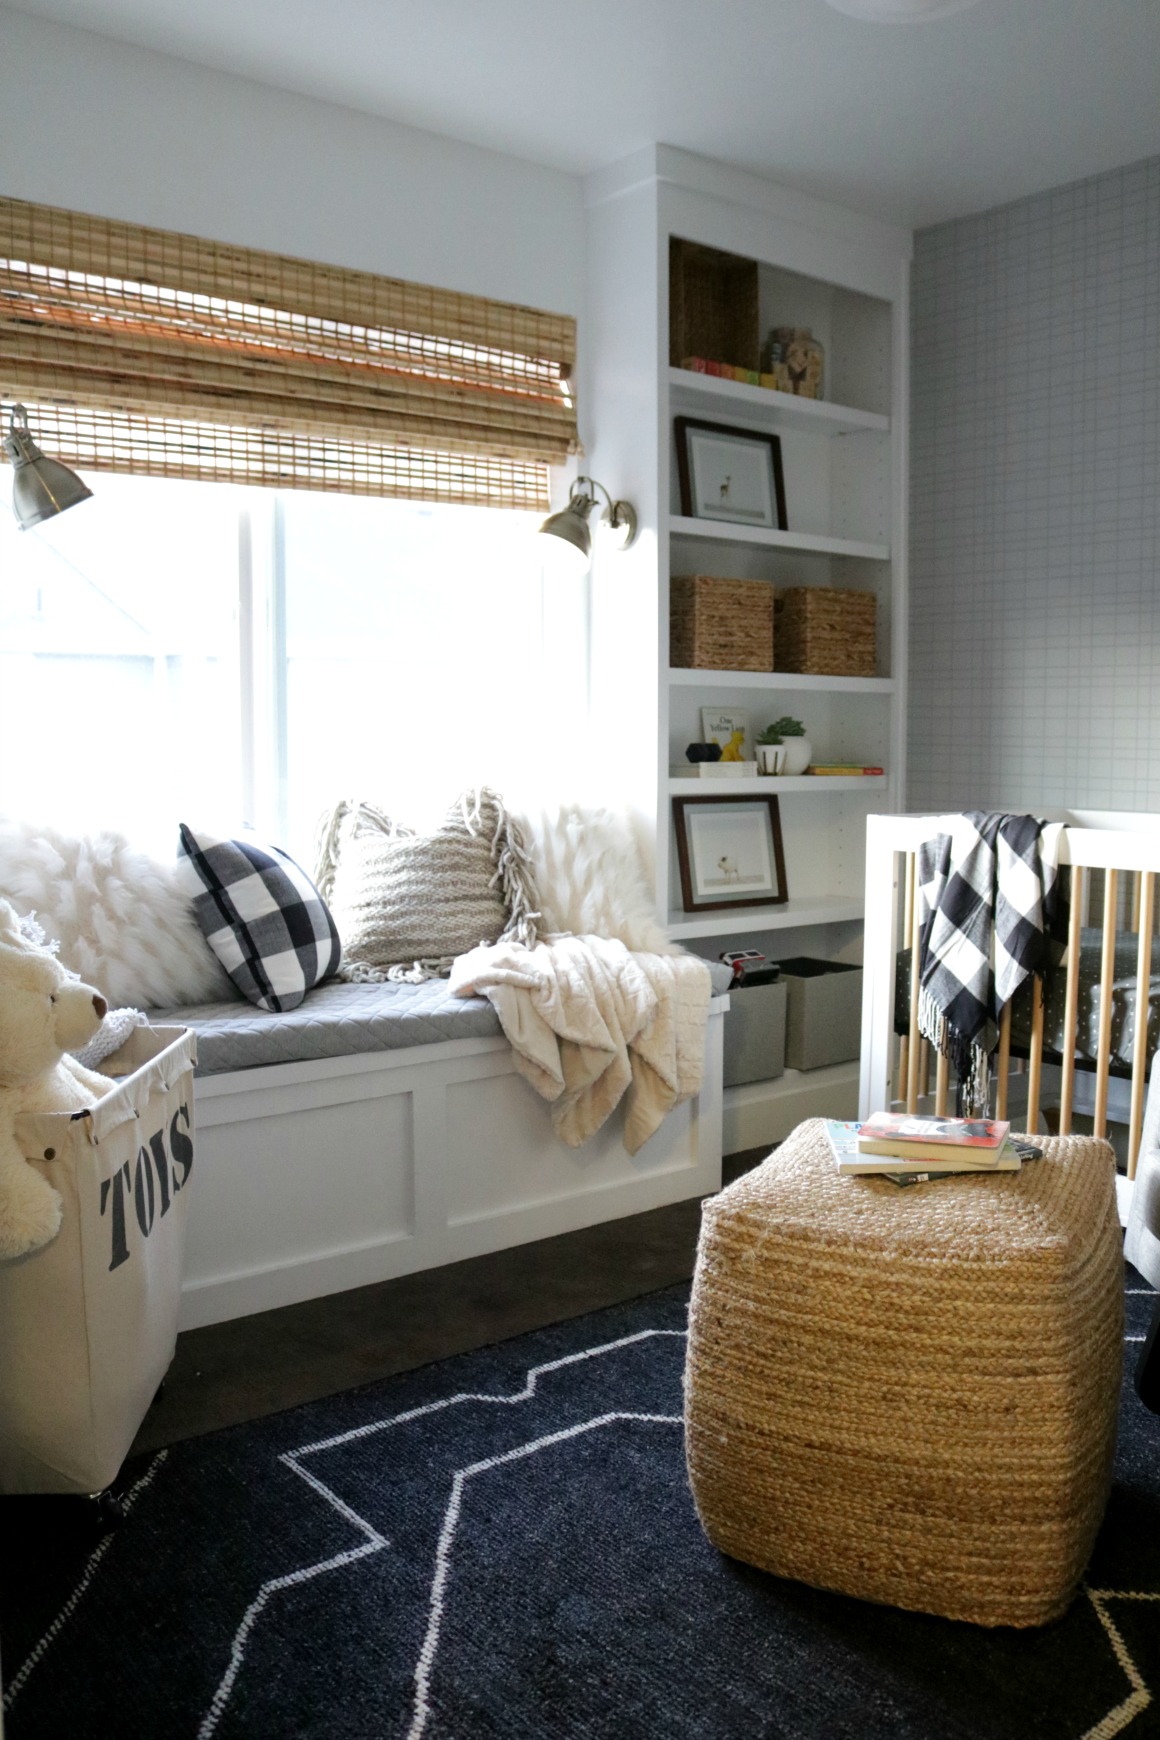
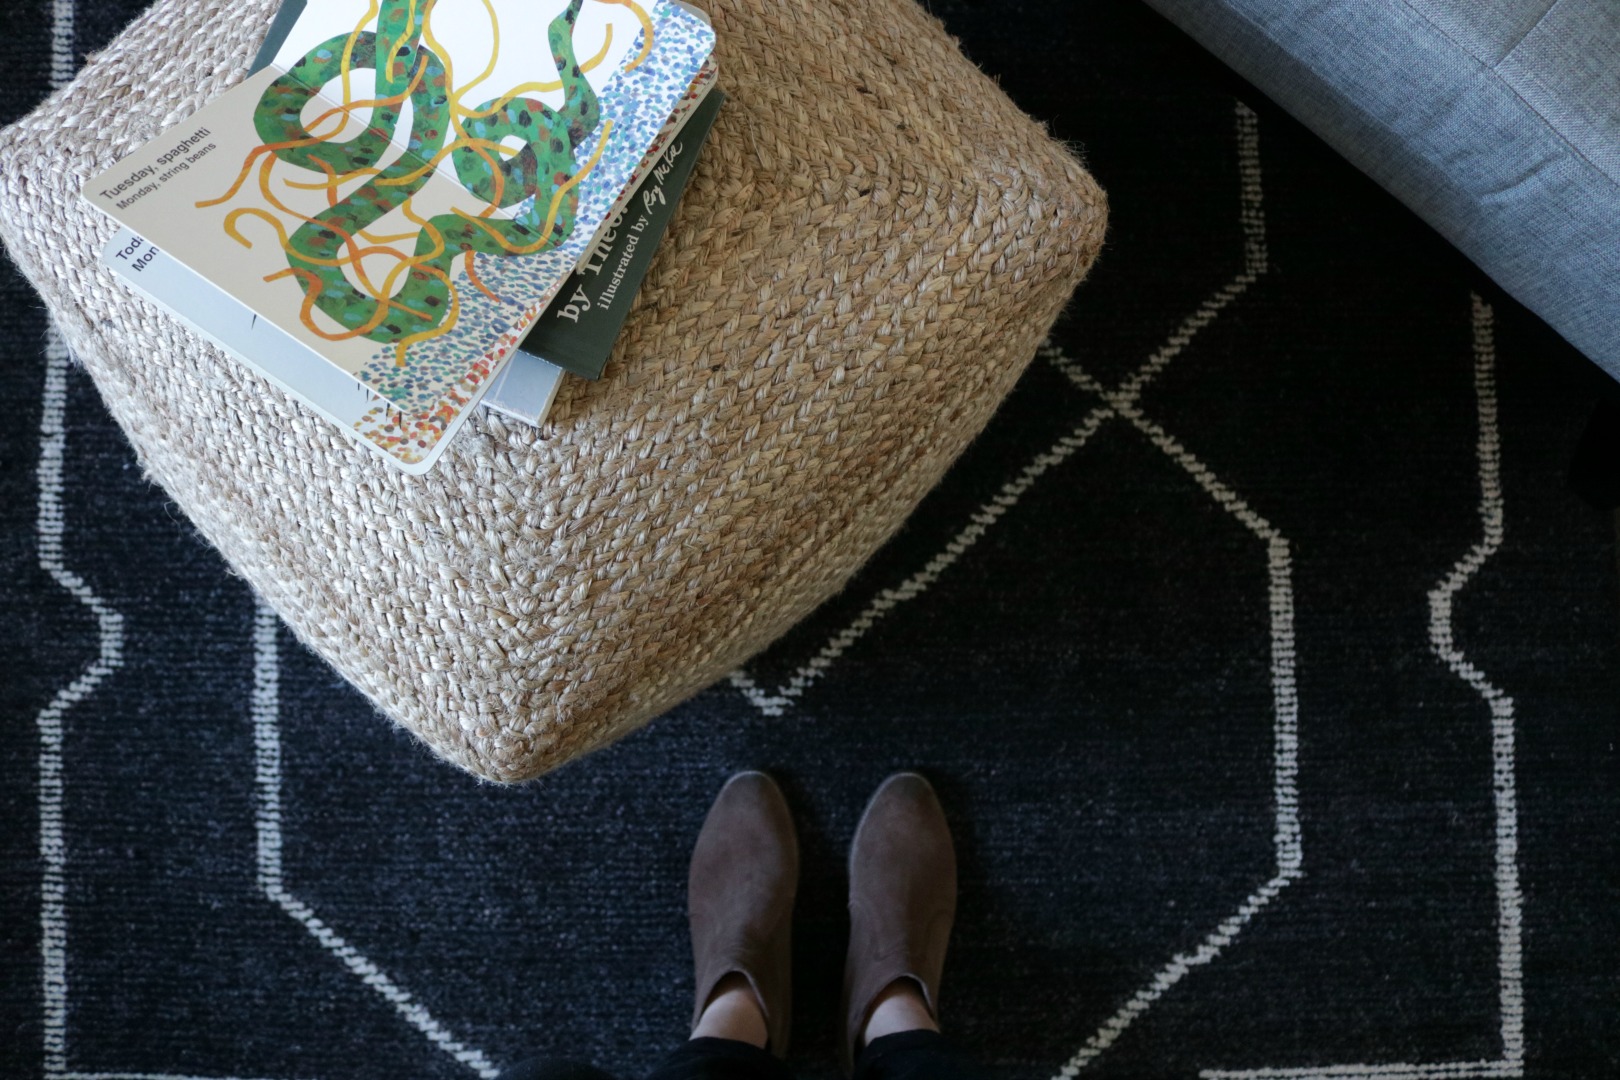
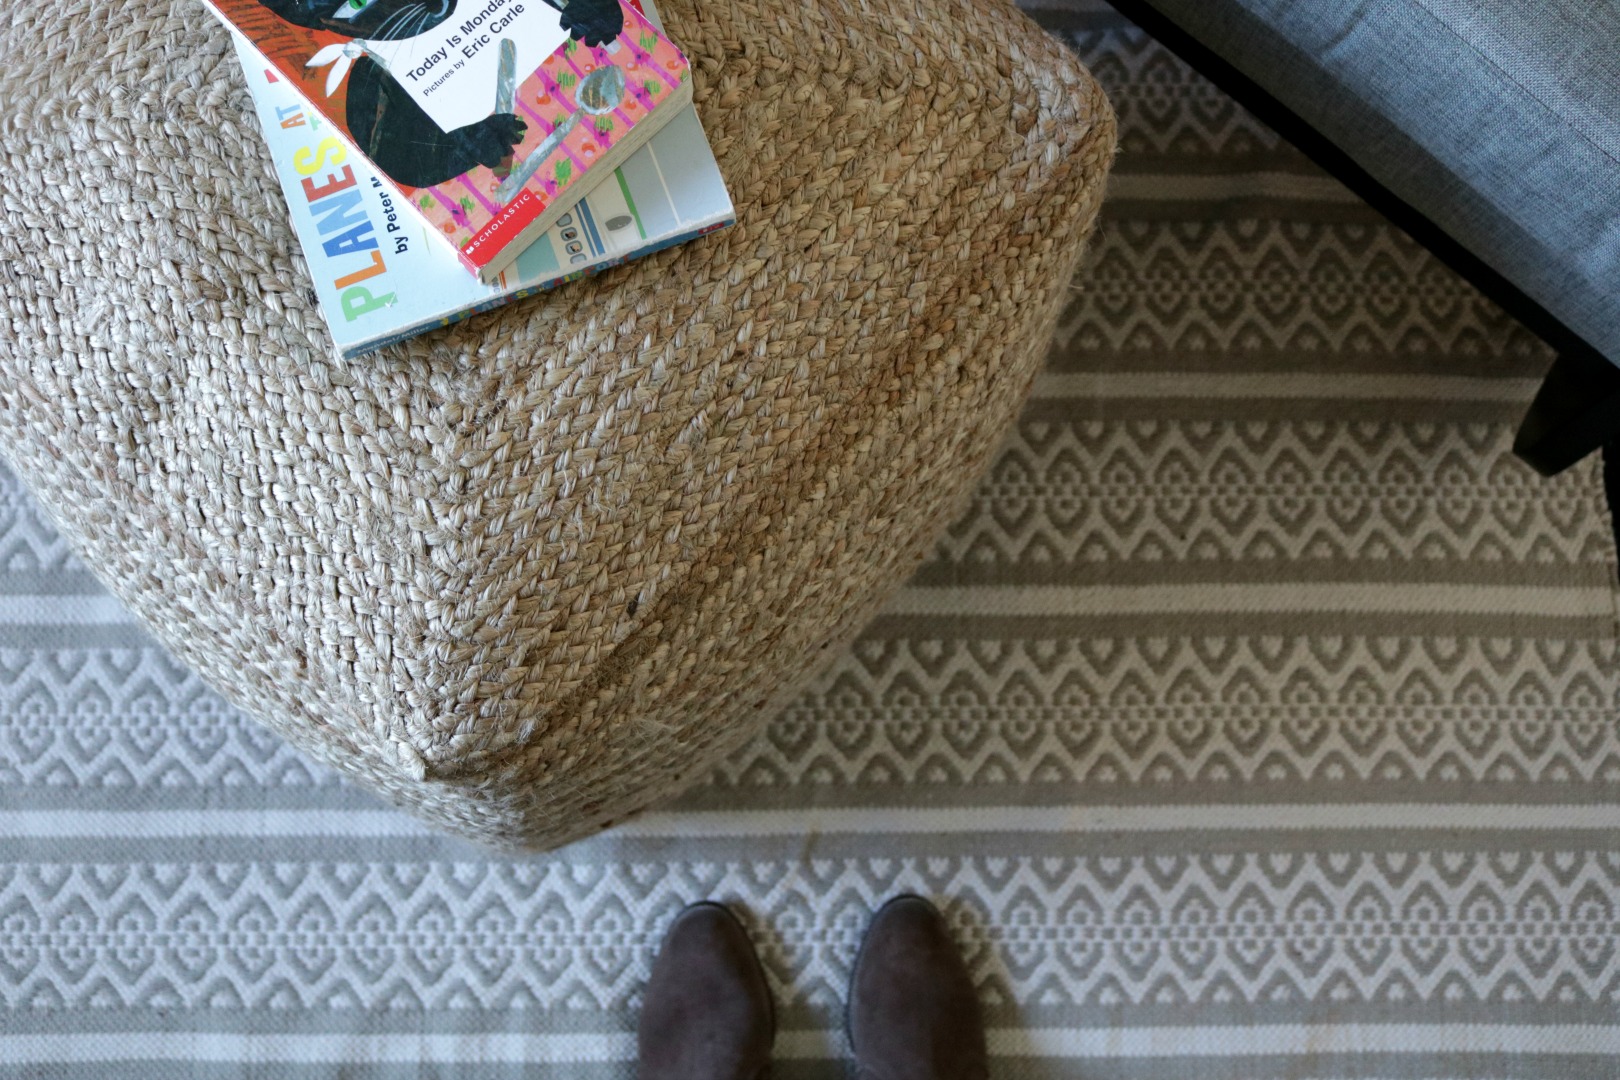
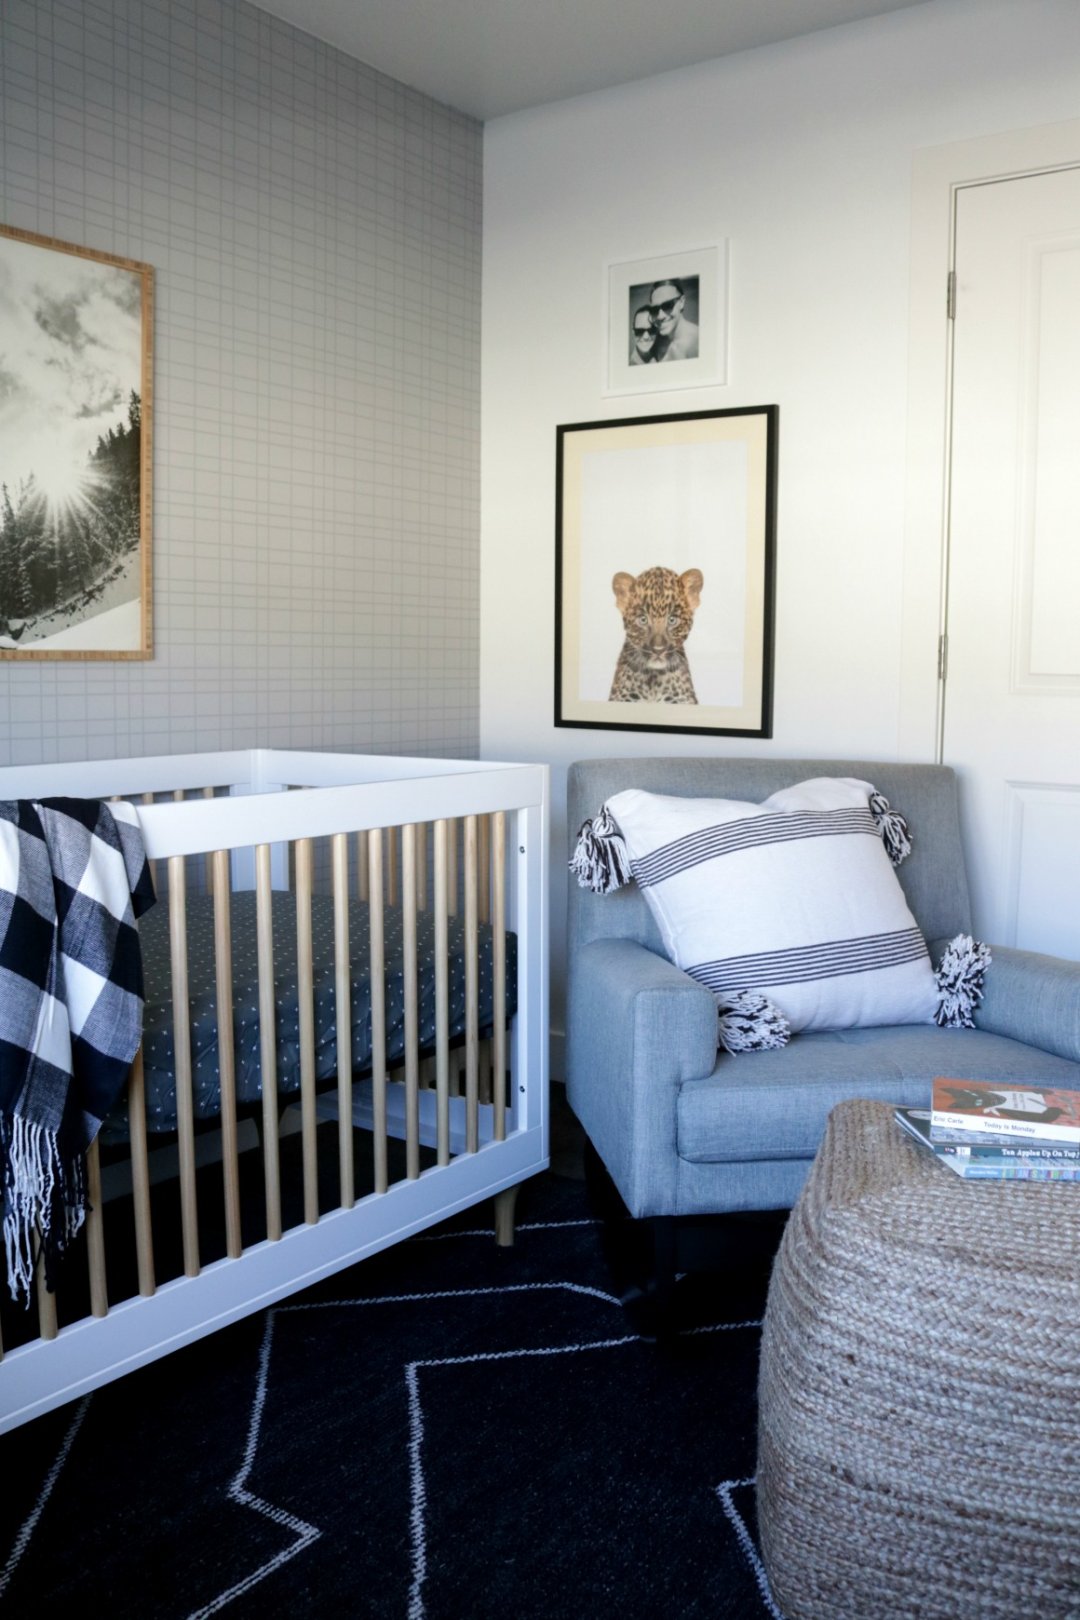
Besides the big DIY projects we tackled in this nursery. The essentials were the crib (they already had) and a nice rocking chair. I have a really similar rocking chair and really like the size and the modern lines. The fun jute ottoman from Lowe’s is a piece that ties in a lot of the warm tones in the room and can easily be moved around.
I still can’t believe we finished it two days! My brother-in-law, Corey (Kevin’s brother) played a HUGE part in this makeover. He owned a wood floor company (he sold that business) so he is very handy and talented in building and working a saw. Just a helpful, smart guy. We were lucky to have him on this project.
Another Nursery BEFORE …
Nursery AFTER…
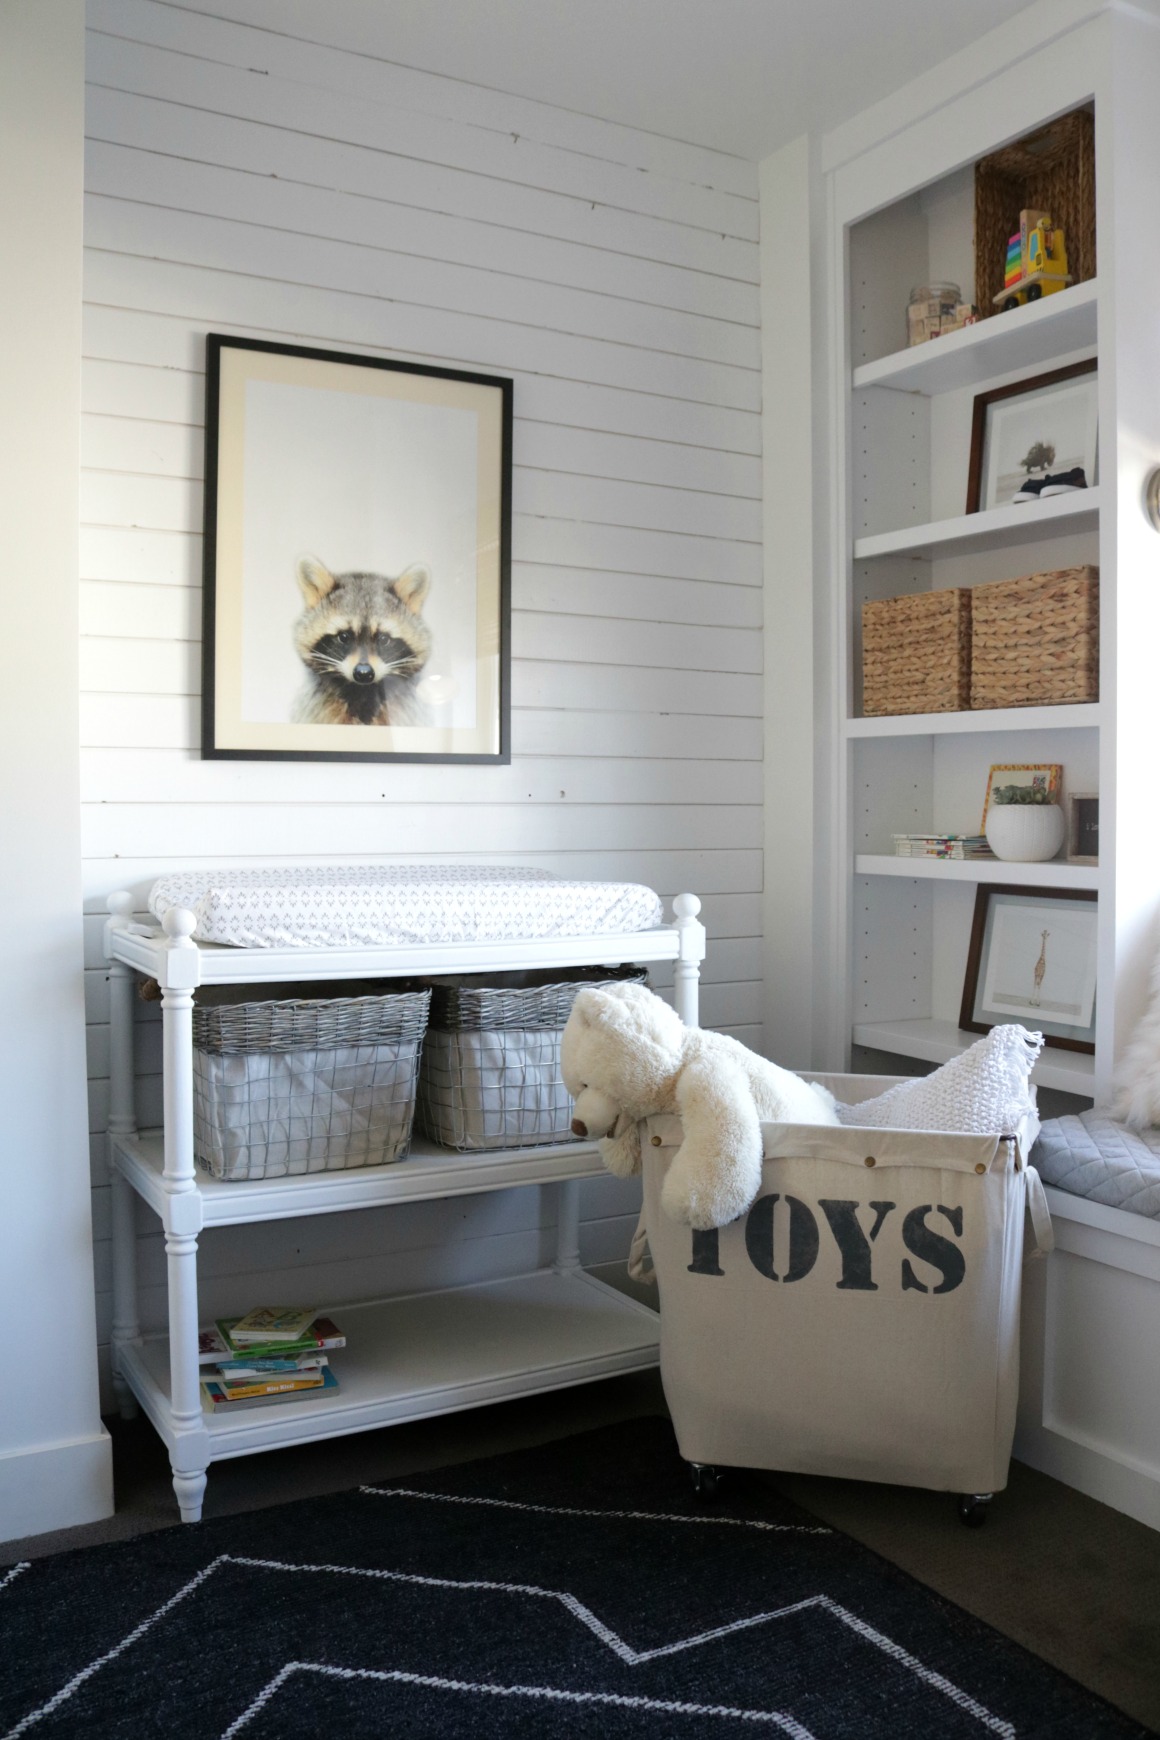
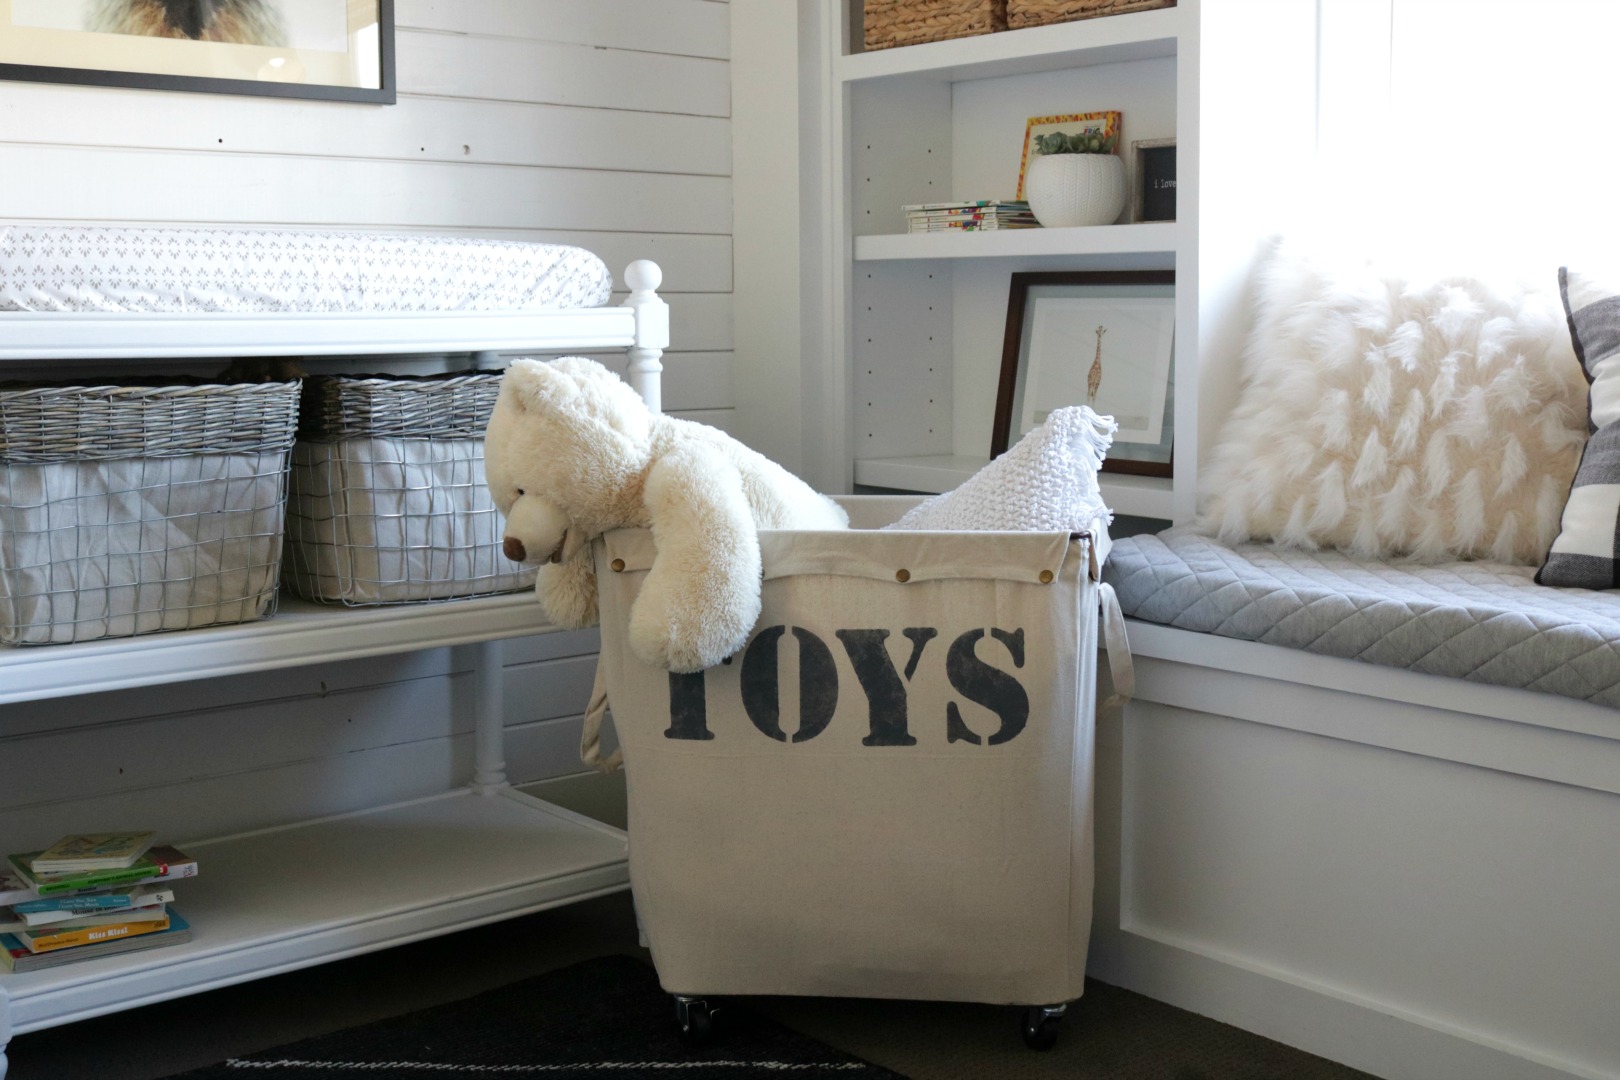
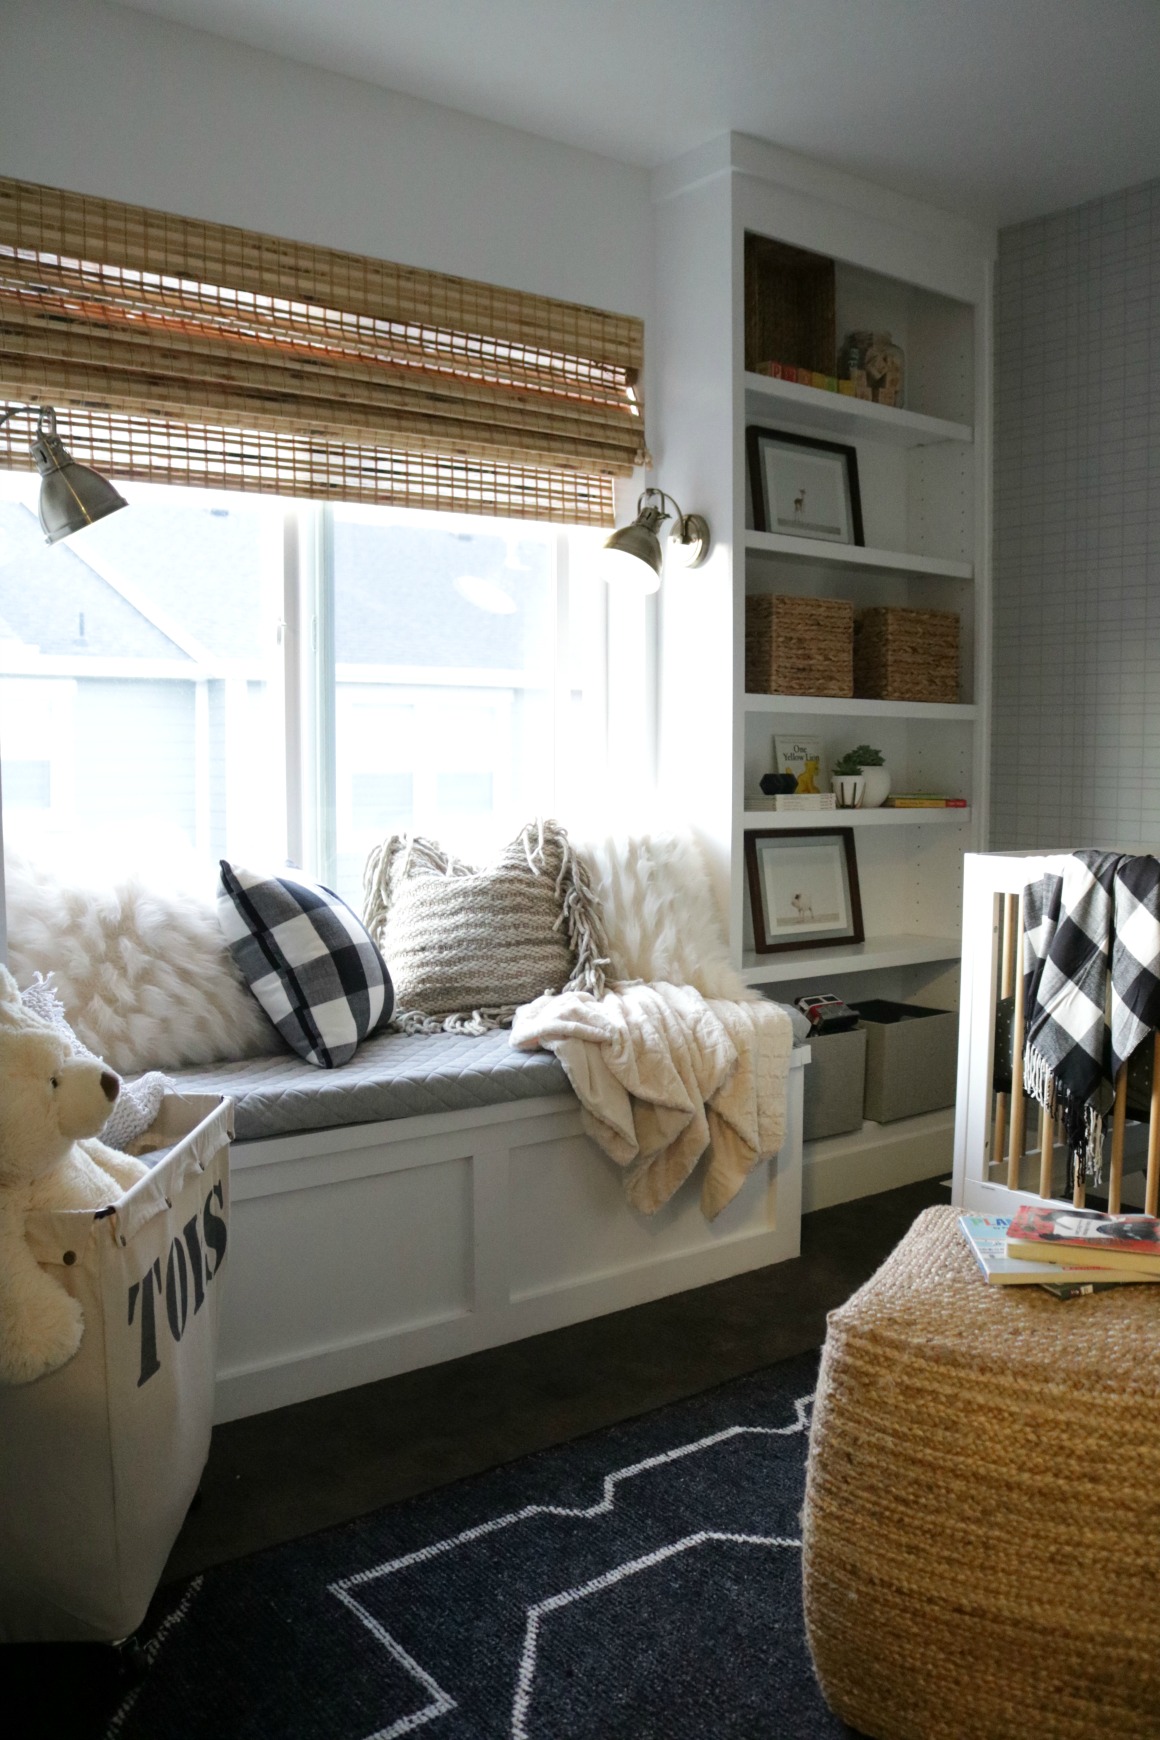
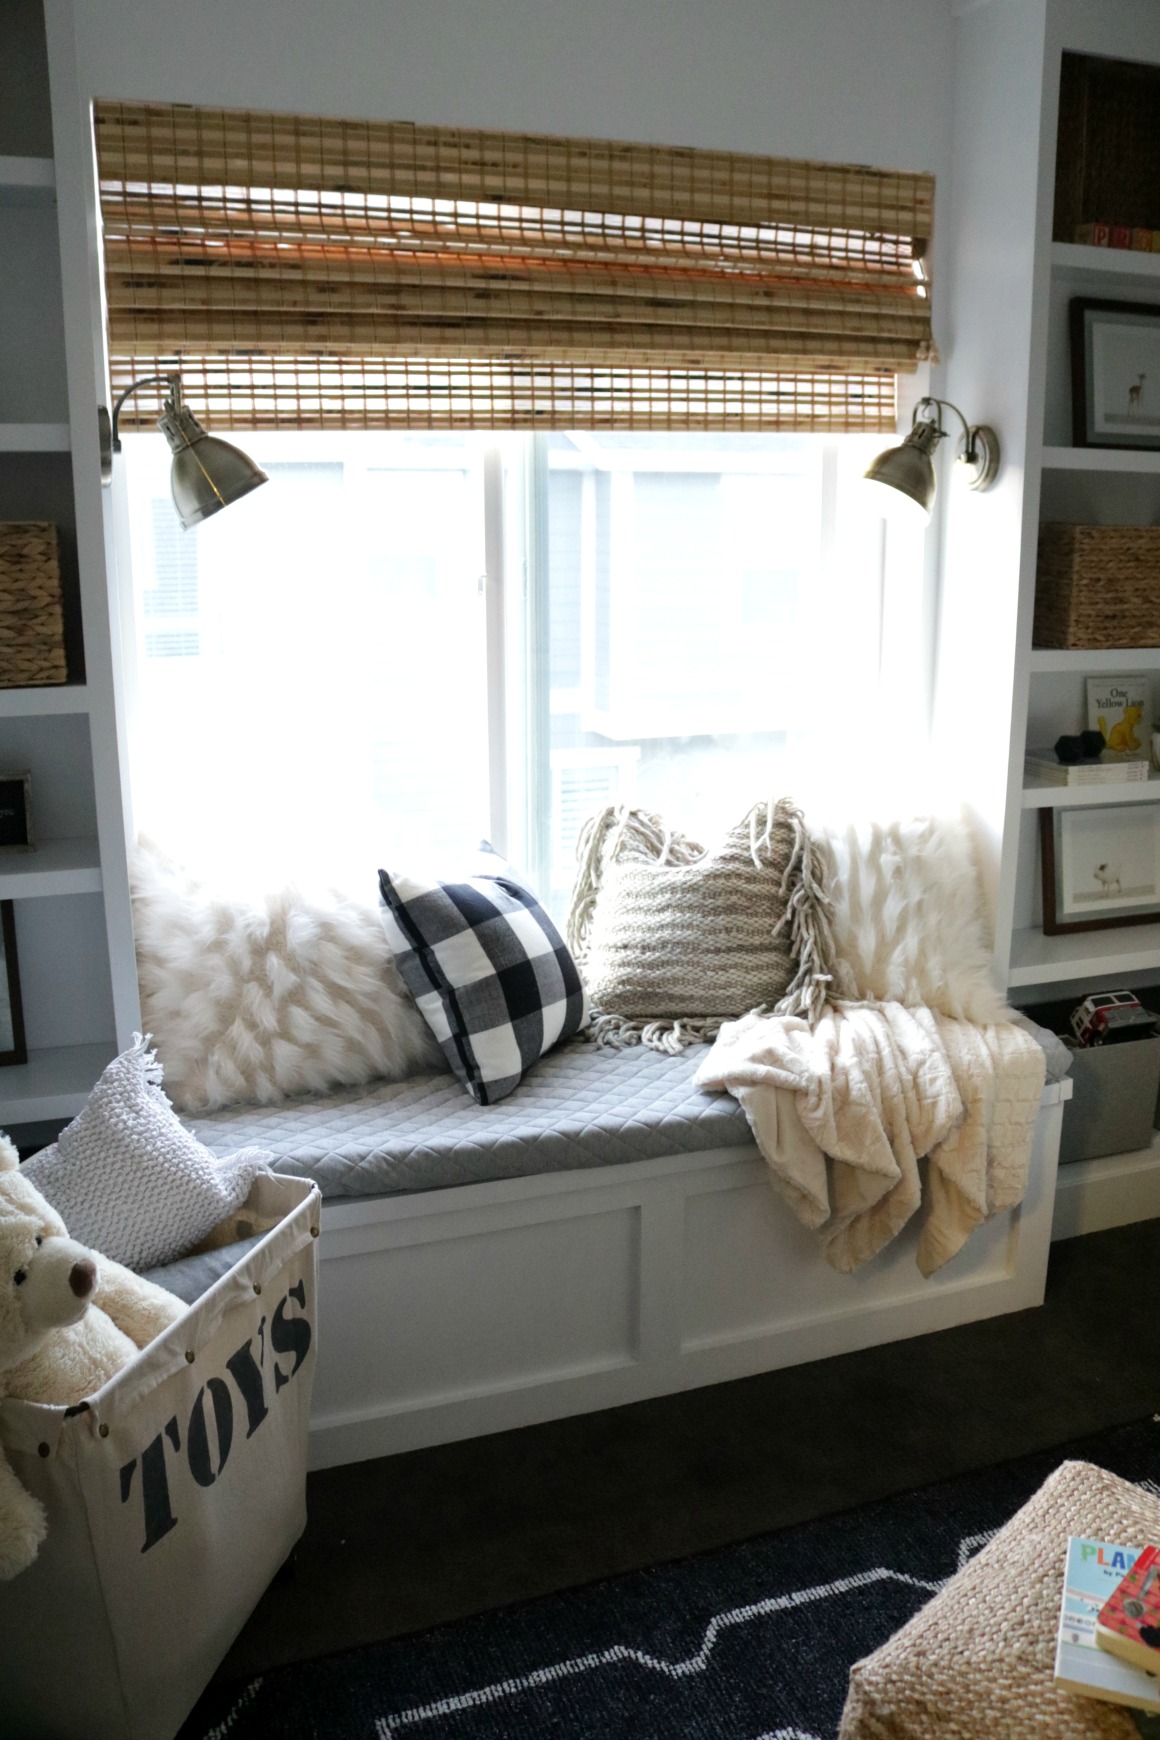
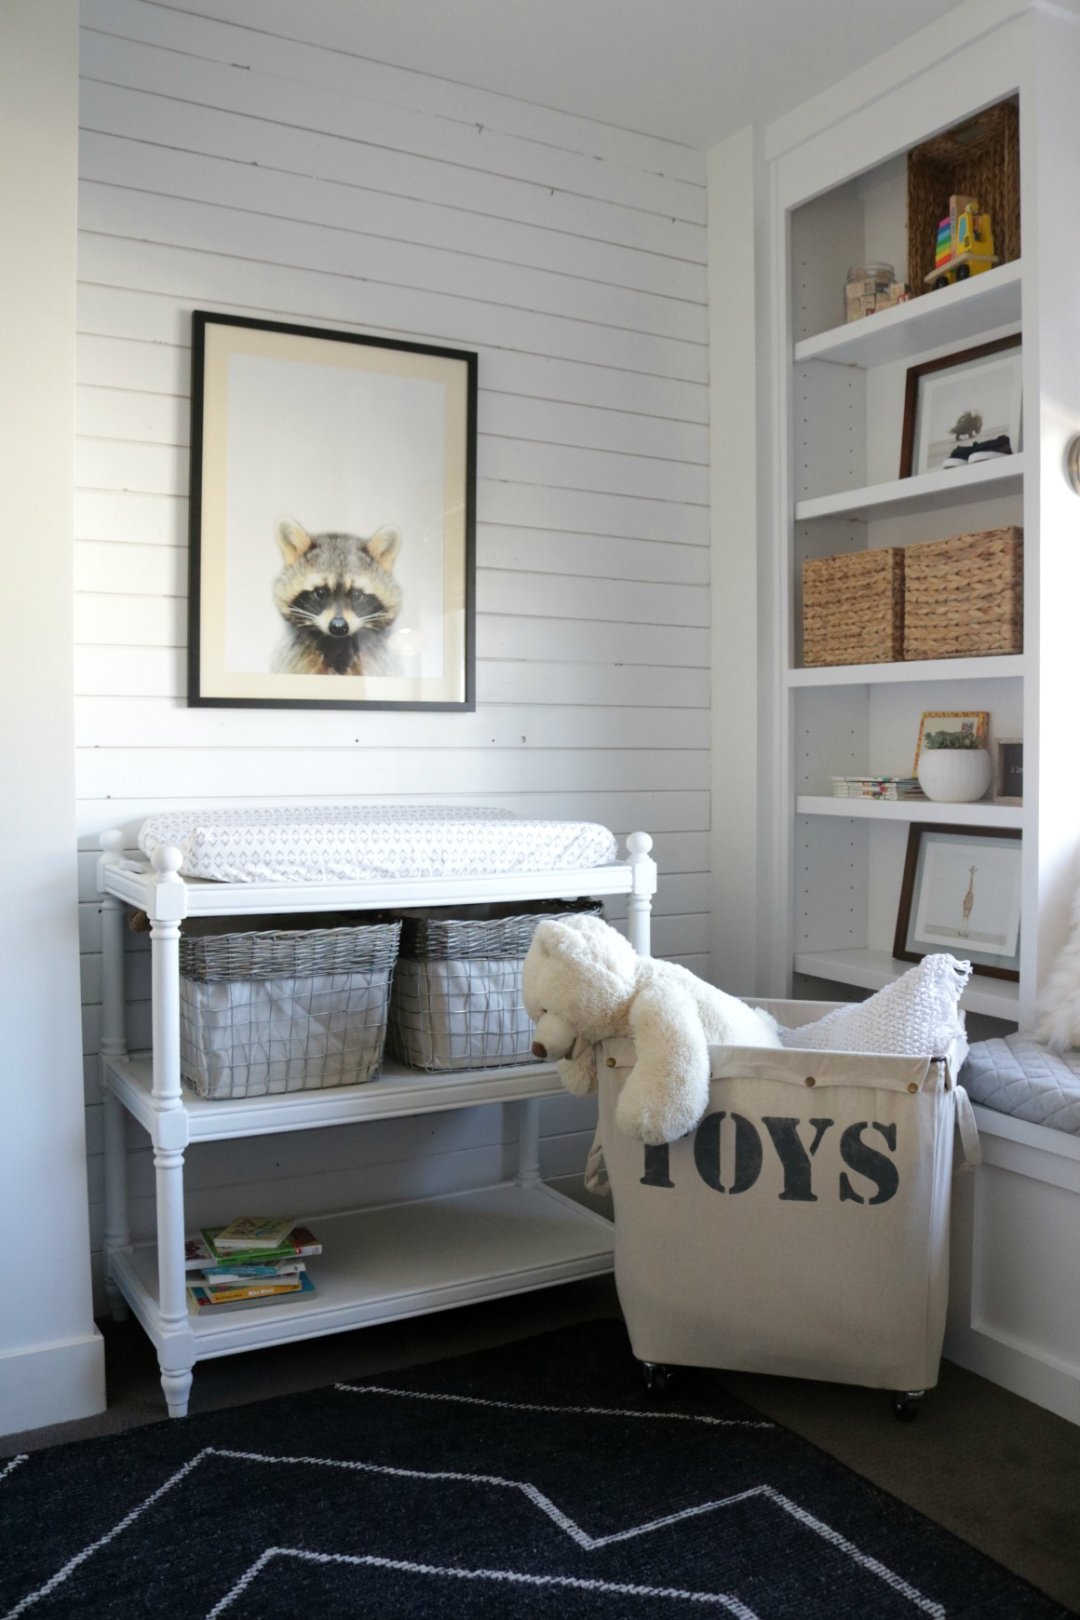
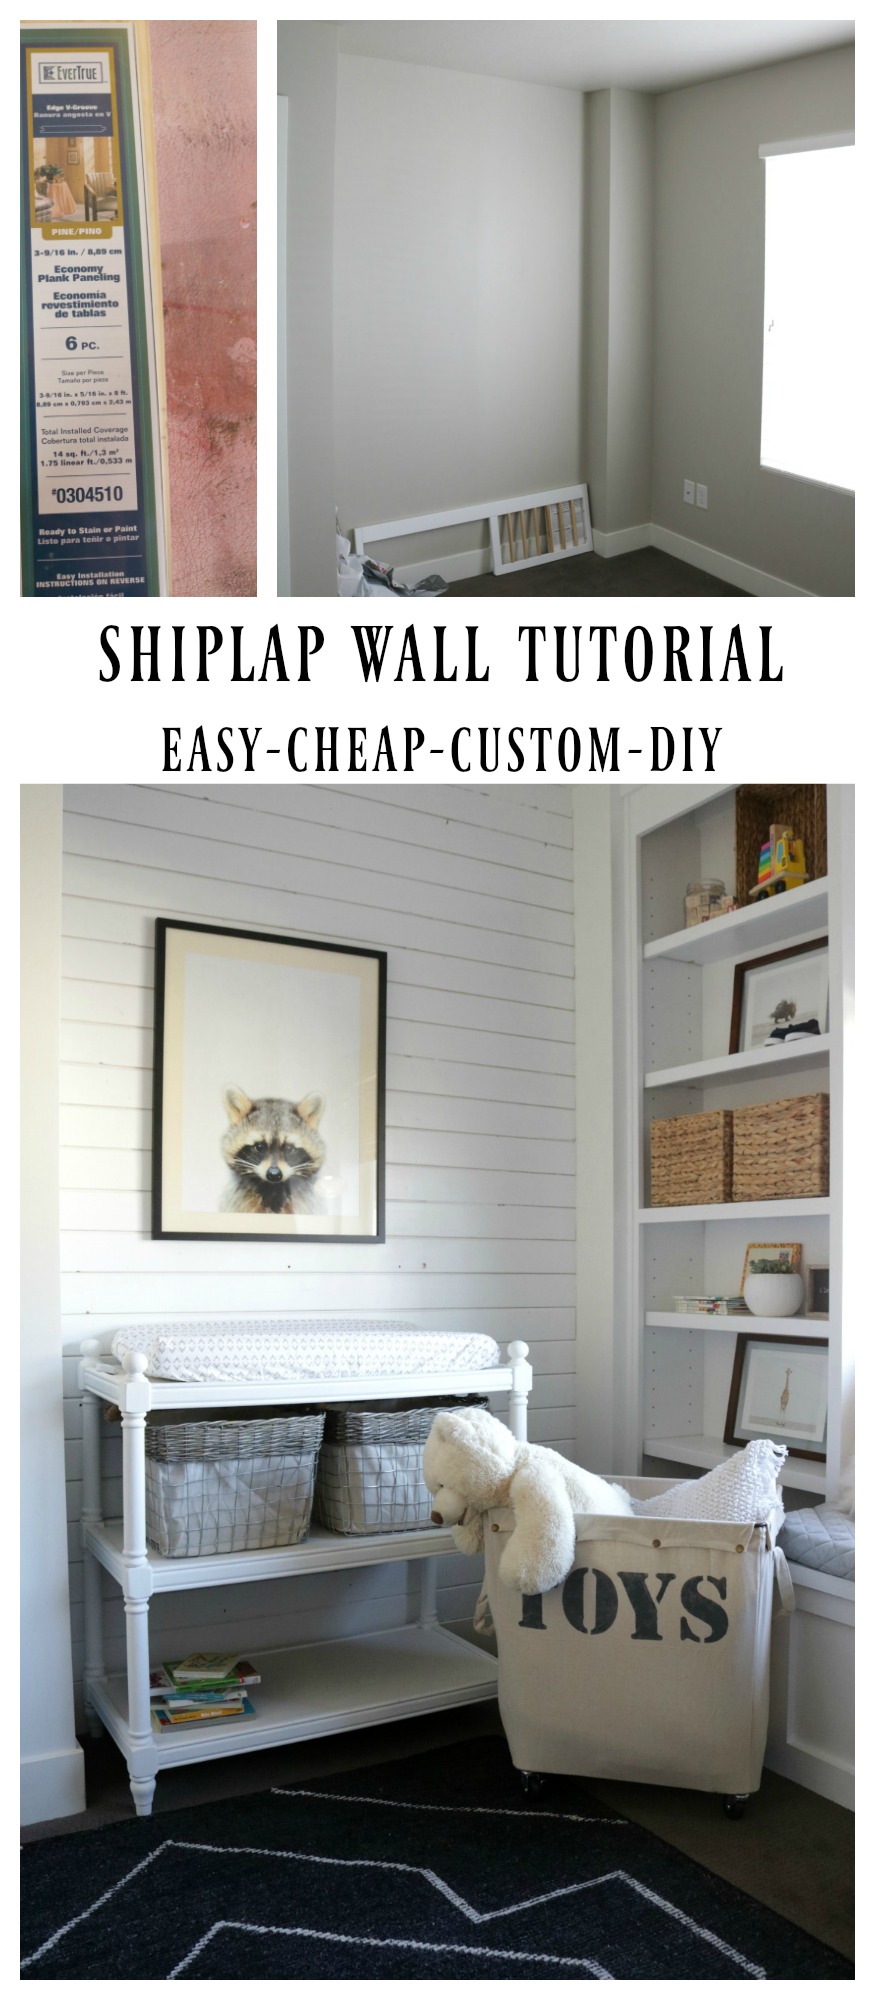
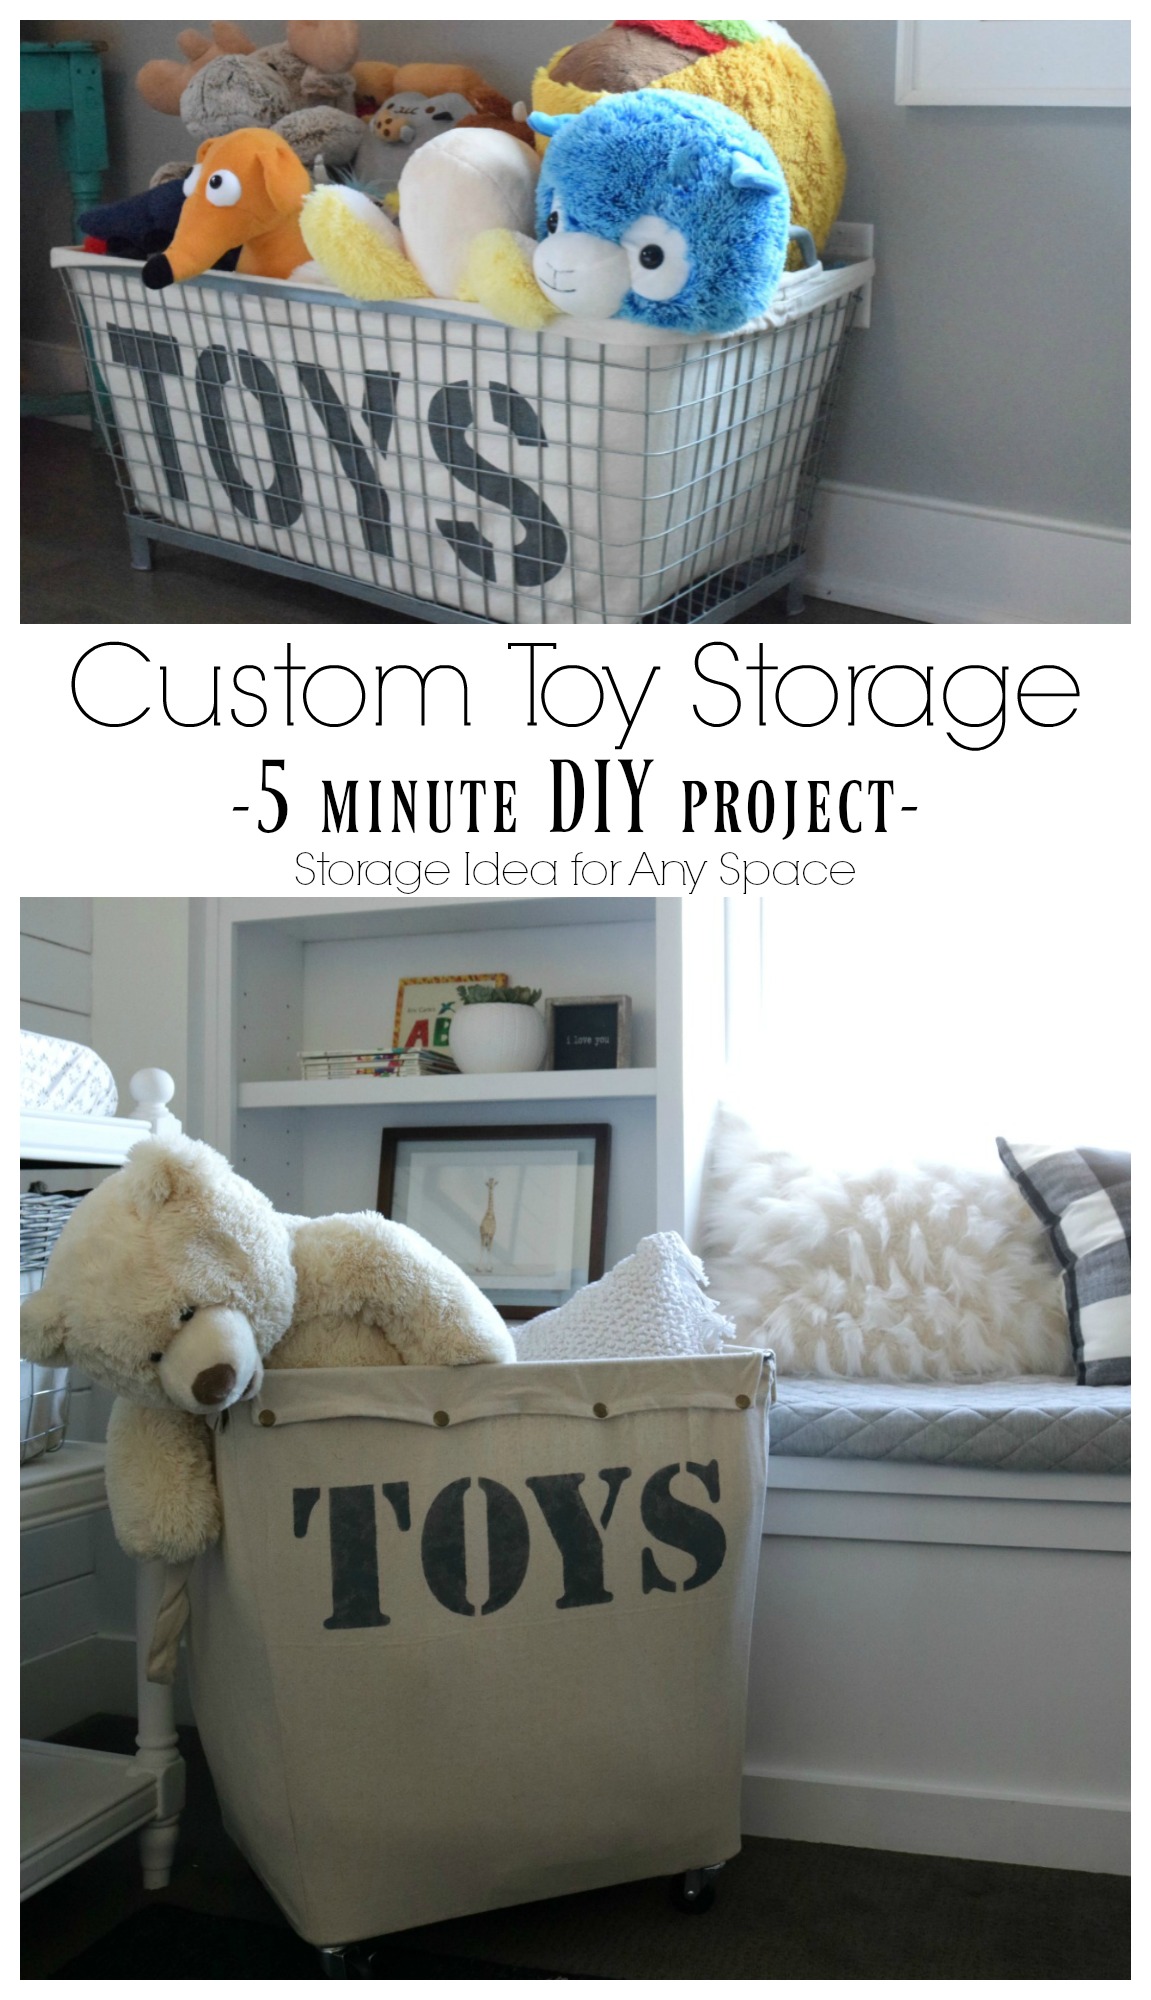
I shared a full tutorial on the wood plank or “Shiplap” wall HERE. It went up so quickly. We did use different paint for the wood planks and for the built-in-bookcase and window seat. It is Oxford White (semi-gloss) from Sherwin Willimans. I wanted there to be a slight difference from the walls. We also primed the bookcase and window seat before painting. The helpful guy in the paint department at Lowe’s suggested just one can of paint and primer and it was exactly what we needed! (I did a little DIY project on that Toy Hamper you can find HERE)
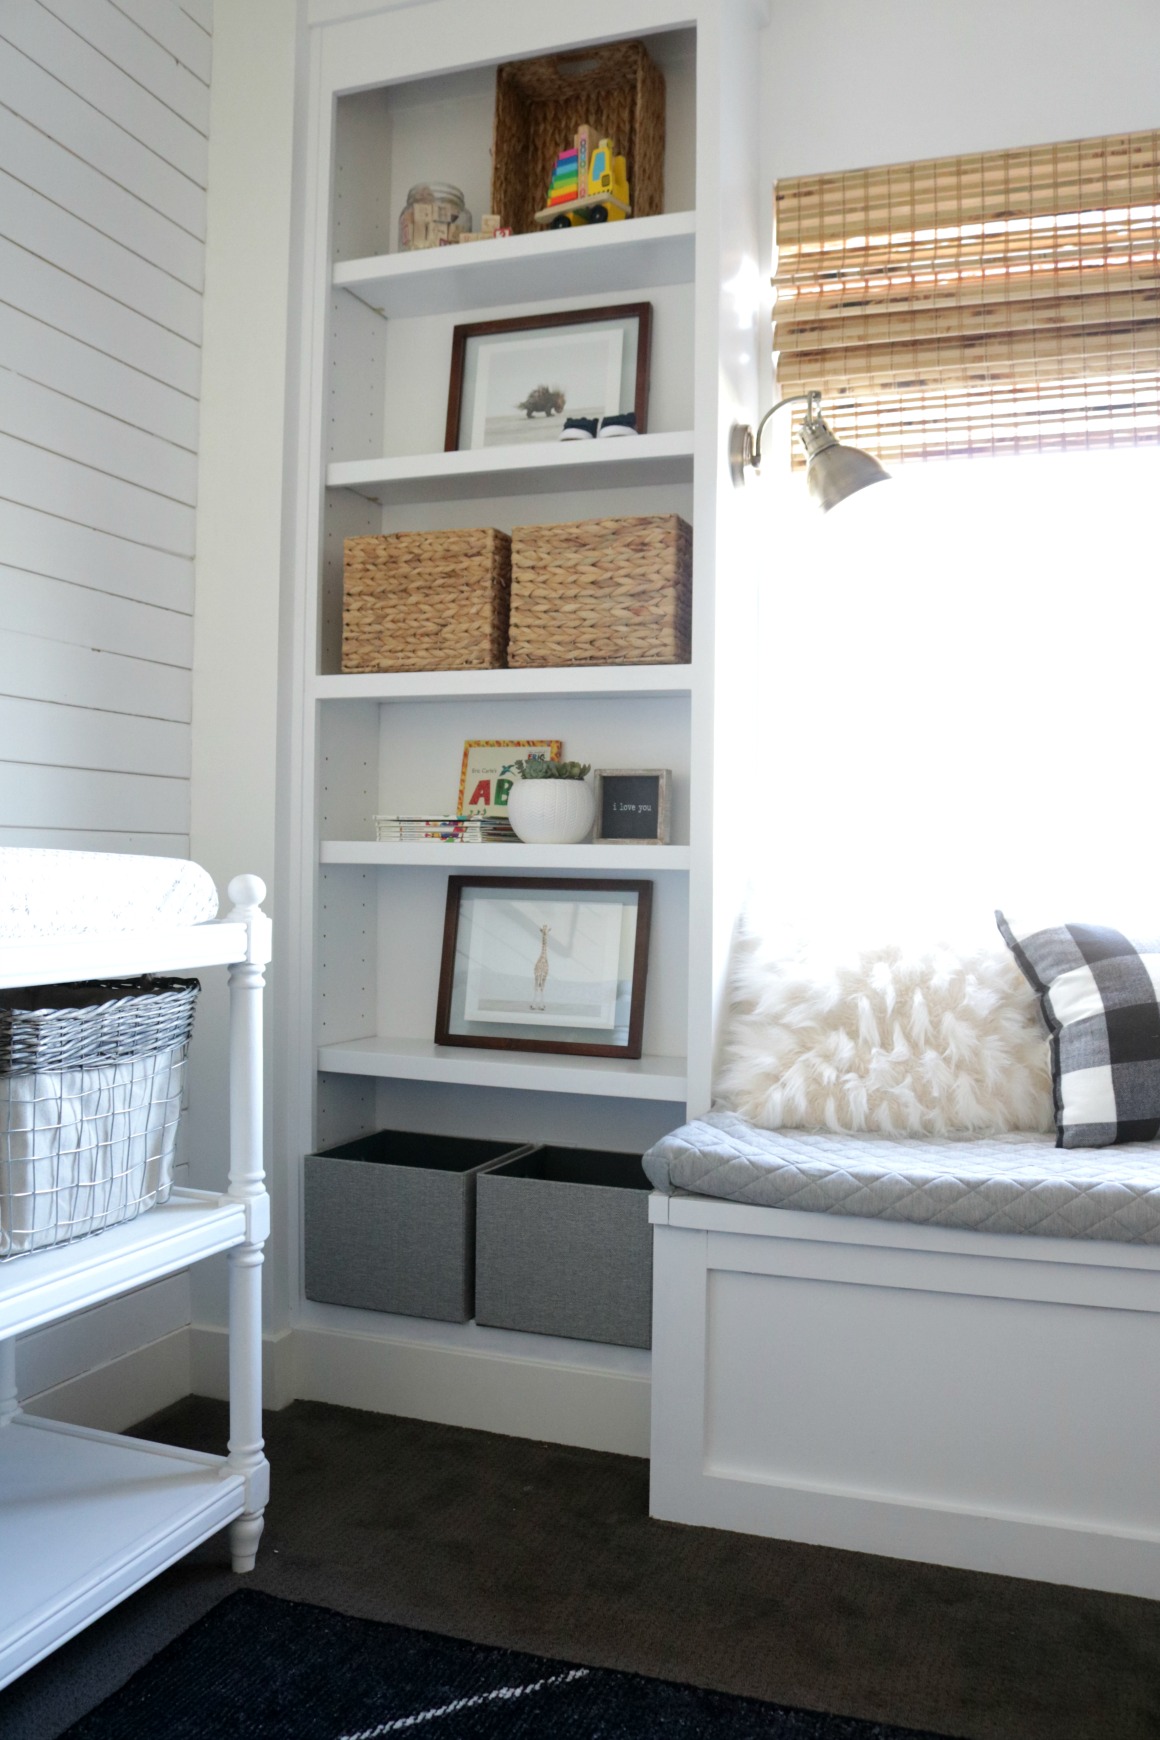
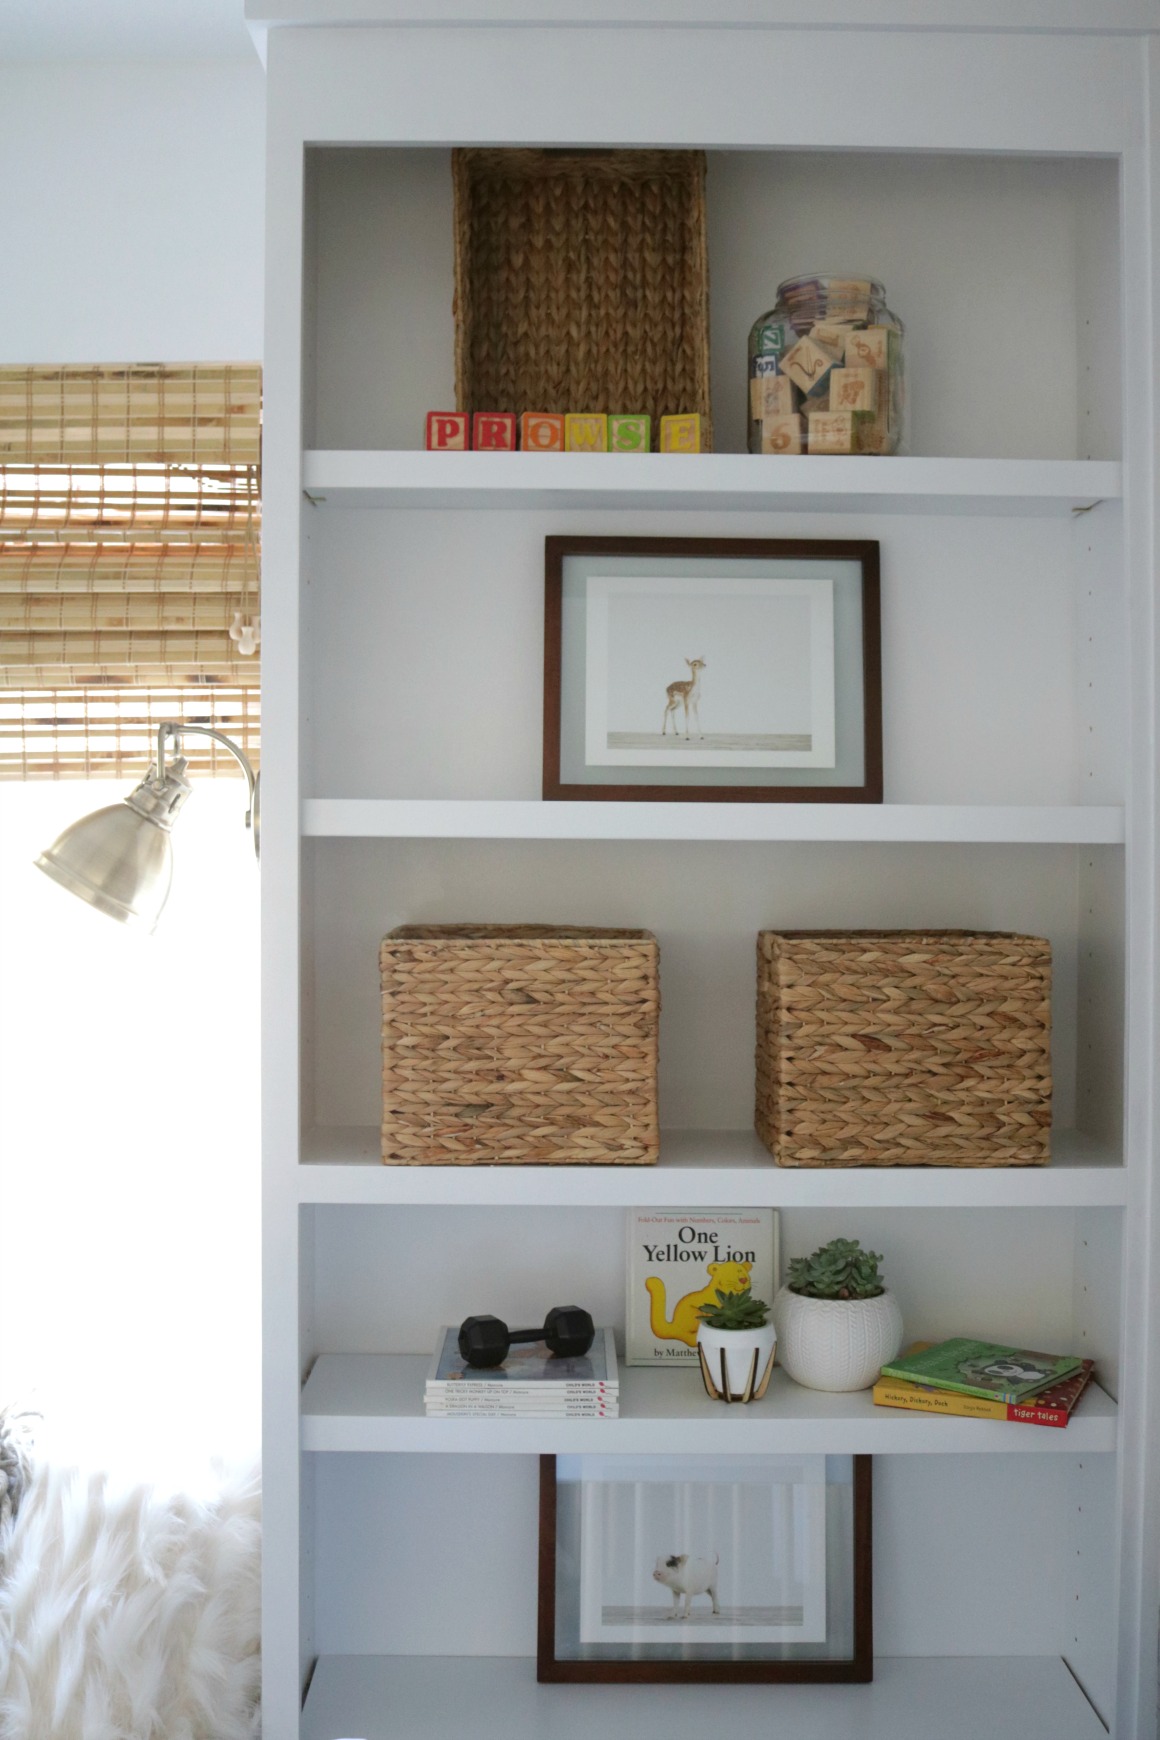
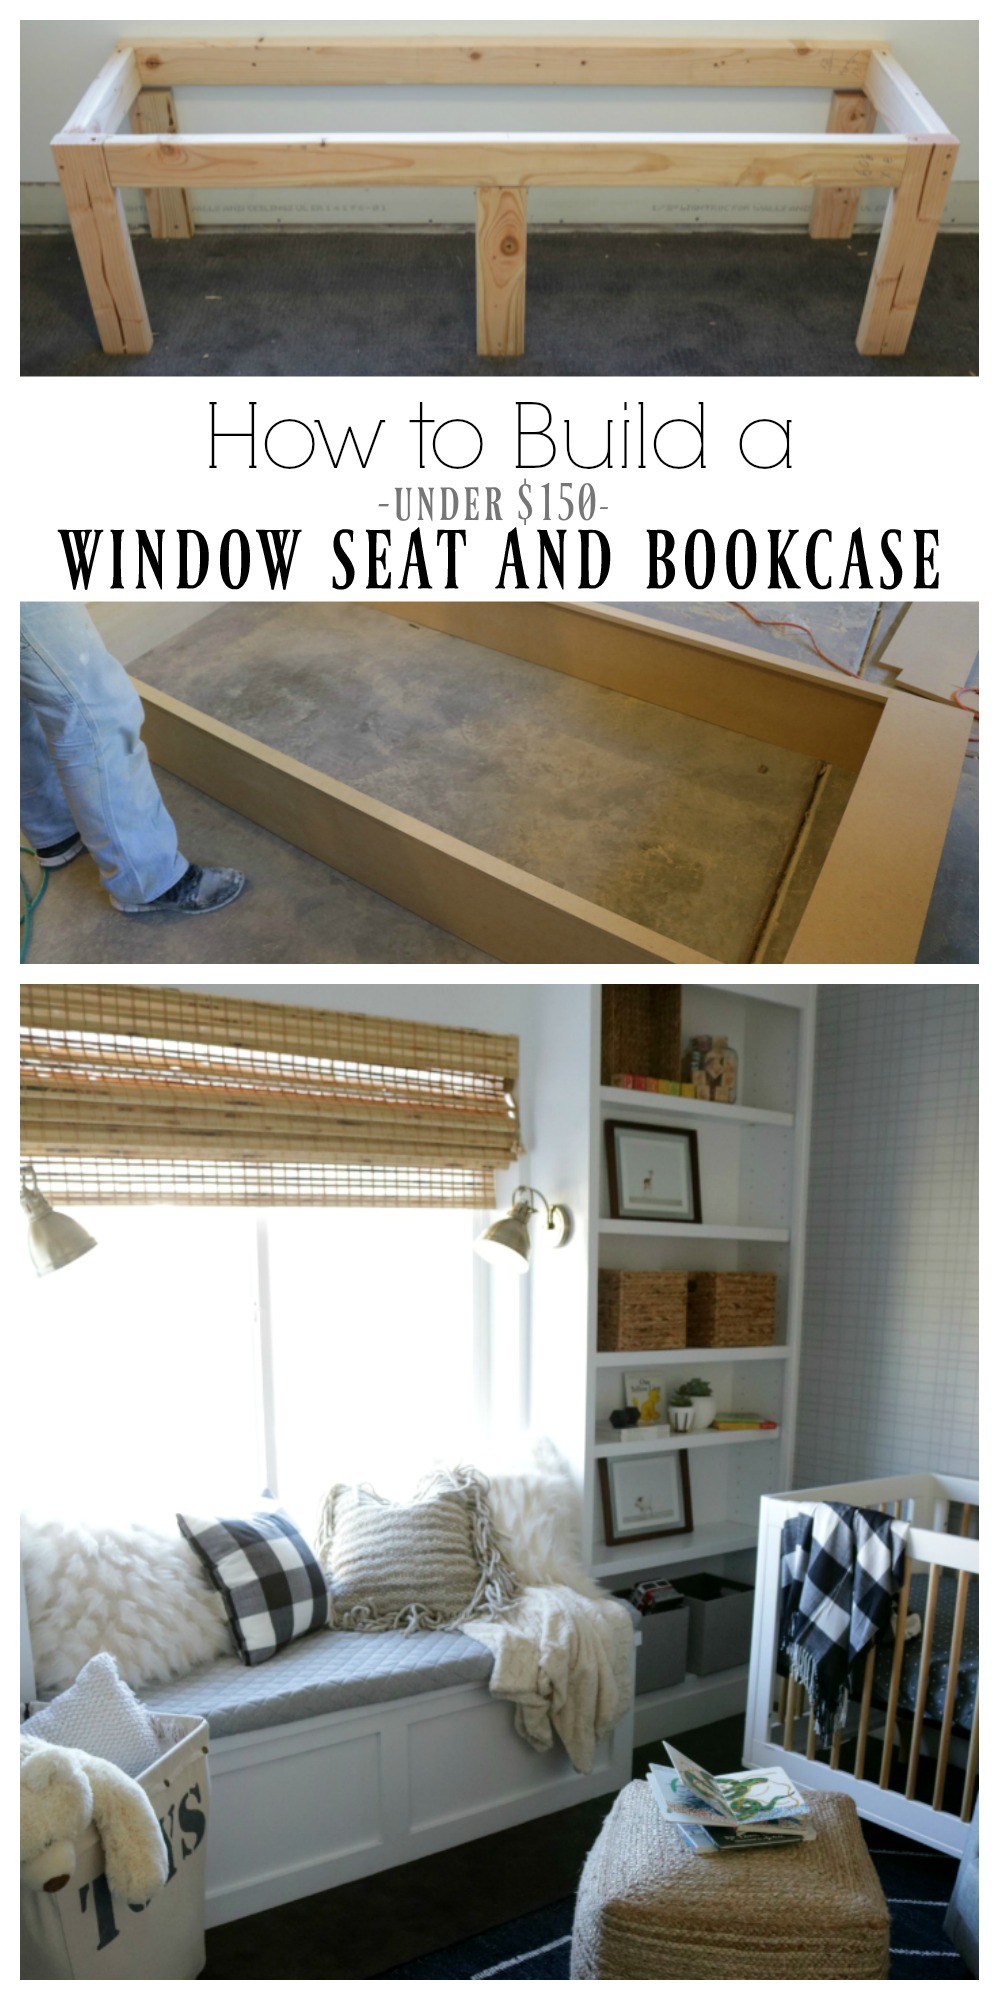
One of my favorite things in the room is the bookcase. They had that little short wall and this bookcase made it seem like it was meant to be there. We just built the bookcases out of MDF! I have so many good tricks to share that Cory taught all of us on building this bookcase and the window seat. You can find that post on how we built the window seat and bookcases HERE.
And if you saw my Instagram Stories I couldn’t wait to get the accessories on the shelves. The guys quickly painted the shelves and put them in but they told me I couldn’t put anything on them! I said that is like giving a kids a piece of candy and saying they can’t eat it! They eventually dried and I could play…
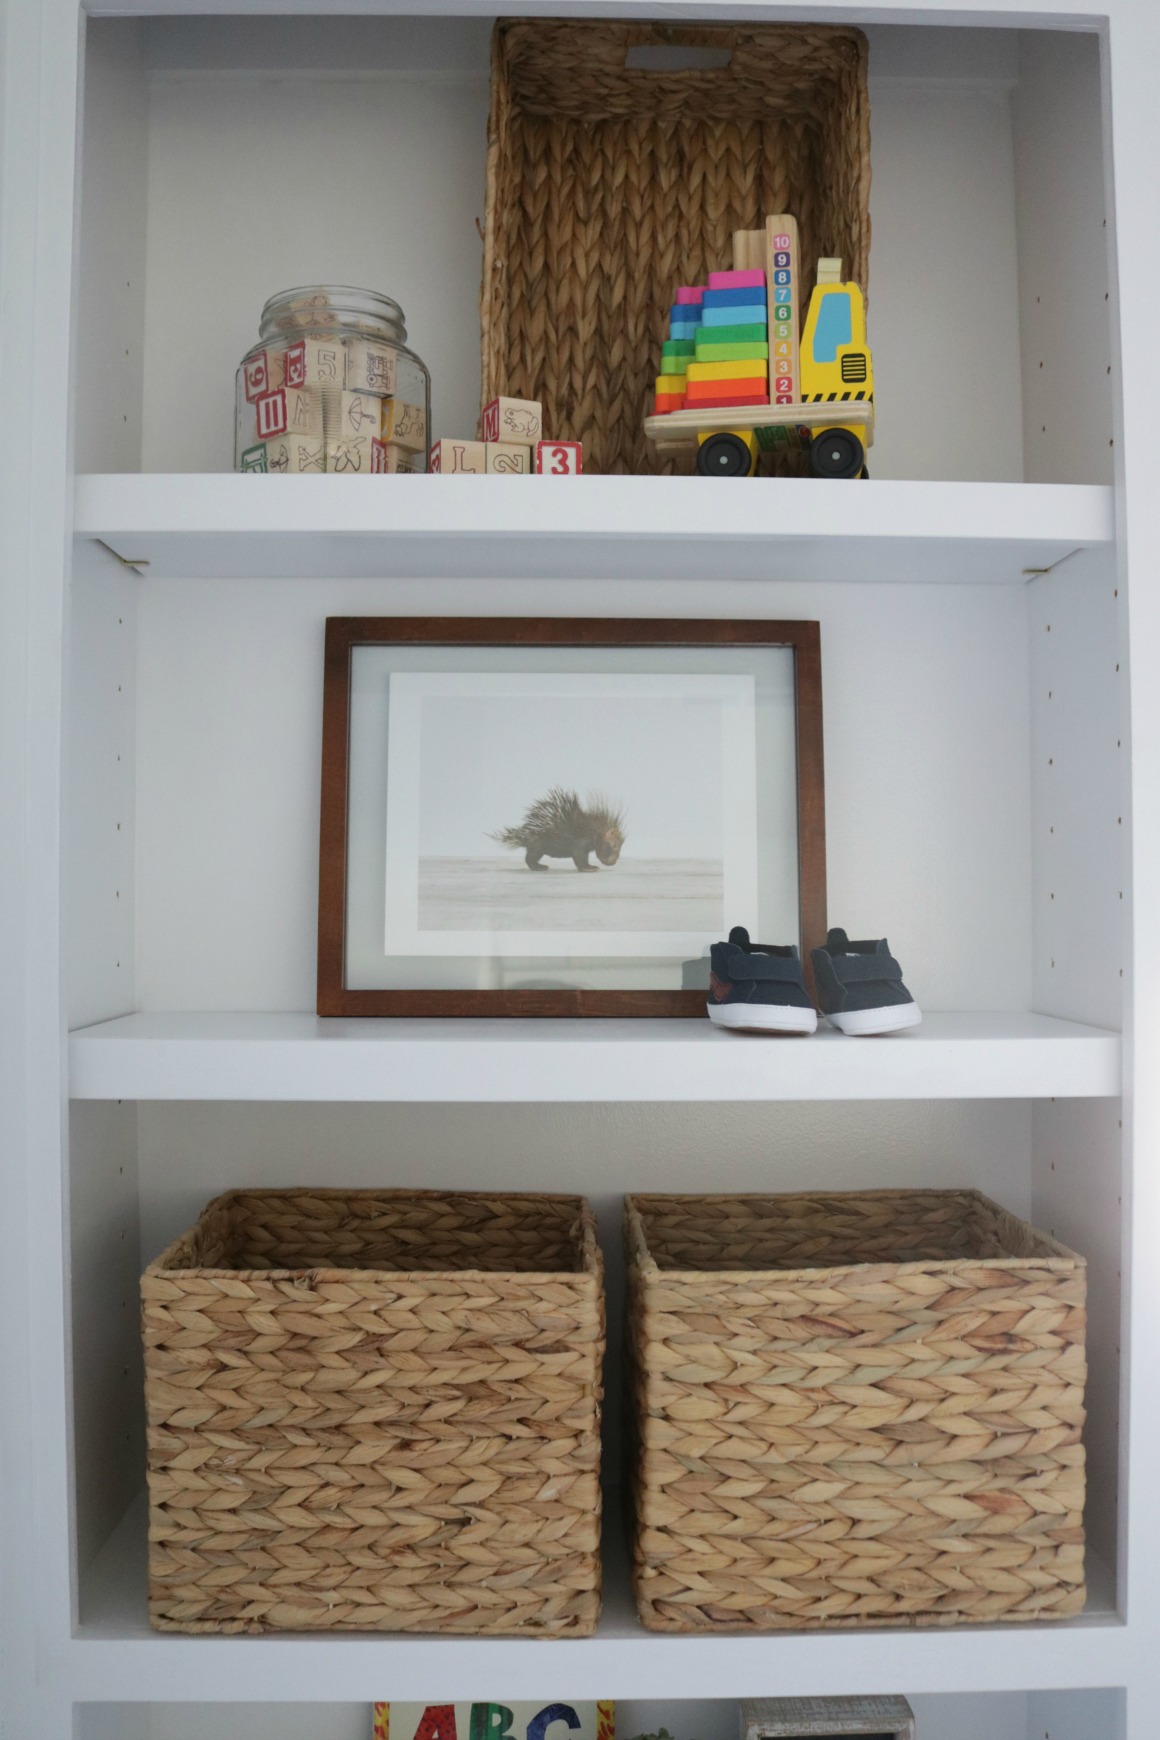
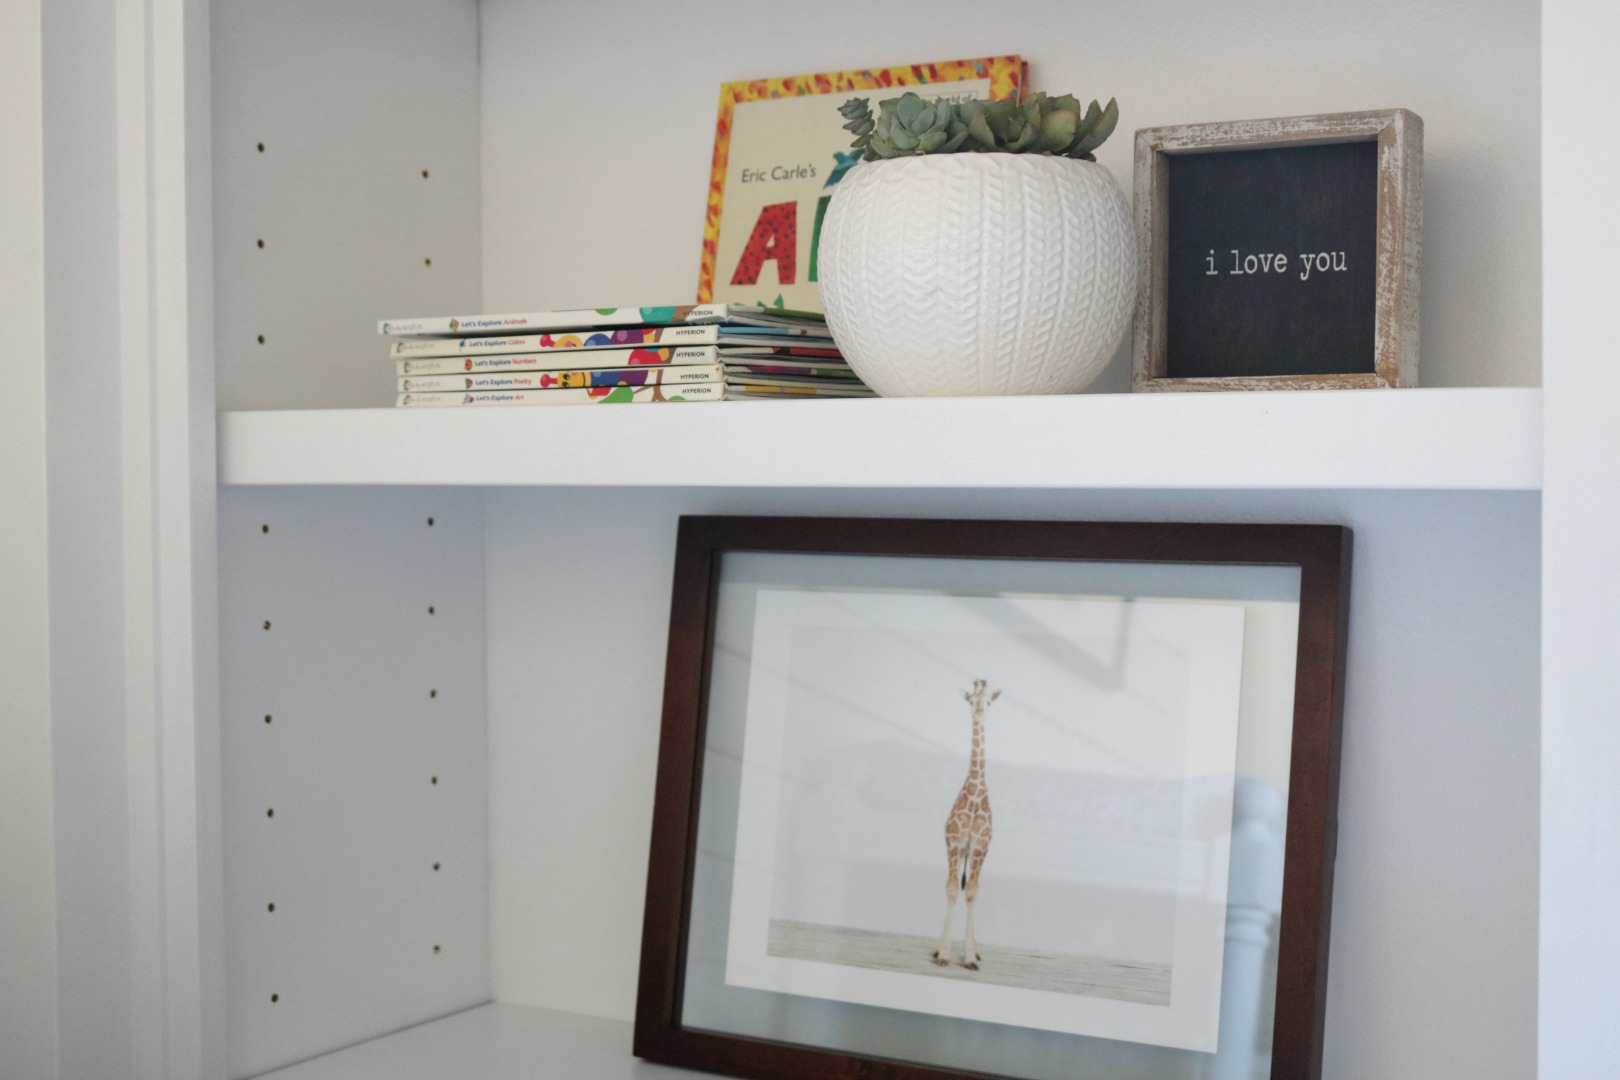
I stopped at a local second hand store and picked up a bunch of baby books, blocks, glass jars and wood toys to finish the look. The succulents and baskets I picked up at Lowe’s! The baby animal prints can be found HERE.
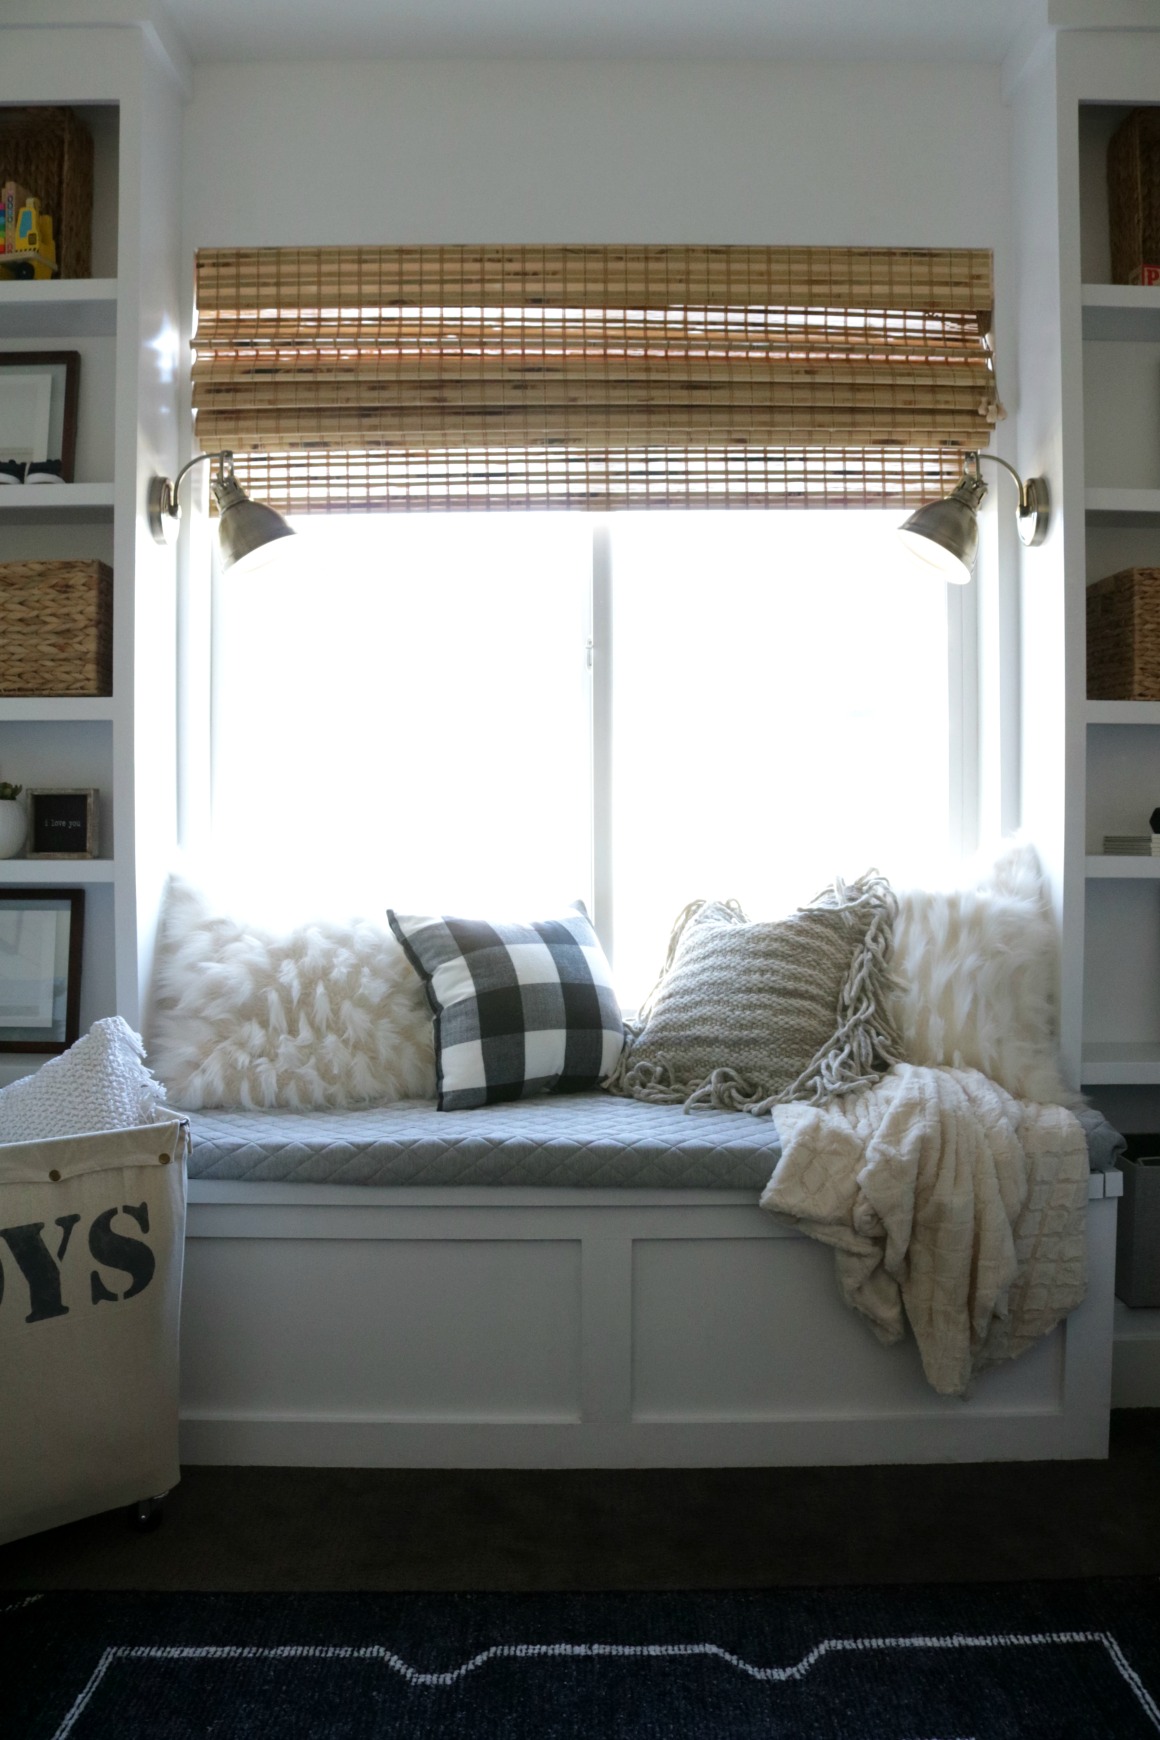
We switched out the wood blinds for Levelor Woven Wood Shades from Lowe’s. You can have any Levelor Window Shade cut size, right at Lowe’s for free! This one just needed to be cut down a little and they did it so quickly. The shade also has a privacy liner, not blackout but I was really surprised at how well it darkened the room- way more than the wood blinds they had. THESE are the exact blinds we used.
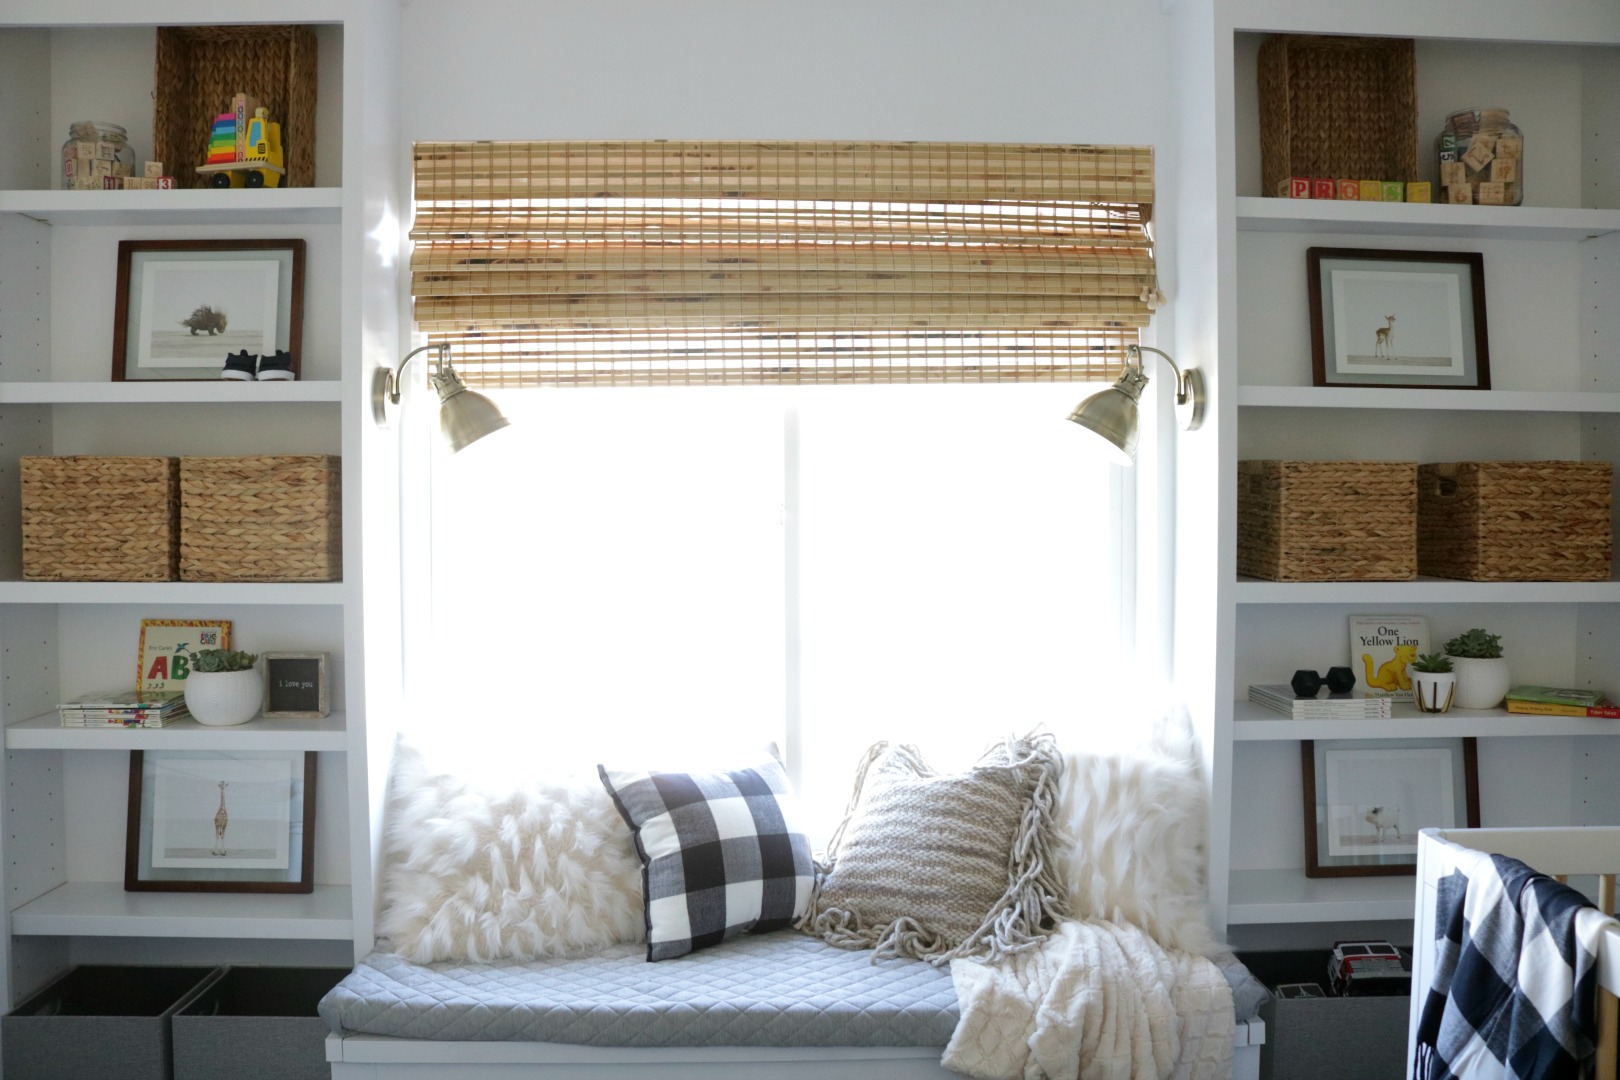
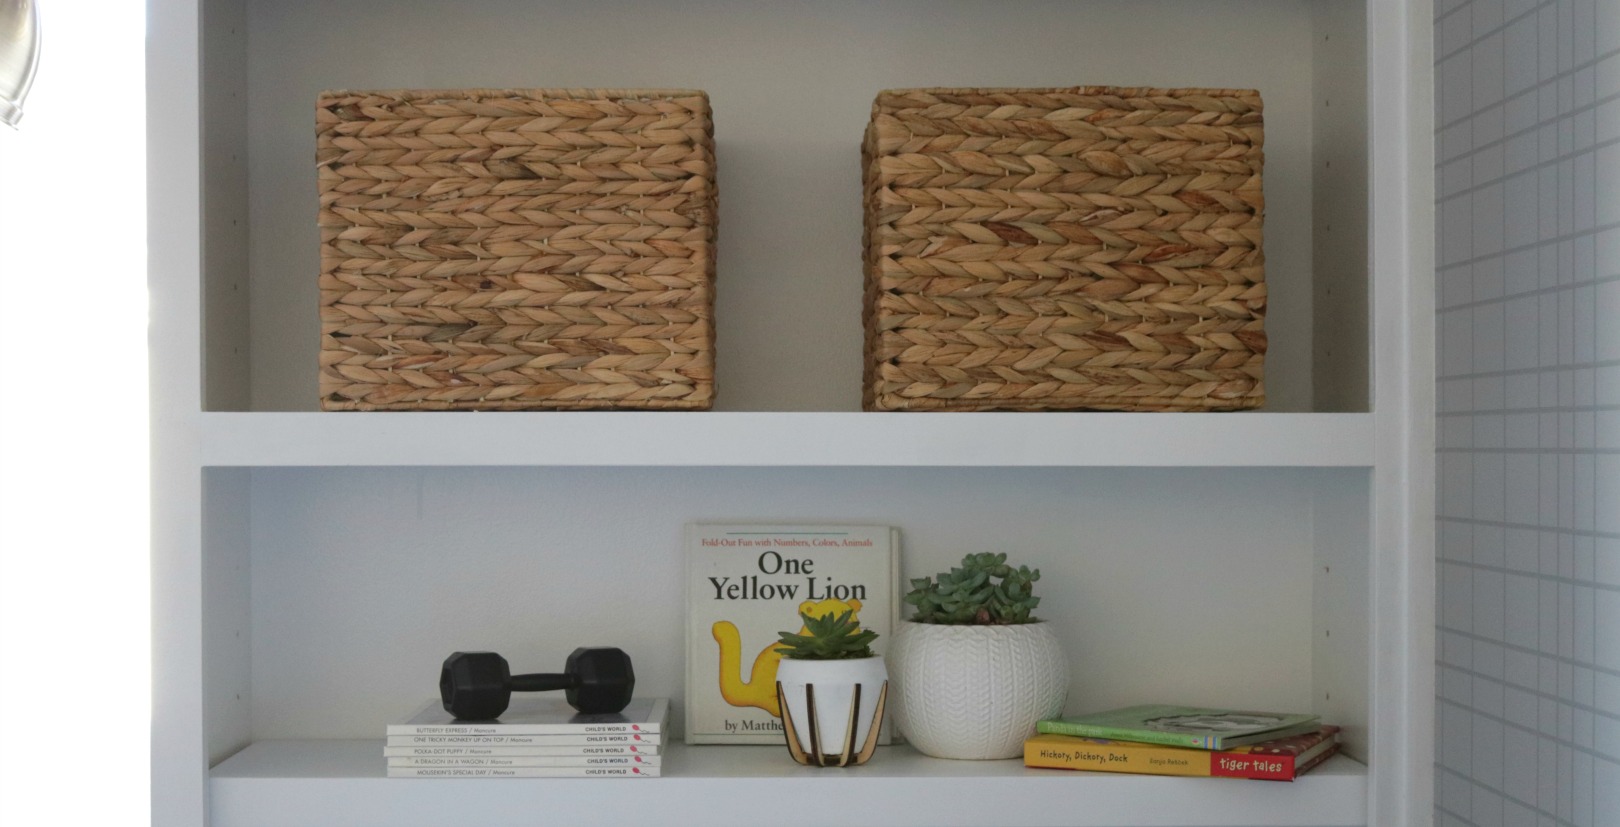
I get asked often about styling bookcases. This image shows that it really isn’t as hard as we make it seem in our heads! I kept everything really symmetrical and balanced. Notice the Lowe’s woven baskets pull in the same texture and color of the Levelor Woven Shade and ottoman? The succulents I found already in those cute white pots at Lowe’s and they are a critical element to bringing some life to the space (they only have to water them every couple of weeks). In a nursery using things you actually use like books and baby shoes are a great way to personalize the bookcase. I grounded the bookcases with THESE gray baskets I also picked up at Lowe’s, they pull in that awesome gray wallpaper and window seat cushion (don’t look too close at that, it isn’t sewed yet:)).
I knew that I wanted to have a window seat built in their nursery for a couple of reasons-
#1- It would look amazing (obviously)
#2- Extra storage under the seat would be so handy
#3- Everyone wants to be where the new baby is, the extra seating will be so nice for them and visitors
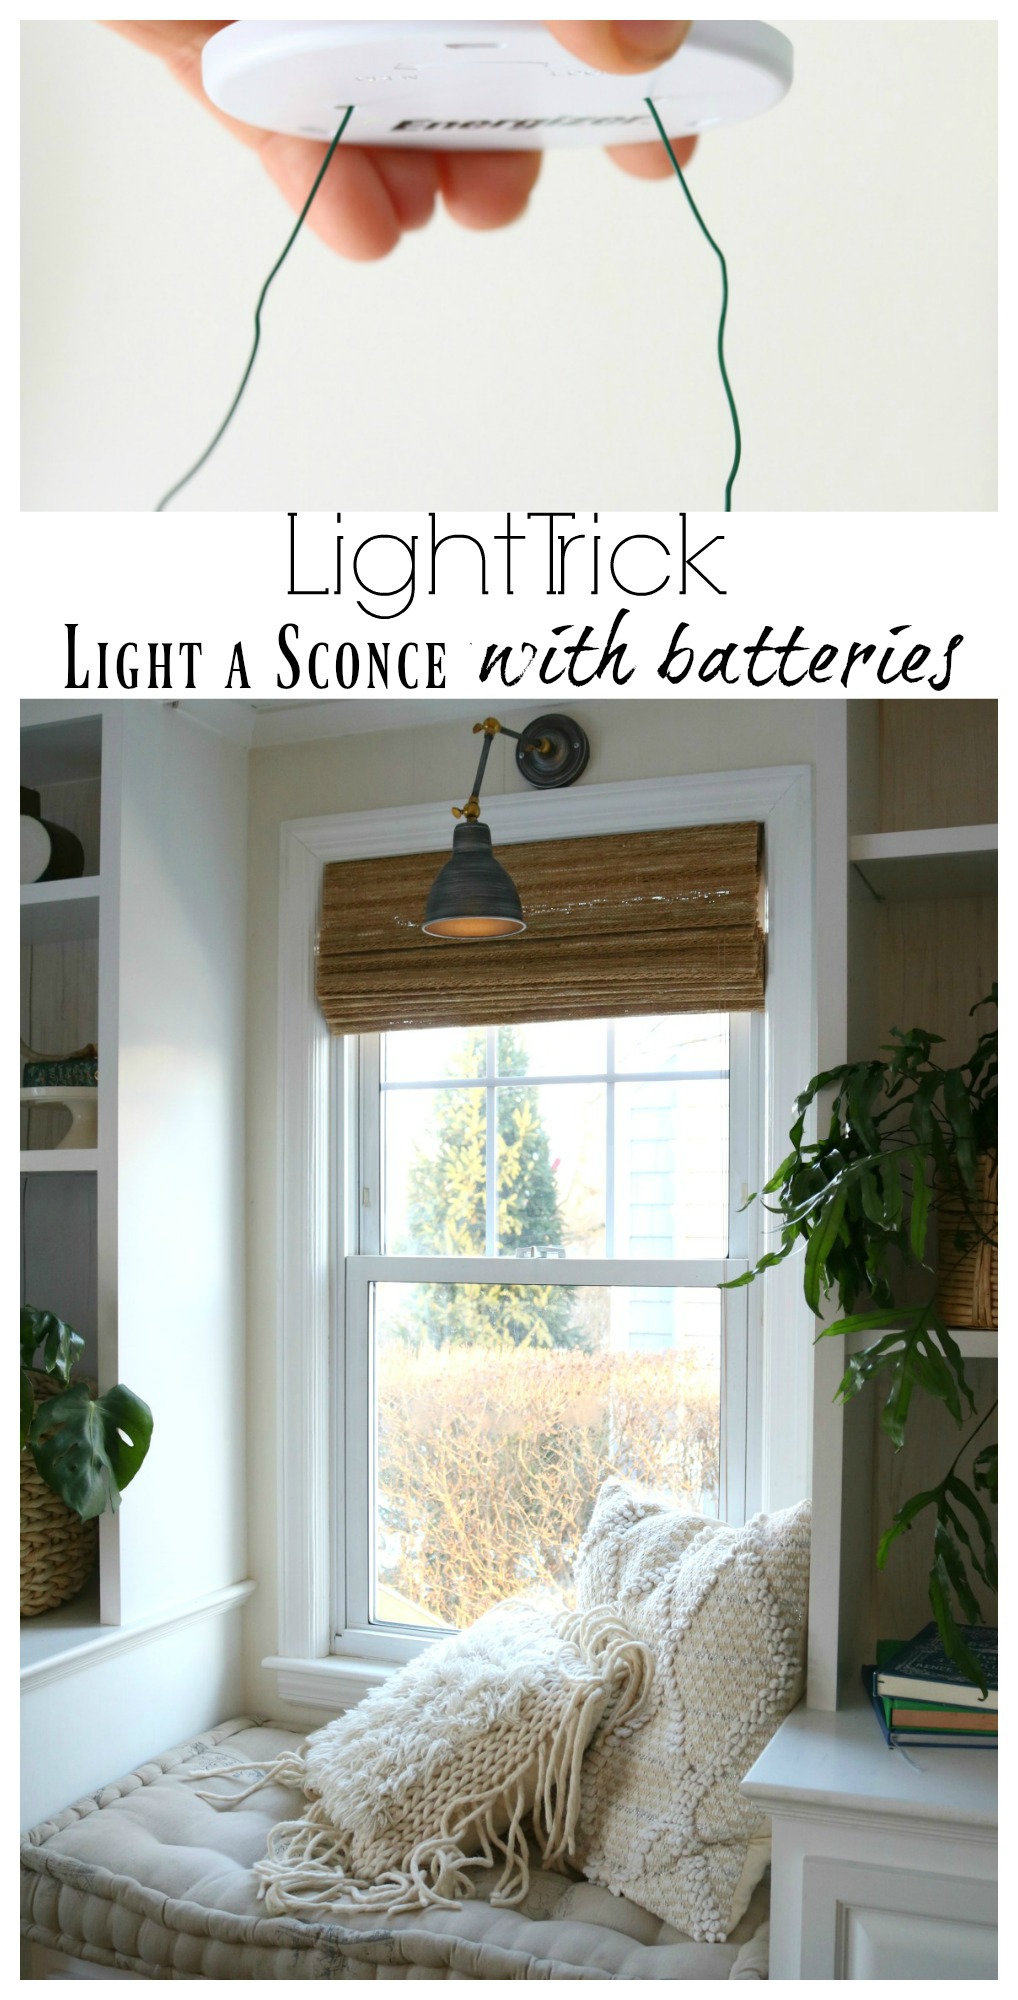
Another feature that we added to the bookcases were THESE gold light fixtures. (I LOVE THESE!!) I did not want to deal with hardwiring them. So I came up with a light trick!! You can find that post HERE.
Last Nursery BEFORE…
Nursery AFTER…

Also changed out the light fixture for a timeless school house style that I found on Lowe’s website.
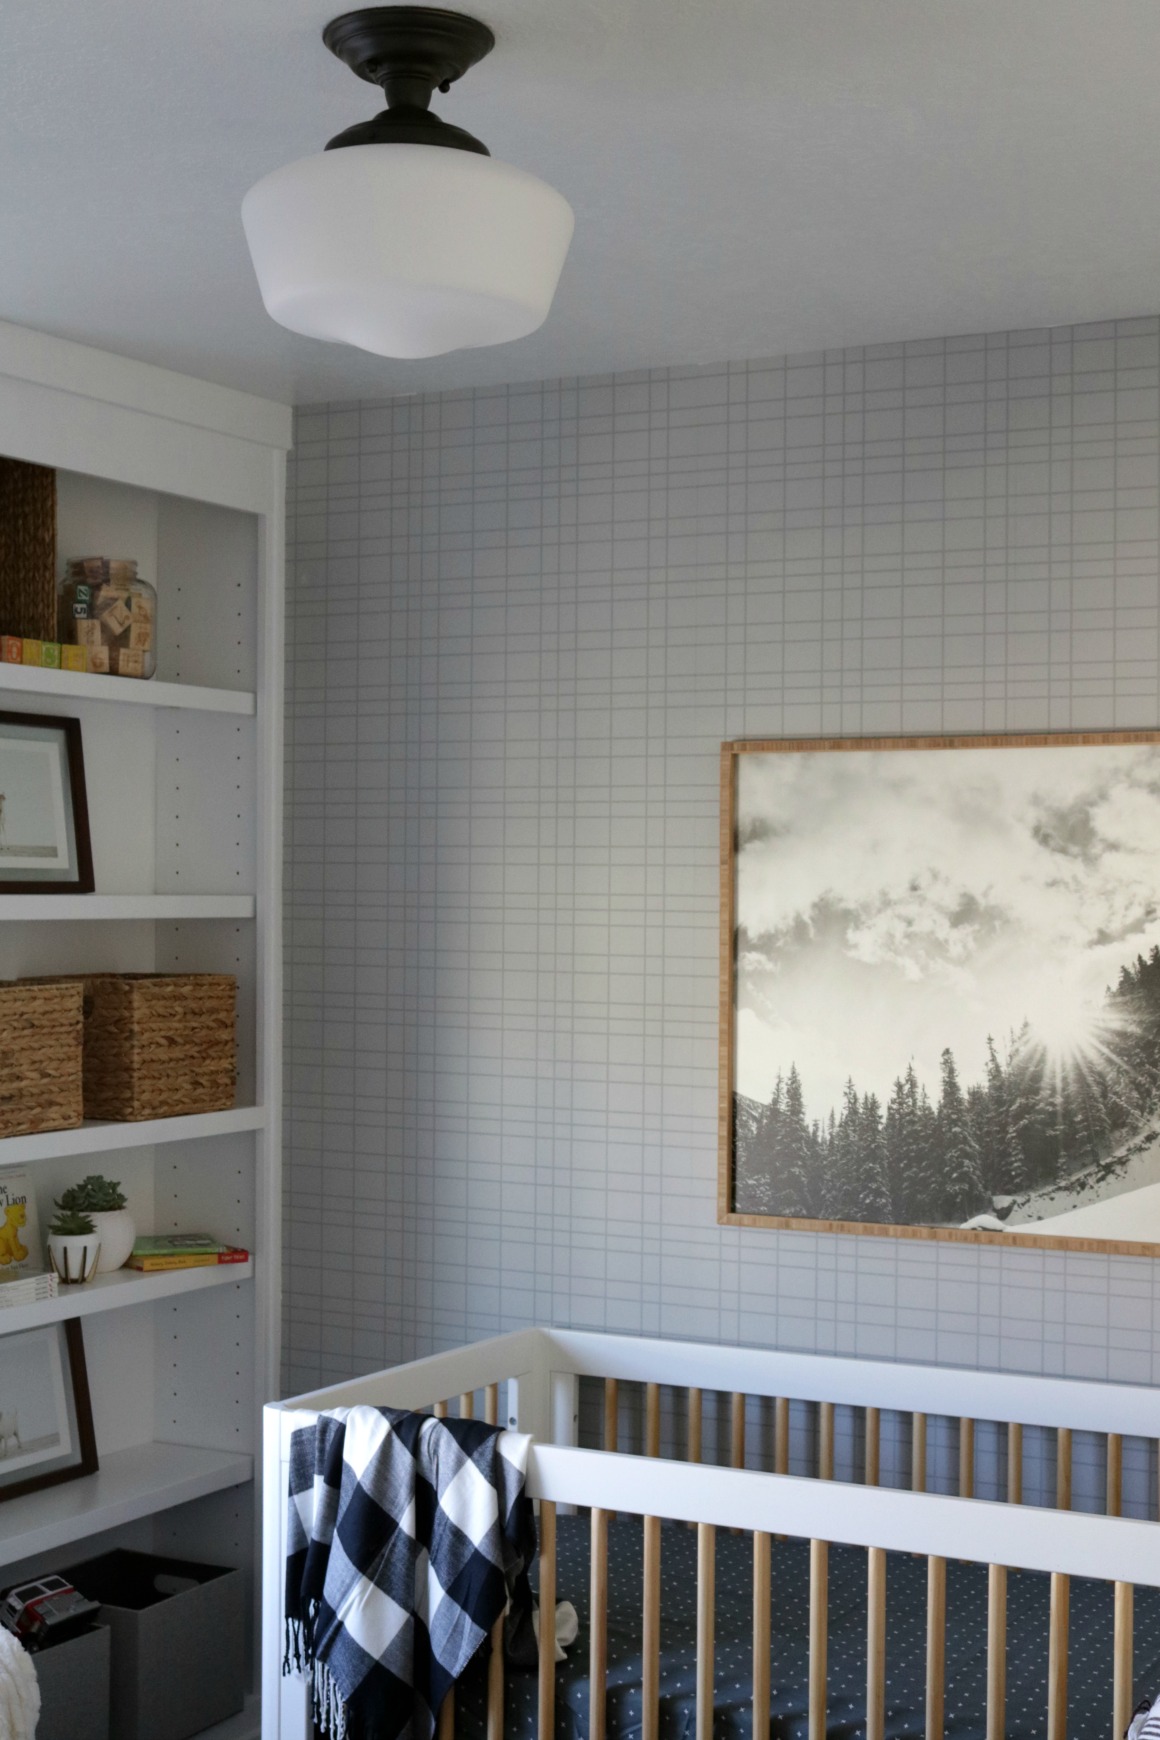
The Mountain Art was just the piece I was looking for to personalize the nursery even more. I picked out that piece because Kami and Blaine love hiking and being in the mountains and I know their baby will be exposed to a lot of fun adventures in the gorgeous Utah Mountains too.
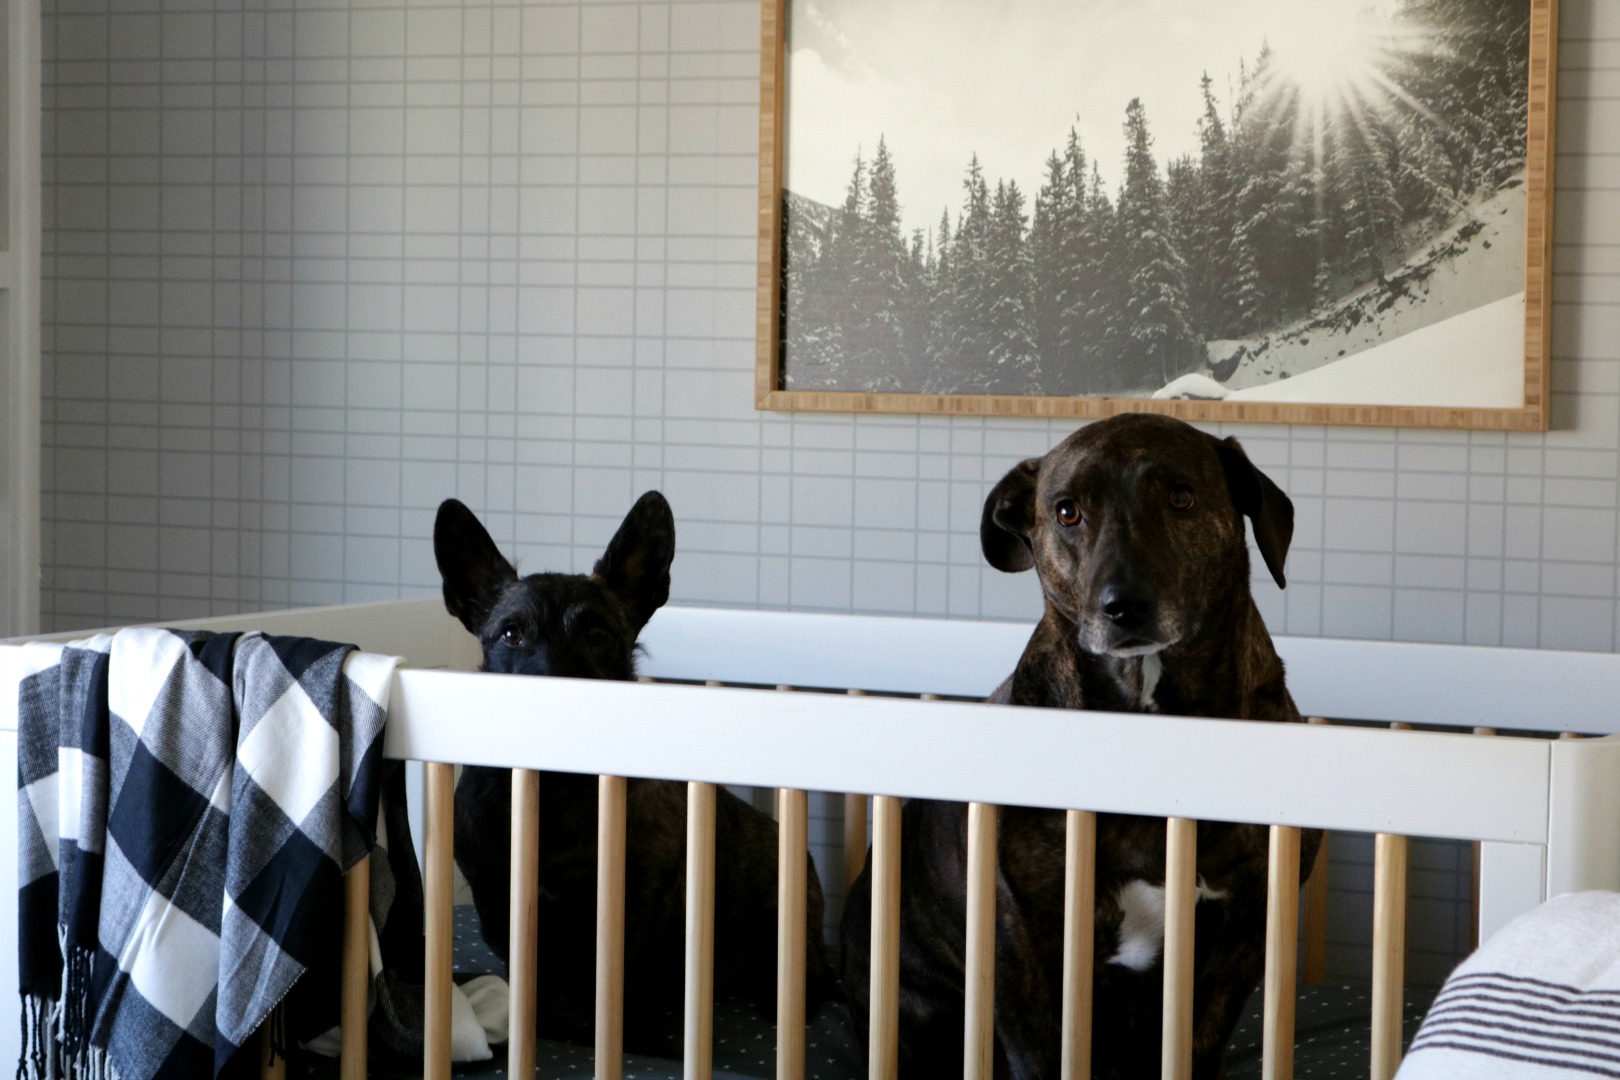
I mean….we had to put the dogs in the crib. haha.
I had to show a picture of the other rug I was debating. Kind of fun to see how a rug can completely change the look of a room. Kami and I both liked the darker rug better. But I ordered THIS light rug too after I saw that the nursery had dark carpet (I was ordering it all online without being in the room). Happy that we went with the original plan. Neither rug is wrong or right, just different looks.
I just want to thank Lowe’s for sponsoring this post and allowing me to give this to my family. What a wonderful gift to have this sweet nursery ready for their baby. And also thankful that I can share how you too can easily create this look in your home. I was SHOCKED how easy it was to build these bookcases and window seat. Look forward to sharing the easy tutorial next week on these projects
You can easily click on any part of the room with a tag to shop it below… (PS- little video at the bottom)

Click on an image below for the Tutorial


totally awesome, thanks for sharing.
Thank you Joanne!
Beautiful job, your sister n law is a lucky gal.
thank you Ginny!
Love the look and you’re right – the boy can grow into the current style………AWESOME!
Thanks Julie!!
Loved the nursery and the built in stole the show! So well done!
Yes! I agree Kelly!! Thanks!
Looks so perfectly suited for both the family and a new baby. I loved following the whole process on instagram. Great job, how awesome it must be to have you as a sister-in-law 🙂
Thank you Sharon! I know they will enjoy it!!
Amazing! I love it. I would love to put a window seat in my kids shared bedroom, but our heat vent is in front of the window 😑. I can’t wait to be able to tackle their bedroom soon.
I think there is a way to work around that with those vents that attach to project air out in a different spot!
Next stop, my house! I love nursery’s but can never make it look this good (or easy!) great job y’all!
Thank you Breanna!
Amazing!!! Seriously I just have to say it now- i love following along on instagram and your blog. You are my favorite haha just the best design style ever 👌 and i live in a tiny CT house too. Love how you utilize space and seeing how a small sq footage doesnt have to compromise on style!! It was so fun to wacth this project come together and everyone give a helping hand. Thats what family and the spirit of Christmas is all about. Such a perfect special gift for parents to be and the new baby!! The outcome was awesome!! Well done you!! 👏👏
Thank you very much Megan!! You are so awesome. I appreciate your support and kind words. It was so much fun to work on together!
I love this! Everything is so well done and I love your design style. Anxiously awaiting the bookshelf/built-in tutorials! I am planning a nursery for a little girl and can’t wait to see if this would work in our room!
thank you! I will share that along with videos I think that is next! Thanks!!
Beyond amazing. Will you do a post on how you added the battery light kit to the sconces??
thank you! Yes I will share that!!
This came out STUNNING! I cannot believe you did this in 2 days. Your sister and brother in law must have been over the moon. It went from cold and bare to cute and cozy. Also, I didn’t realize you could find all those things at Lowes! Good to know.
Few questions. Can you link the 4 cute pictures on the bookshelves of the baby animals? Thanks. Also the link to the pillow on the rocking chair is incorrect. I love that pillow and I’m interested to find it. Thanks again. I love the nursery and so many great ideas I can’t wait to incorporate.
You can find the baby animal print here- https://rstyle.me/n/cwc9jqb5qwf
Love everything in the room! The photo of the dogs in the crib is the best!
Can you link the 4 baby animal pictures on the book shelves? Also the link for the pillow on The rocking chair is incorrect. I would love to purchase that pillow and have been looking everywhere so if you could update it I would really appreciate it. Thank you so much this nursery looks amazing I cannot wait to incorporate some of these ideas.
Sorry! I fixed that link on the pillow- here it is- http://rstyle.me/~aeeBL
I will get back to you on the baby animal art
❤️
Love this! I would love a tutorial on how you created the entire built in shelves and bench!
Yes! Coming your way next!
So classy!! Love the art, wallpaper, colors, and of course built ins!!!
Thank you so much!!
Oh my gosh it’s so precious! You nailed it! I loved seeing your stories on Instagram. So fun to follow along. Have a great week!
Thank you Savanna!
Could you tell me where the dresser you have shown on the mood board is from? LOVE this nursery!! So what I would have done for a little boy many years ago if I’d had one ;).
Btw, I just ordered two sconces and my LED lights!! You have fulfilled my decade long desire for sconces above my fireplace that couldn’t be accomplished without alot of money and destruction due to a masonry chimney!!!!! Can’t wait for my DIY when they arrive! Thanks so much for such a great, simply idea!
You can find the dresser here- http://rstyle.me/~aeeAU
YAY! Send a picture after you do it!!
Oh, it’s so, so cute!! Can you share where the buffalo check throw is from? I’d love to find a cute blanket like that 🙂
I found it at Joannas fabric store- I saw some on Target online before!
Love how this room turned out and very impressed the guys knocked it out so quickly.
What program do you use to create your design boards?
I’m doing some design work on the side for friends and I’ve been using photoshop but would love other recommendations on suitable program or apps to use.
TIA
I used Pic monkey- I get used all the time what I use. I will do a blog post on it.