In our new Utah Ranch Style Home we have a lot of rock. A LOT. Over 50% of the exterior is this same rock, the actual name is Idaho Travertine. Looks a lot like a lava rock. We did not want to just tear it out (even though we could have). We LIKE the character and texture the rock adds to the home. We decided we wanted to try to modernize it. Fill in the deep grout with mortar and make it more flush. In my head that was all we were going to do. But, 20 hours later and 8 bags of mortar, we ended up with something different and we really like it! First let’s look at our current rock wall, inspiration photos, and the end result.
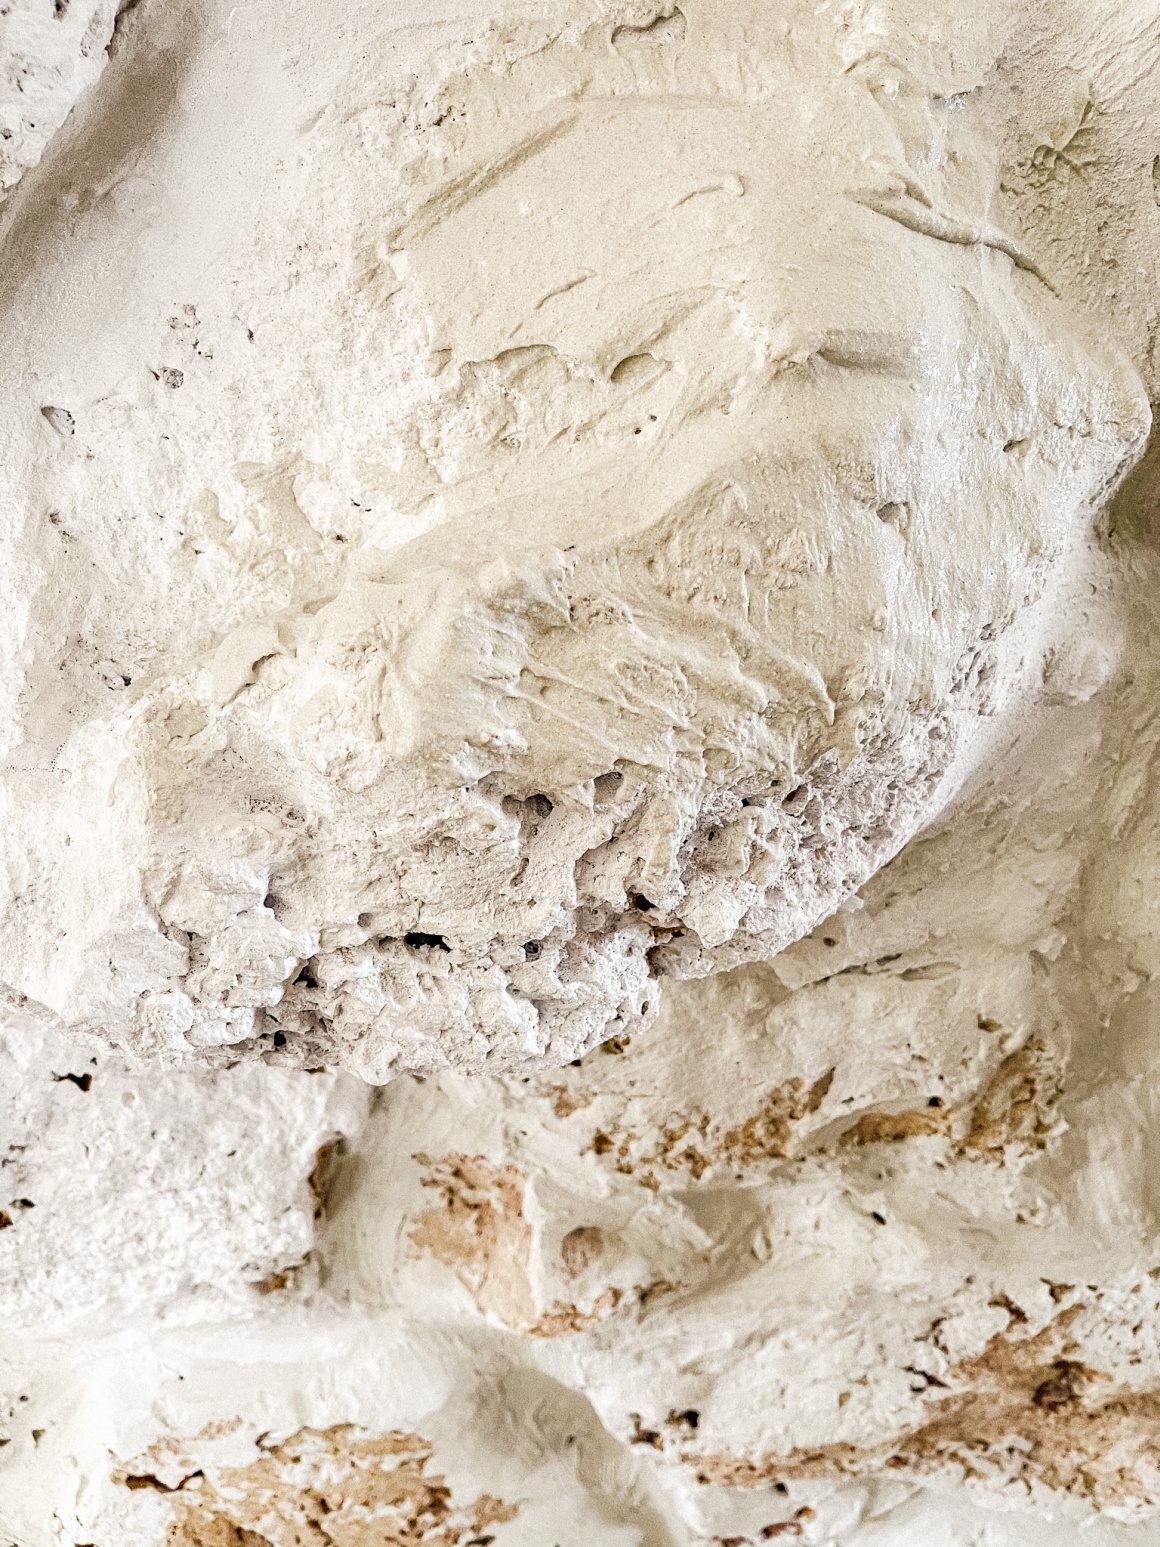
Wall BEFORE (aka Idaho Travertine)
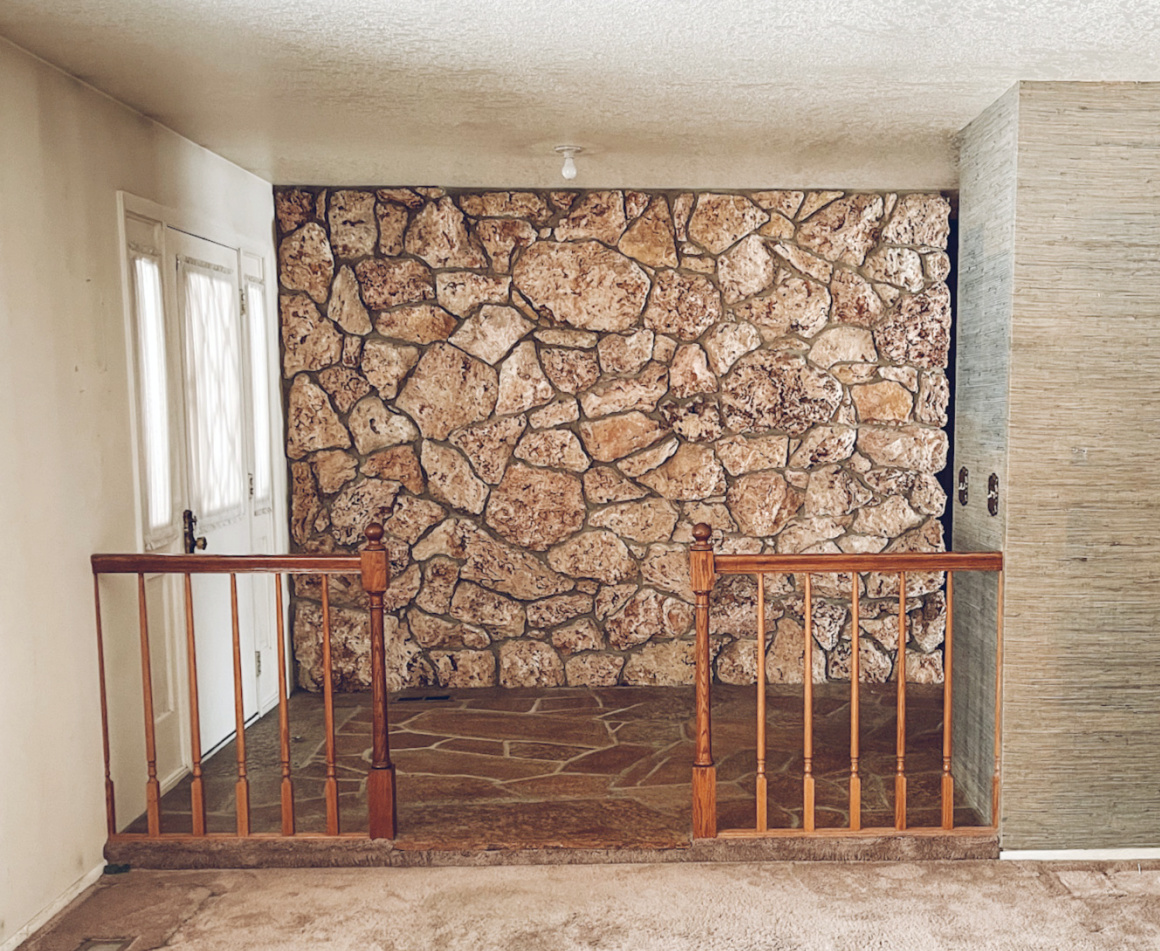
See all the orange? And the deep grout? I do want to mention that I am sure it was so cool in it’s day. The previous home owner has passed away, his name was Mr.Mackay. His sweet daughter, Marcee discovered my website and came across the post of our new home and discovered it was her childhood home we bought! She has been telling me the story of this 1970’s home. And sent me this- “That is Idaho travertine, from his quarry in Idaho. It was my father’s favorite stone. That’s why it’s all over the house🤣 your doing a great job… Love watching what you’re doing🥰.”
Stone Wall Inspiration Photos-
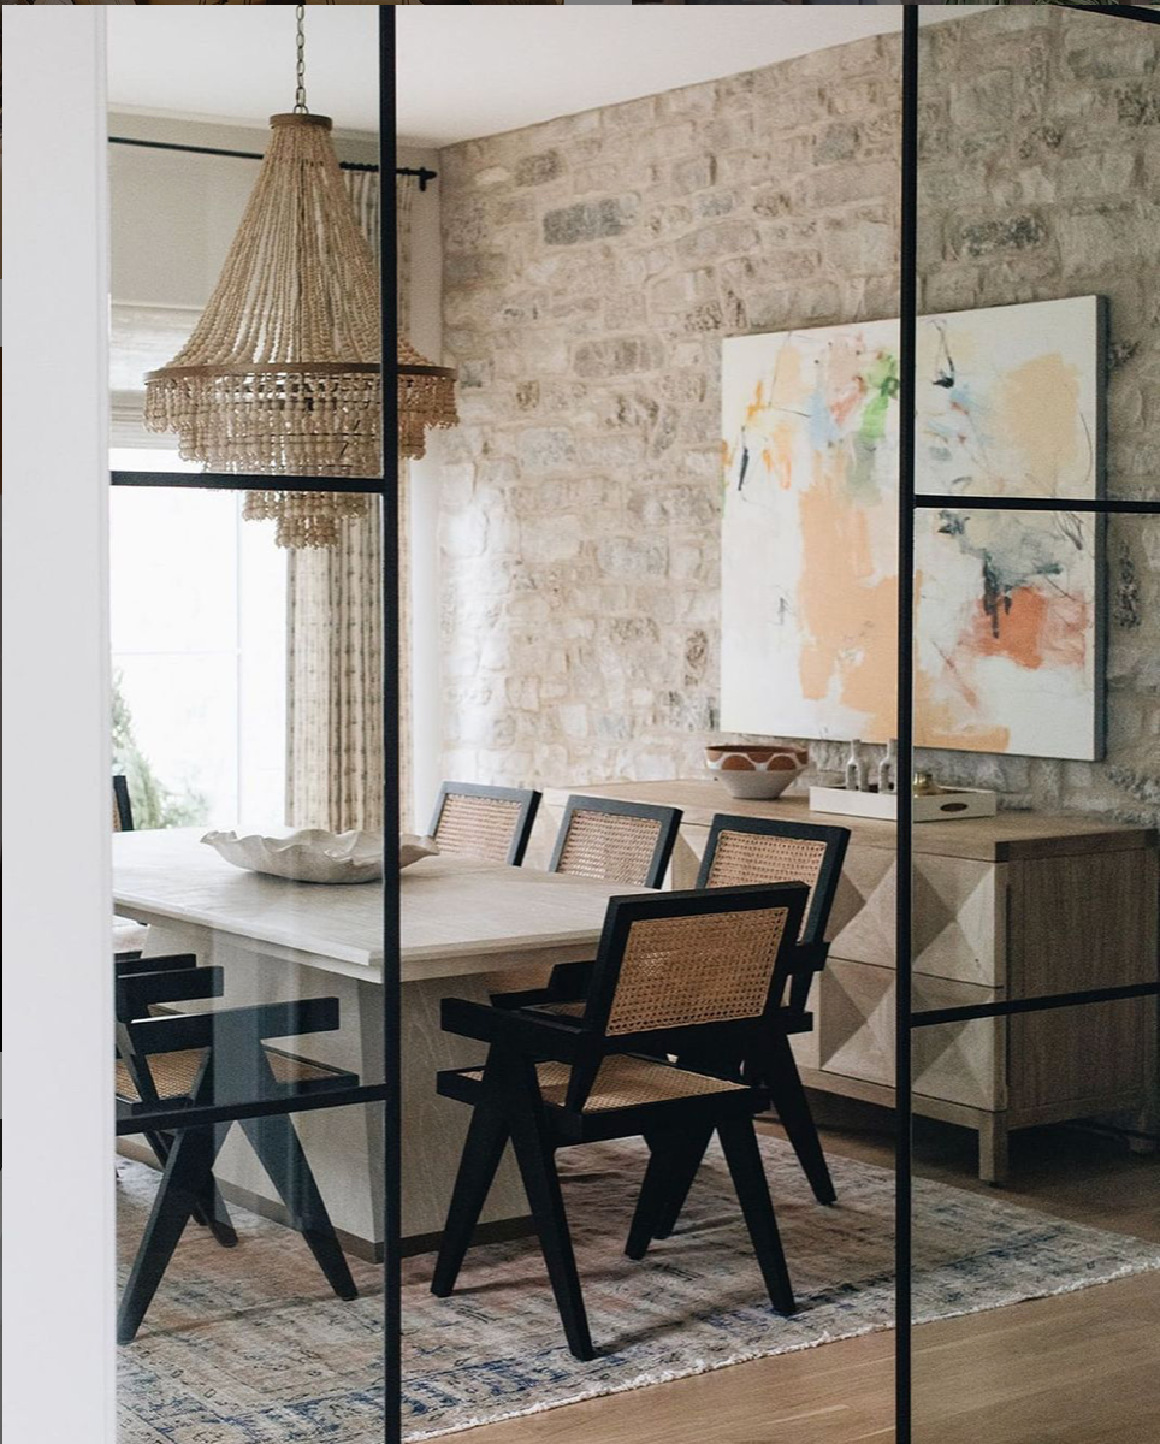
I love a stone, rock, brick travertine…whatever it is, I like it. That being said, since our rock is actually Idaho Travertine, it has a lot of orange in it. No grays or whites and not even a lot of brown. So getting the look of some of these inspiration photos won’t turn out the same. Plus our travertine has a lot of deep holes in them.
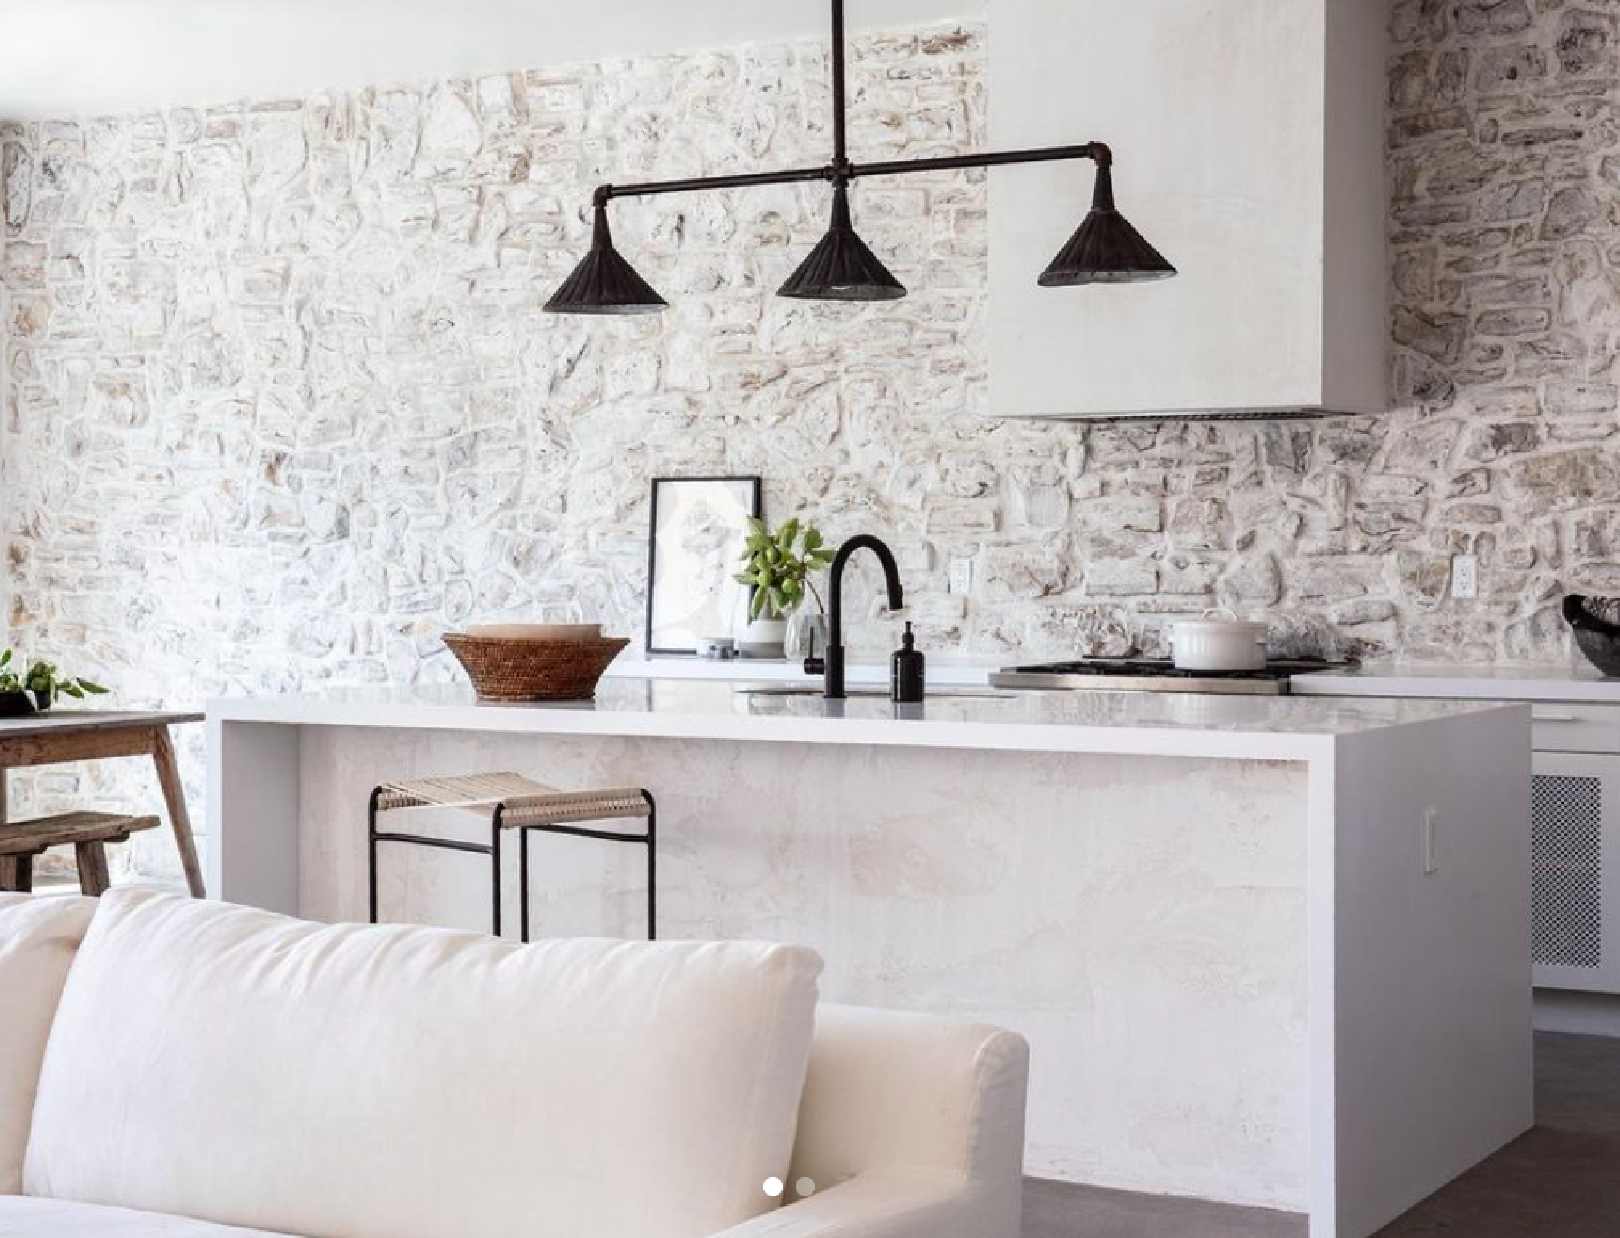
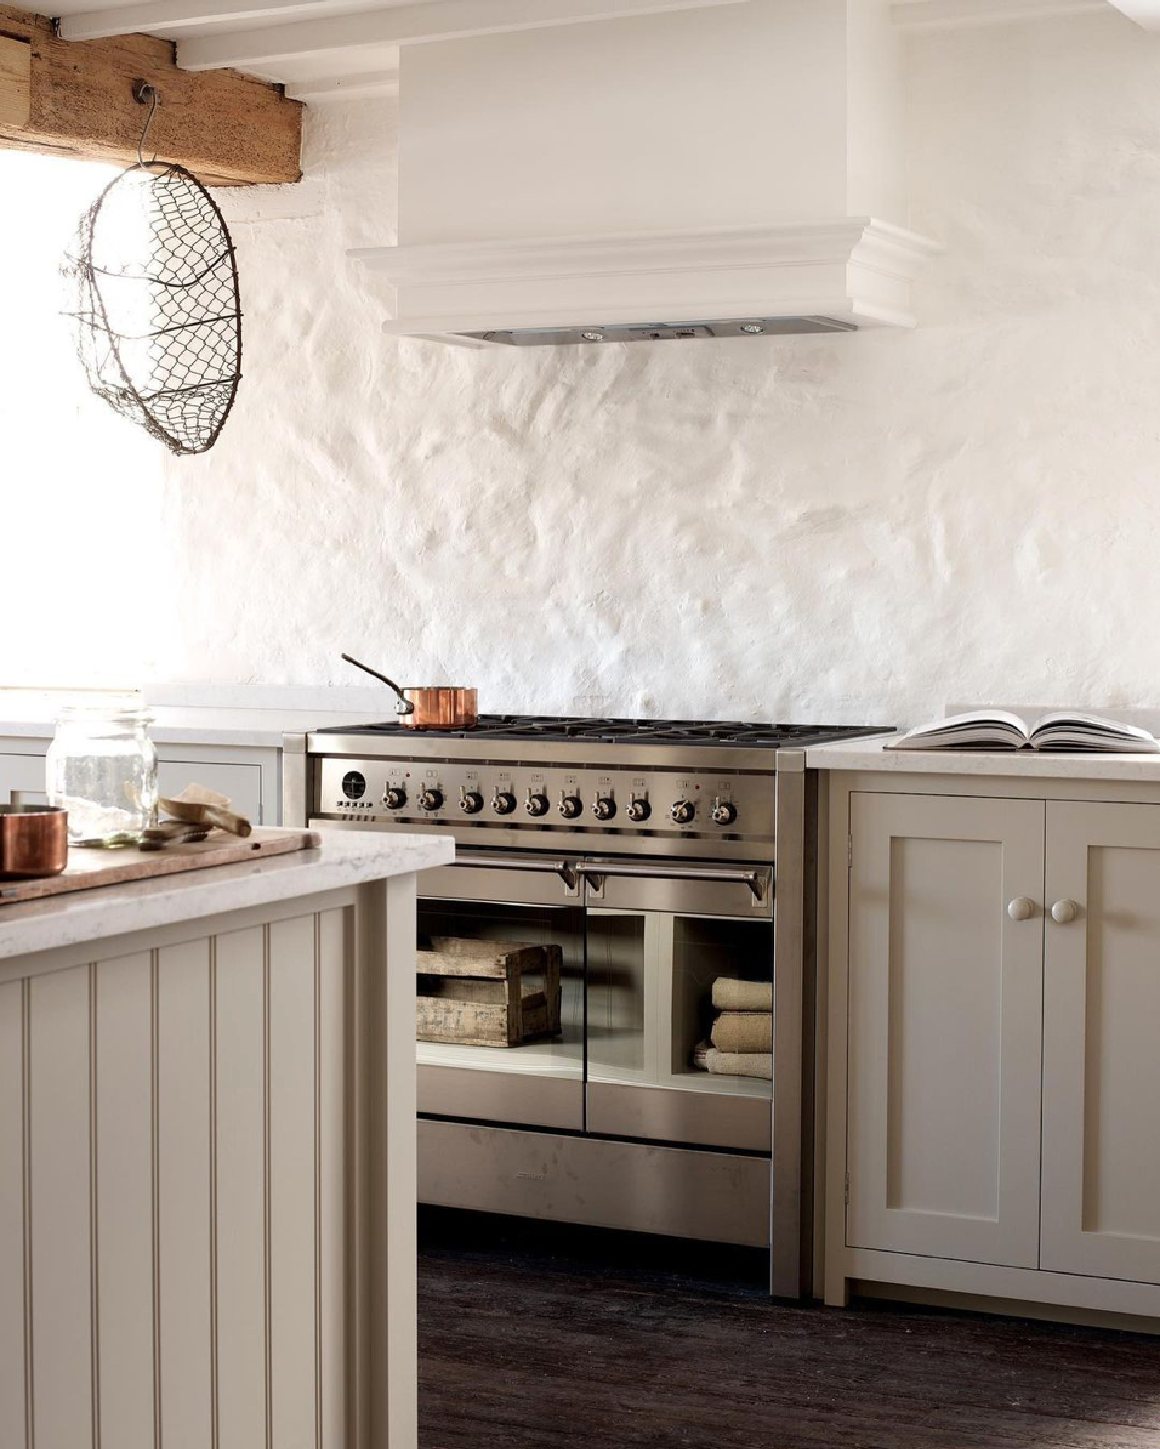
Leanne Ford did this kitchen for “Rock the Block” on Discovery+ I just watched it last night! While again, I love this look our travertine is completely different from this rock.
Yes, to living here! This stone is very smooth and is almost covered by the mortar…which we attempted to do, but it just didn’t look the same.
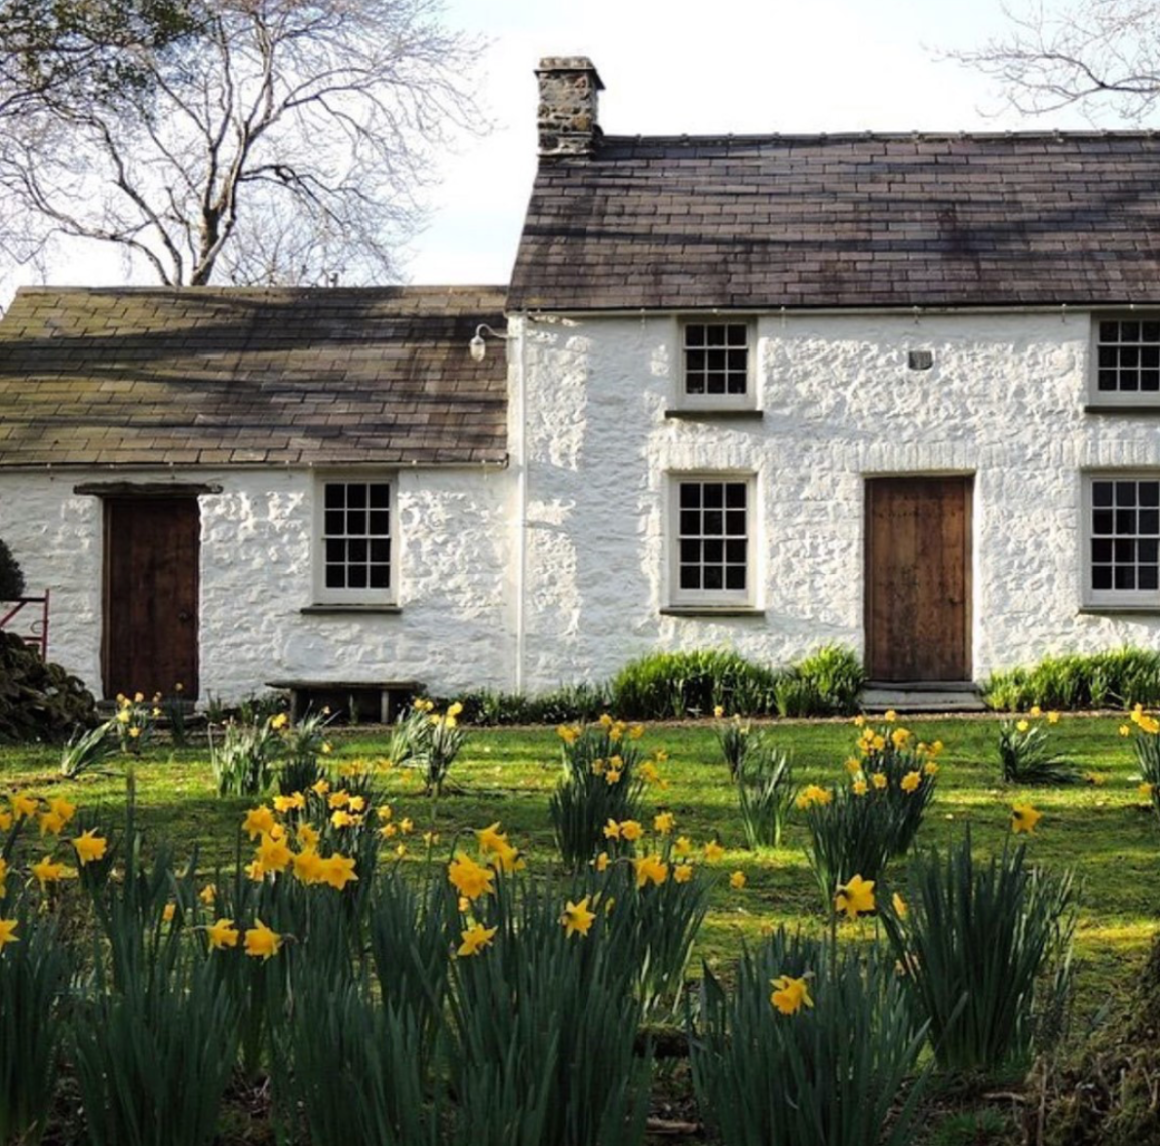
And this stone is looking more similar to ours….but it is completely painted white…..I would love for ours to look like this cottage. Looks like it has been there for ages.
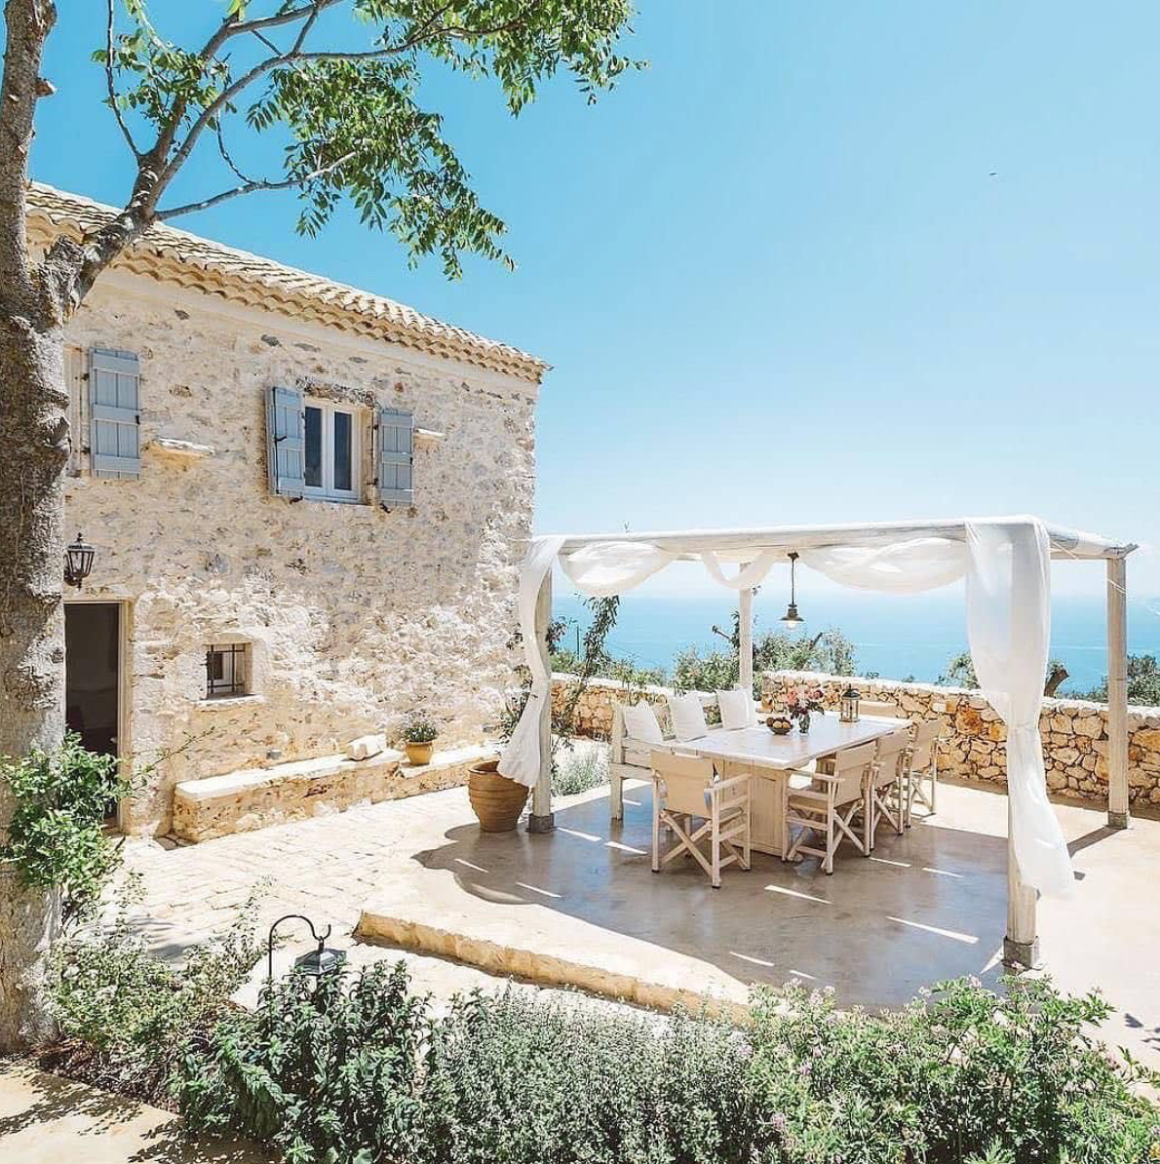
Lastly this inspiration photo was what we ended up going with after we had tried all of the above. Ready to see?
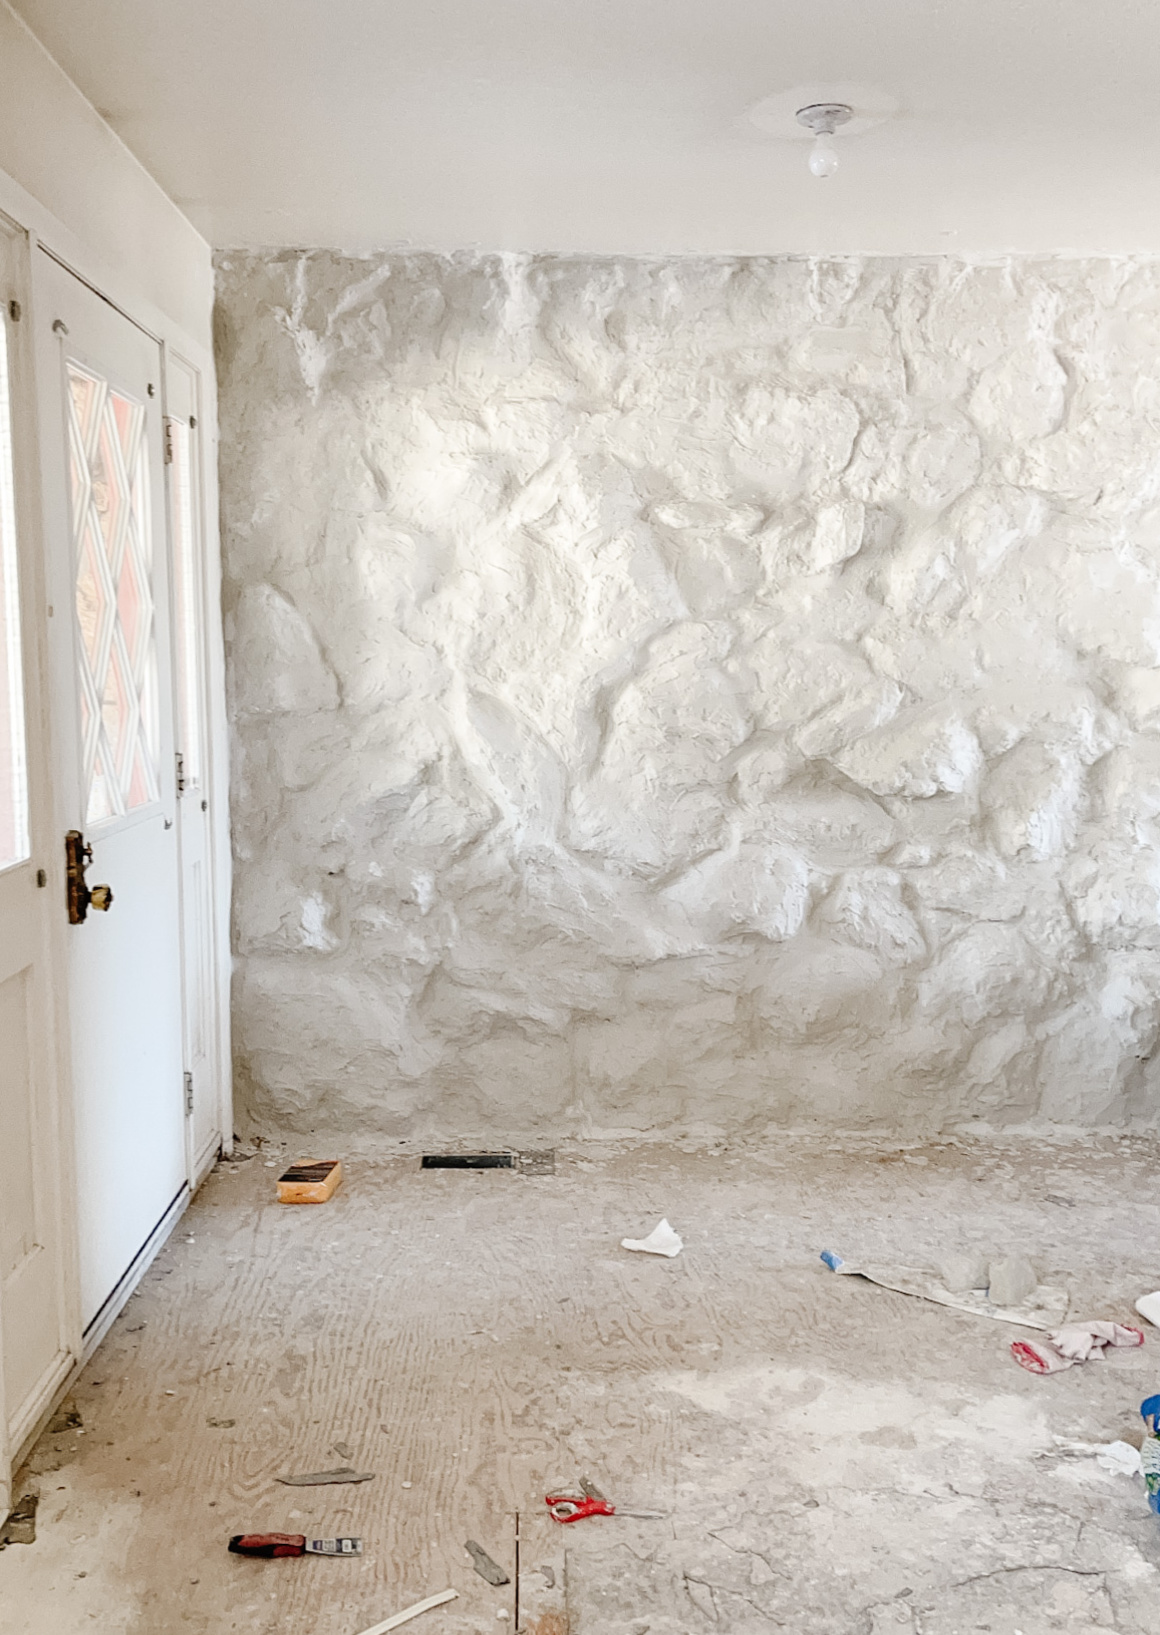
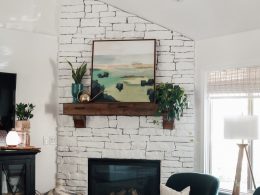
Before and After of our Idaho Travertine (Rock Wall)
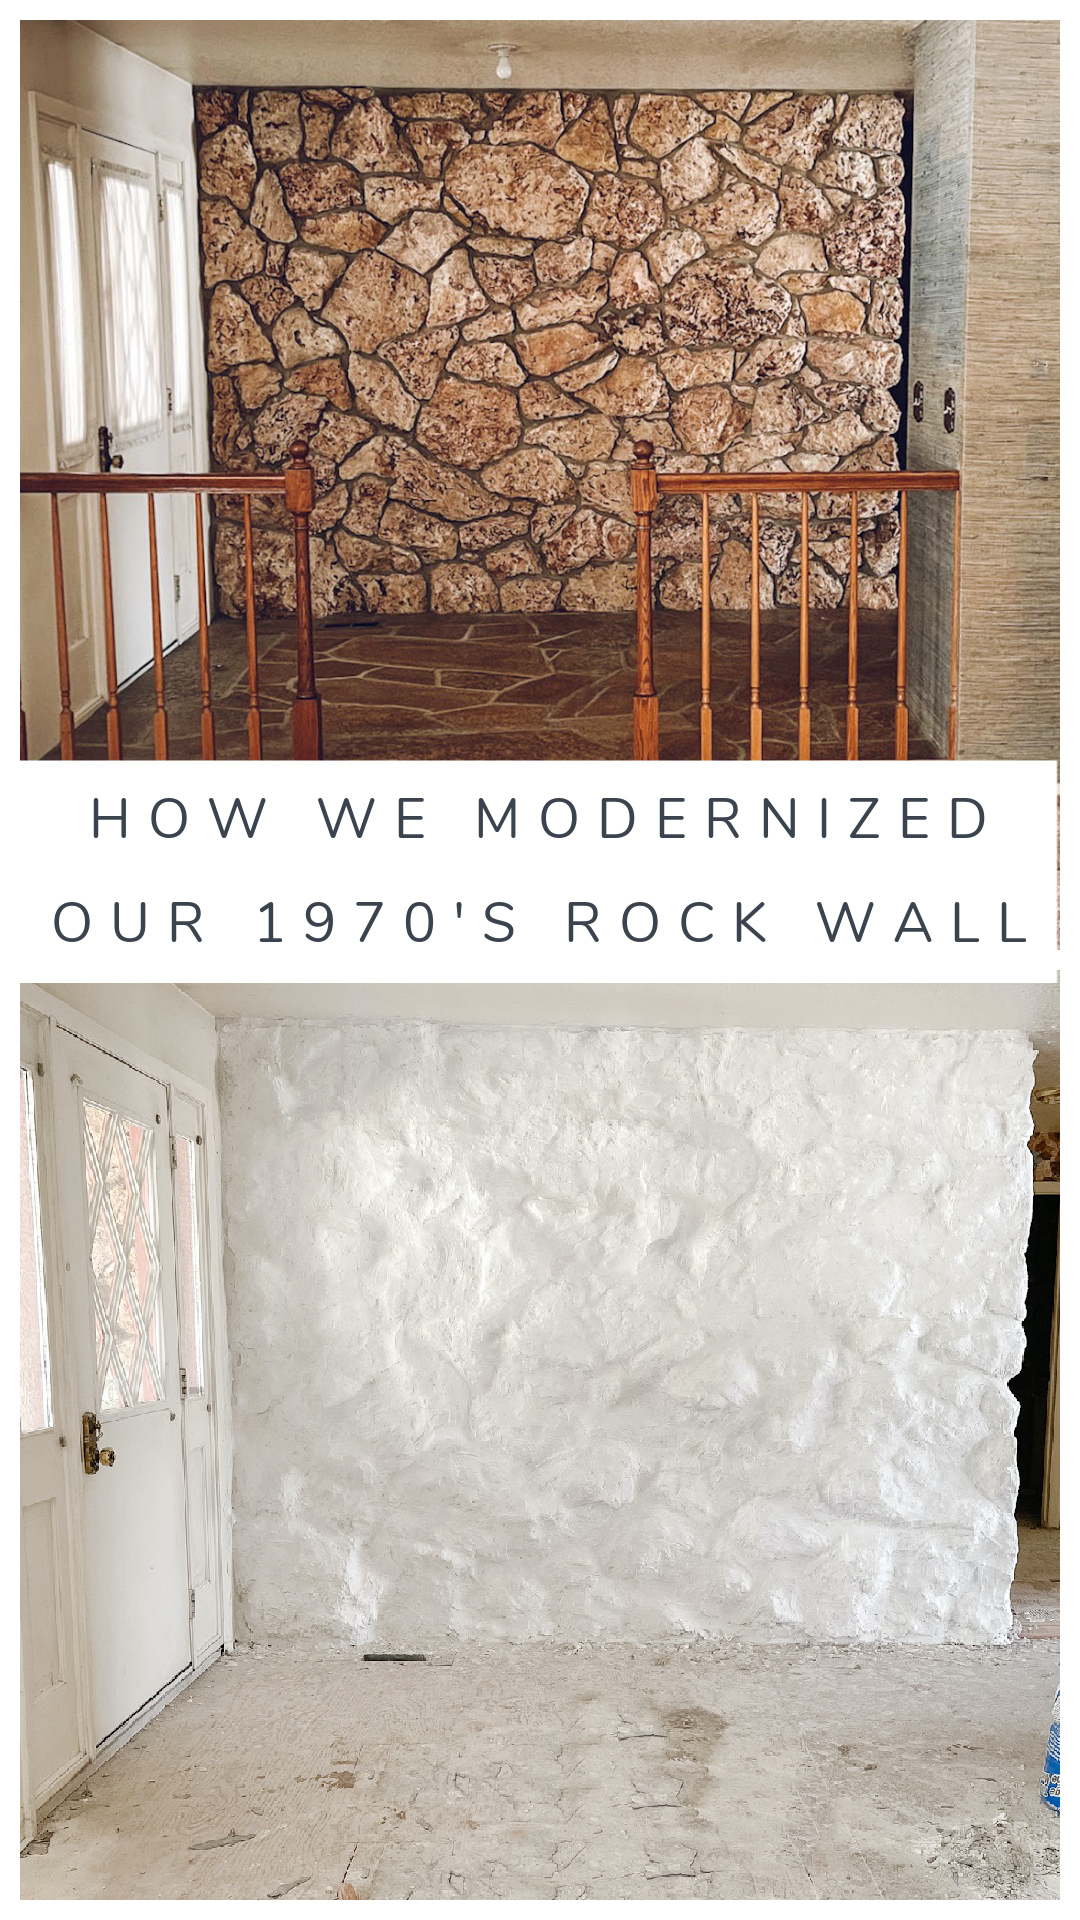
As you can see, we ended up covering the travertine with a lot of mortar and painted completely white with Limewash in Bianco White.
DIY Painted White Rock Wall Steps-
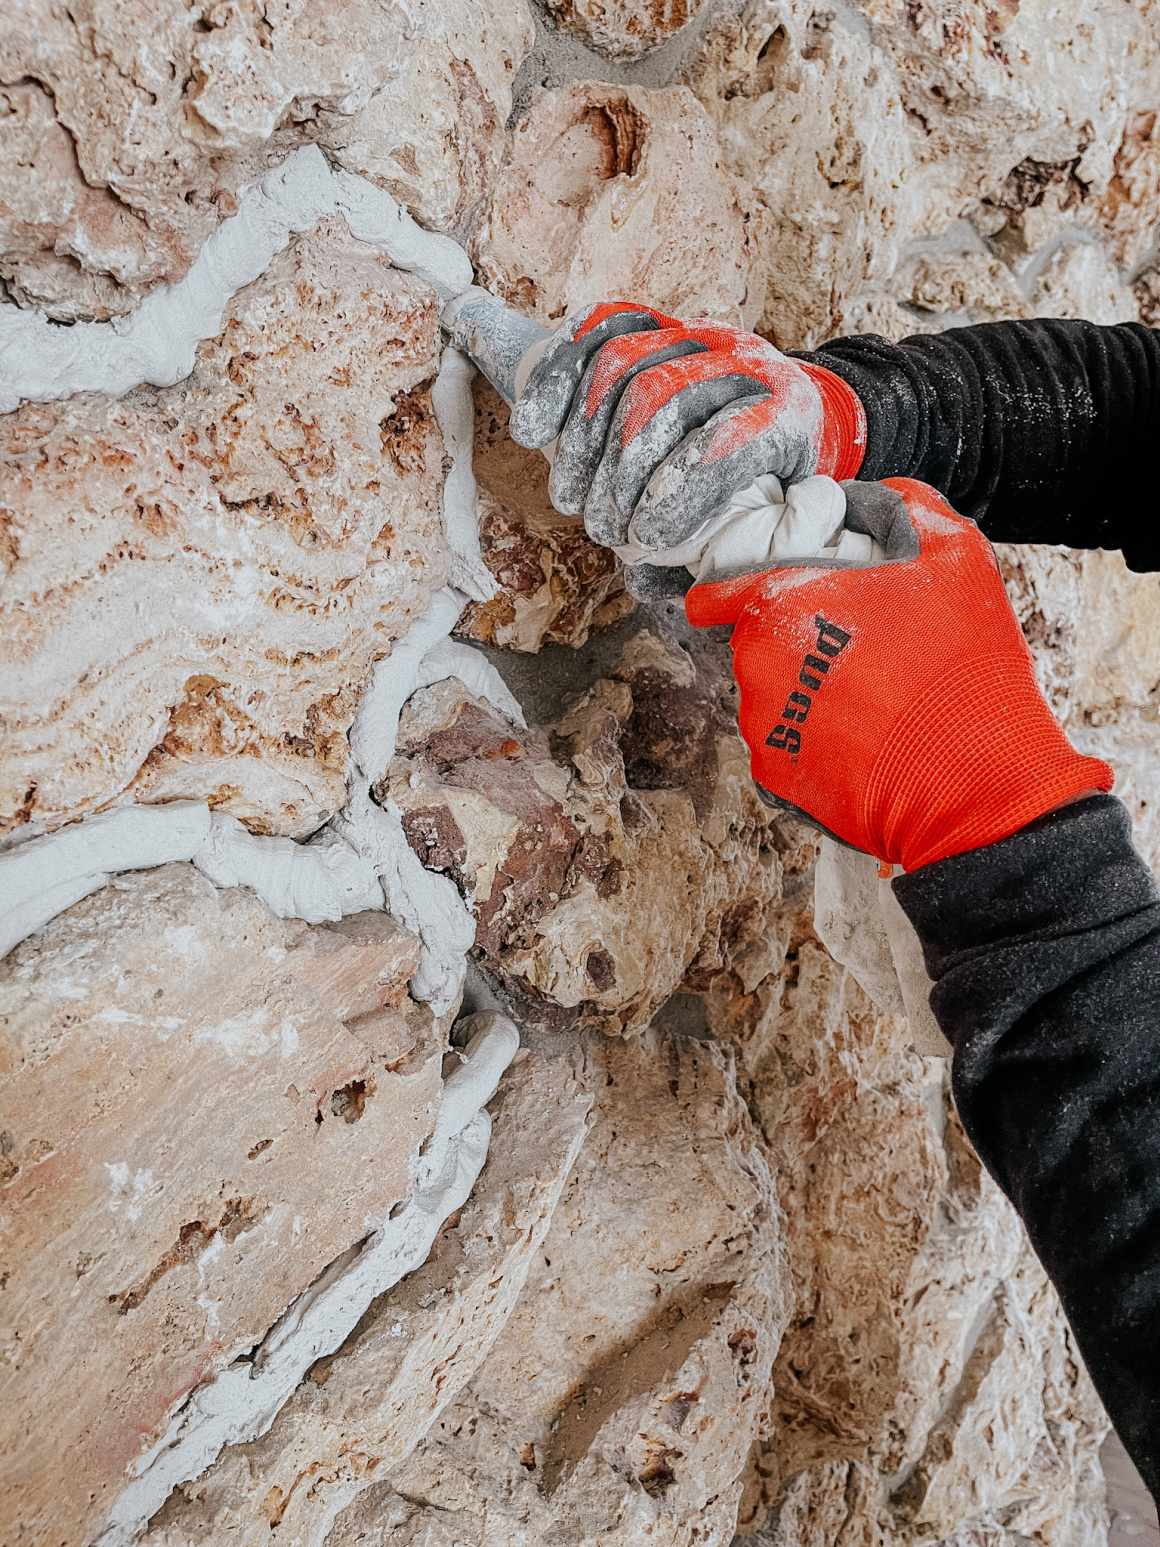
We started by trying to create a over-grout look. Using a large mortar piping bag we filled it with white mortar and pipped in the grout lines. The grout lines are extremely deep, we ended up using a lot more mortar than expected. We also had to experiment with the thickness of the mortar we wanted.
Mortar Pipping Tips-
- You want a thick mortar, about that of frosting any thinner the mortar tended to fall out of the grout line
- Don’t fold the top of the mortar bag, rather twist it closed
- Cut a bigger hole at the tip
- Use your opposing hand to apply pressure on the bag
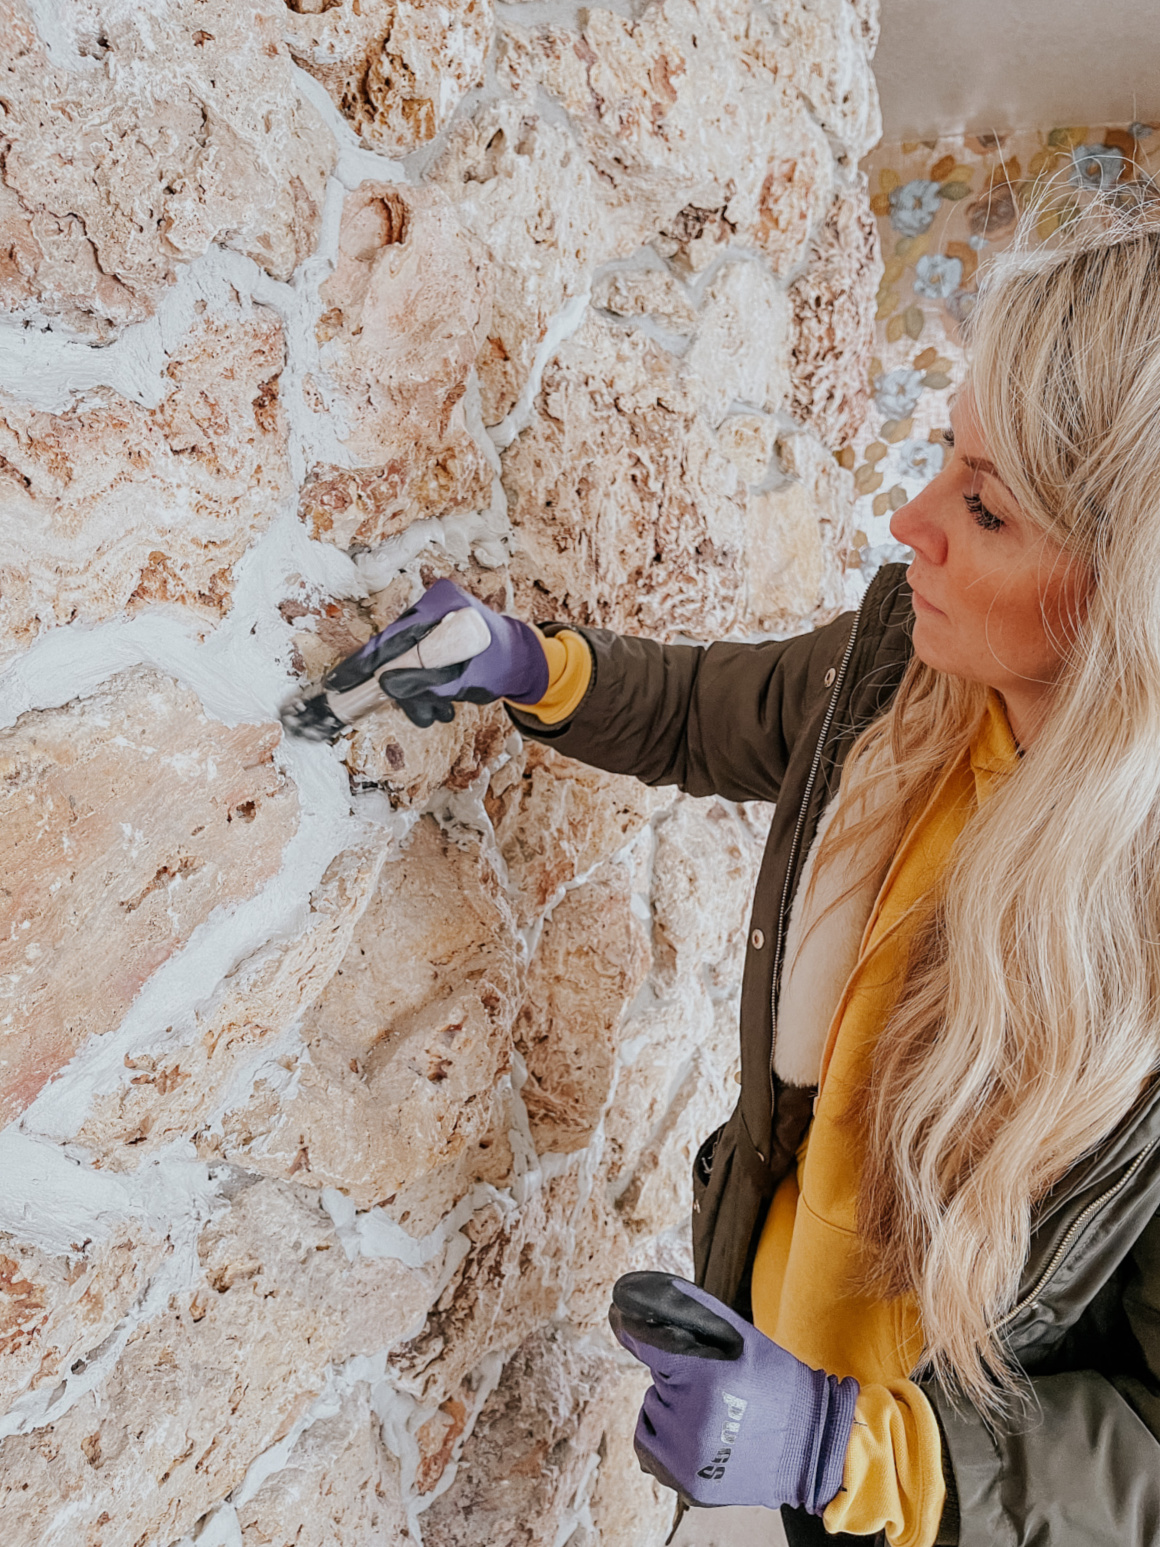
After we completely filled in the grout lines we waited about an hour and went back through with a small brush to spread the mortar slightly over the rock. This was when we were still trying to just do the over-grout look. In this step all you do is get the brush slightly wet and smooth the mortar in the grout lines, taking it slightly over the edge of the rock. The issue we ran into was that our rock, for one, was not flat. And our rock is very porous and jagged so it was challenging to get a clean over-grout type look.
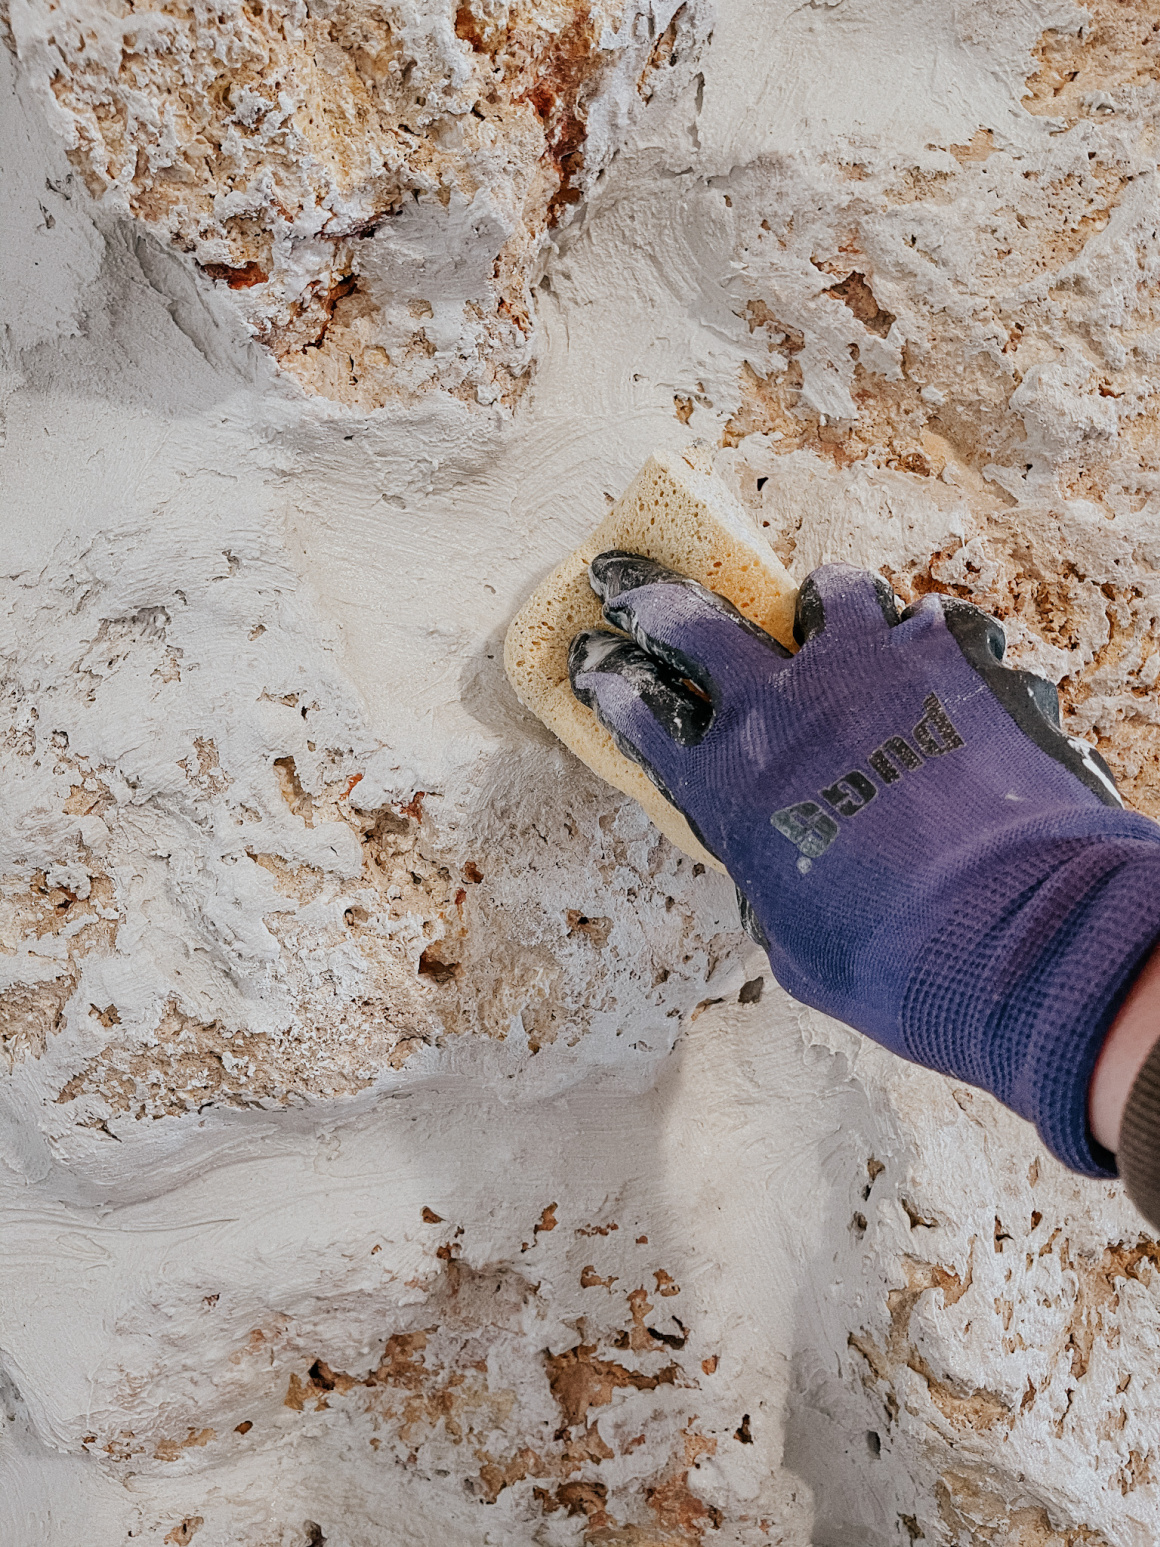
We decided to pivot slightly and use a sponge to cover more of the rock, we simply took a damp sponge and mortar and covered more of the rock. This was the point where we were moving away from the over-grouting look, although it would still be considered over-grouting once we completed this step.
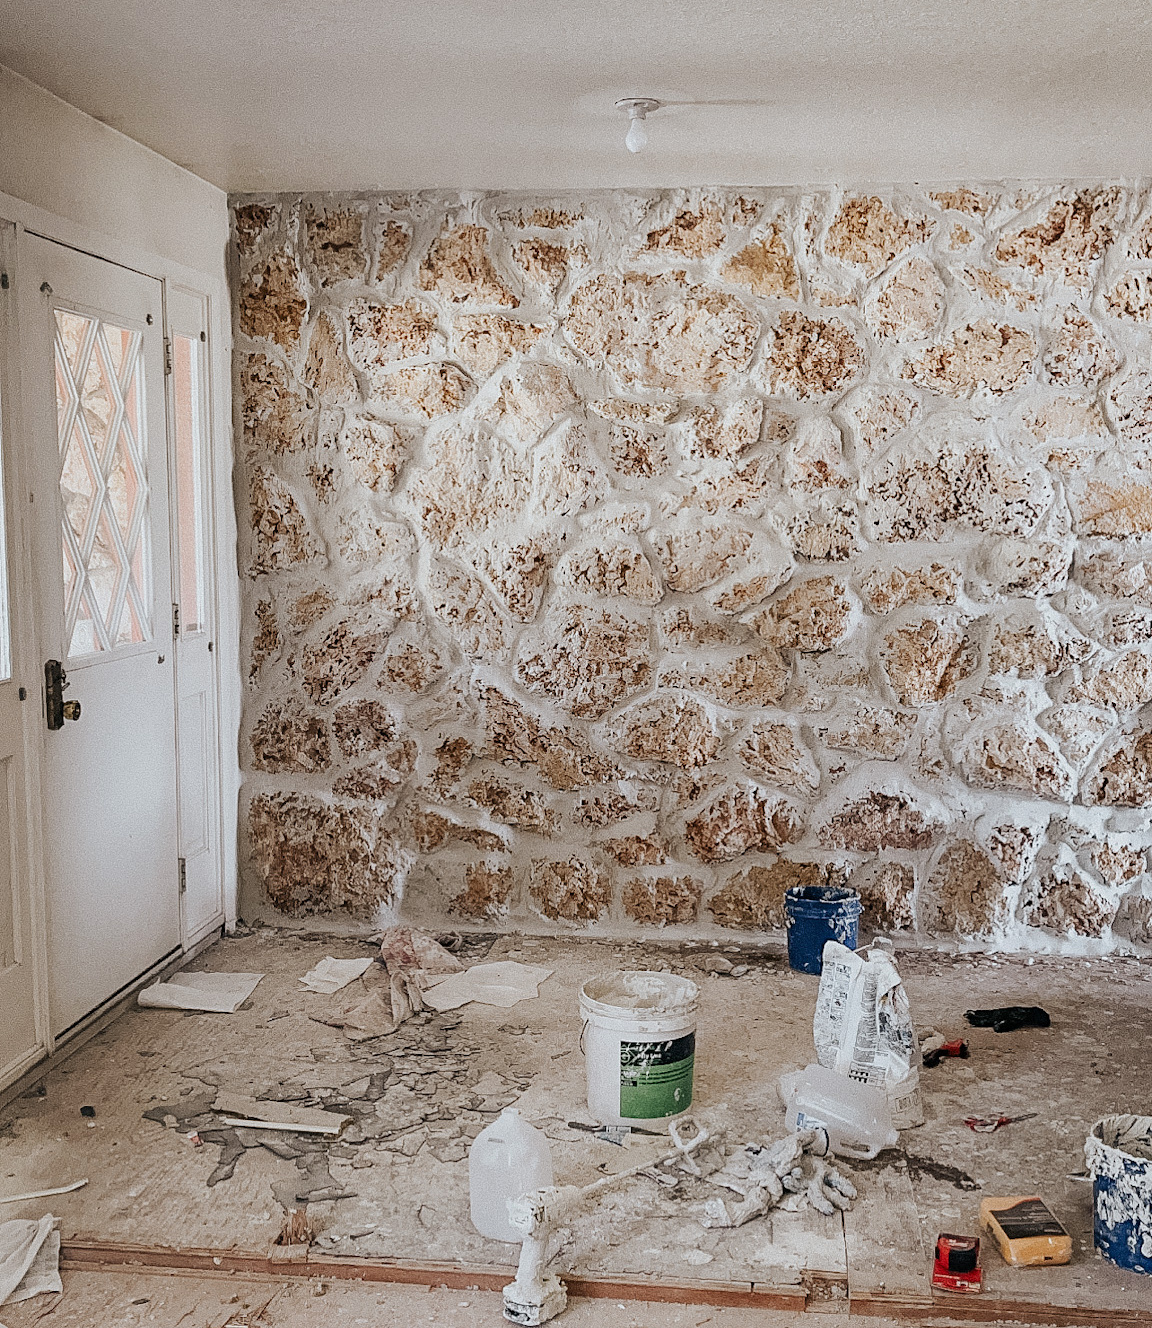
I really wanted to love the way the wall looked at this point, we had worked on it for quit awhile. We wanted to keep some of the natural rock color. However, we didn’t love it. Someone (kindly) pointed out that it looked like cereal floating in milk.
So, we decided to set the mortar aside and see how it would look if we just painted the rock. Right away I could tell that I still wasn’t loving the look, the rock still looked very jagged and harsh. You could see all the large holes and it frankly just looked like we painted the rock, one dimensional.
We decided to move forward with a mortar/grout wash over the entire wall. To do this we simply mixed up some mortar with a slightly thicker consistency and got to work covering the entire wall. We used grout sponges to apply the mortar. Once the wall was completely covered we got a sponge slightly wet and went over the entire wall to smooth the mortar as much as we could.
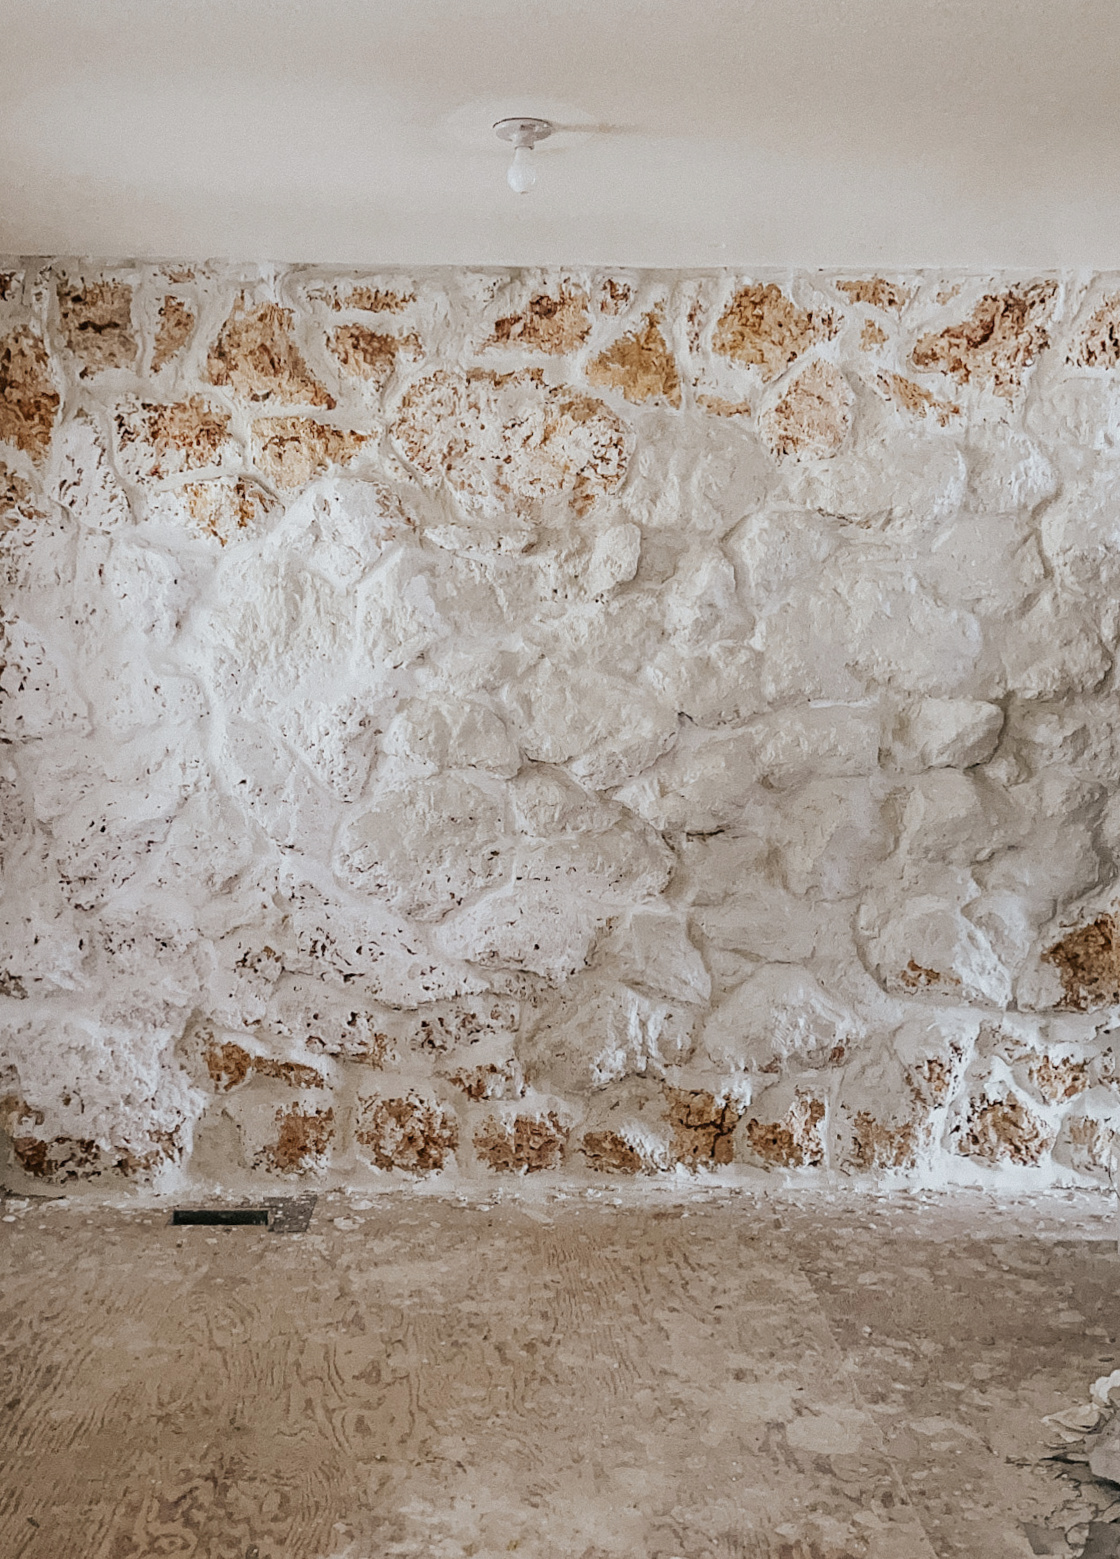
The wall was now completely covered in mortar and I was really starting to love it. However, there were some still very prominent rocks. We went back the next day and applied two more bags of mortar into the grout lines. We, once again, mixed up the mortar slightly thicker and applied with sponges and smoothed it after the mortar was applied.
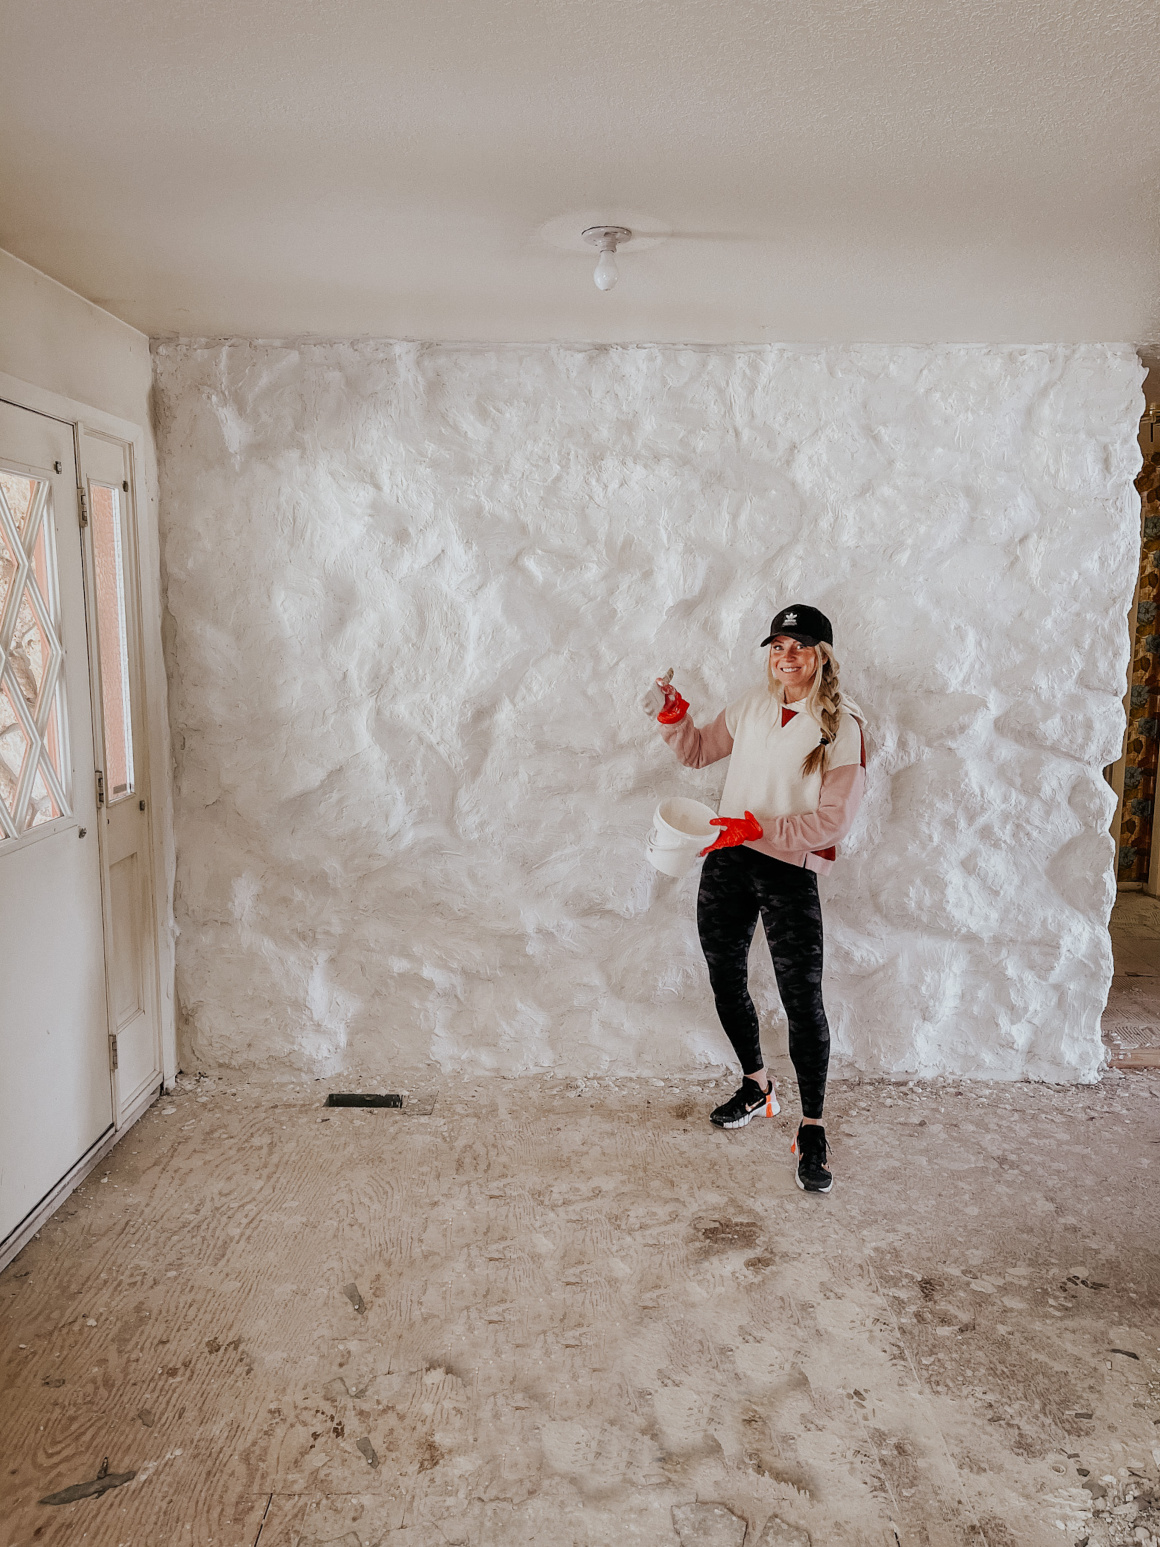
The final step and the thing that really put the project over the finish line for me was the Limewash. We had decided that the chalk paint didn’t soften the wall up like we had hoped so we went with the Limewash and are so happy we did! We slightly thinned out the Limewash in a bucket and applied with paint brushes, it took a 2 1/2 gallon bucket of Limewash to cover the entire wall.
Supplies Needed
- Mortar (ours was white) *make sure you have access to water to mix with this
- Mortar Pipping Bags *make sure to have scissors on hand to cut the opening bigger
- Limewash *we did Bianco White
- 5 gallon Mixing Buckets *we got 3
- Grouting and Mortar Sponge
- Stiff Craft Brush
- Drill
- Mortar Mixing Attachment *this attaches to a drill
I am so happy with the way that the wall turned out. No, it was not easy. No, it is not perfect. No, it’s not what I initially had in mind…. But I STILL love how it turned out! I really think that a lot of the joy I have for this wall comes from the process that Kevin and I took in completing it, we adjusted as we went along, we stayed positive, we worked hard, and we smiled and had fun with each other while we did it. Now one of the first things you see as you walk into our new home will be a labor of love and we hope that love will translate throughout the entire home.
Check out this post to see Five Different Entry Ideas I am deciding between!


I would’ve torn it out and used it outside. But I know with your amazing styling it will look good
Wow, what a job!!! Well done! Kudos to you for your perseverance.