
When we moved in these cabinets were a dark brown, not my favorite. We knew that there weren’t many options for cabinet placement so we opted to just have the existing cabinets refaced and new doors put on. The reason for refacing rather than painting was the style needed to be updated. New molding, larger doors etc. What we did not do and should have done when we remodeled the kitchen was paint the inside of the cabinets. 3 years later it still felt unfinished. So for my Mother’s Day gift to myself I started with one cabinet and bought all of the organizing things to really maximize this small kitchen and these cabinets! Seems like such a small un-neccessary step but I would disagree! Doing this step of painting inside motivated me to elevate the rest and really maximize and streamline what we keep inside each of the cupboards. Our home is 1100 square feet and this kitchen is about 143 square feet (11×13) we love this kitchen just as much as our previous kitchen that was double the size. We have learned how to enjoy it through keeping it organized and having a “home” for everything. Here is a tour of our kitchen cabinets for our Small Space Living Series!
Kitchen Cabinets BEFORE-
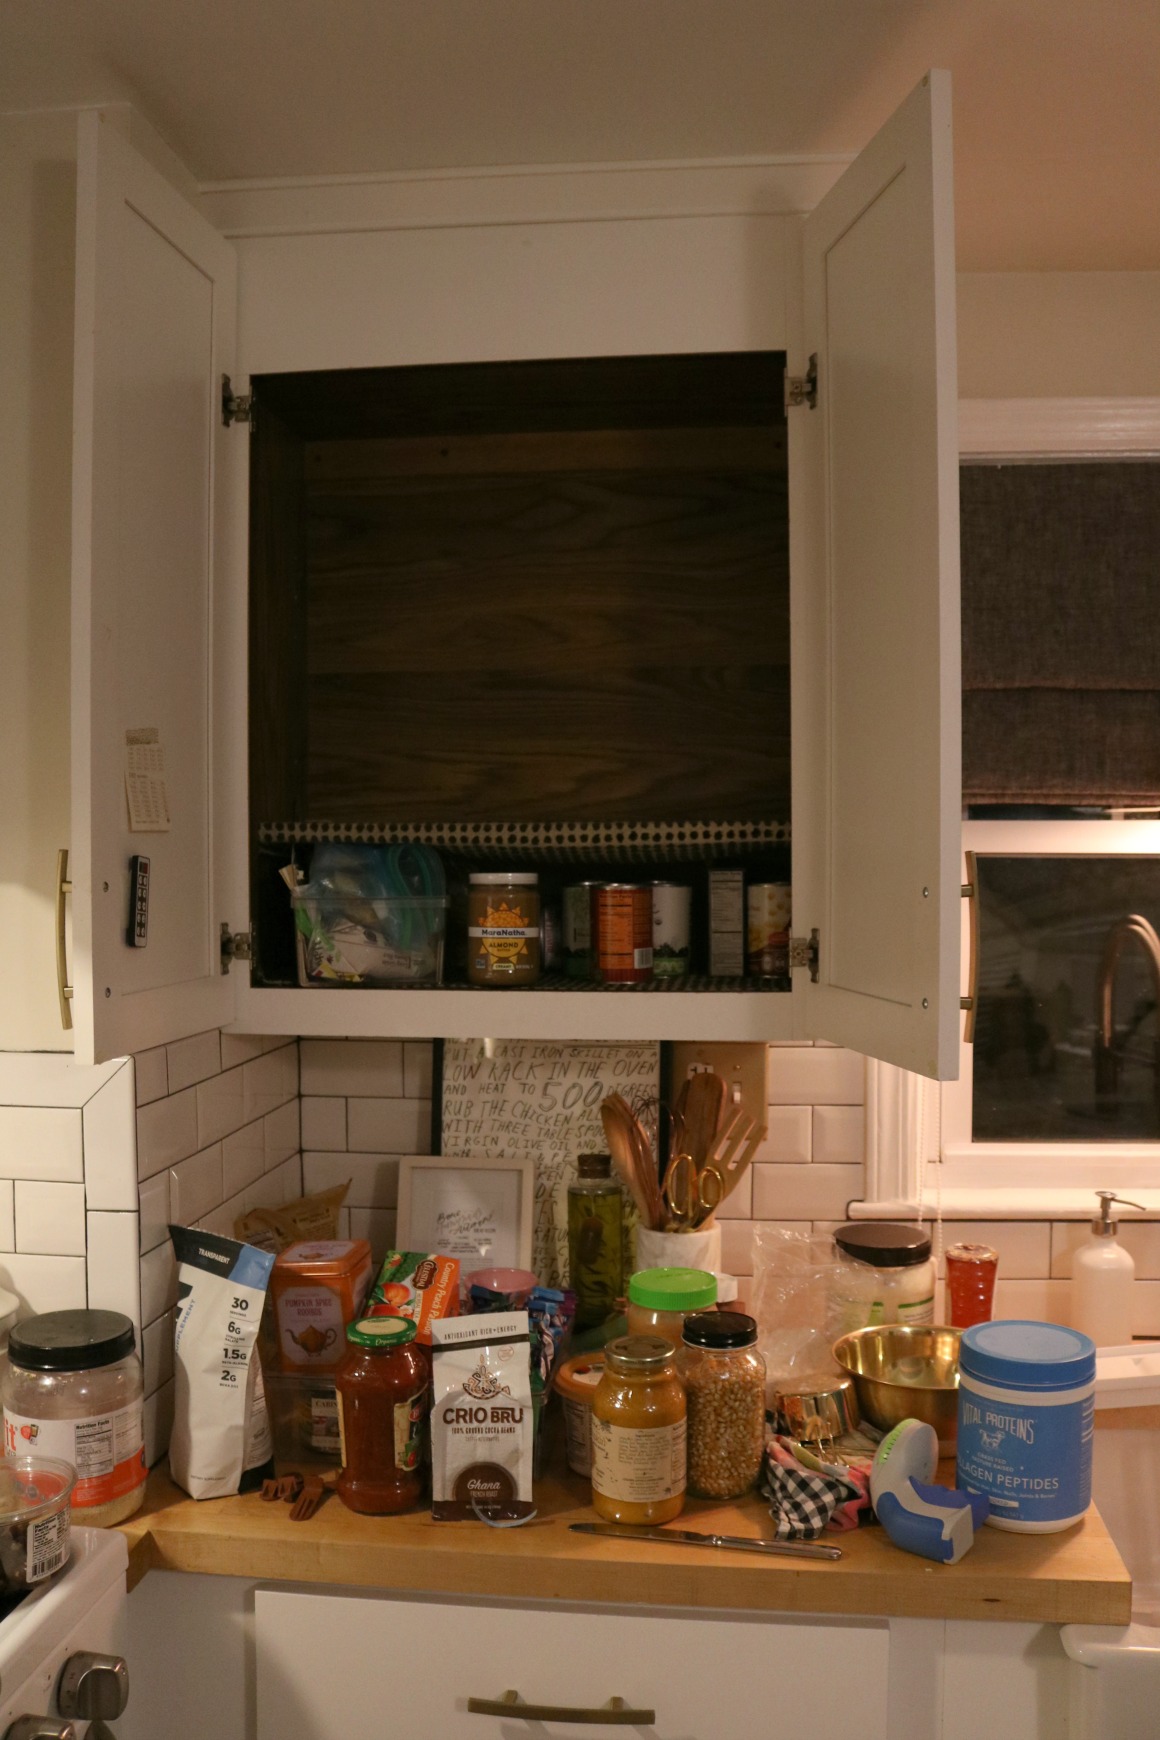
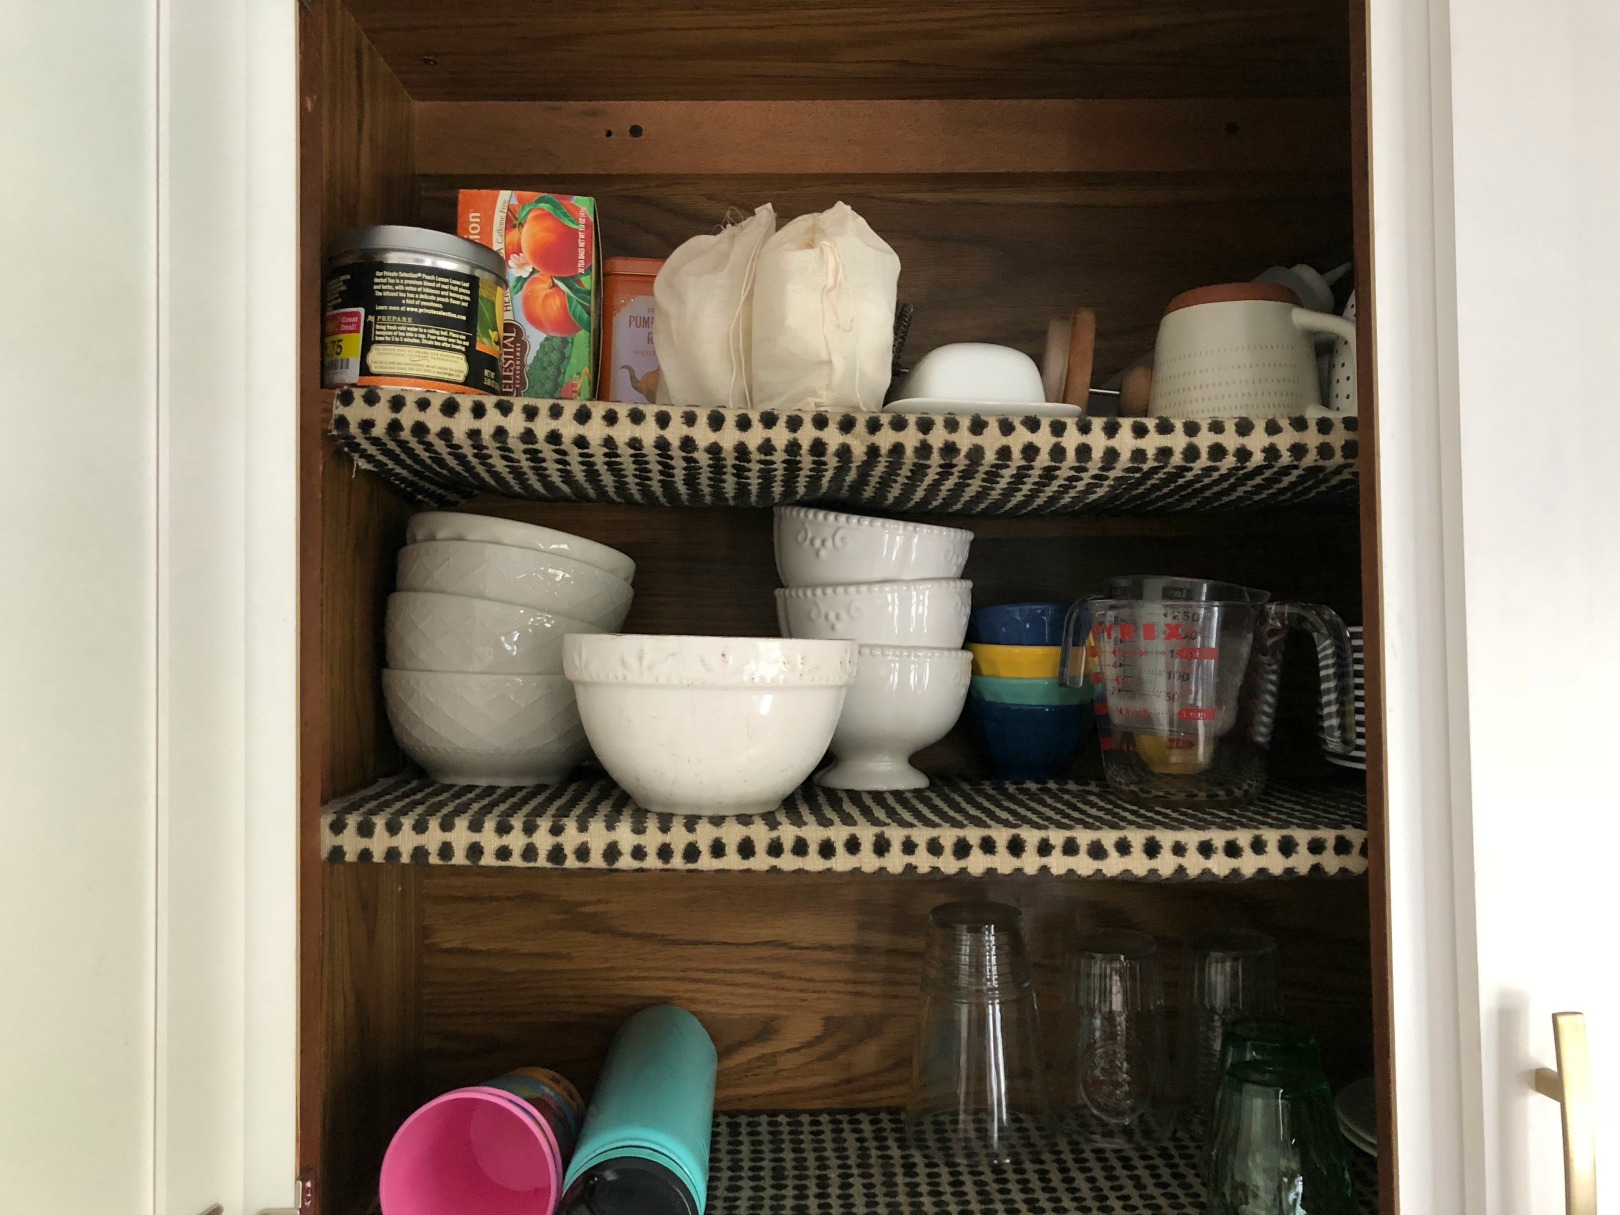
I took the the above photo right after I started to prep to paint them. You can see how dark they were and really unorganized. We had two shelves before and decided to just do one. We also switched to THESE small shelf pins.
PAINT- Valspar Ultra White in a semi-gloss with a primer mixed in. It took three coats of paint because it was a laminate dark brown cabinet. We used blow dryer to dry the shelves quickly! We did not seal it after but you could to avoid any scratches (we used was THIS sealer on our banquette). I lined each shelf with THIS premium non-adhesive shelf liner.
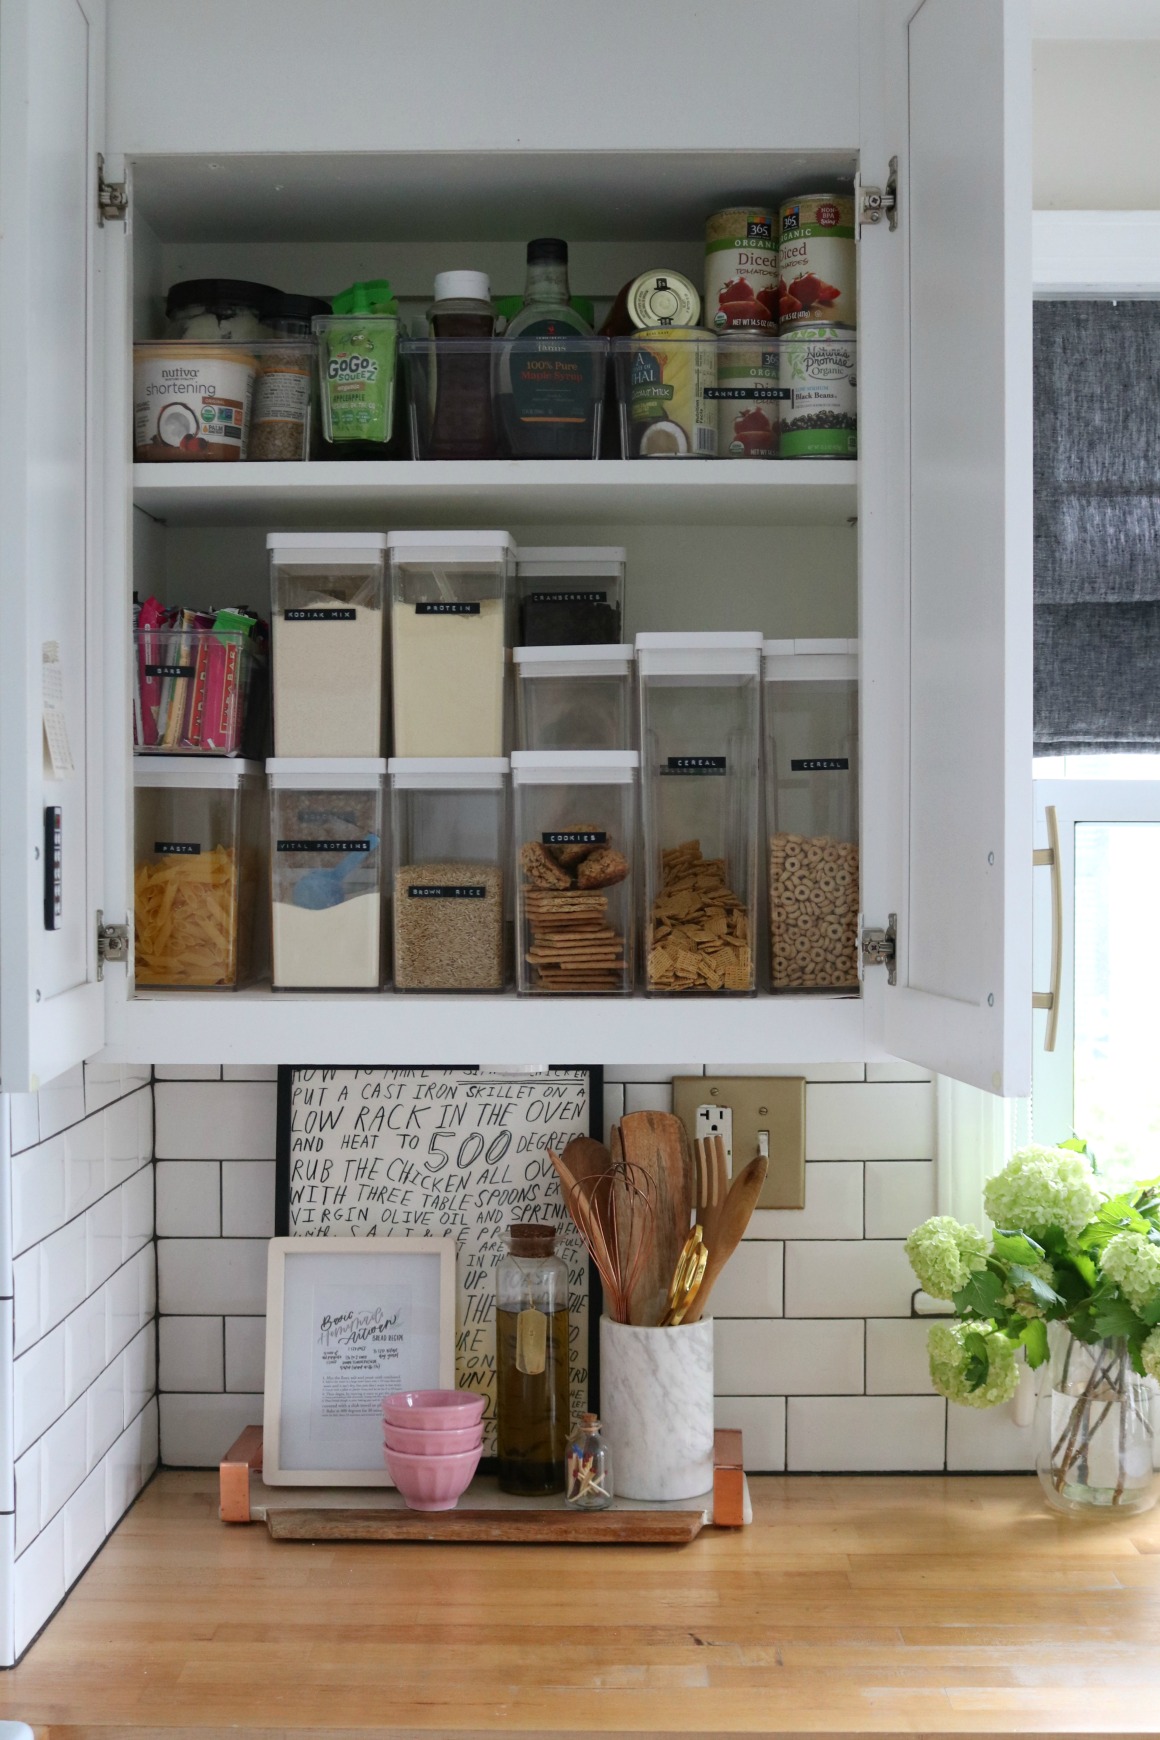
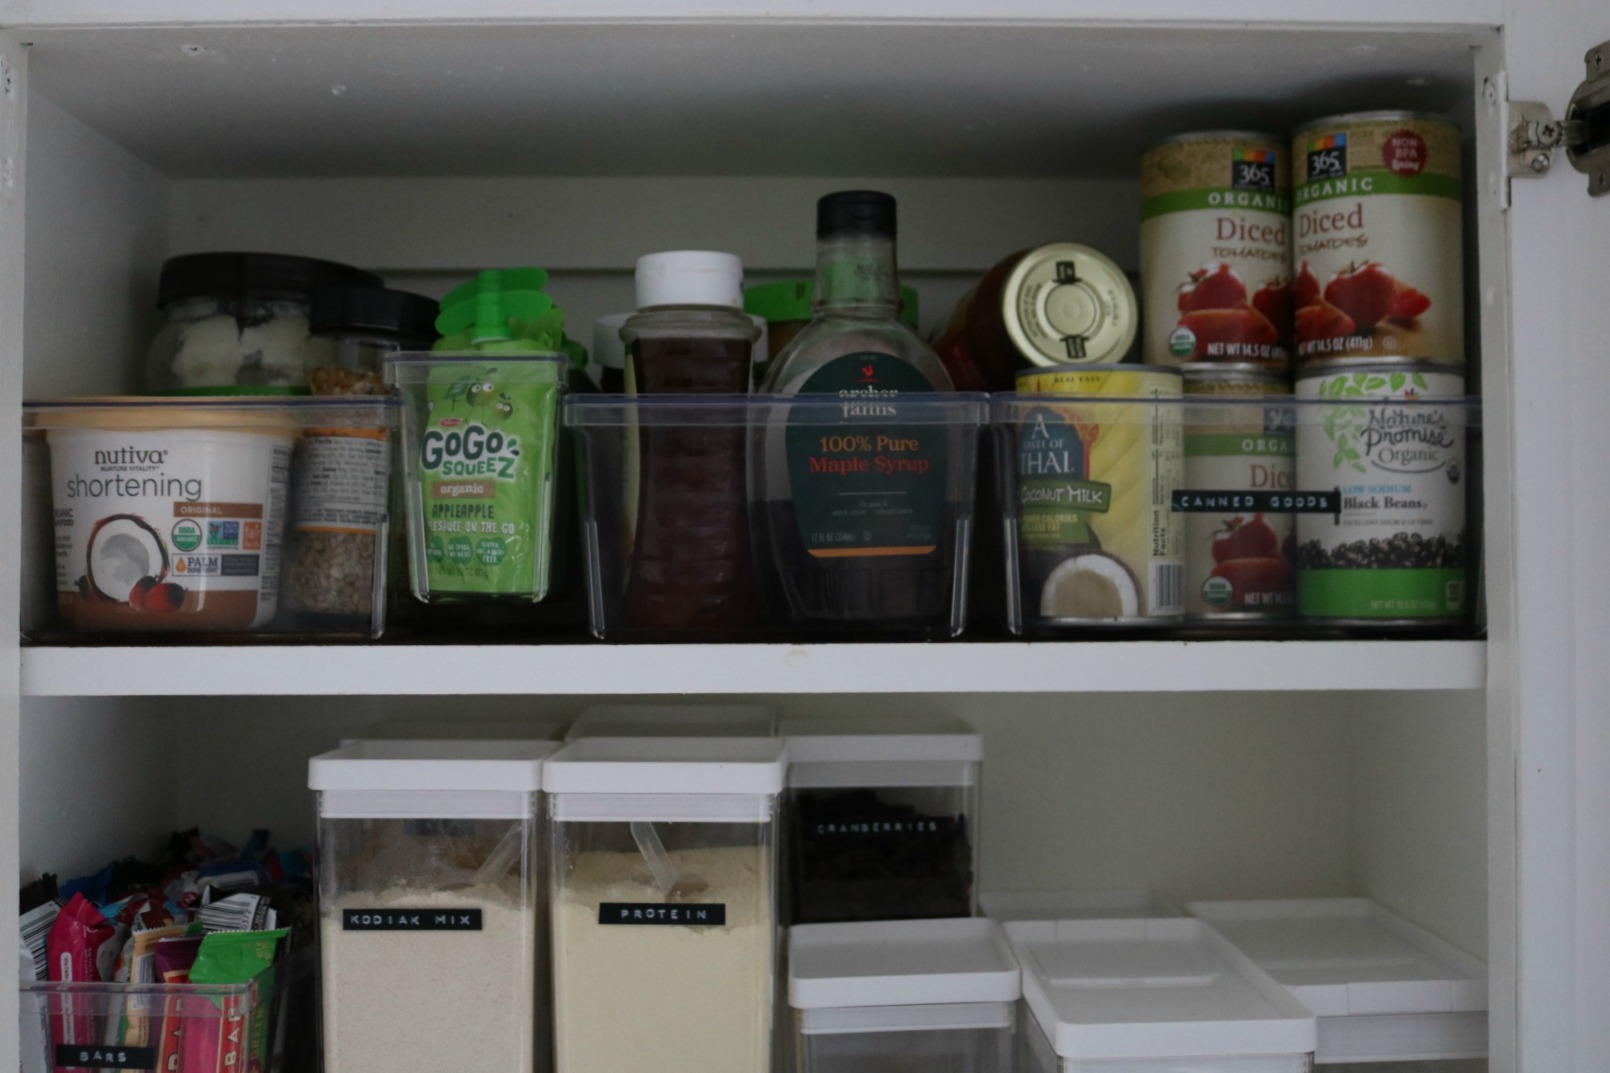
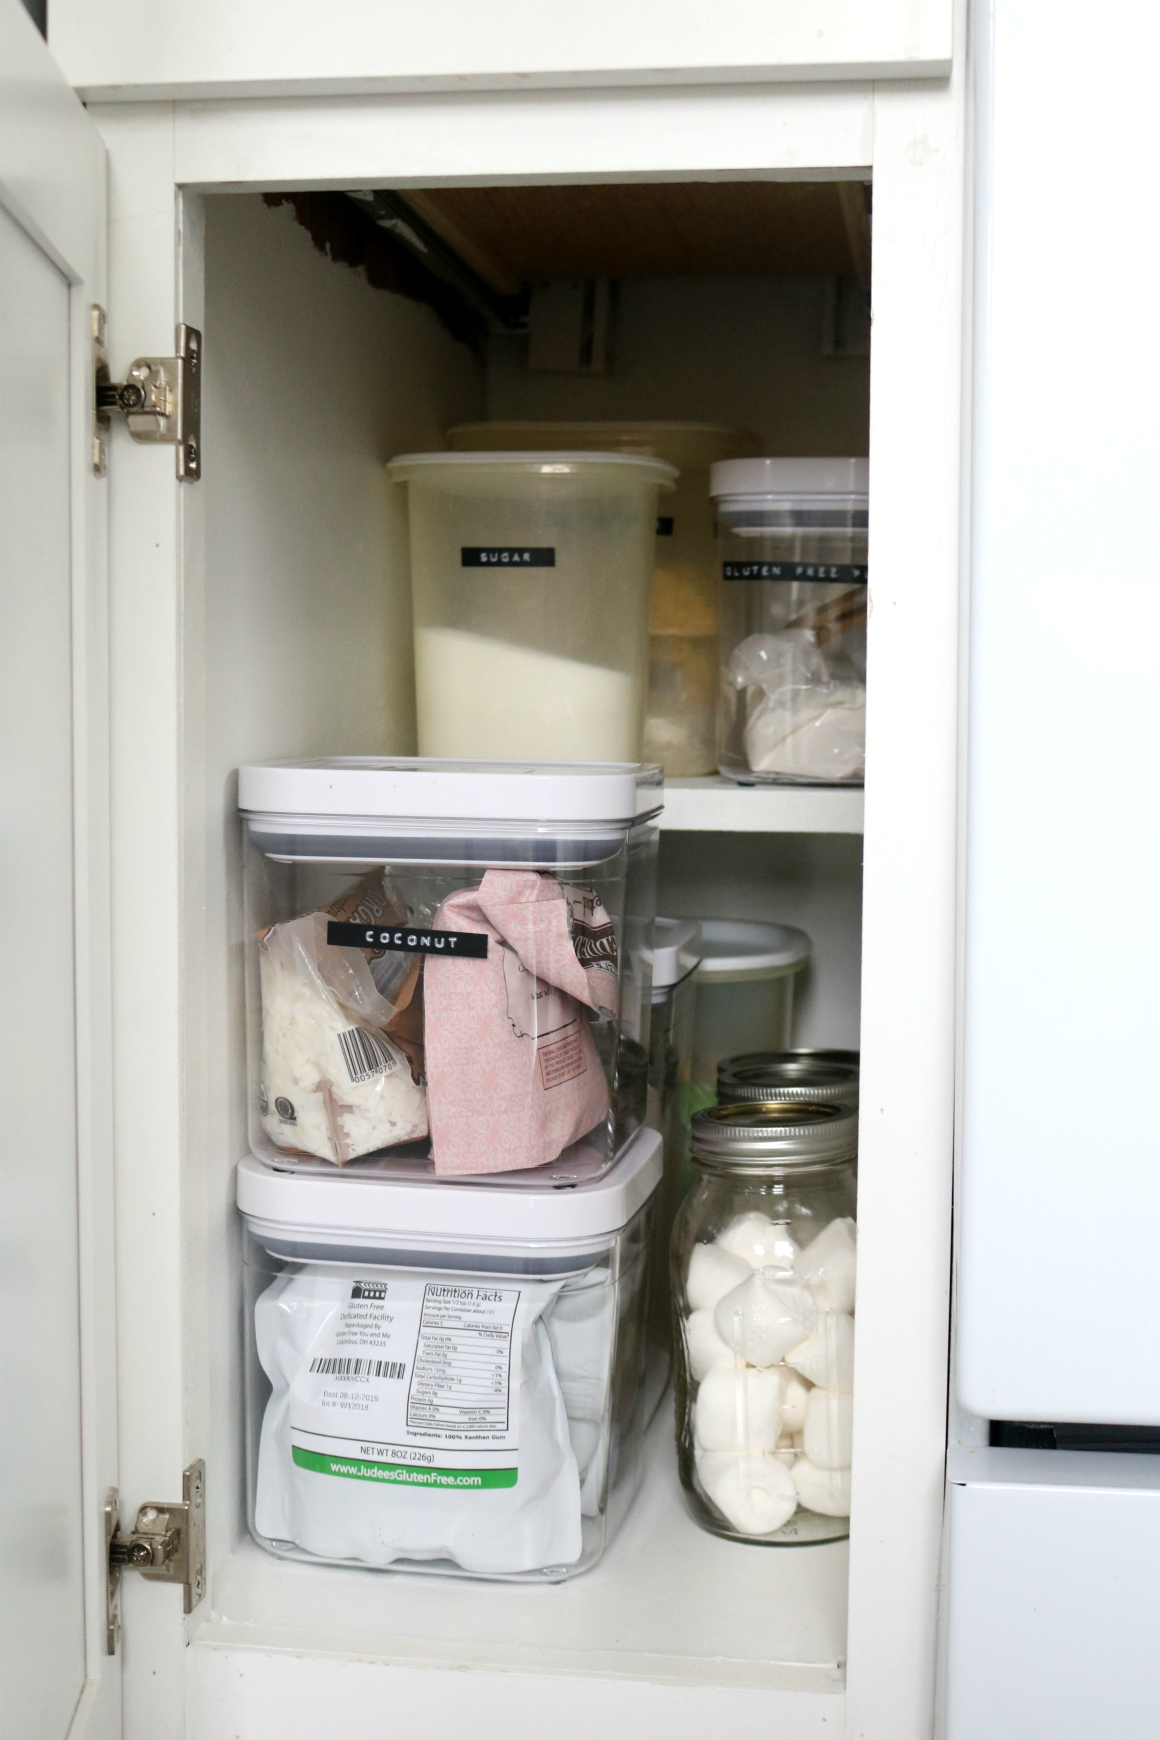
Taking food out of packages saves SO much space! We used THESE stackable clear containers. I like how they are square and not as bulky, making it possible to fit a lot! I labeled each one with THIS label maker. I write on the bottom of each container with a washable marker the expiration date. I also cut out the label on the container if there are instructions I need and tape to the back of the container.
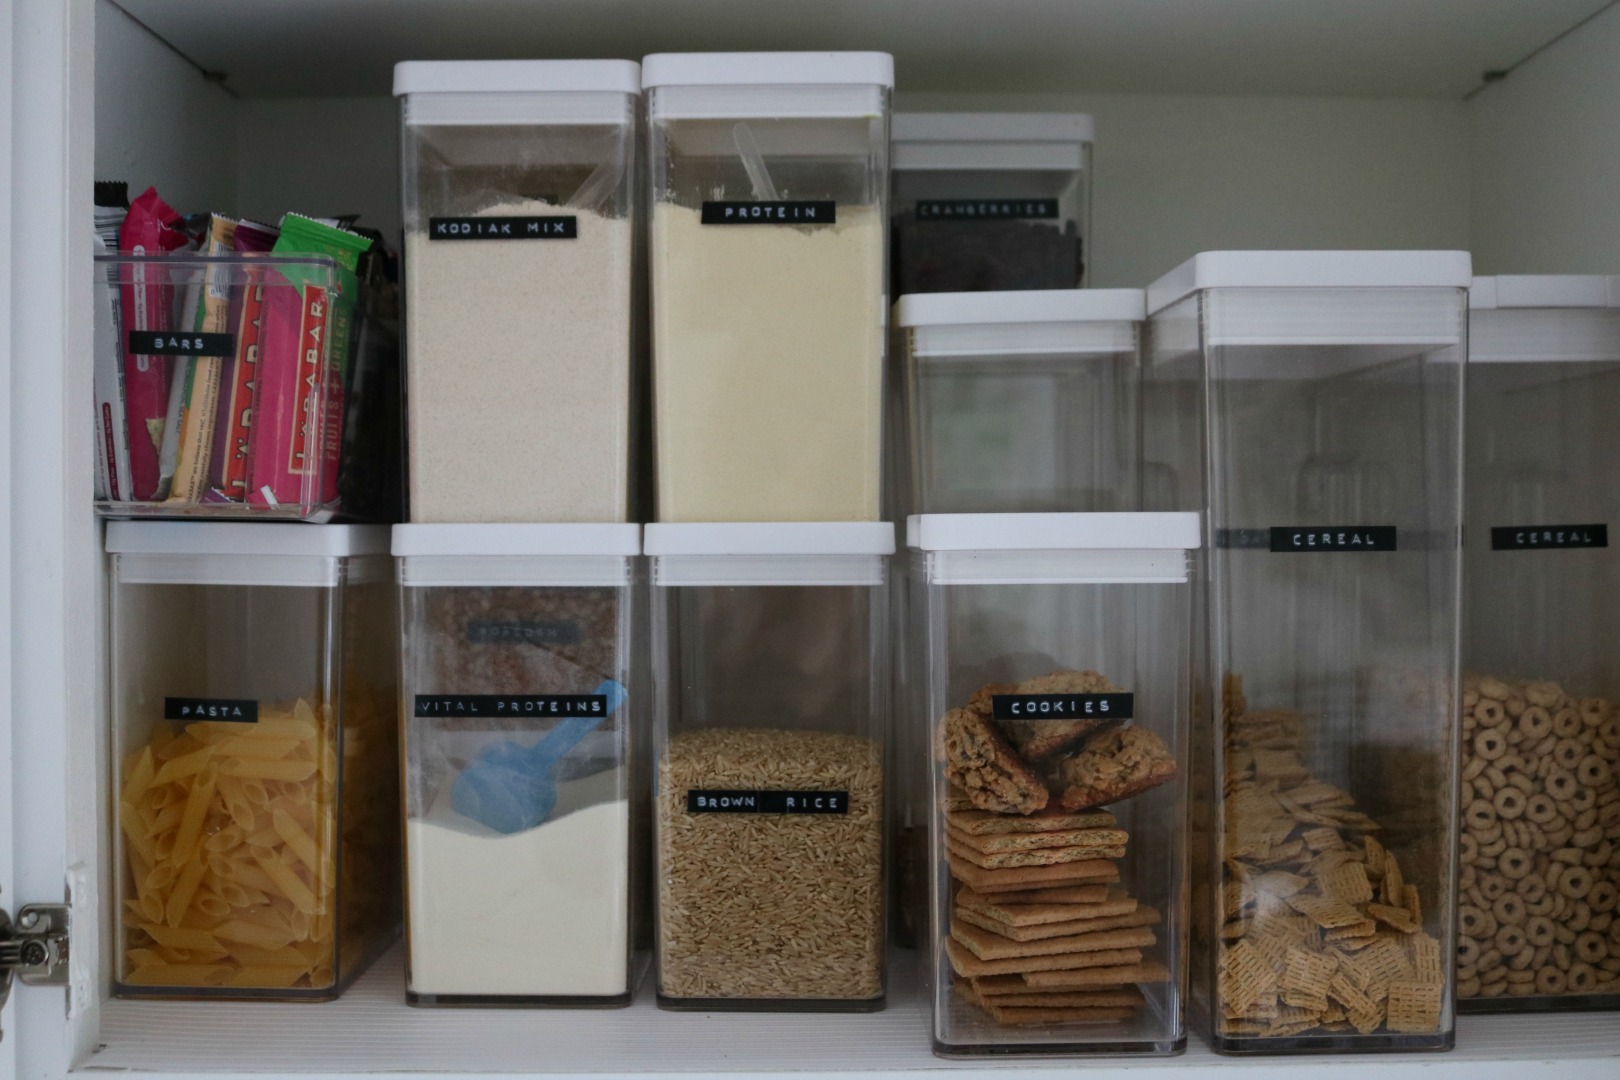
I keep things on the bottom shelf that we use the most and my kids need to be able to reach. The top shelf has canned goods, nut butters, coconut oil etc. that we keep inside THESE clear containers. This makes it easy to pull the entire container down to get what we need. We also have a cupboard in our basement that has extra food storage, back-ups of the things we eat often and a lot of water.
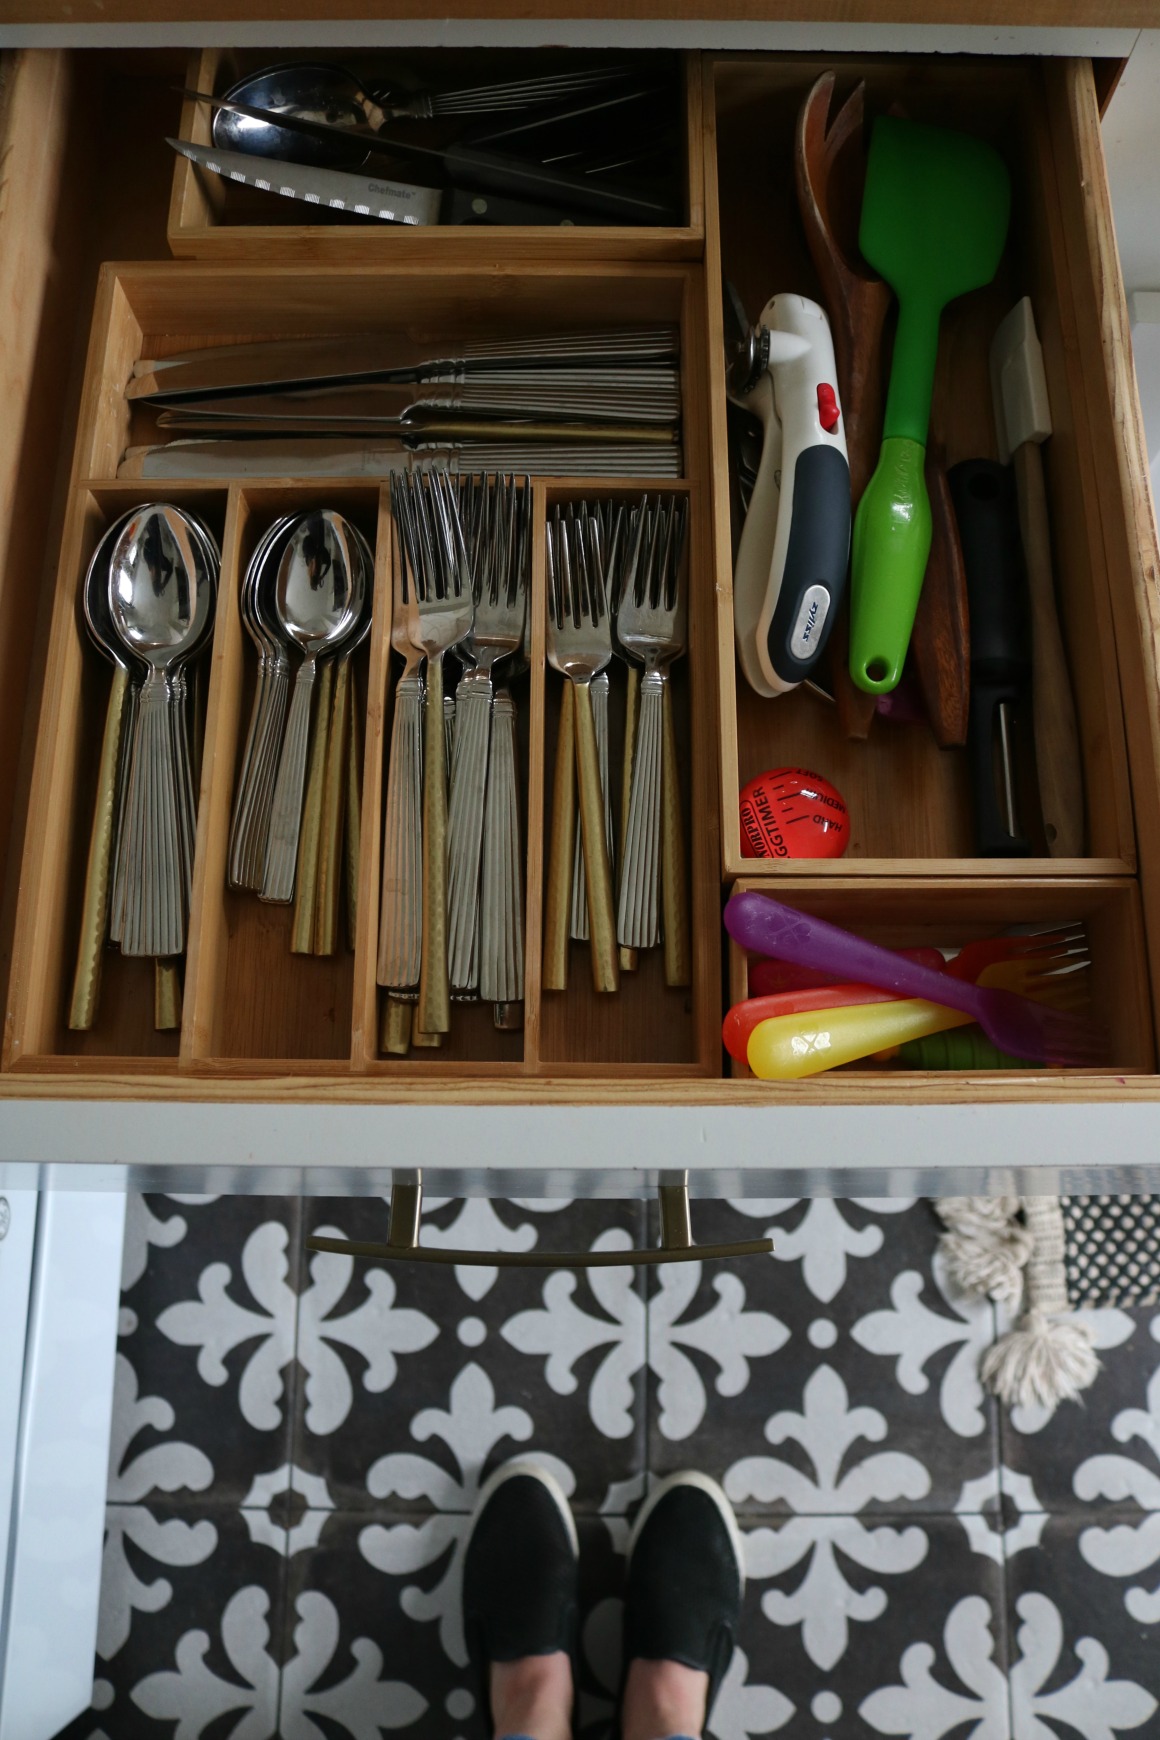
I really simplified our silverware drawer. Getting rid of the million plastic spoons and spatulas. Just keeping what we use on a regular basis, keeping in mind we can easily wash any utensil if we need it again. I used THESE bamboo drawer liners.
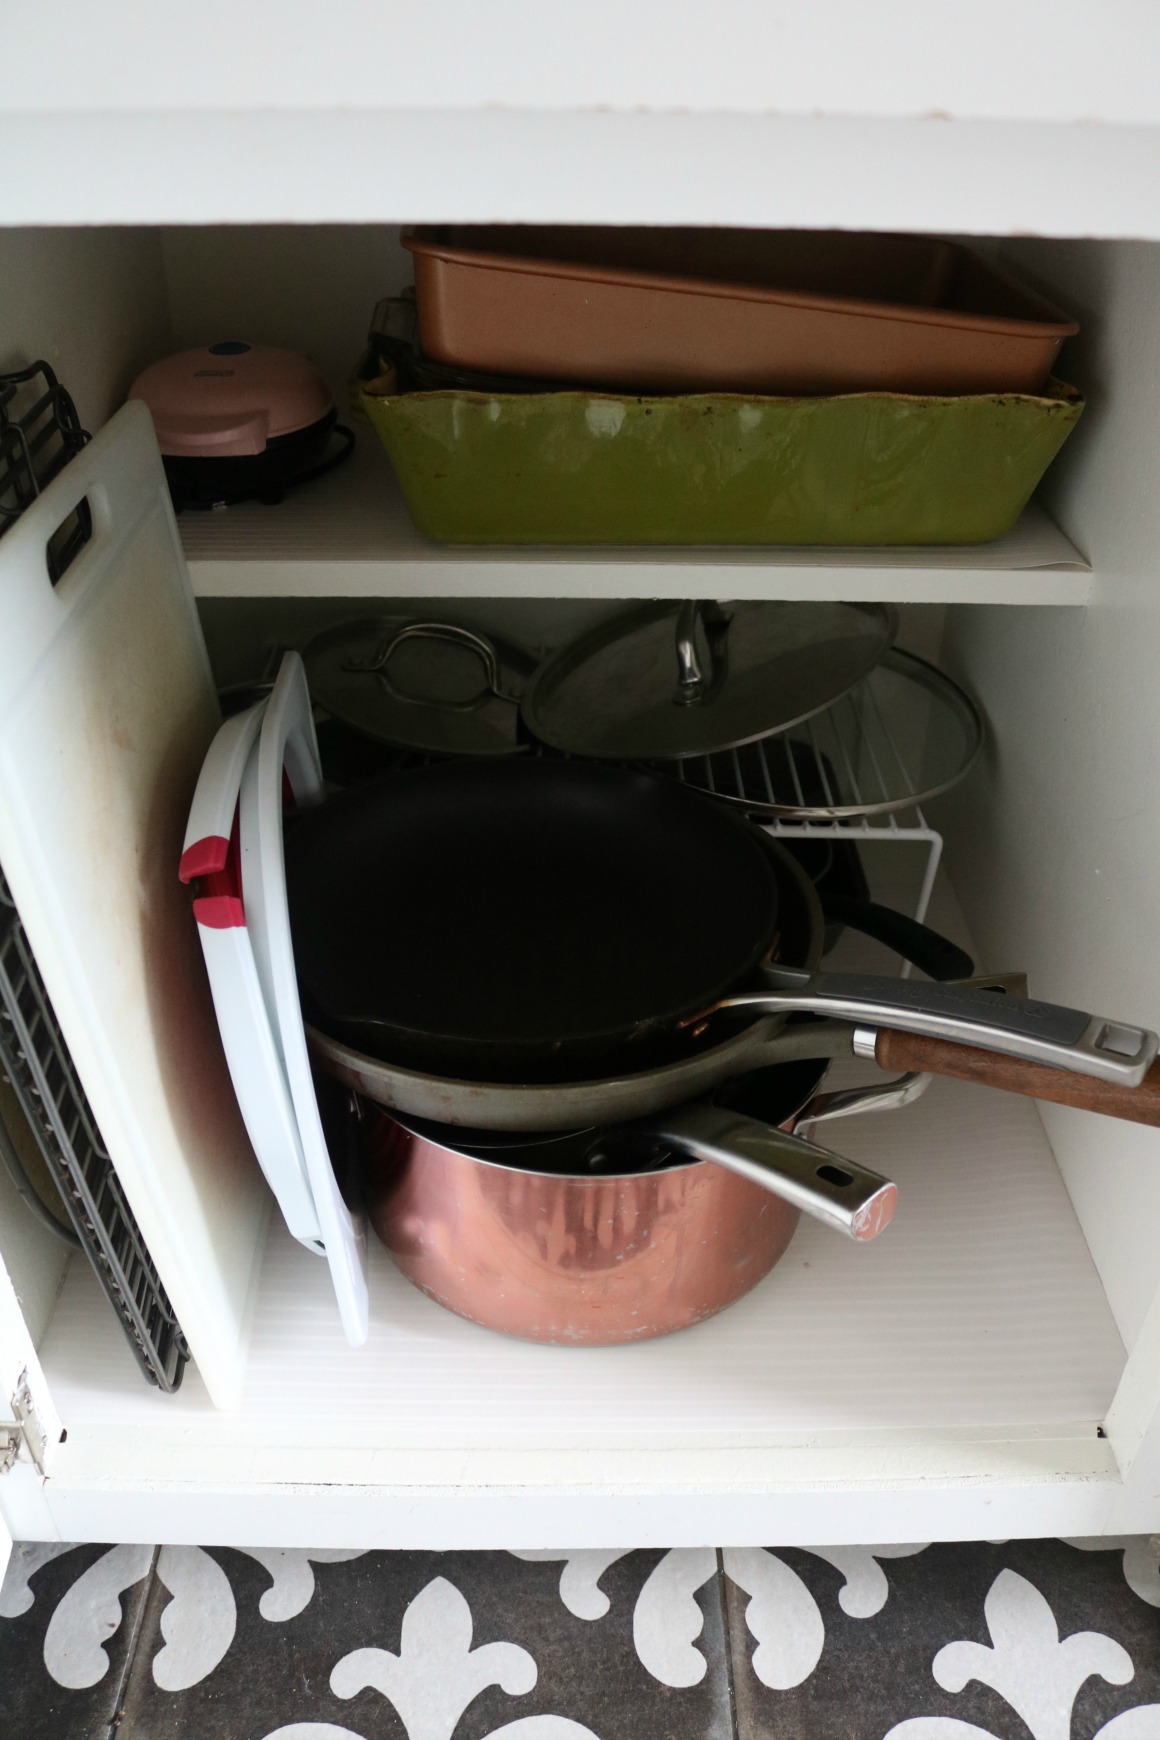
Our bottom cabinet has our pots and pans, cutting boards and baking pans. I found that we only use about 5 pots and pans so that is what we kept. And four assorted size baking dishes. We have THIS mini waffle maker that my daughter can easily operate and also perk it doesn’t take up a lot of space. I found THIS wire shelf to stack the lids and put baking dishes under. (I also lined each cabinet with THIS premium non-adhesive shelf liner).
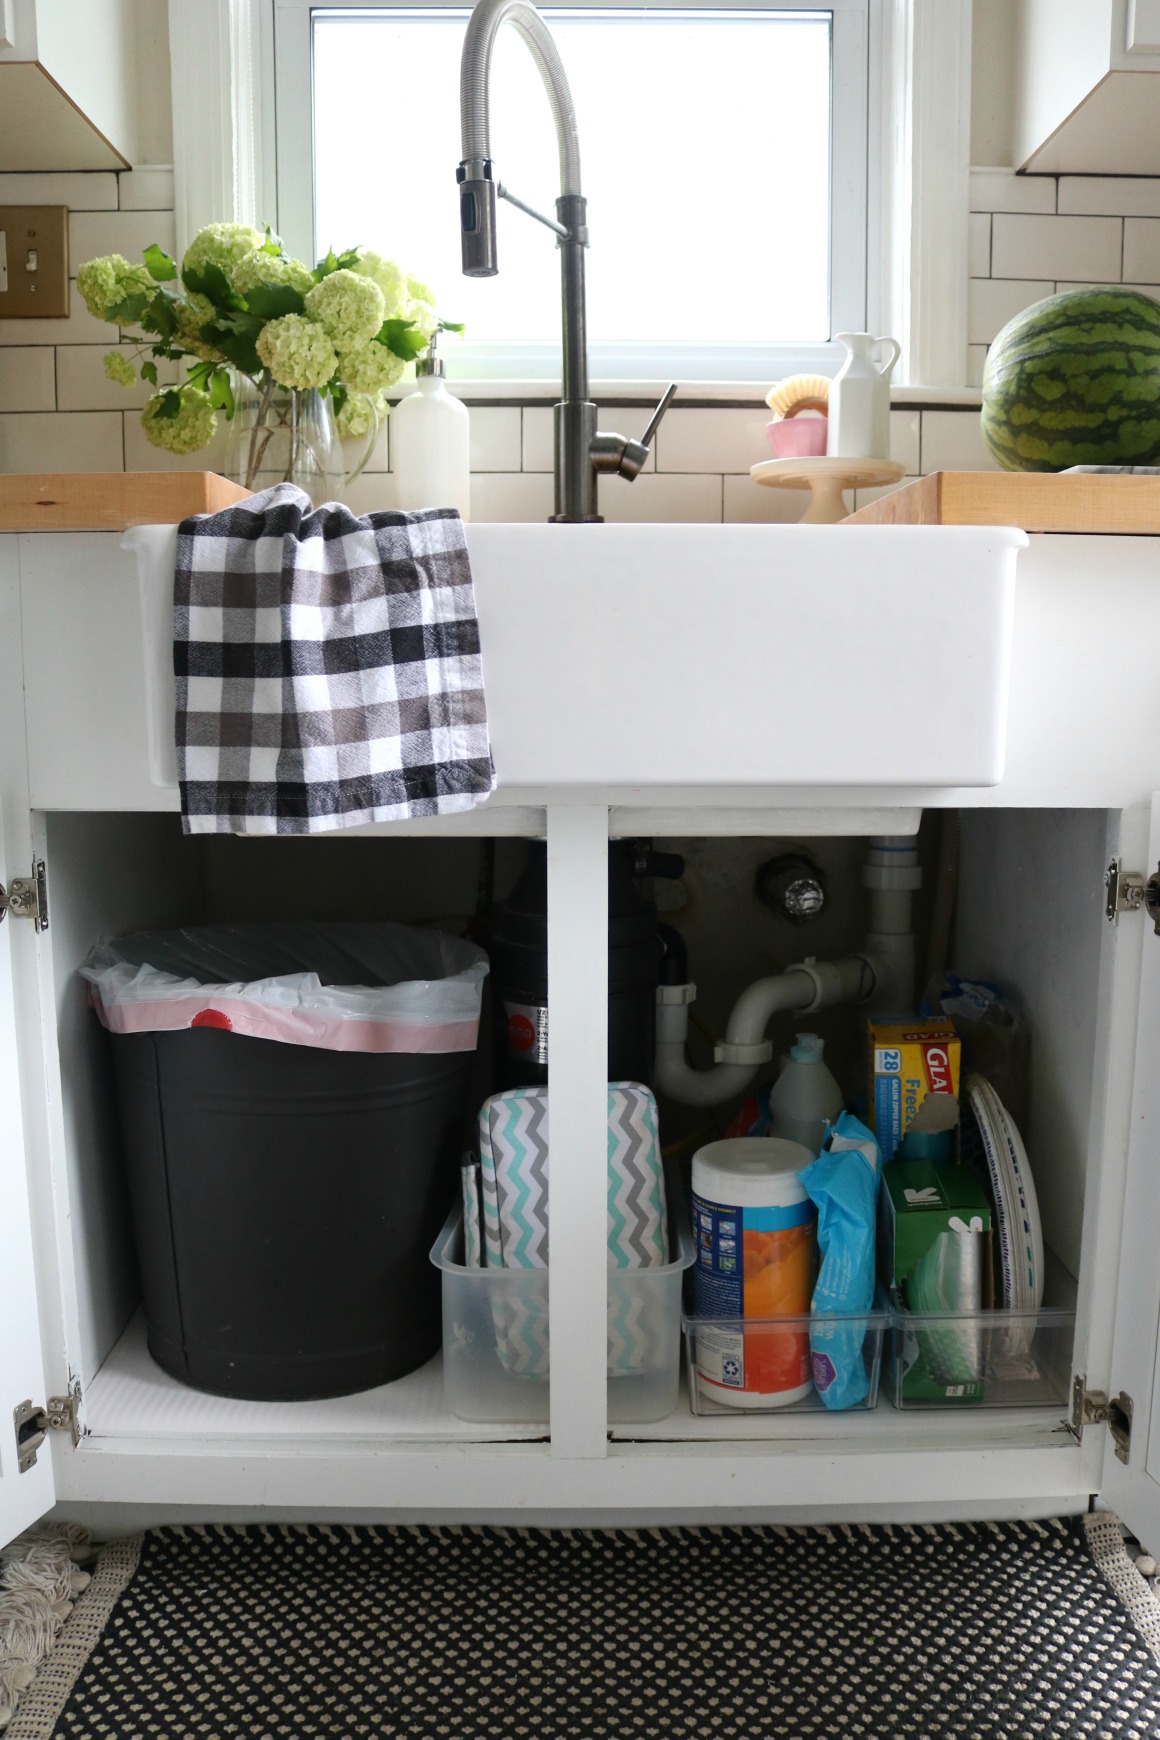
Under our kitchen sink we keep ziplock bags, paper goods, dish-soap, ditsenfective wipers, baby wipes (to clean up messy Finn after each meal) lunch boxes, trash can liners, big jug of white vinegar (my main cleaning supply) and a few other cleaning supplies hidden behind the garbage can. Speaking of garbage cans. I have tried a trash can that we keep out (like a nice looking one with a lid) but it just took up valuable space in the kitchen and no matter what I just don’t like to see a garbage can (personal preference). I found the oversized black tin can at IKEA and leave the lid off for easy access. You can’t smell it because the cabinet doors are closed. As far as recycle goes we just put outside the back door and take it to the larger recycle as we walk out back.
Kitchen Cabinets BEFORE-
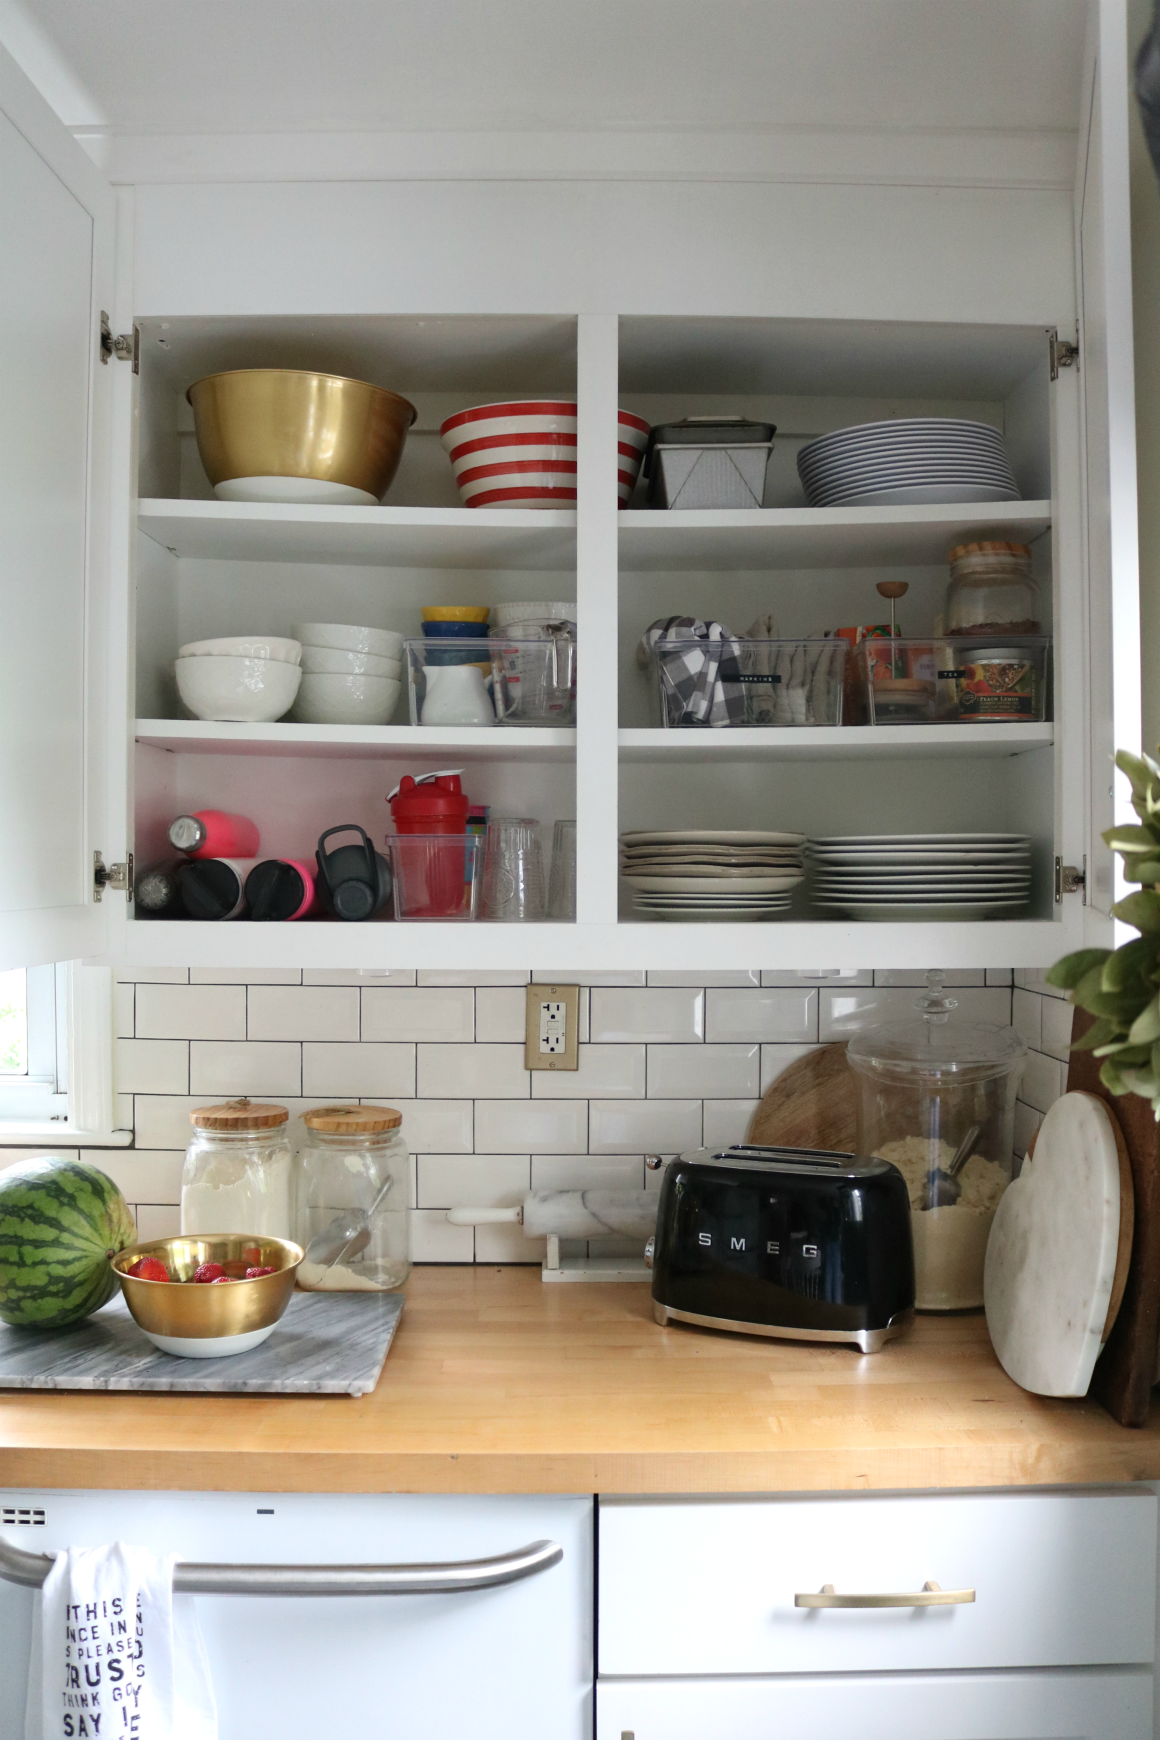
Not all of the bowls and cups are in the cabinet, some were in the dishwasher. But that is the majority of the plates, cups and bowls we have (we have others you will see that are out as decor, but we actually use too). There are about three cups for Finn that we use. The other day I got rid of any cup that leaked or didn’t work perfectly. And ended up with three of THESE cups (use code NESTINGWITHGRACE for 10% off) for Finn that don’t leak and keep his milk and water cold for 24 hours! We also use THESE cups for the girls for school and keep some full in the fridge so they can easily grab. Finn now uses the plates we use. I was tired of all the cheap plastic plates that he would just throw as a baby. I would just put his food right on the clean table or his highchair (that is where it ended up all the time anyways).
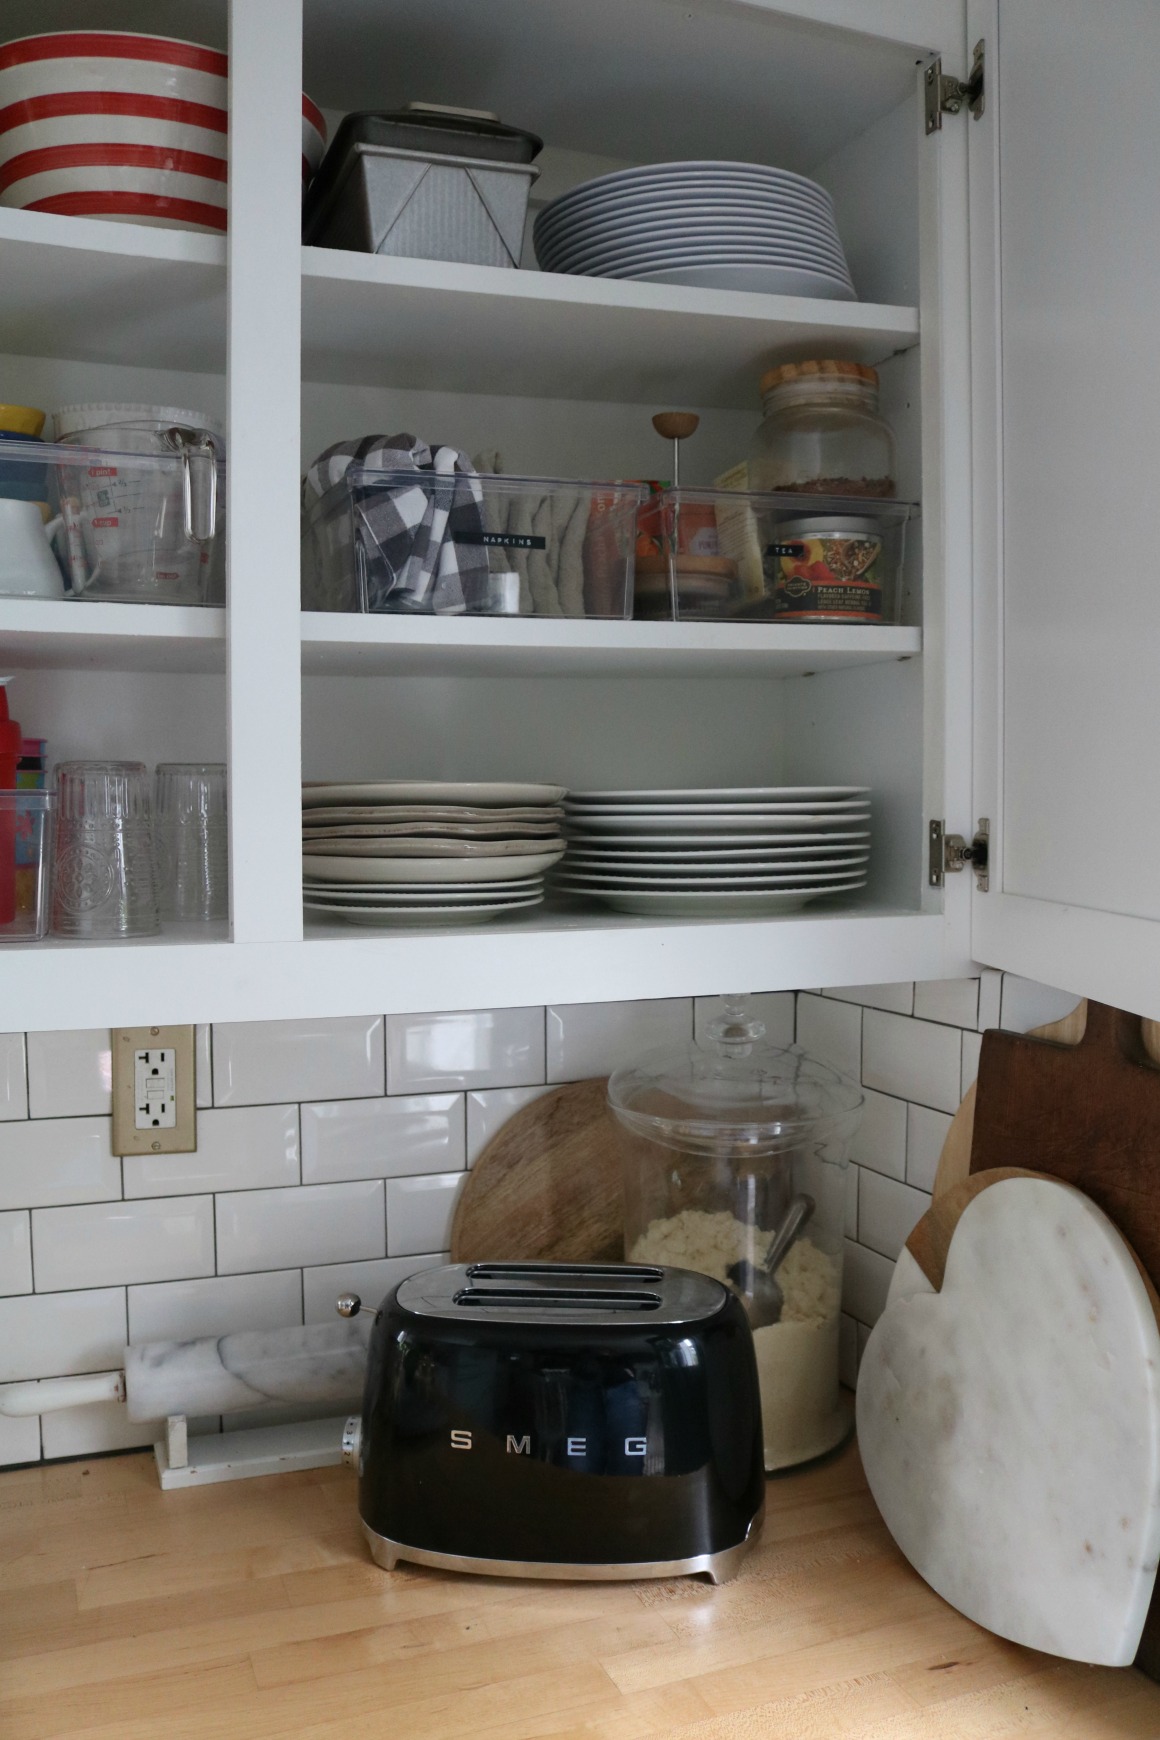
We have THESE melamine plates on the top shelf to use outside and THESE large white for everyday use and nicer dinners too. Also used THESE clear containers again one for Tea and Hot Drinks and one for our cloth napkins (some of the black and white were being washed). We don’t use paper napkins. We don’t use paper towels, just towels or rags.
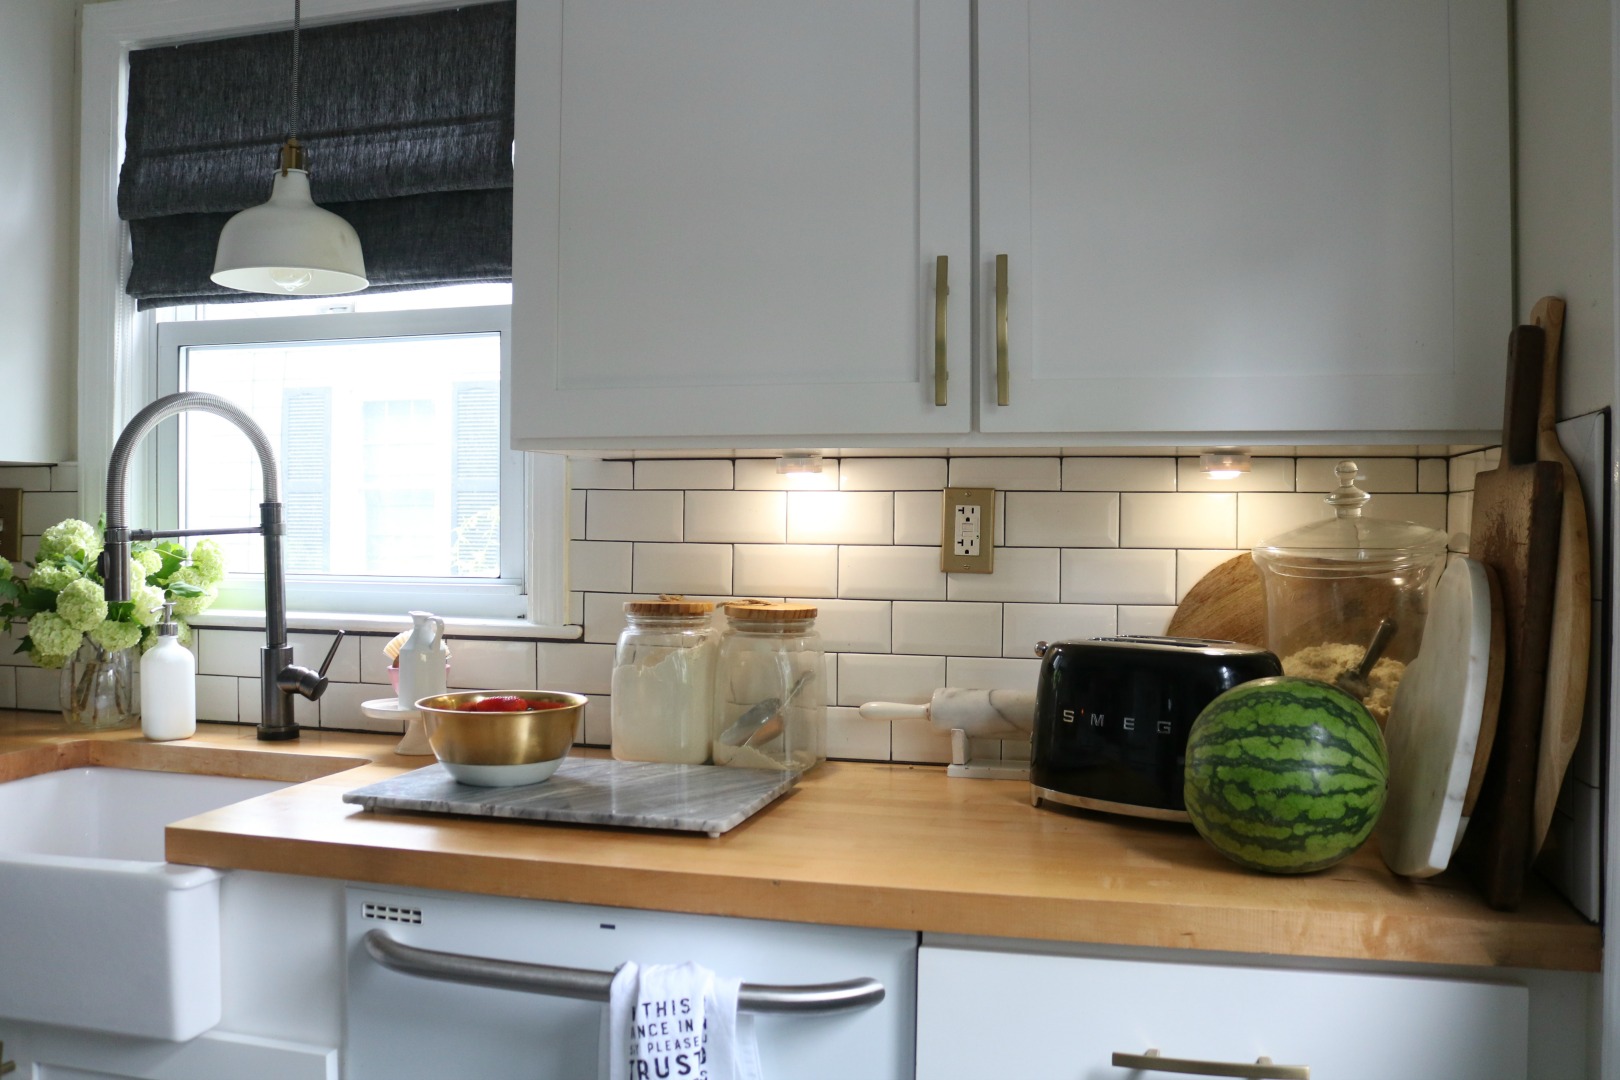
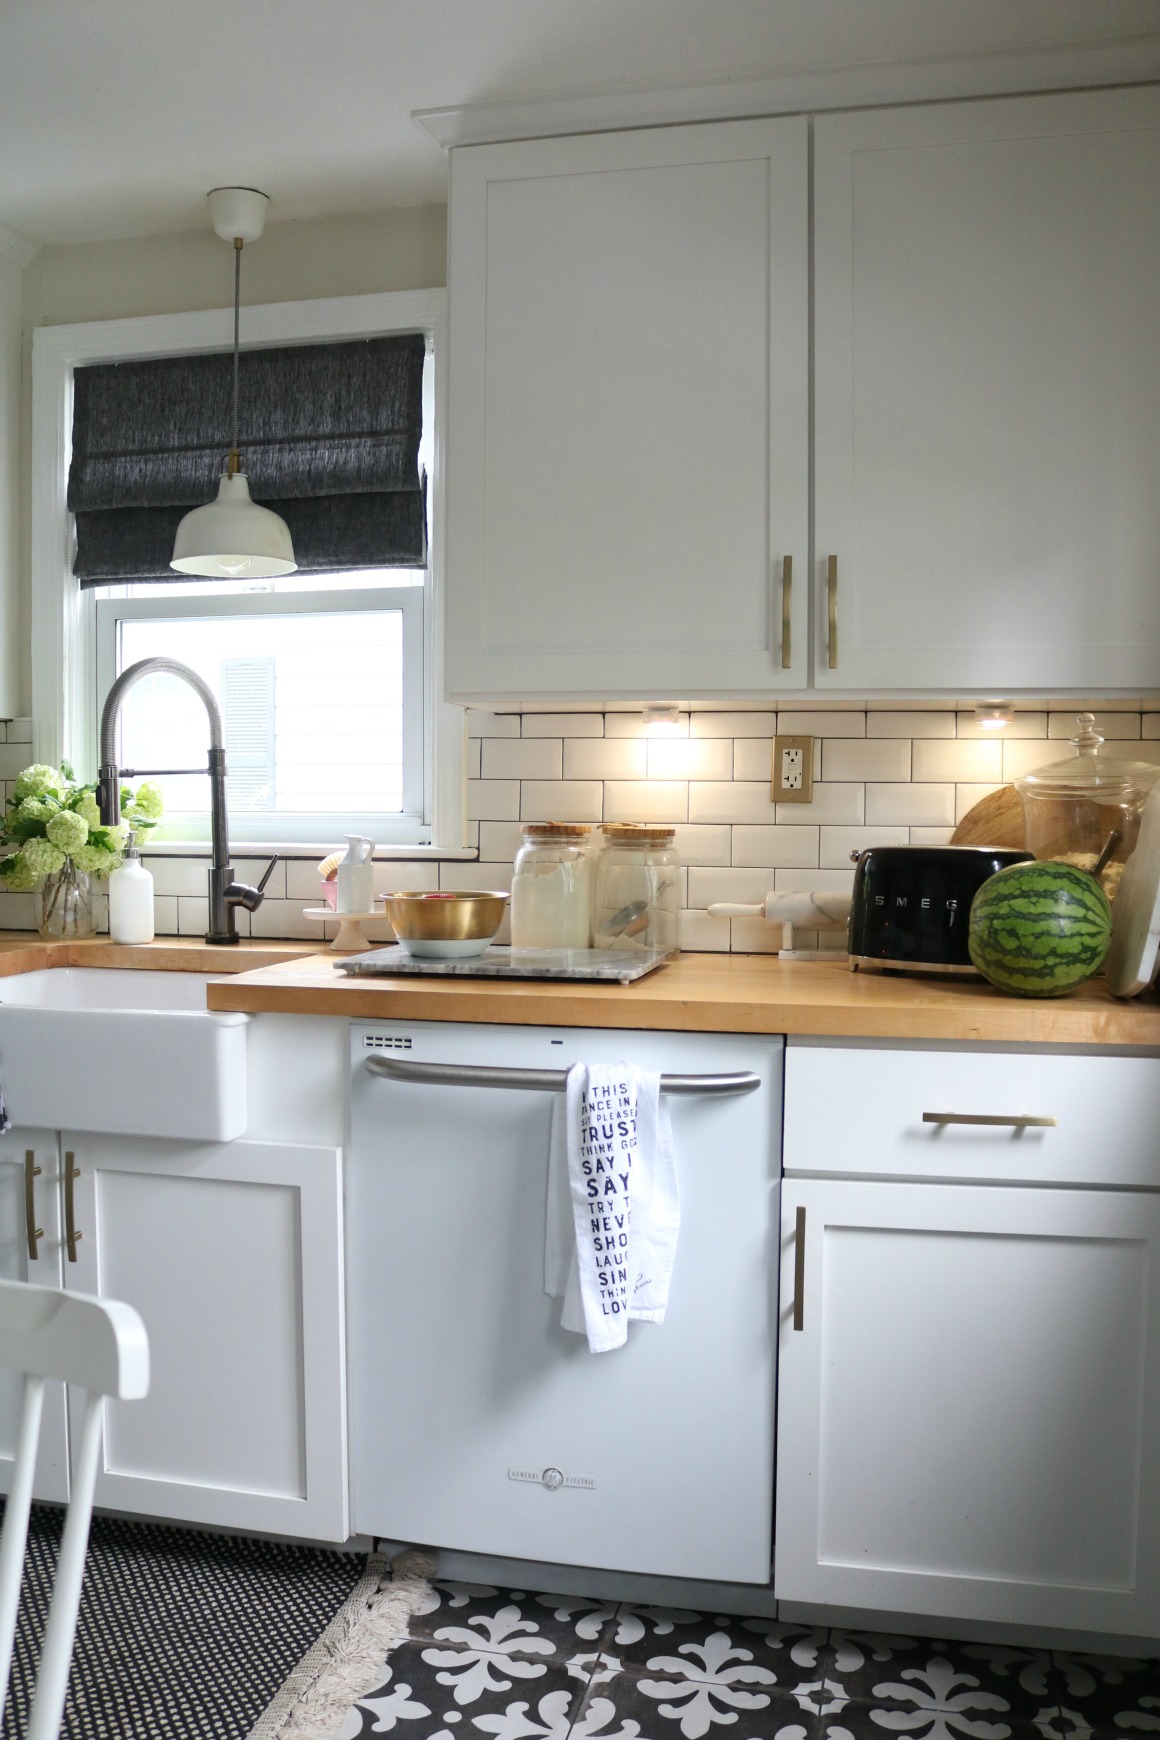
I had a cheap $1o toaster before that I kept hidden in the cupboard. It was taking up valuable cabinet space. So I splurged and bought THIS nice toaster that I love to see on our counter! We also stack cutting boards and serving platters on the counter by the toaster.
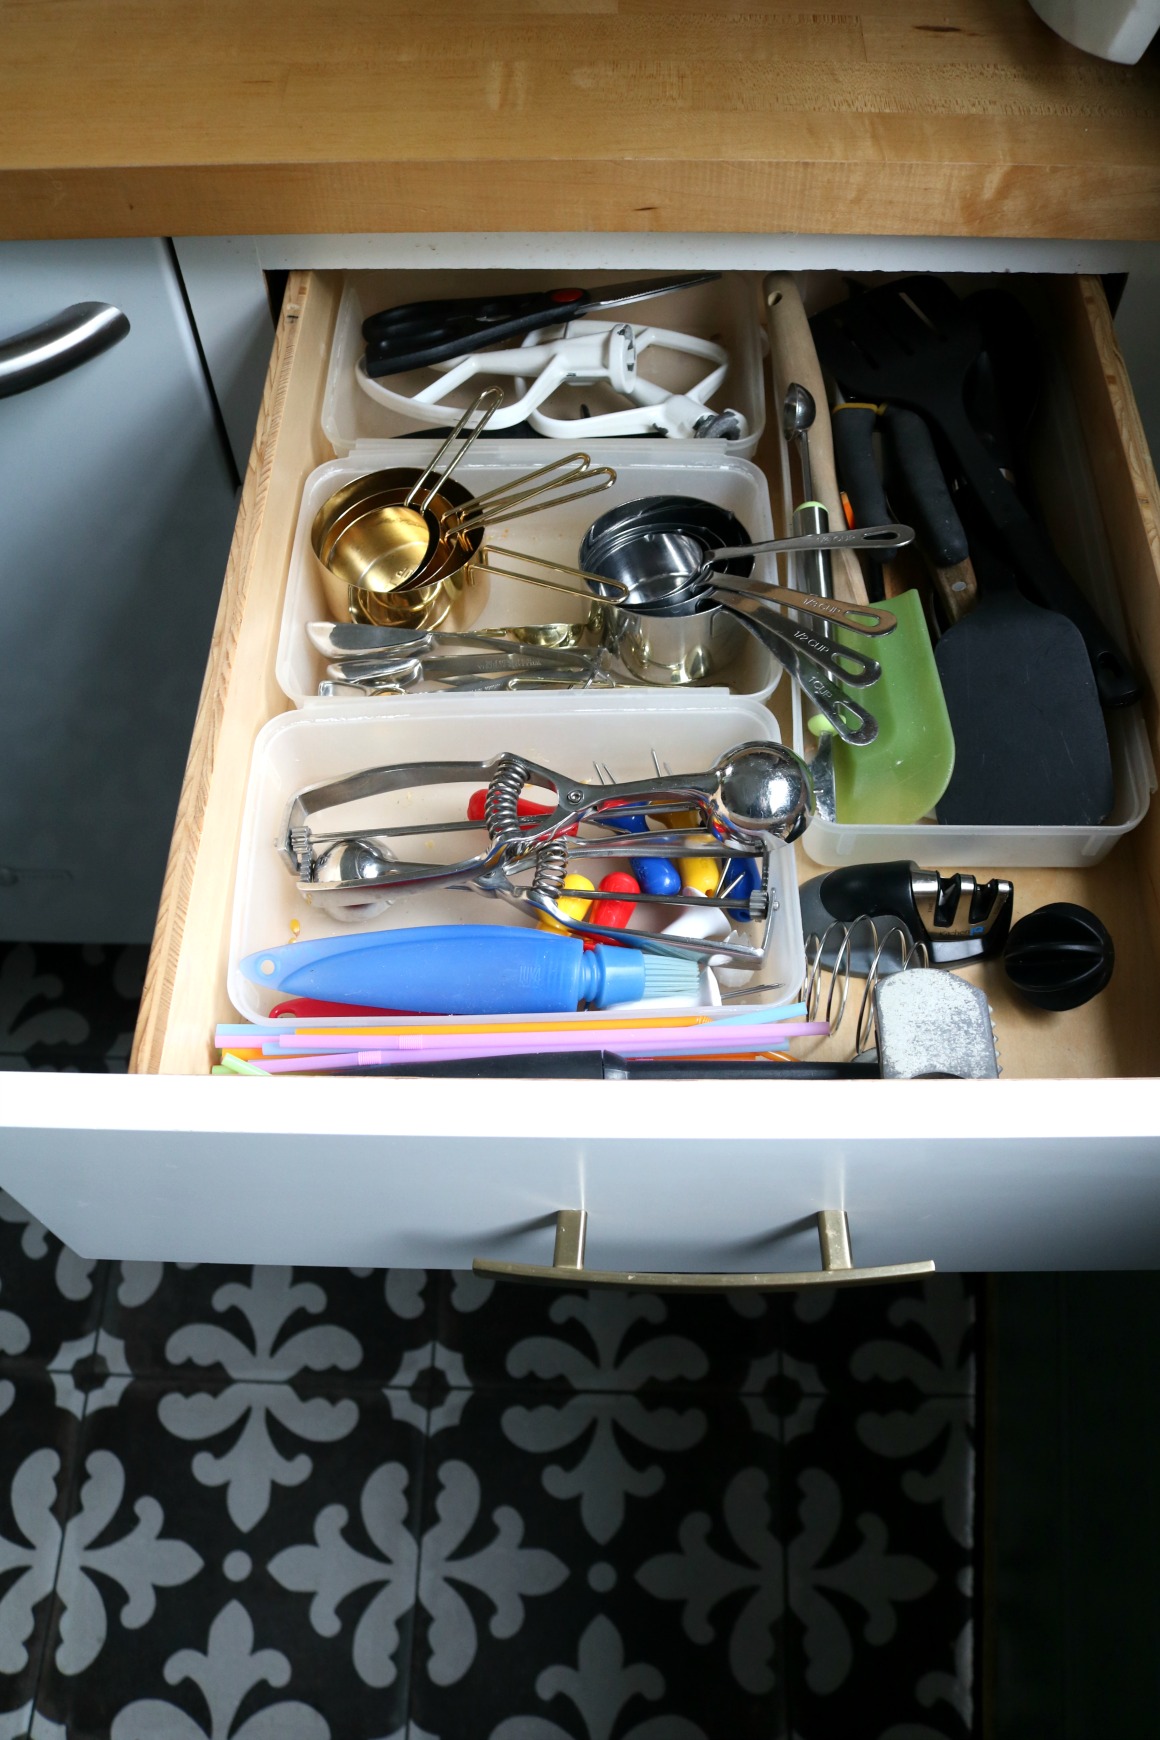
Another drawer with plastics dividers and a lot of the baking and cooking supplies.
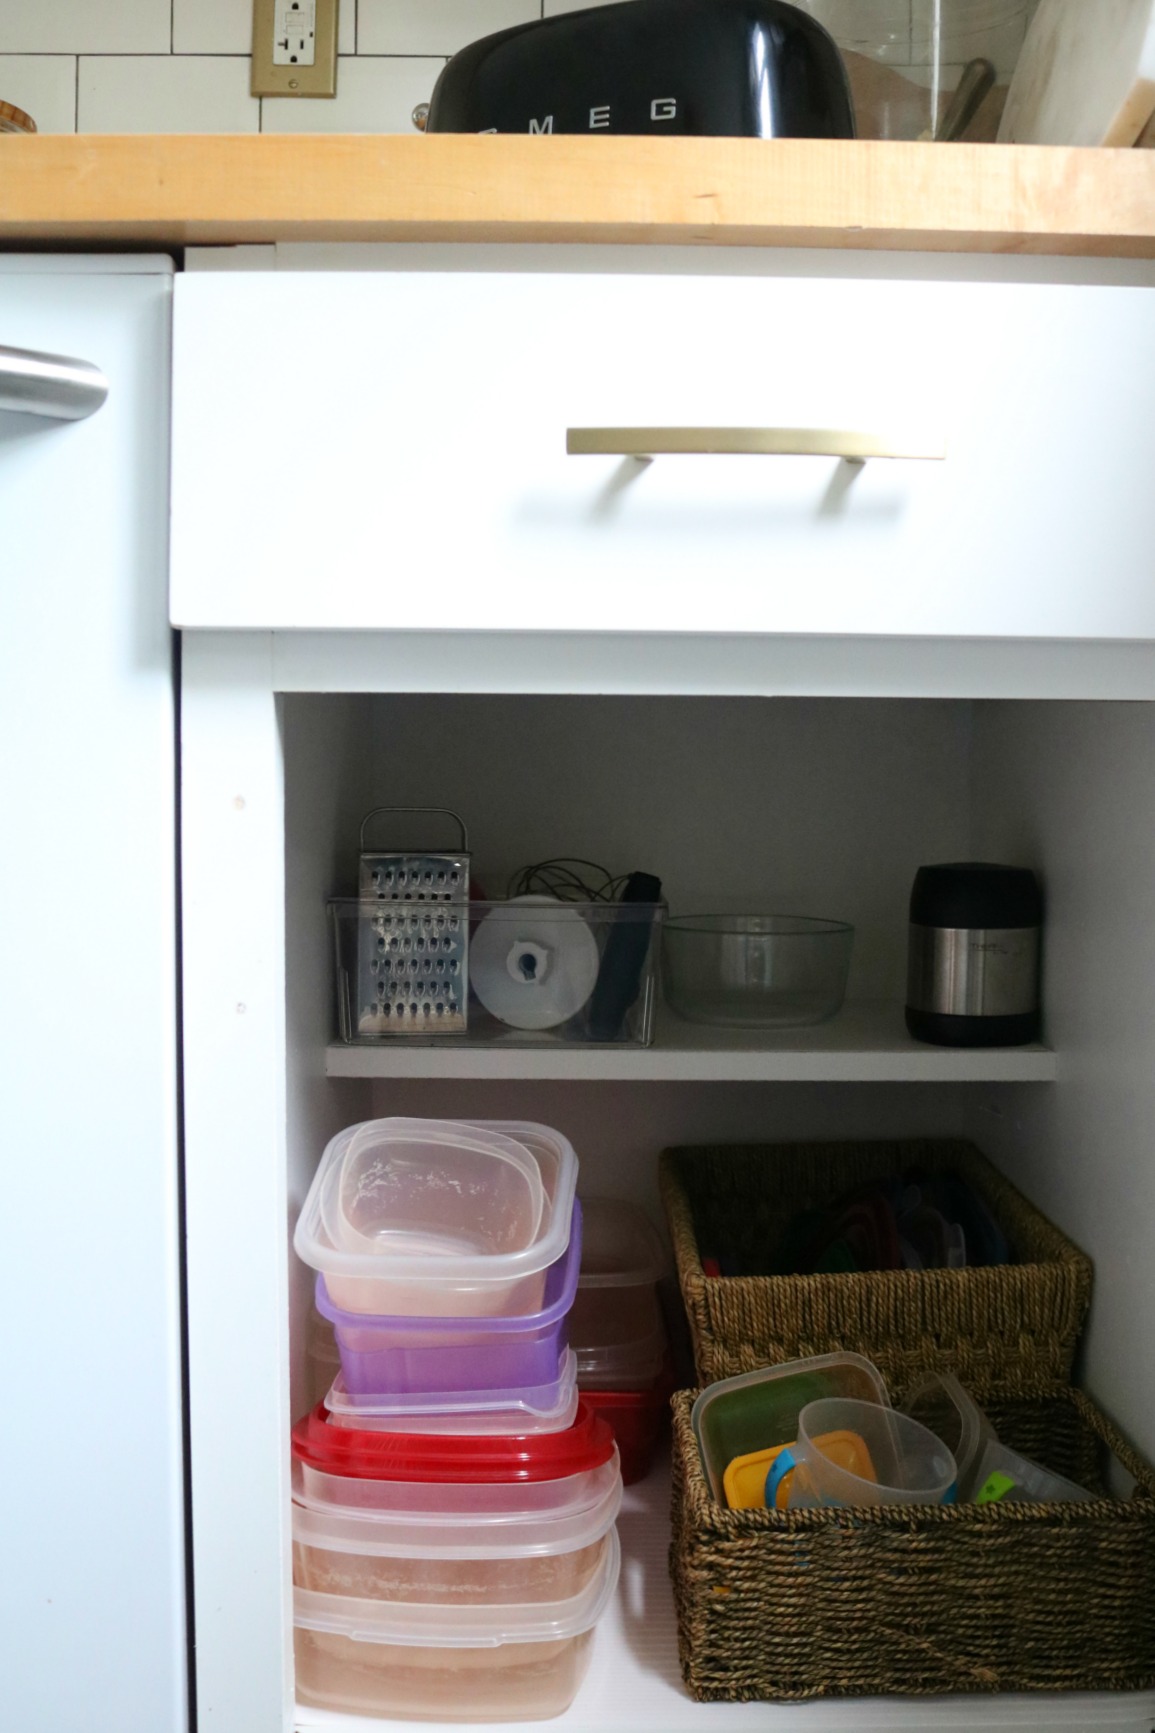
Our Tupperware storage and a few more cooking supplies. I have lids in the larger basket and smaller containers and lids in the smaller basket.
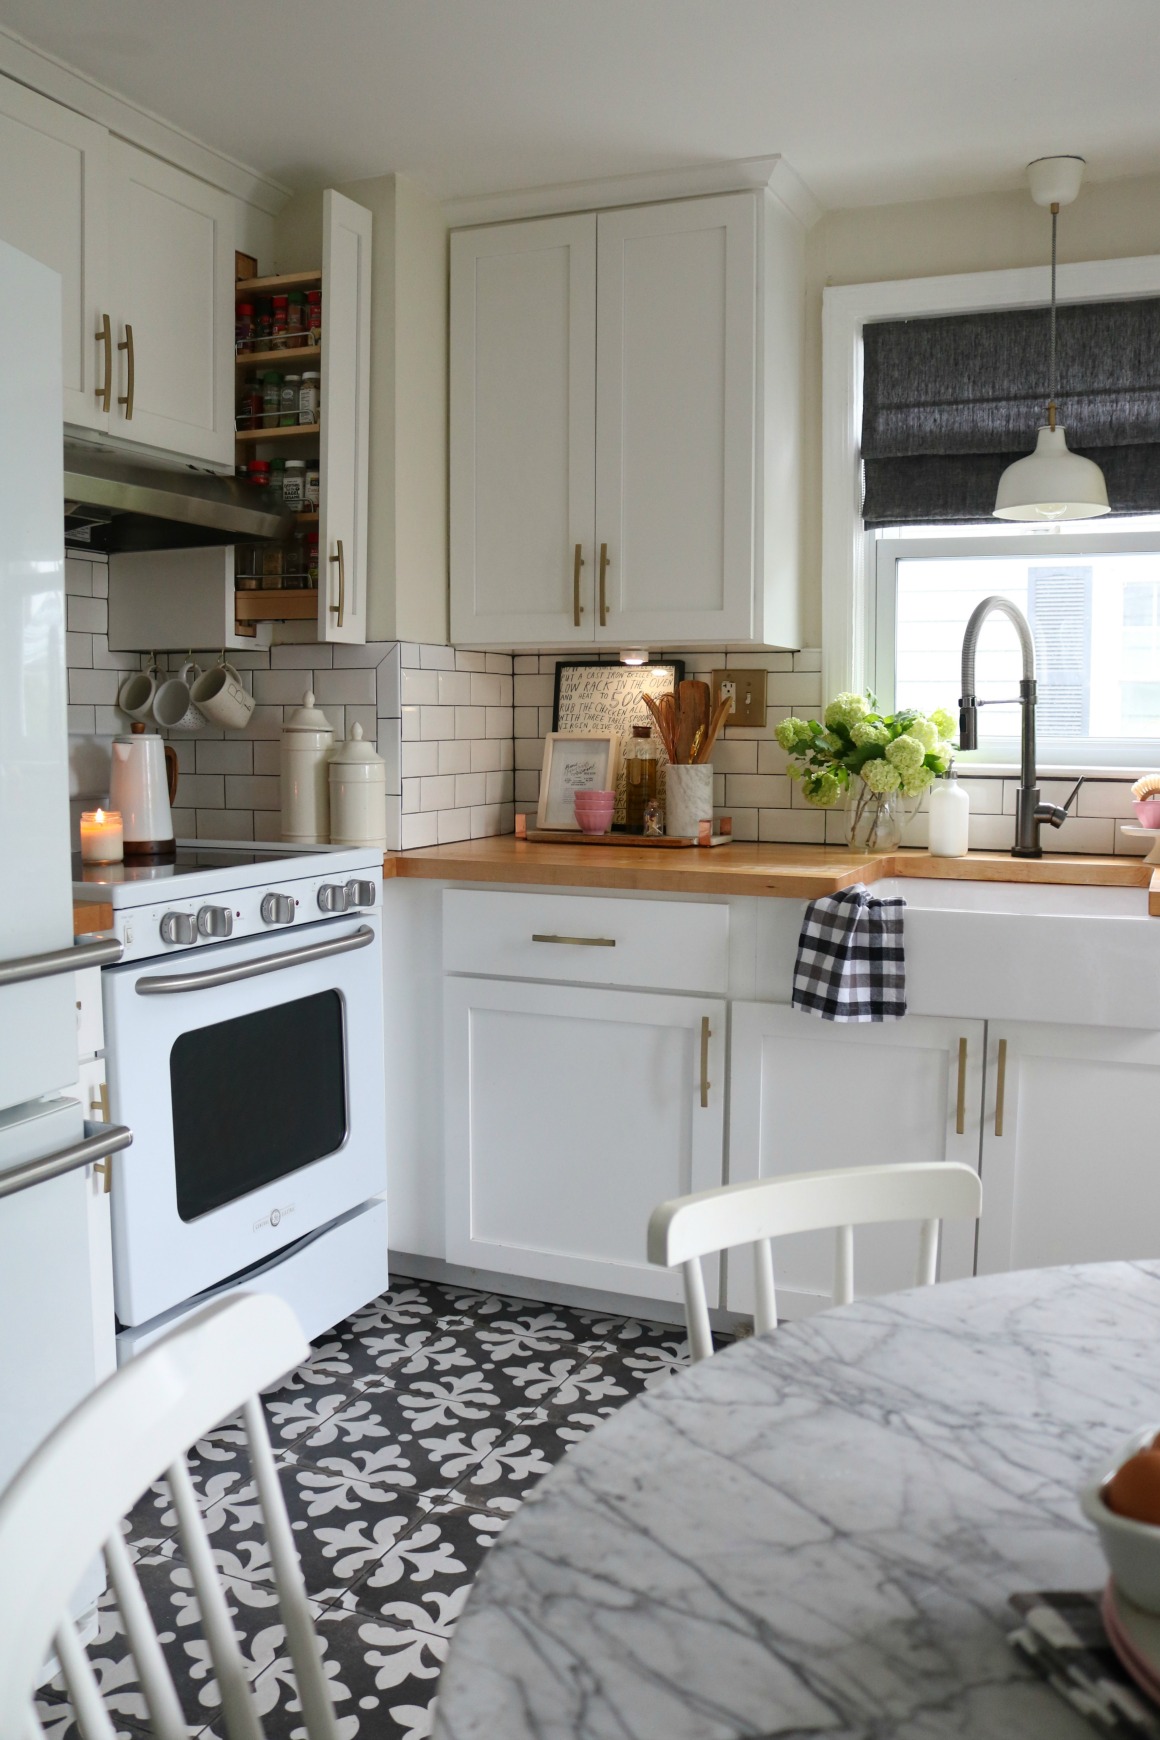
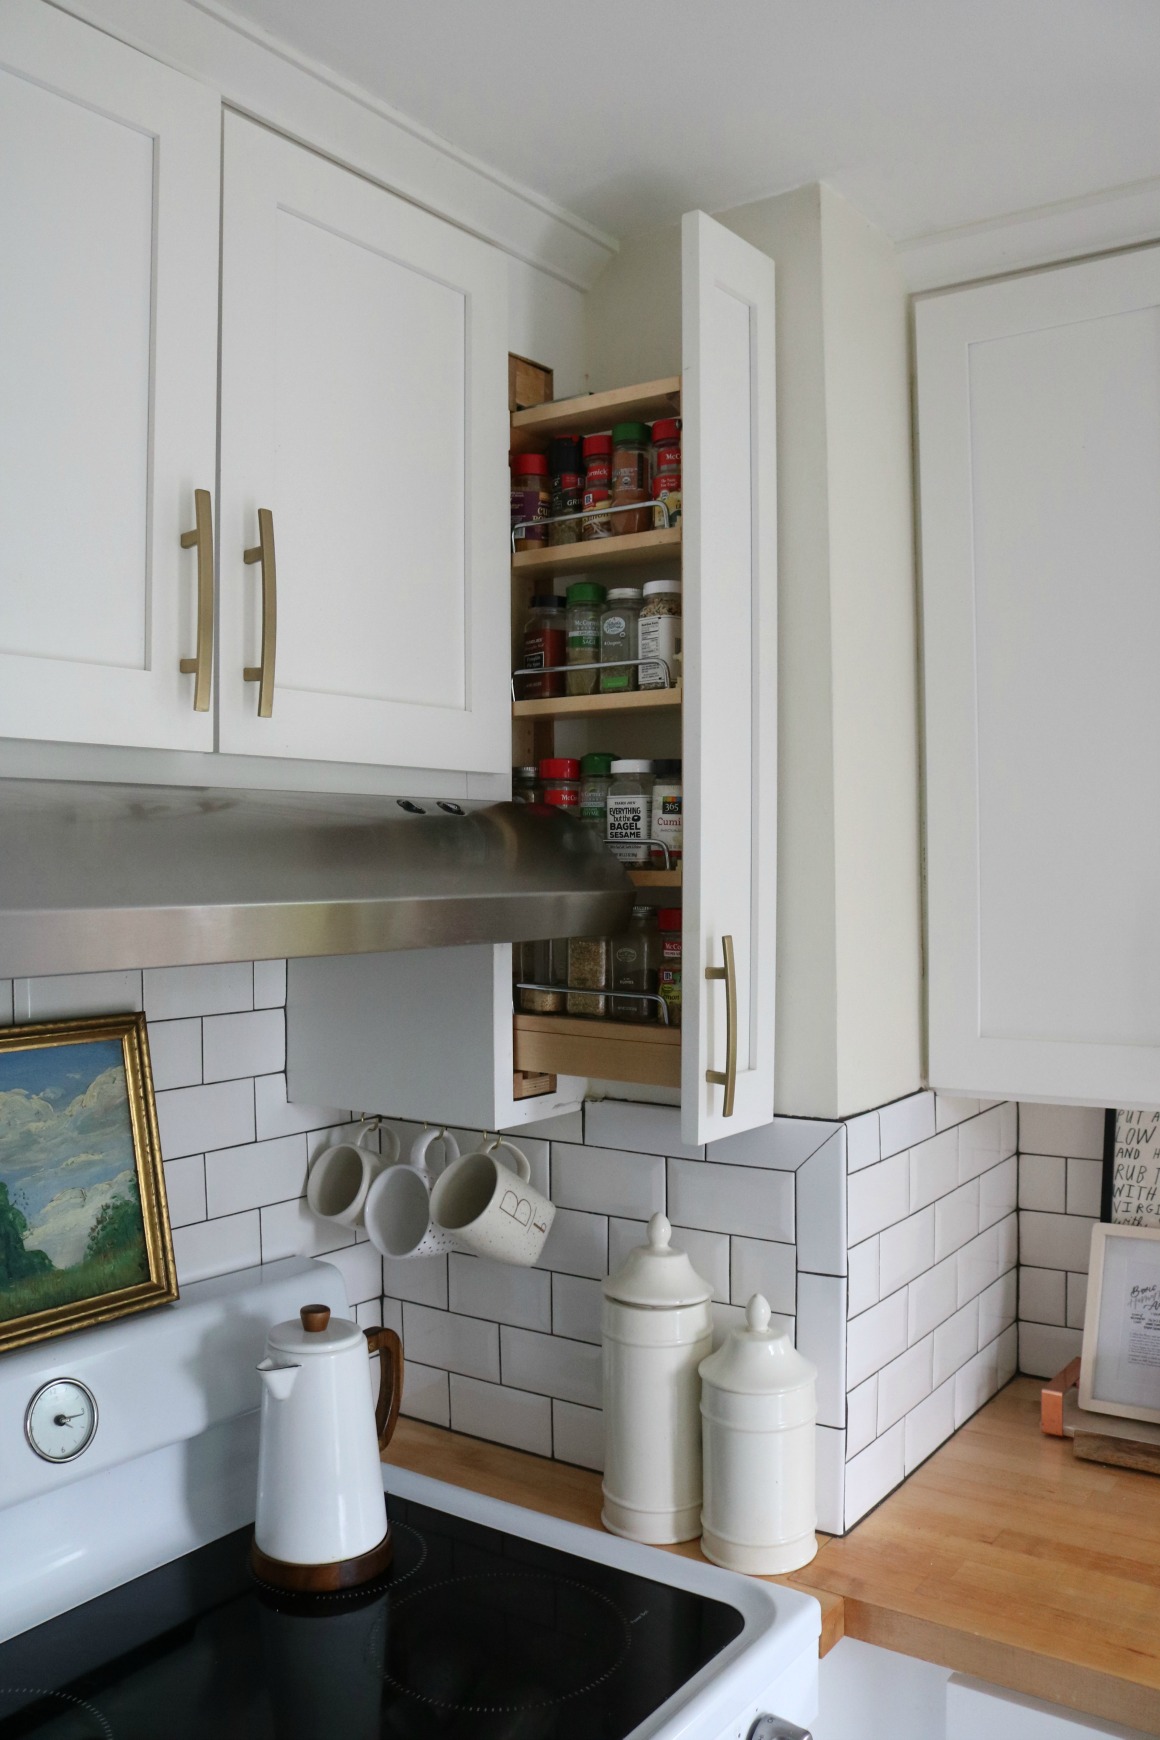
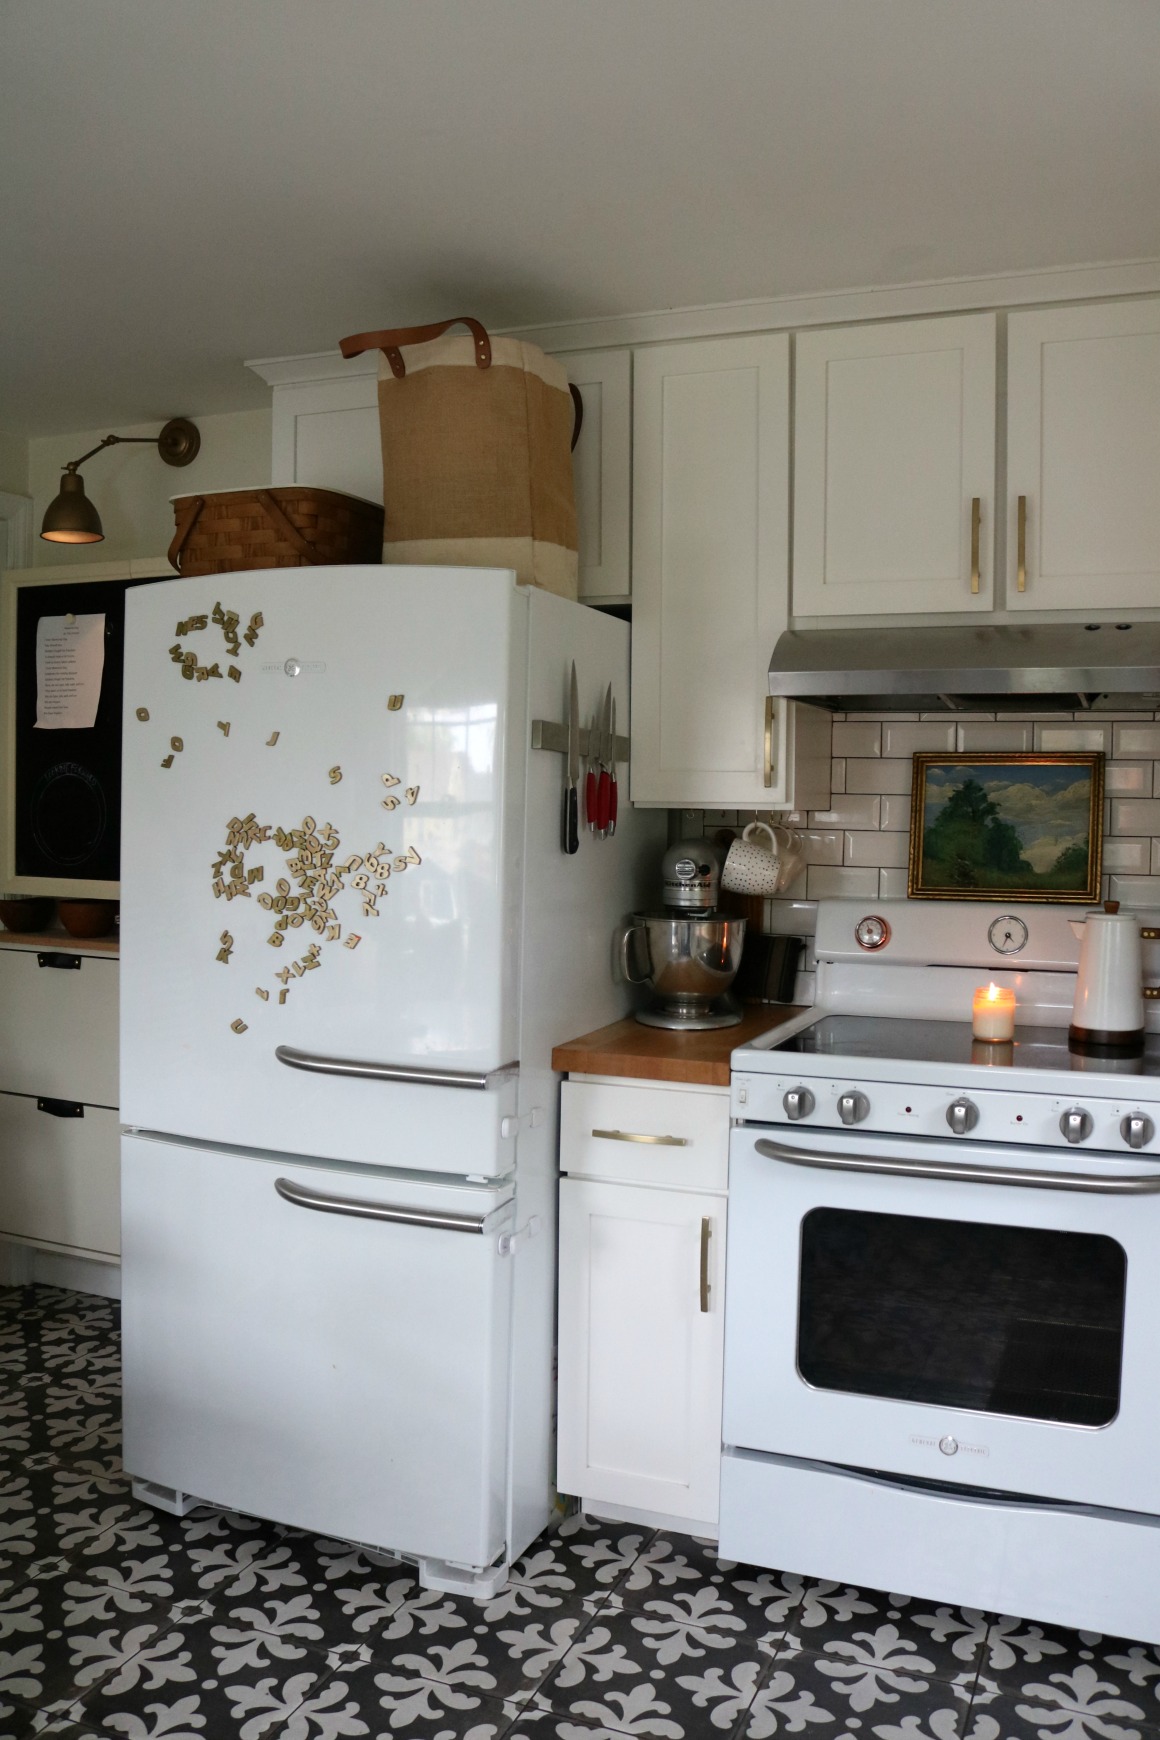
When we refaced the cabinets that space to the right of the stove was just a solid piece, a waste of space. I had them add a pull-out spice cabinet! We love it. Also we added mini hooks under the cabinets by the stove for our mugs. Everyone has a mug with their initial then we have two extra for guests. That is it. No collecting of mugs. Kevin brought home a cute mug that he had used on his trip, it really wasn’t significant to him, he just thought I would like it. It was very cute, but I just didn’t need it or have a spot for it. I passed it onto someone that wanted it. That is the thing about kitchen storage, you have to be selective about what you keep.
The white canisters by the stove have Truvia sugar packets and drink packets. We bought a really cute kettle that we can leave out of the stove all the time so it doesn’t waste cupboard space.
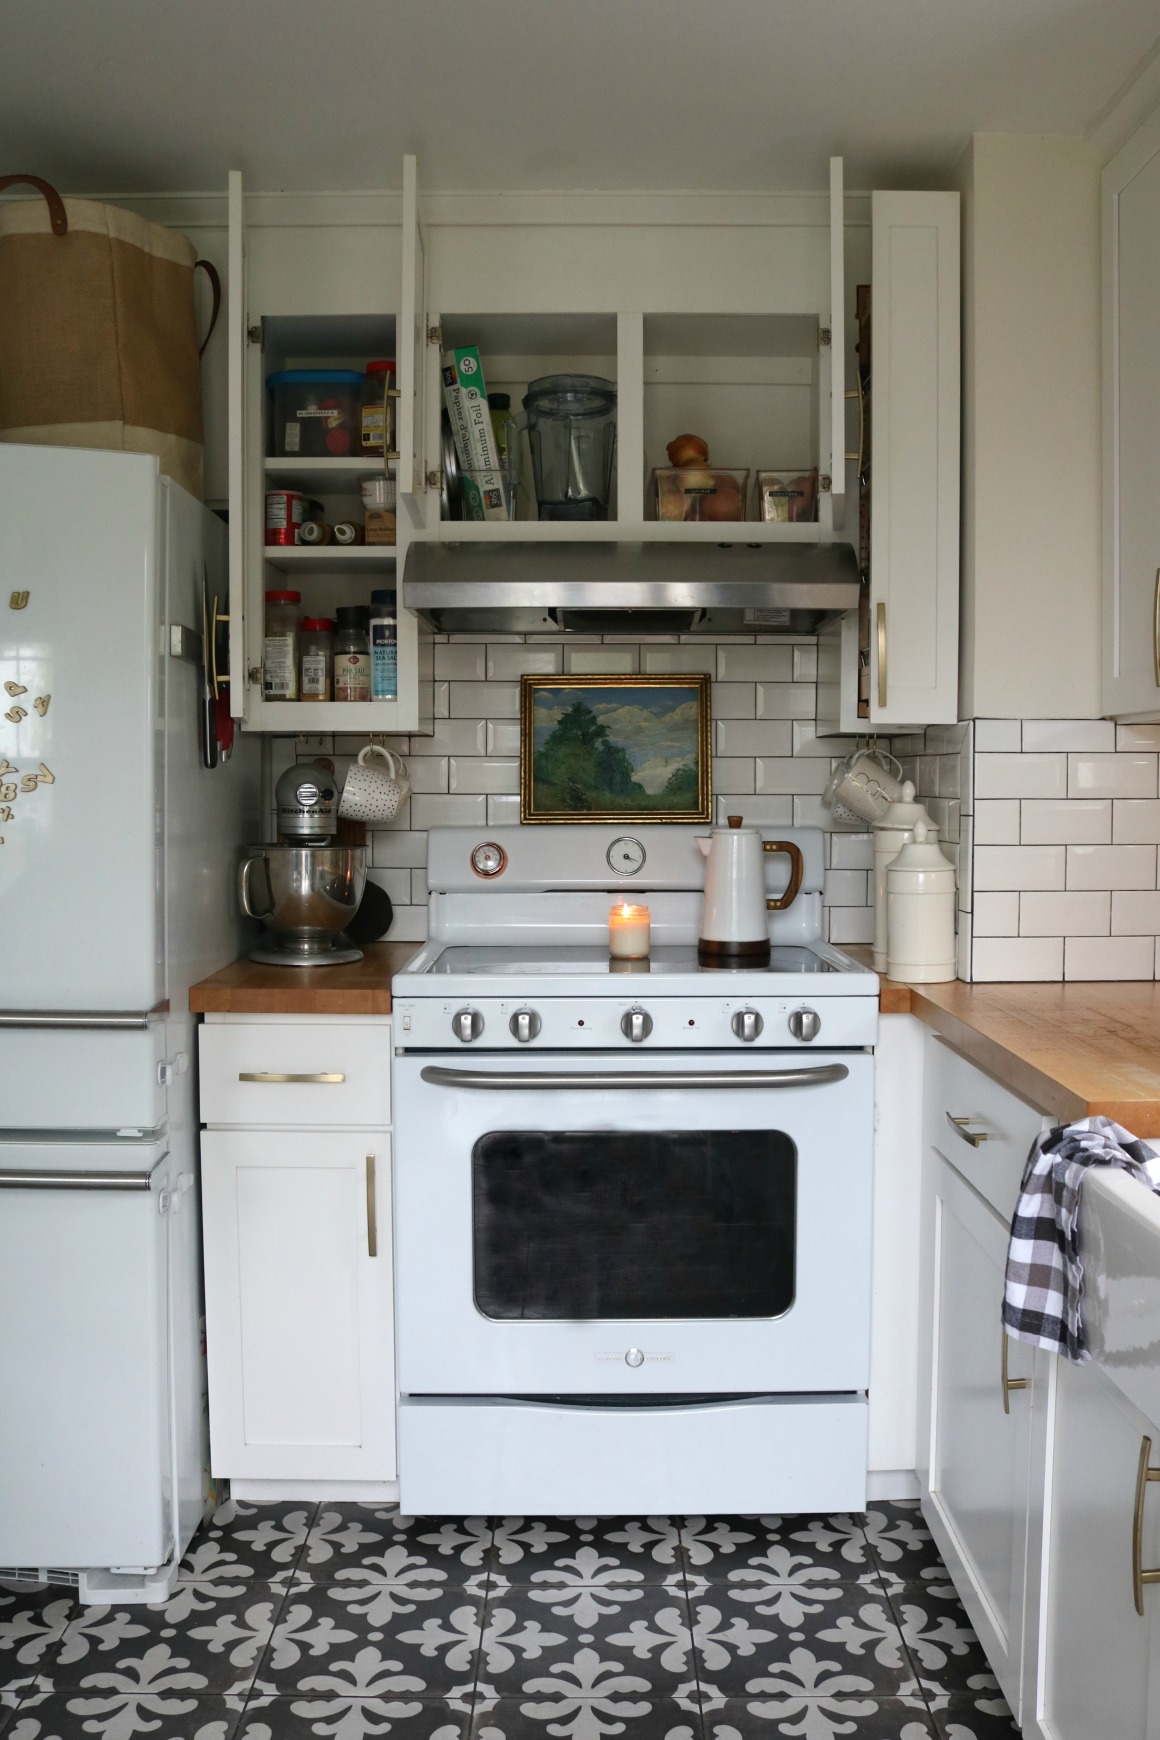
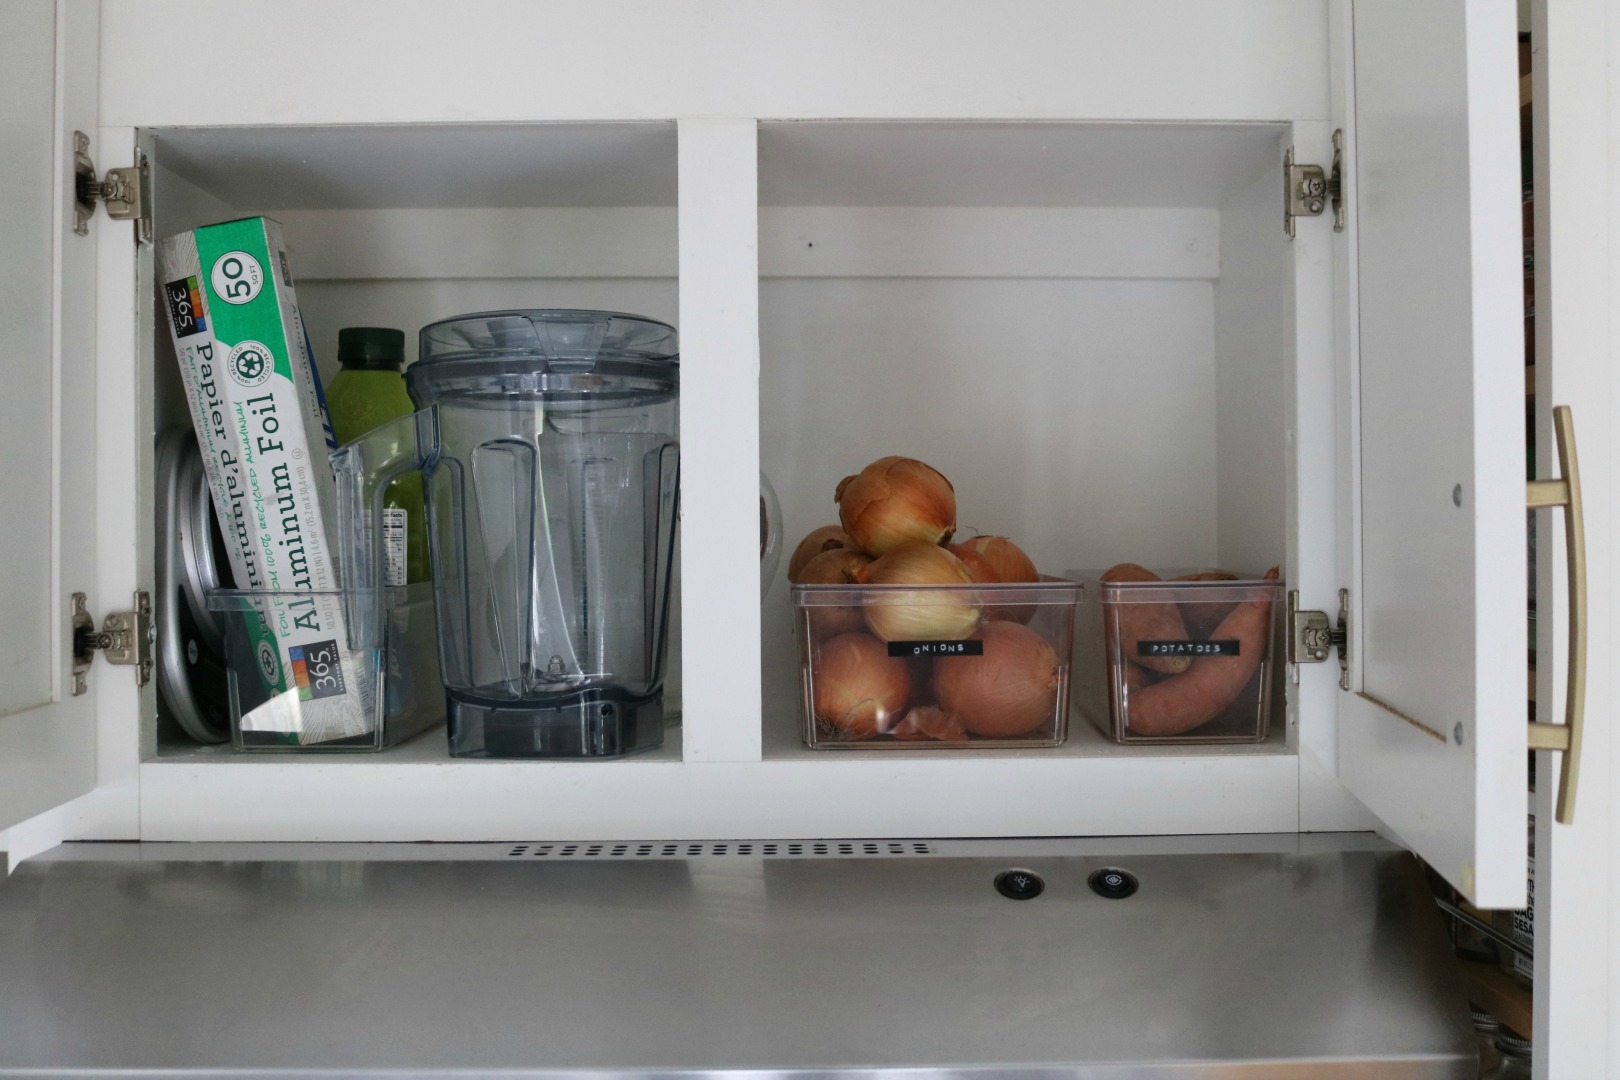
Above the stove we have vegetables that shouldn’t be refrigerated, onions and potatoes (separated since they shouldn’t touch). Also tin-foil, parchment paper, extra olive oil (we have some on our counter that we use daily) glass water pitcher and blender top (base is on tea cart).
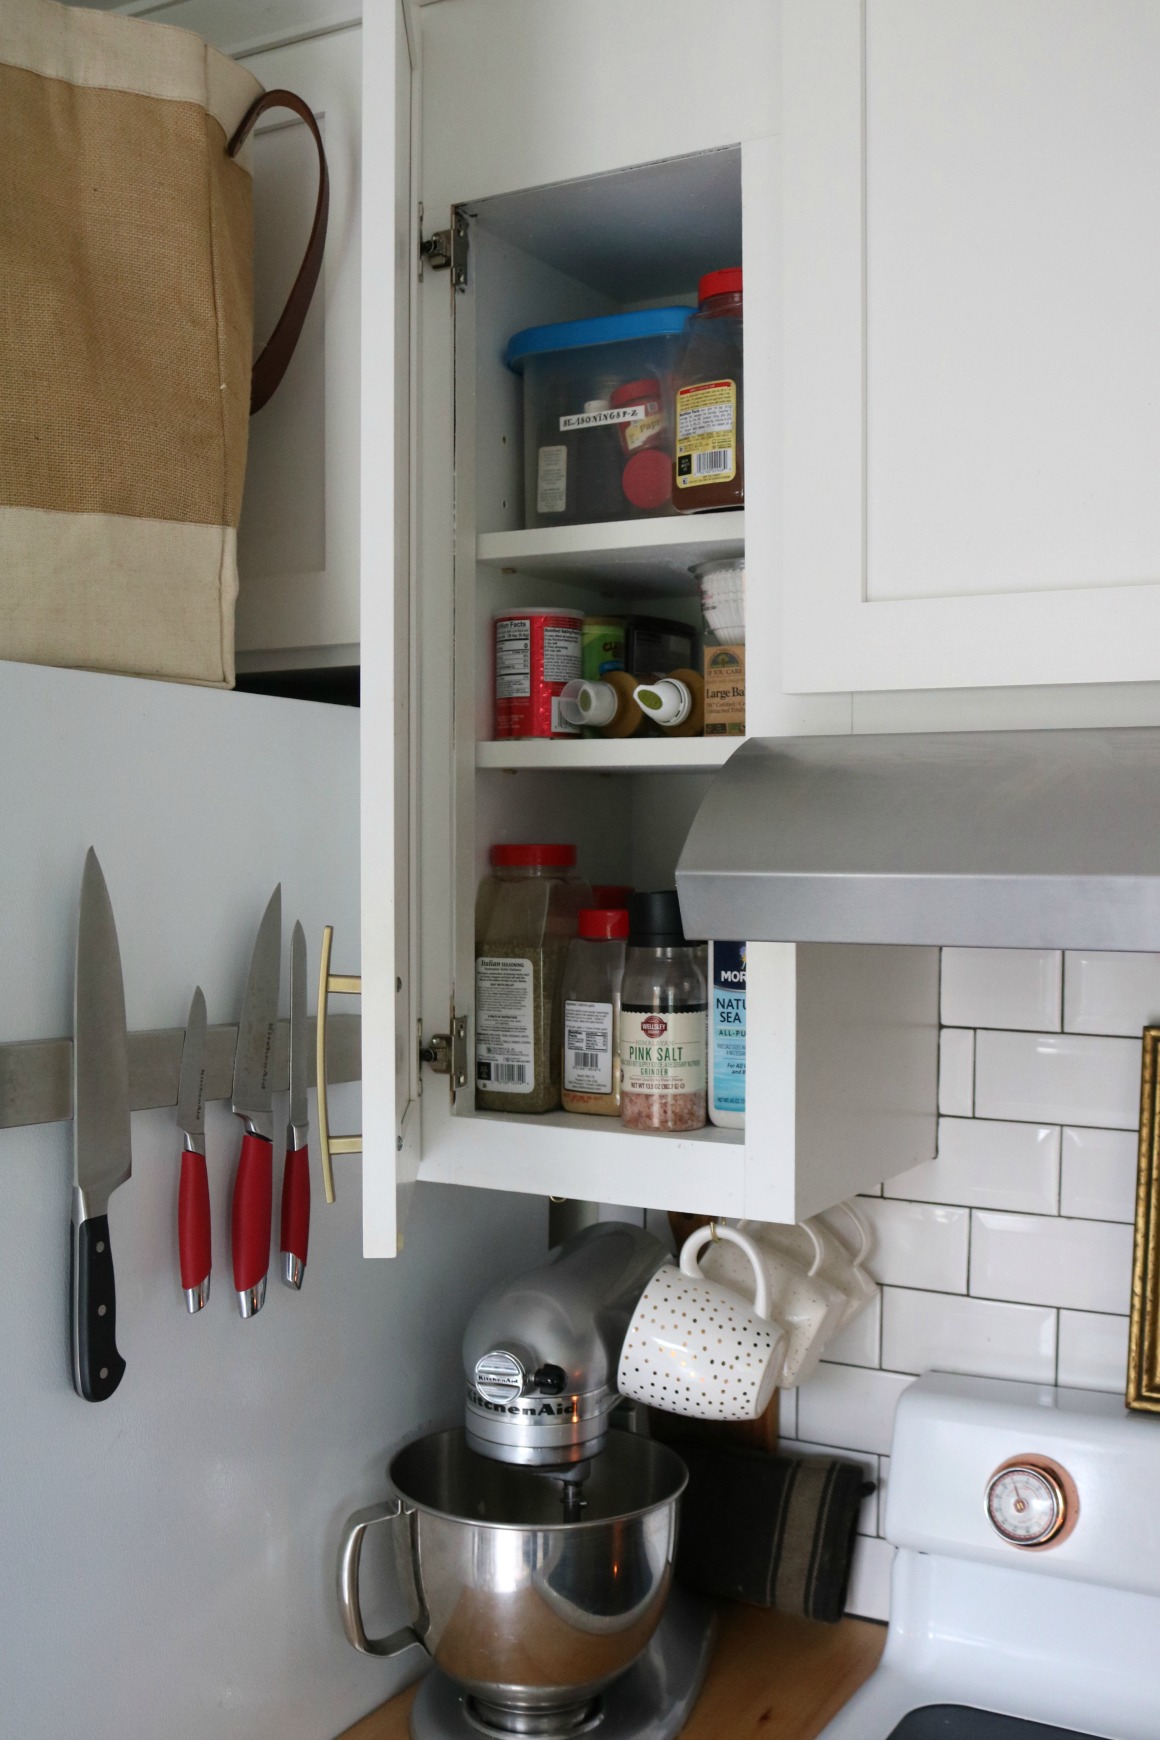
More spices and baking supplies are to the left of the stove. On the top shelf I have smaller containers of spices that I can easily pull down to go through. Also knives are on THIS magnetic strip to save space.
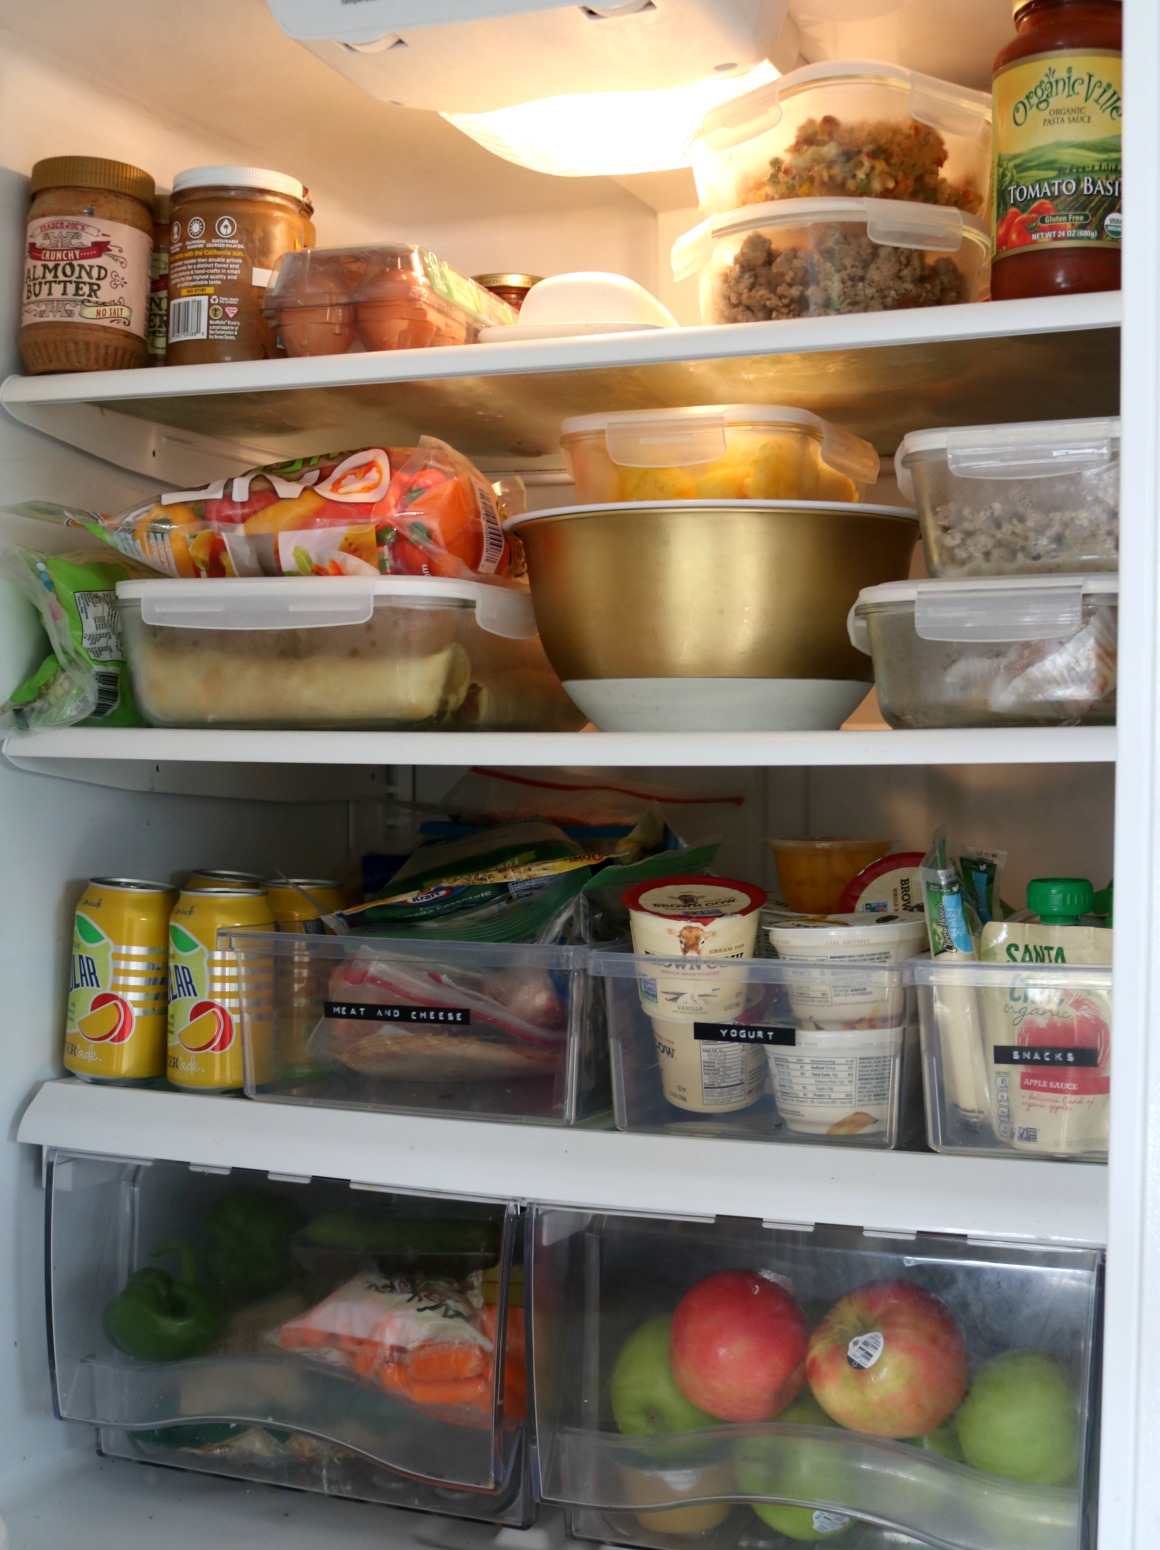
I even use THESE containers in our fridge and label them with THIS label maker. It helps so much to not loose food in the back of the fridge or the husband saying or kids “can’t find it”.
More baking supplies are on the bottom left of stove. Everything is labeled and has expiration dates written on the bottom with a washable marker.
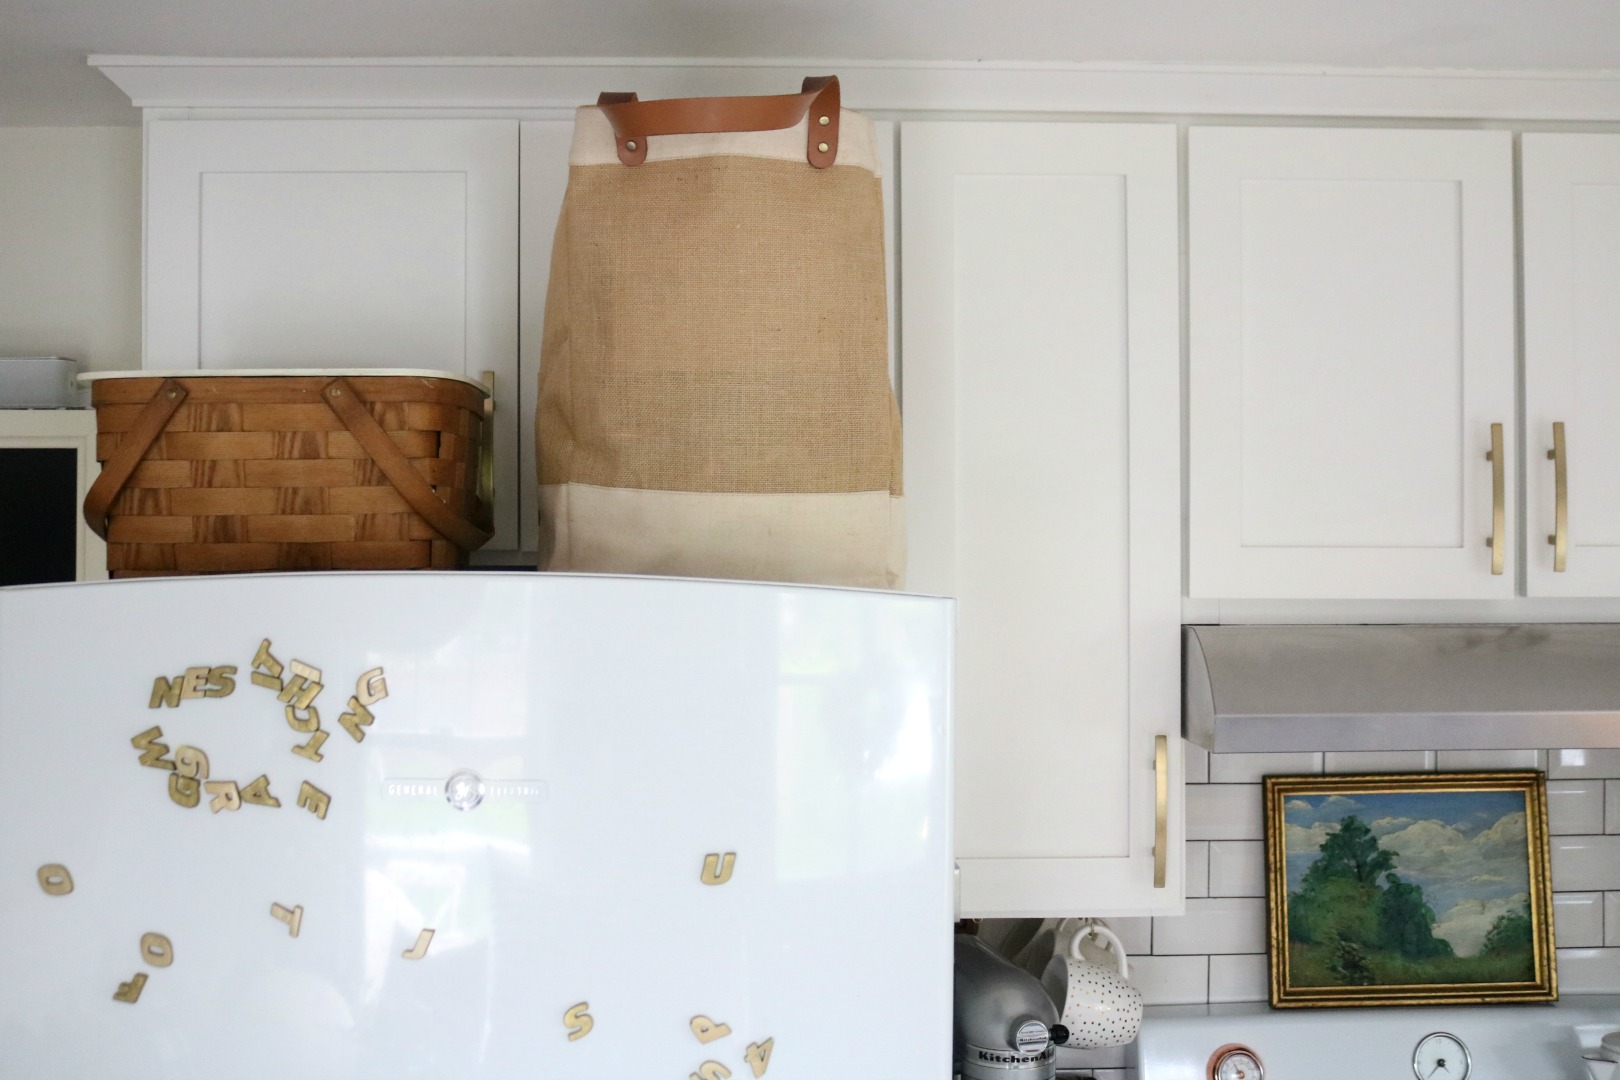
On the top of the fridge we have THIS large burlap bag that acts as a mini pantry. All the chips and crackers are up there. We just pull down the bag when packing lunches or snacks. In the vintage picnic basket is our S’more supplies (marshmallows, crackers, chocolate, matches and baby wipes) we can easily grab it for S’more night! (Off season we don’t keep it up there, it goes to the basement). Then behind the baskets are back-up protein powders and a container of medicine (we thankfully don’t have to access often).
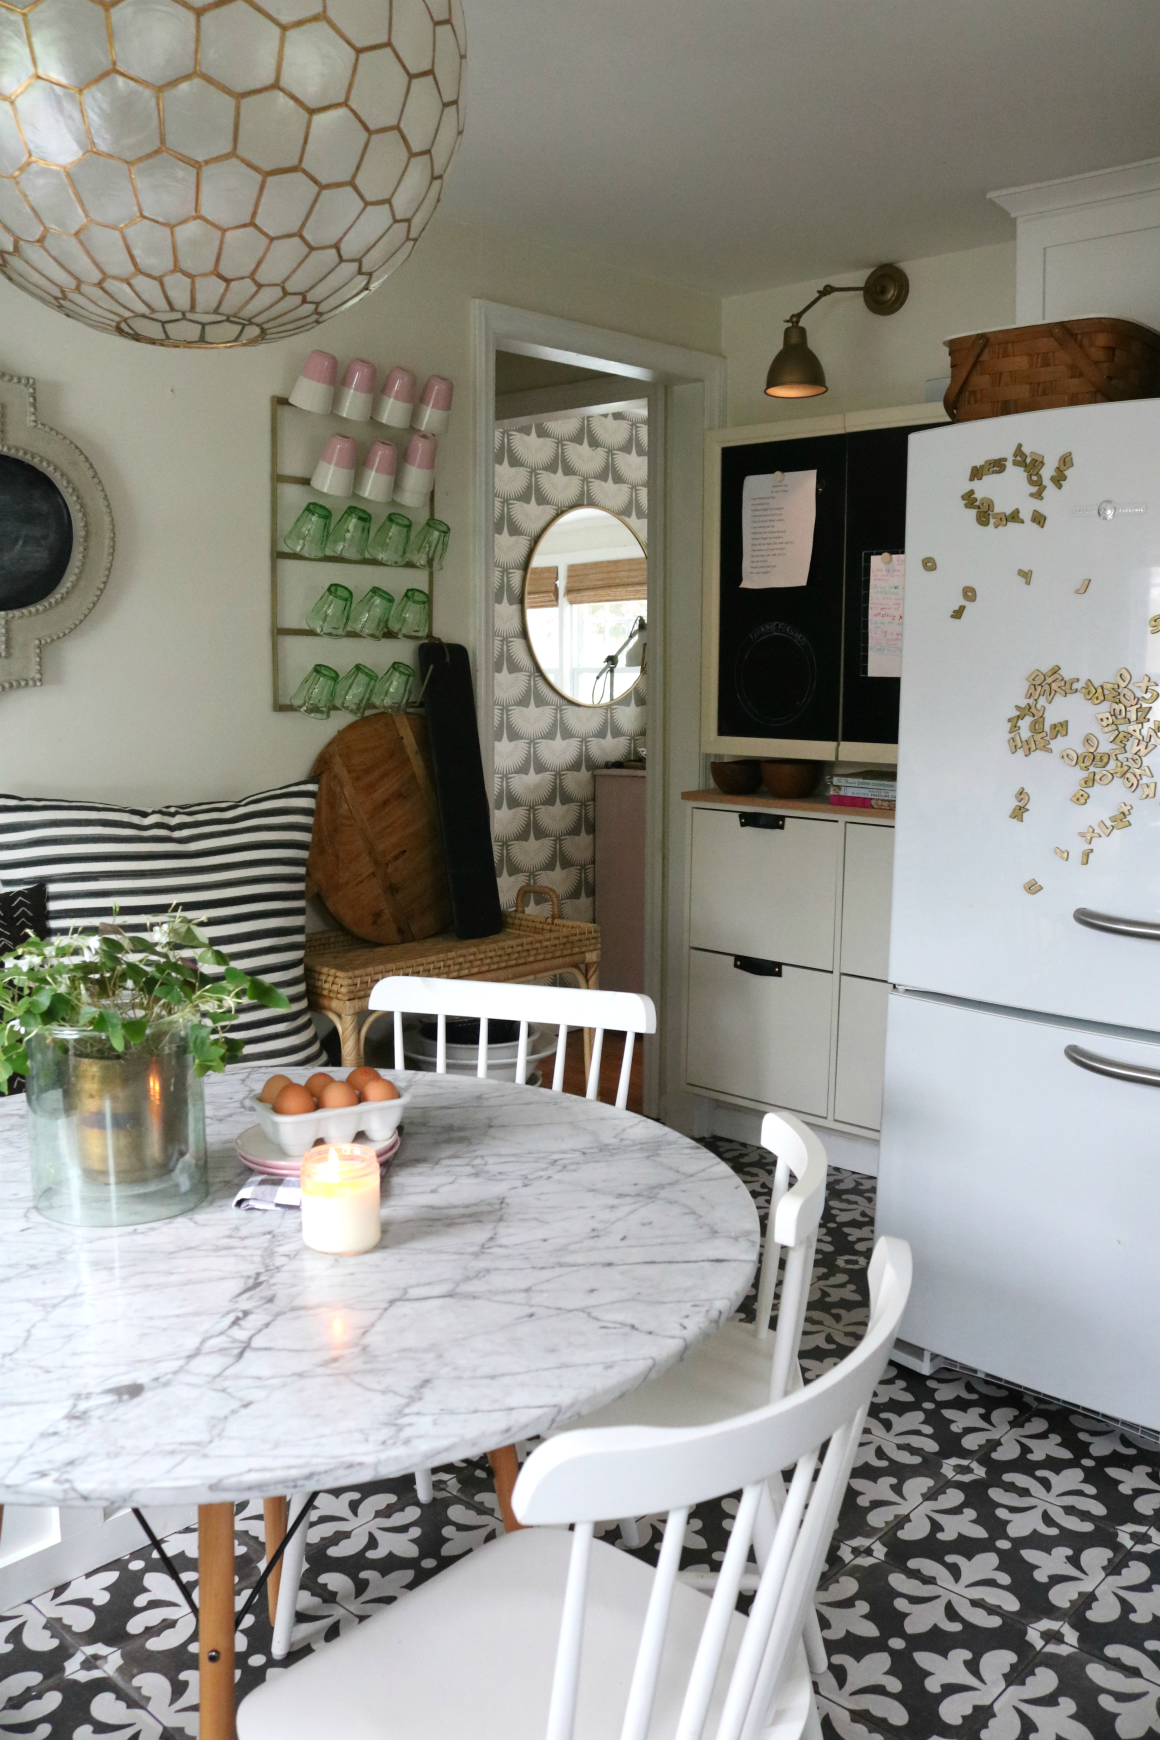
Behind the fridge is the entrance to our kitchen. We have THIS IKEA storage piece that has our cookbooks, bowls where the car keys go and inside the cupboard as more food!
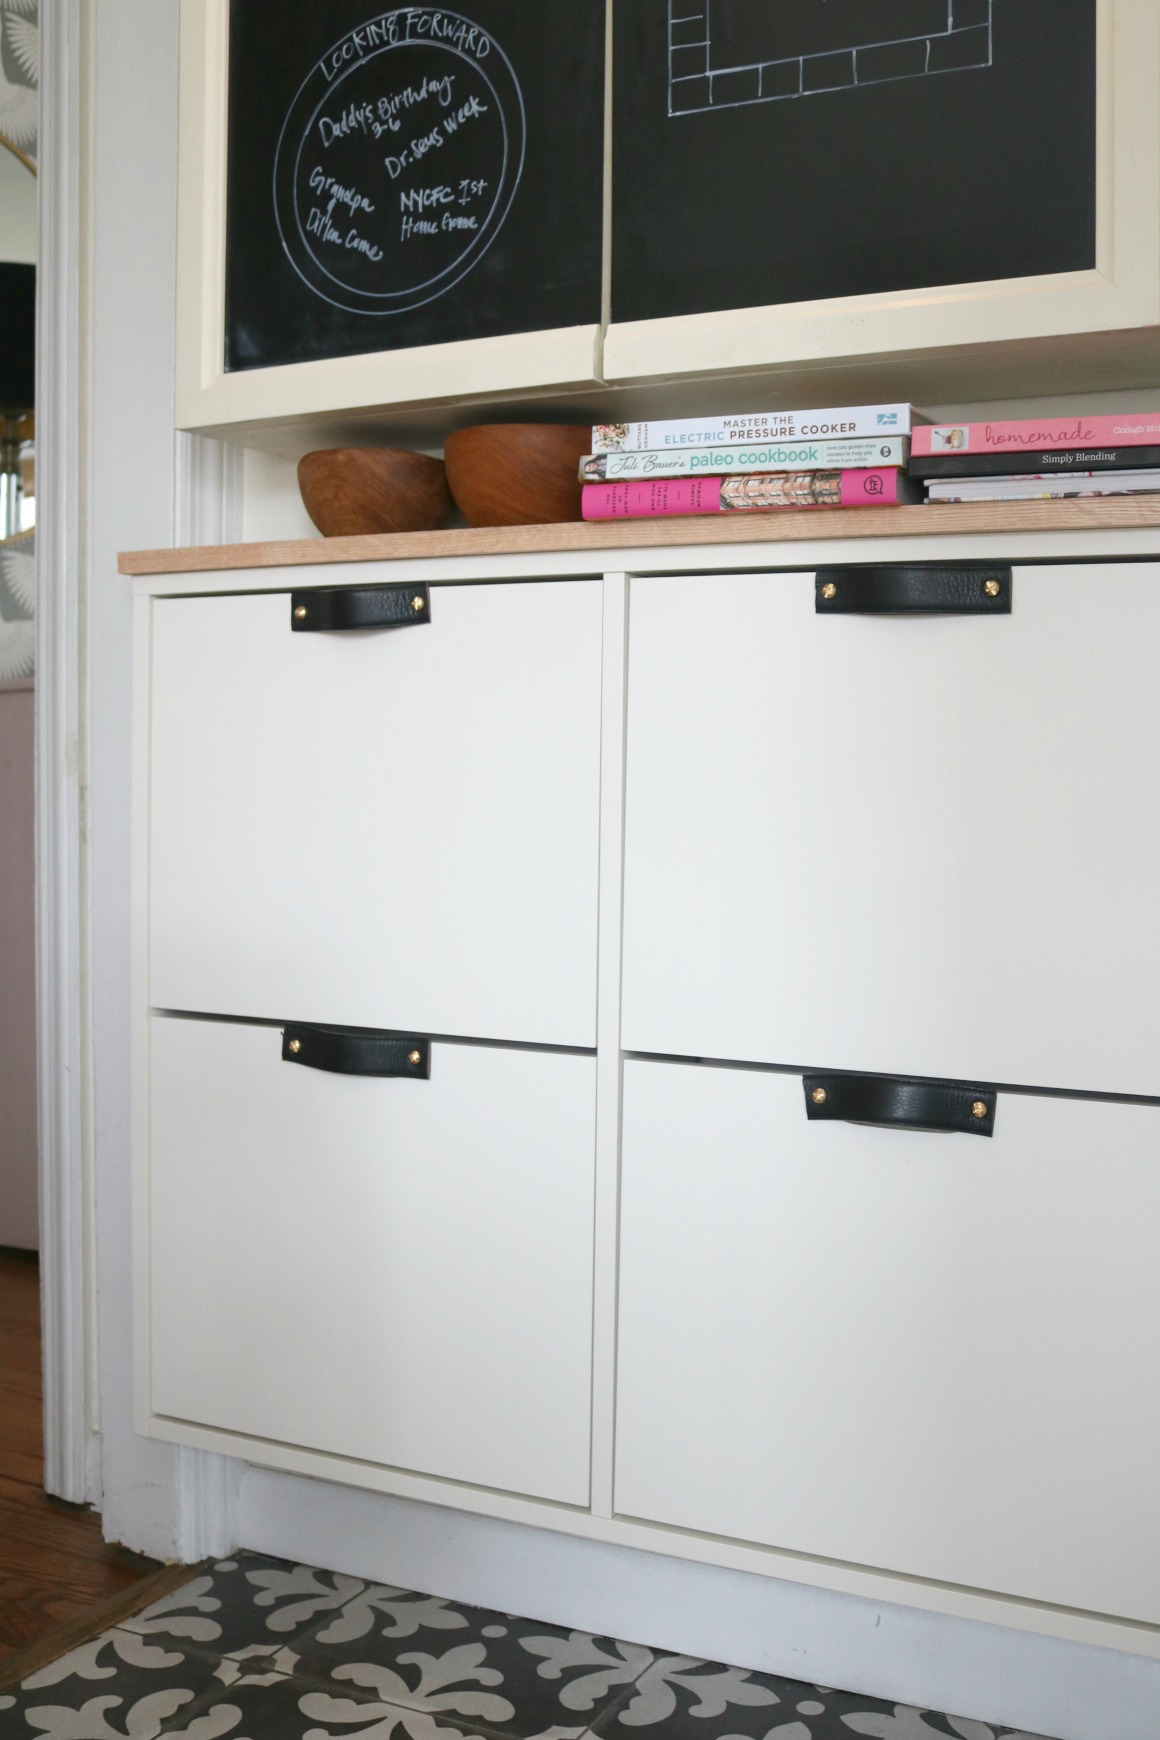
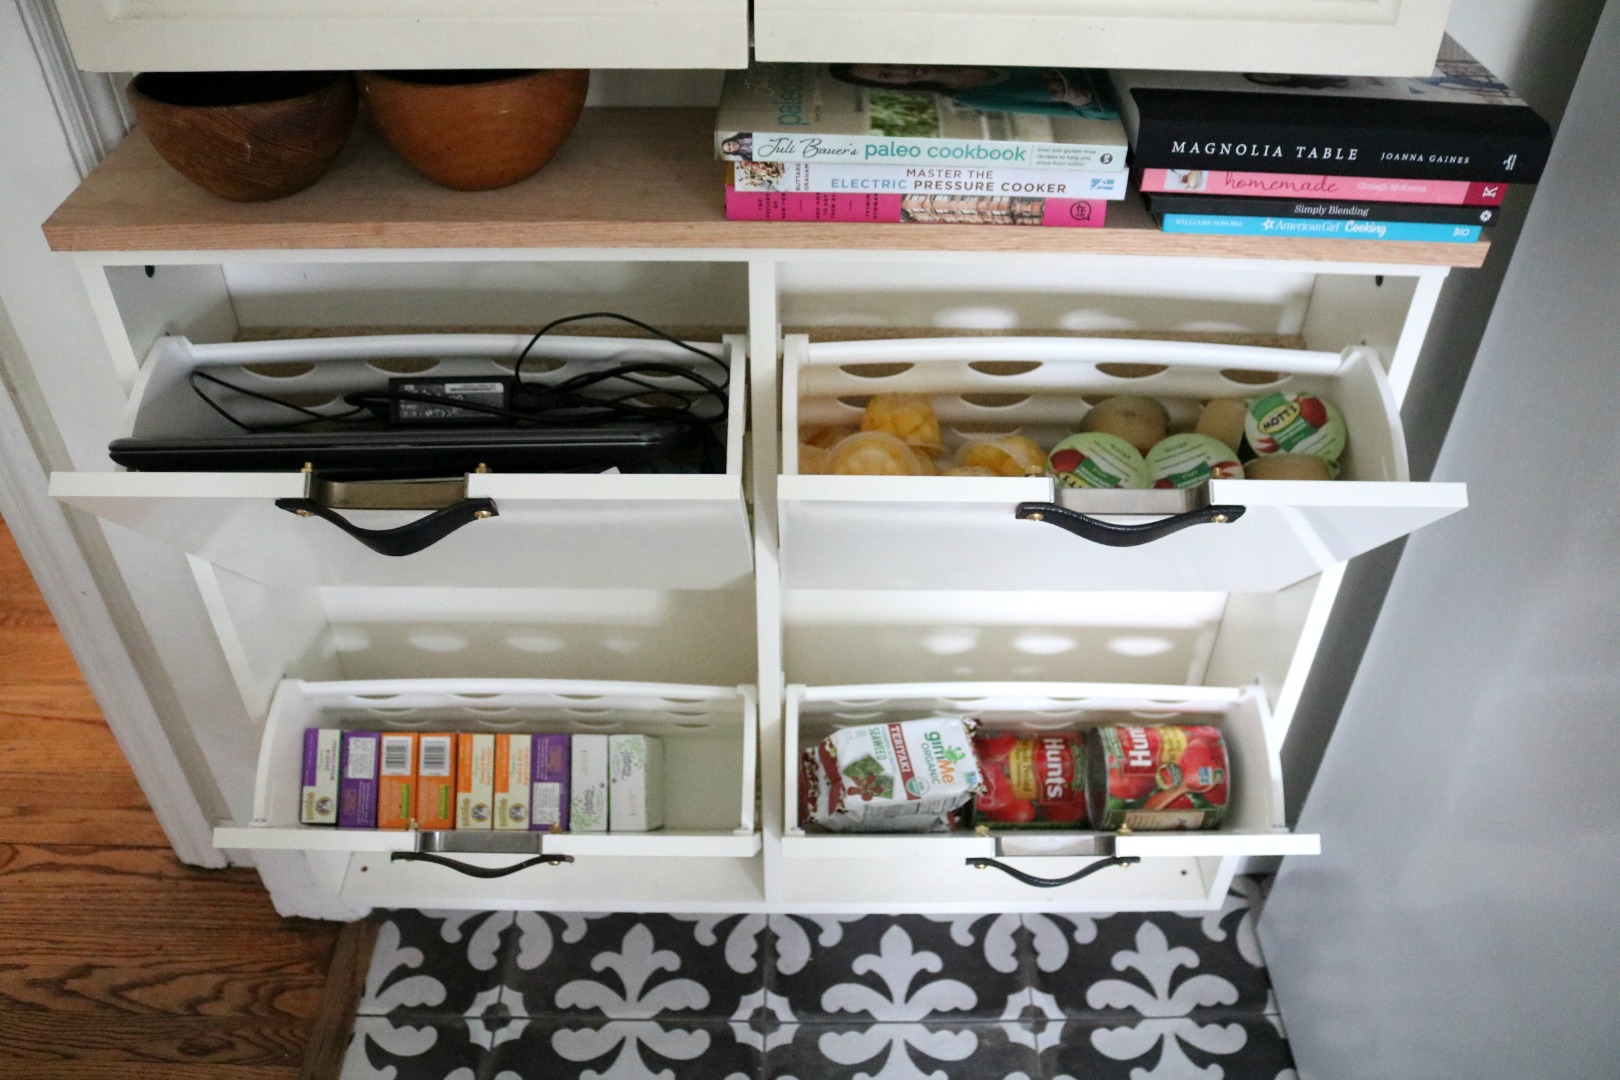
The top left drawer as the computer we use for the kids (they can occasionally watch a show with breakfast, or Finn gets it with lunch). Snacks for school lunches, Mac n’ cheese, larger canned goods etc.
Also we have a rule that when the kids are home they can’t have packaged food. Those packaged foods are to easily grab for lunches and running out the door. When they are home we encourage them to eat “fridge food”- cheese, apples, yogurt, carrots, home-made muffins, breads etc.
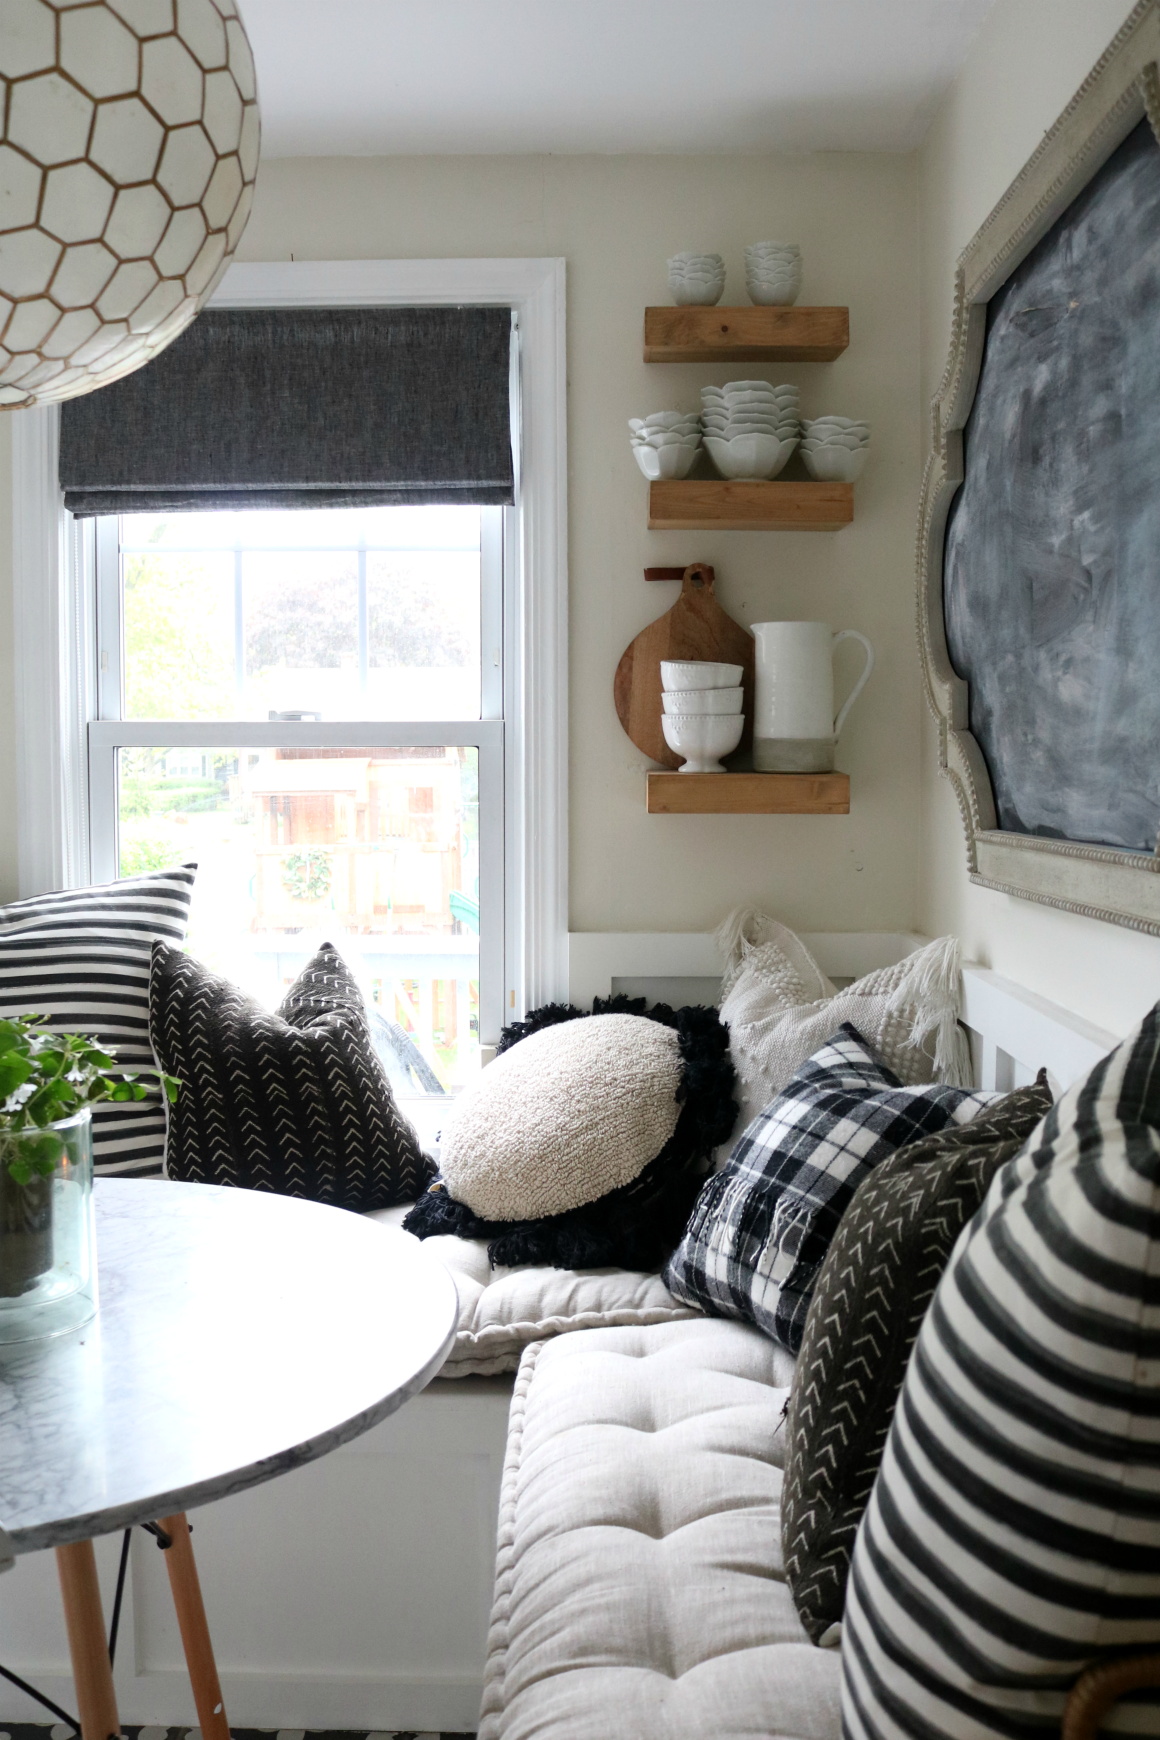
We have THESE small shelves filled with some bowls and small plates that we use daily too. I love use everyday items as decor.
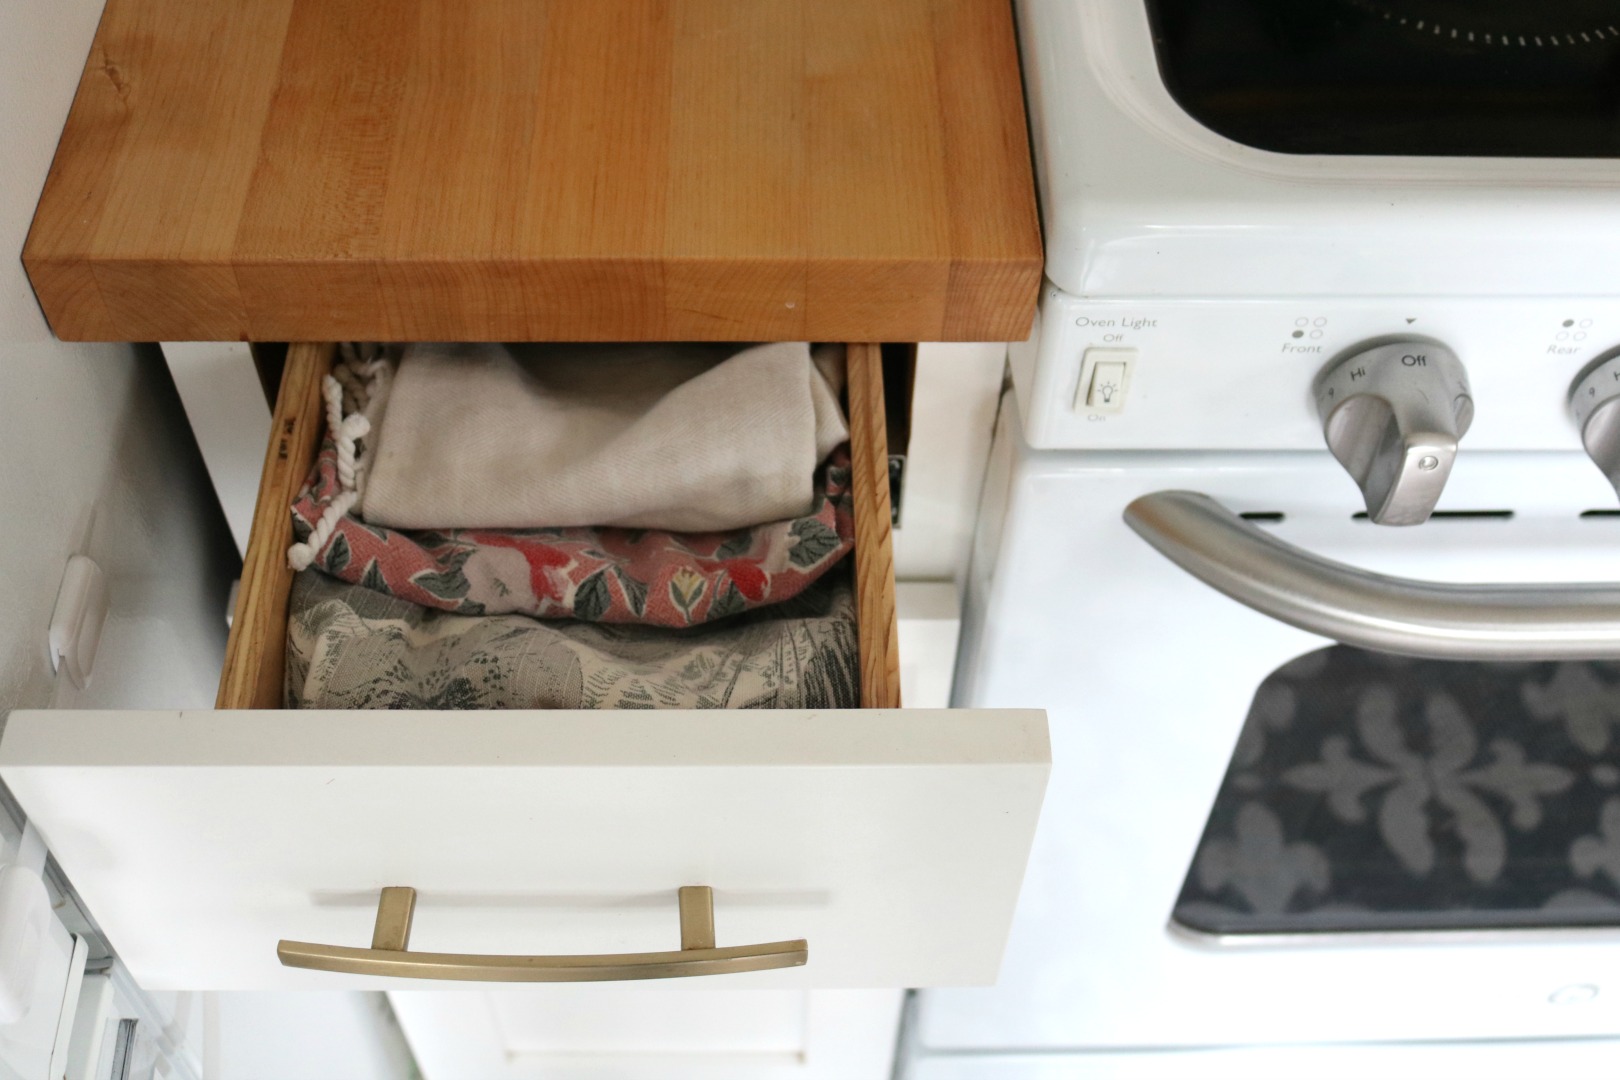
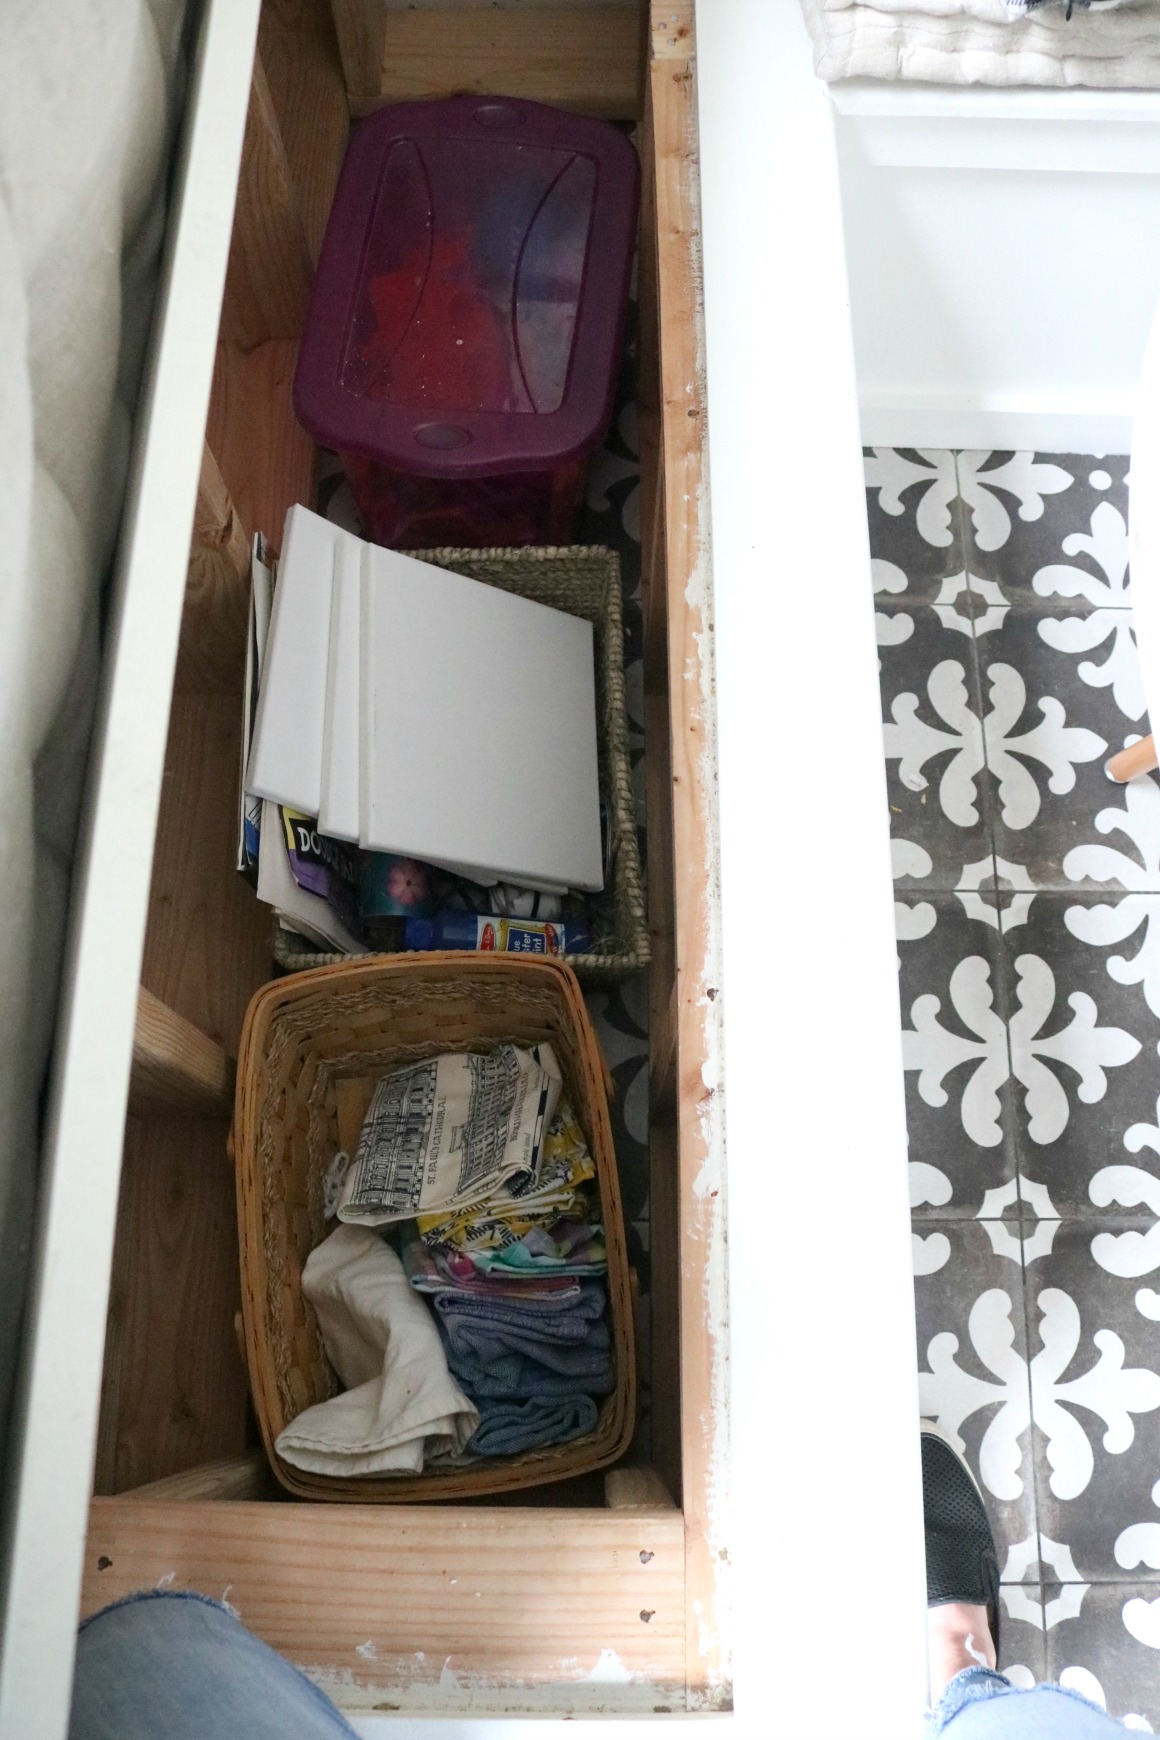
Under the built-in banquette we keep a lot of larger kitchen gadgets. Pressure cooker, crock pot, food processor, popcorn maker and other baking supplies. On the other side- play dough, extra napkins and crafts.
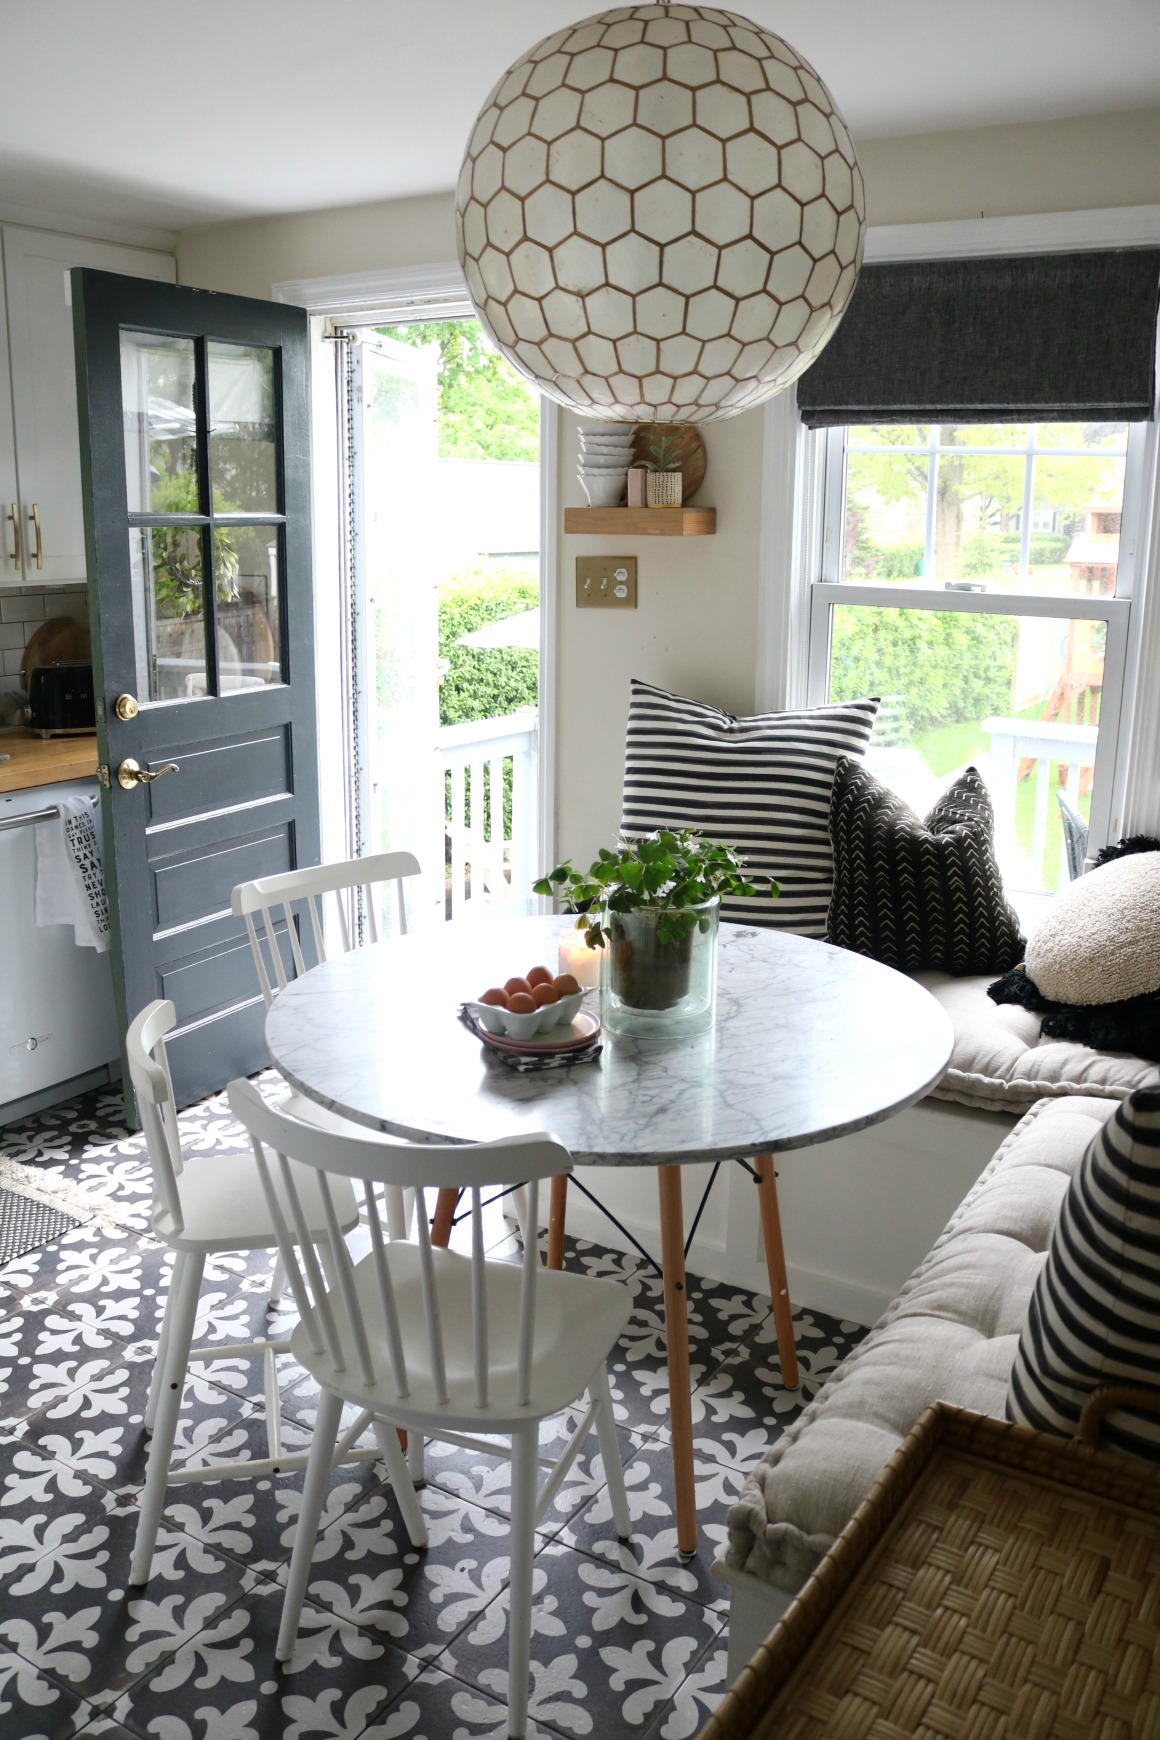
See how we built the Banquette HERE.

To the right of our banquette we have THIS Tea Cart that holds extra dishes and our blender base. There is actually a plug behind the black serving board so we can use the blender there. I like to keep the top of the tea cart empty to avoid a cluttered look. THIS mug rack (I spray painted) holds the cups that we use daily. Our kids can easily get their own cup and then the cups don’t take up cabinet space!

I am still learning the best way to use and maximize our small kitchen. I have a box in our basement that says “donate” that I am always adding to. Finding ways to simplify and declutter. I also listened to The Life Changing Magic of Tidying Up that book was helpful and really gets you in the mood to declutter! I believe everyone can love their home no matter the size and the way to love your home is to maximize every inch!
Kitchen Sources-


Wow, what a difference painting the inside of your cabinets made. I can see why you wanted to do it. Super cute and organized. Thanks for sharing.
I have a couple of tips for your long drooping shelves. #1 Flip them over periodically so they can level out. #2 If the vertical support board in the middle is deep enough, you can add shelf support pegs at the midpoint…one peg on the backside of the center vertical board and one corresponding peg on the back wall of the cabinet. Voila! No more drooping. (Love your blog, by the way!)
thank you! That is a good tip to flip it over periodically. We did look at getting a center support (sent Kevin and he came back empty handed hahah)
They looks so much better painted! So bright. Can you link to where you purchased your tea kettle from? Thanks!
It was a Target buy last winter! I dont see it anymore 🙁
Love your kitchen! I have a question about the cloth napkins. I have been wanting to ditch the paper ones and go with cloth, but I haven’t done it yet. I have 3 messy little people (6 and under). How do you keep them from looking dingy looking? Most of my dish rags that are not a solid dark color are dingy looking. Any tips? Thanks!
The black and white ones I have found to be the best! They wash really well and the black hides a lot of the dirt!
I do use the baby wipes for Finn to clean him up!
Thank you so much for this post! I loved seeing how you have everything organized. We have a small kitchen too and I’m so inspired! Quick question…where are the metal scoops that you keep in your canisters from? I’m looking for a good one for our flour canister. My daughter is starting to bake but is having a hard time scooping without making somewhat of a mess ;).
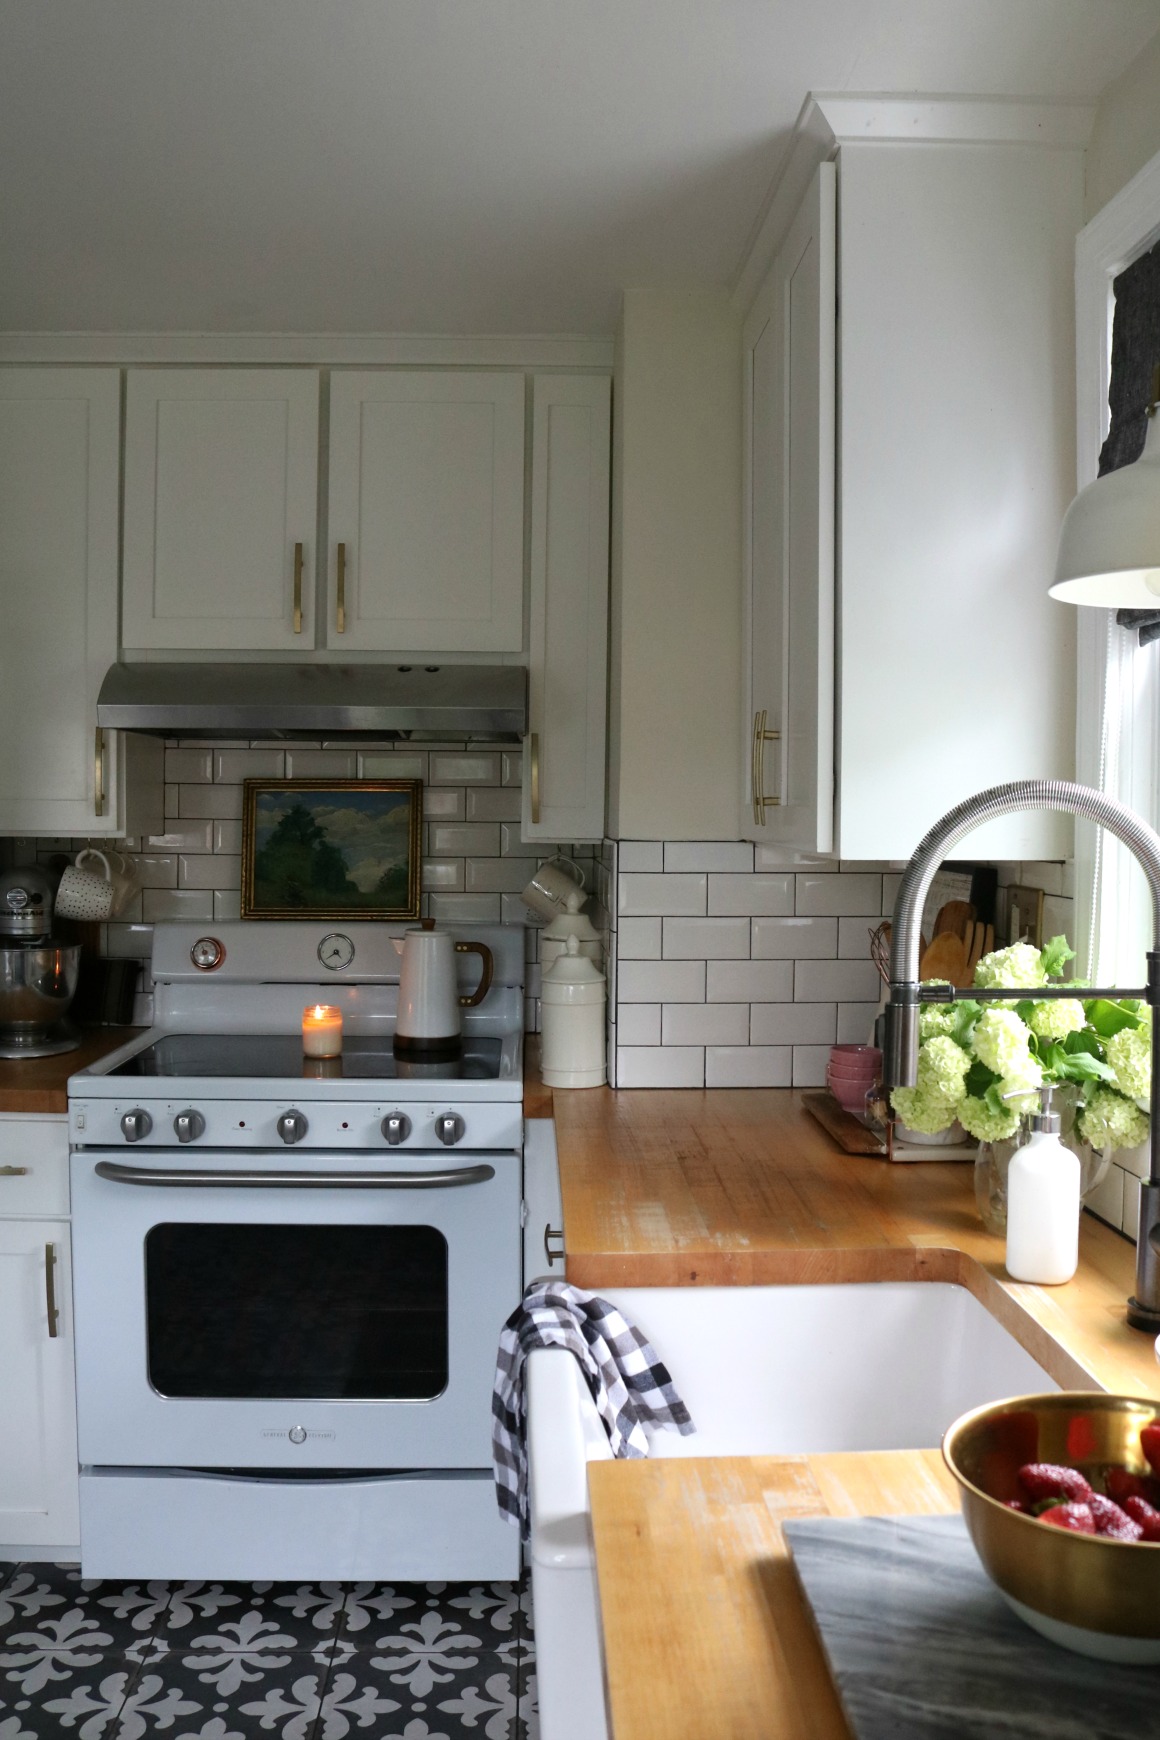
Love what you did with your kitchen!! Where is your stove from? I love that it’s not stainless steel and that it looks vintage!
It is GE Artistry Series! But discontinued 🙁
Hi Brooke, first off I have to say you are SO TALENTED! I love your style and how you are able to make your space work so well! I too live in a Cape built in 1950 that is similar in size to yours. My kitchen actually has less cabinets that yours, boy did I have to pare down to the essentials. It really is the only way to go, but it definitely takes time to get there and time to get used to it all. I too keep my trash and recycle bins under the sink. I don’t like to see them either. There really isn’t space anyway, but on the upside, the bins are small and the trash goes out frequently, which is a really good thing! Thanks so much for sharing your “small spaces”. I just love it! Also, love the white interior of your cabinets, so fresh!!
Can you please link your garbage can?
Hi Grace! How is the knife strip attached to the fridge? Is there any drilling involved or just the magnet? aka zero setup!?
Yes it is magnetic! Stays right on the fridge!
Hi, I just want to drop a line and let you know I recently found your blog and really enjoy it. I have a smaller home– it is under 1500 sq. feet– basically a starter tract home in the suburbs built in the late 1970s. I really enjoy seeing the smaller kitchens. I have been to Parade of Homes in my community and they are so large and unlike what I live in. There is a need for people to blog about regular houses that cost less than $150K. We have a 3 bedroom, 1.5 bath home with a deck, yard and 1 car attached garage. There are 3 of us living here with 2 dogs and 2 cats, and some clown fish.
yes! It would be nice to go to a parade of homes house that was small!!
I wish our home was less than $150k! It is closer to 400k! Isn’t that shocking for the size? We live in CT, expensive place to live!