We recently made over our friends office into a guest room. They were debating if they should leave it an office or use it as a guest room. It can be a hard decision, trying to figure out how to maximize a room. Since they have guests often and Lauren works from home a couple times a week, both a home office and a guest room were important. I suggested to use this bonus bedroom as a guest room because you can really put an office desk anywhere, but you can’t put a guest bed anywhere!!
Today we are going to share what we did for their office. We went back and forth about putting a desk in their closet. I loved the idea of doing some built-ins in the closet and they liked the ideas of buying a desk for the office. I’ll show you what we decided on!
Bedroom Before and After-
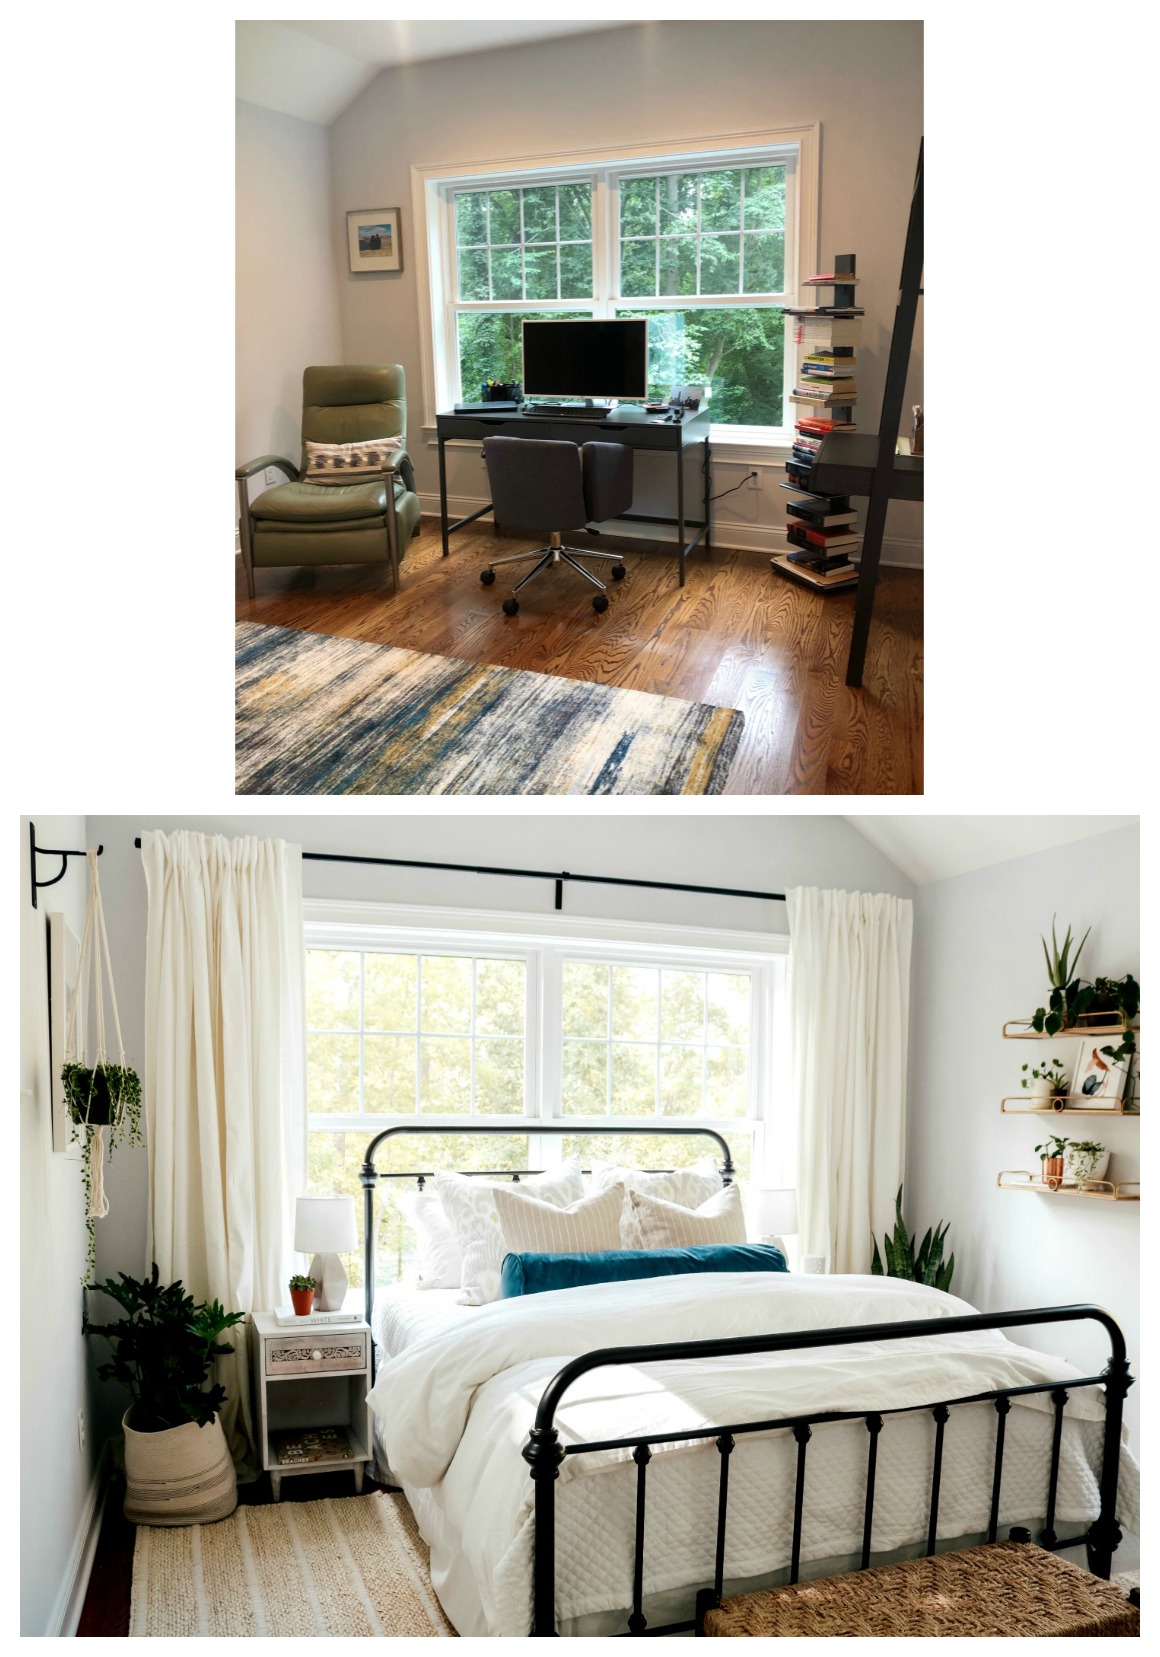
If you missed it we just shared the guest bed reveal on this blog post.
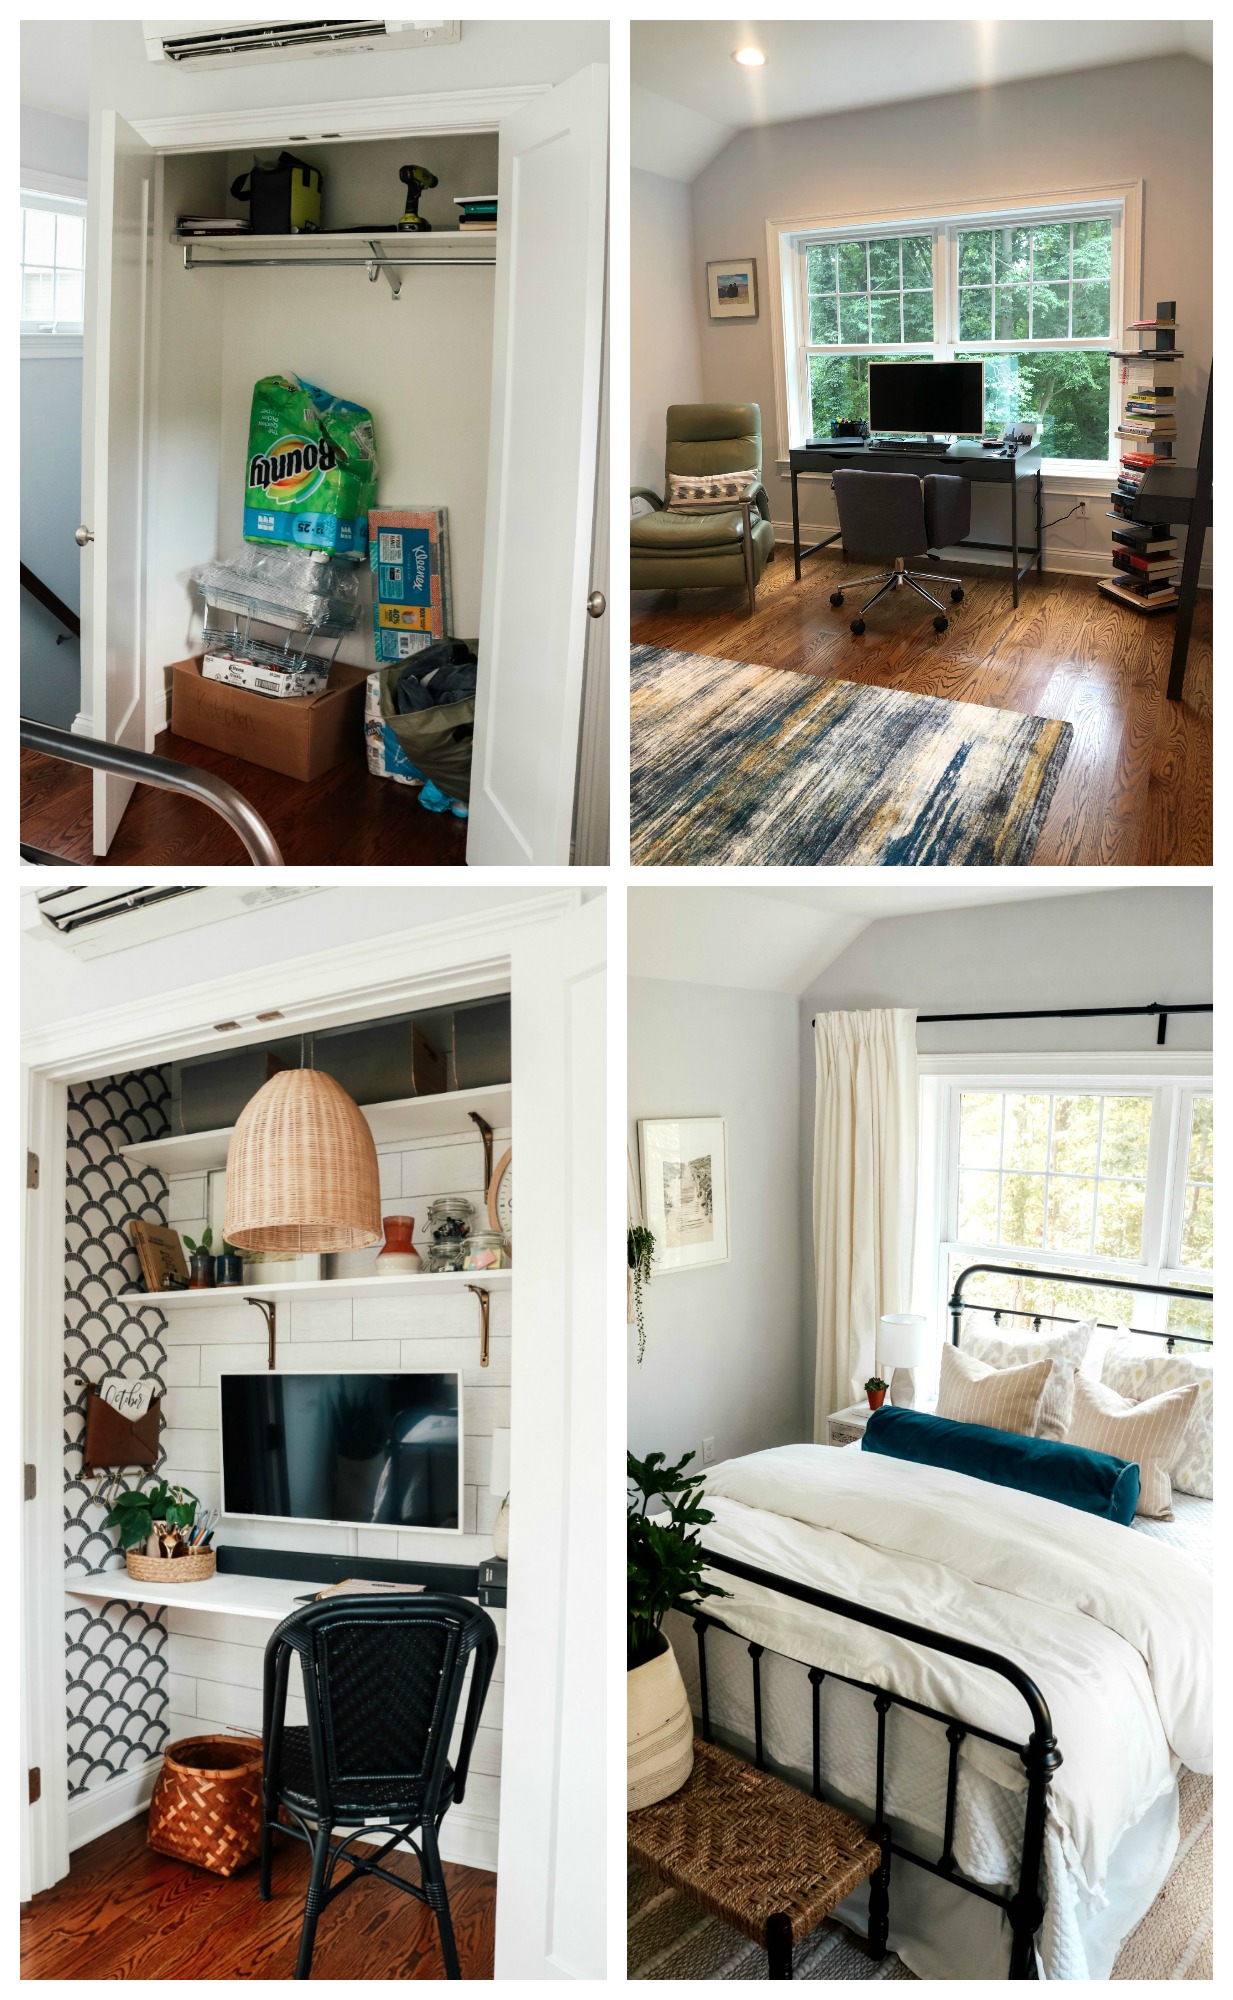
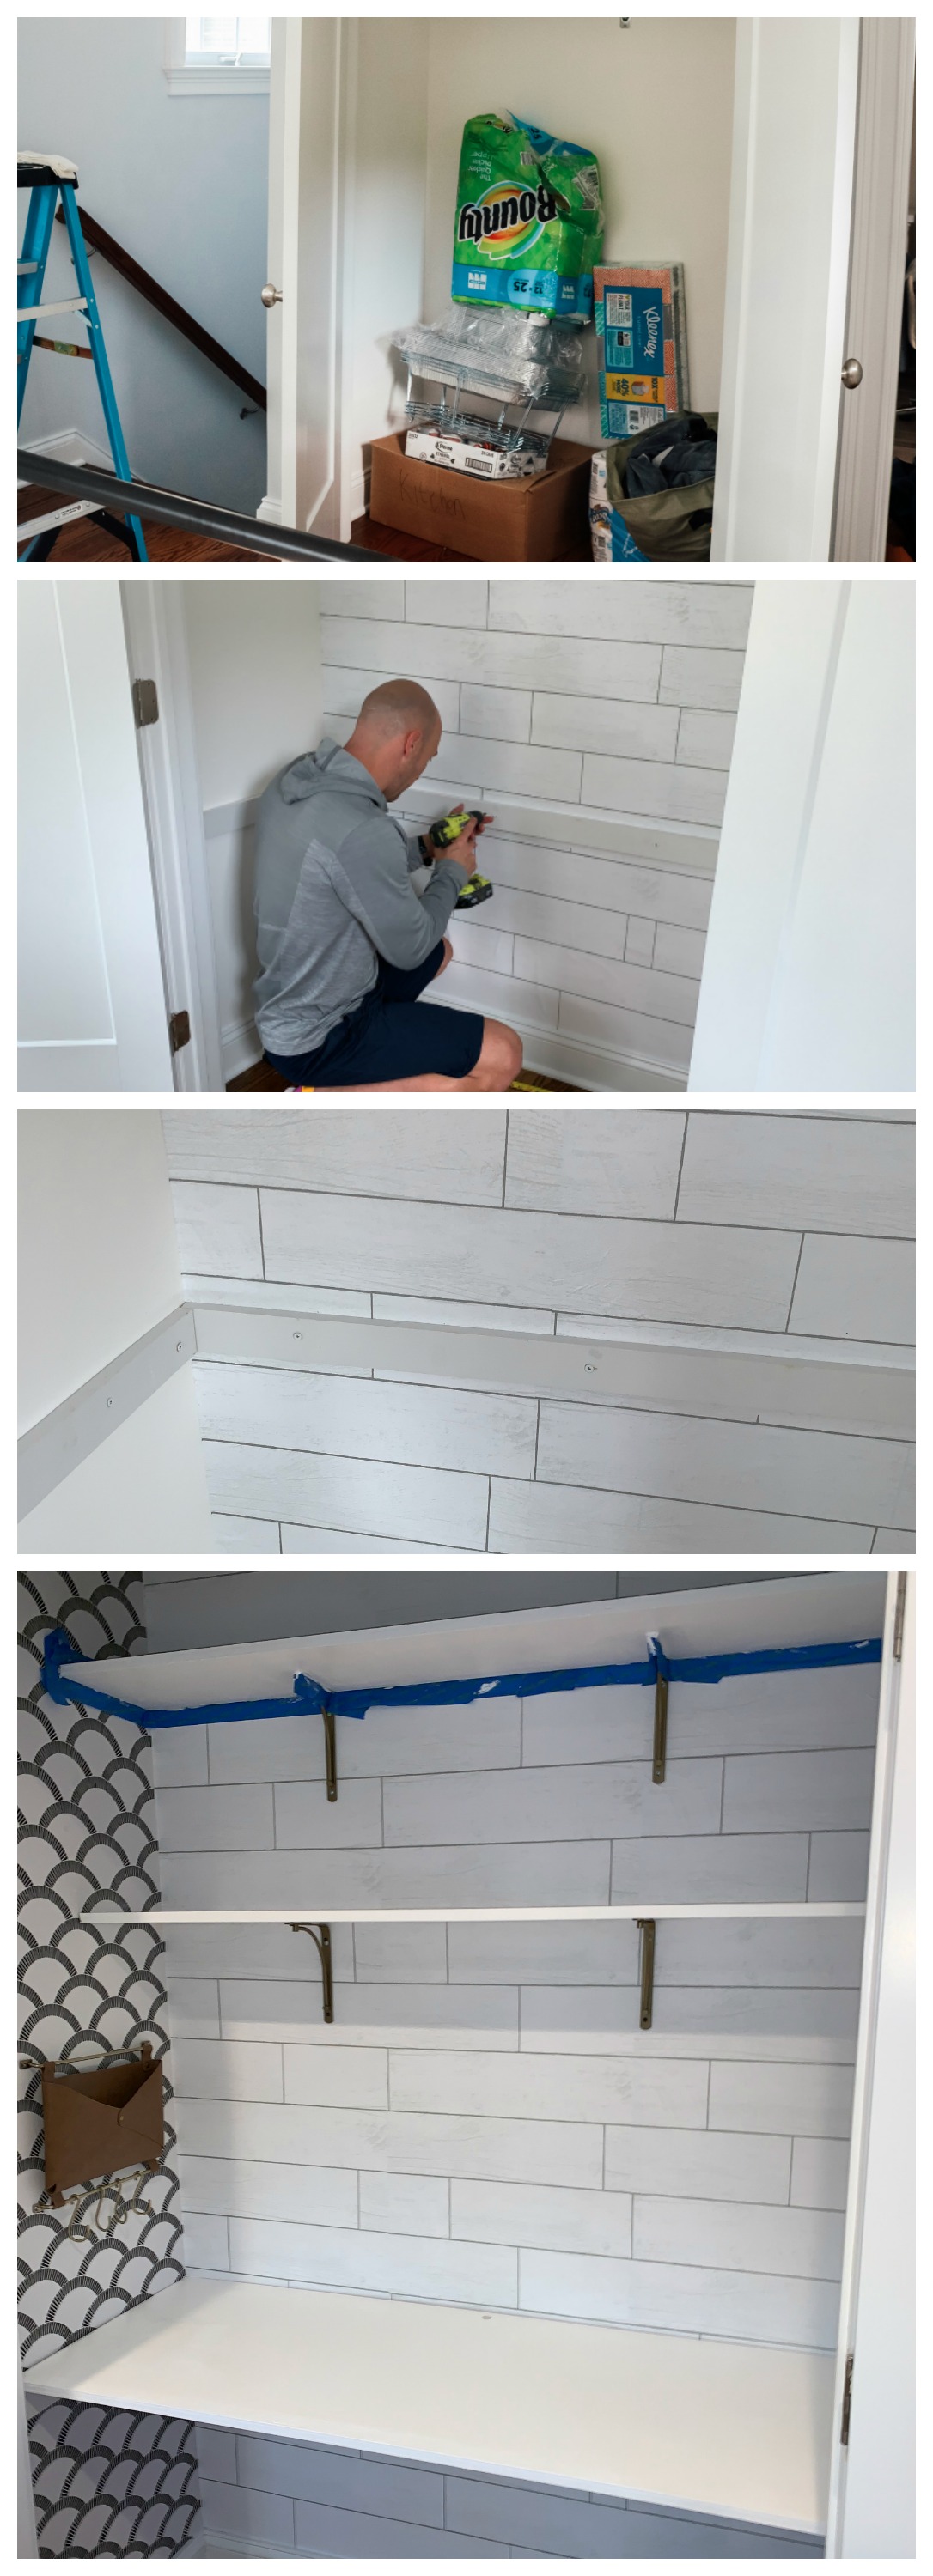
Closet Before and After-
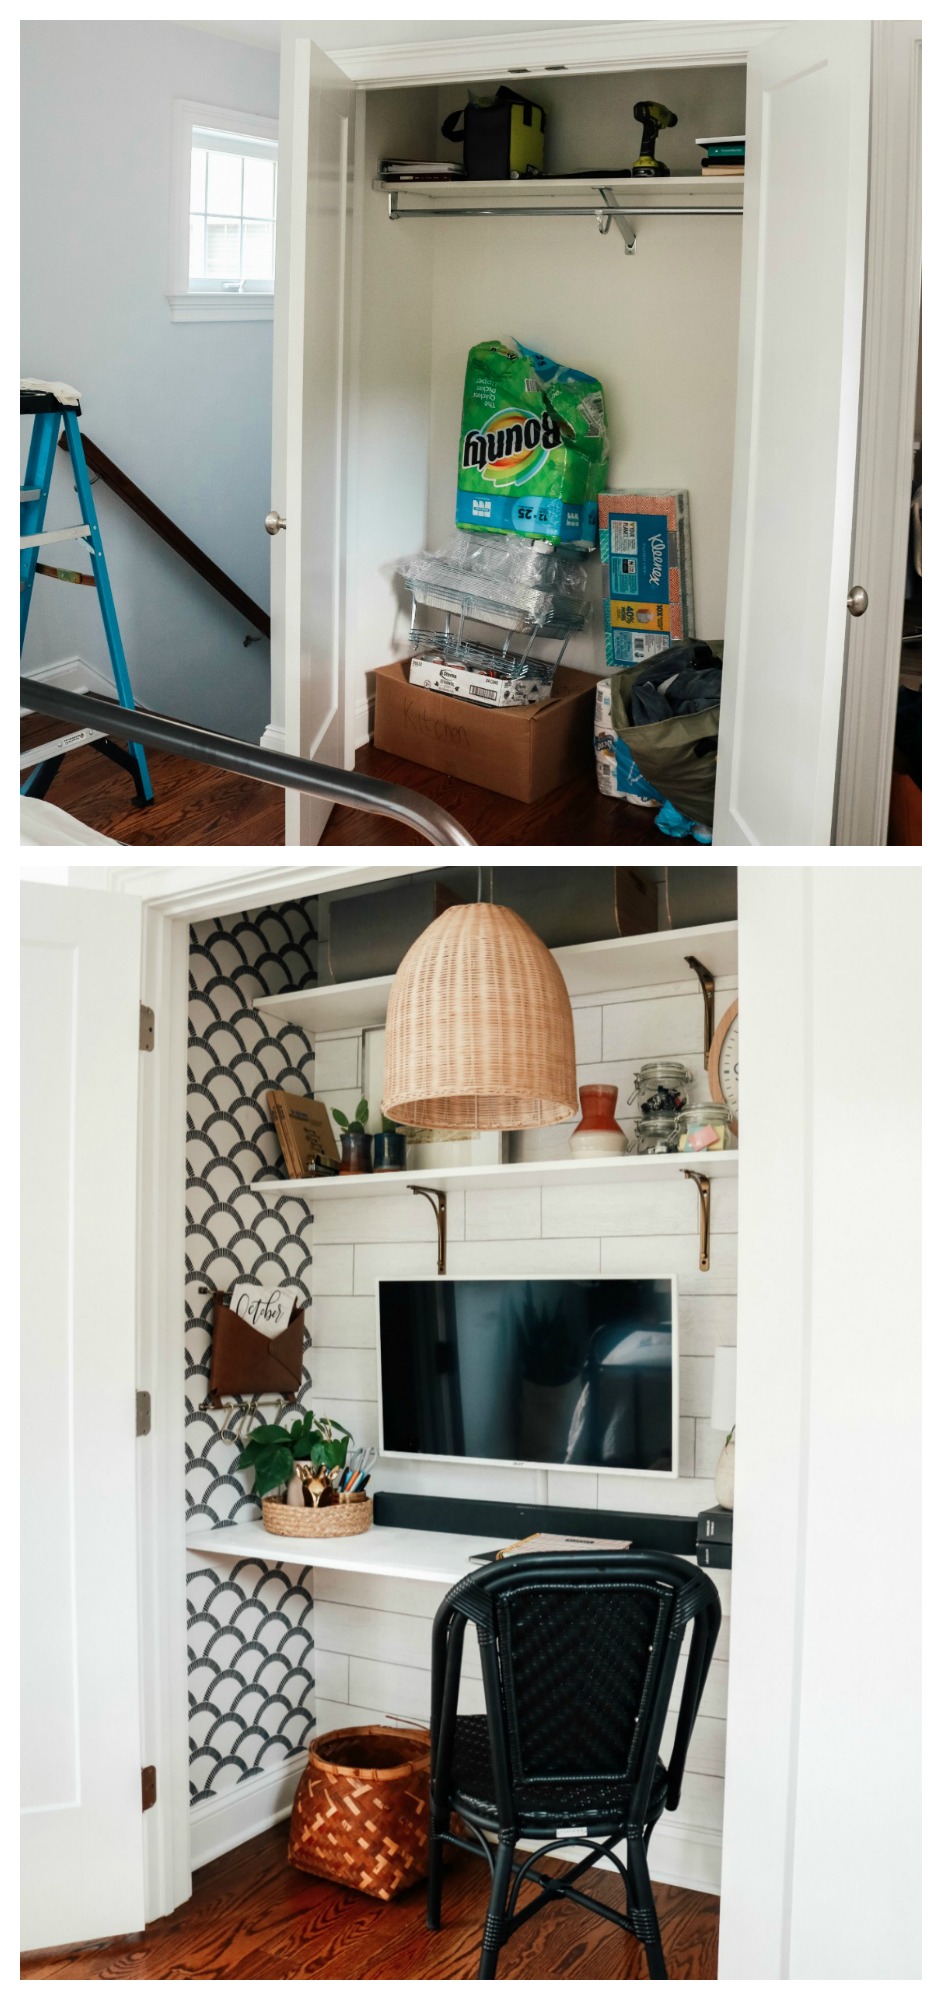
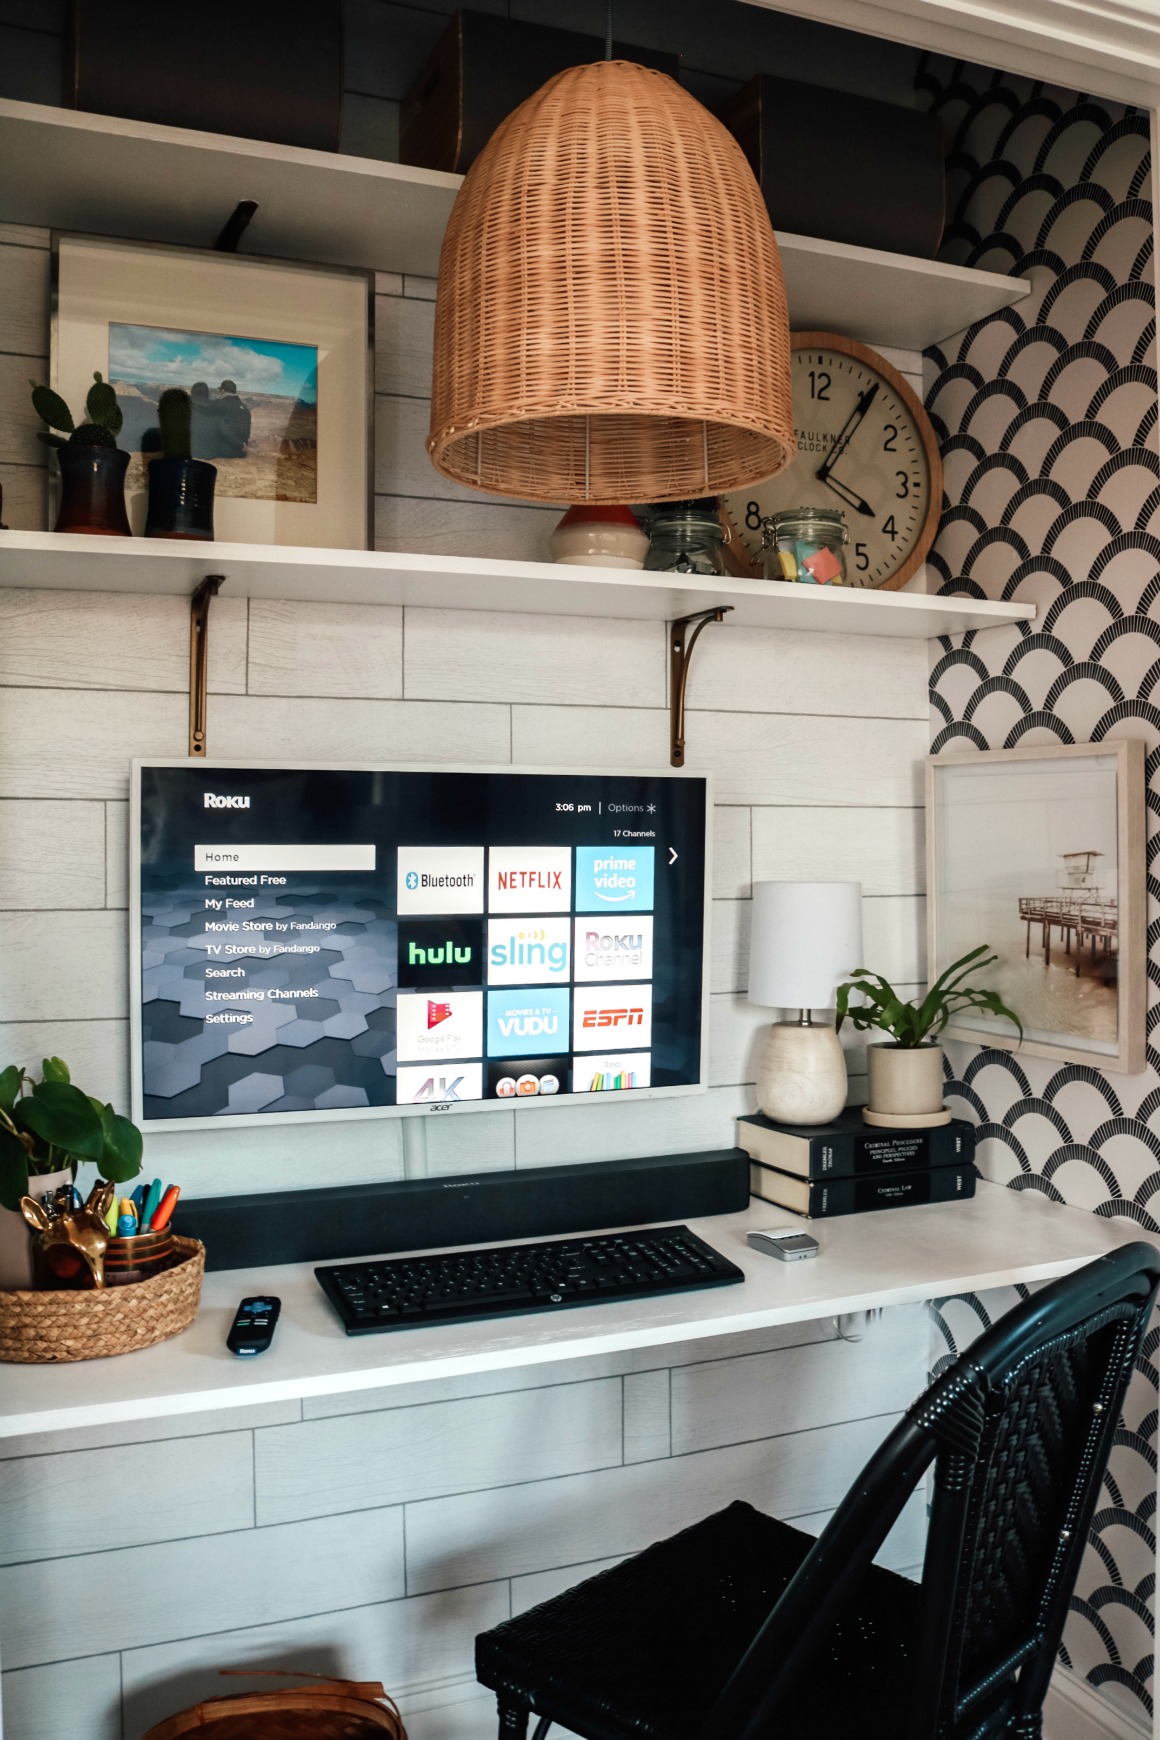
A “Cloffice”!!! We ended up building shelves in the closet, rather than buying a desk for the closet. They had wanted to just buy a desk and put it in the closet (the desk they already had wouldn’t fit). I was concerned it would look like we just shoved a desk in the closet. They were worried about it costing too much. I told them not to worry, we would figure it out! So Kevin and I transformed the closet into a desk for less than buying a desk! The wood for the desk and shelves cost $20, brackets were $32 and wallpaper was about $120! SUPER affordable DIY project!!!
Floating Desk Details-
- The wood for the desk and shelves were from a sheet of 4×8 Plywood, measured and cut to down to the dimensions for the desk and shelves we wanted. We actually had the pieces cut at Home Depot by one of the employees. (You can find the exact plywood we used HERE)
- The depth of the desk we went with was 20 in, this gave us enough work space and enough room to be able to tuck the chair in so we could close the closet doors when the desk is not being used
- To attach the desk top we used two 2- 2 in x 3 in x 6 ft select pine square edge boards (we did use a saw to cut these down to size) and secured them to the studs in the wall at the hight we wanted the desk to be (standard desk height is between 28-30 inches high), we actually set the desk around 32 inches and it works perfectly for Lauren.
- After the support boards were in place we placed the desk top on and secured in each corner to the support boards (see photo below).
- The two shelves are 14 in deep and the width of the closet. To attach the shelves to the wall, we used THESE brackets and spray painted them in Rust-Oleum Pure Gold Spray Paint.
- After we installed it all Keith went in and taped off the brackets and painted the wood in Valspar Ultra White in a semi-gloss. It took about two coats of paint. He let the paint dry, then he sealed it (I HIGHLY suggest you seal something like this that you will be working at and sledding things across) it would easily scratch. We used was THIS sealer.
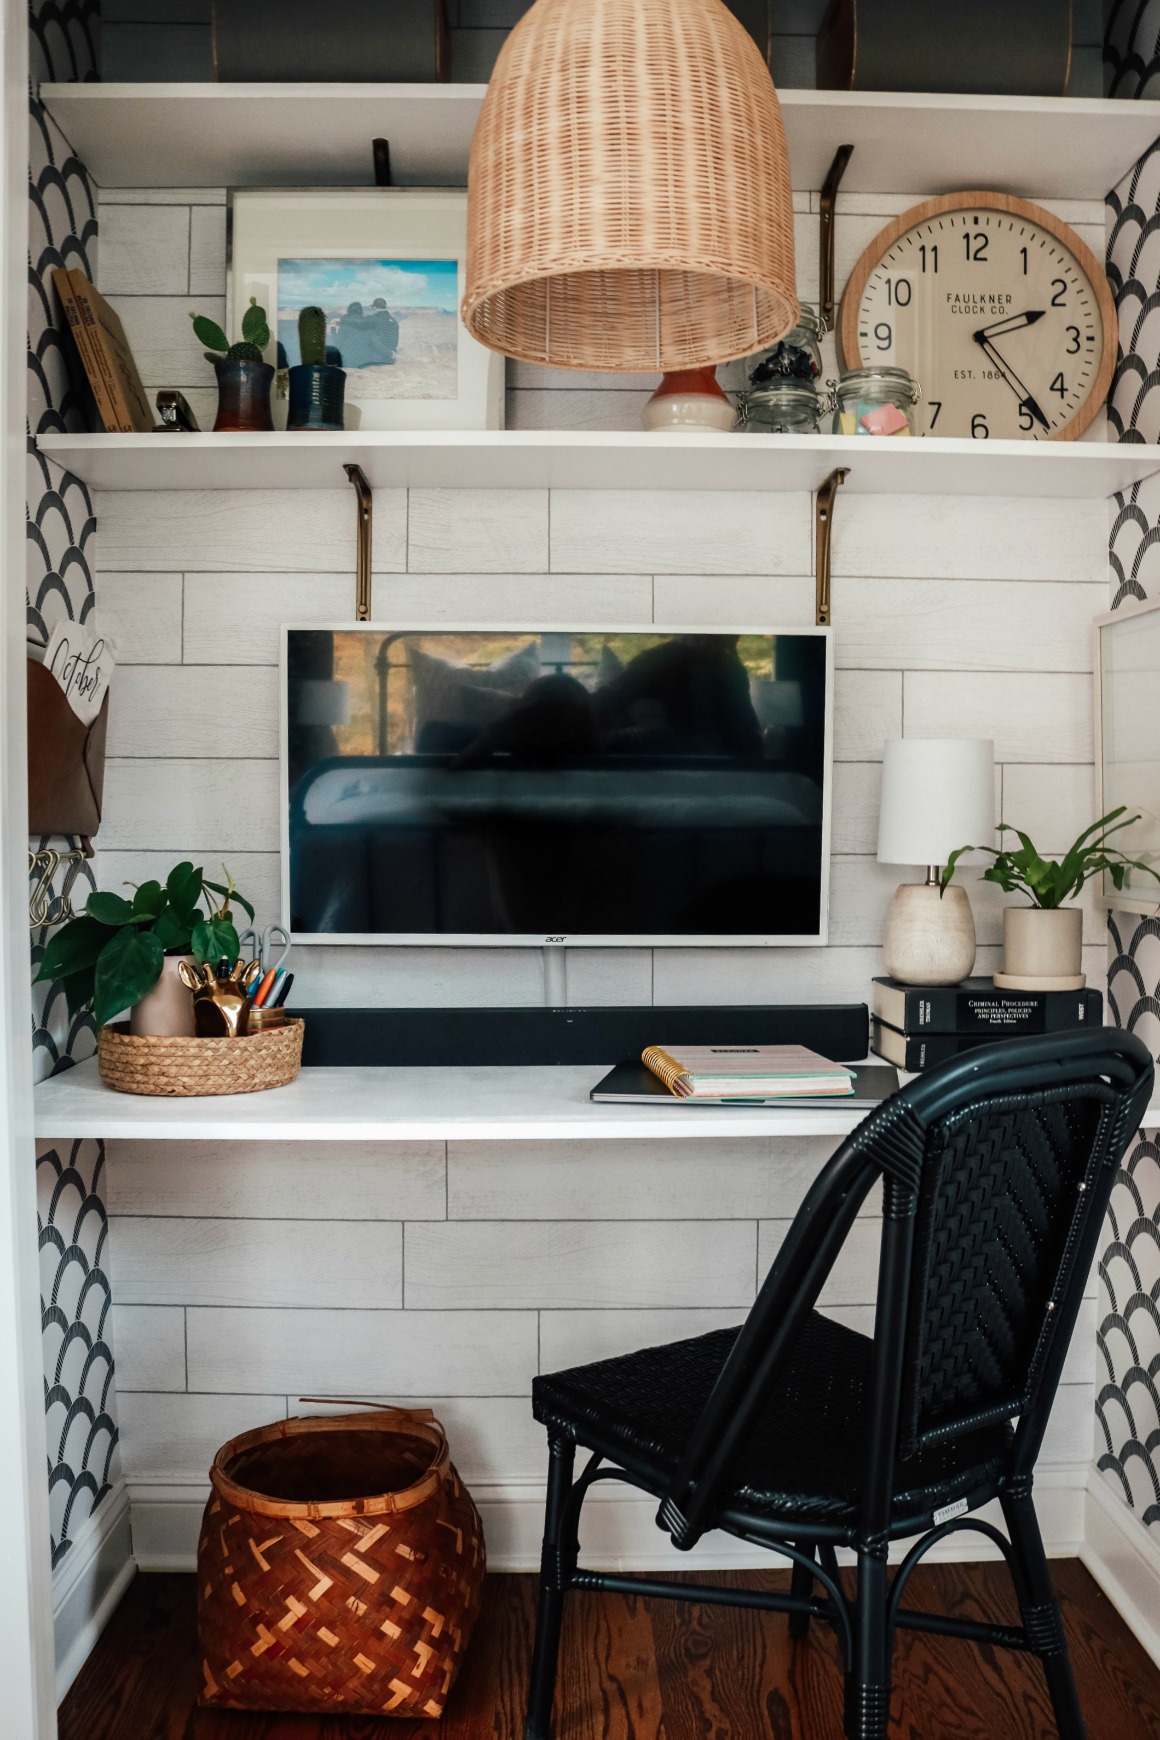
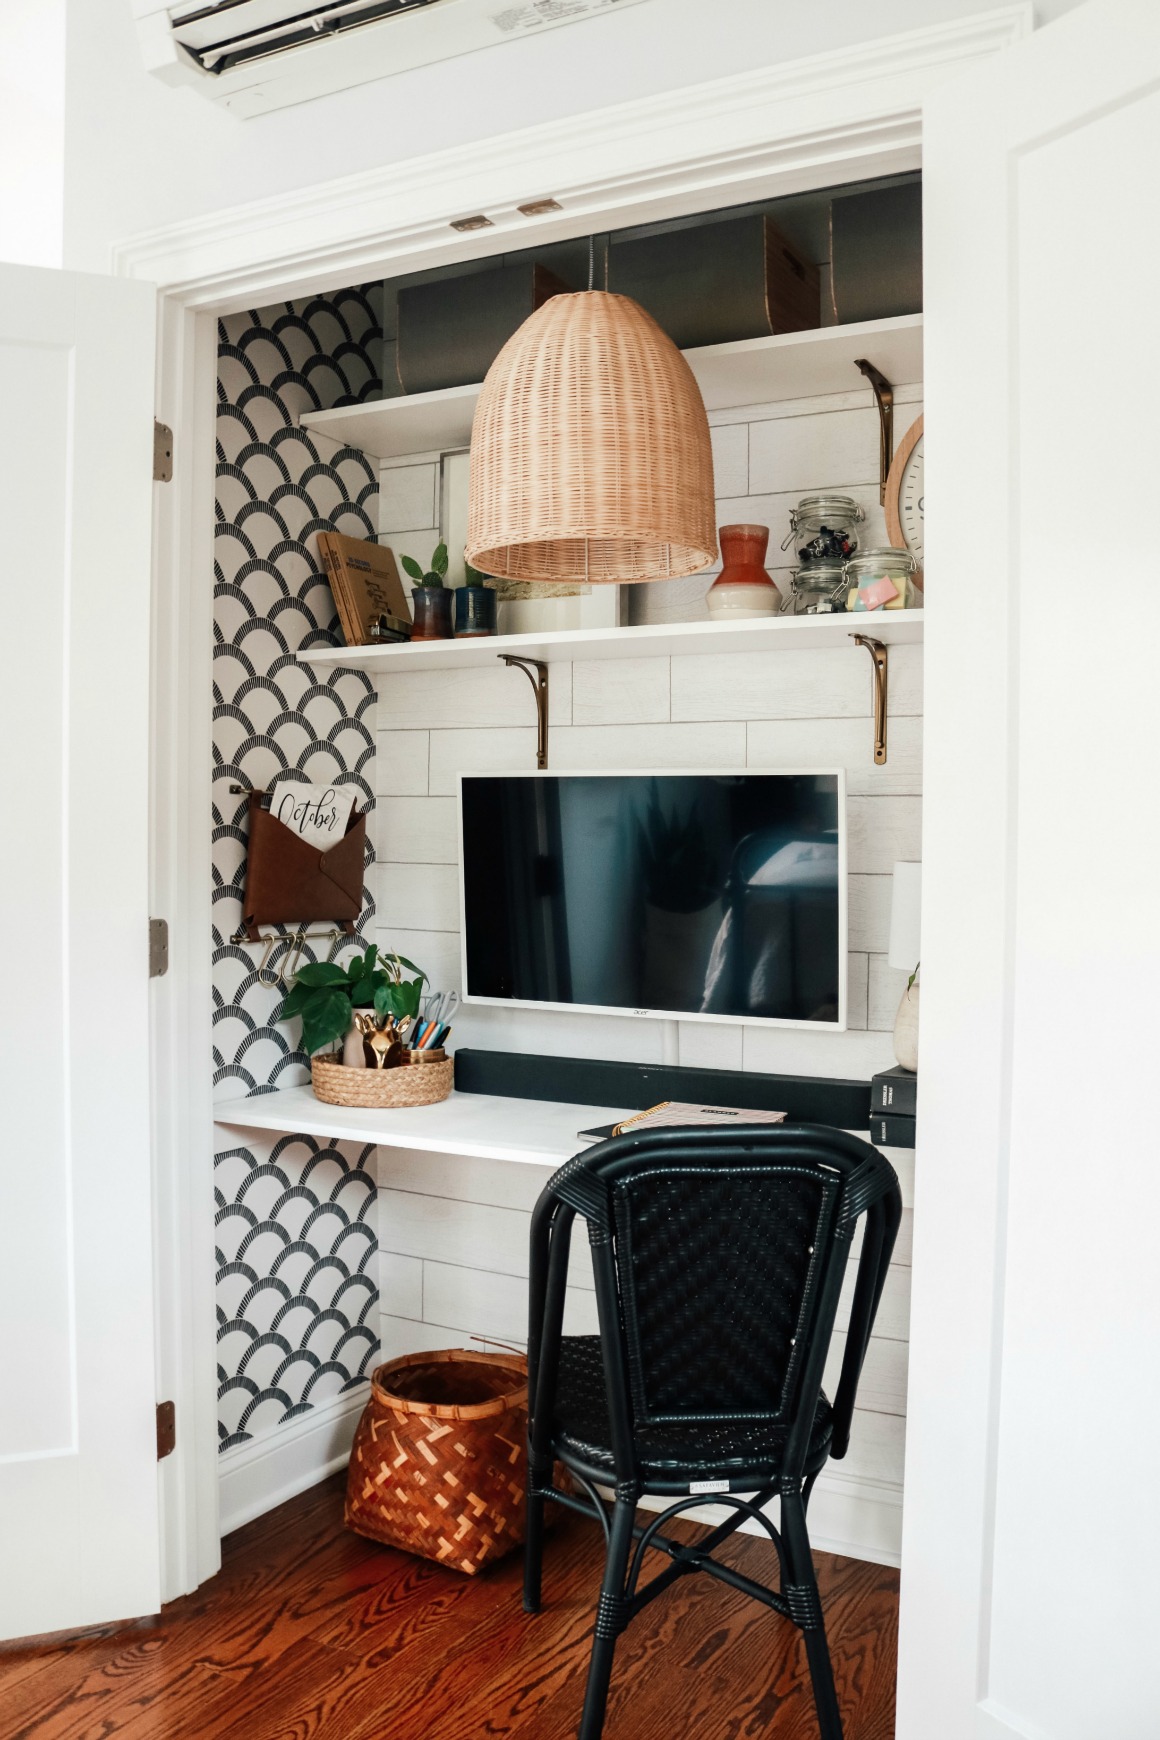
I ended up using two different types of wallpaper. I actually went off of the wrong measurements for the closet, so I only had two rolls of wallpaper, only enough for the back wall. THIS is the faux shiplap peel and stick wallpaper. Luckily I had some of THIS black and white wallpaper that is peel and stick too. Totally a happy accident! I LOVE the combo of the two patterns. And Keith and Lauren love it too! (the black and white peel and stick wallpaper was leftover from this makeover).
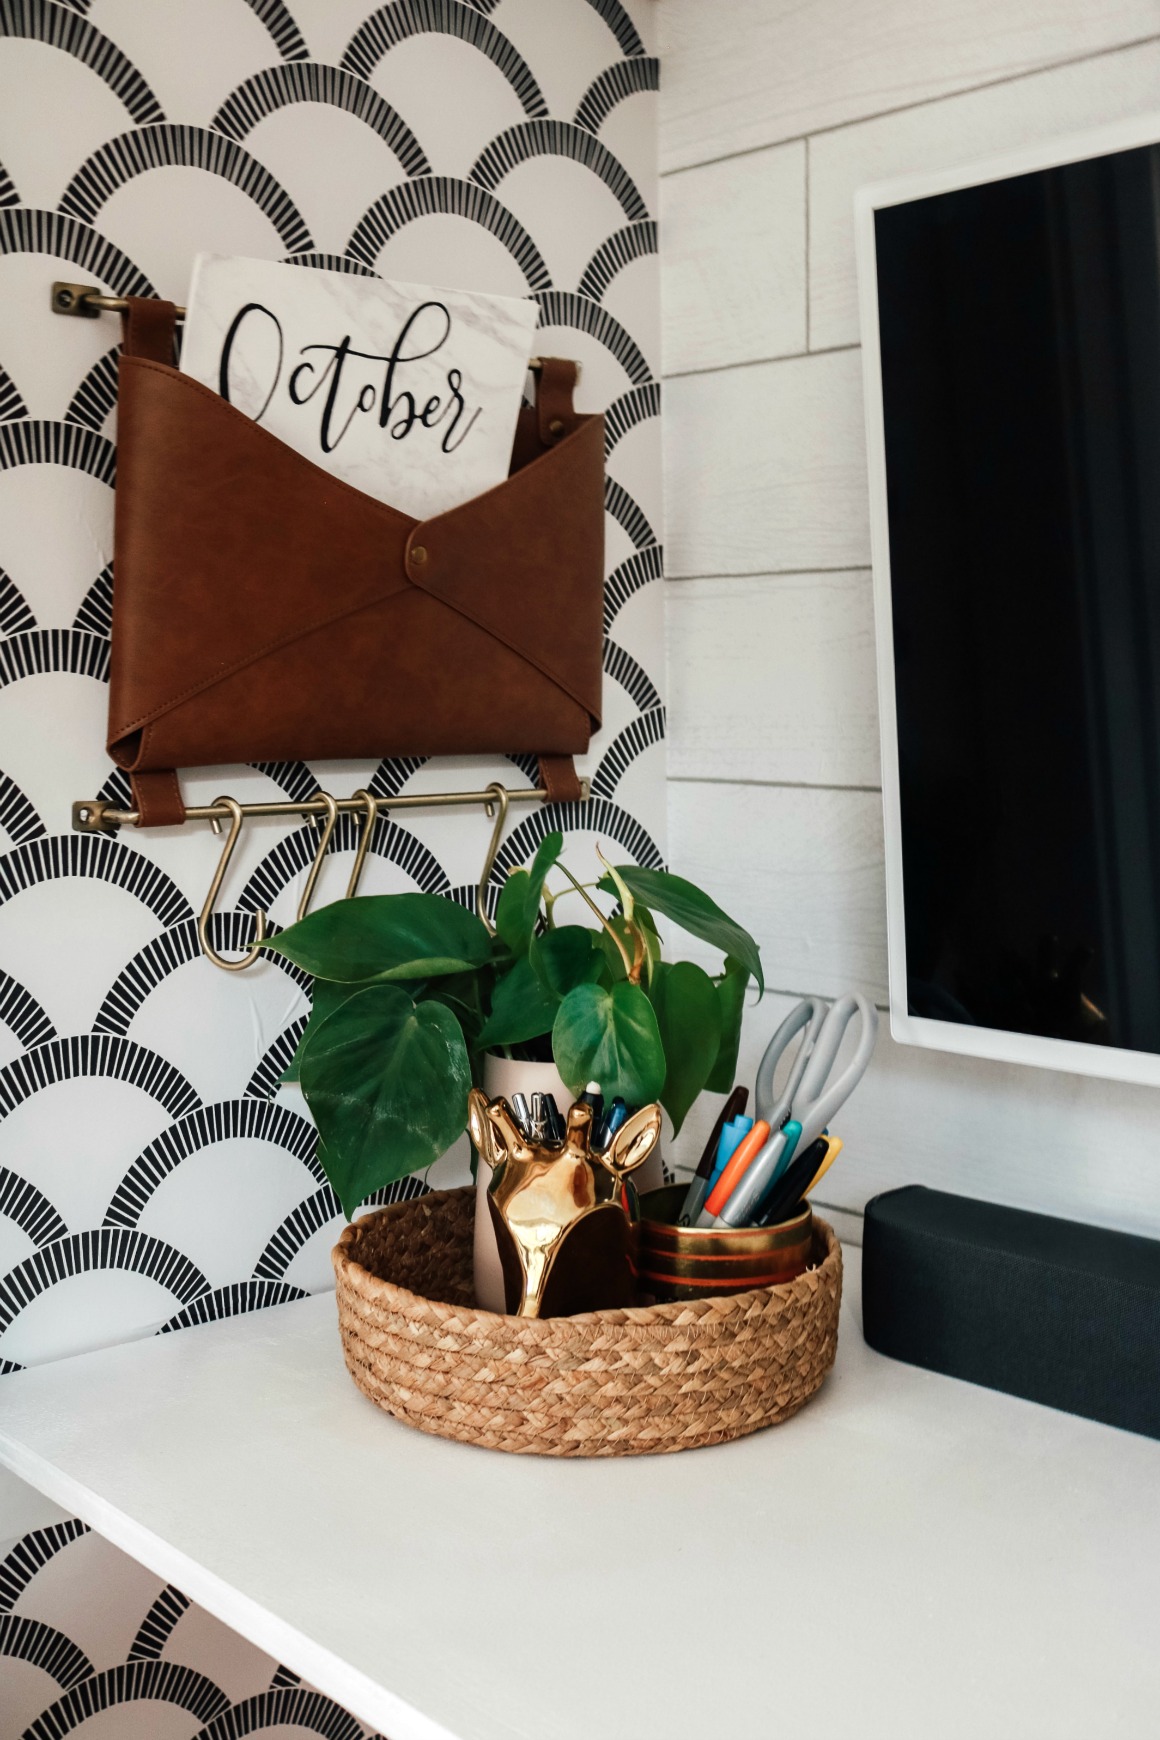
For storage, there are no drawers so I had to get creative with storage and make sure that it not only looked great, but was functional too! Things like this leather envelope, doubles as paper storage and looks pretty darn cute too.
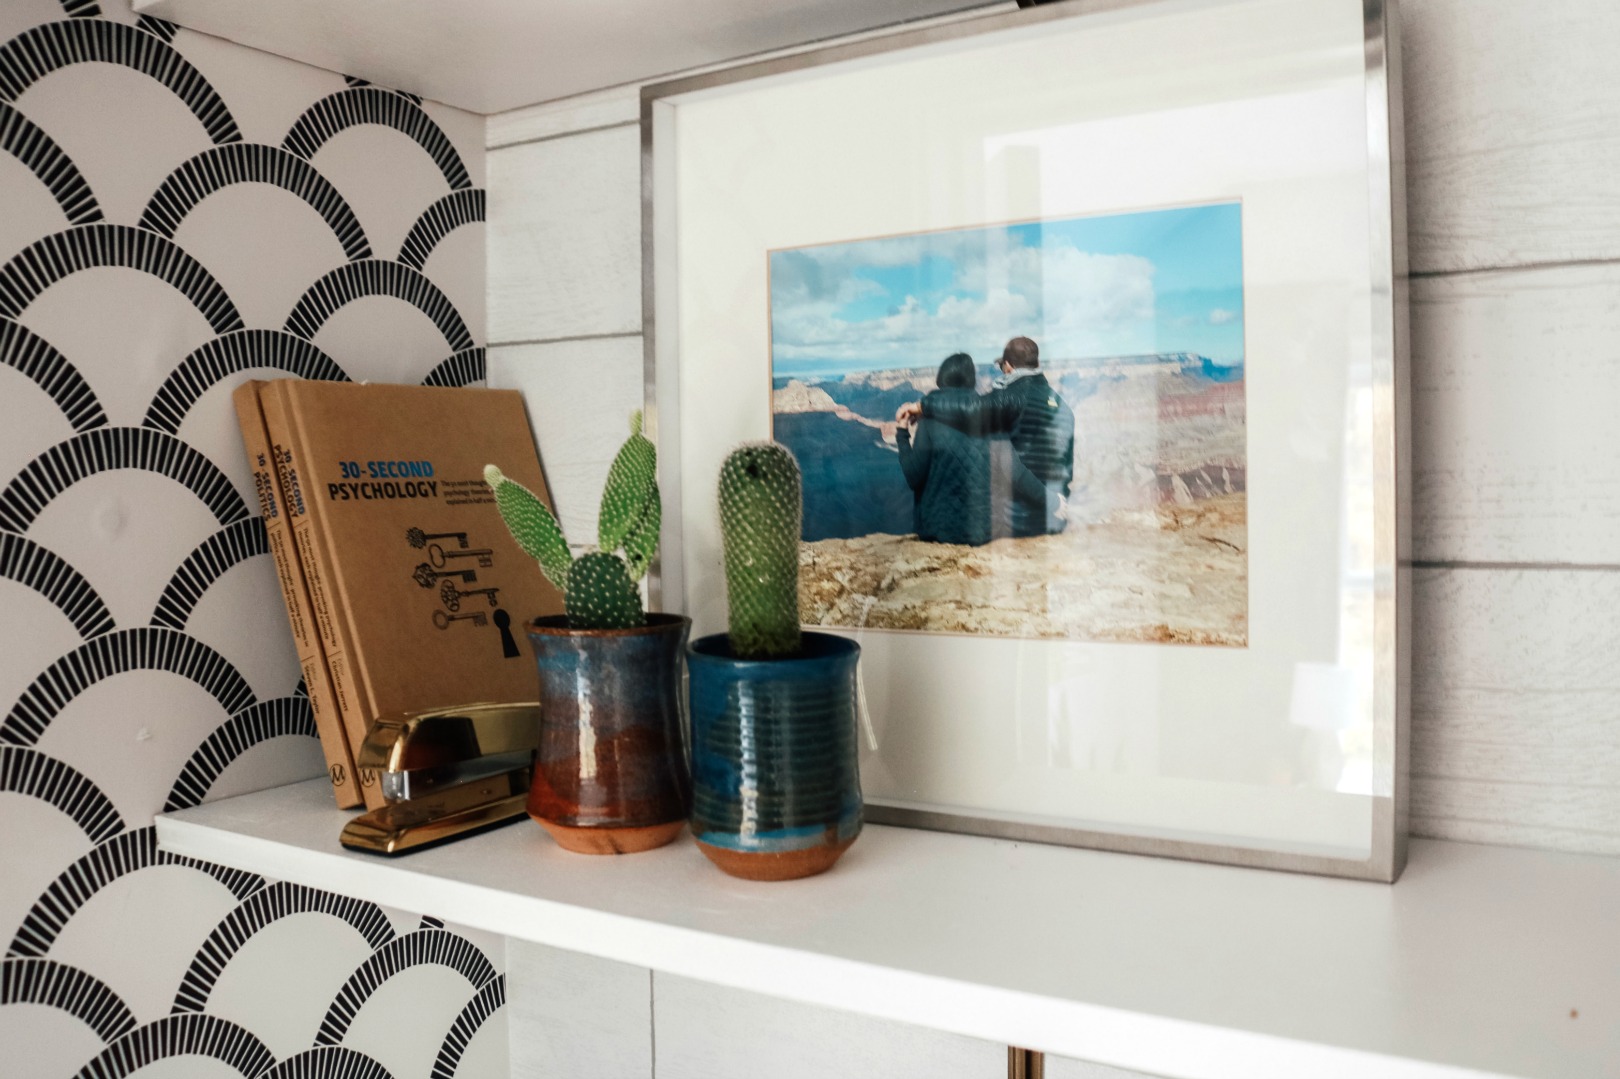
They can have succulents in their Cloffice because she has the doors open often enough that they get some sunlight! TIP- look for vintage and handmade pottery at second hand stores for great planters!
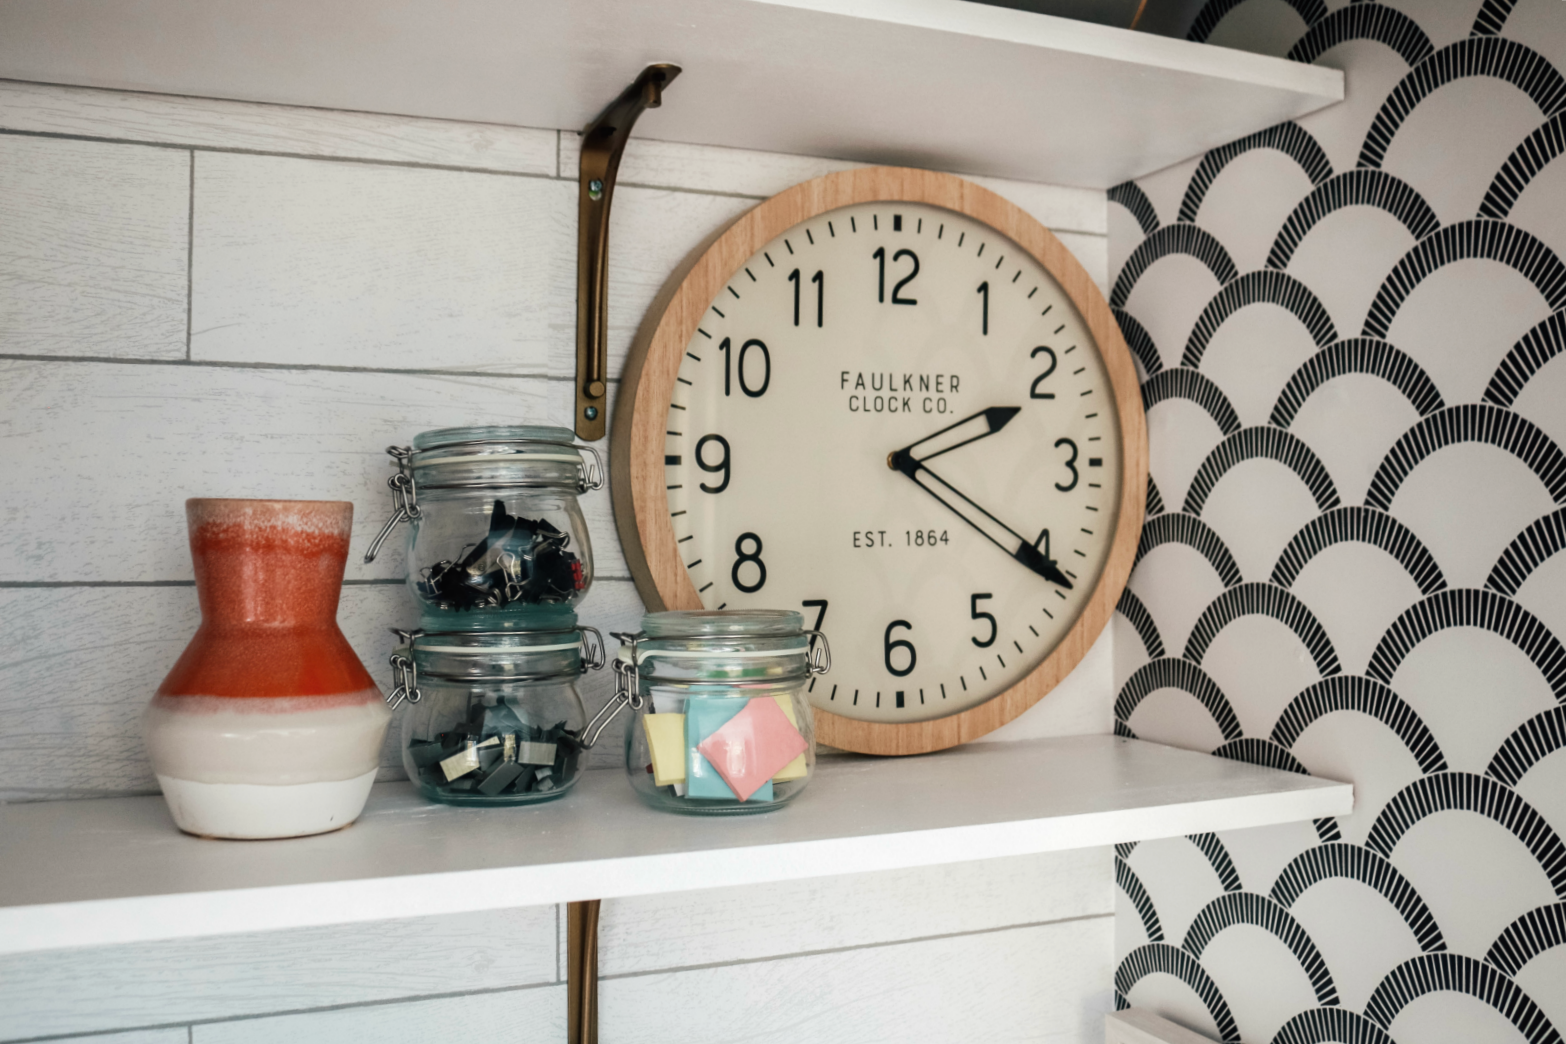
I used some glass jars I had gotten at IKEA so Lauren can easily see what she is running low on and can access it easy. (Find the clock HERE).
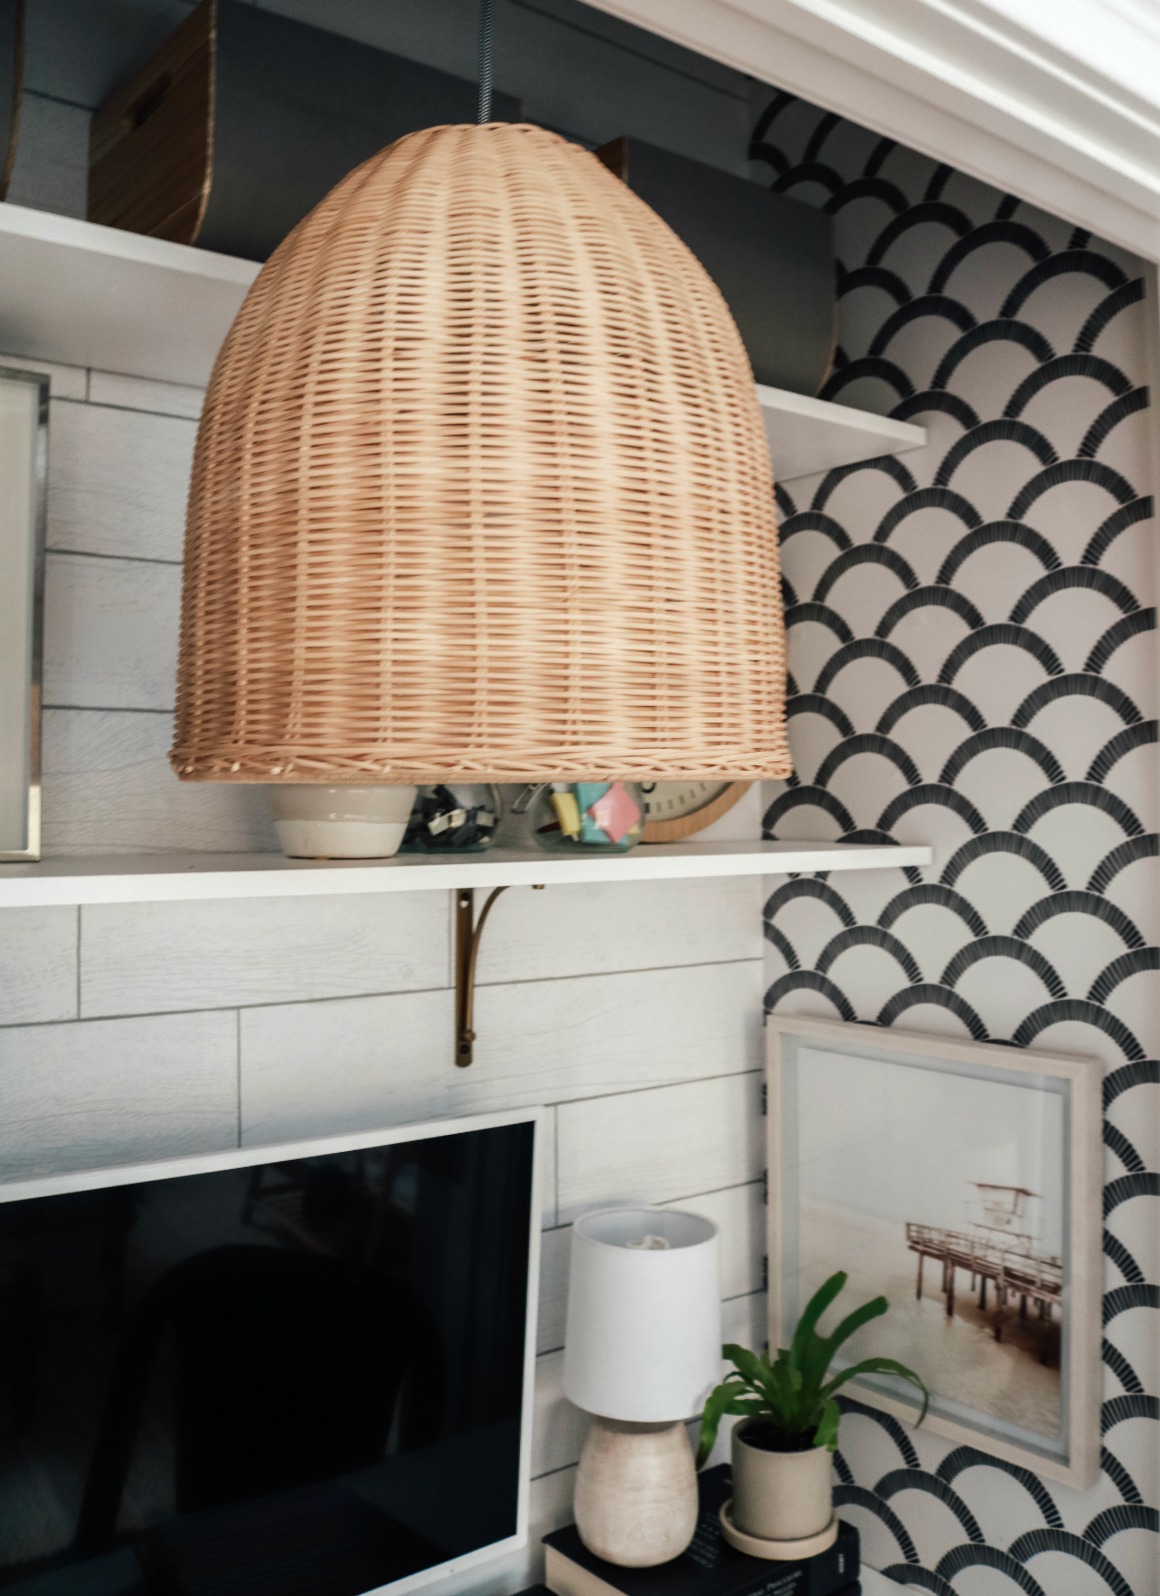
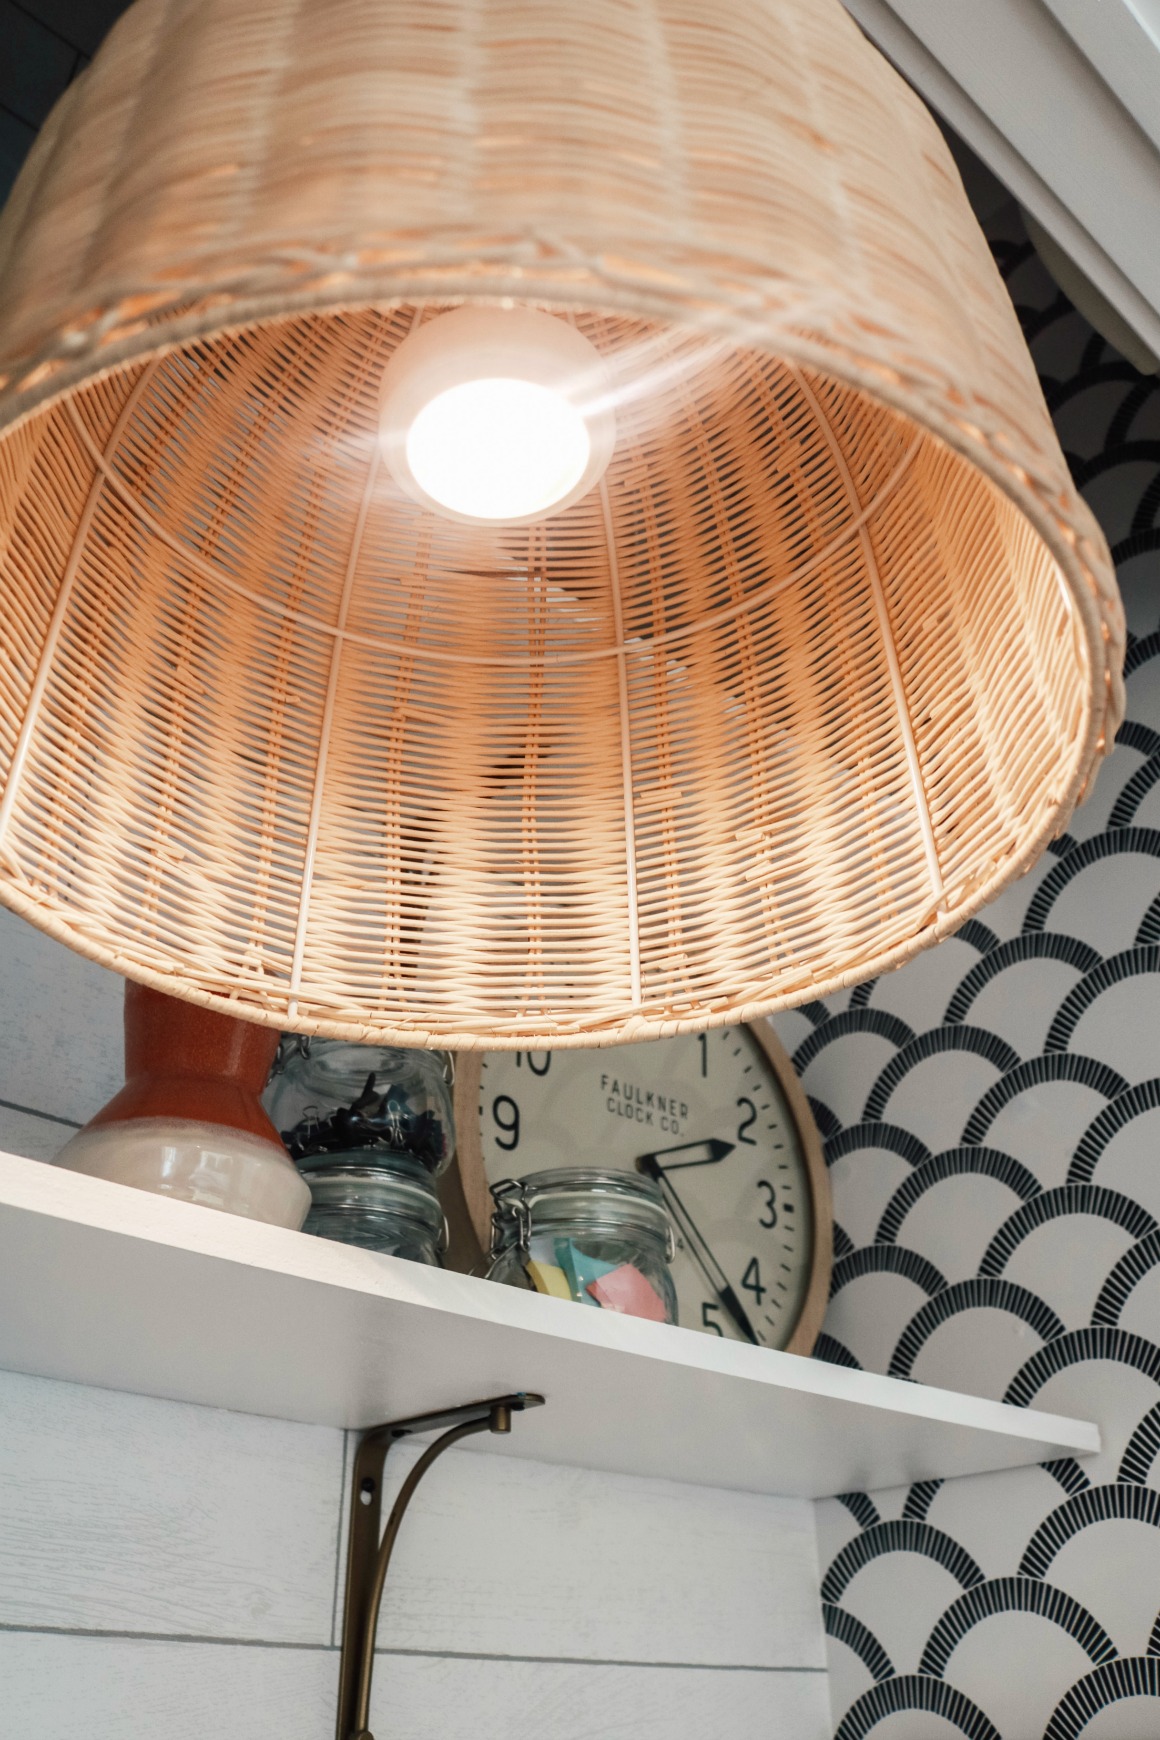
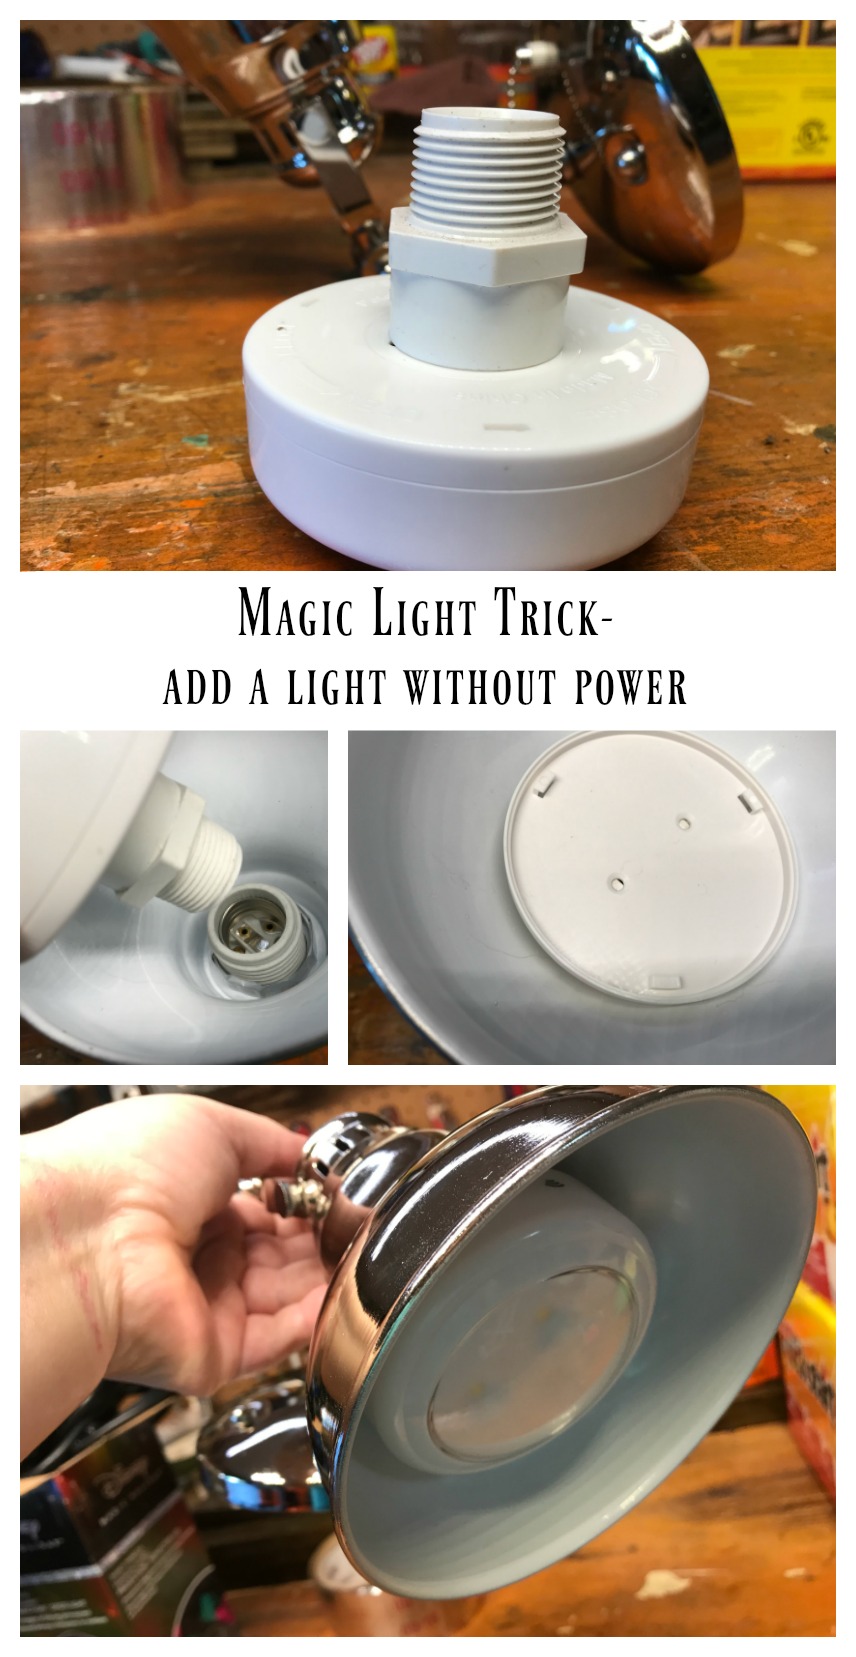
They do not have ceiling light fixture in the closet, which is pretty typical. So we introduced the Magic Light Trick to this little home office! I used THIS rattan pendant light and put a puck light in it. She can easily reach up and turn it on and off, or use the remote. Instant accent lighting! Plus the rattan pendant light adds the right amount of texture! (Also added this mini desk lamp too!)
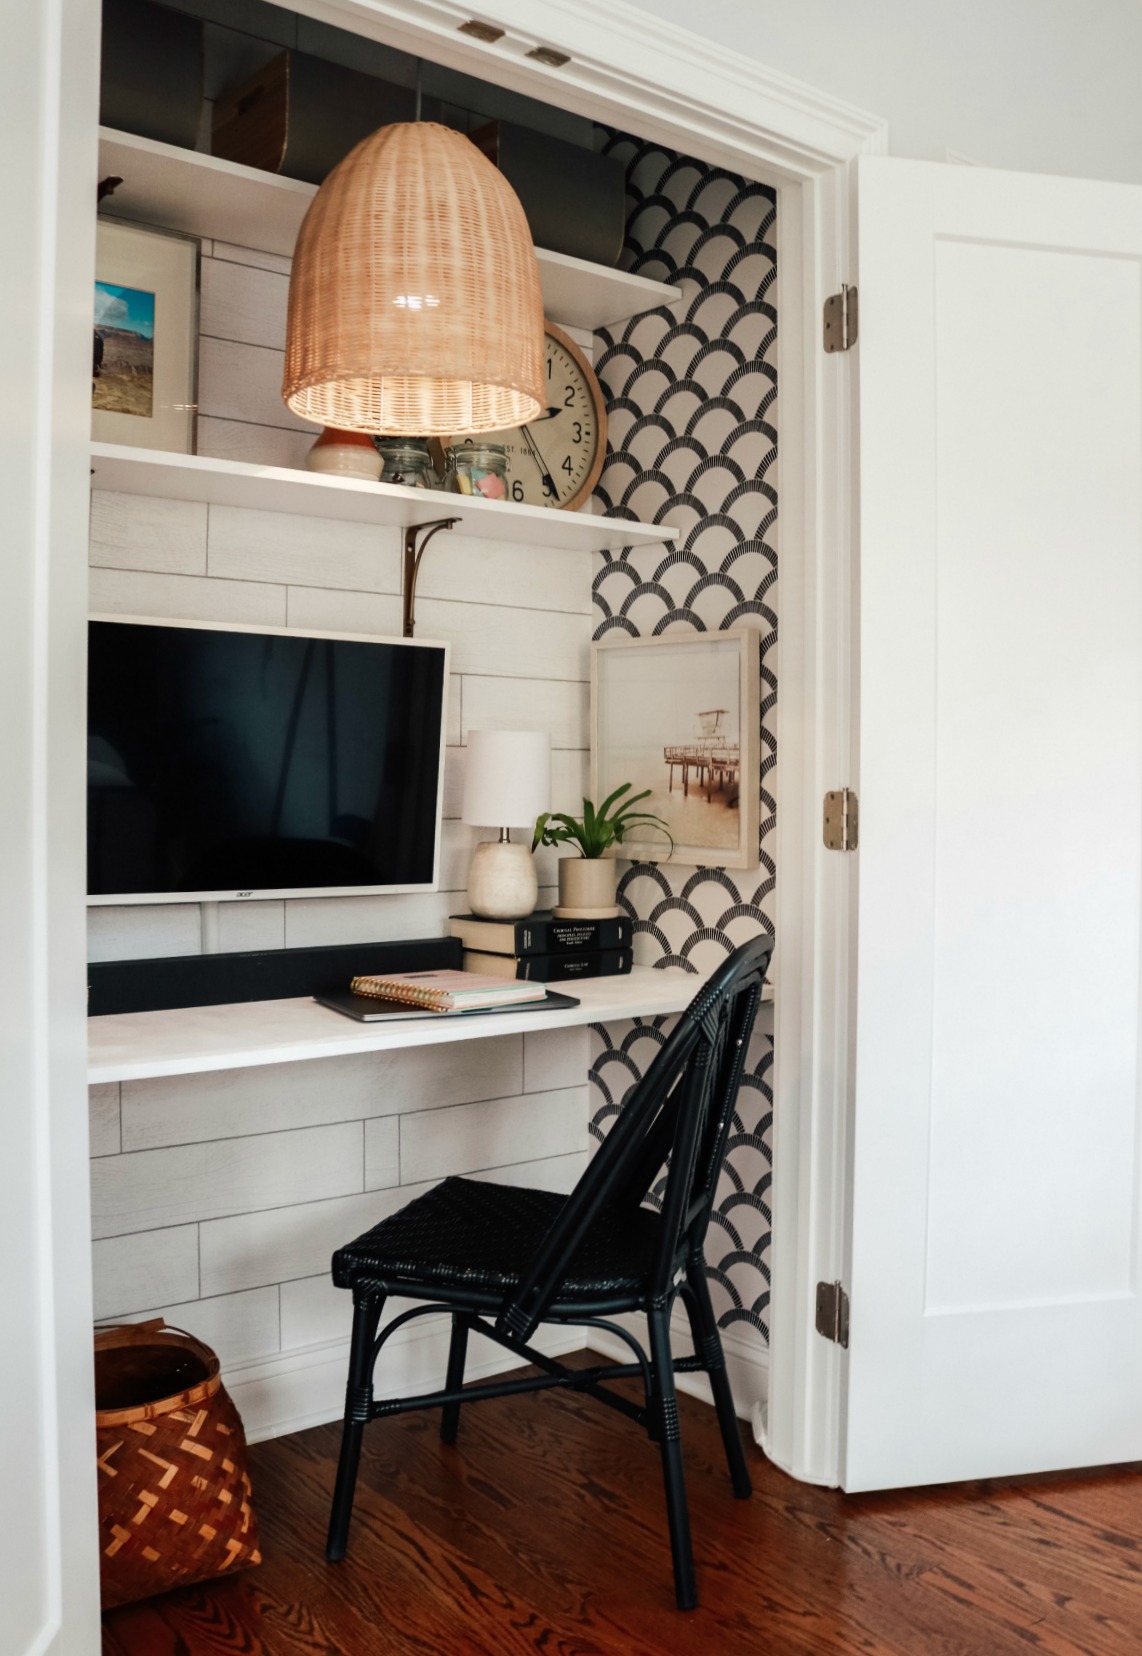
And since this Cloffice is in a guest bedroom, we decided to mount the computer screen to the wall. It works perfectly! Double use! Although the small speakers that are on the laptop that she hooks up to the screen are not even loud enough to hear from the bed. So we installed a Roku Soundbar. They can access all of the channels that Roku offers (we have it instead of cable) and now they can hear the TV from the bed!

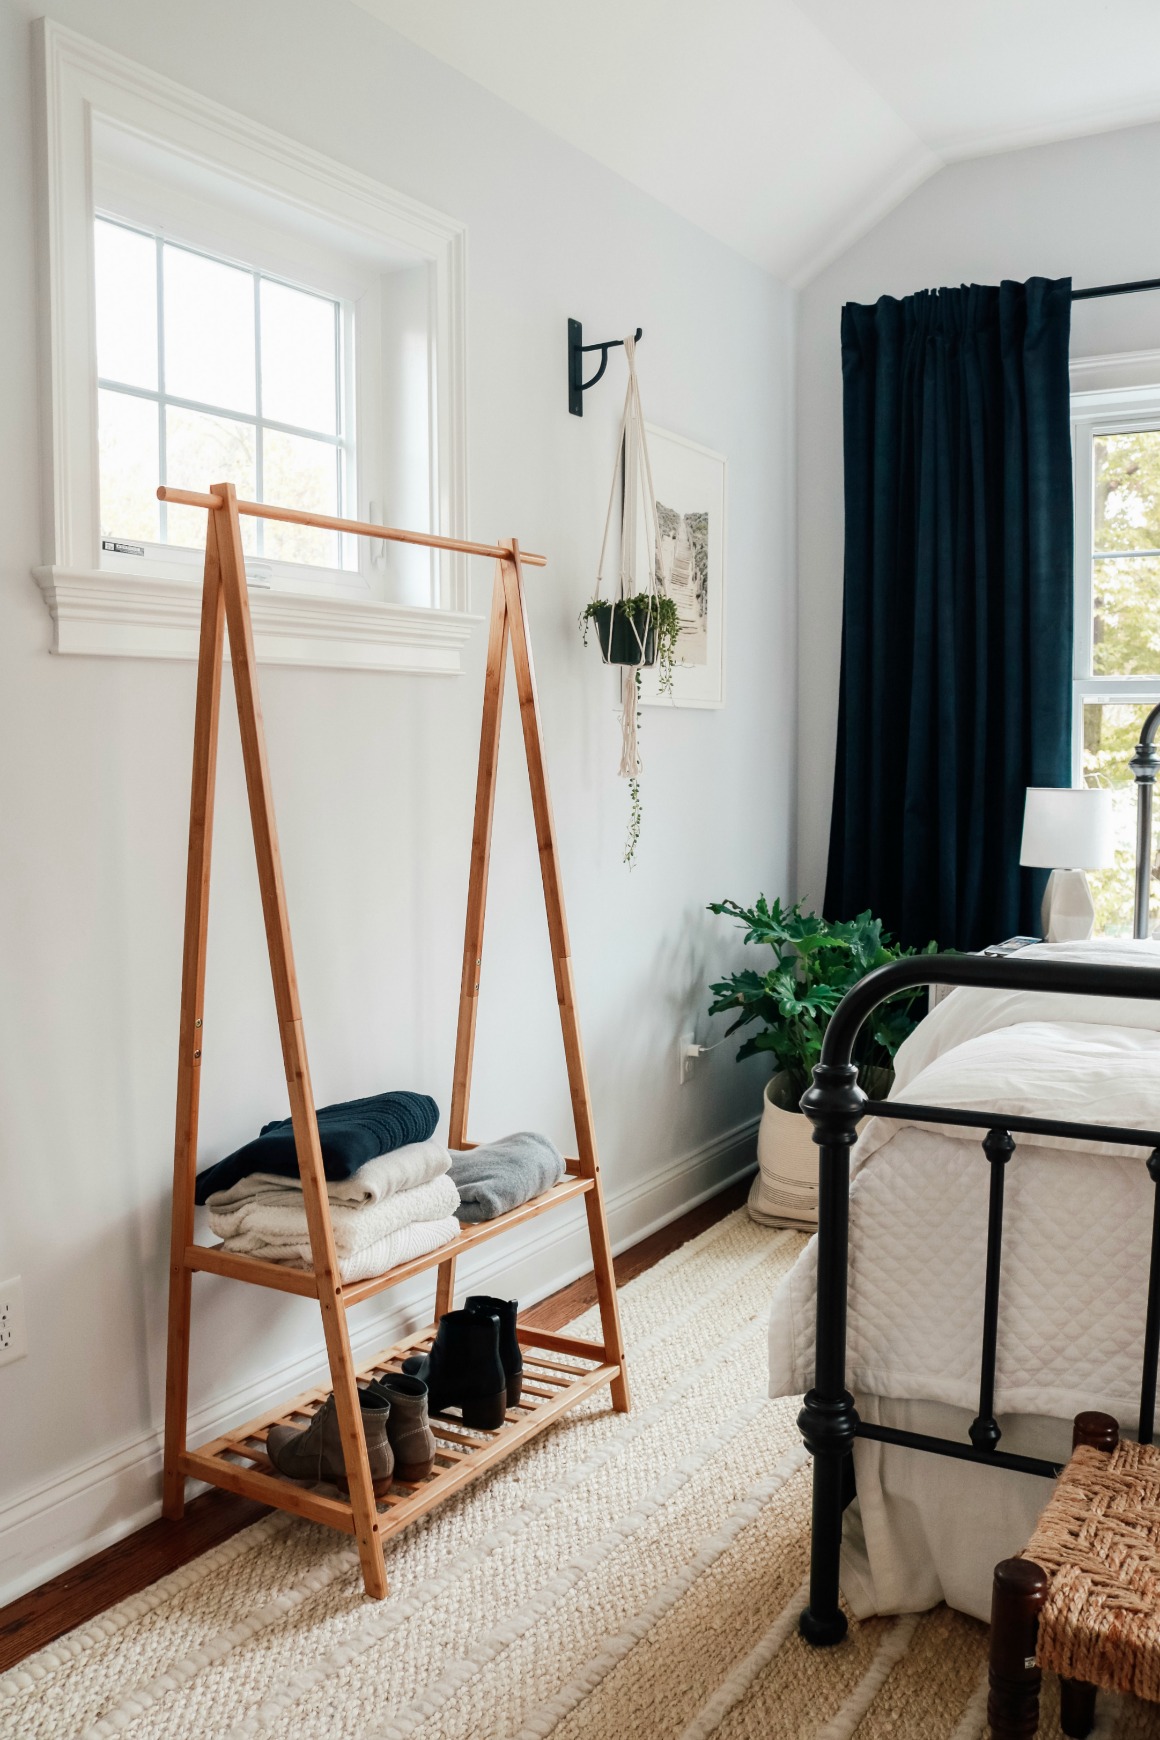
And if you are worried where guests put their clothes? Don’t worry, we thought of them too. I found found them this bamboo rack to hang their clothes and put their shoes on!
So happy with how this project turned out and to show that anyone can easily do it!! Click on an image below to shop the post-

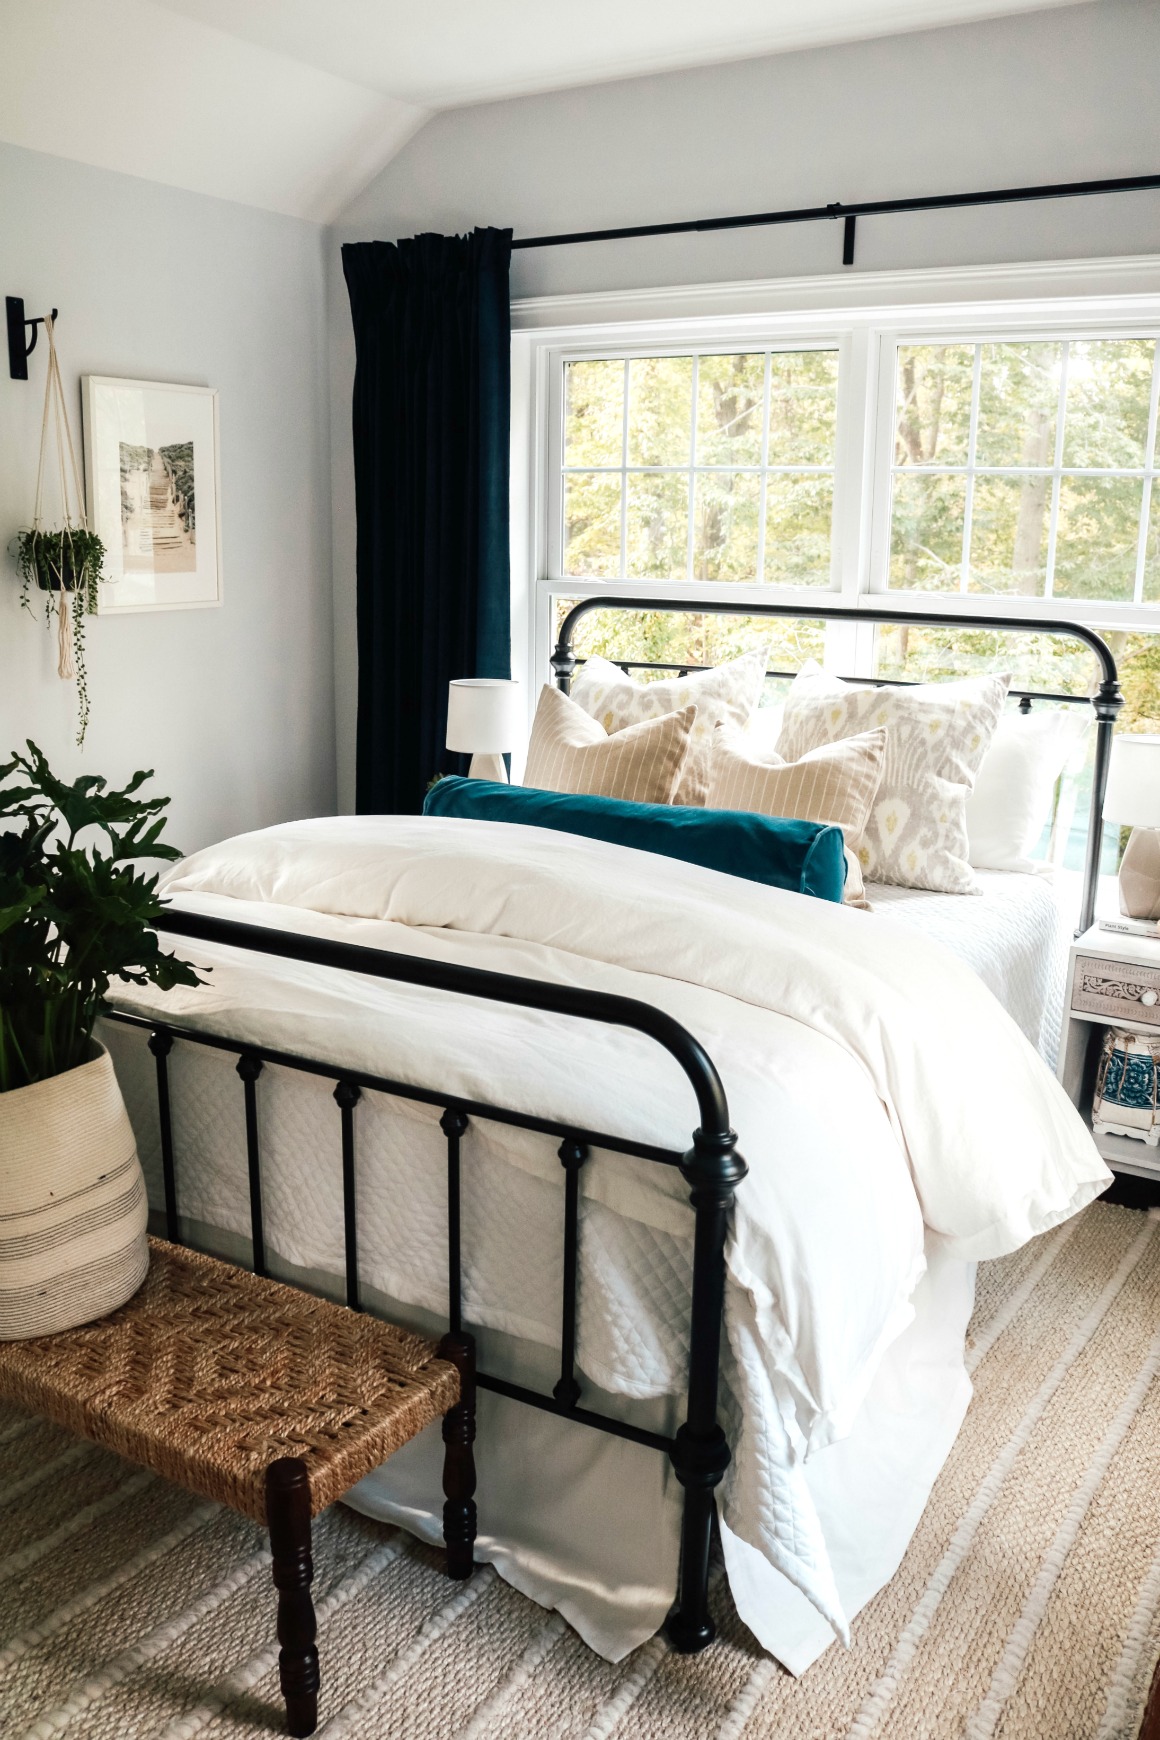
You can see the rest of the guest room on this blog post.

And see how we turned a closet into a LEGO Closet on this blog post.
Read more about the Magic Light Trick HERE


I LOVE the mixed wallpaper patterns! I voted to just paint, I’m so glad you didn’t!
Looks so cozy and functional! However, I’m confused about the desk lamp since I don’t see a cord running down the desk. Is it plugged in wall or not? I know you used the light hack on the ceiling pendant but you didn’t specify how the lamp turns on. Thanks!
It is plugged in!!! There is a hole in the desk top and the cord goes down under it! We were really sneaky with the wires. I tacked them under the desk! I hate seeing cords. Pet peeve!
So cute!!! I love it! And I really love how the mixed wallpapers came together. Really really cute!!
I voted to paint the side walls… I was WRONG! You absolutely nailed it!! Thanks for the inspiration.
thanks!!!
Soooo good!! Prefect win/win for that family! Love all the good you do…and that luggage rack! 😉 I have a similar office nook, thank you for the inspiration (and within our tight budget price point)!
Love Love Love! This looks amazing..i too voted painting it but wow the mixed wallpapers looks great!! Thanks for the inspiration! I wish you could come here and help me redecorate 🙂
So incredible! I REALLY want to do a rattan pendant over our dining room table. All we have is a random hook coming from the ceiling, so it would be perfect for the puck light trick. How did you attach the puck light in this pendant?
I did the trick with the plumbing part that is mentioned on this post= https://nestingwithgrace.com/magic-light-trick-follow-post-video-adding-light-sconce/