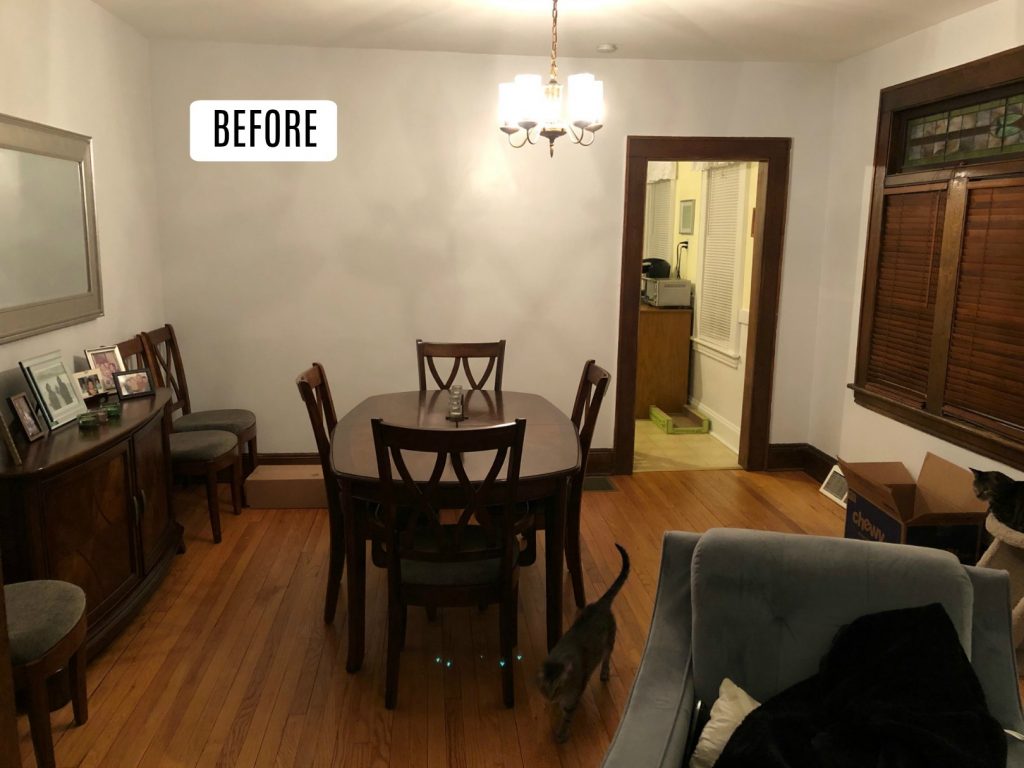
This is another first for the blog! I have never done a dining room makeover before! And I really love the idea of a dining room, I think I just like separated space, feels very charming to me. This dining room belongs to my friend Brenda. I met her at our local CrossFit and became friends there. If you remember the entry makeover I did recently, that was her space too. So as you can imagine, the domino effect went into place! I first suggested she change out her lighting! She could have painted the furniture she had, if she didn’t have the budget to get all new. But she had some money set-aside for the bigger pieces. Let’s look at the dining room before.
Thank you Troy Lighting for sponsoring this post
Dining Room BEFORE-
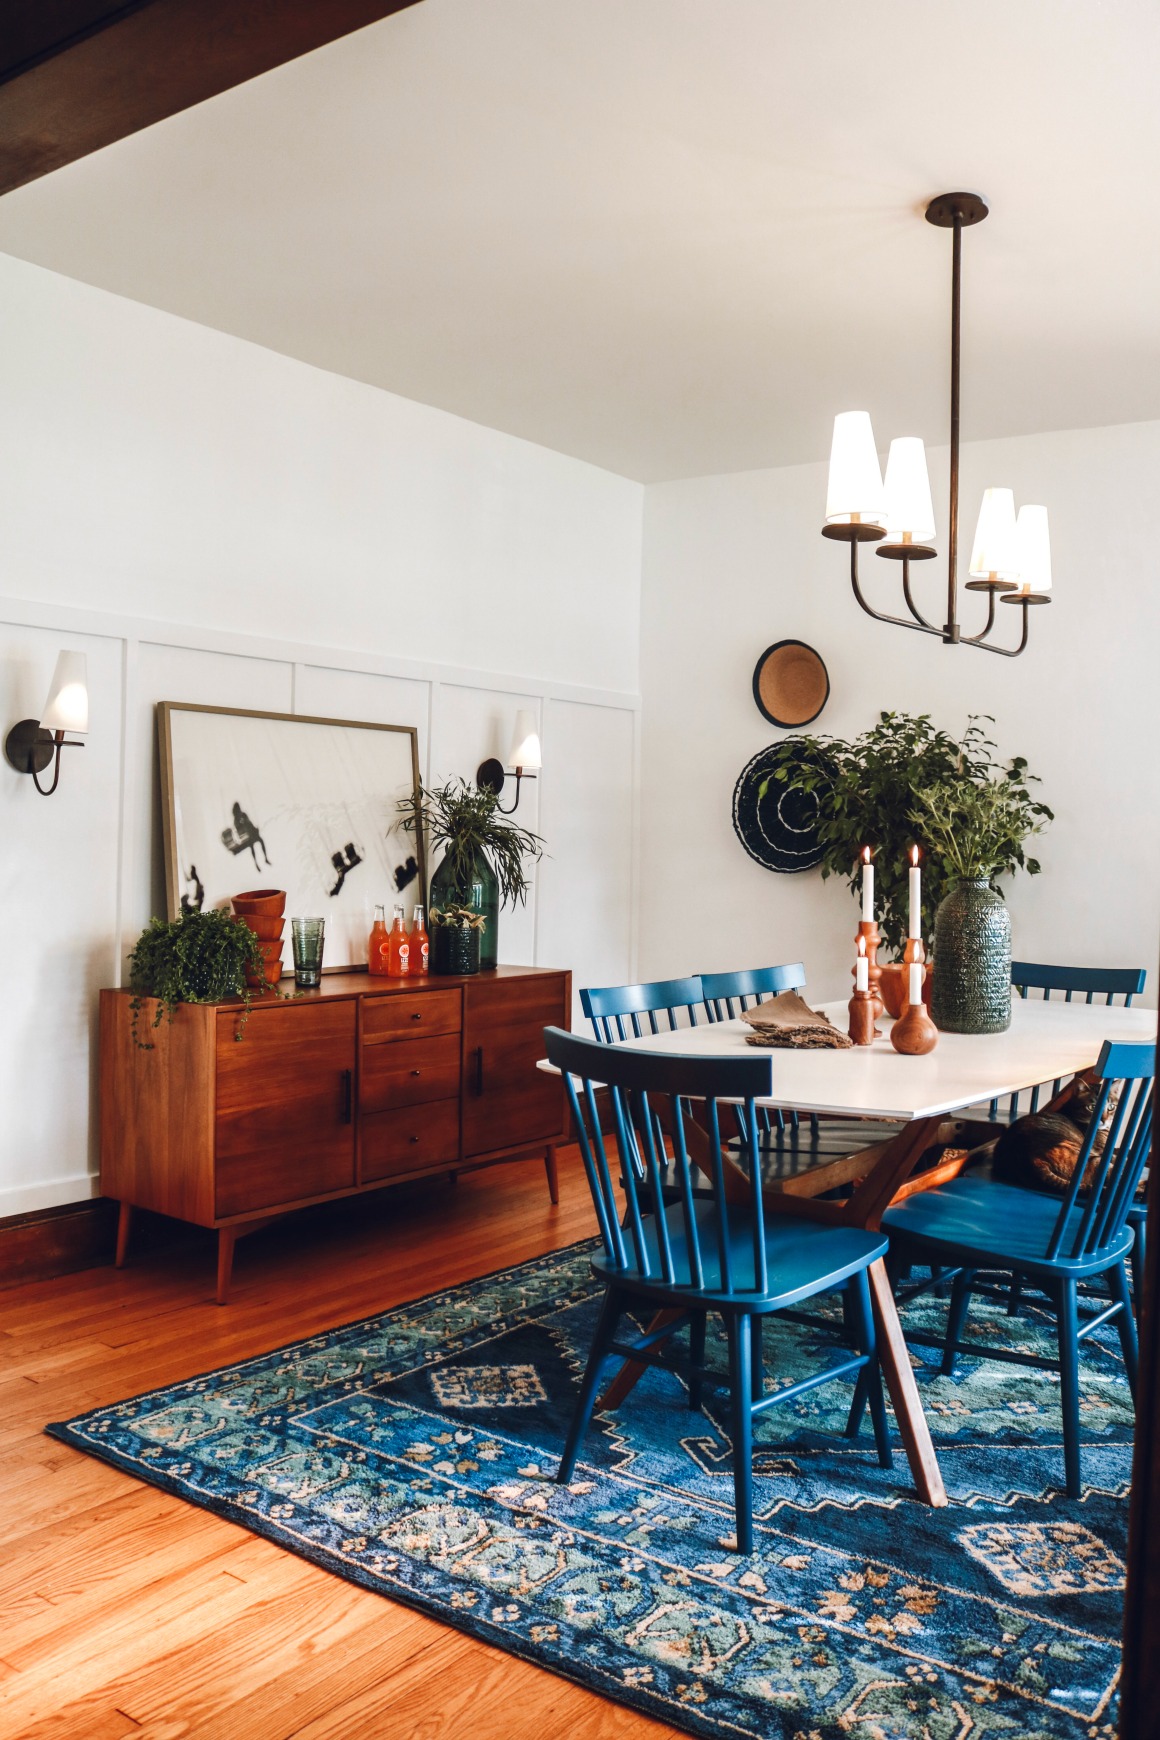
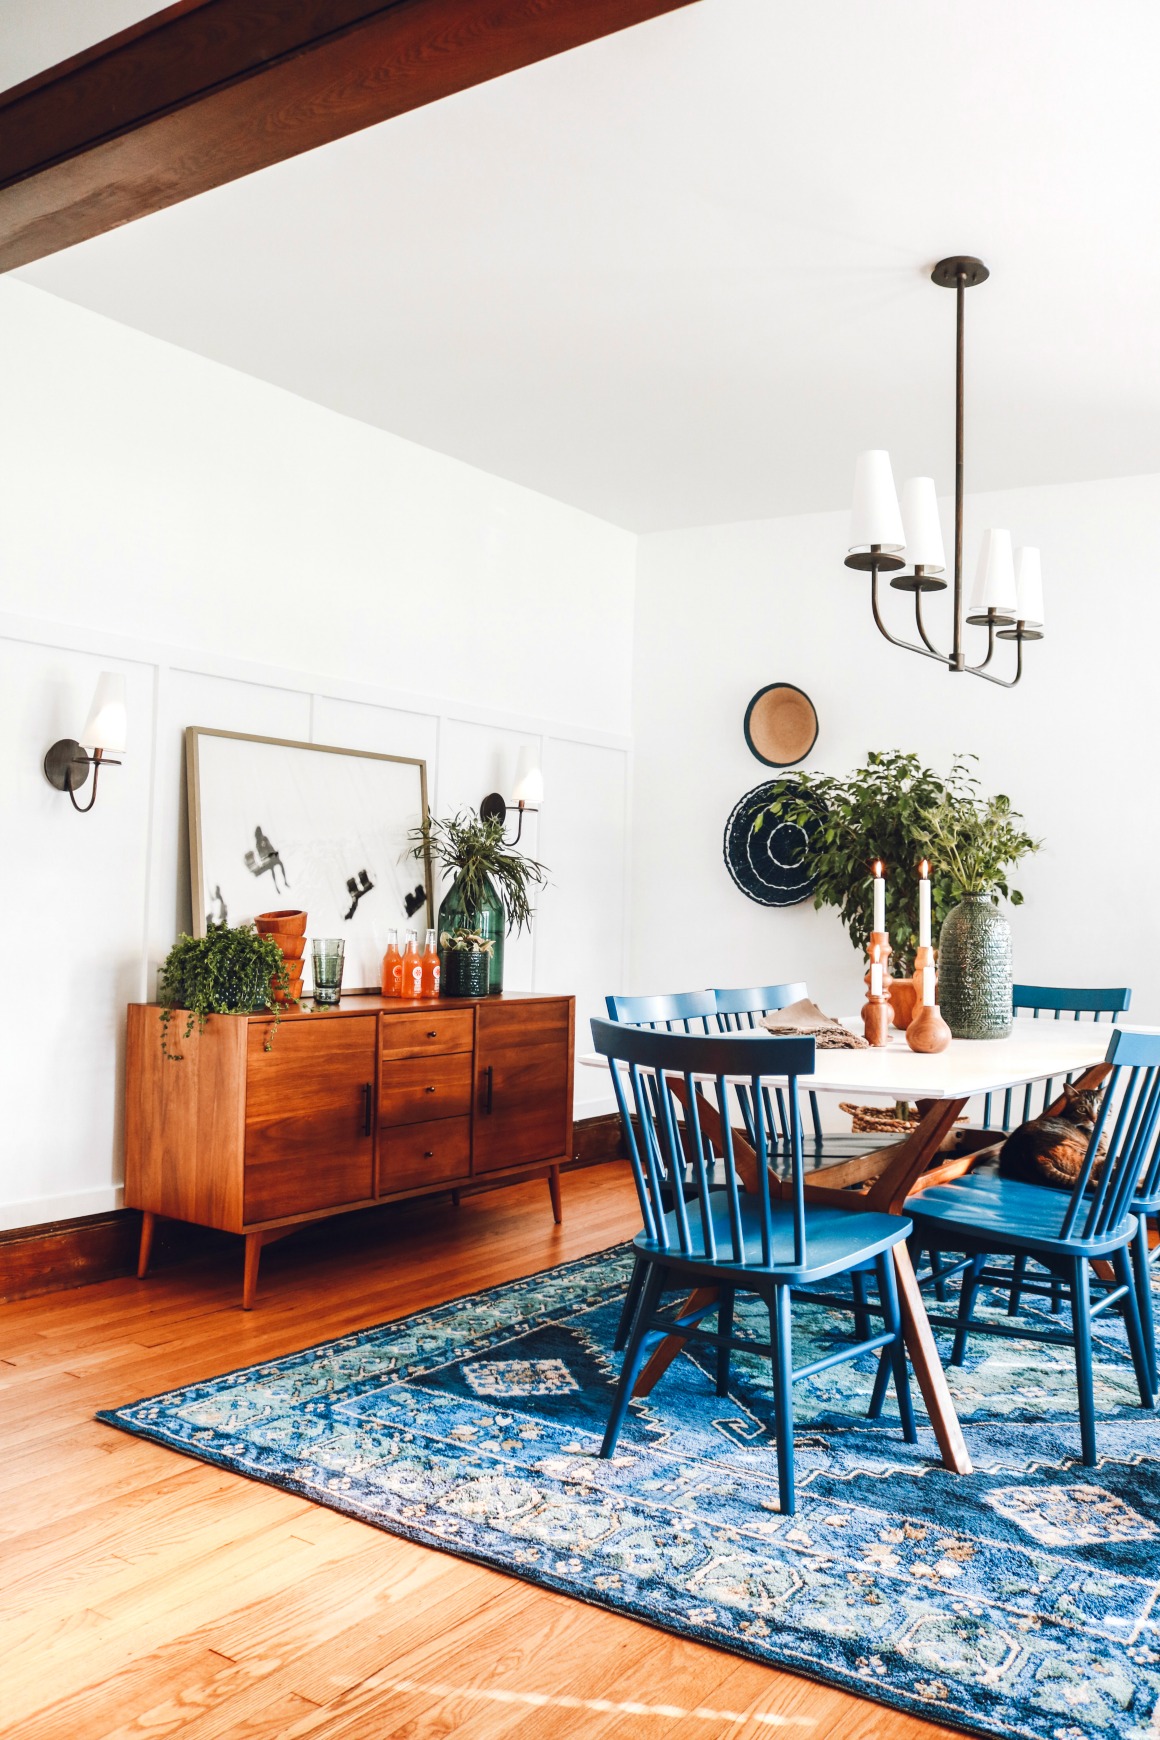
Dining Room AFTER-
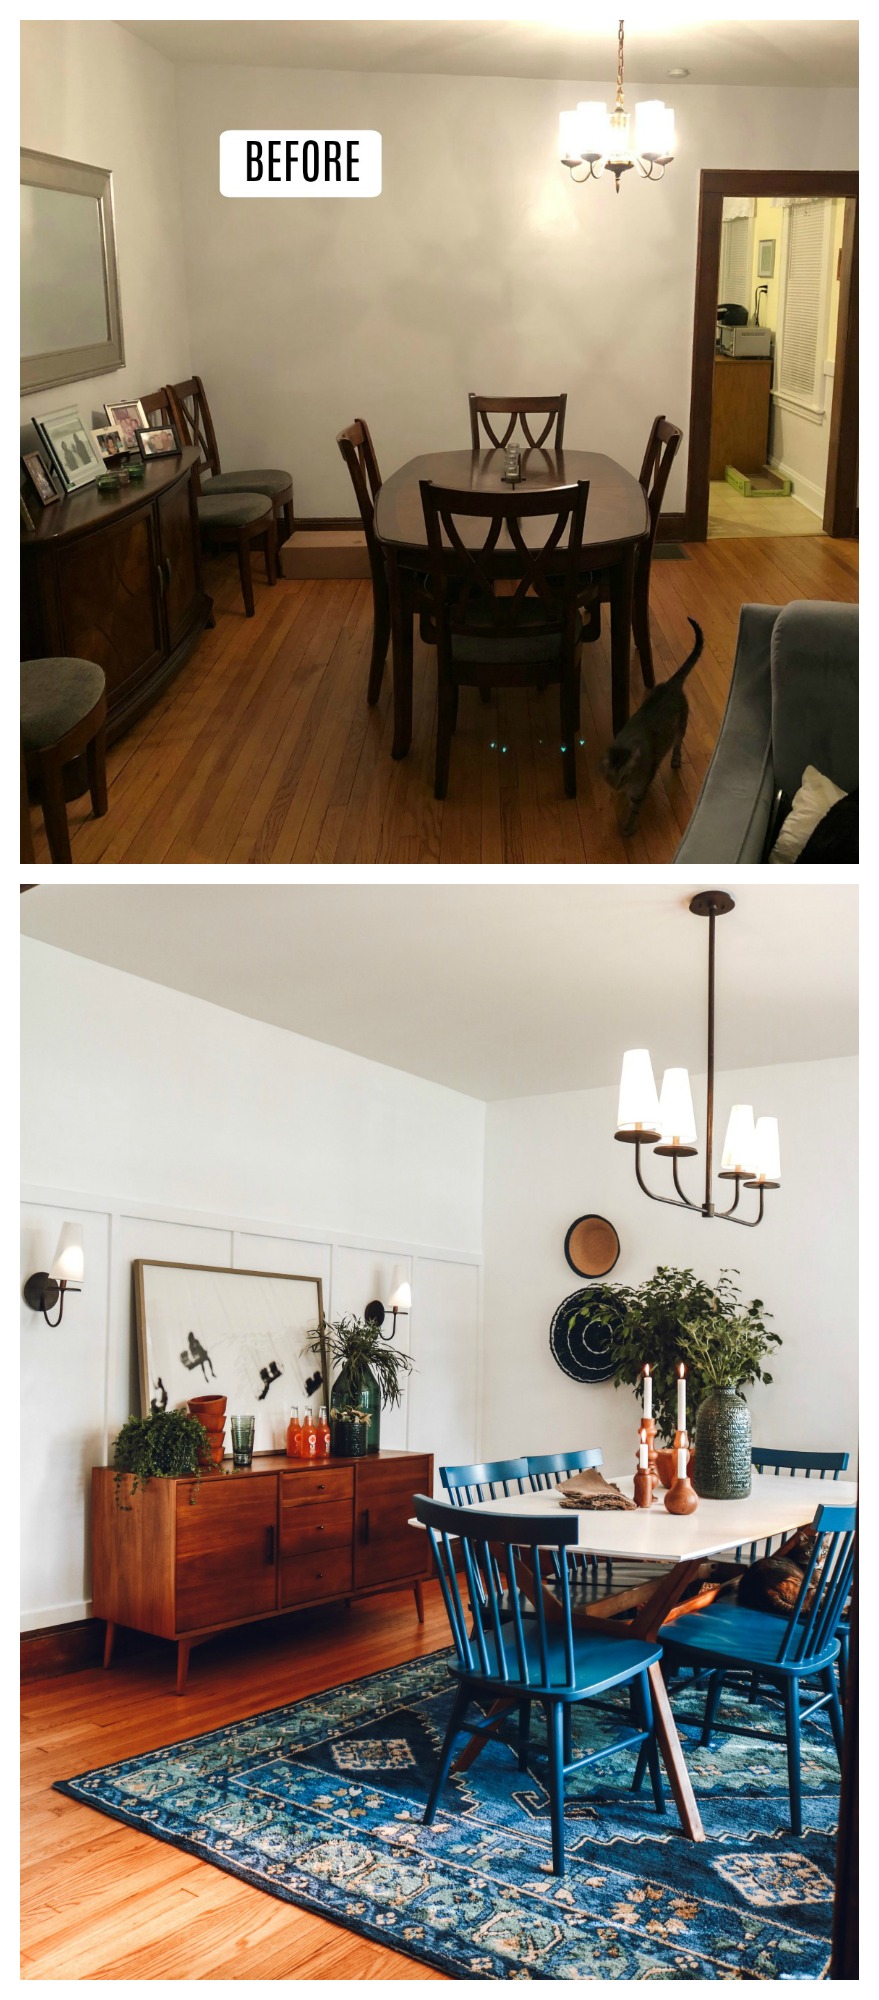
Dining Room BEFORE-

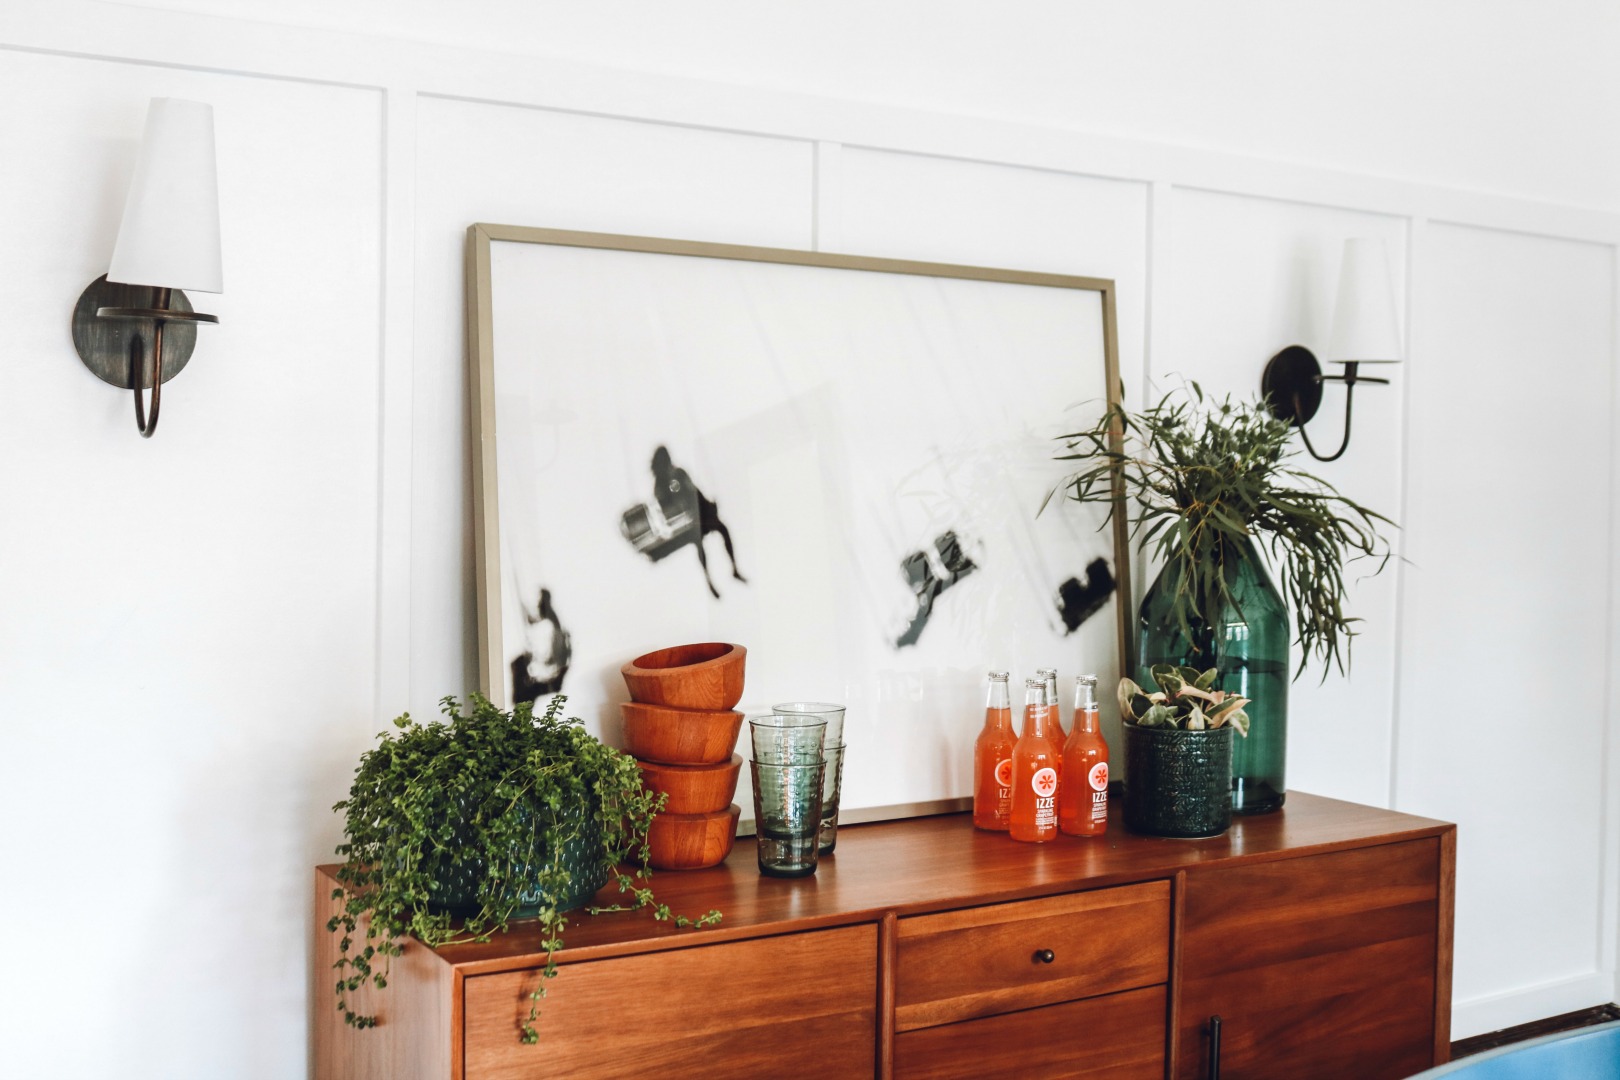
Dining Room AFTER-

Can you even handle it??? I can. Not. My friend, Brenda LOVES it. These are her favorite colors. I didn’t even ask her, I could just tell from what she had in other rooms. I designed this room off of that bold rug. She said it now looks like a magazine. And I know I was meant to design this space for her and collaborate with Troy Lighting. The day I was at her home decorating it and doing all the fun finishing touches. She came home after having a really hard, sad day with her mom, who is not feeling well. So thankful she was able to come home to a place that made her happy and lifted her up, for a little bit. Our homes should be a source of comfort and peace for us.
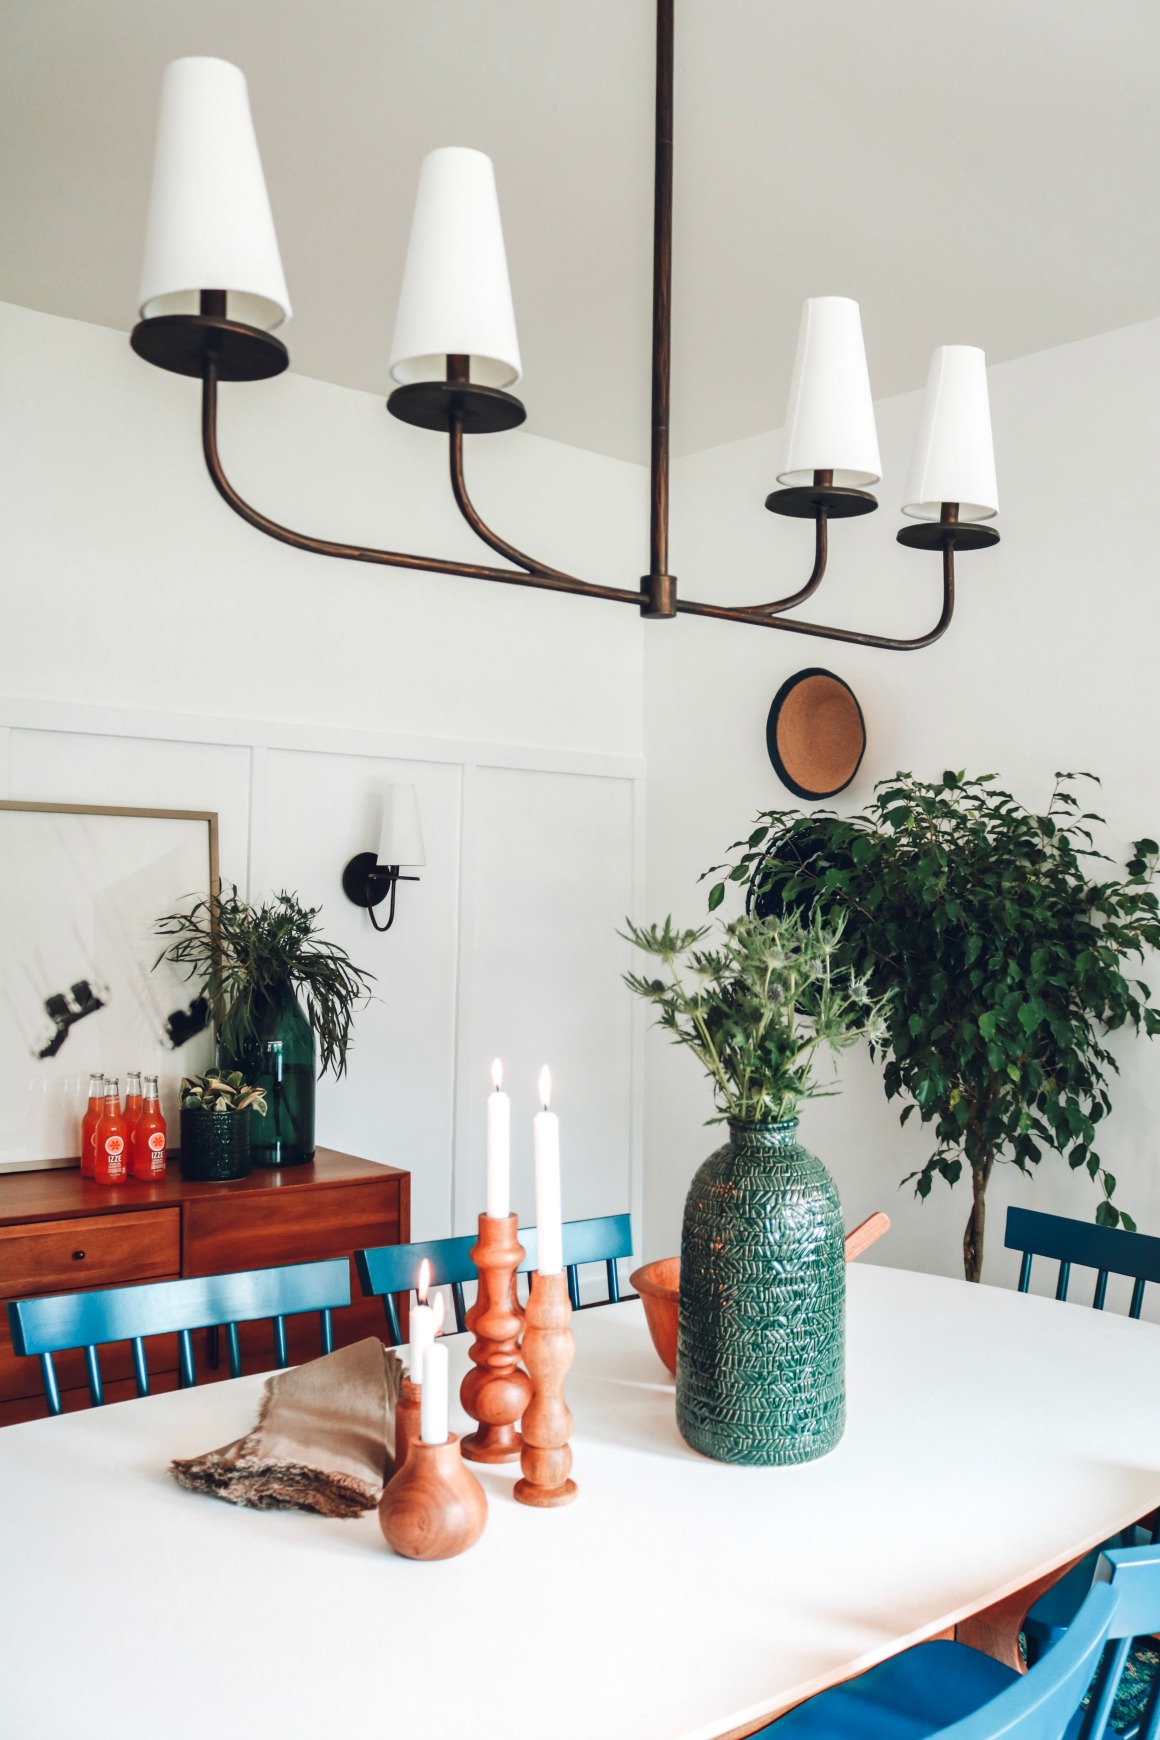
Lighting-
The lighting was the first thing I suggested that Brenda change to make a big impact. She could have just changed the chandelier and had it centered over the dining table and it would have made a world of difference. Brenda is actually renting this amazing place (she would love to buy it if it became an option). I love sharing that this is a rental for many reasons. Do not think you are “stuck” with what you have, if you are renting. Often landlords will work with you if you ask to update the home. Maybe they will give you money off your rent or just cover the cost for supplies and you do the work. In this case the landlord paid to have her electrician come and switch out the chandelier that I selected from Troy Lighting for this project. Updating the light fixtures is a huge selling point.
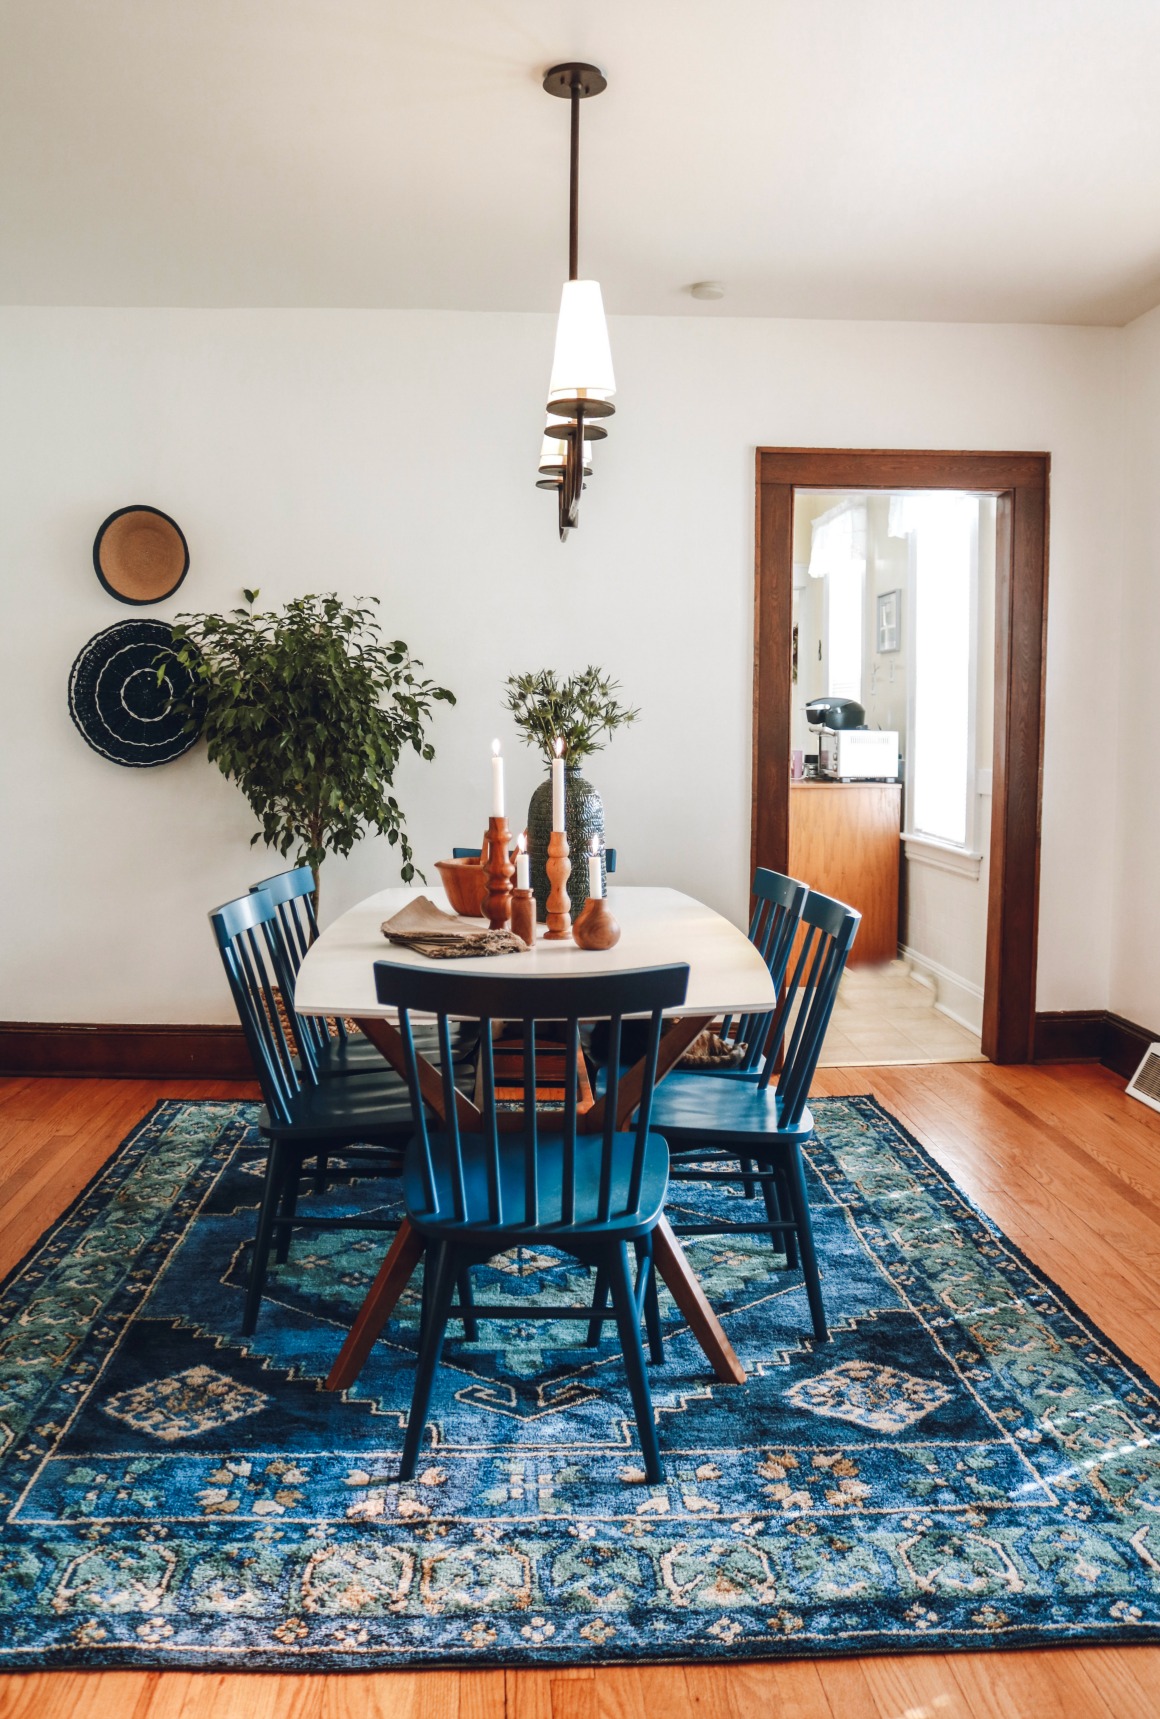
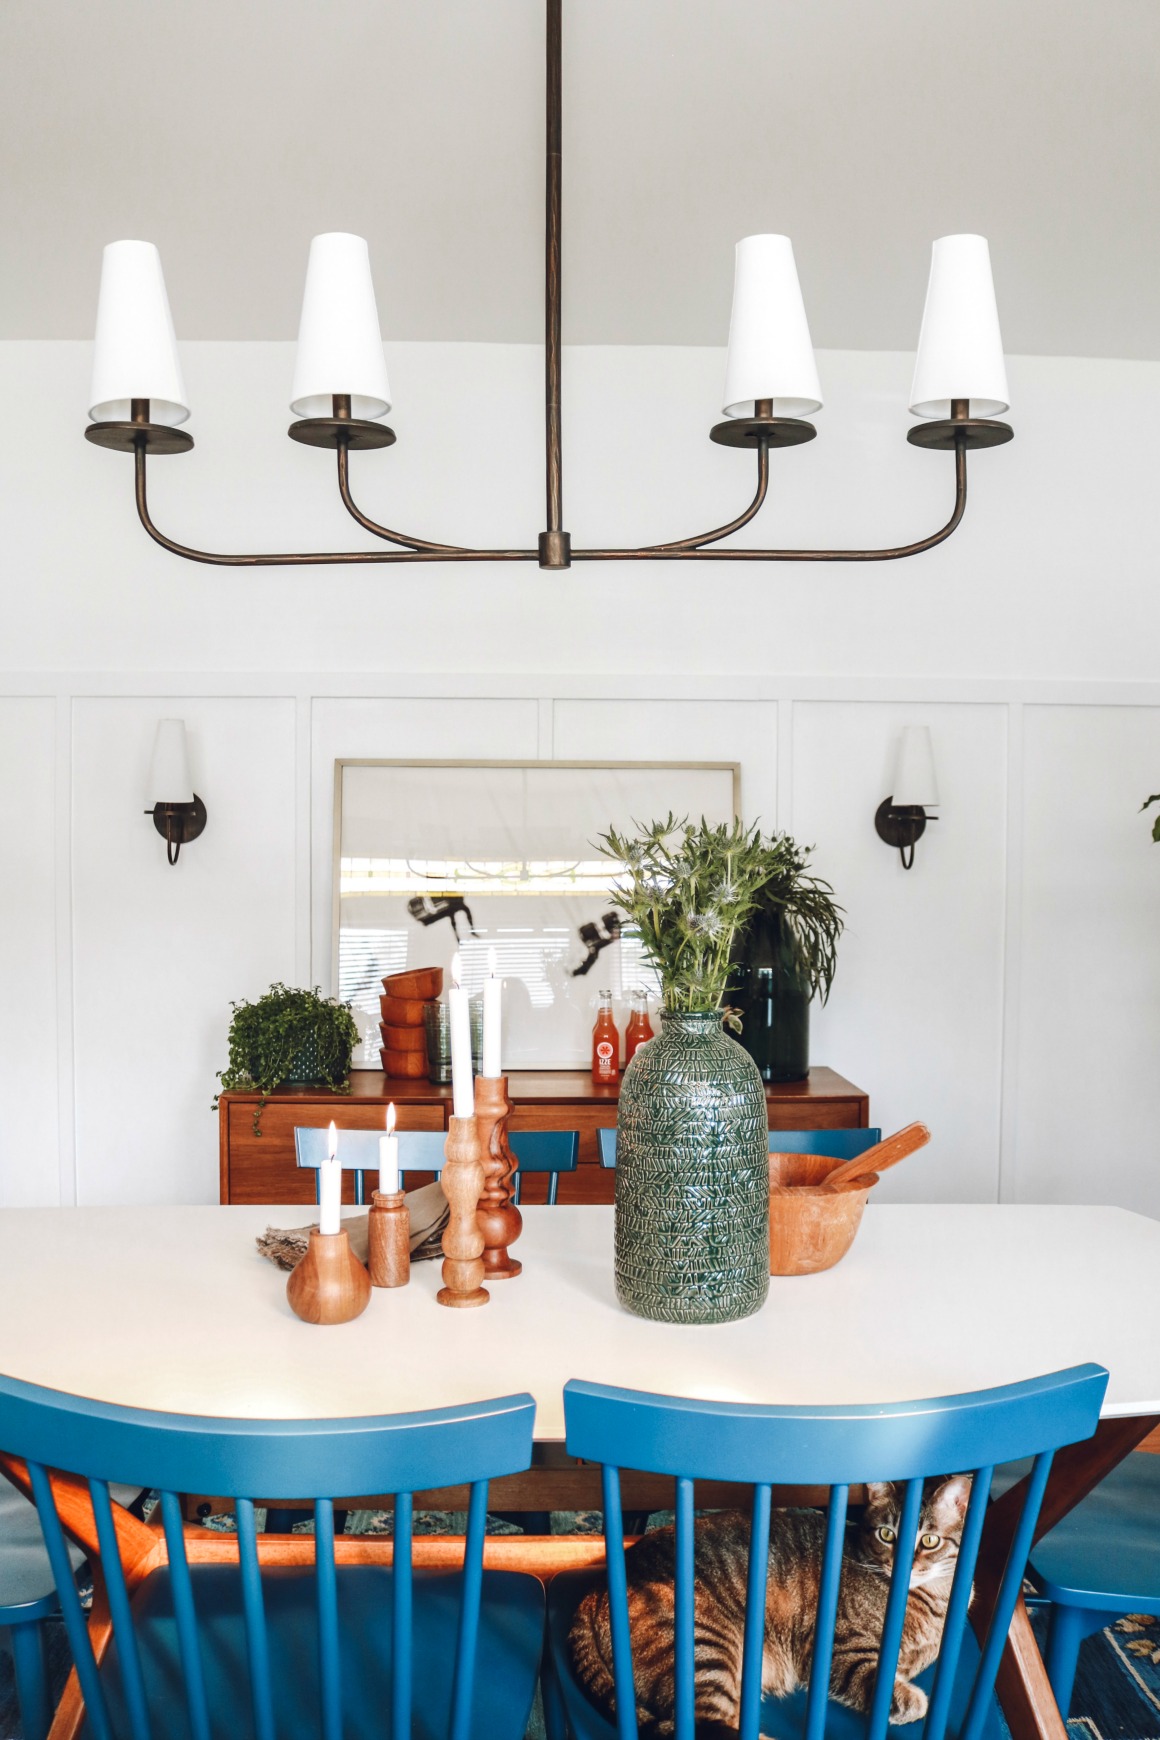
Troy Lighting as SO many wonderful chandeliers at a variety of price points. I knew that THIS chandelier was a great modern, yet classic style that would go with anything. I really loved the uniqueness of it too.
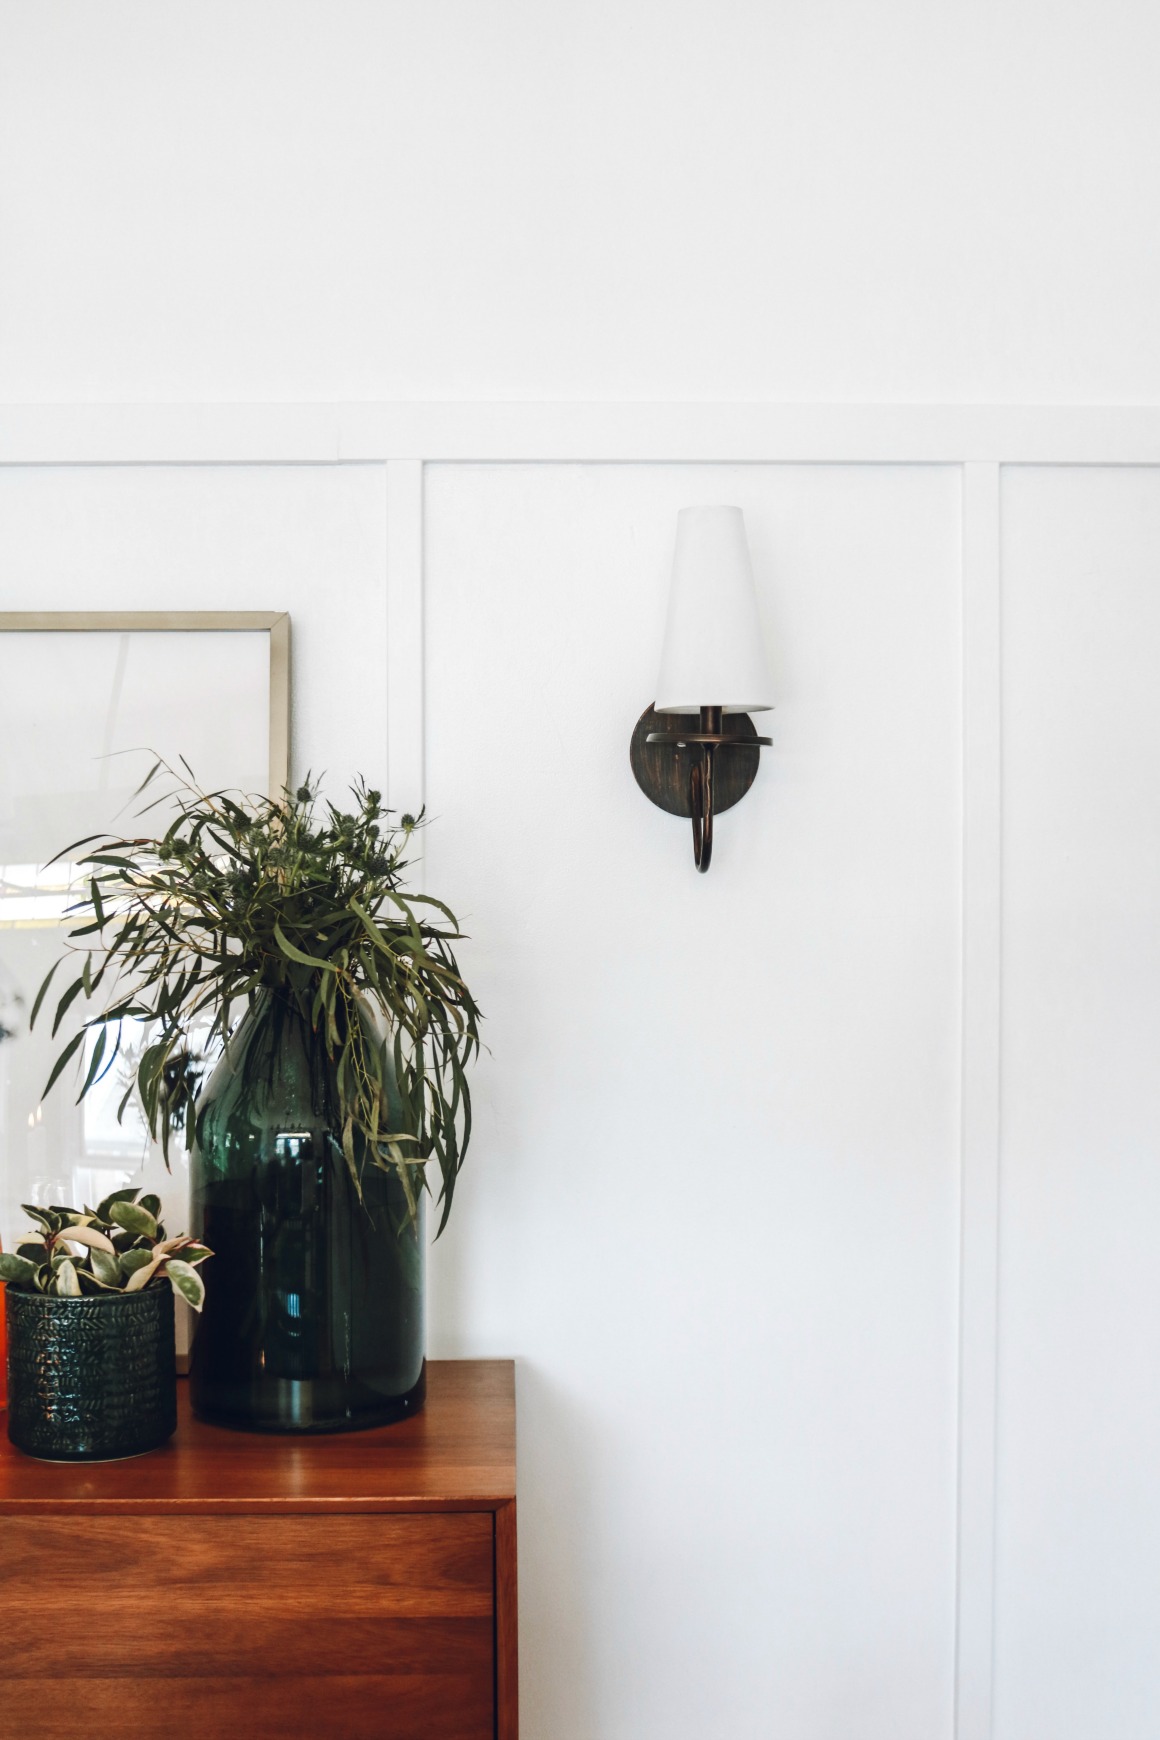
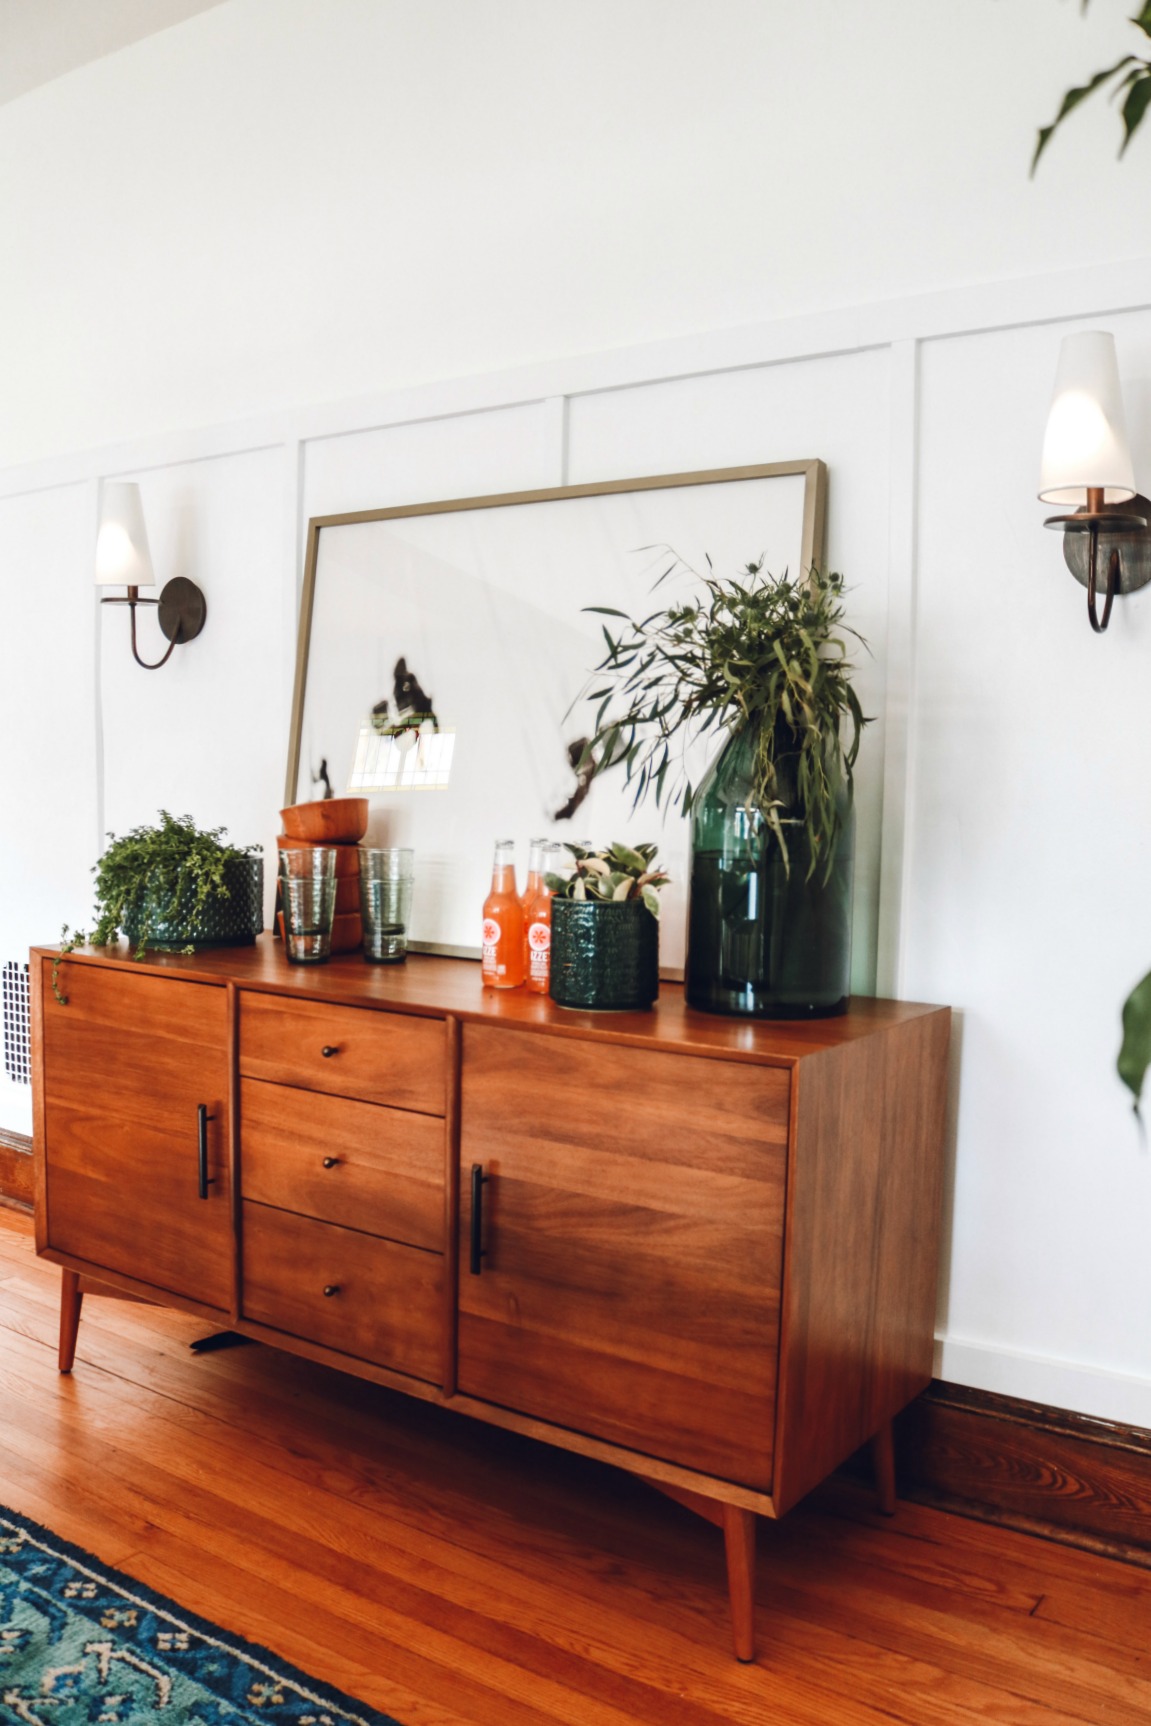
I also picked out THESE wall sconces to do on either side of her sideboard. Rather than having them hardwired, I did the magic light trick! It was a little trickier to make it work with this type of shade. I ended up putting the lightbulb in and putting the shade directly on the lightbulb (like normal). But then I wired the magic light to the top of the shade and the magic light sits in front of the lightbulb.
You can see the magic lights in the photo above. They are shinning forward, rather than up. But I still think it works great! They could always have an election come in later if they decide to have them hardwired. But the magic light trick is a wonderful option for renters, it allows you to have something more custom looking, like a wall sconce!
The wall sconces work better in this space rather than table lamps on the sideboard. There is not a lot of space for serving in this dining room, so having lamps take up valuable square footage really wasn’t the best option. Shop all of Troy Lighting HERE.
Walls-
The walls are painted in Sherwin Williams, Pure White. I honestly love that white so much. I have it on our kitchen banquette too. It has ZERO cream or gray in it. Really brightened up the room. The bright white looks especially great with wood trim.
I was originally just going to paint the board and batten in the bright white, but decided it all would look best the same. Simple, because this dining room is a central area in the home.
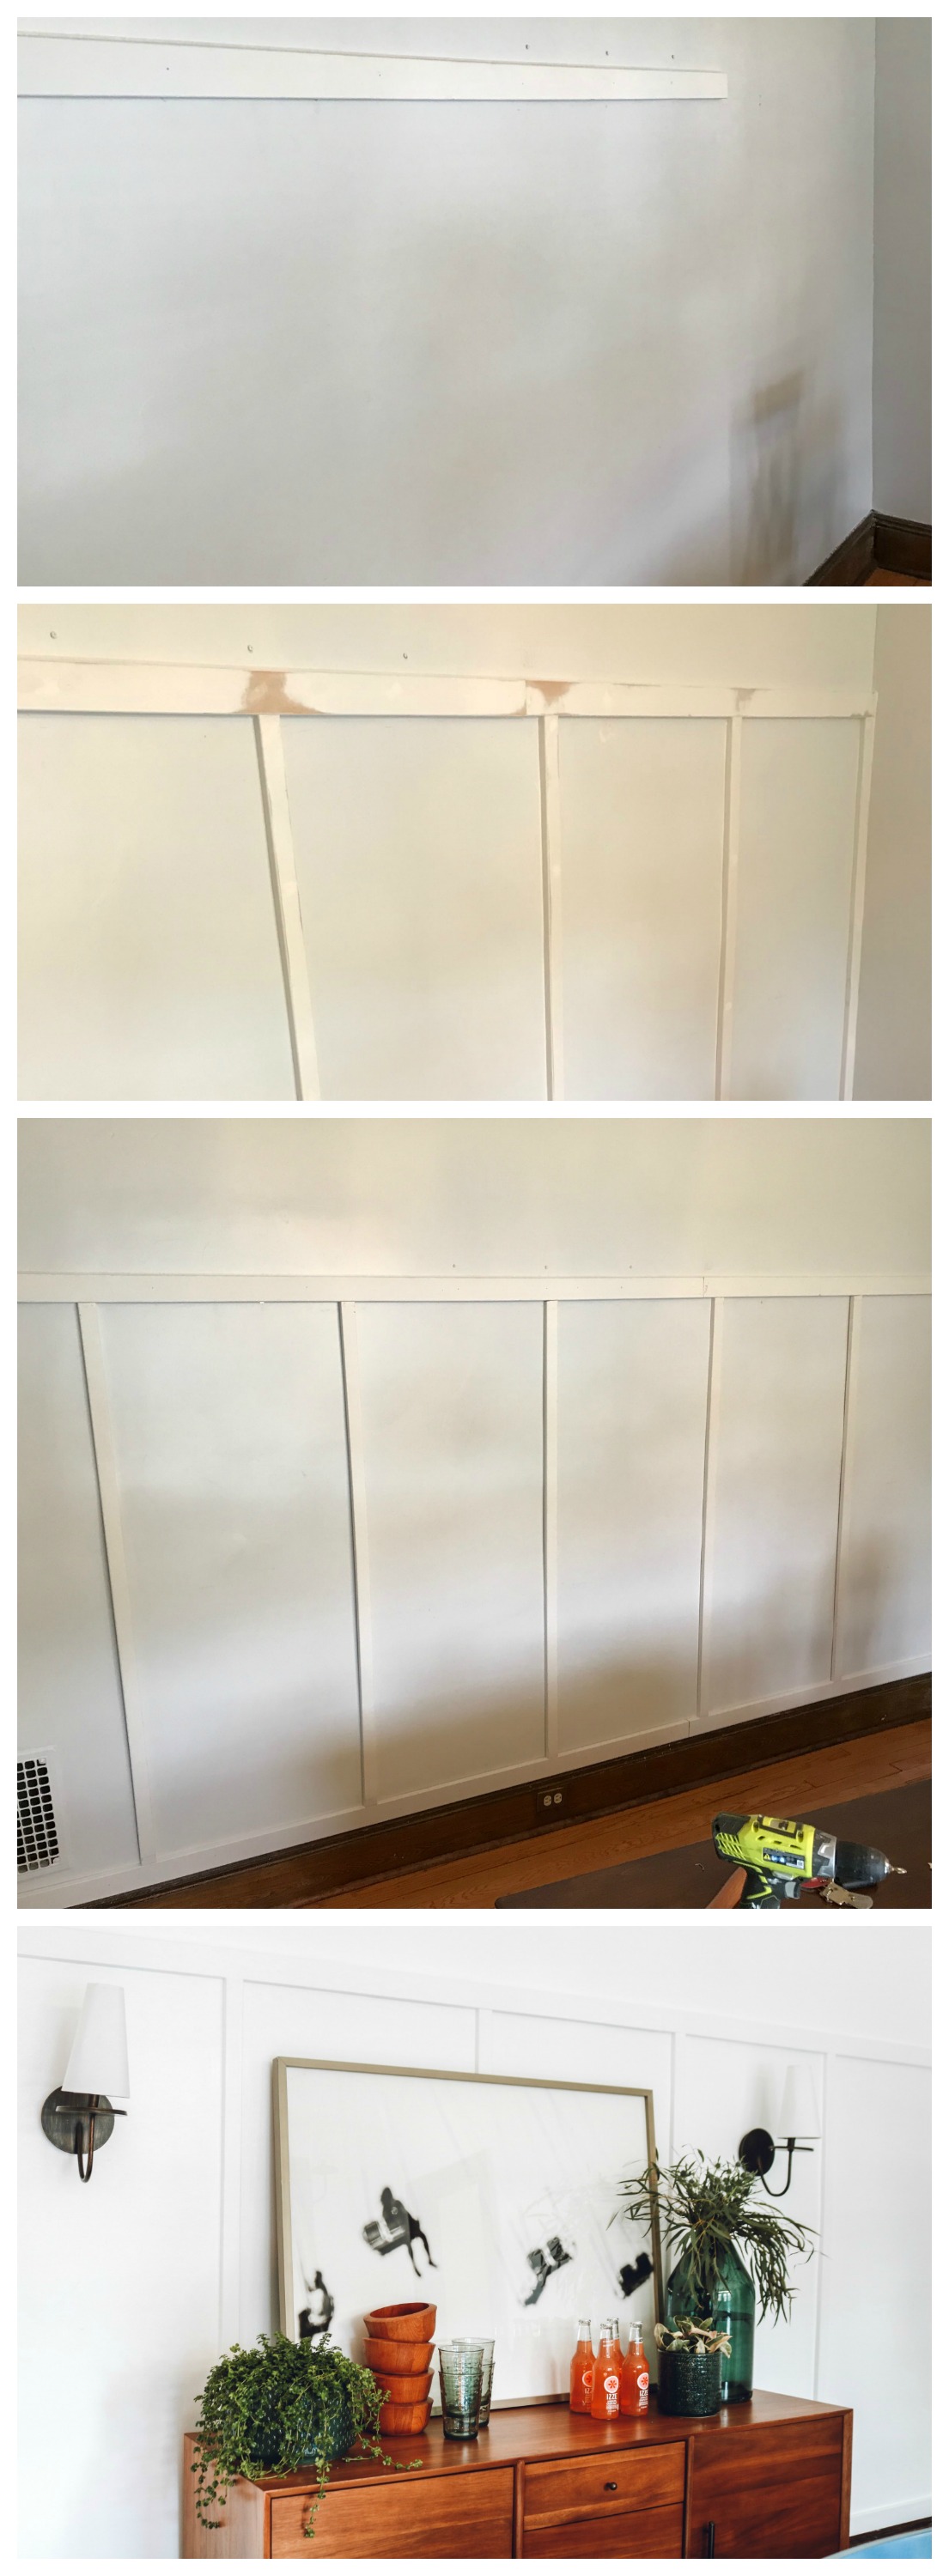
Kevin actually installed the board and batten. He did such a good job!!! It was his very first time doing this treatment. I showed him a picture and asked if he thought he could do that….of course he said, SURE! That guy. Servant and can-do heart. It did take a little bit of time to calculate the right size. I am not going to do a full blog post on it. But I will tell you the size we did.
Board and Batten-
Height 5′ from the top of the molding (so it was abut 6′ from the ground). The width we based off of the wall size, so that the spacing would be even (that took the most time to figure out). The spacing ended up being 18″ inside each of the molding pieces.
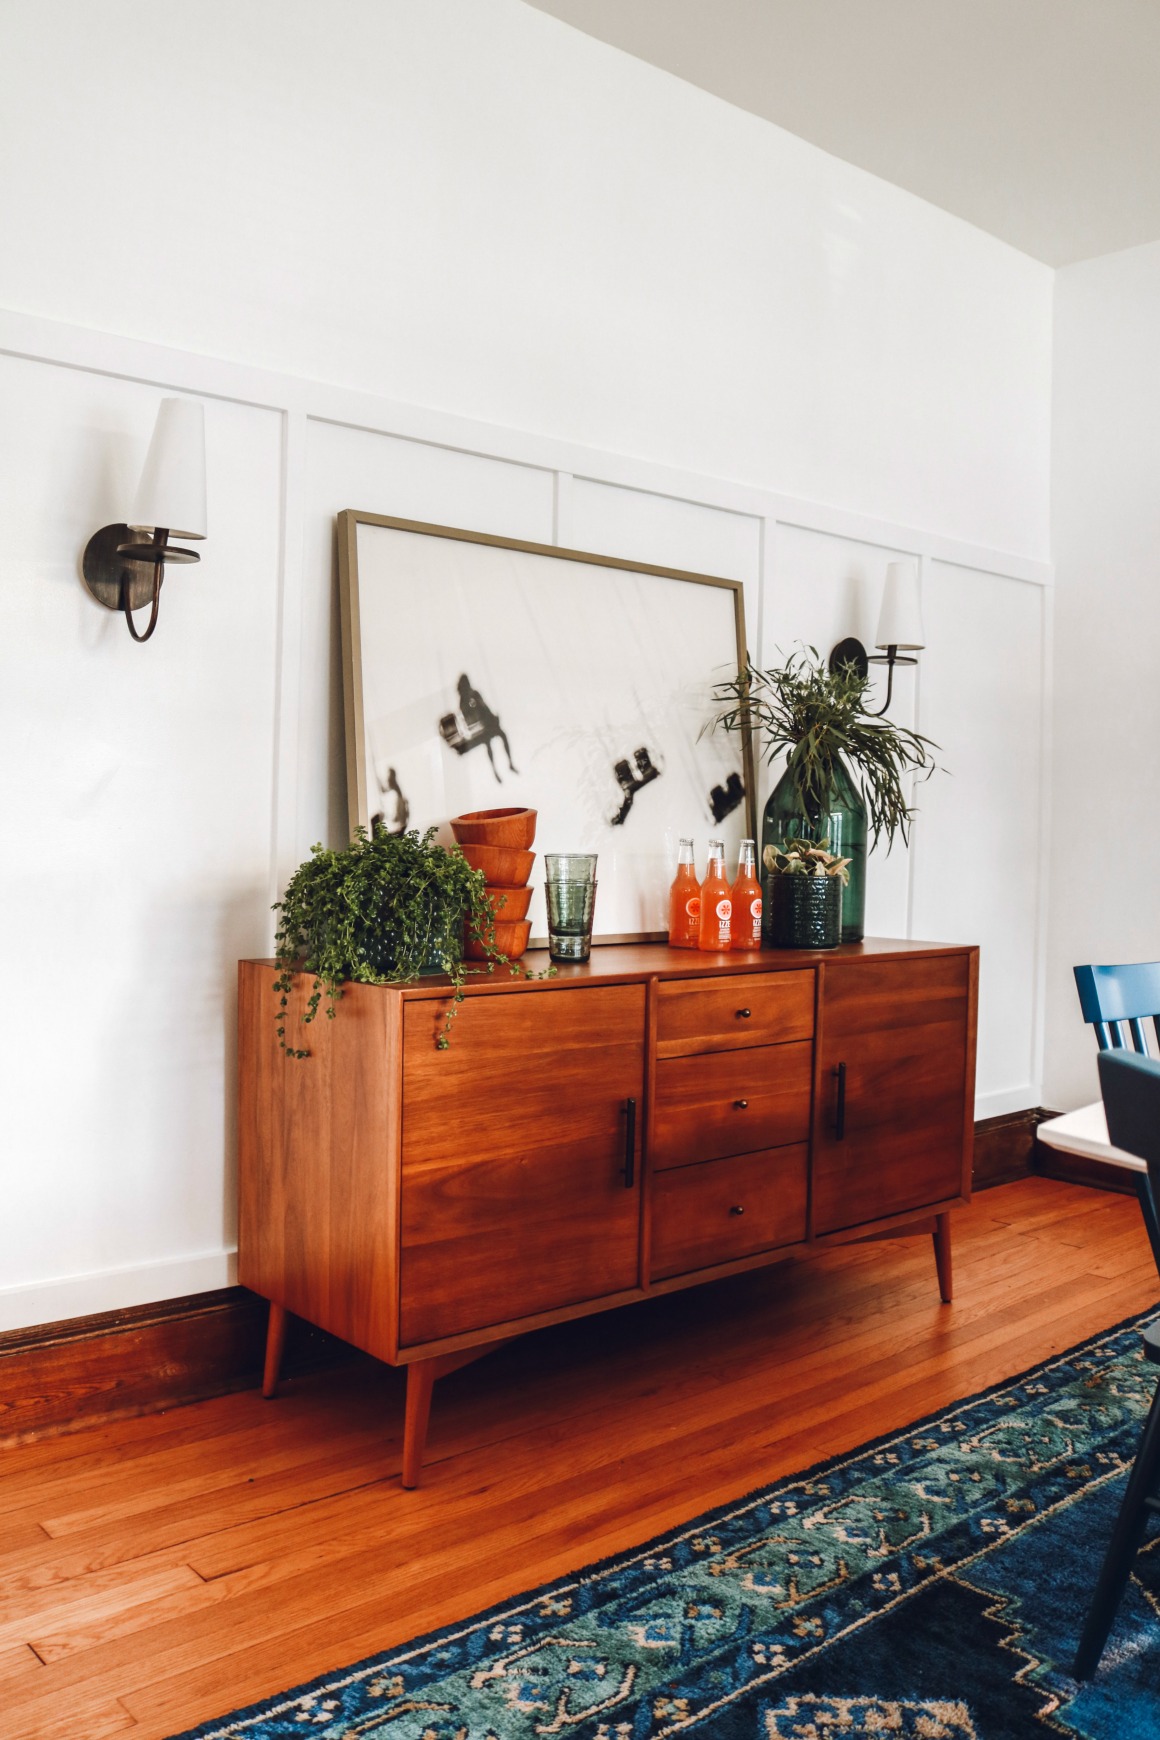
*I based this height off of the sideboard height and the height of the art I was going to put on the sideboard and the wall sconces. I did not want the board and batten to hit anywhere that I would want to hang the sconces.
Kevin first nailed the pieces of molding on the top and the bottom. He cut the center pieces and placed them in before nailing them to the wall. That way we were certain the spacing would be even all across the wall. (The bottom and top pieces are 2’x6′ and the center pieces are 1 1/2″x 8′ both are primed MDF).
Next he nailed all the center pieces. Then put putty in the nail holes and caulked the side edges to hide the gaps. Lighting sanded then painted!
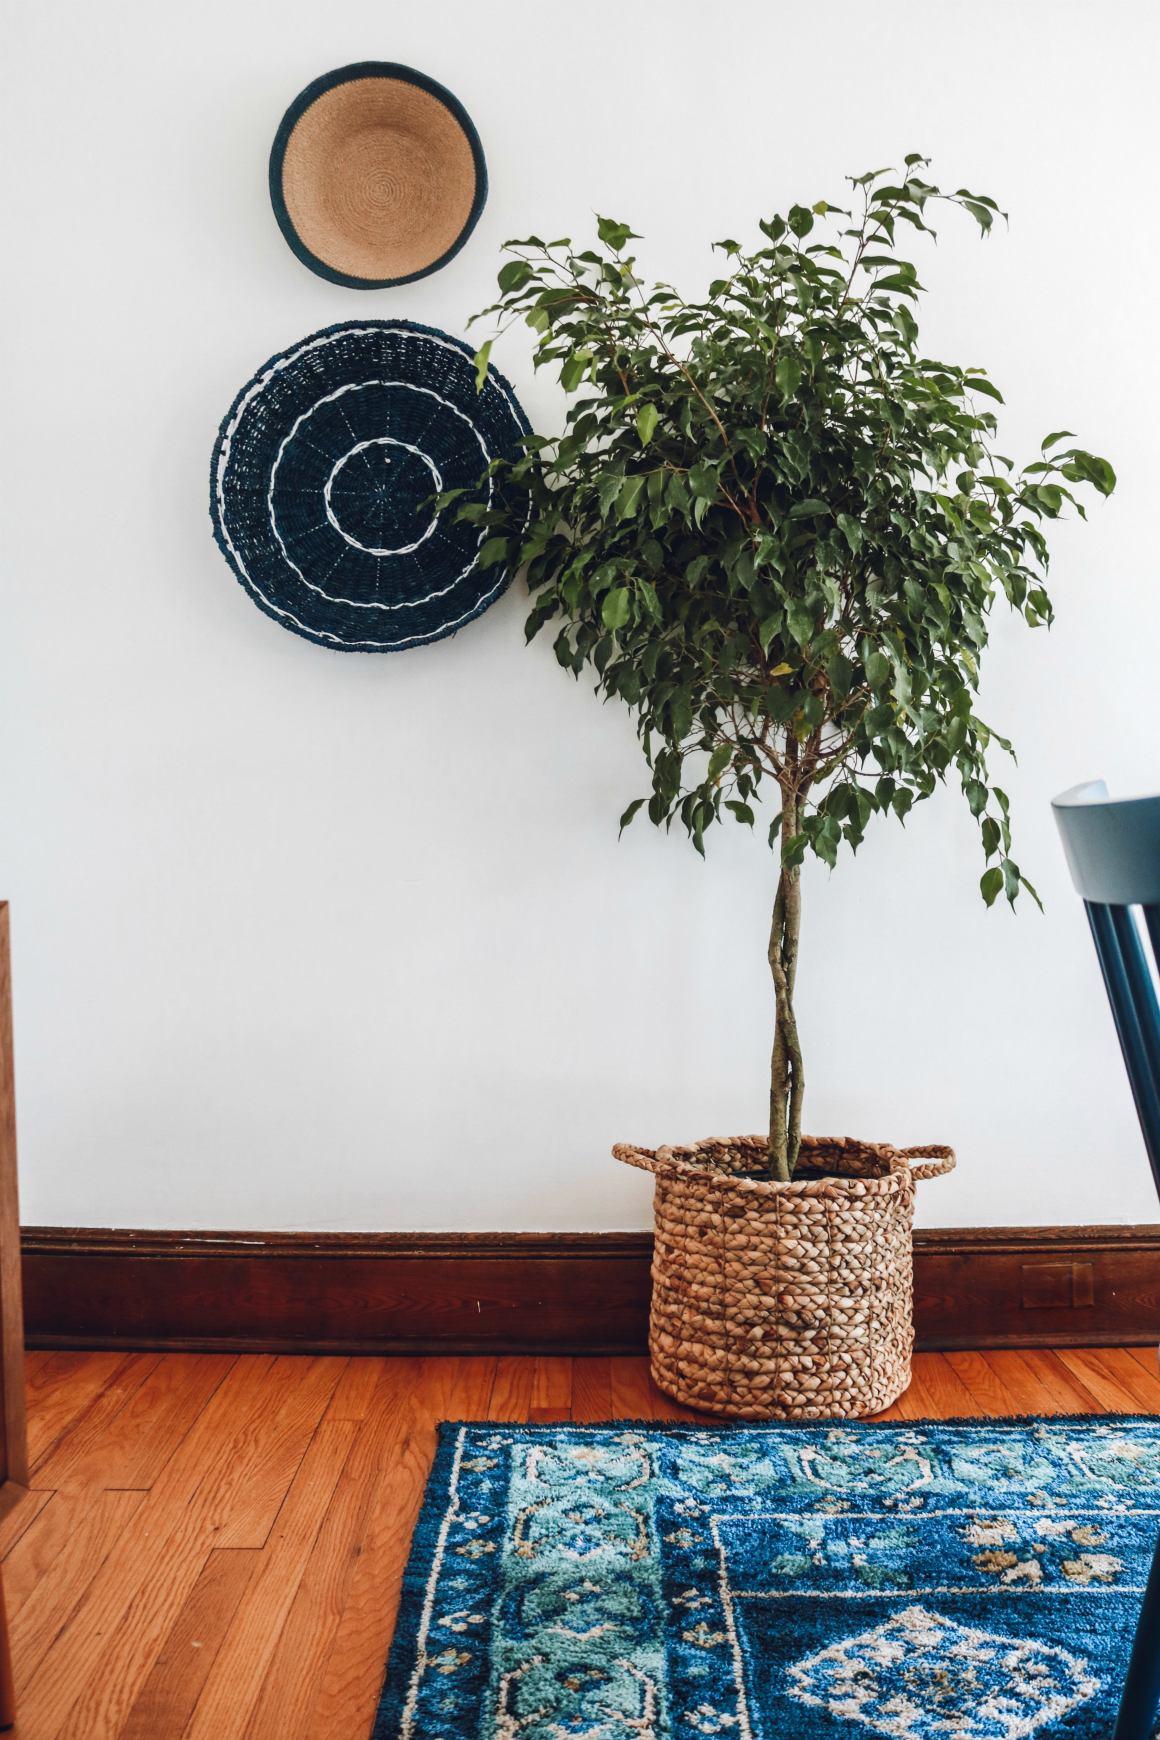
Finishing Details-
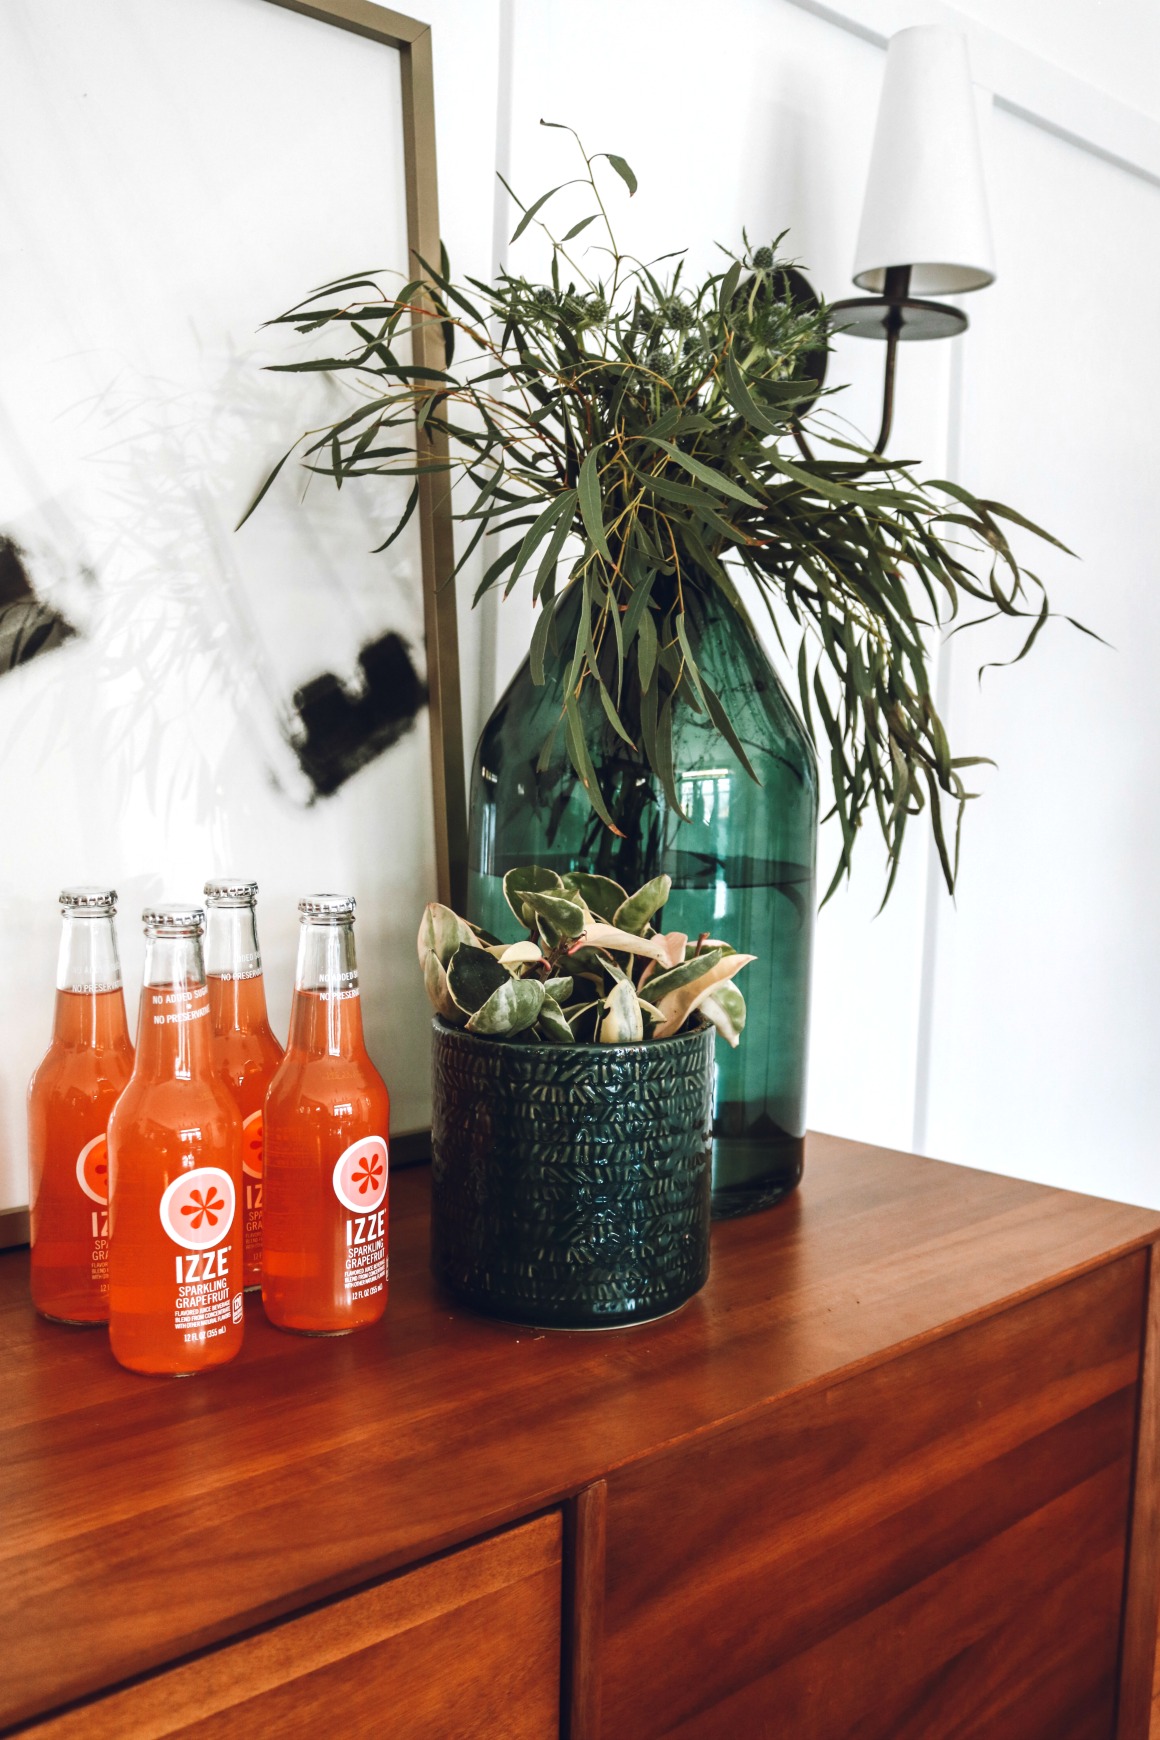
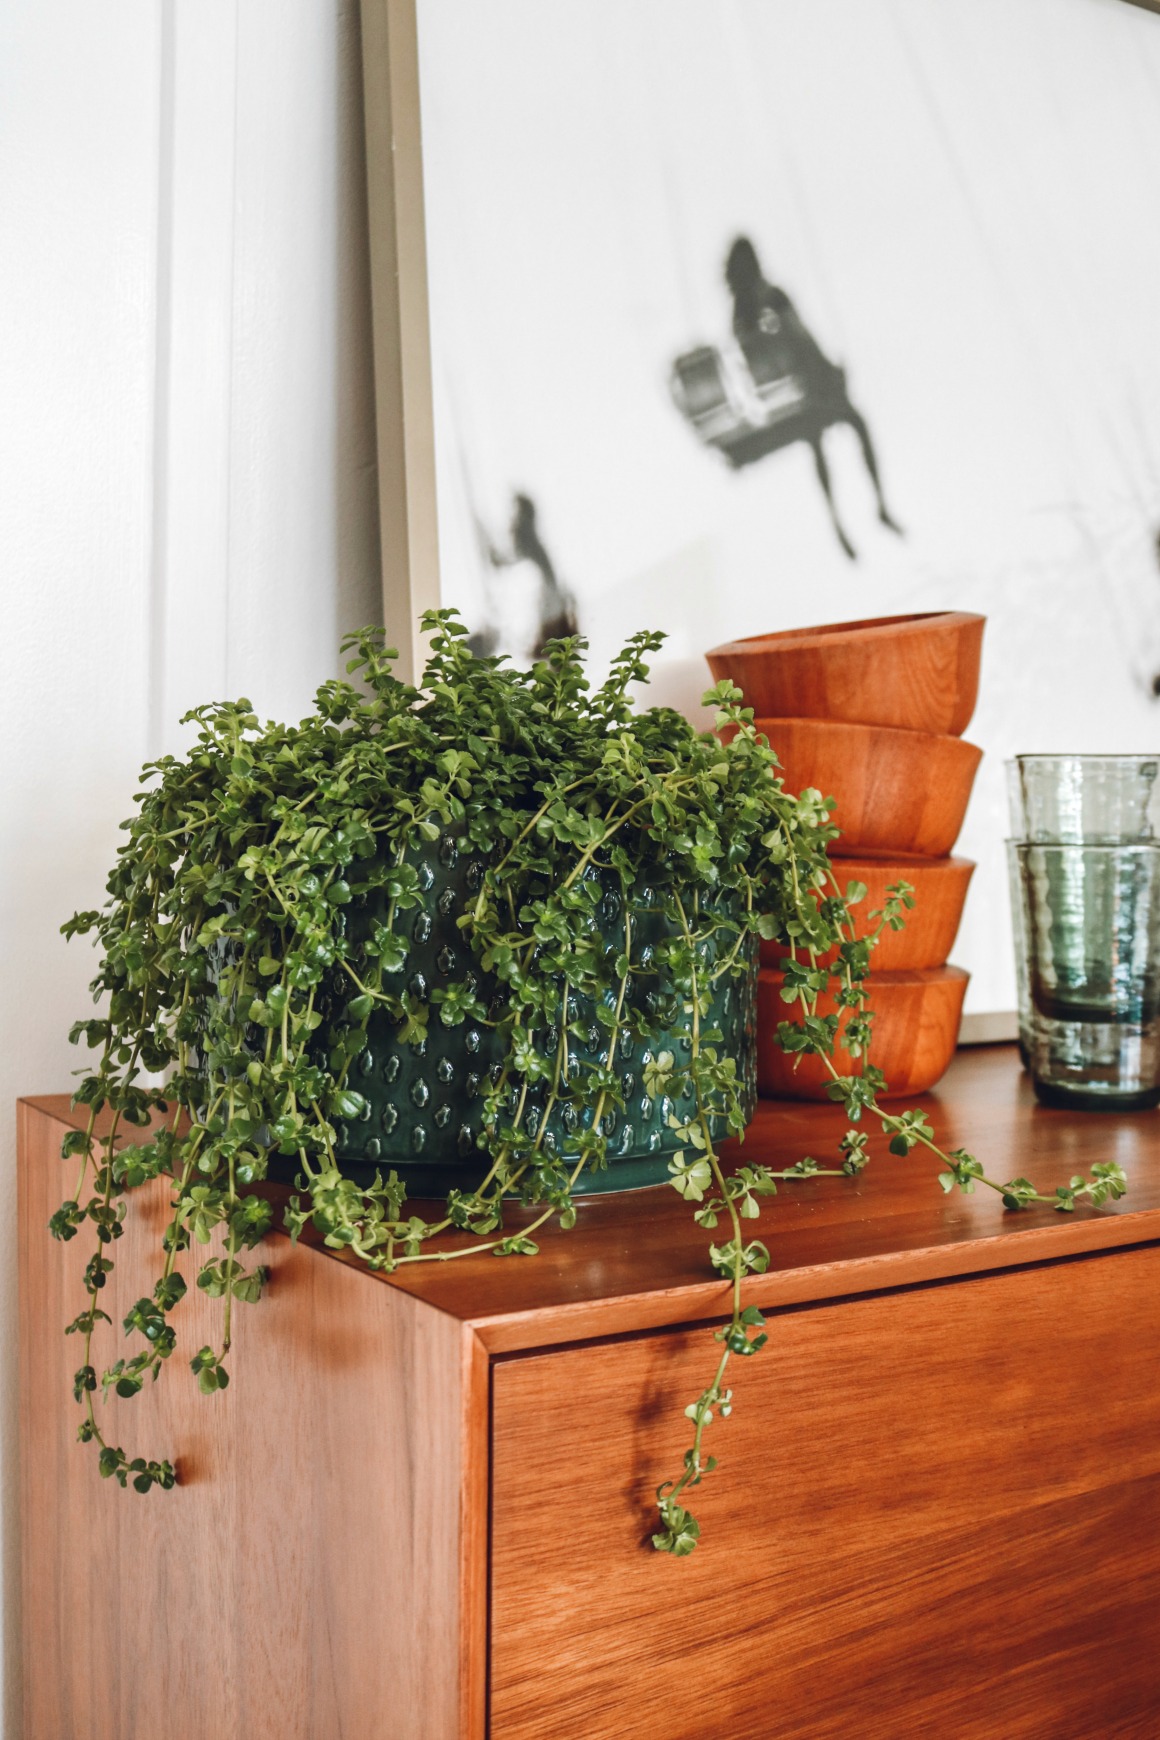
It is all in the details. Of course plants bring LIFE into the space. Plants are a necessity in ever room (if you ask me). I also like to decorate with everyday items. Wood bowls, cups, cute bottles and candle tappers. I made sure to bring in the color of the sideboard over to the dining table to tie it all together. You can shop this room at the end of the post by clicking on an image!


More Lighting-
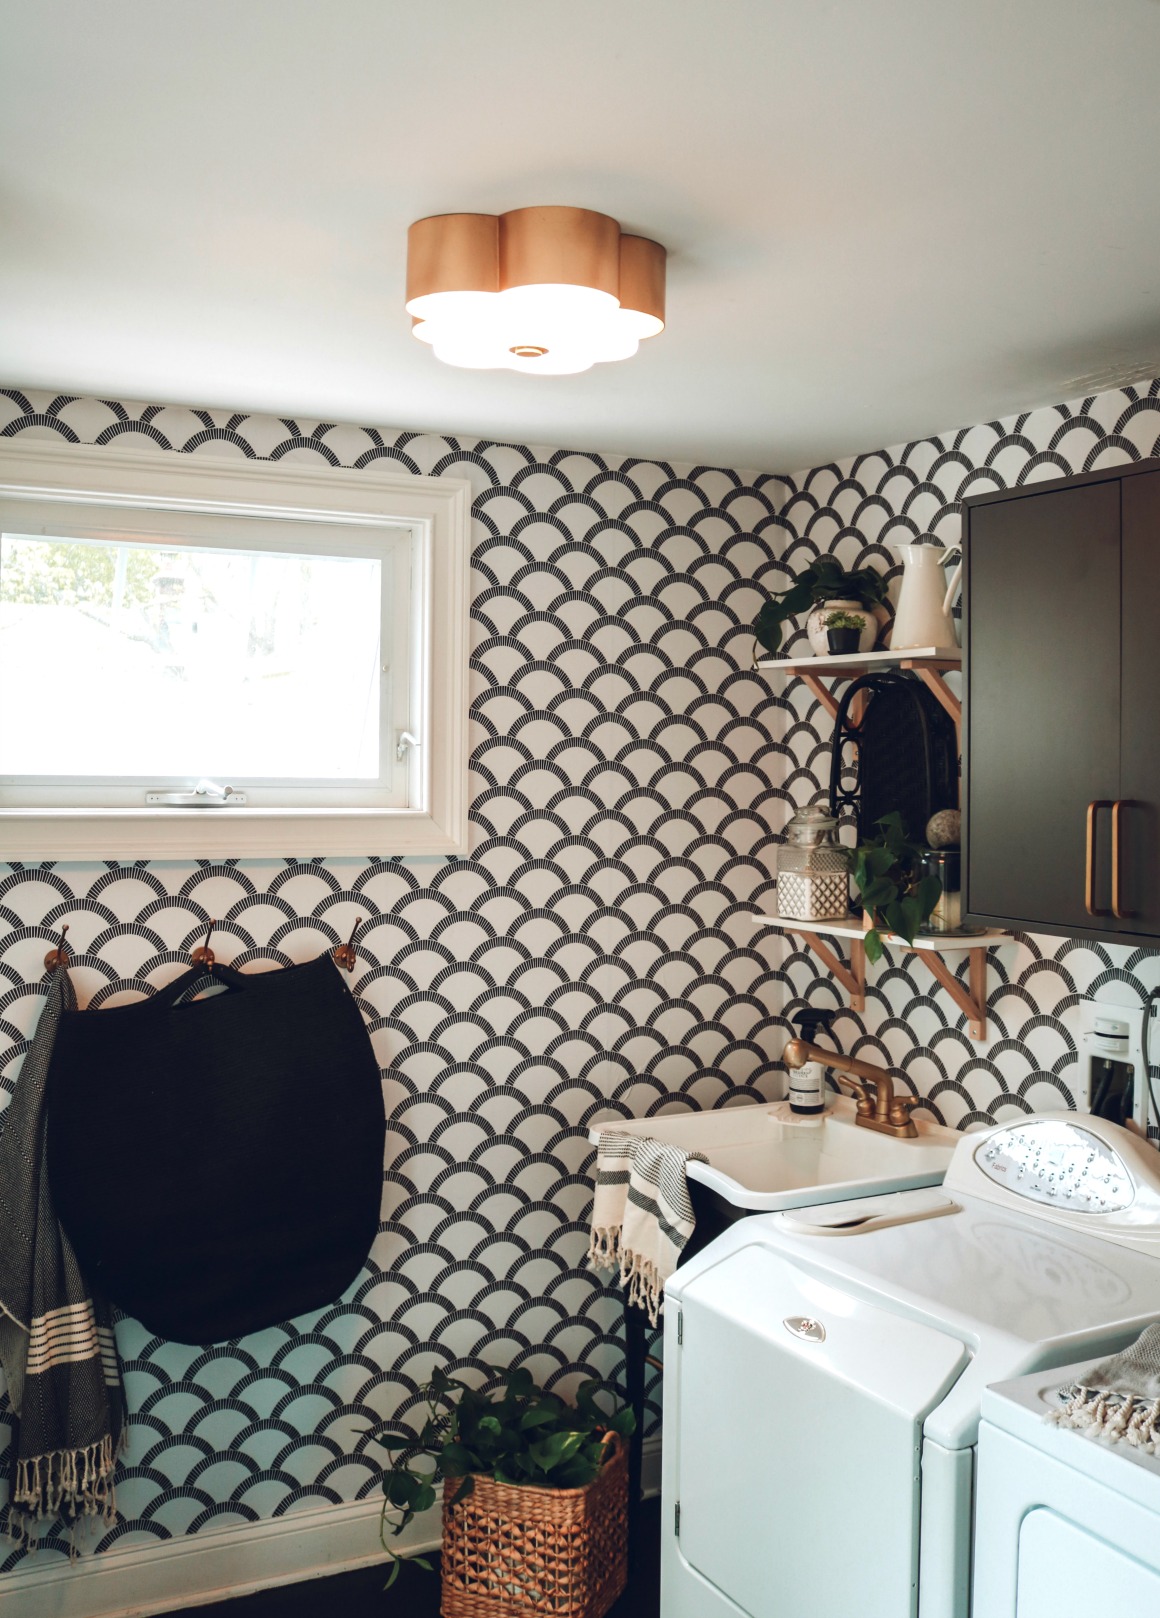
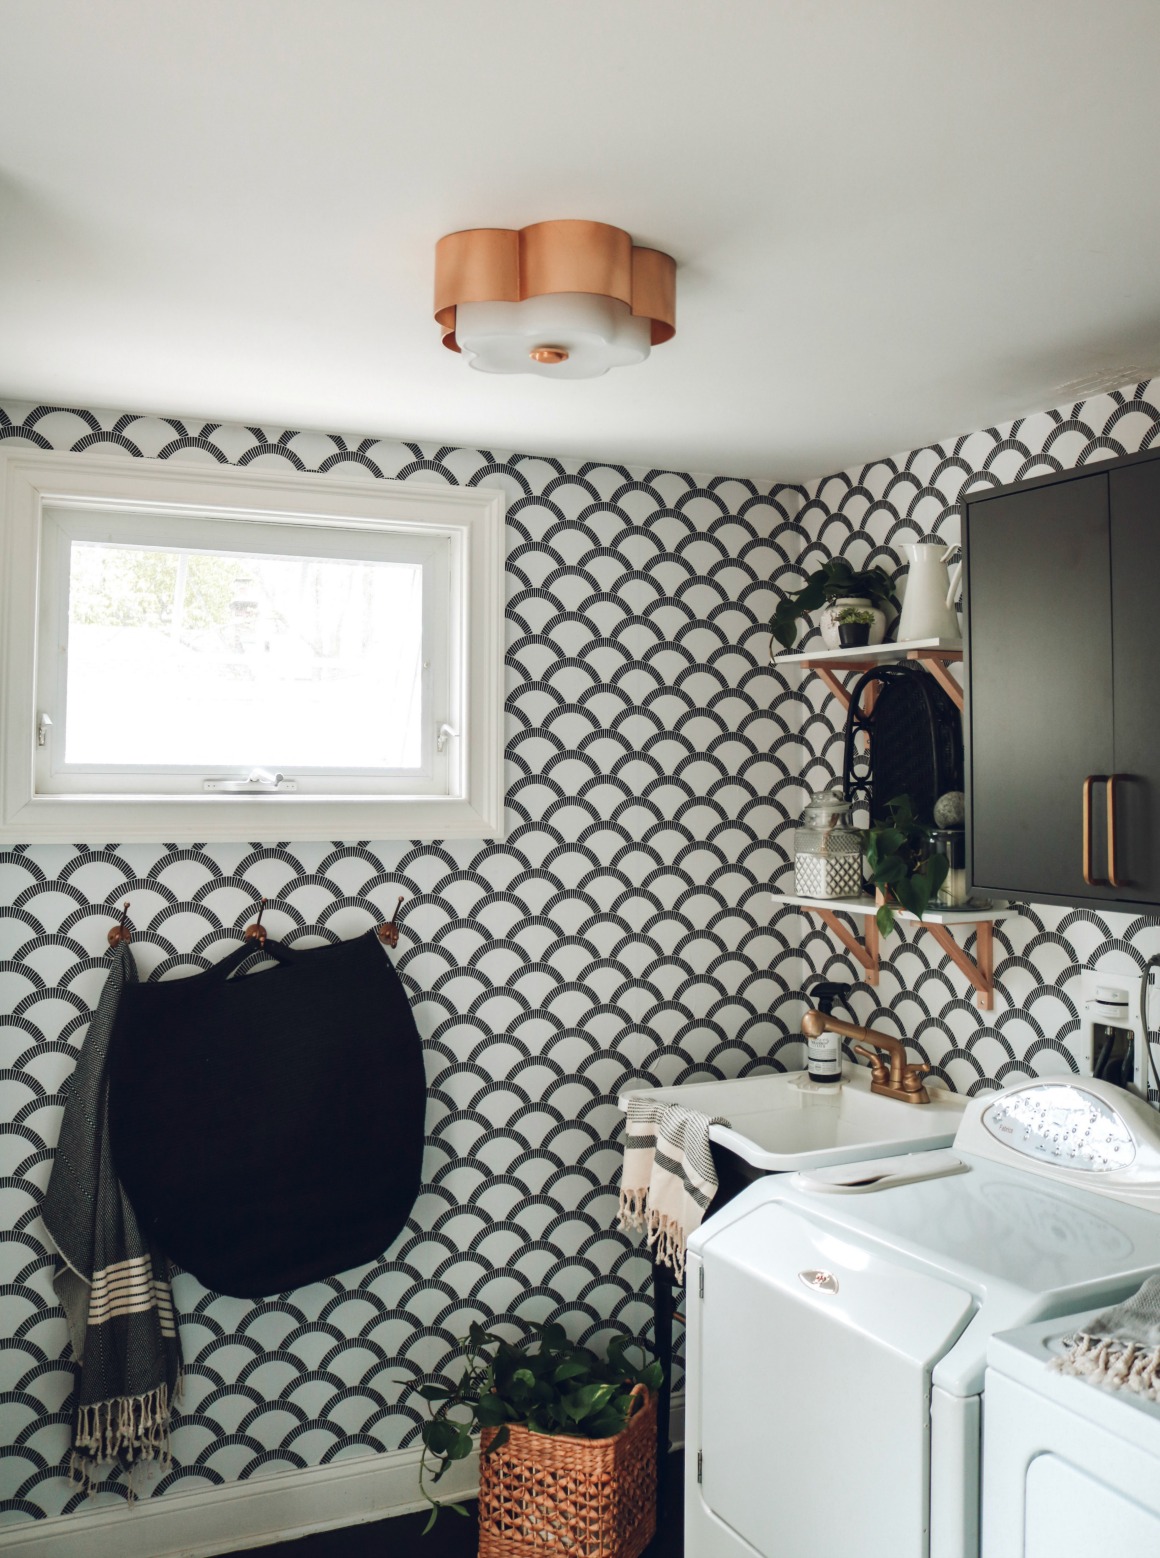
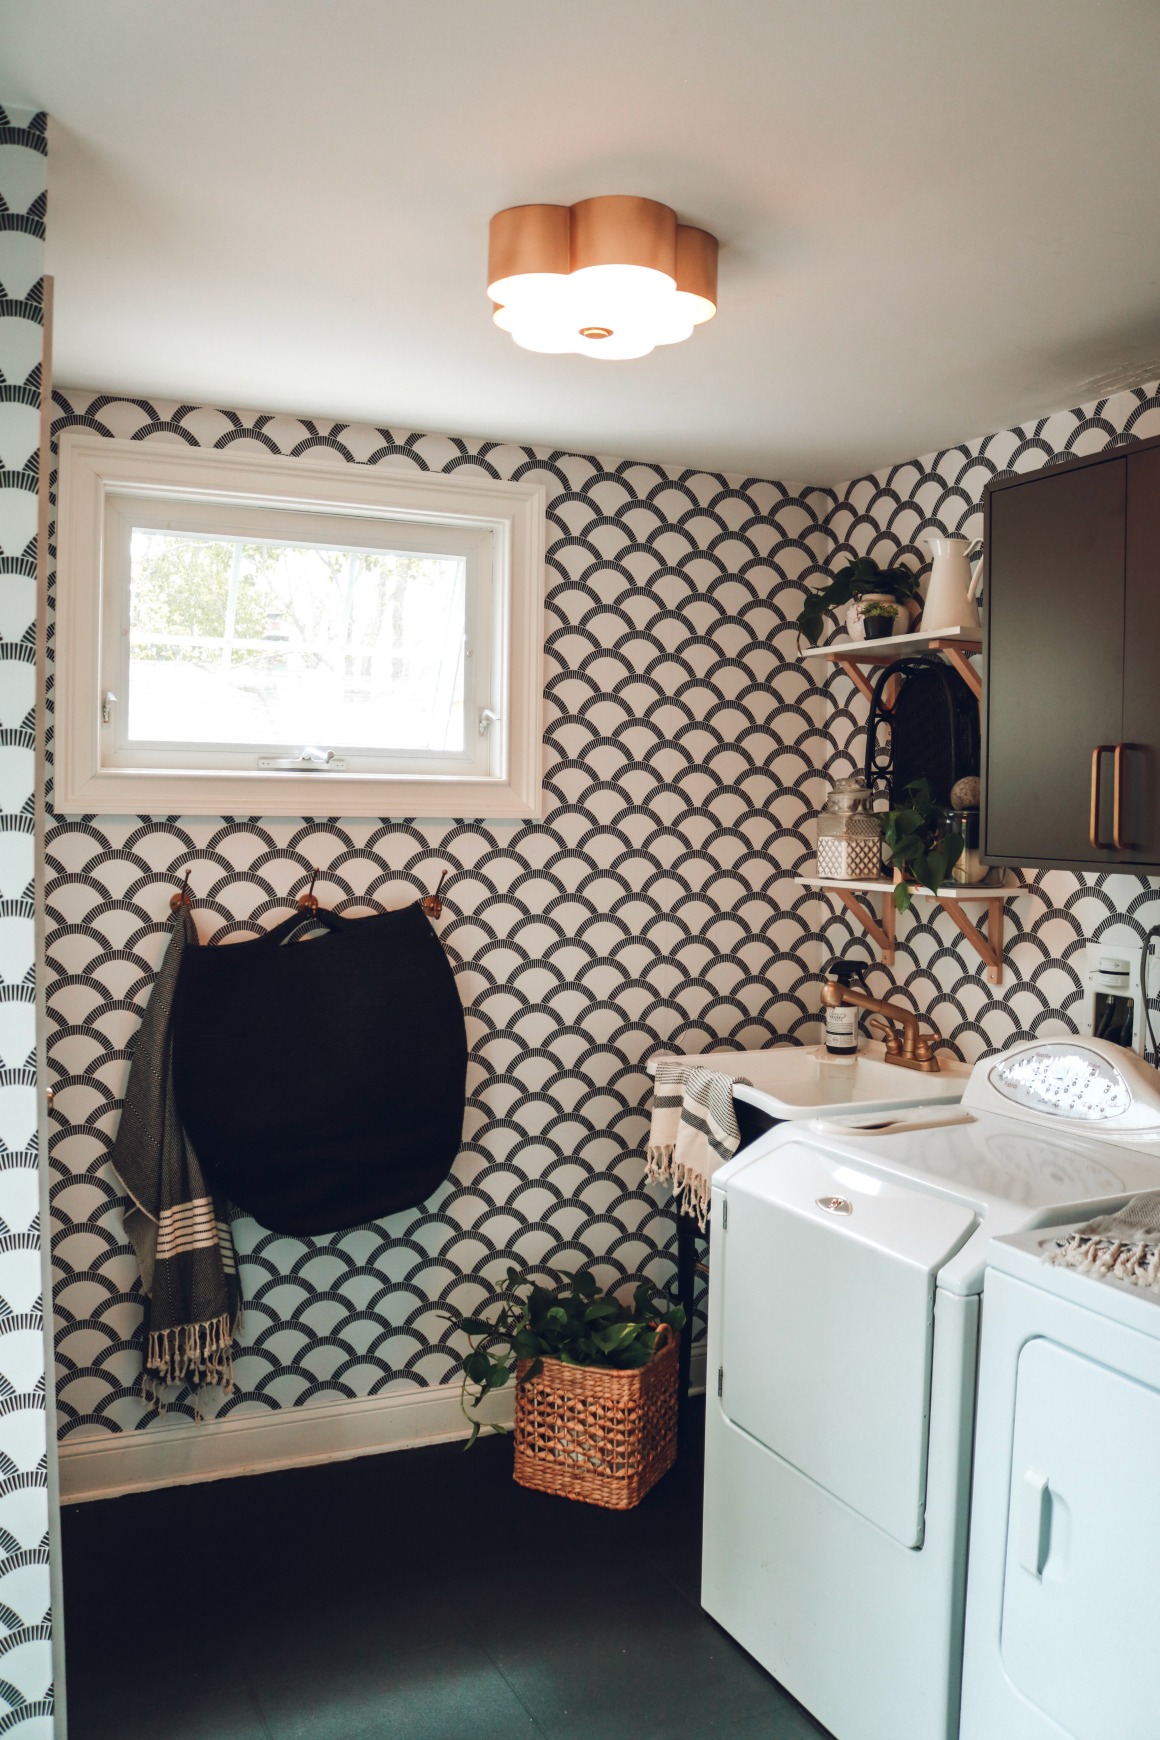
If you remember the Laundry Room I made over I also used a light fixture from Troy Lighting. I actually ordered it for myself, because I am obsessed with it and was going to do a light swap. But I ended up using it in the laundry makeover, so I was glad that I had ordered it. It is the PERFECT match in the laundry room. Find the gold flush-mount HERE. And check out the laundry makeover HERE.
Shop the Dining Room-


Girl! You nailed it!!! I love the way it turned out 😁
Thank you!!!
Wow! What a bright beautiful space you created.
Thanks so much!
AMAZING! As always, I always love your “Before and After” posts. Such a big, beautiful impact every single time! Love that you do these for friends as well!
Love love LOVE this room. Could you share the ceiling color? Is it Pure White as well? Currently in the stage of repainting our whole house and don’t know whether to go brighter on the ceiling or go with the white that I will be putting on the walls.
it was already painted- we just left it! Sorry!!
Oh my goodness. I had to look back to be sure I was still on this page! You are more than amazing. It is gorgeous and warm and makes you feel good all over!! She is blessed to have you as a friend!!
Wow so pretty and fresh. And Kev I love seeing your face.
Thanks Les!!!
Love the car perched in the chair for the photos. 🙂
Beautiful room!!
Such a nice touch. Is their wall textured? I’ve been playing with the idea of a feature wall like this behind our master bed and wasn’t sure how it might look with a textured wall.
no, the wall wasn’t textured….
The links aren’t working at the end.
Nevermind! They are now!
Love it! Are the walls plaster or dry wall? Did you use any glue on the MDF boards or just nails?
They were dry wall. We just used nails, easier to remove incase of landlord wanting to change it. If not I would do glue too. Although the nails held fine
I love all the plants you used. Where are your favorite spots to shop for indoor plants?
I honestly just go to Home Depot since it is the closest to me and they have affordable plants!!
What would you call this style of decor? I am in love!
I would call it mid-century modern