This post is a sponsored post
We have a garden! Three years in this house and this is our first garden in Connecticut. At our previous home in Utah we made garden tables for tomatoes. It was a big fail. The bottom of the tables fell out once the tomato plants got bigger, leaving us with a big pile of dirt. It was a great concept with the intention of keeping animals out of our garden and not eating all the juicy tomatoes. After that experience we were jaded and felt that gardens were a big waste. This is my inner monologue-
“I am an avid farmers market goer, I can get garden vegetables there” = NO to a garden
“Our kids really wanted a garden and it’s good for them to see the cycle of food”= YES to a garden
“We have the PERFECT spot in our yard for a garden” = YES to a garden
“All the squirrels, raccoons, bunnies and deer (yes we have seen all of those in OUR yard) will just eat it!” = NO to a garden
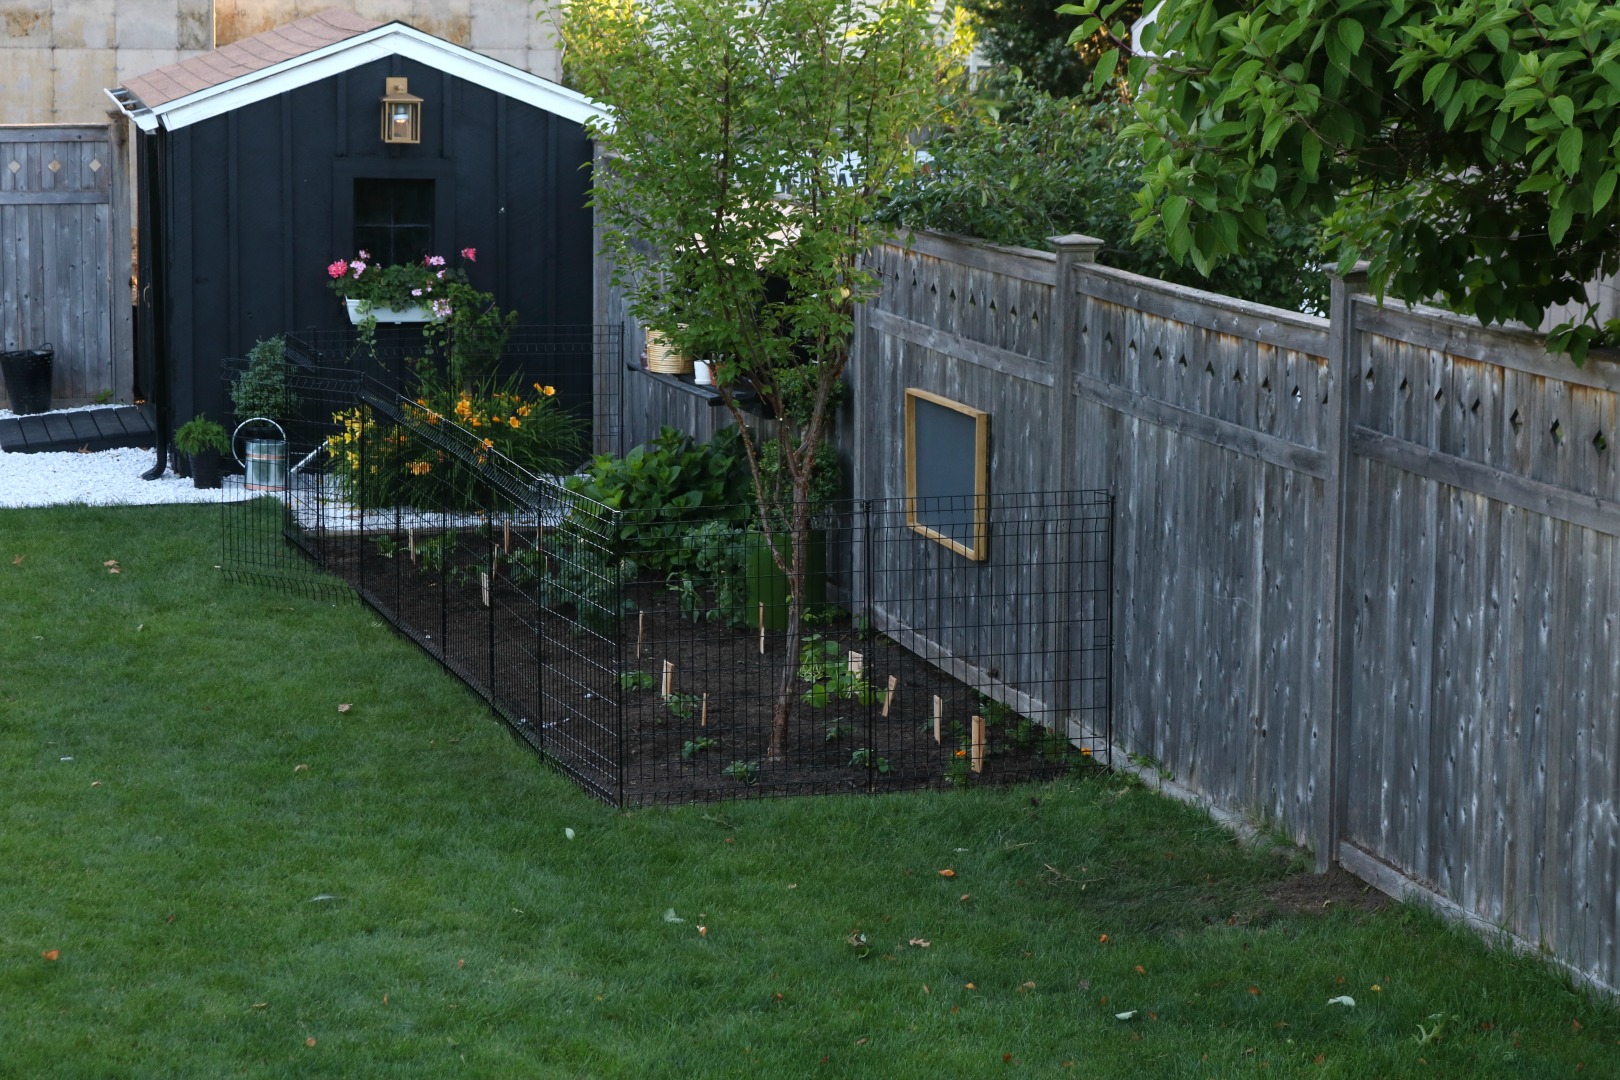
Two no’s and two yes’s. Well the last one became a non-issue when we found the perfect No-Dig Fence to put around our garden, requiring no building of anything or getting out fancy tools (that we don’t own) from Lowe’s. Obviously we ended up saying yes to the garden and the cutest Nesting Box completes it!
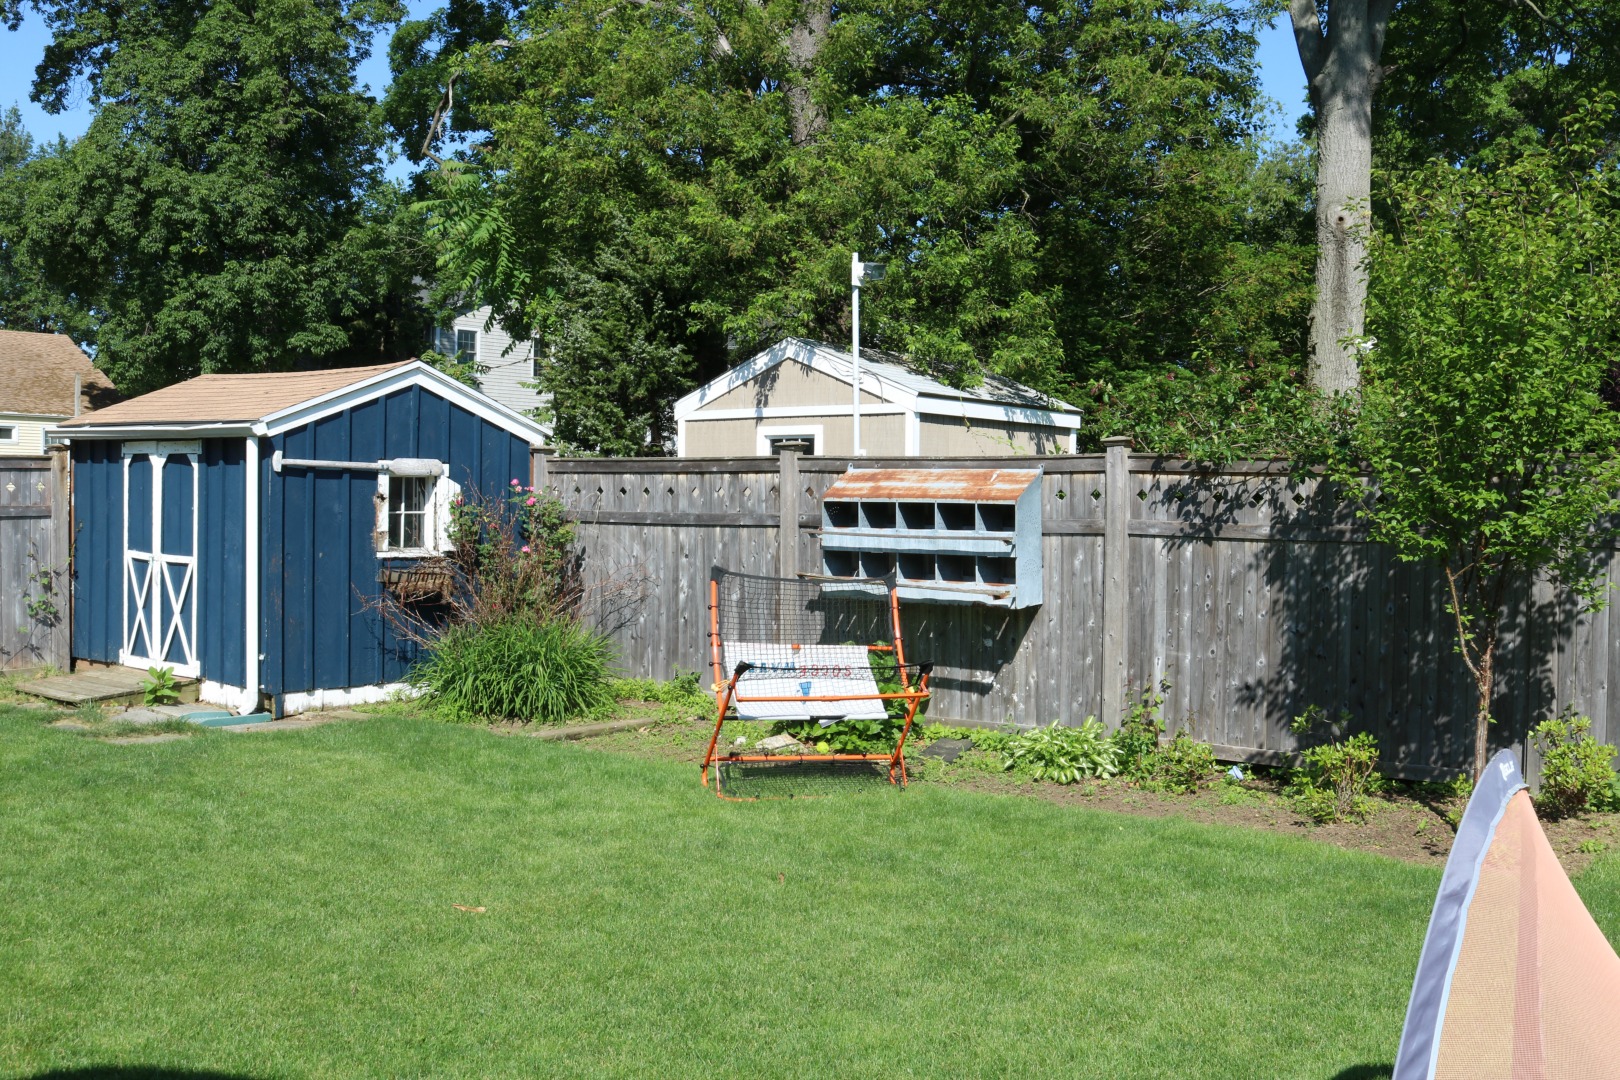
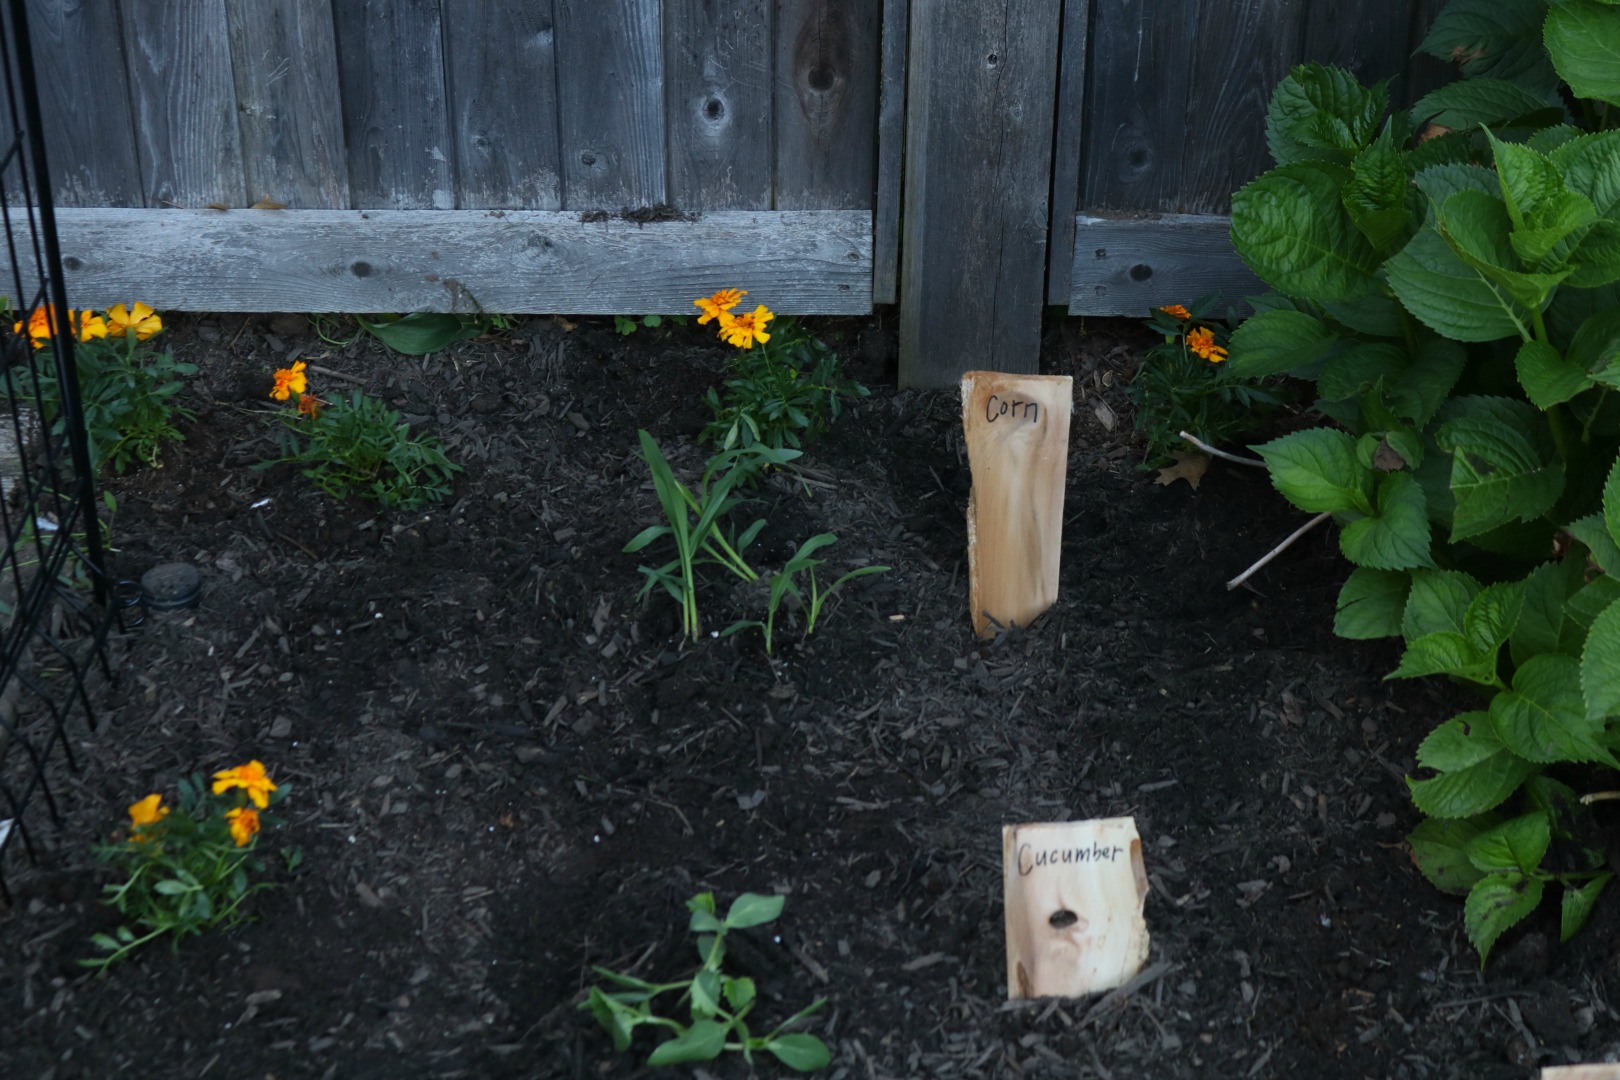
Garden Space BEFORE-
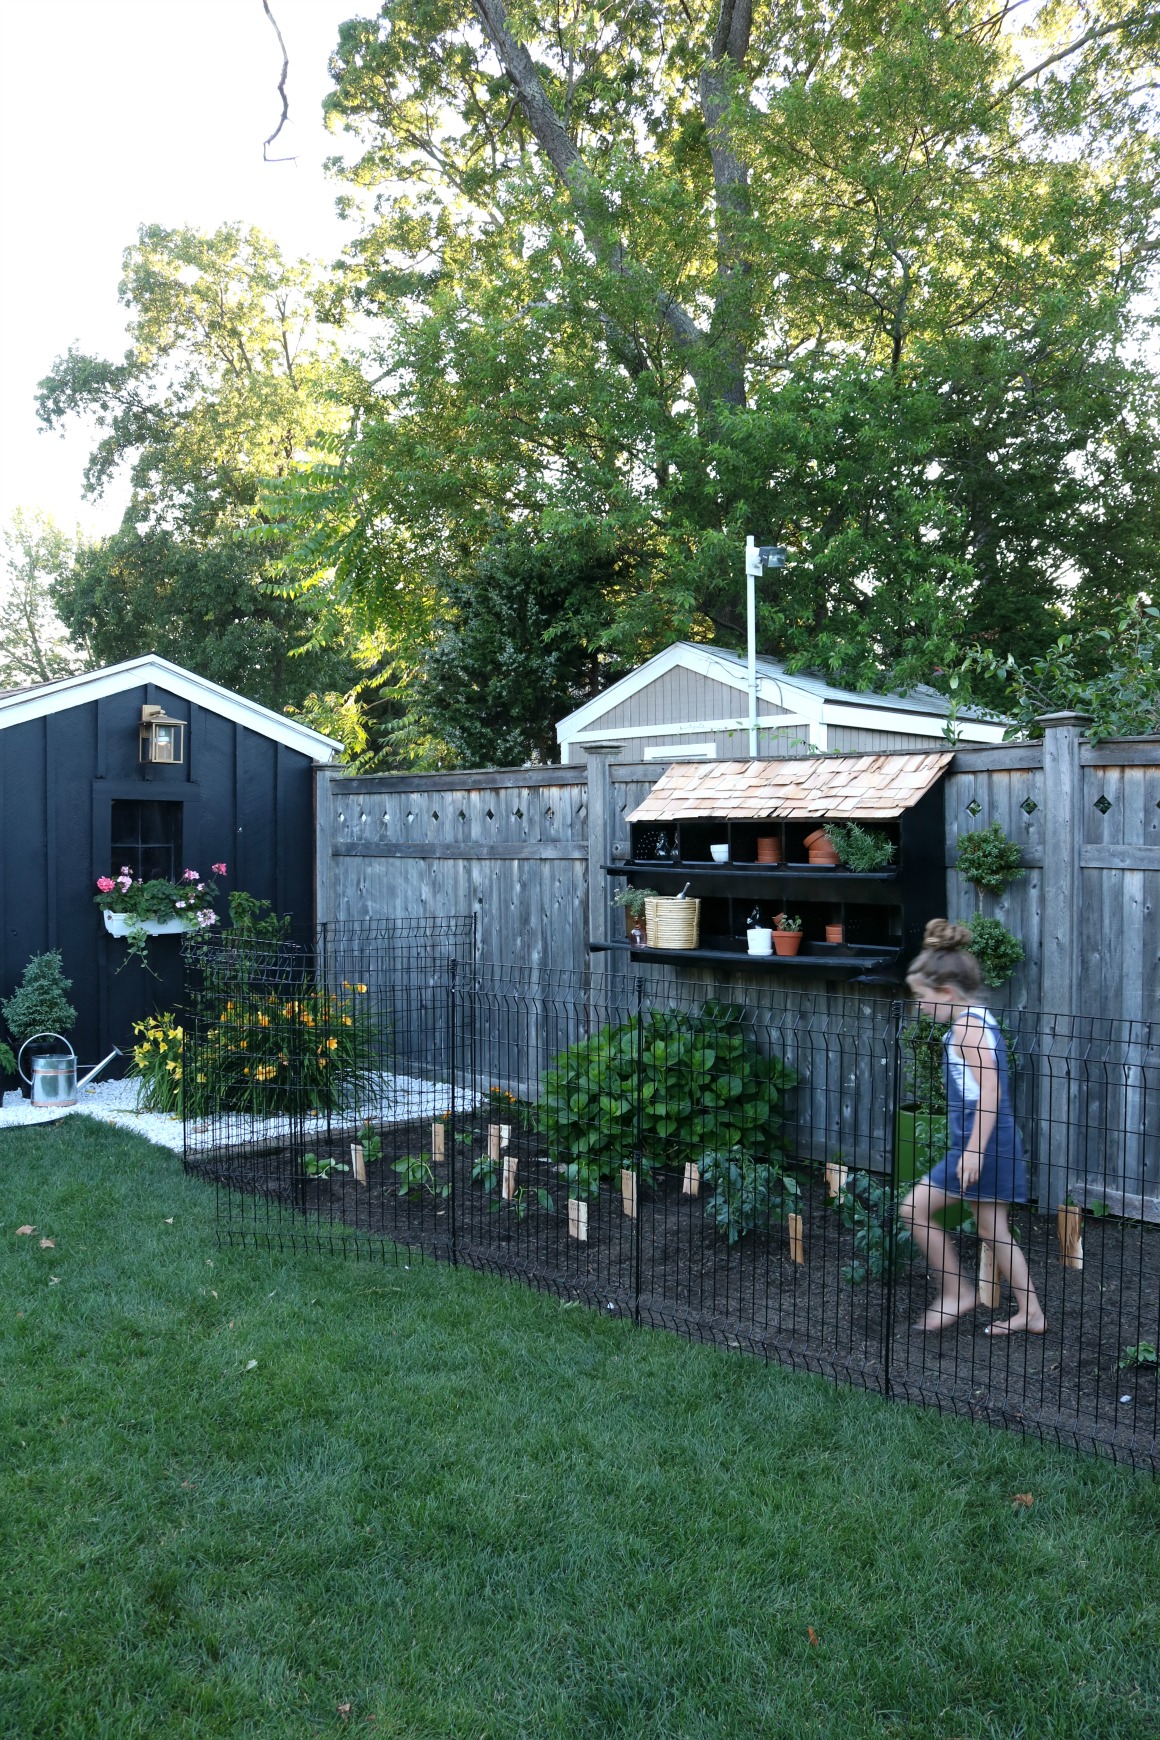
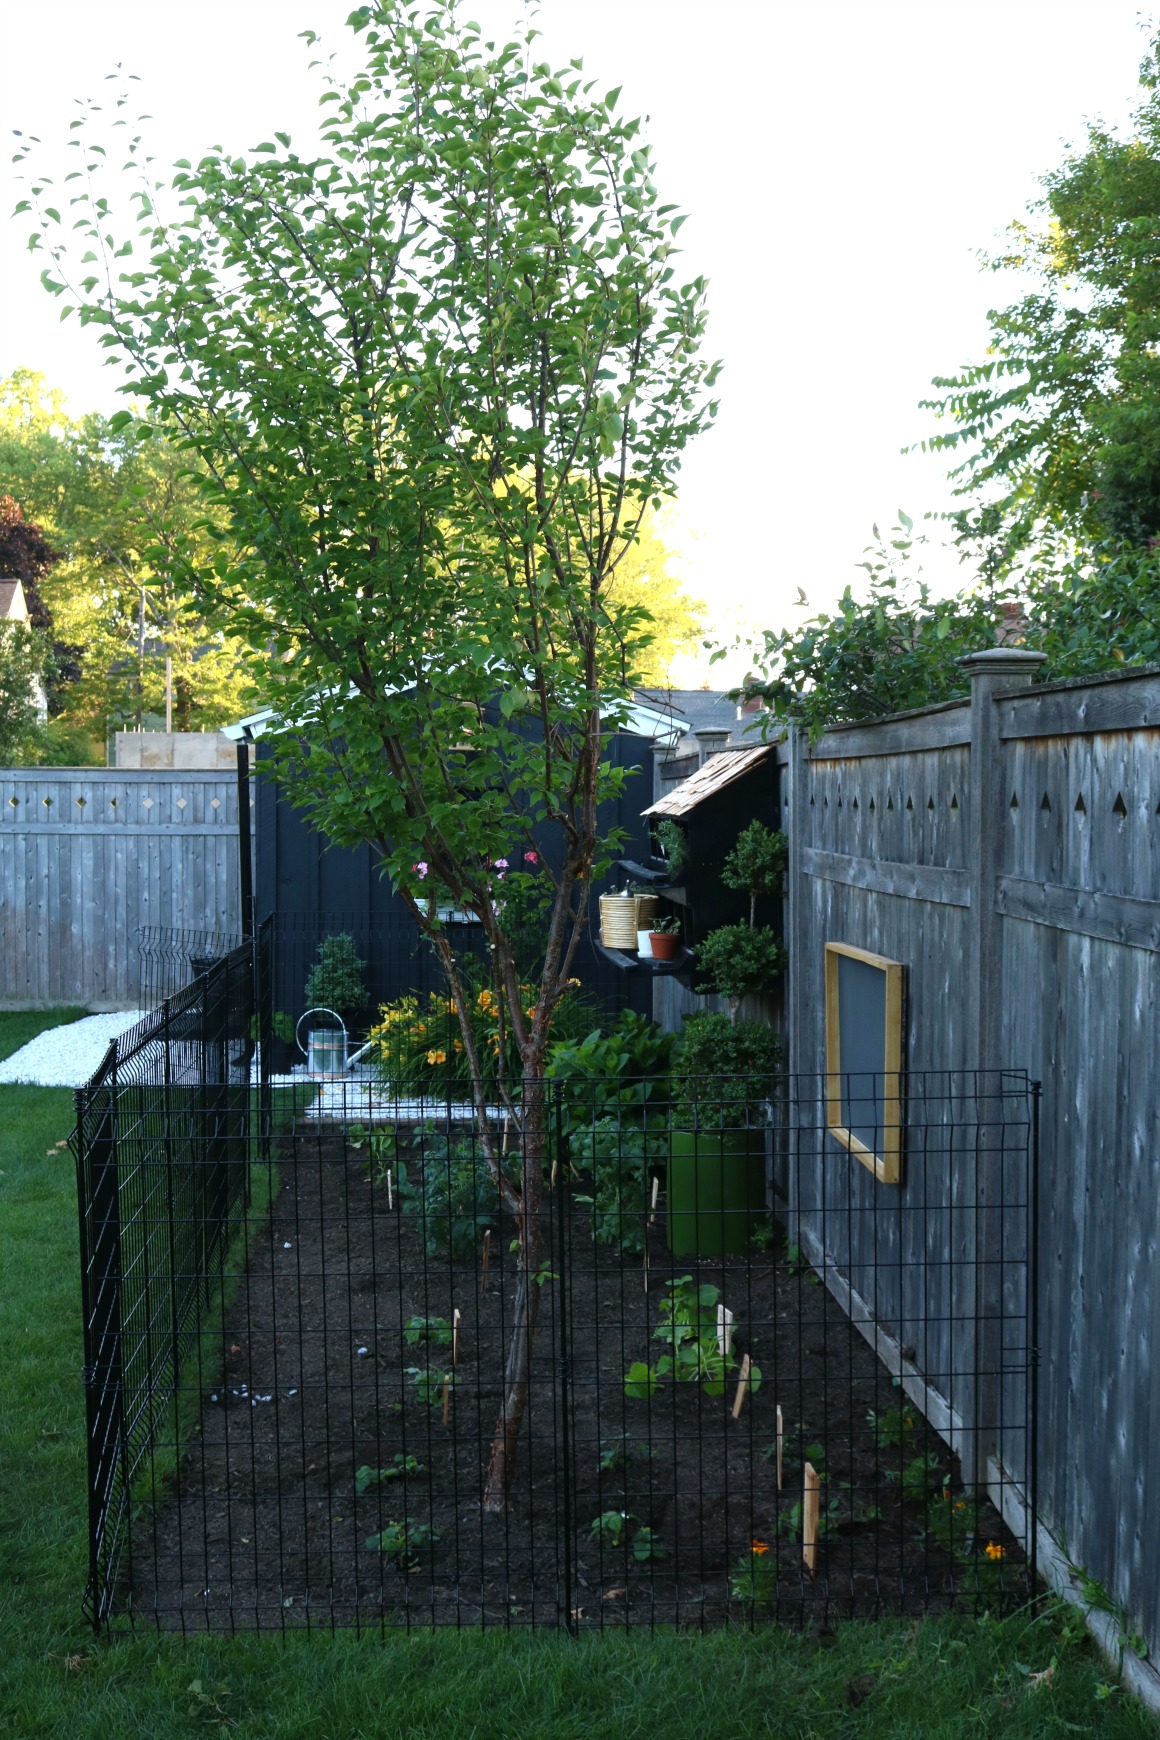
Garden AFTER-
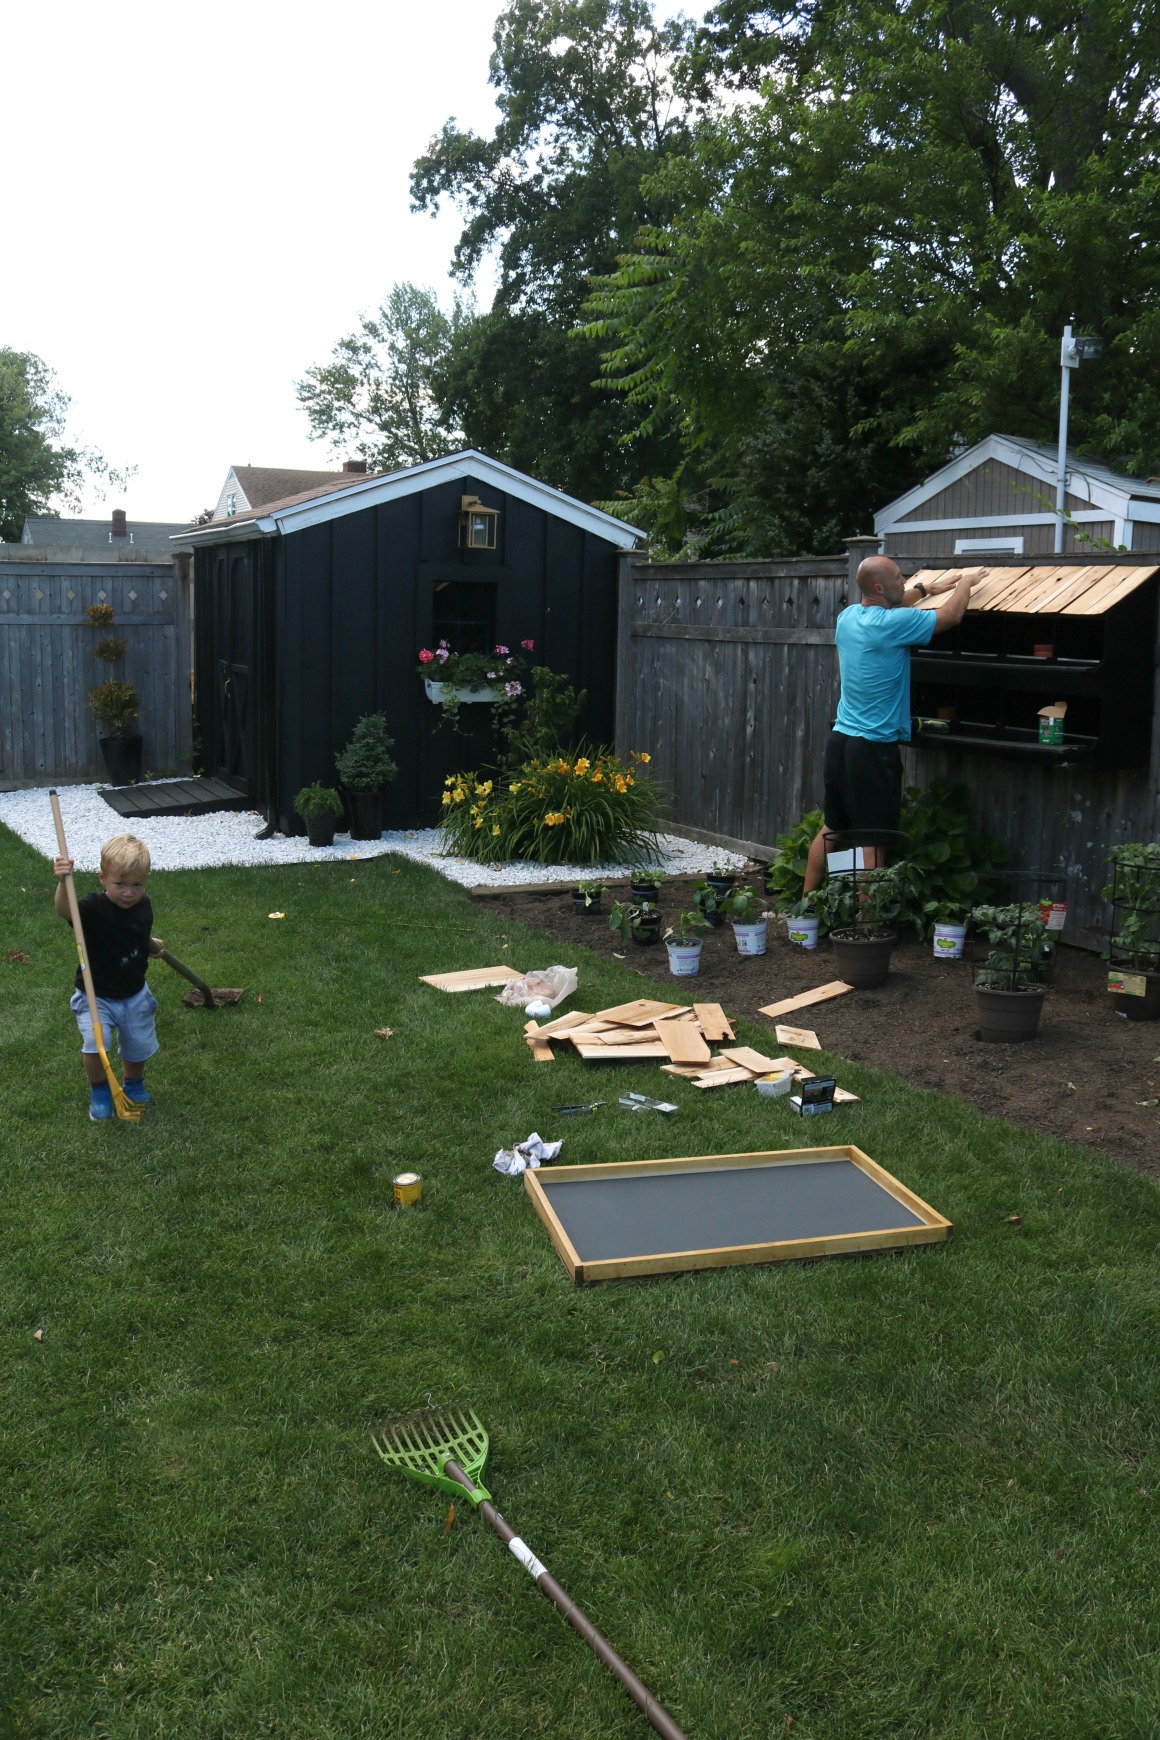
Our family is SO excited about this garden addition to our yard. And I have to say it was a full family project. We had planned to start the garden on Kevins one day off that week. But I ended up having to go in for Jury Duty. So Kevin took the kids to the store and picked up all the plants, garden soil and supplies we needed. He cleaned up all the weeds and took out the plants we had in that space. They also took videos and shared it to my Instagram Stories- it was the cutest thing ever. Ella asked everyone to “leave a comment sharing advice on keeping the animals away.” I am so glad that she asked all of you. I had NEVER heard of a lot of the tips. The main tip that came was- “get a fence or make a fence.”
Tips for Keeping Animals out of the Garden-
- Fence (#1 recommendation and most long-term solution)
- Human hair- yes you heard that right. Many said they get hair clipping’s from the hair dresser and spread it around the edges of the garden. The hair does loose it’s scent after a few weeks so it needs to be replaced. The hair will repel many animals- deer, rodents and rabbits
- Mint or strong smelling plants will repeal some animals
- Crushed egg shells to stop slugs from climbing up the plants
- Coffee grounds- to keep deer away and slugs
- Fake rubber snakes- keeps rabbits away
- Fake Owl- keeps small bunnies away and possibly squirrels
- Marigolds (we planted some on the corners and by the gap under our wood fence)
- Cayenne Pepper around the edges of the garden- some say it repeals squirrels and raccoons
- Fox Pee (you can actually buy this from some garden stores and online, yes it smells like pee)
- Human Pee (some say you let your boys pee around the edges of the garden)
- Portable Halogen Lamp- confuses animals to think it is daylight (set on a timer)
Like I said we went with the fence because we see so much wildlife around our house. But plan on sprinkling cayenne pepper too for good measure! And not the human hair or the pee. Just can’t. Below is the No-Dig fence we used from Lowe’s.
Garden Fence to keep Animals Away-
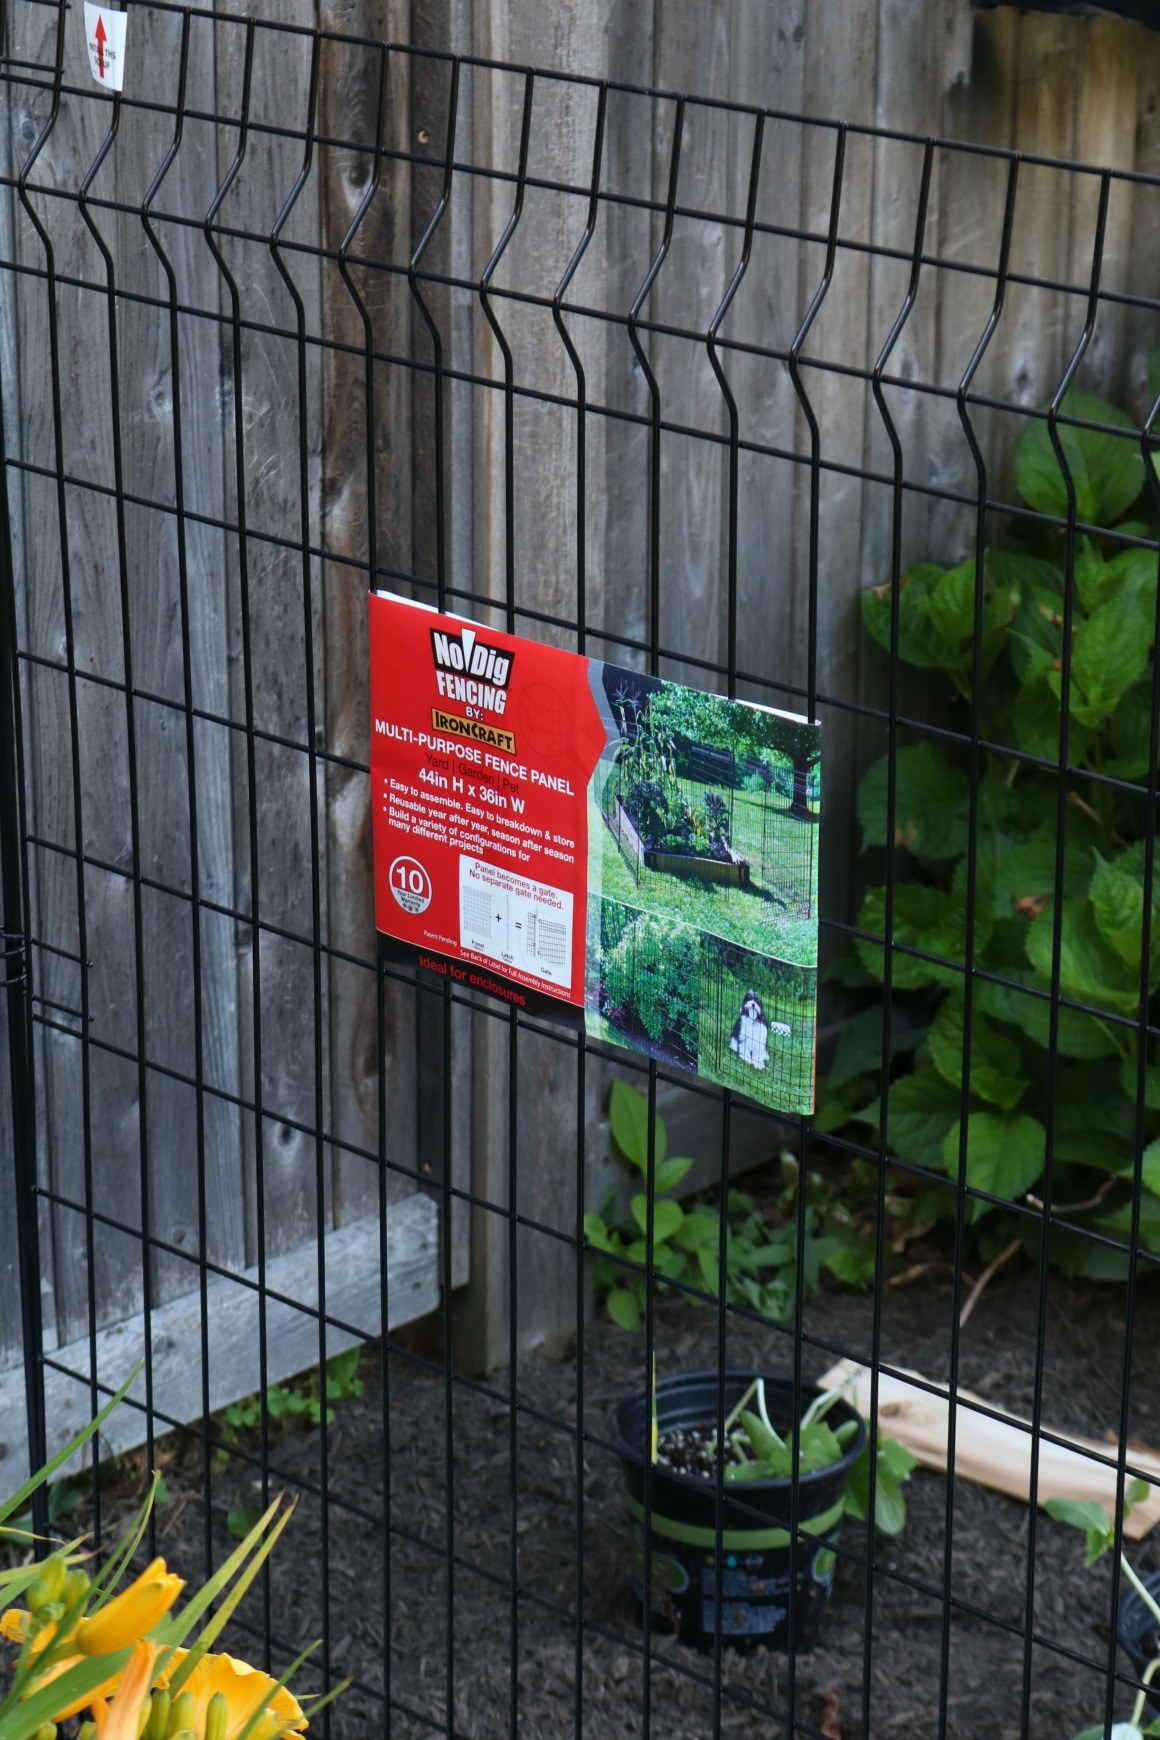
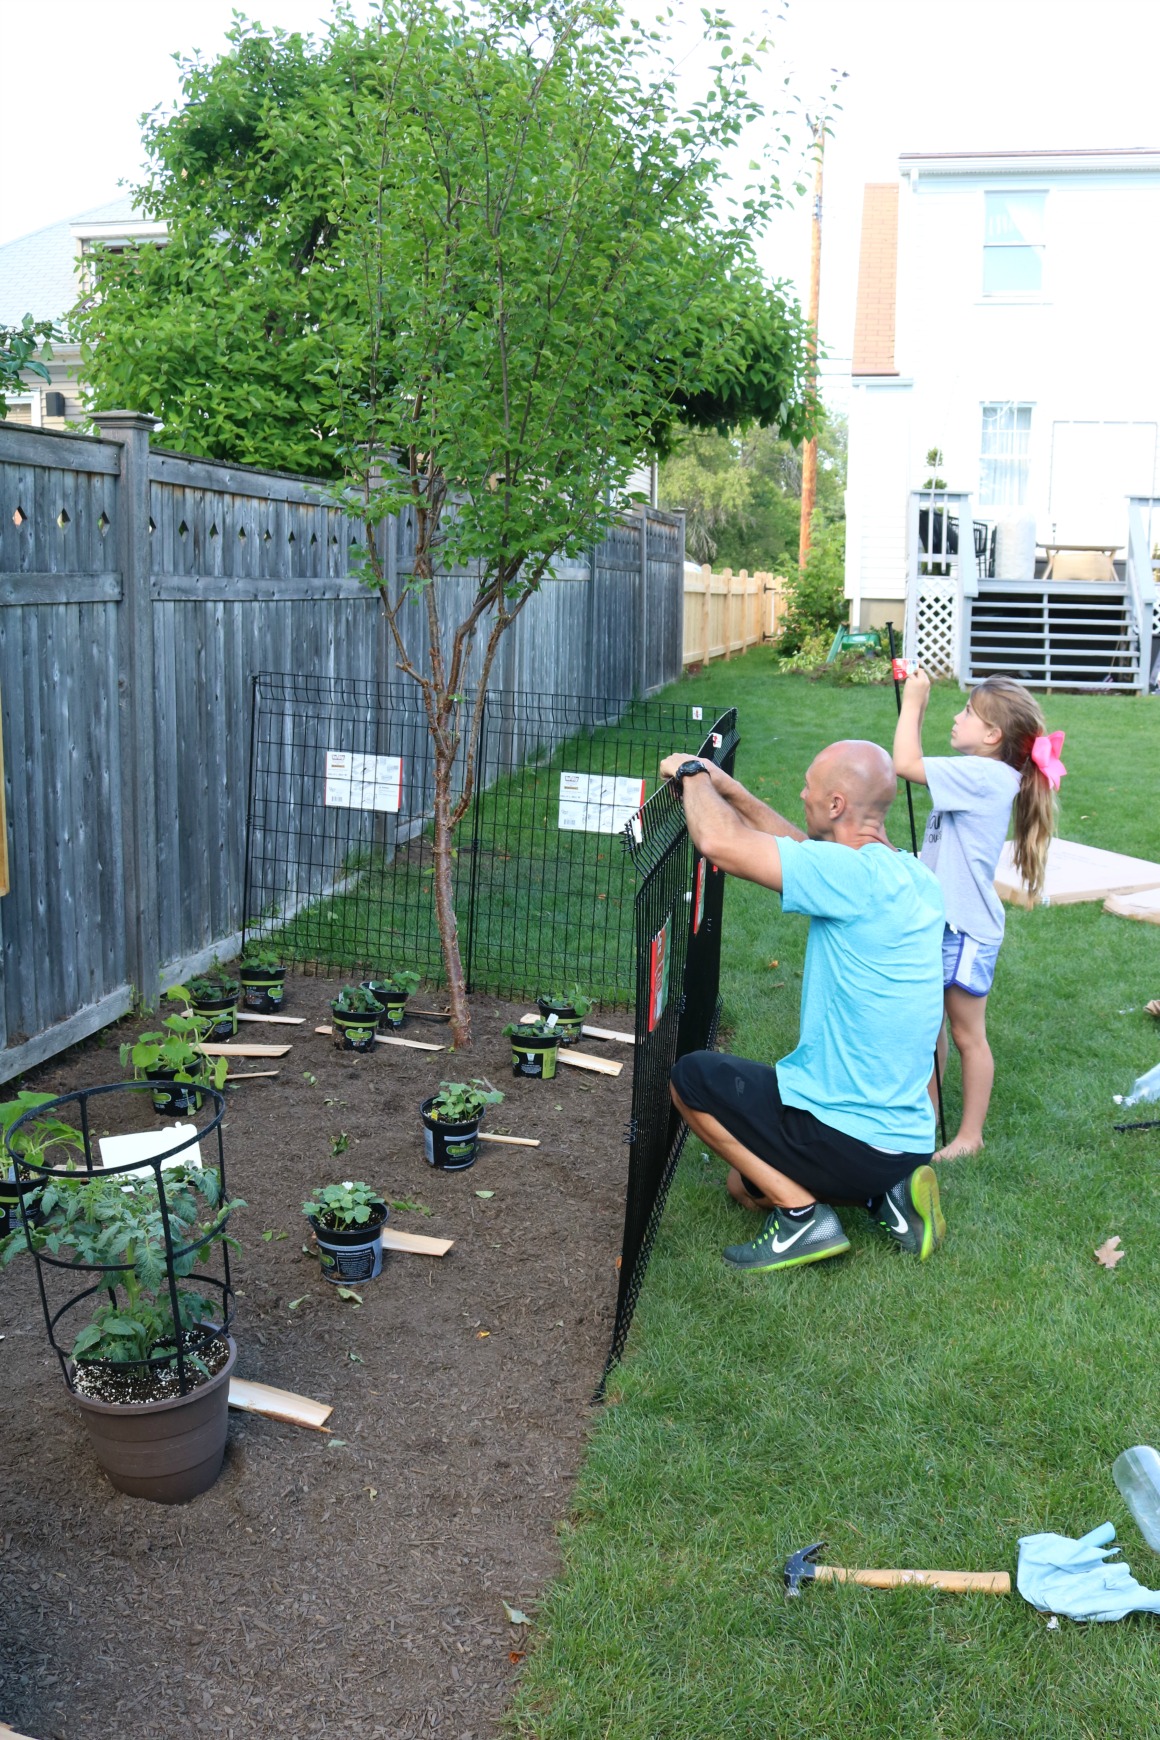
The fence came in panels, making it easy to use in any space. Each panel is 44″h x 36″ w. We used 11 panels for our space. After preparing the ground for the plants we mapped out where the plants would go, based on what plants need more space and what grows best by each other. We waited to plant the plants in the ground before putting up the fence, but you can add the fence after too.
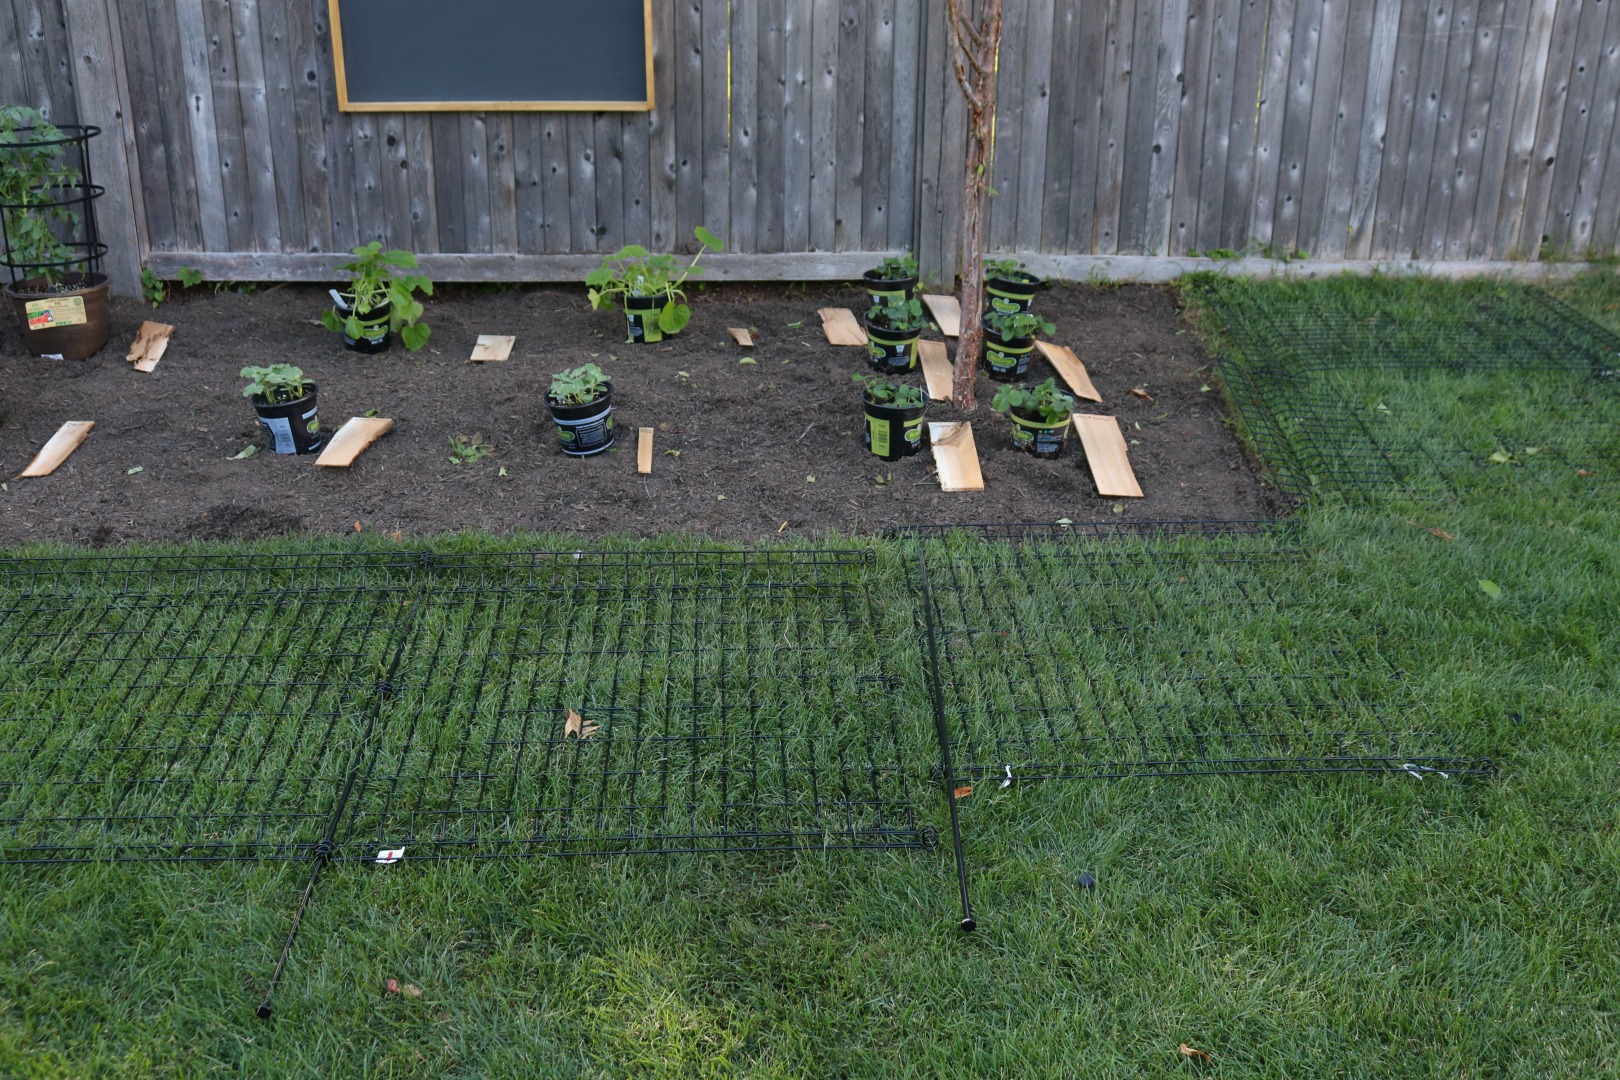
We laid all the fence pieces on the ground then put each panel up one by one. We did watch THIS one minute video showing how to easily install the fence. Below are the links to what we used to create our fence-
Fence Panel
Posts
Gate Latch
You literally stand the fence up. Interlock the panels and drive the posts thru the dirt with a hammer.
Kevin said the hardest part was taking off the sticker. Ha! And actually he said that AFTER we took down the fence and put it up again. We realized after that the fence should be on the grass so the gate can open. Before the gate couldn’t open because of the step down to the dirt. It really took 10 minutes to re-do it.
And now the gate opens perfectly! This fence can also be used to block off any space. I saw someone use it to put around a fire-pit to keep little ones away. And a reader said she used it all around her yard as fence for her dogs! Another reader said she has the fence too and set it up to keep her chicken’s in a section of her yard.
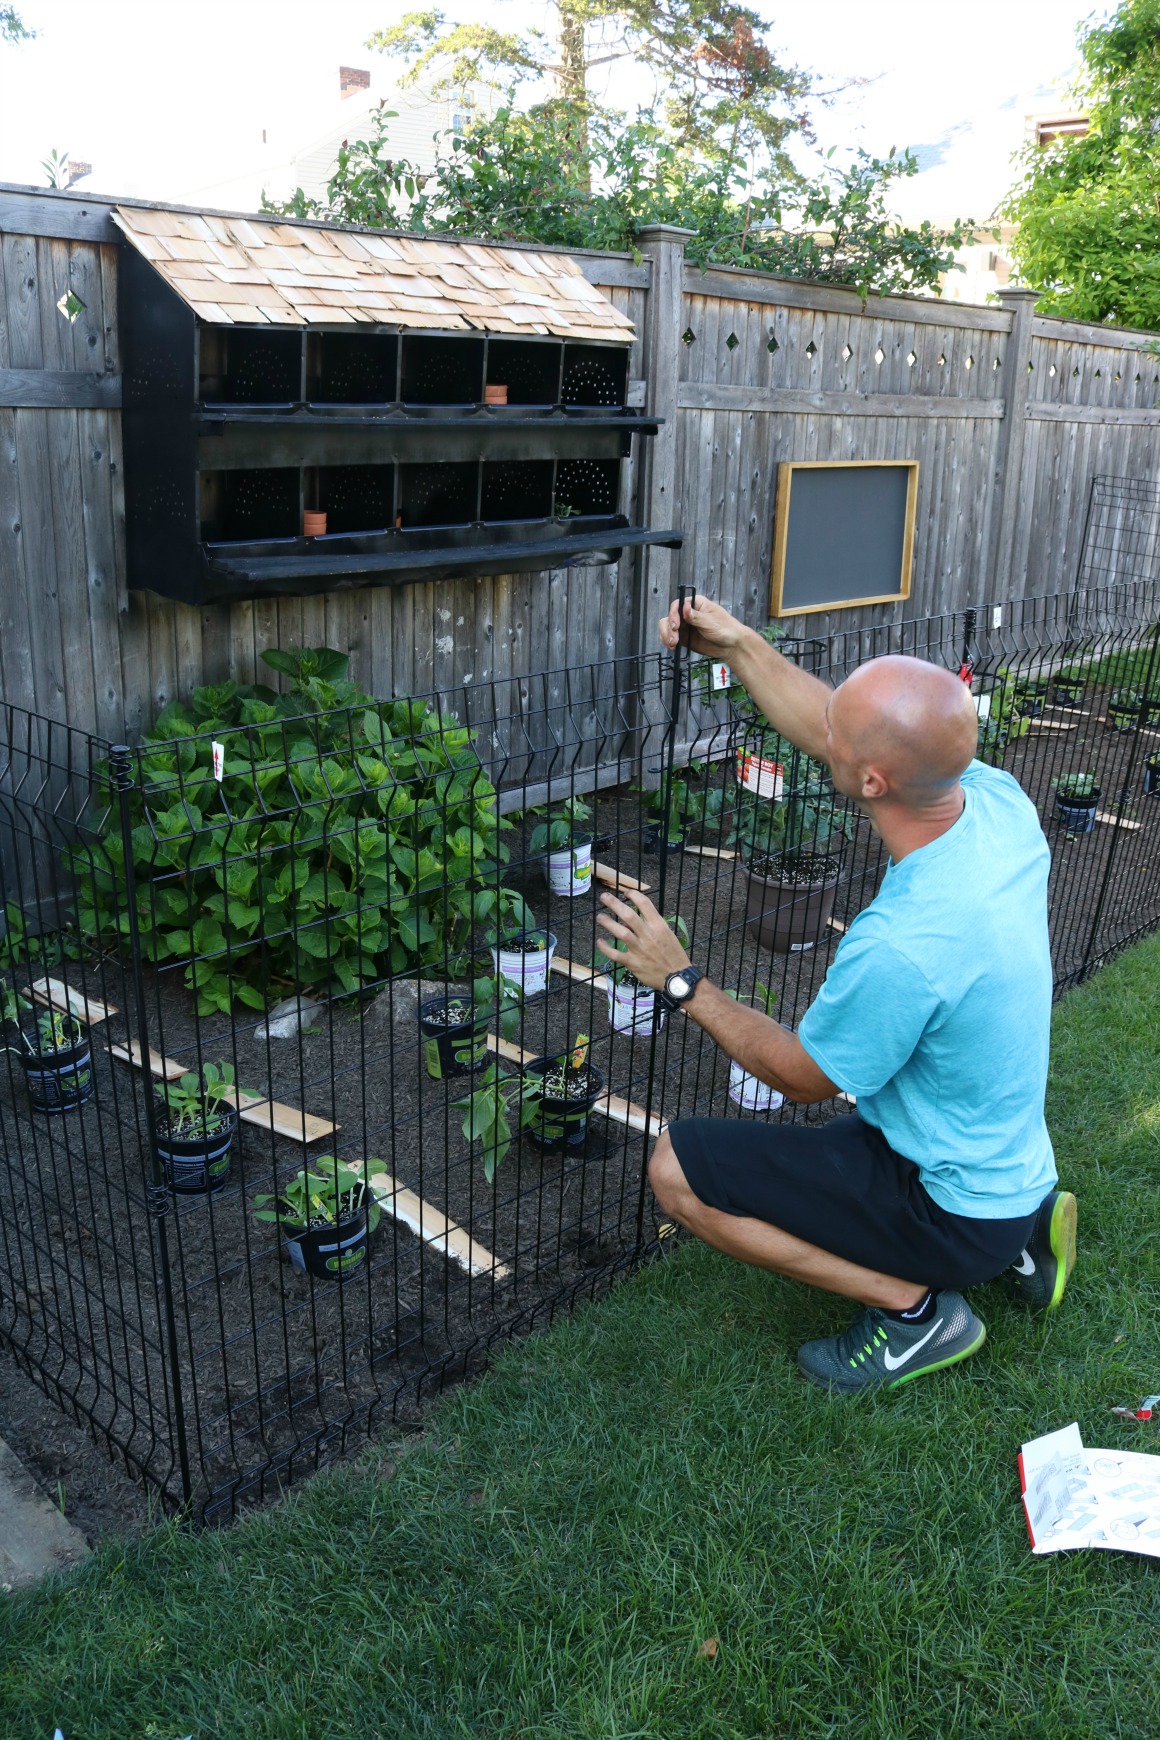
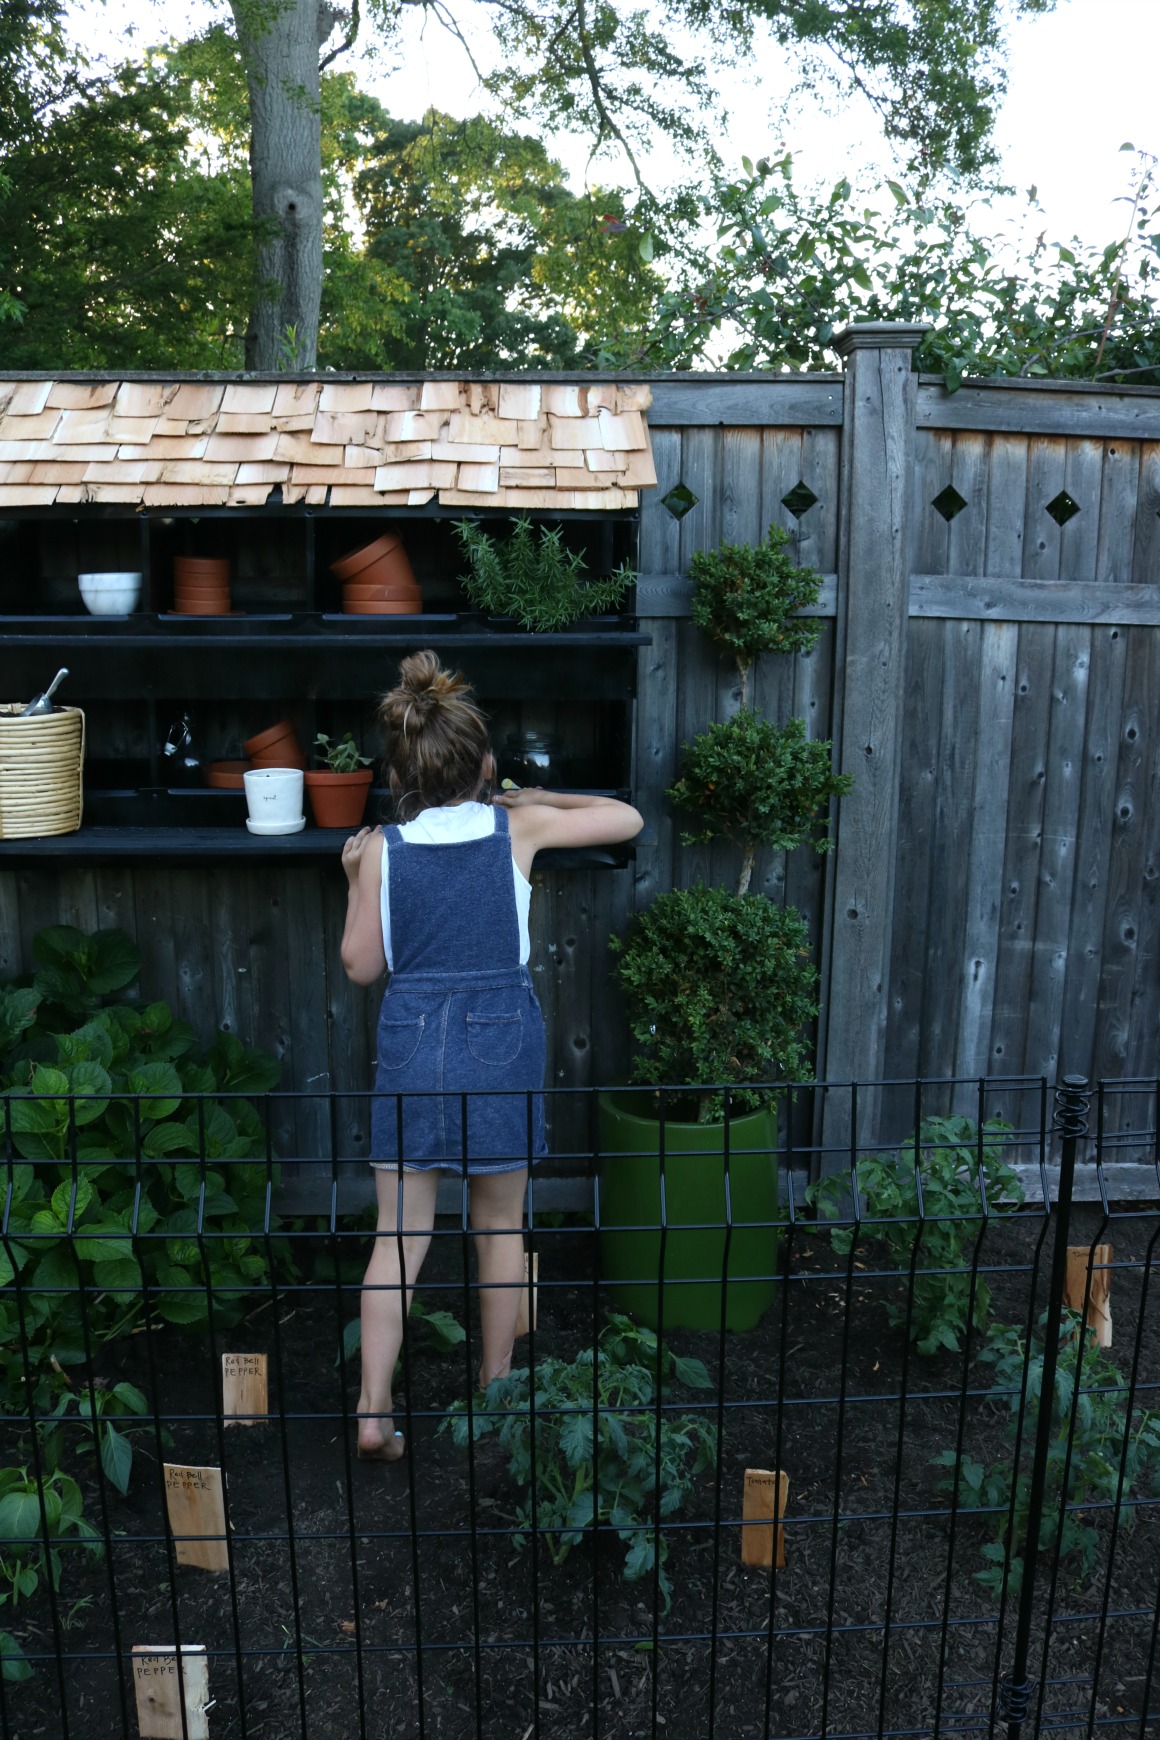
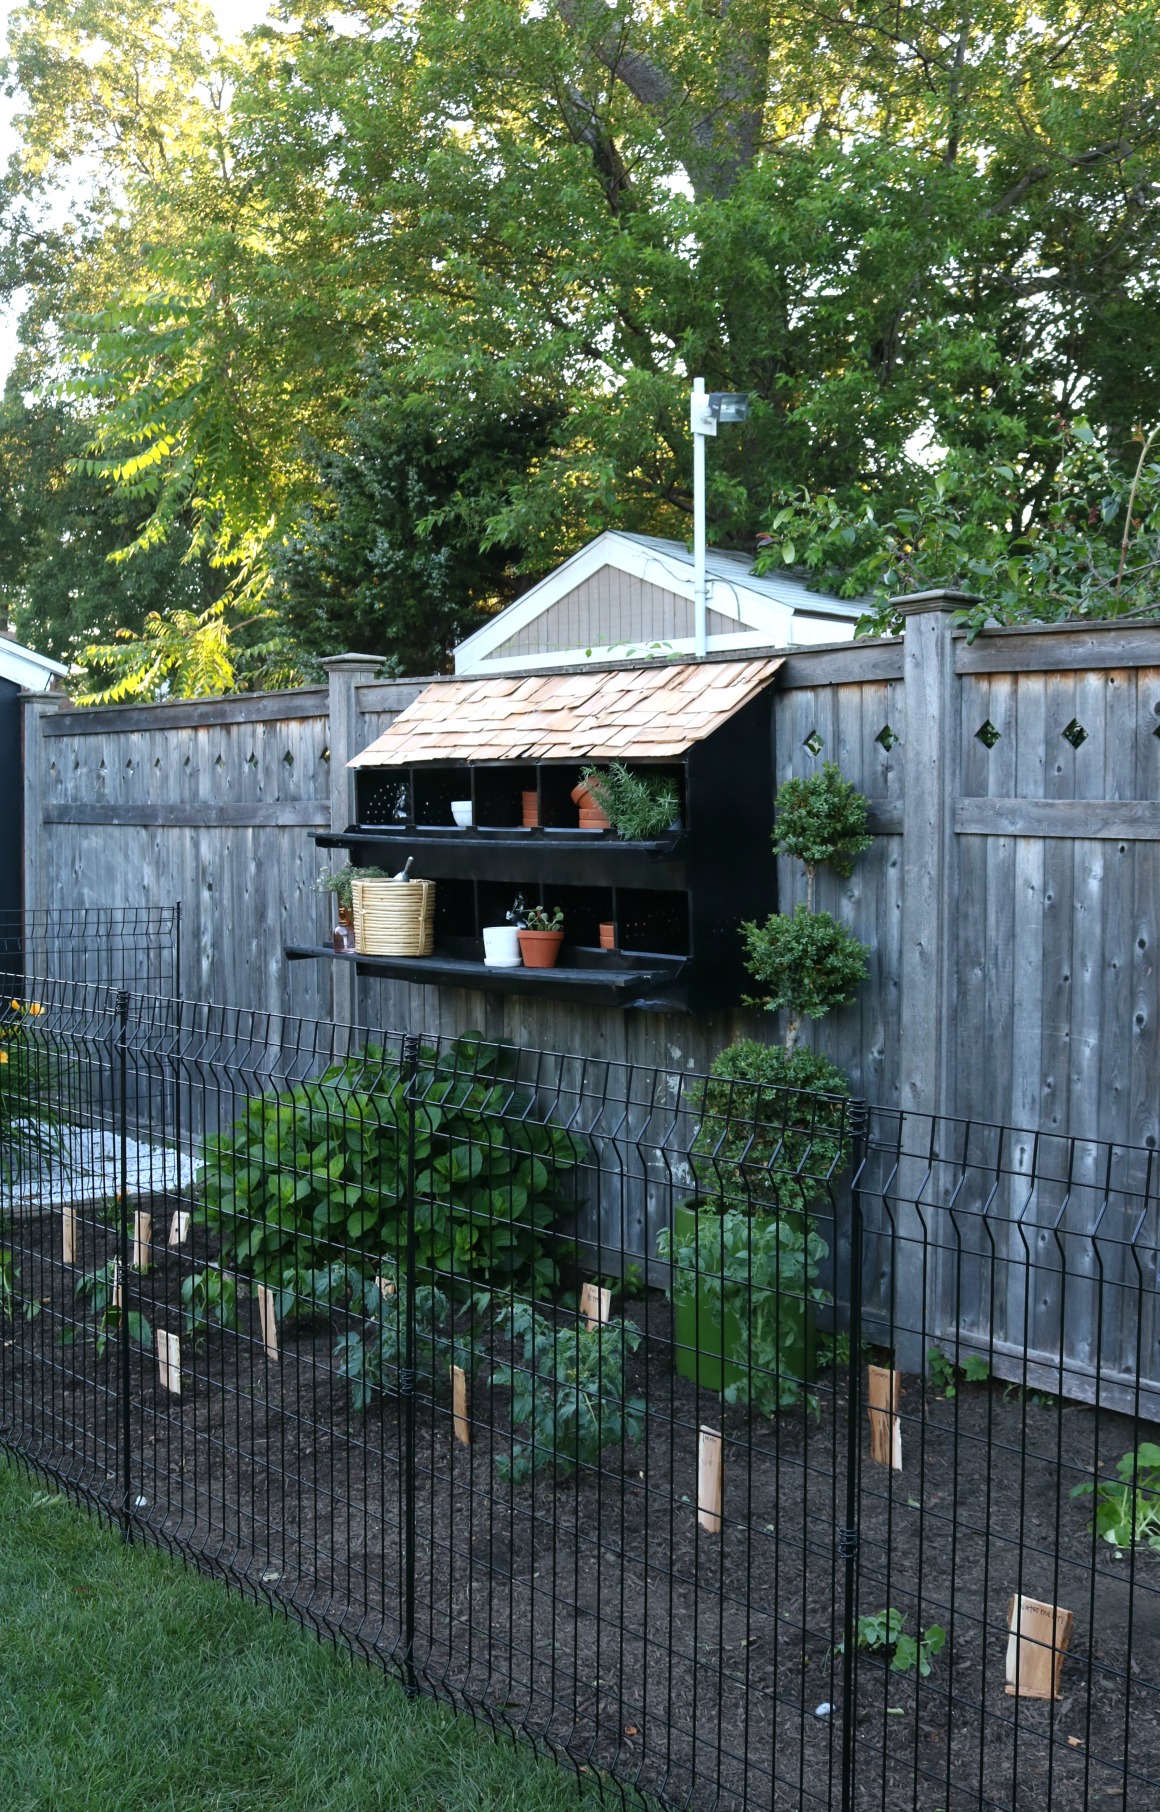
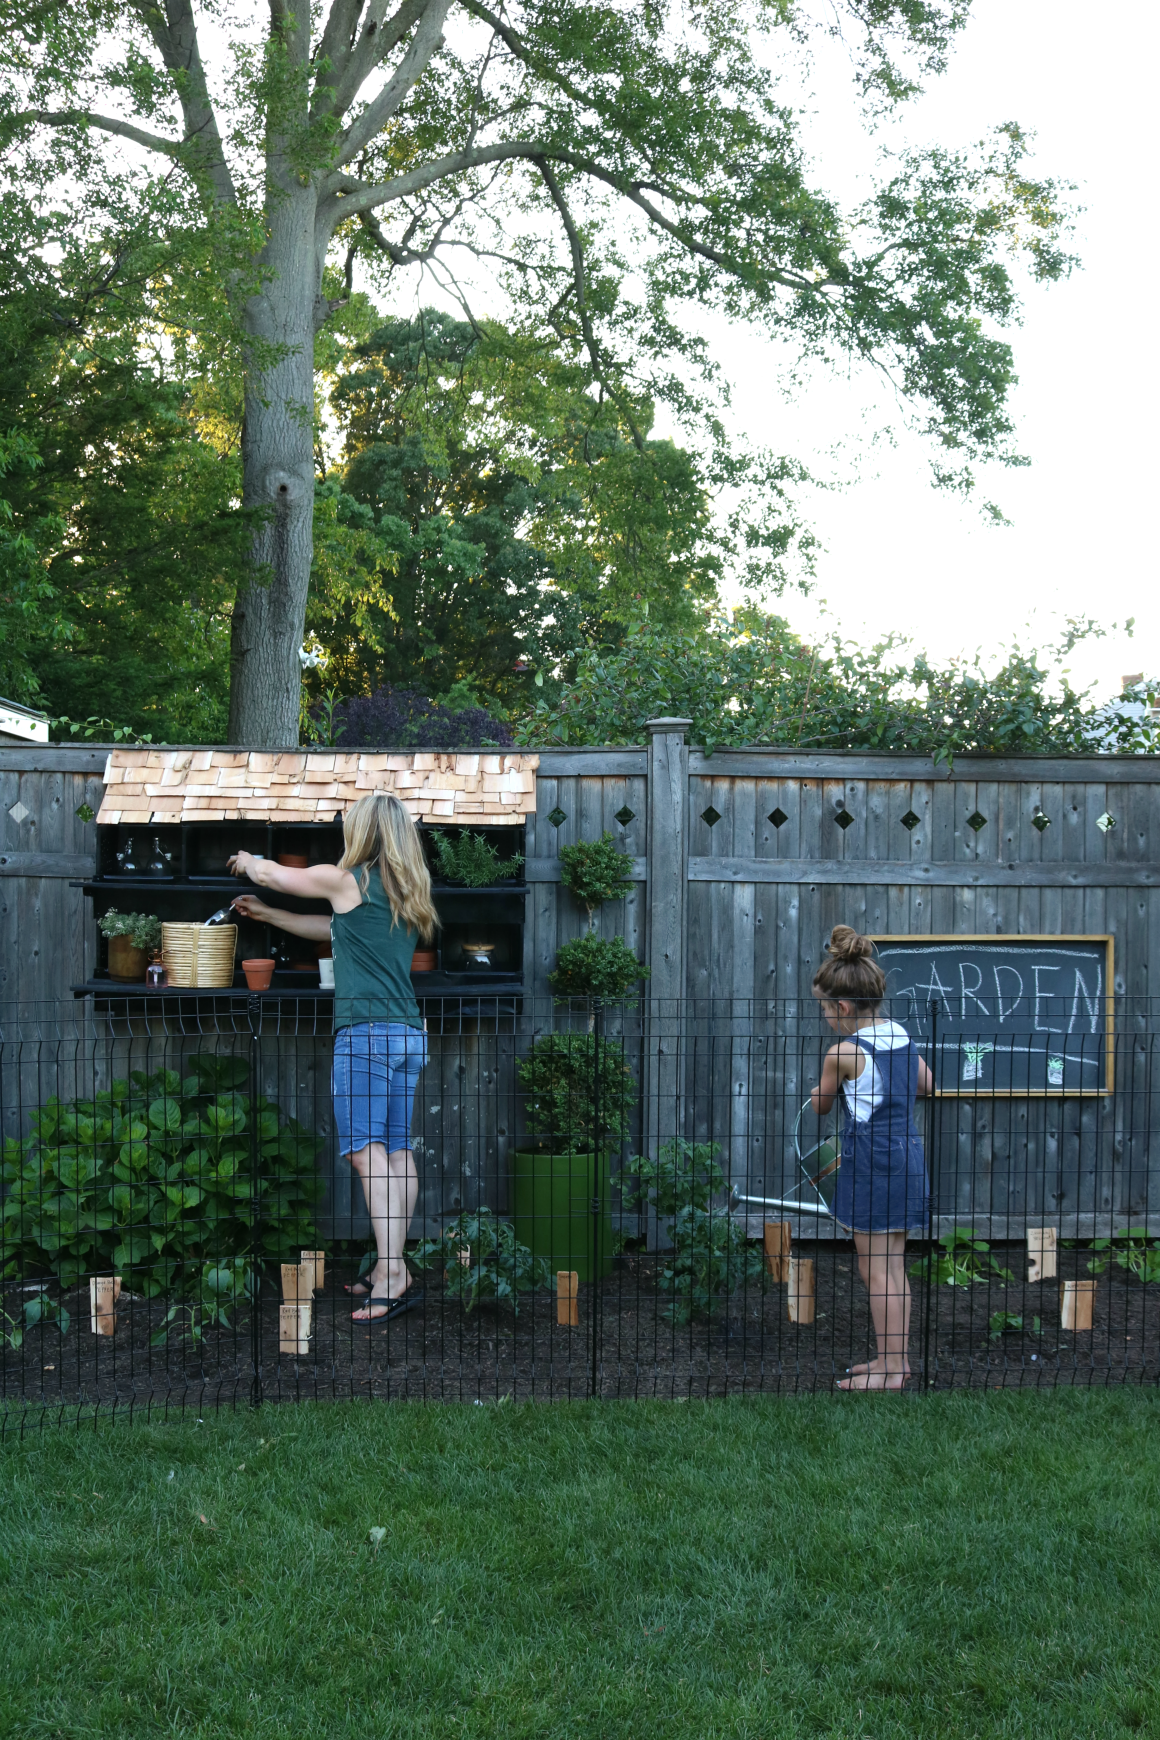
Garden Nesting Box-

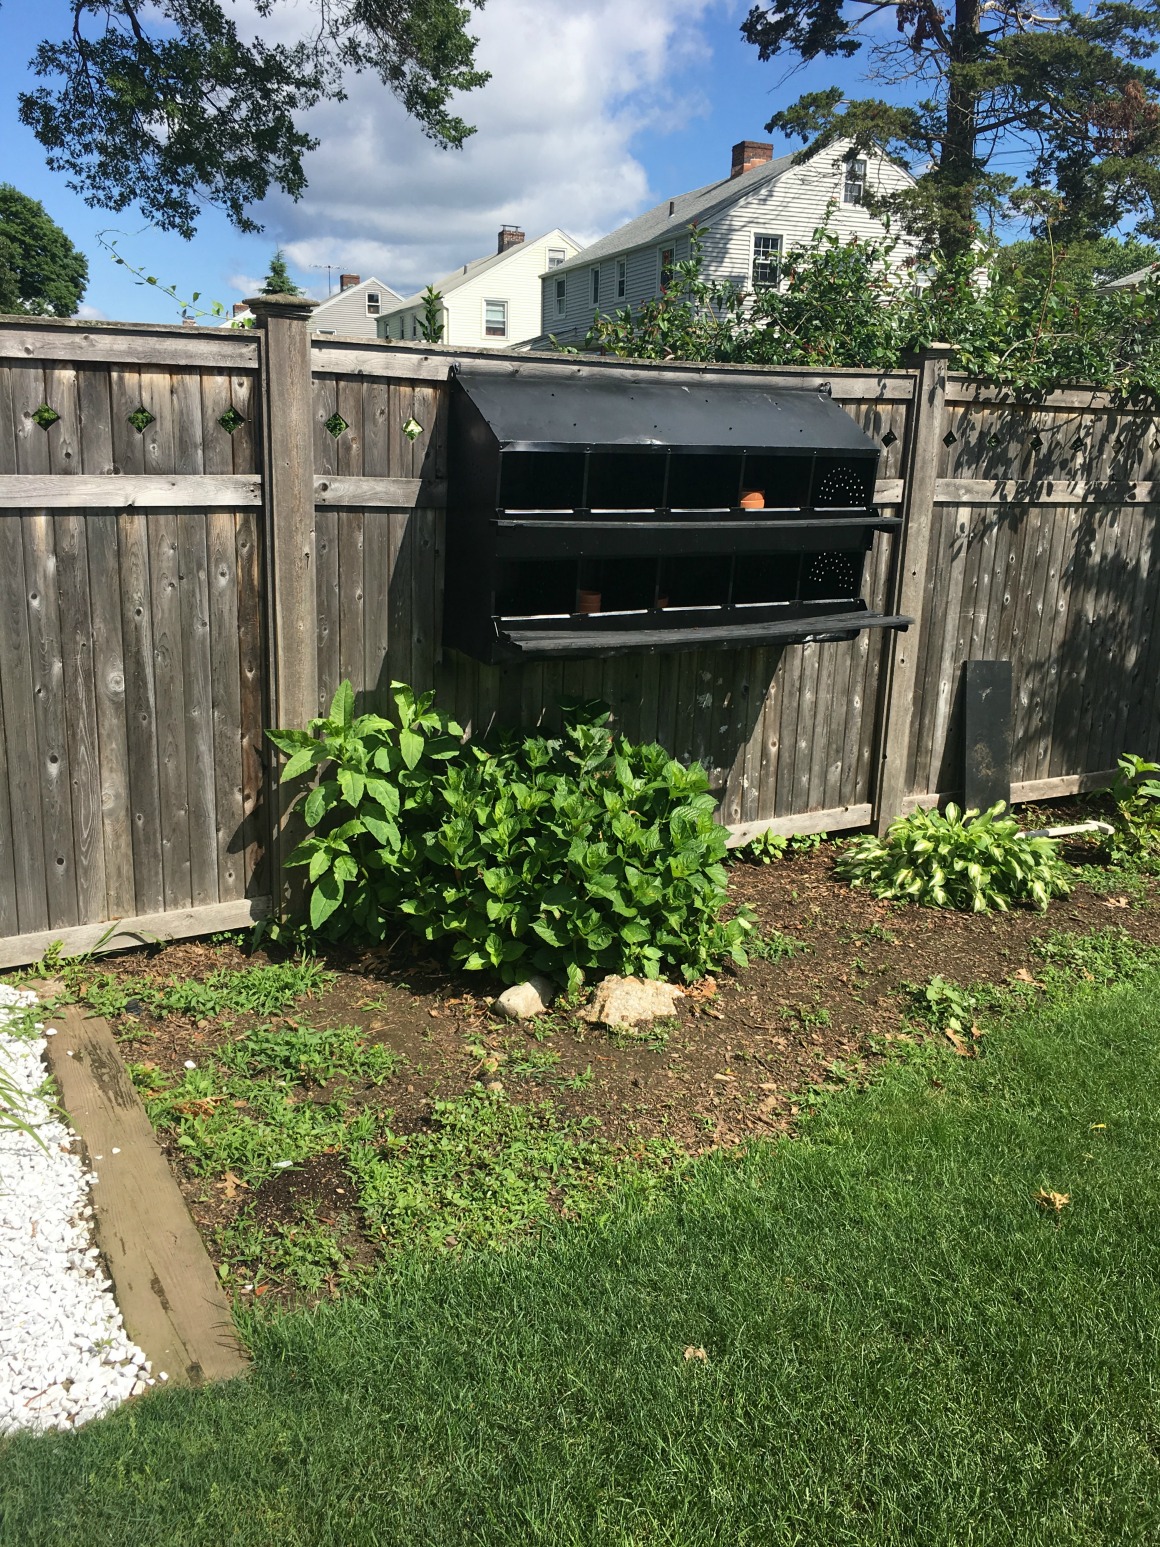
Another thing we added to our garden was a Nesting Box! Well I shouldn’t say added. Because we have had it. We bought it two years ago at an antique shop. A Nesting Box is where chickens go to lay eggs (I kept calling it a chicken coop, duh me). My original plan for it was to use it on our deck as a serving station. But it was way too big on our deck. Then I felt sick about it. I think I paid close to $175 for it. After looking into it, that price is pretty average and actually a decent deal. I almost sold it then decided to hang it on the fence incase we ever got a garden. And I am SO glad we kept it! After the changes we made I love it more than ever. Let’s look at the before again.
Nesting Box BEFORE-
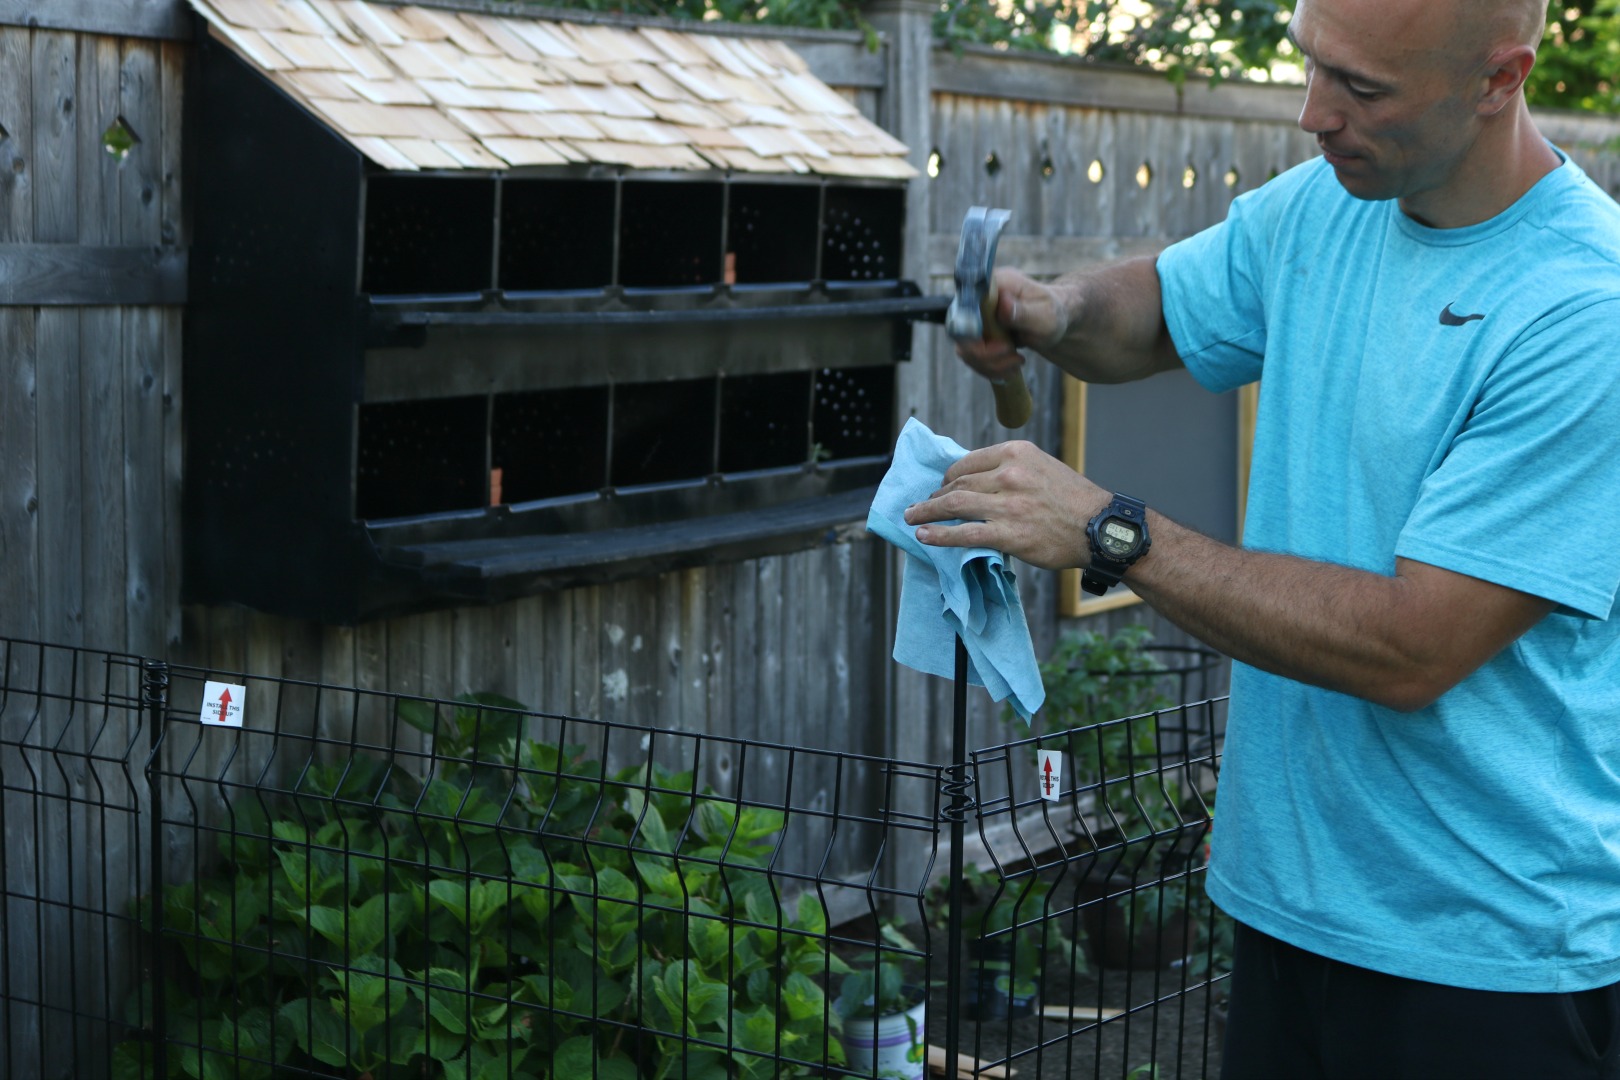
While we were painting the shed black we spray painted the Nesting Box black. It adds a nice contrast off the fence and tie’s in the shed perfectly.
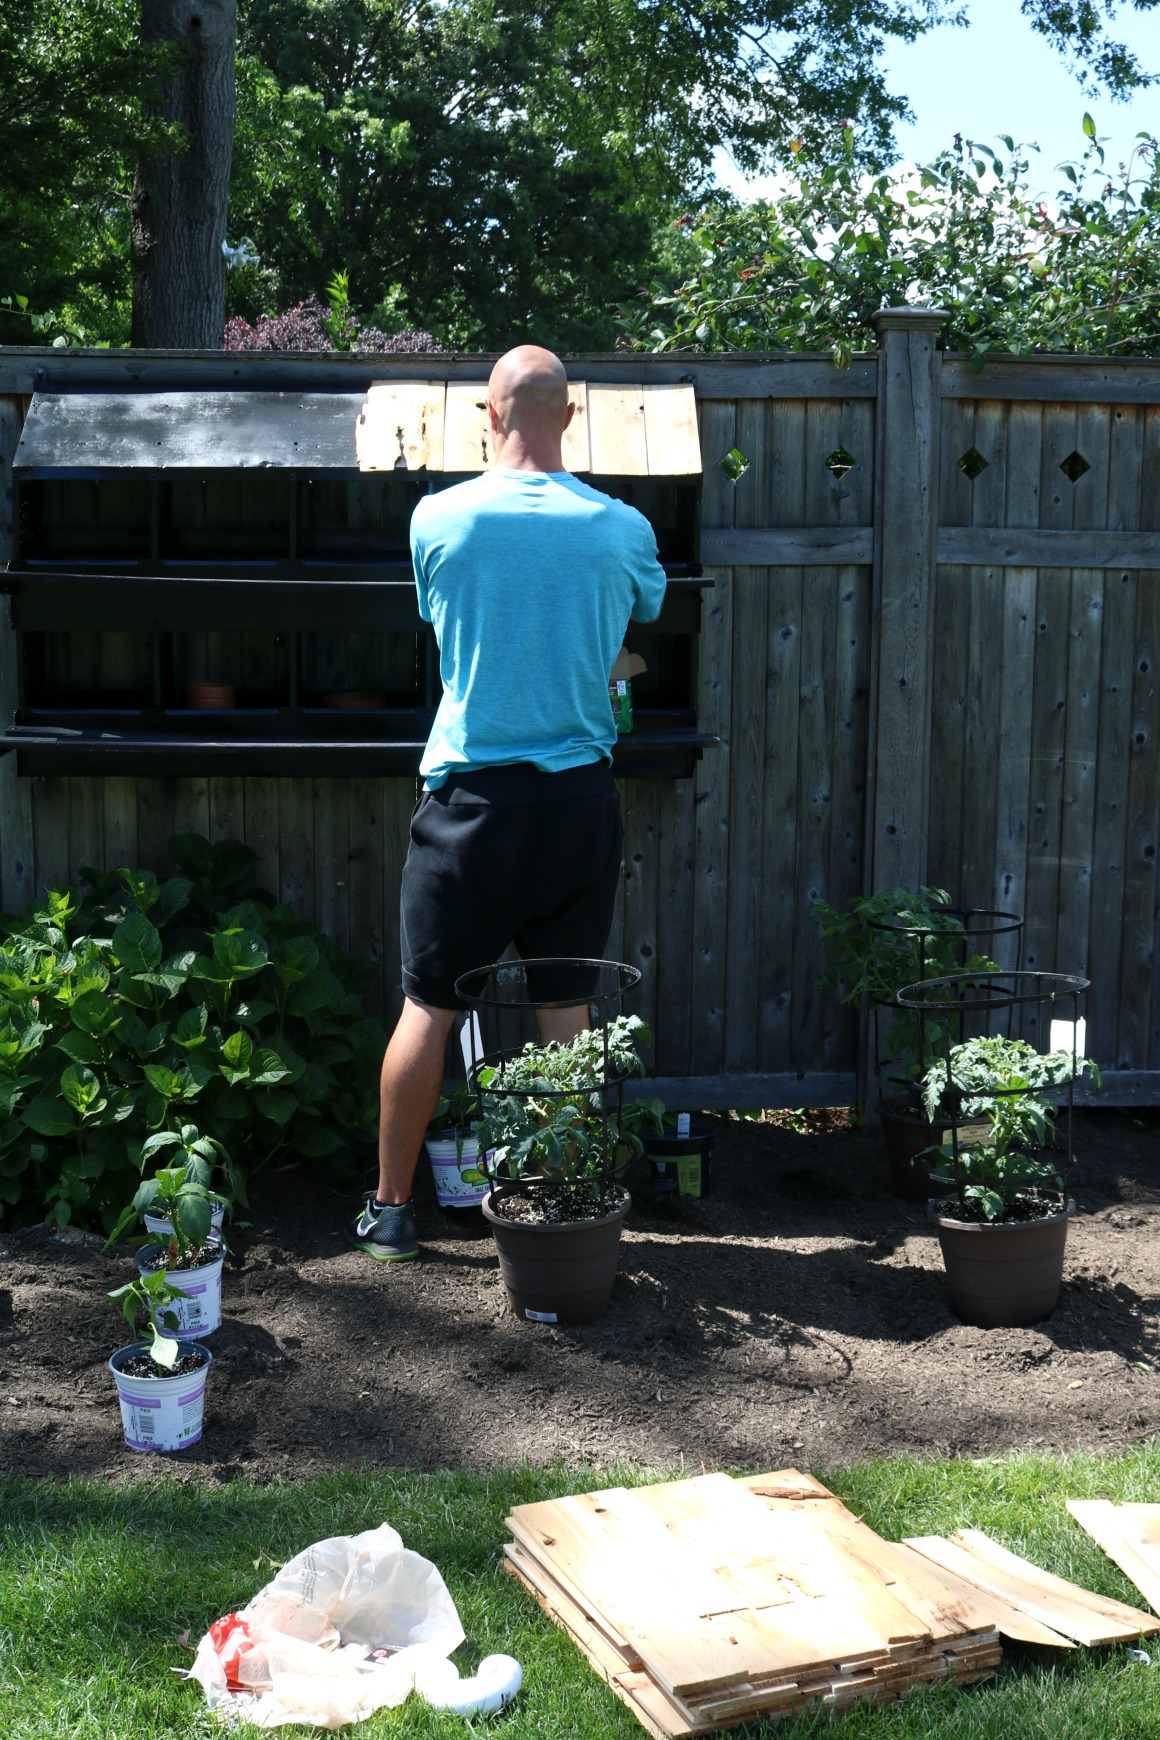
We bought a bunch of Cedar Shake Shingles for $12 and screwed them into the top in a roof-like pattern. And I use that term “we loosely” I was the project manger and Kevin did all of the work. And he did such a great job!
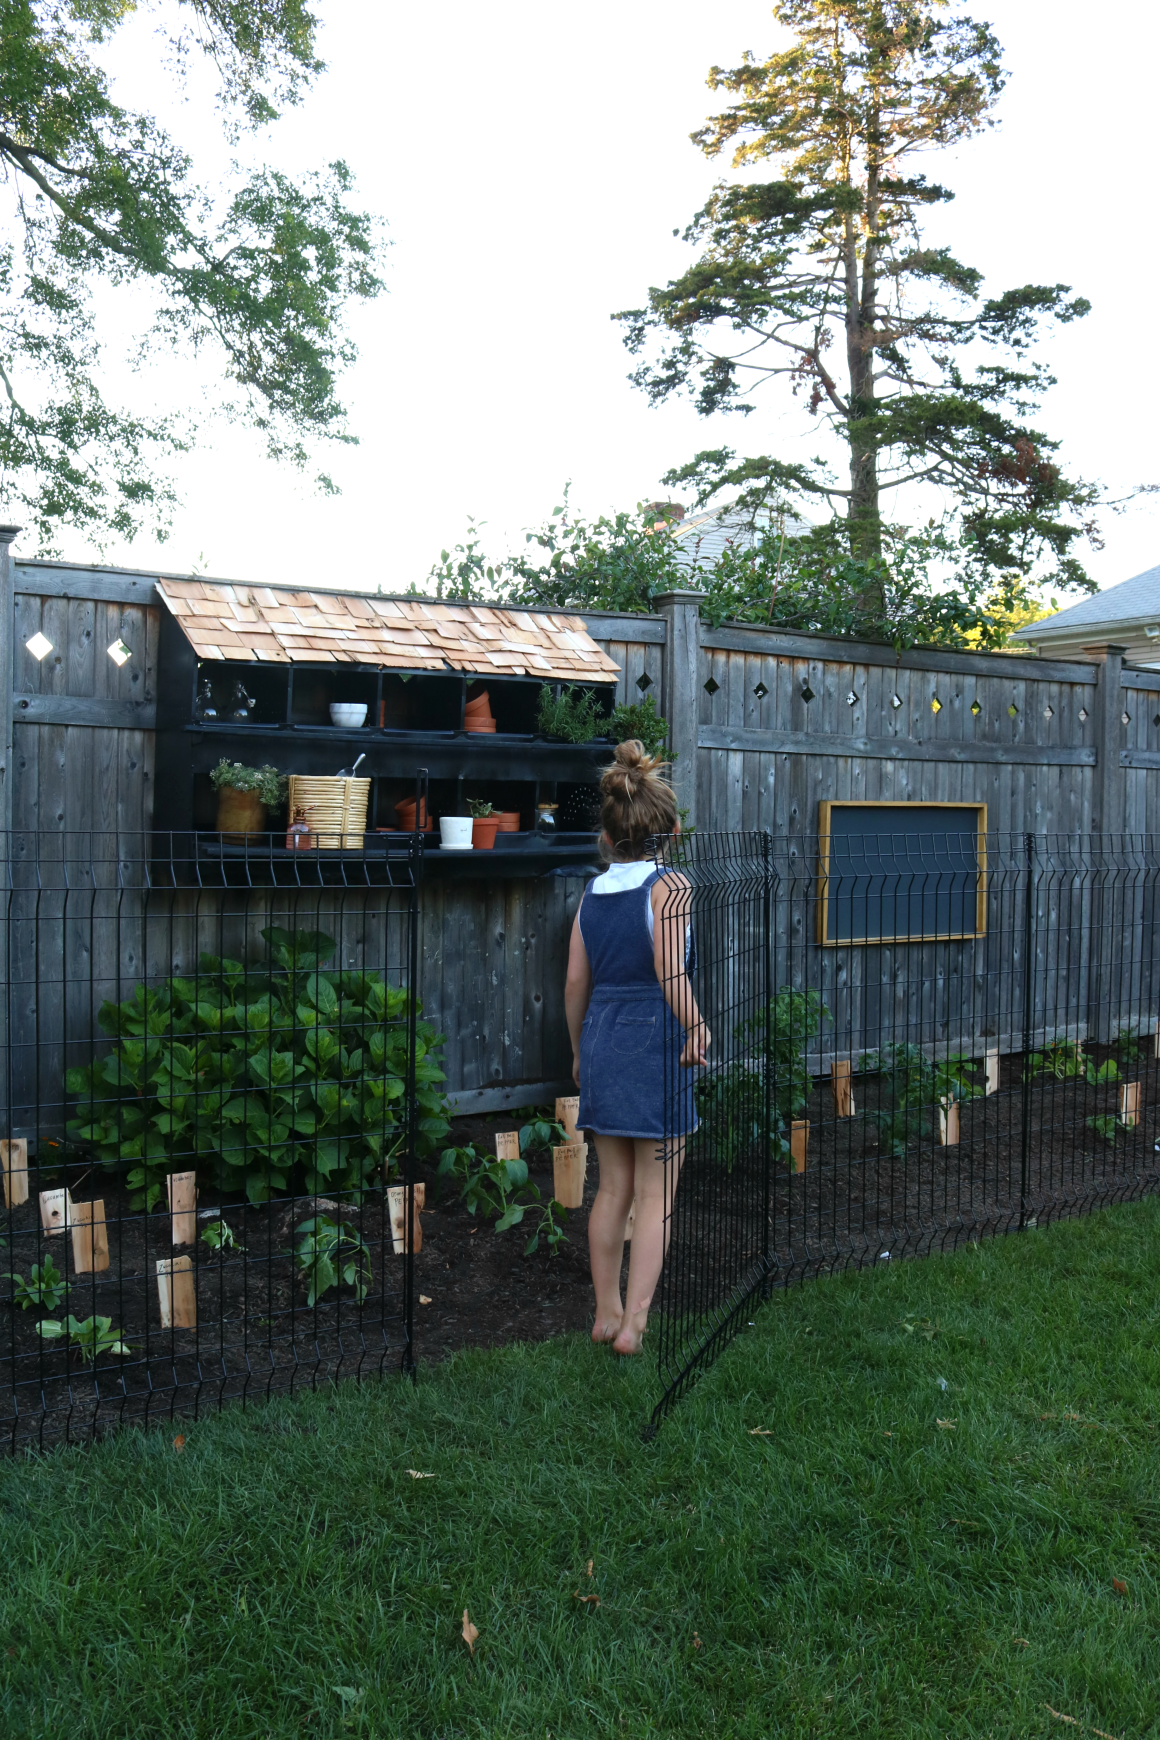
Nesting Box After-
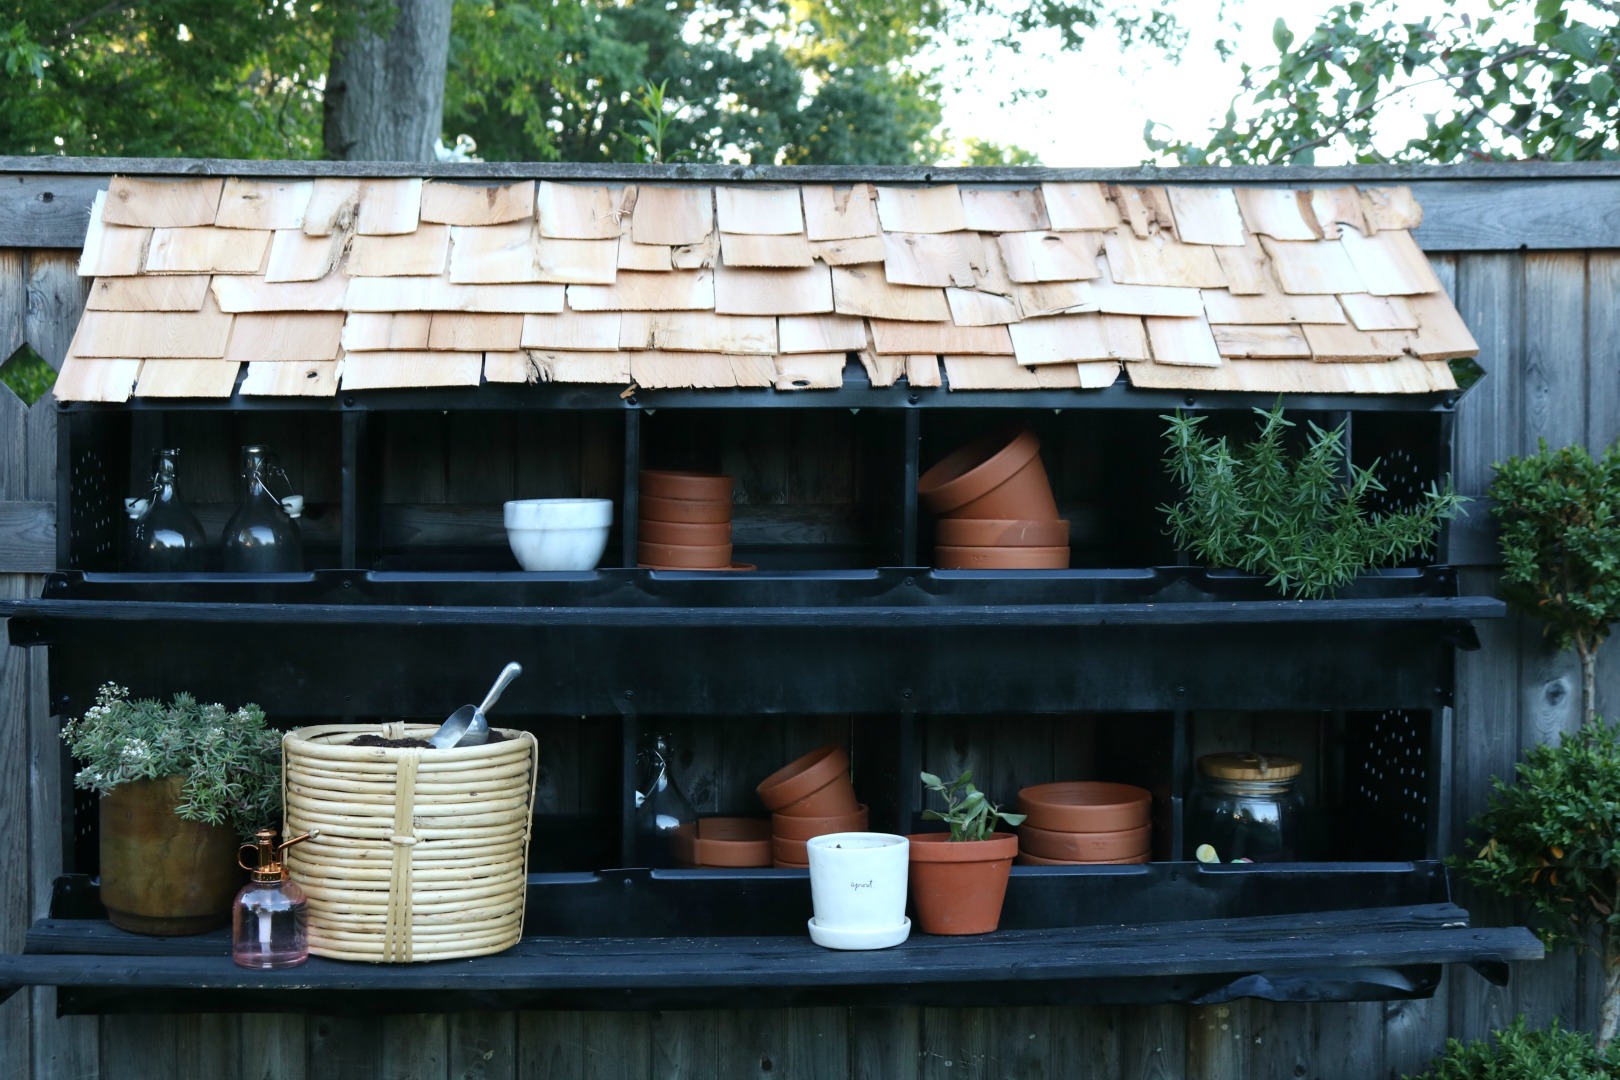
I am in love with it. Really it completes the garden and creates a focal point- like a piece of art. And I like how the black pulls in the black fence.

We added a bunch of our pots, a planter full of extra potting soil and a glass jar with a lid for the chalkboard we added to the fence.
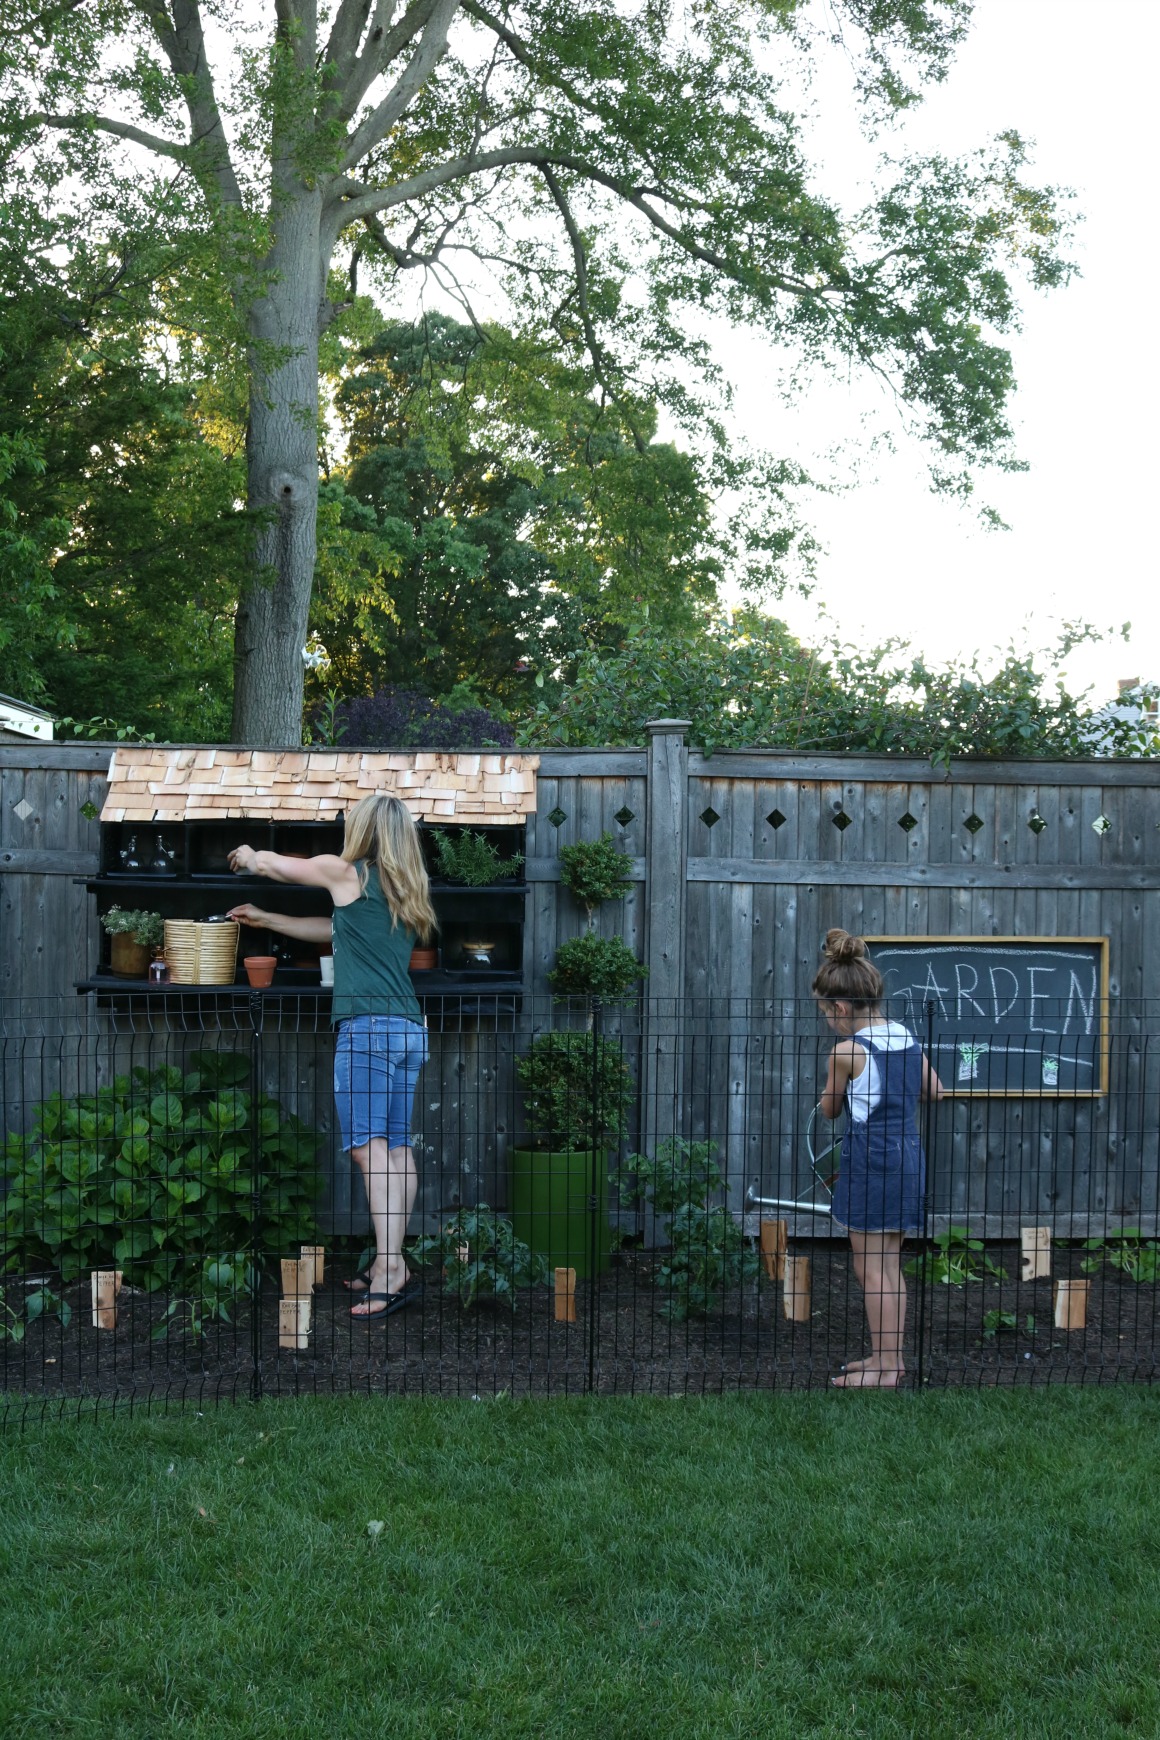
PS- I will do a separate blog post on how we made that chalkboard (*update- find chalkboard tutorial HERE).
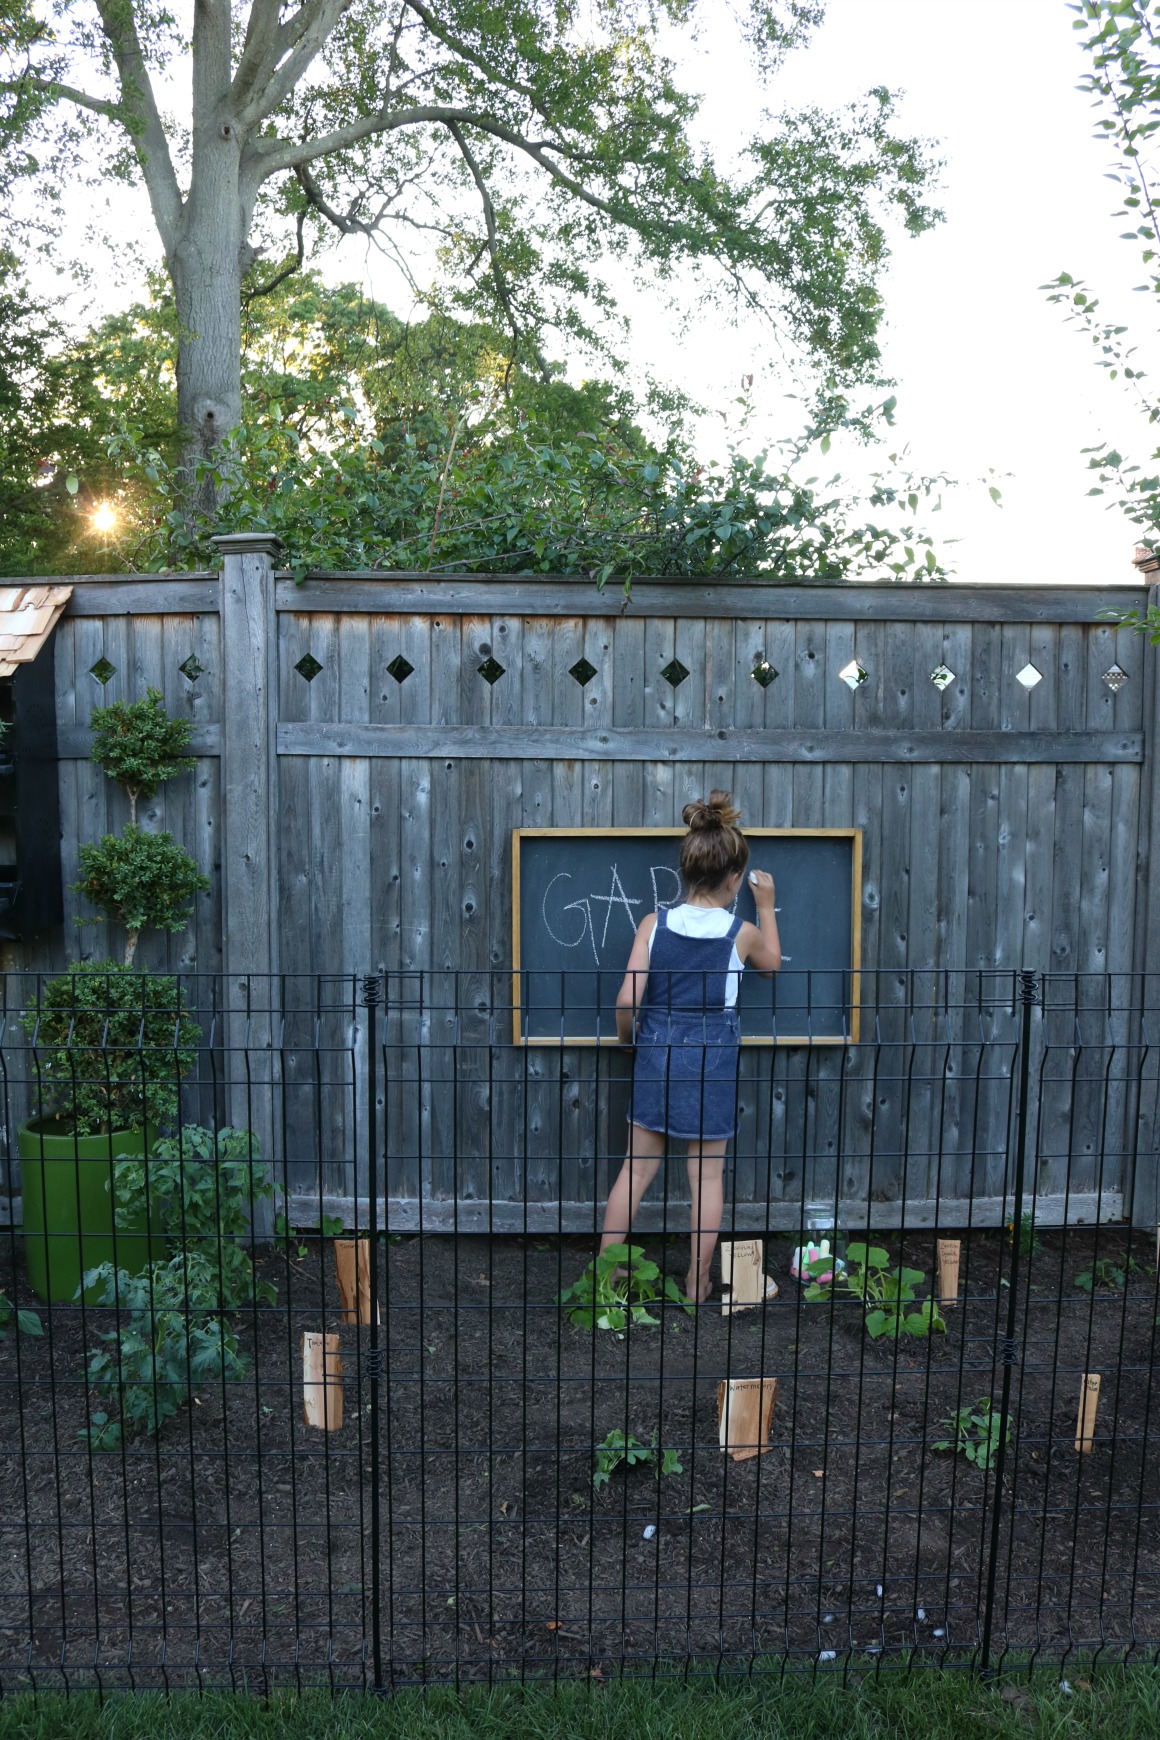
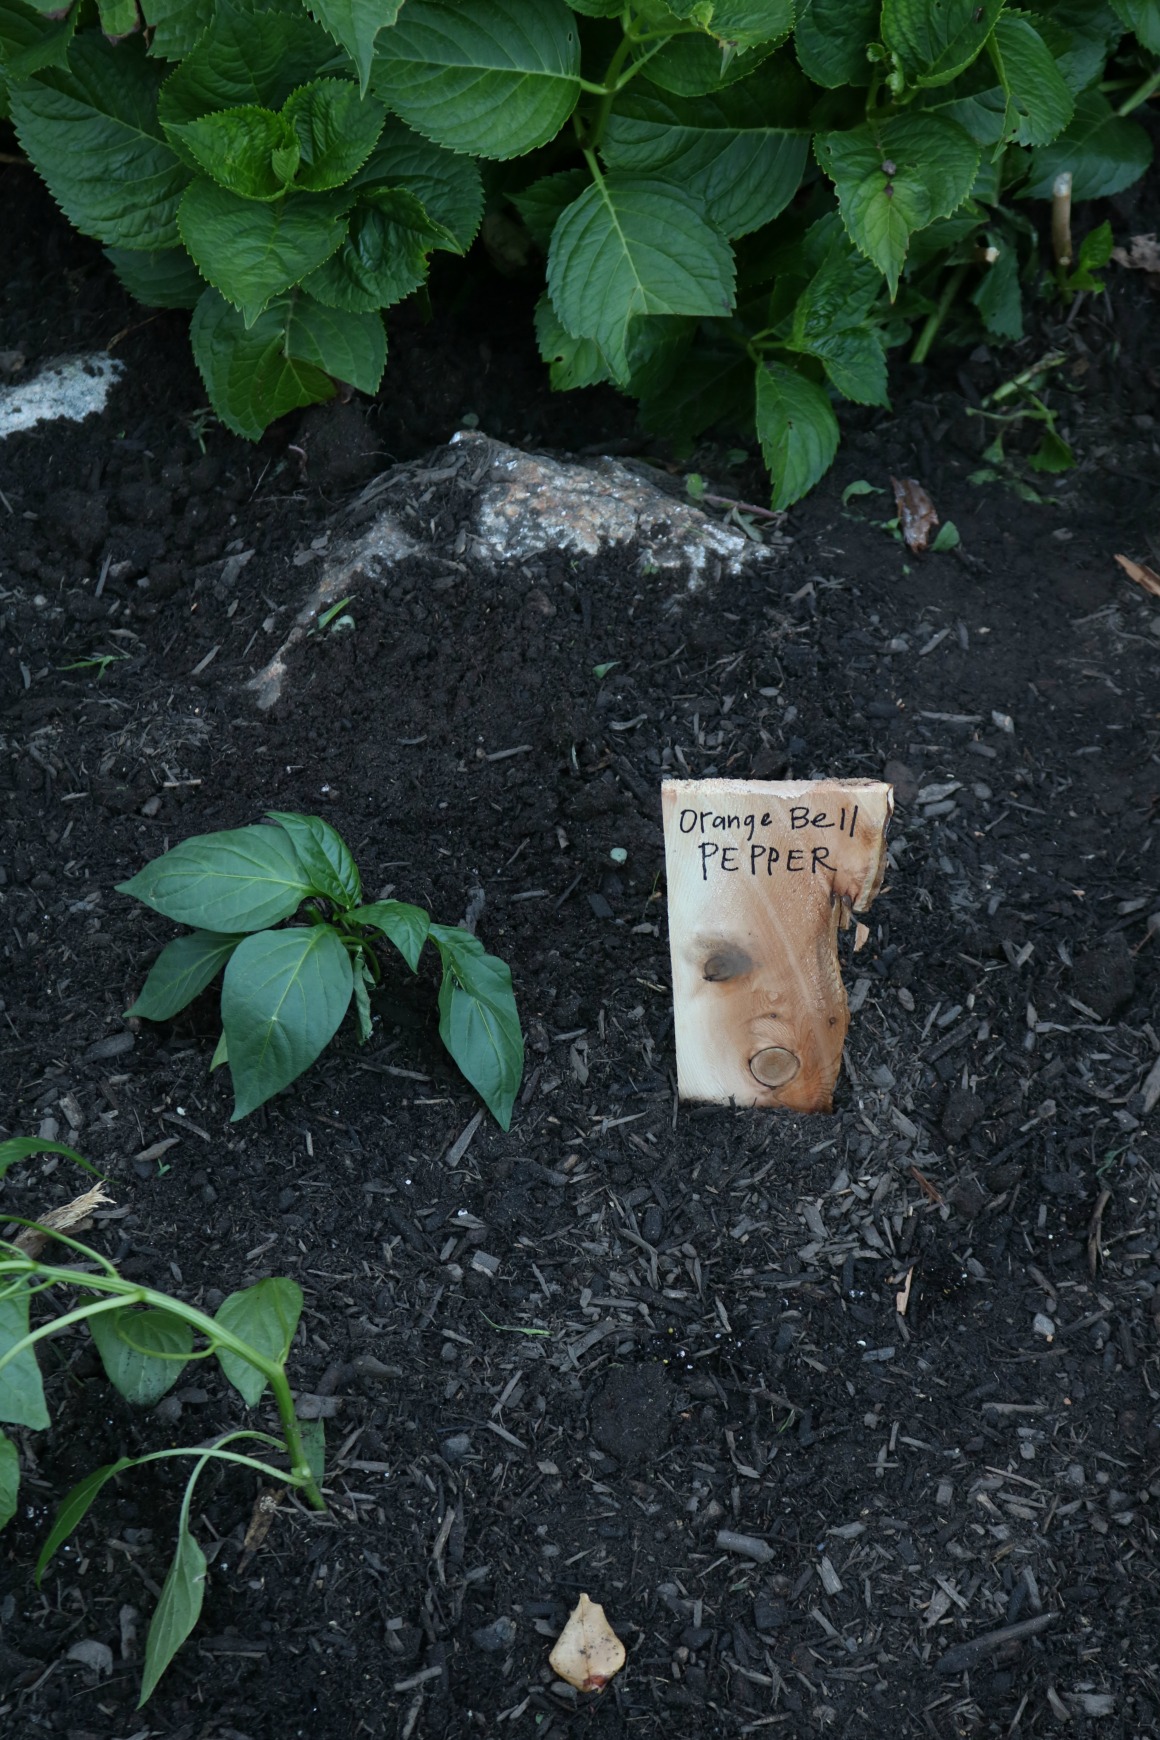
With the remnant piece of cedar we wrote the names of the plants with a marker and hammered them into the dirt. Love using what you already have!
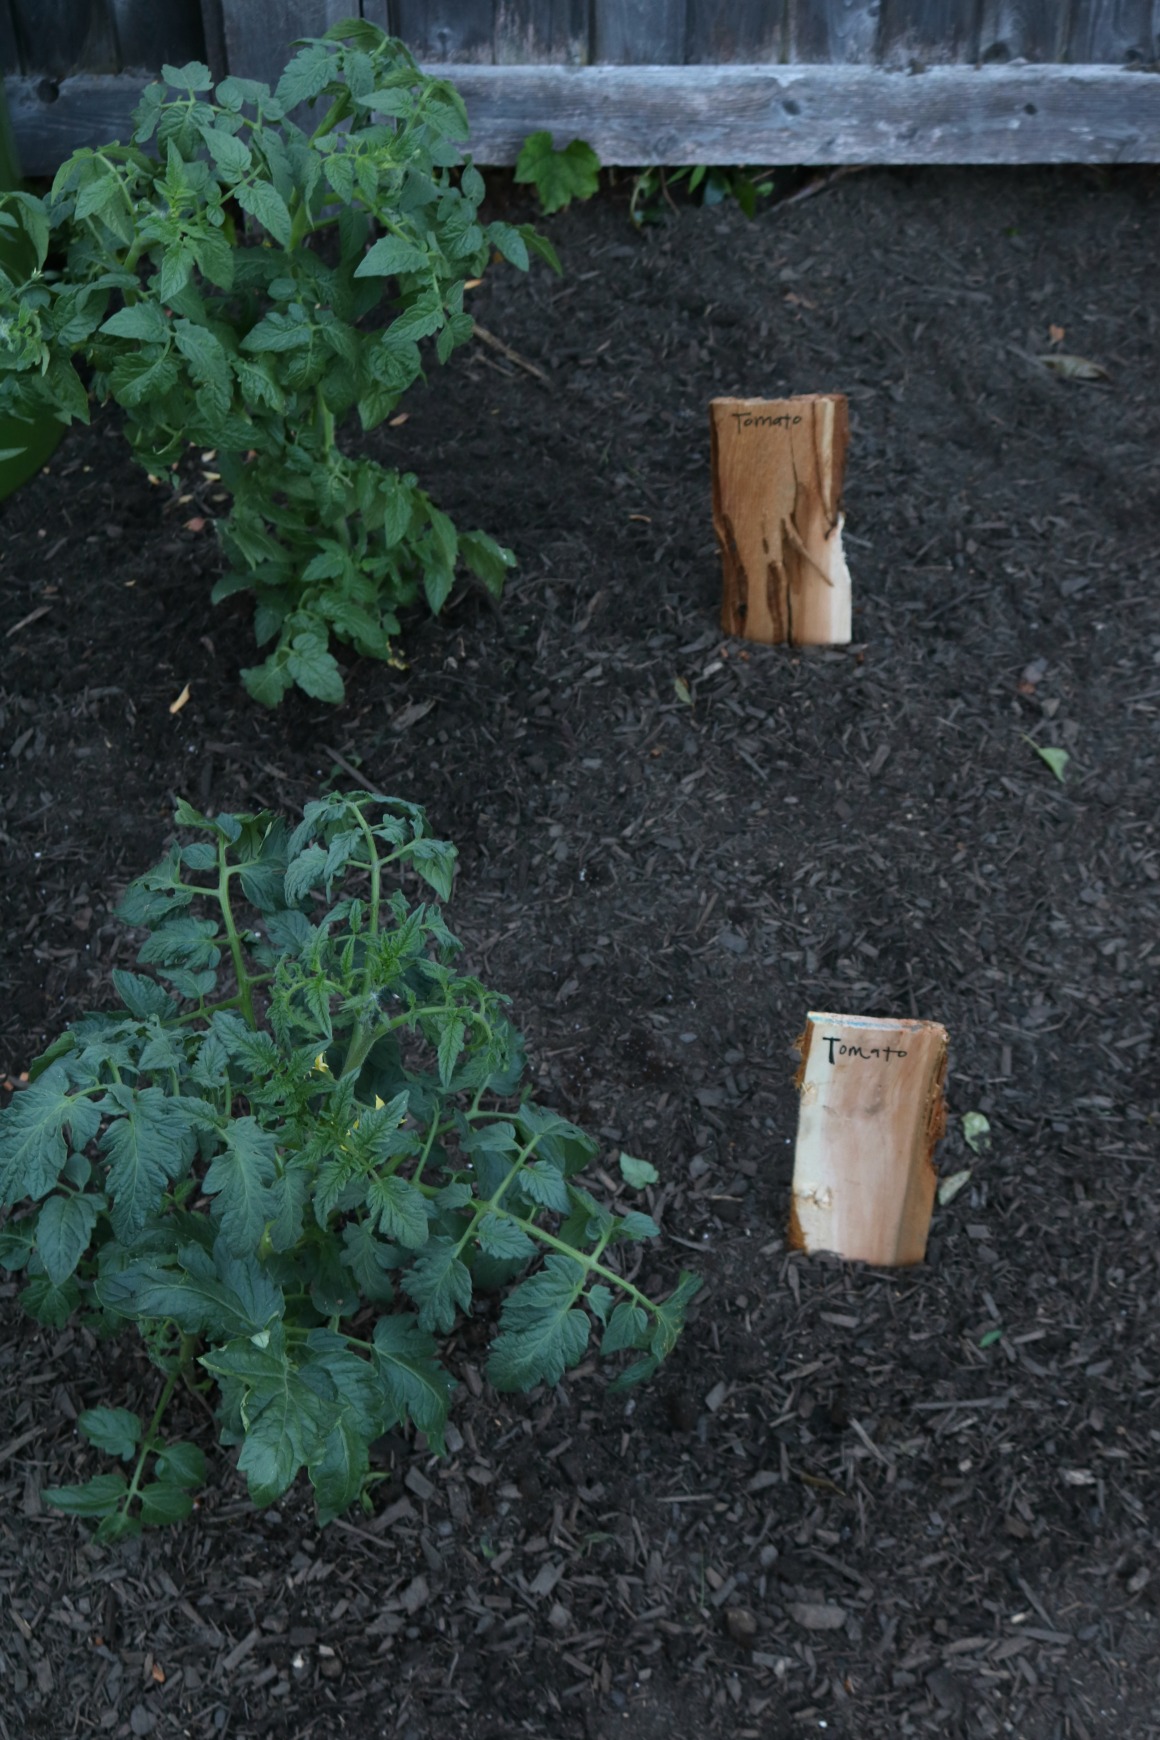
We can’t wait to see little vegetables start sprouting! Thankfully our sprinklers hit this garden space too. Every morning (so far) Lola has said “I am going to go check on the garden” and she open’s up the gate and hand waters a few for fun. I am sure we will make some changes next year as to where we place the vegetables and what we plant. It is a fun learning process and love learning and hearing all of your ideas on gardening!
Black Shed Blog Post
DIY Chalkboard Blog Post

That is the cutest garden area I’ve seen! The chalkboard and the cedar shakes on the nesting box are perfect additions to make it such a homey space…
Looks so nice and love the fence. We had a little one and took it down. We had rabbits at first, but now it is gone. I posted our raised veggie be on my blog.
This is one of the sweetest little garden areas I have seen. I LOVE the makeover of the nesting boxes, and it’s certainly one of my favorite details in this area. The cedar shingles and the leftover pieces as markers add a special little touch that we can always find in your spaces. Enjoy!
So nice Brooke! You guys get more in one day than I do in an entire season!! The garden/shed spaceblooks amazing!! I’m still working in hanging two strands of lights…lol
You can take any space and make it so cute! The nesting box and chalk board are adorable touches for this garden. Please visit Nashville and redo my home!!!
The CUTEST little garden I have EVER seen!!!
Use tomato cages for the peppers and spray paint them black. You’ll need something for the tomatoes too. Maybe a tee pee style stake. Don’t be like me and wait until they need it. It’s much easier to add them now before they get huge. I heard you want the middle number of your fertilizer the highest once your plants are established to encourage blooms and veggies/fruits from @rootedgarden (I think). Teach the girls to water at the roots and try to not get the leaves. These are the tips I just learned and found the most helpful and doable. Hopefully, the pros will correct me. Im excited for your first harvest!!
I love it all!! I’ve been wanting. A nesting box forever! Love what you guys did to yours!
Oh my word AMAZING!! You guys did an awesome job. Your whole back yard is so beautiful and that nesting box really is awesome on your fence!!!!
Everything looks wonderful! I have been wondering how well that fencing works, it looks great! I really enjoy watching your cute family on Instagram, and you always crack me up!
It looks amazing ! The before and after pics are mind blowing.
The coop is kick ass. Nice work! Now who is going to take care of it bc aren’t you leaving for vaca soon for a while???!! ❤️
We are leaving Kevin behind 😬 so he is on garden duty! And project duty! Ha!
Are the holes at the bottom of the fence small enough not to let bunnies in the garden? I love the look of the black fence rather than putting up chicken wire.
Yes!! But we should add chicken wire to the opening under our wood fence!
Once again you hit it out the park!!!! Gorgeous and I love the fence!!! I am going to use this for the dog in the backyard!!!
What a perfect spot for that garden. And that chicken coop!!!! As always your new space… is just perfect!Your kids are going to love that this summer!
I love it…you guys are just so clever!!
hey girl- love the garden! so cool!
Garden is beautiful! The bunnies are so bad this year I may have to steal that fencing idea. I read about the cayenne pepper trick too, but the comments on the article said that the animals get it on their paws and then when they clean themselves the pepper gets in their eyes and mouth and it burns. I opted for bone meal and peppermint oil. Only downside is I have to reapply every time it rains, which has been quite frequently here.