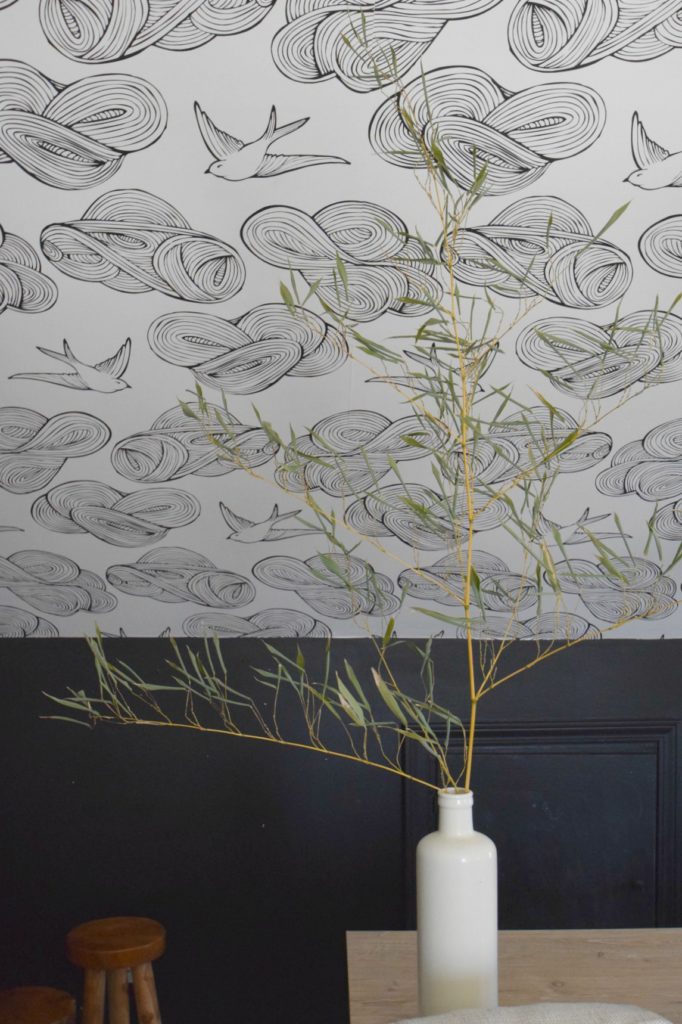
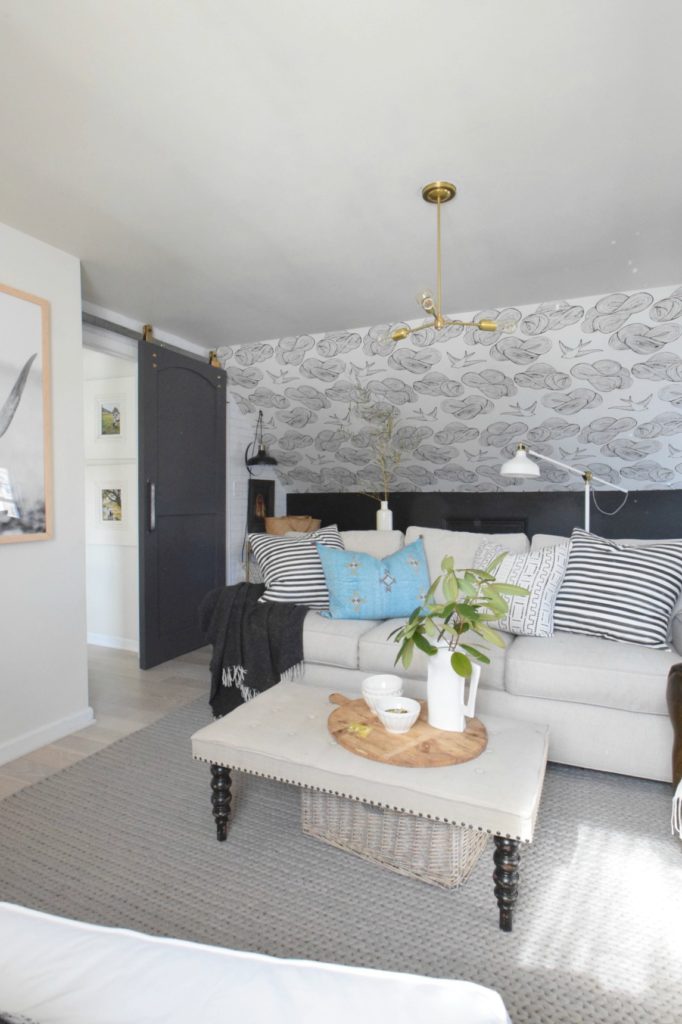
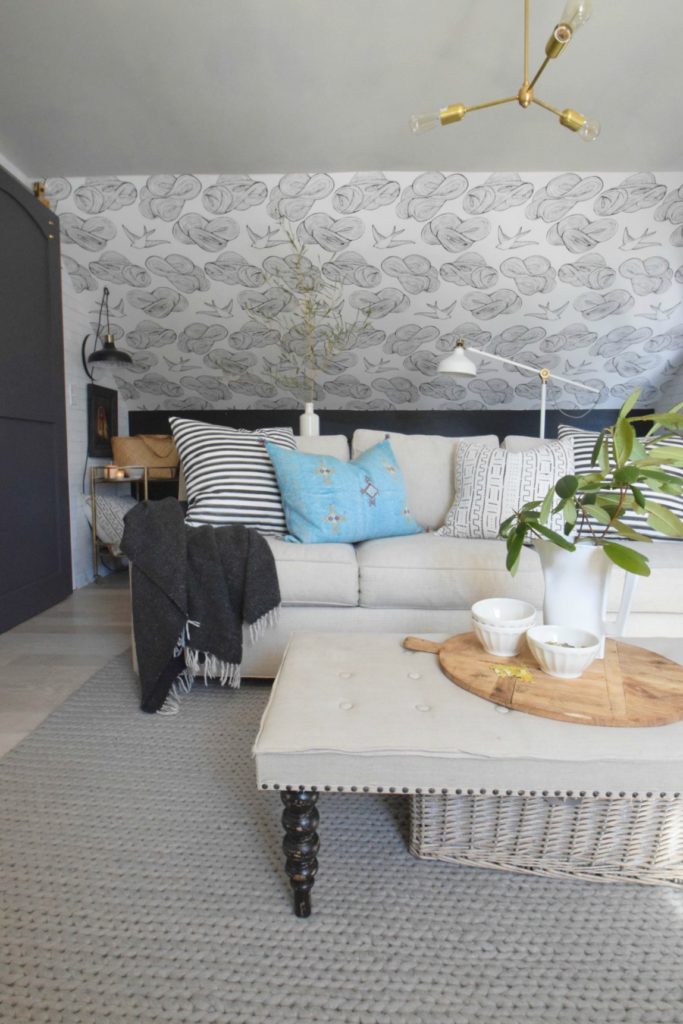
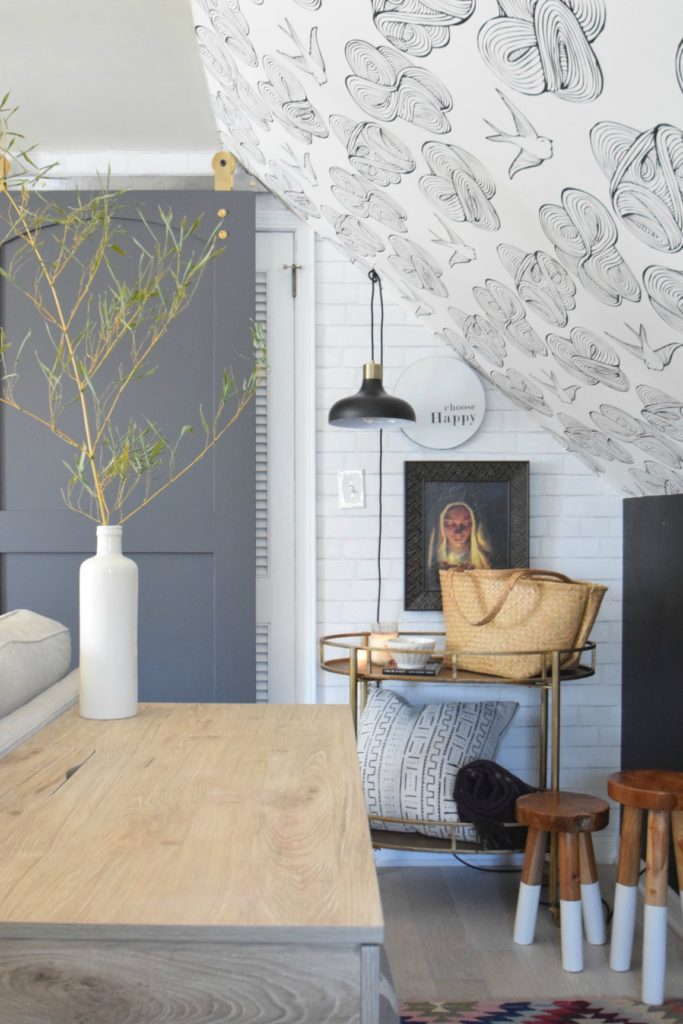
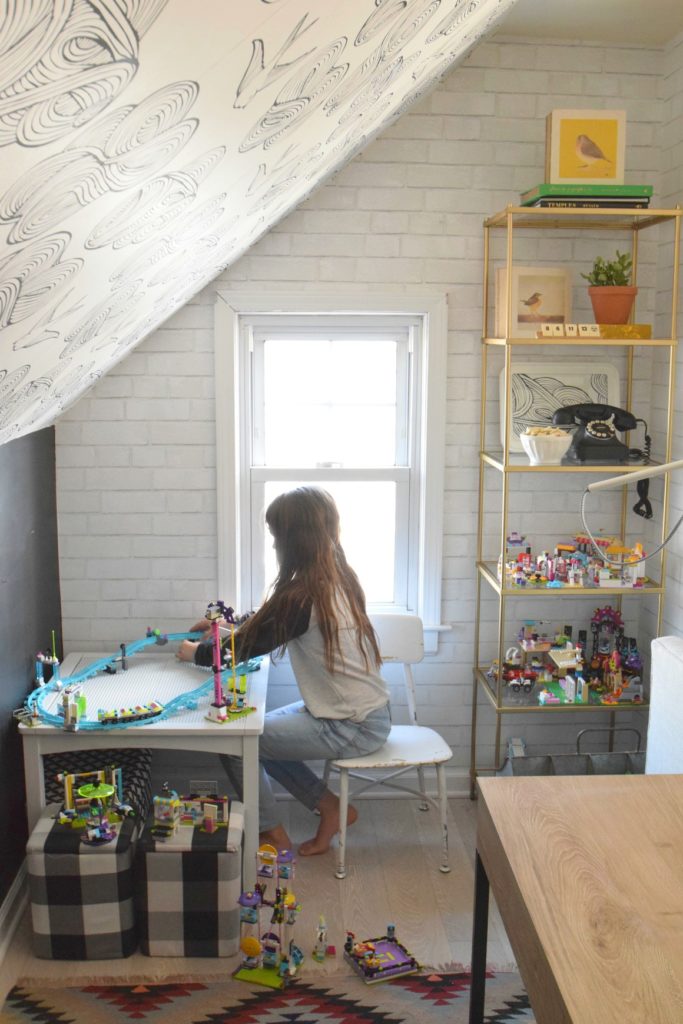
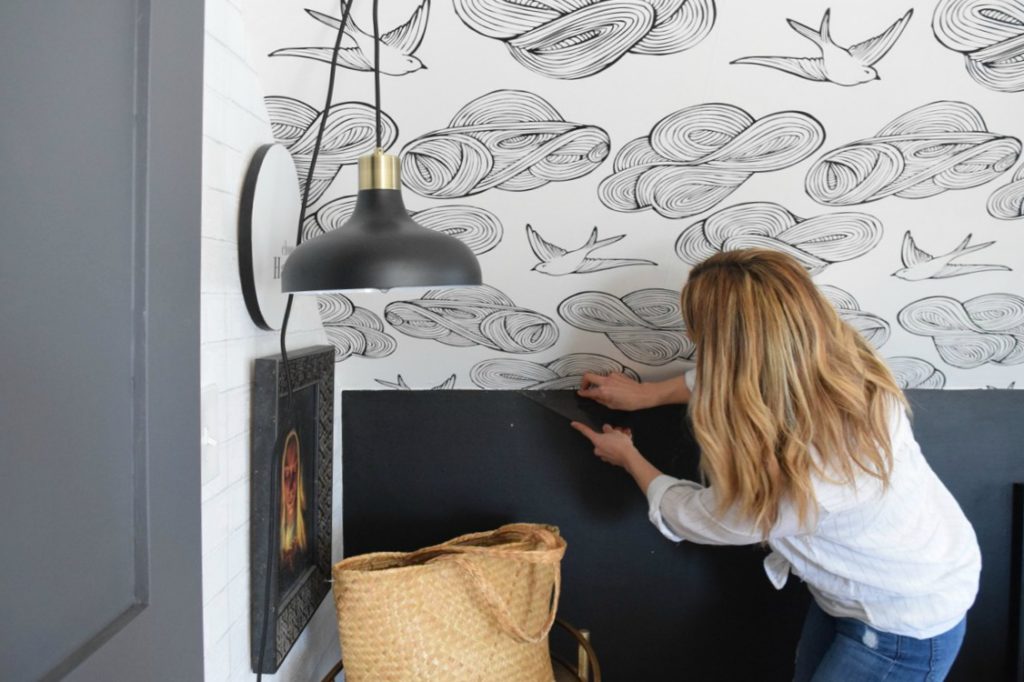
I shared a couple of pictures of our new wallpaper on Monday for my Spring Home Tour. I can’t get over how much I like this wallpaper and how it really completes the room. I have been wanting to do something above the chalkboard wall since we painted it last year, actually since we moved in. It is a dormer ceiling and painting it with chalkboard paint felt too heavy and dark and wouldn’t make sense to have chalkboard paint that high. We also have THIS temporary faux brick wallpaper on the other walls and the brick felt weird to put on the dormer and wouldn’t make sense either. So I just left it empty and feeling a little sad. Until now! I had been eyeing THIS Daydream wallpaper with the birds for a long time and recently saw the black and white wallpaper version and knew it would be a perfect match to complete this space.
Before I show you it all complete I want want to show you what the room looked like BEFORE we lived here. The previous home owners used this room as their master bedroom.
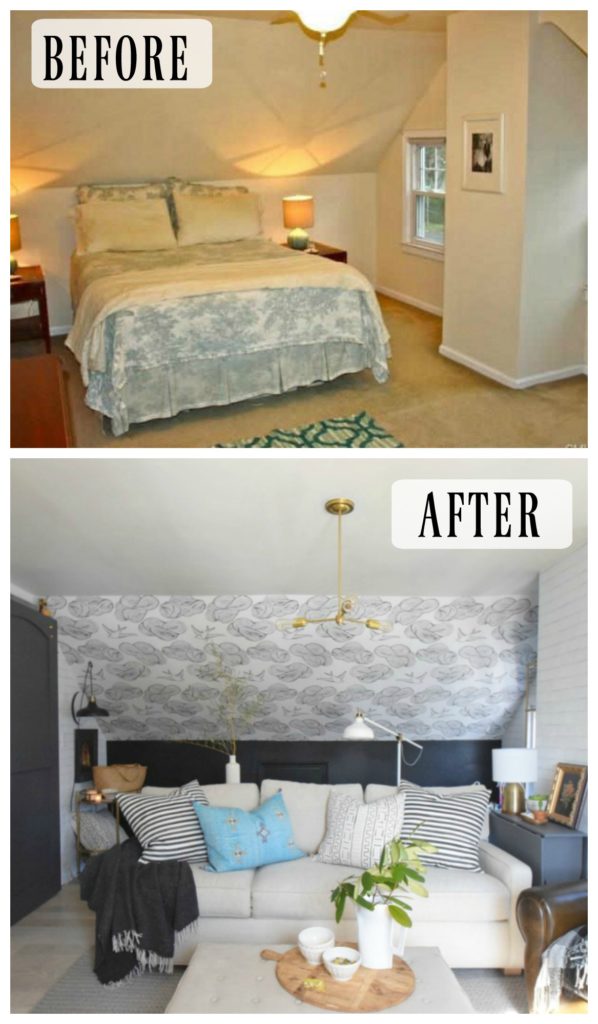
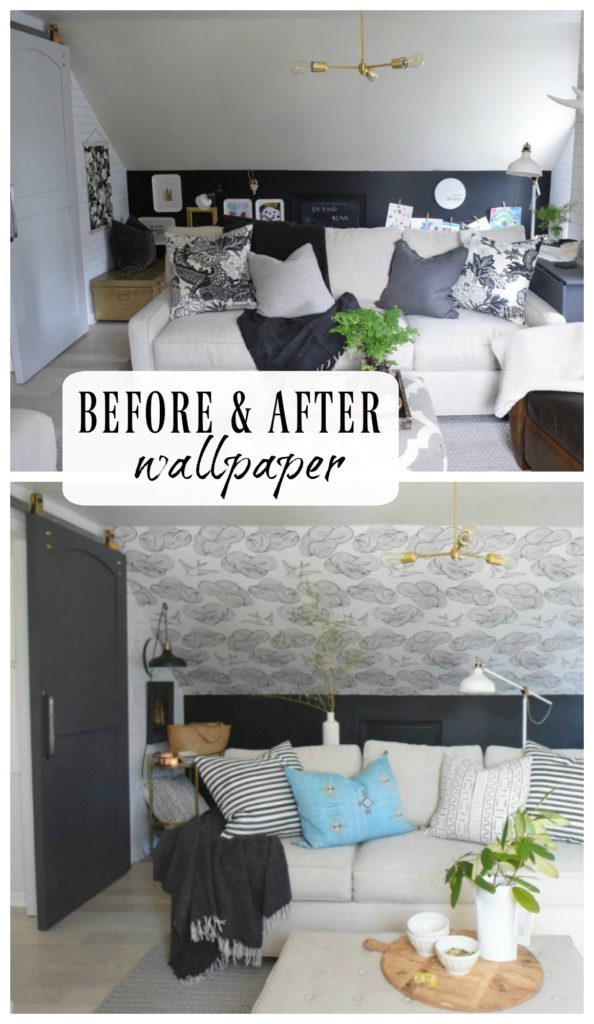
And this is what it looked like BEFORE we did the wallpaper on the dormer.
 I actually get asked about these dormer ceilings or ceilings with sharp angles from clients wanting to know how to paint them. I think the best way to look at dormers is as if they were part of the wall, not the ceiling. Imagine if you were to push the dormer straight back- it would be the wall. So you should paint it the same color as the wall or do an accent treatment on it like we did. You can look at my girls bedroom HERE– they also have a dormer and I did wallpaper on the dormer and on the wall below it to match.
I have shared this area before. Behind our sofa is a little play area for the kids. I also have it set up for guests to keep all their things here when they come and stay in this room (the sofa is a sleeper sofa).
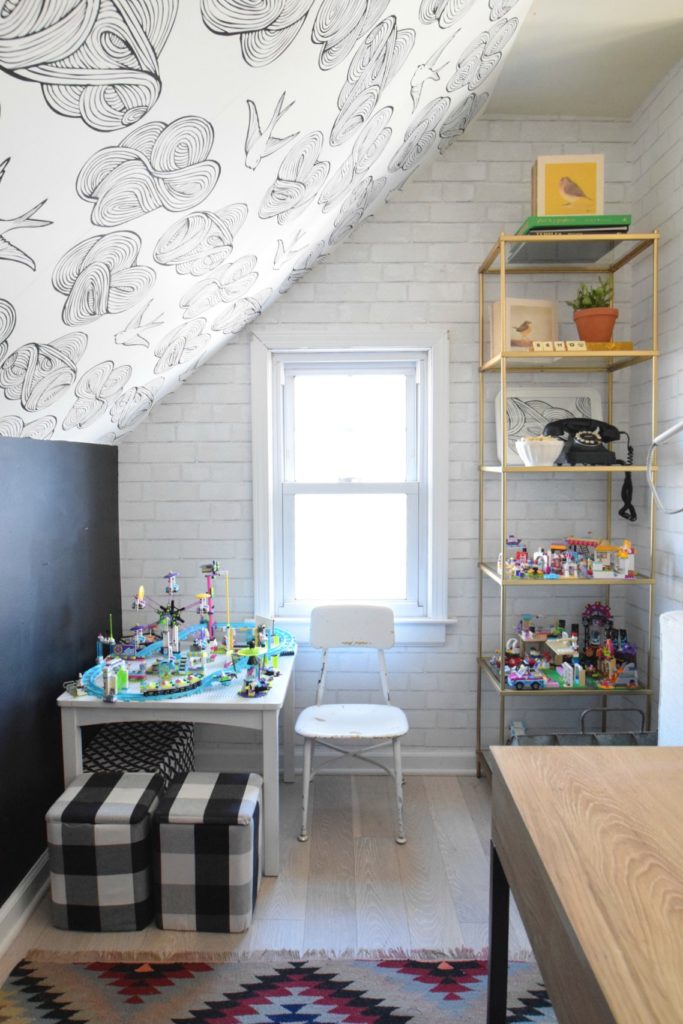
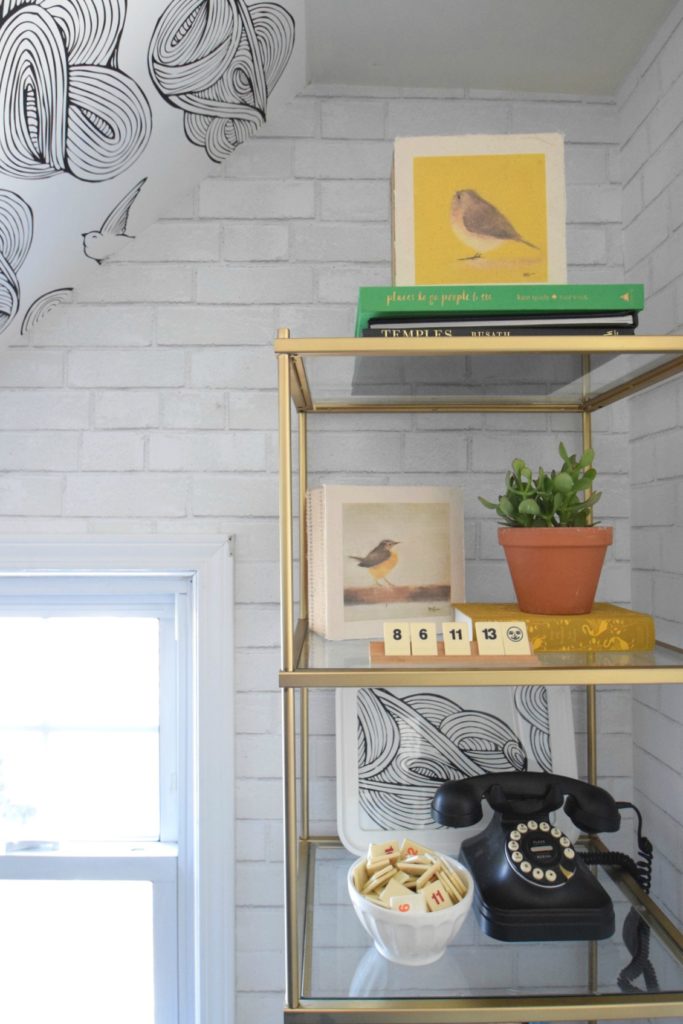
We have this little desk behind the sofa. And since Christmas time it has looked like a Lego bomb went off on it. I was totally fine with it until the Legos started to multiply and there was a LARGE Lego roller coaster taking up all the space on the desk. I moved THIS gold bookcase out of our kitchen (because of the changes we are making to our kitchen). I thought this bookcase would be a great place to hold all the built Lego’s on the bottom shelves.
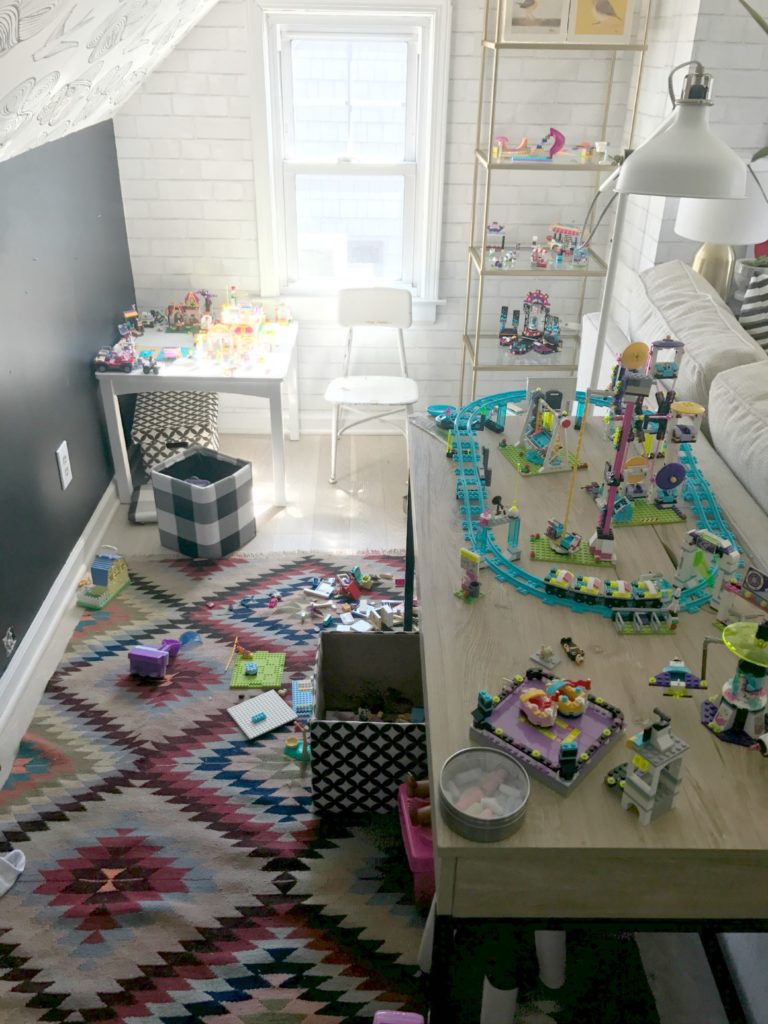
My sister and I moved all of the Legos off the desk and to the Lego table while my oldest, Ella was at school. We were SO careful not to break any of her built projects. I was nervous about her reaction- because she can be a little teenager in a 9 year old body. I am scared for my future.
Let’s just say she was not happy about it.
She cried and was mad at me for moving them.
I had warned her before she went into the room and had even talked to her a little about it before I did it.
I gave her some space to think about it. I told her if she hated it then we could move it all back.
She came back to me and was open to talking and hearing why I did it.
I told her I didn’t buy the new desk to be her Lego table, she already had a Lego table. And that I wanted the desk to be able to do other crafts and puzzles on for the family. I told her all my ideas and different areas and ways to really enjoy this new organized space.
She was so sweet and apologized. She said that she understood where I was coming from and why I did it. It was really a great learning experience for both of us. I should have talked to her about all my ideas and thoughts before I did it. I thought I had, but I guess I did not do it well enough. Now we know and are closer for it. Who knew Lego’s could bond a mom and a daughter:)
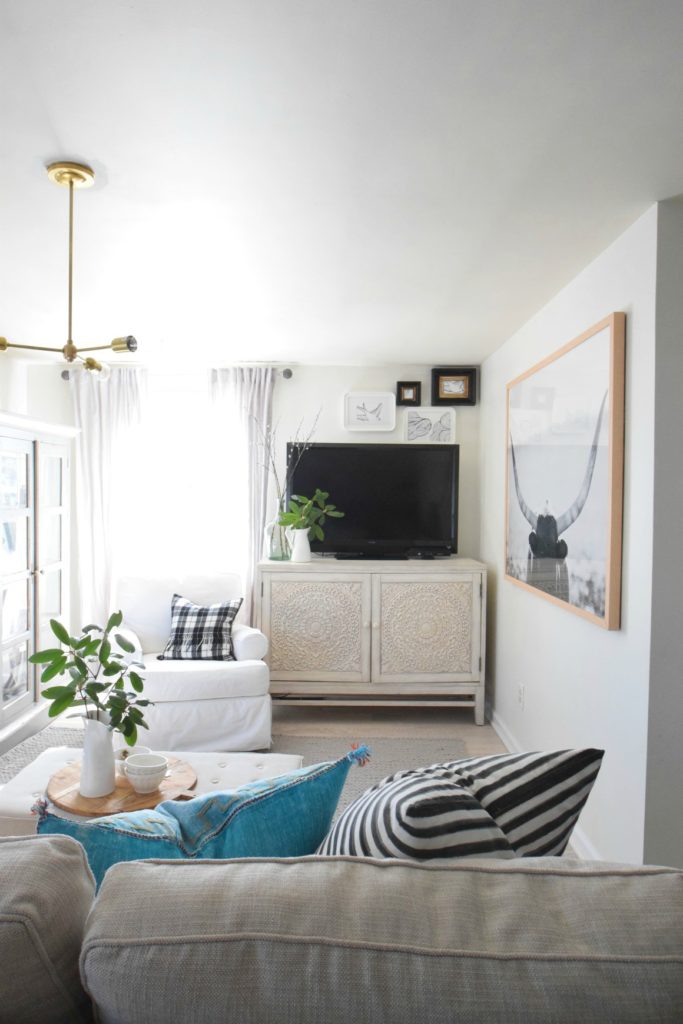
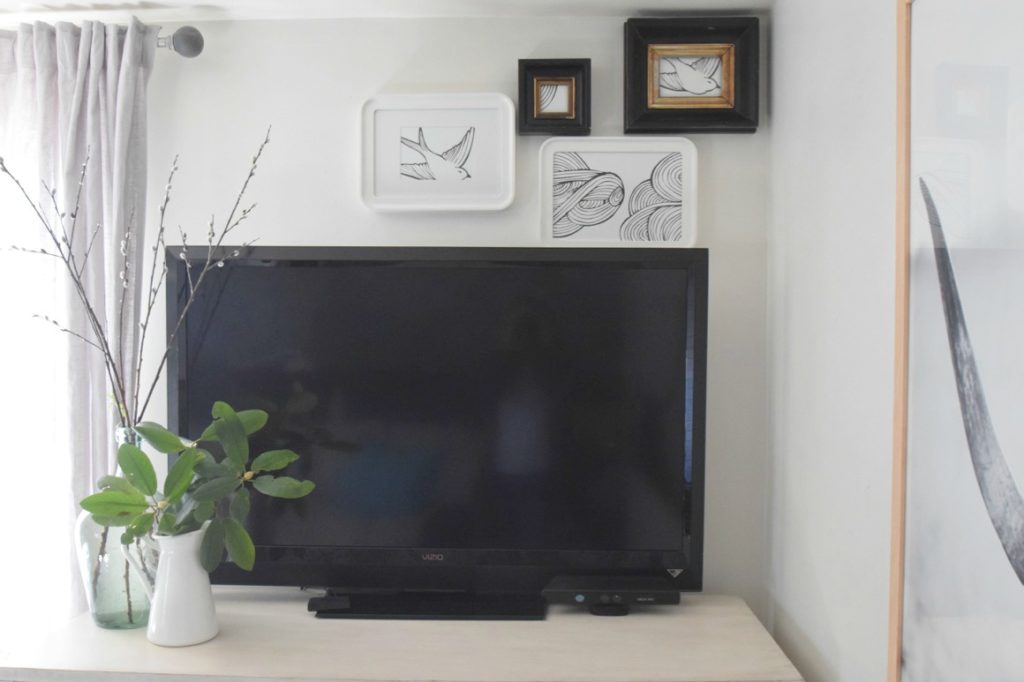
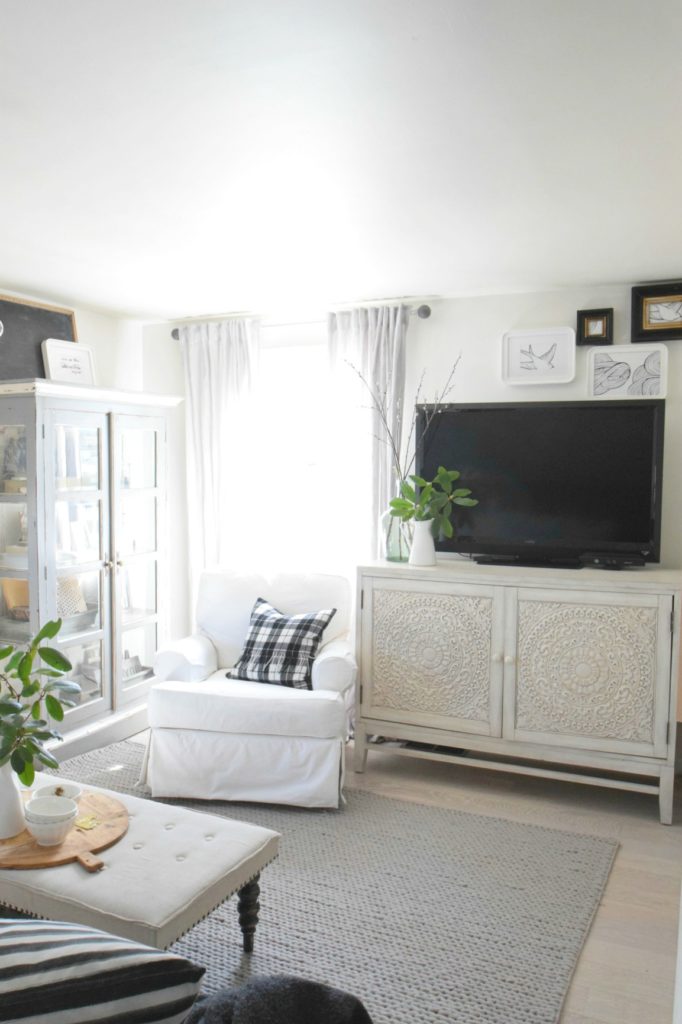
I used some of the leftover wallpaper in these frames above the TV. I love how it turned out- an inexpensive way to create some art and tie the room together.

How to Install Wallpaper
- Set up an area with all your supplies-
- wallpaper paste
- wallpaper smoother tool
- roller for paste
- paint brush
- paint pan for wallpaper paste
- rags
- straight edge
- razors
- scissors
- measuring tape
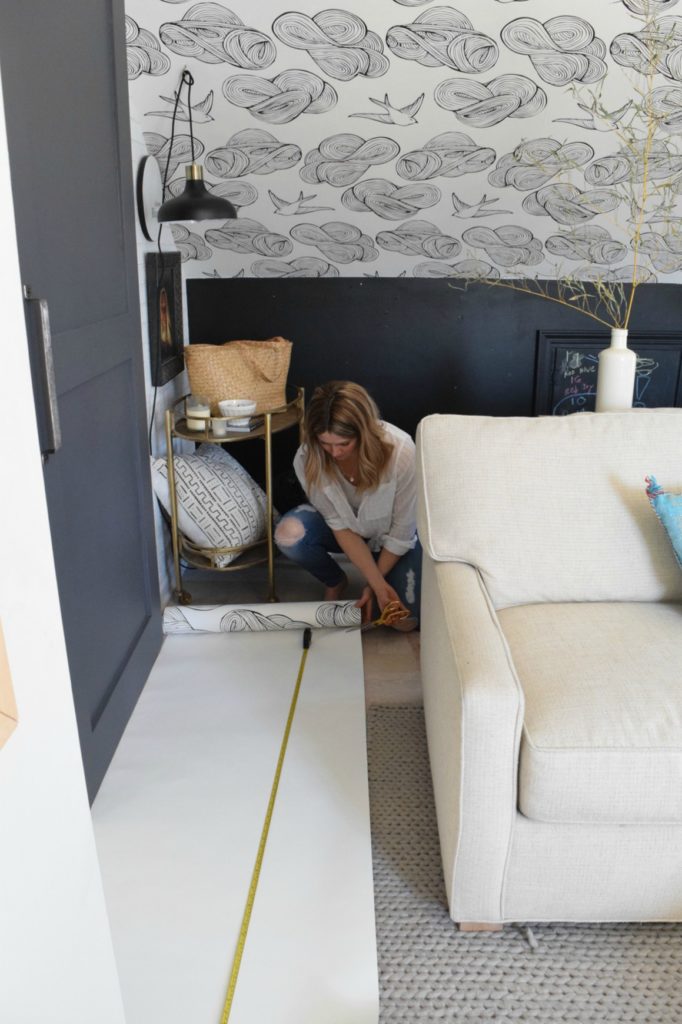
- Measure one area at a time then cut the wallpaper for that one space. Only cut one area at a time.
- Apply wallpaper paste to the back of the wallpaper and also to the area on the wall you are going to put that strip of paper (only do one section at a time).
- Work from the bottom up. Pressing down as you go by using THIS tool and follow up with a rag to wipe off any extra paste that comes out from behind the paper. Make sure to smooth out any bubbles as you go.
- If the edges are not sticking use a paint brush to add a little bit more wallpaper paste to the wall.
- Use a straight edge to hold right where you need to trim the excess wallpaper and use a razor blade to remove the extra wallpaper.
- Move onto the next strip of wallpaper. MATCH up your pattern, this is an important step and the reason that you don’t cut all the paper all at once. I hold up the paper on the wall to match it up. Then I cut it. Make sure to cut EXTRA paper I suggest cutting an extra 10″ to avoid running too short. (I have done that too many times and I just have to cut out a piece for that spot and it takes a lot of time!).
It really is easy to install wallpaper. I recommend having a helper- in my case it is my husband and he does the smoothing part, it is a workout! This space took us about two and a half hours.
Room Sources-
(contains affilate links)
Hygge and West Day Dream Wallpaper HERE
Wood and Iron Desk HERE
You can read about our Sliding Track door from White Shanty HERE
Similar Sleeper Sofa (mine is discontinued) HERE
Black and White Stripe Pillows HERE
Blue Pillow HERE
Similar Leather Recliner (mine is discontinued) HERE
Faux Brick Wallpaper HERE
Rug HERE
TV Console HERE
Gold Bookcase HERE
Desk behind sofa blog post HERE
Gold Light Fixture HERE
Gold Tea Cart blog post HERE
Dipped Stools HERE
Bull Art Work HERE

The wallpaper looks great Brooke! It really adds dimension to the space. Happy Spring!
I appreciate you sharing Ella’s feeling about moving the legos. This happens in my house all the time! I feel bad rearranging something or heaven forbid, throwing something away! But some times it’s necessary. Your right it’s better to talk to them first!
Thanks so much Jamie- it is hard to know what to do with kids! I guess we learn and hopefully get better at it:)
hey girl- great post!
Thanks Shawnna!
I just love this room!!!! THIS feels like a family room- with the sitting area, the TV and a place for the kids cause let’s be real, the kids play by the parents, right??? Your home is my favorite for that simple reason: you show real life. I have 4 boys. My couch is cute for 6 hours a day when they’re at school. I don’t even want to sit on it during that time just so it can look like a picture. Haha! Thank you for showing absolutely beautiful spaces, but lived in. It makes reading your blog and following you on instagram that much better.
You just made my night with your kind words. Thank you so much Clarissa. I do clean up spaces for pictures- it can get real messy just like everyone else. I am like you I love the tidy space before the kids get out then the bomb goes off with lunches and play but I love that time too:)
I just love this room Brooke! That wallpaper is so cool and looks great, I keep thinking the room can’t get any better but then you do something new and it looks great!
Tania
haha thanks Tania! I just keep adding don’t I 🙂 thank you!
Hi Brooke,
I LOVE the new wallpaper an this is one of my favorite room in your home:)
May I ask where you purchased the black and gold hanging light?
Thank u
Thanks Kathy! I appreciate that:) I found that light at Target on Clearance a few months back:)
Thank you for sharing your room re-finishing. I do love how the wallpaper accents the black and white of the furniture and throw pillows, without being too much to overpower everything. I think you did a wonderful job. I also love the use of the space behind the sofa as a building area for your daughter. A very inventive use of the space!