Dried fruit used as Christmas decorations isn’t new…but it’s new to me! I had art that motivated me to give it a try and I am so happy I did. Truly a very simple and cheap way to add some color and character to your Christmas. Sharing how we made a garland with really the only two things you need, fruit and time!
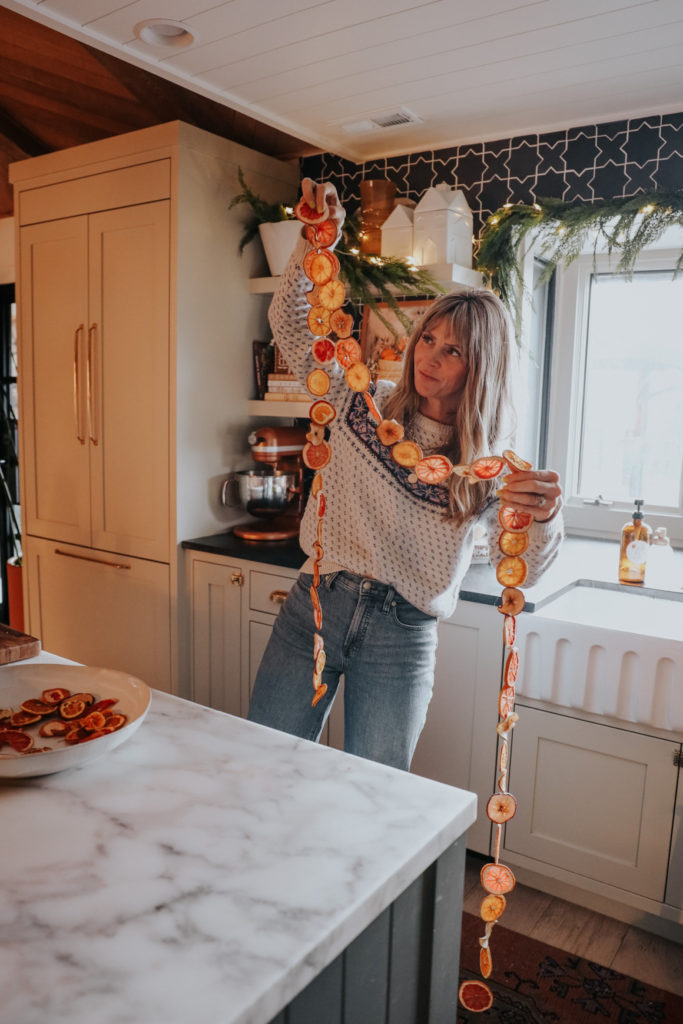
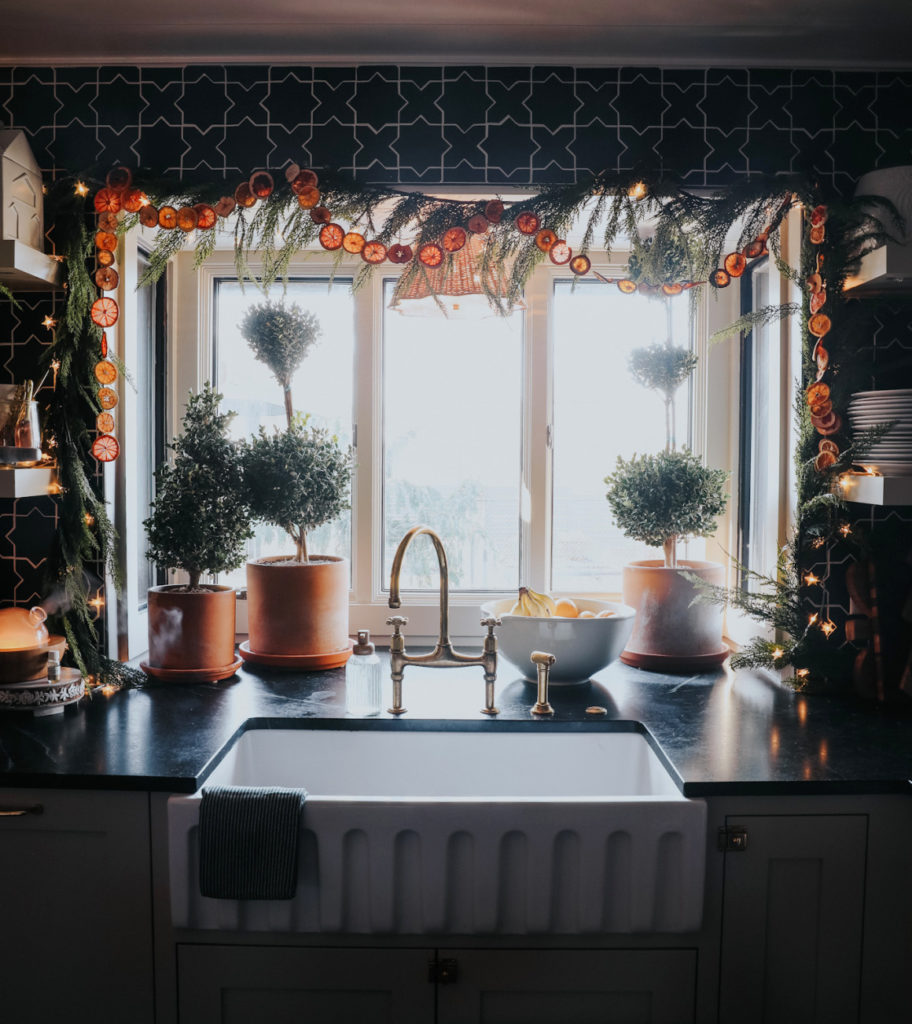
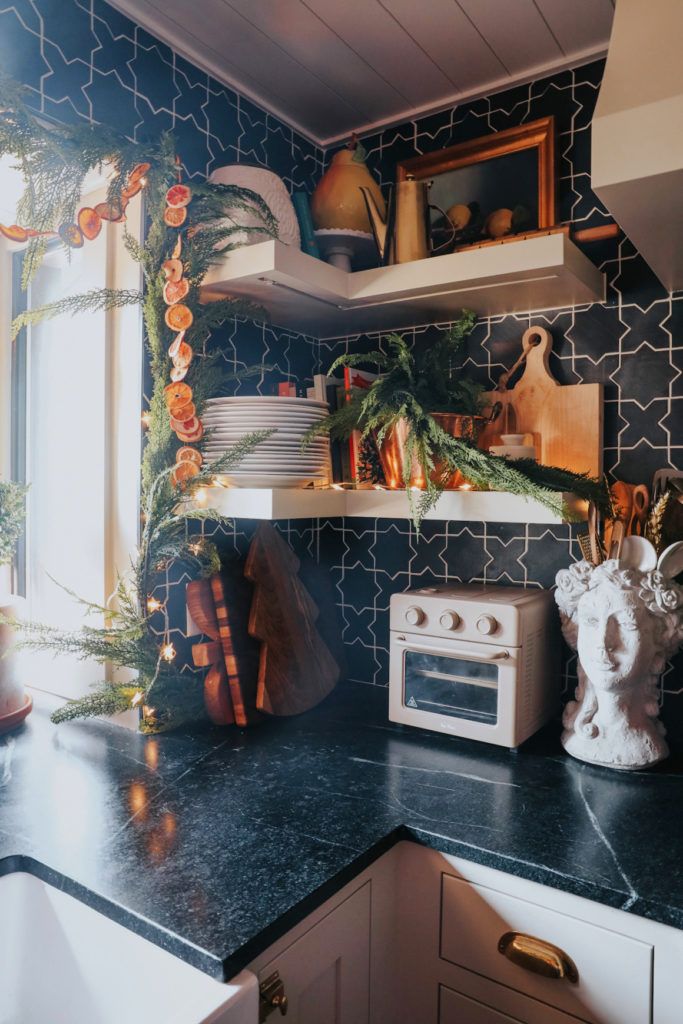
I’ve always hung green garland over my kitchen window for the holidays. So cozy!! This year, I was inspired by my new art (see below) to mix in orange and grapefruit garland.

This is the art, Citrus Garland art from Lindsay Letters that inspired me to try making a dried fruit to use as decor! I will keep this art up through the winter.
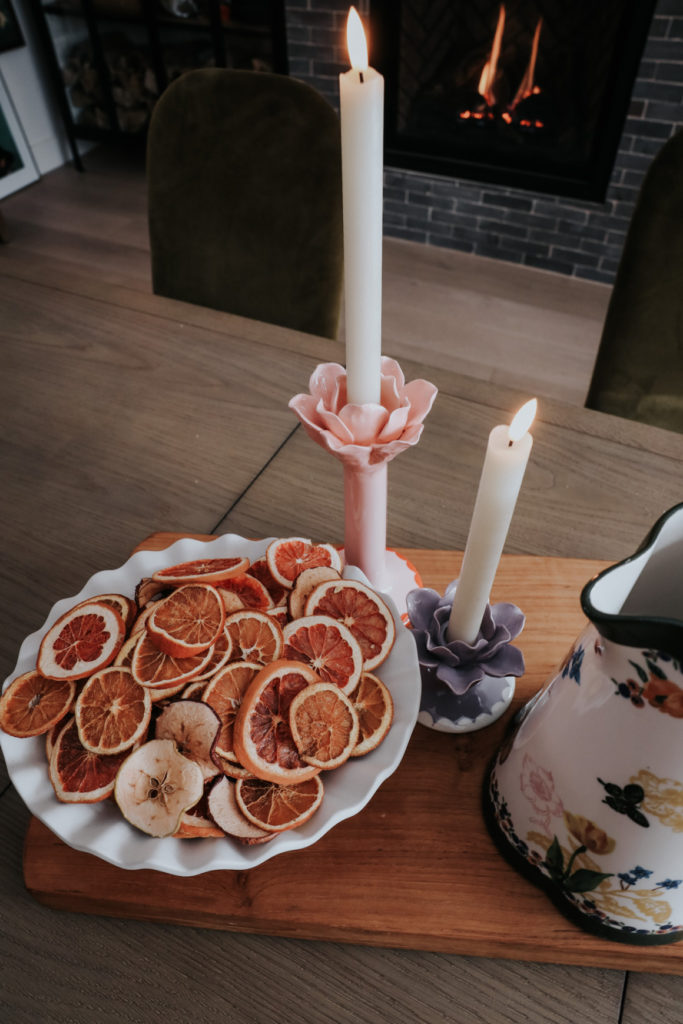
Not only are oranges and grapefruit so pretty strung into garland, they look just as pretty sitting in a bowl. I placed a bunch of my dried garland in this scalloped stoneware bowl. Love all year round! PS- find candlesticks and candles HERE.
Colorful Houses Art (on mantel HERE)
How to Make Dried Fruit for Garland or Decor-
- My kitchen window from the both the sides and the top is about 13′, I used this 15′ cedar garland.
- For the citrus garland, I used 5 oranges, 4 grapefruit and 2 apples. It ended up about 6′ long.
- First, preheat your oven to 200 degrees.
- Then start thinly slicing your fruit, about 1/8-1/4″ thick.
- The first time I did this we laid them straight on a cookie sheet and put in the oven. Turned out fine, cooked in the oven for about 5 hrs at 200 degrees.
- You do need to flip your fruit every hour.
- The second time I blotted off some of the juice, and cooked for 4 hours at 200 degrees.
- Another option is to put parchment paper over your oven racks and lay the fruit on that, instead of in pans. That way you can put a lot more fruit in the oven when you do this!
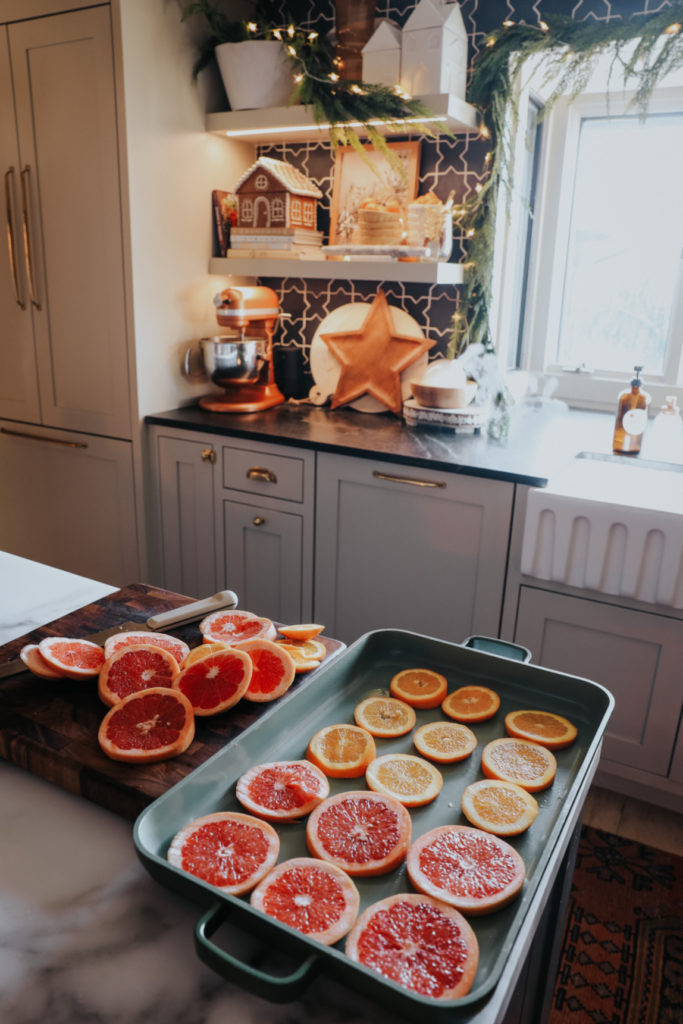
I used a serrated knife to slice my fruit, about 1/8-1/4″ thick. PS- I use these oven pans for everything! I put the fruit right on the pan.
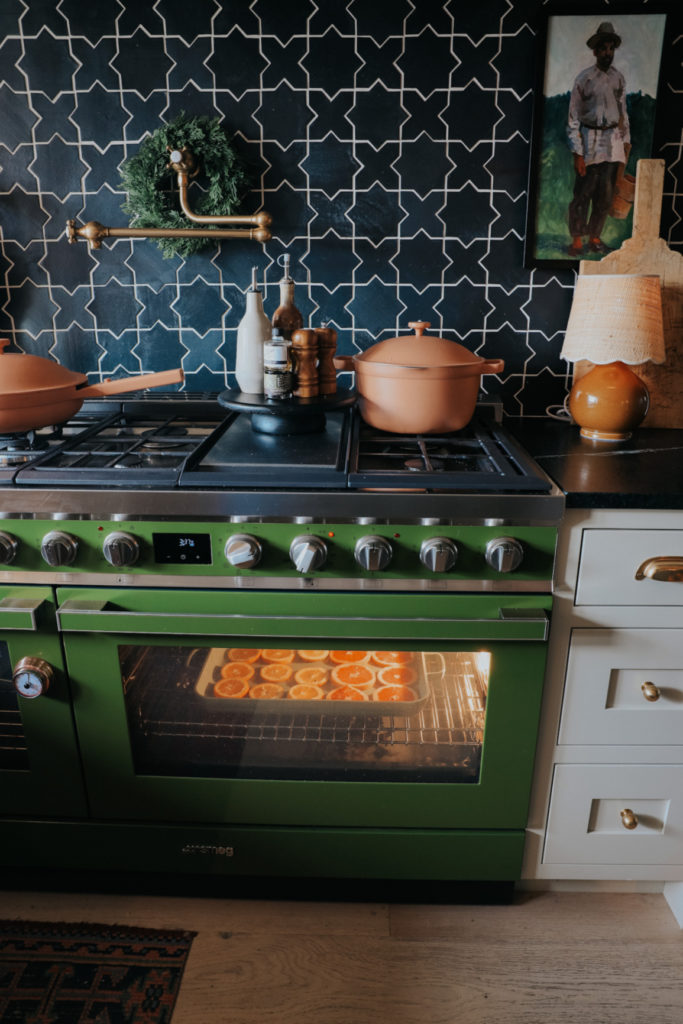
Once in the oven, cook for 4-5 hours.

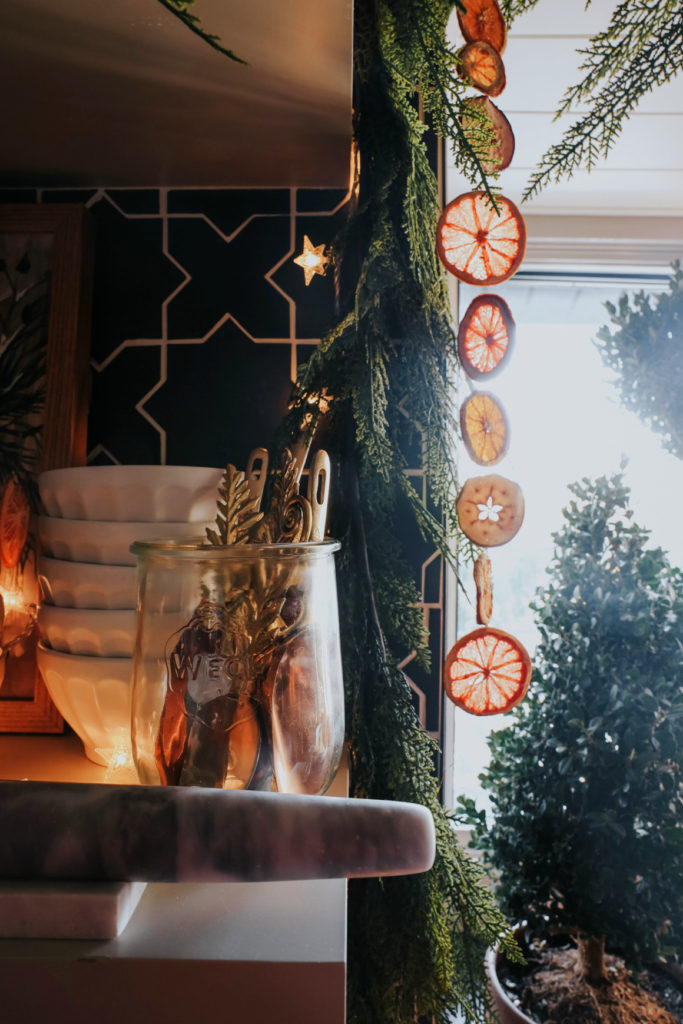
There are a couple ways to string your garland, I wanted the easiest route. A needle and thread made this part quick. I use this gold thread start one side of the fruit and pulling the needle back out the other side, helped keep the fruit in place with no slipping.

I didn’t do a pattern. You can’t go wrong. I loved all the colors!
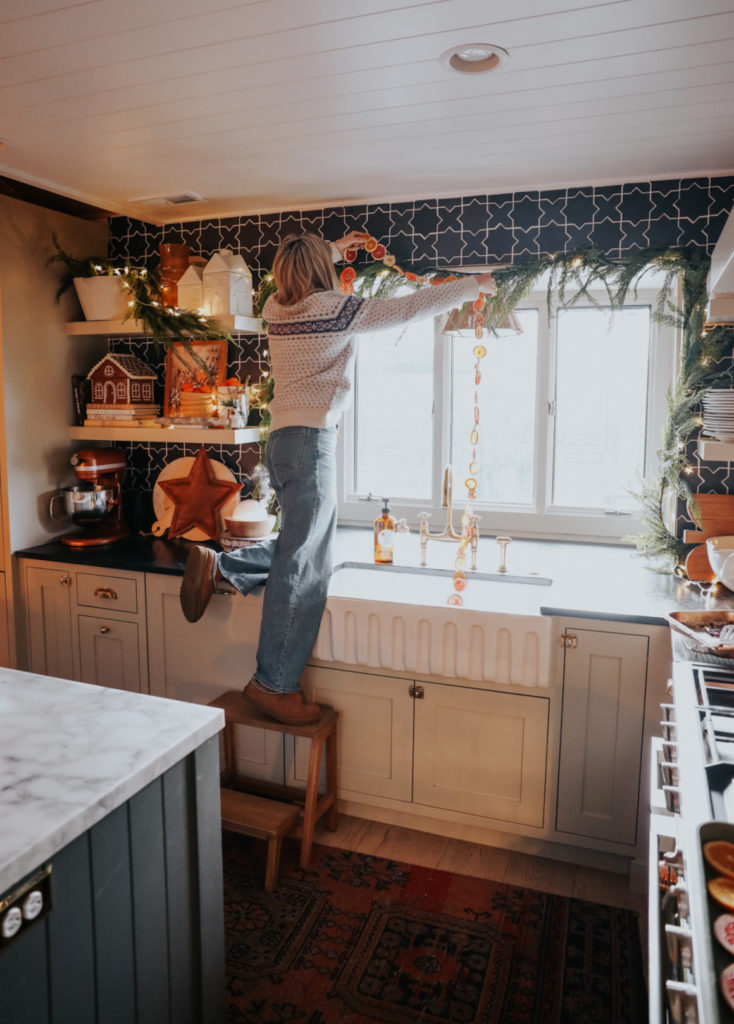
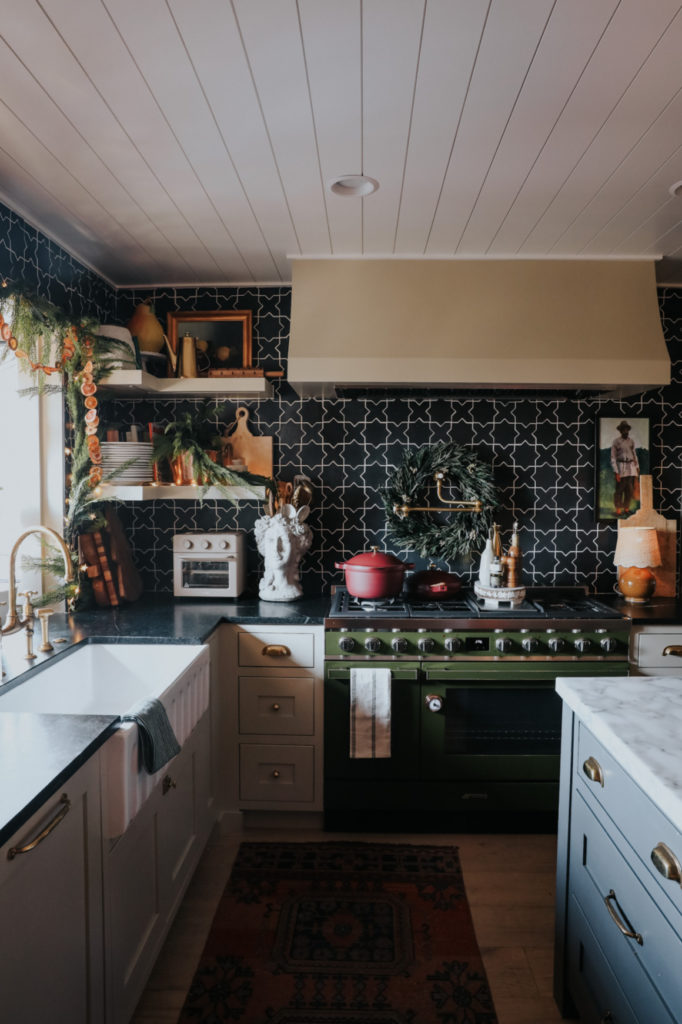
To hang my cedar garland and fruit garland on my tile I have to use 3 heavy duty command hooks in each corner and in the center.
I layer this star string light strand over the window, it is really long, so I string it on my kitchen shelves too!
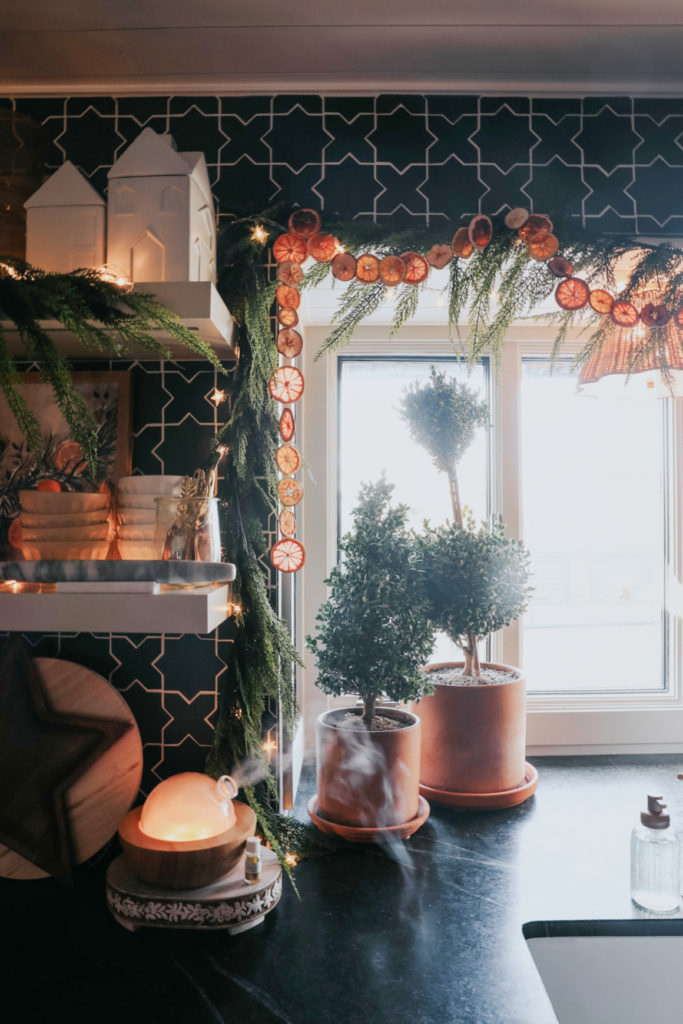
I had boxwood topiaries outside, and brought them in for the winter to our kitchen window. Love the boxwood mixed in with the fruit garland, match made in heaven!
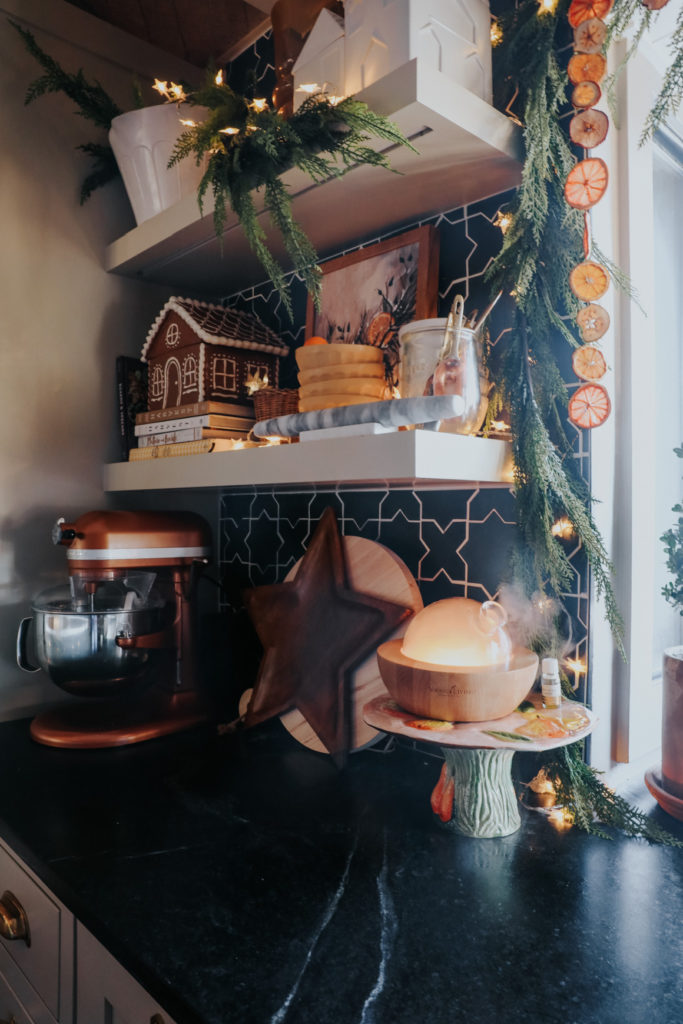
And you know my house smells like oranges and all the yummy citrus smells, thanks to my diffuser! Find my favorite essential oils and diffusers HERE. I did get a new cake pedestal, because it had the fruit on it!! Perfect place for my aria diffuser.
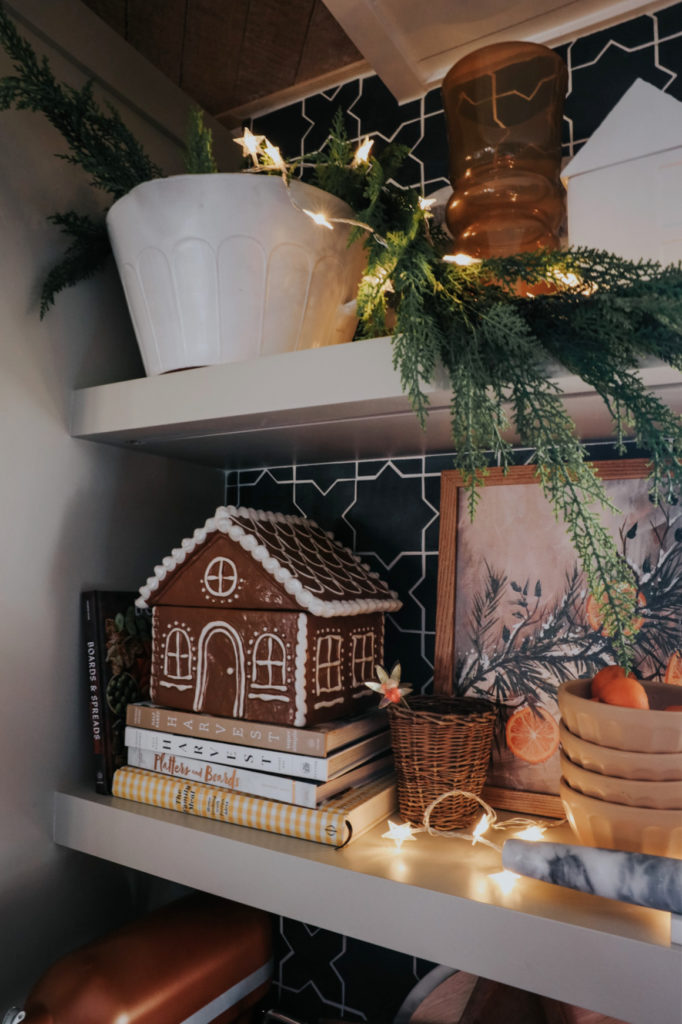
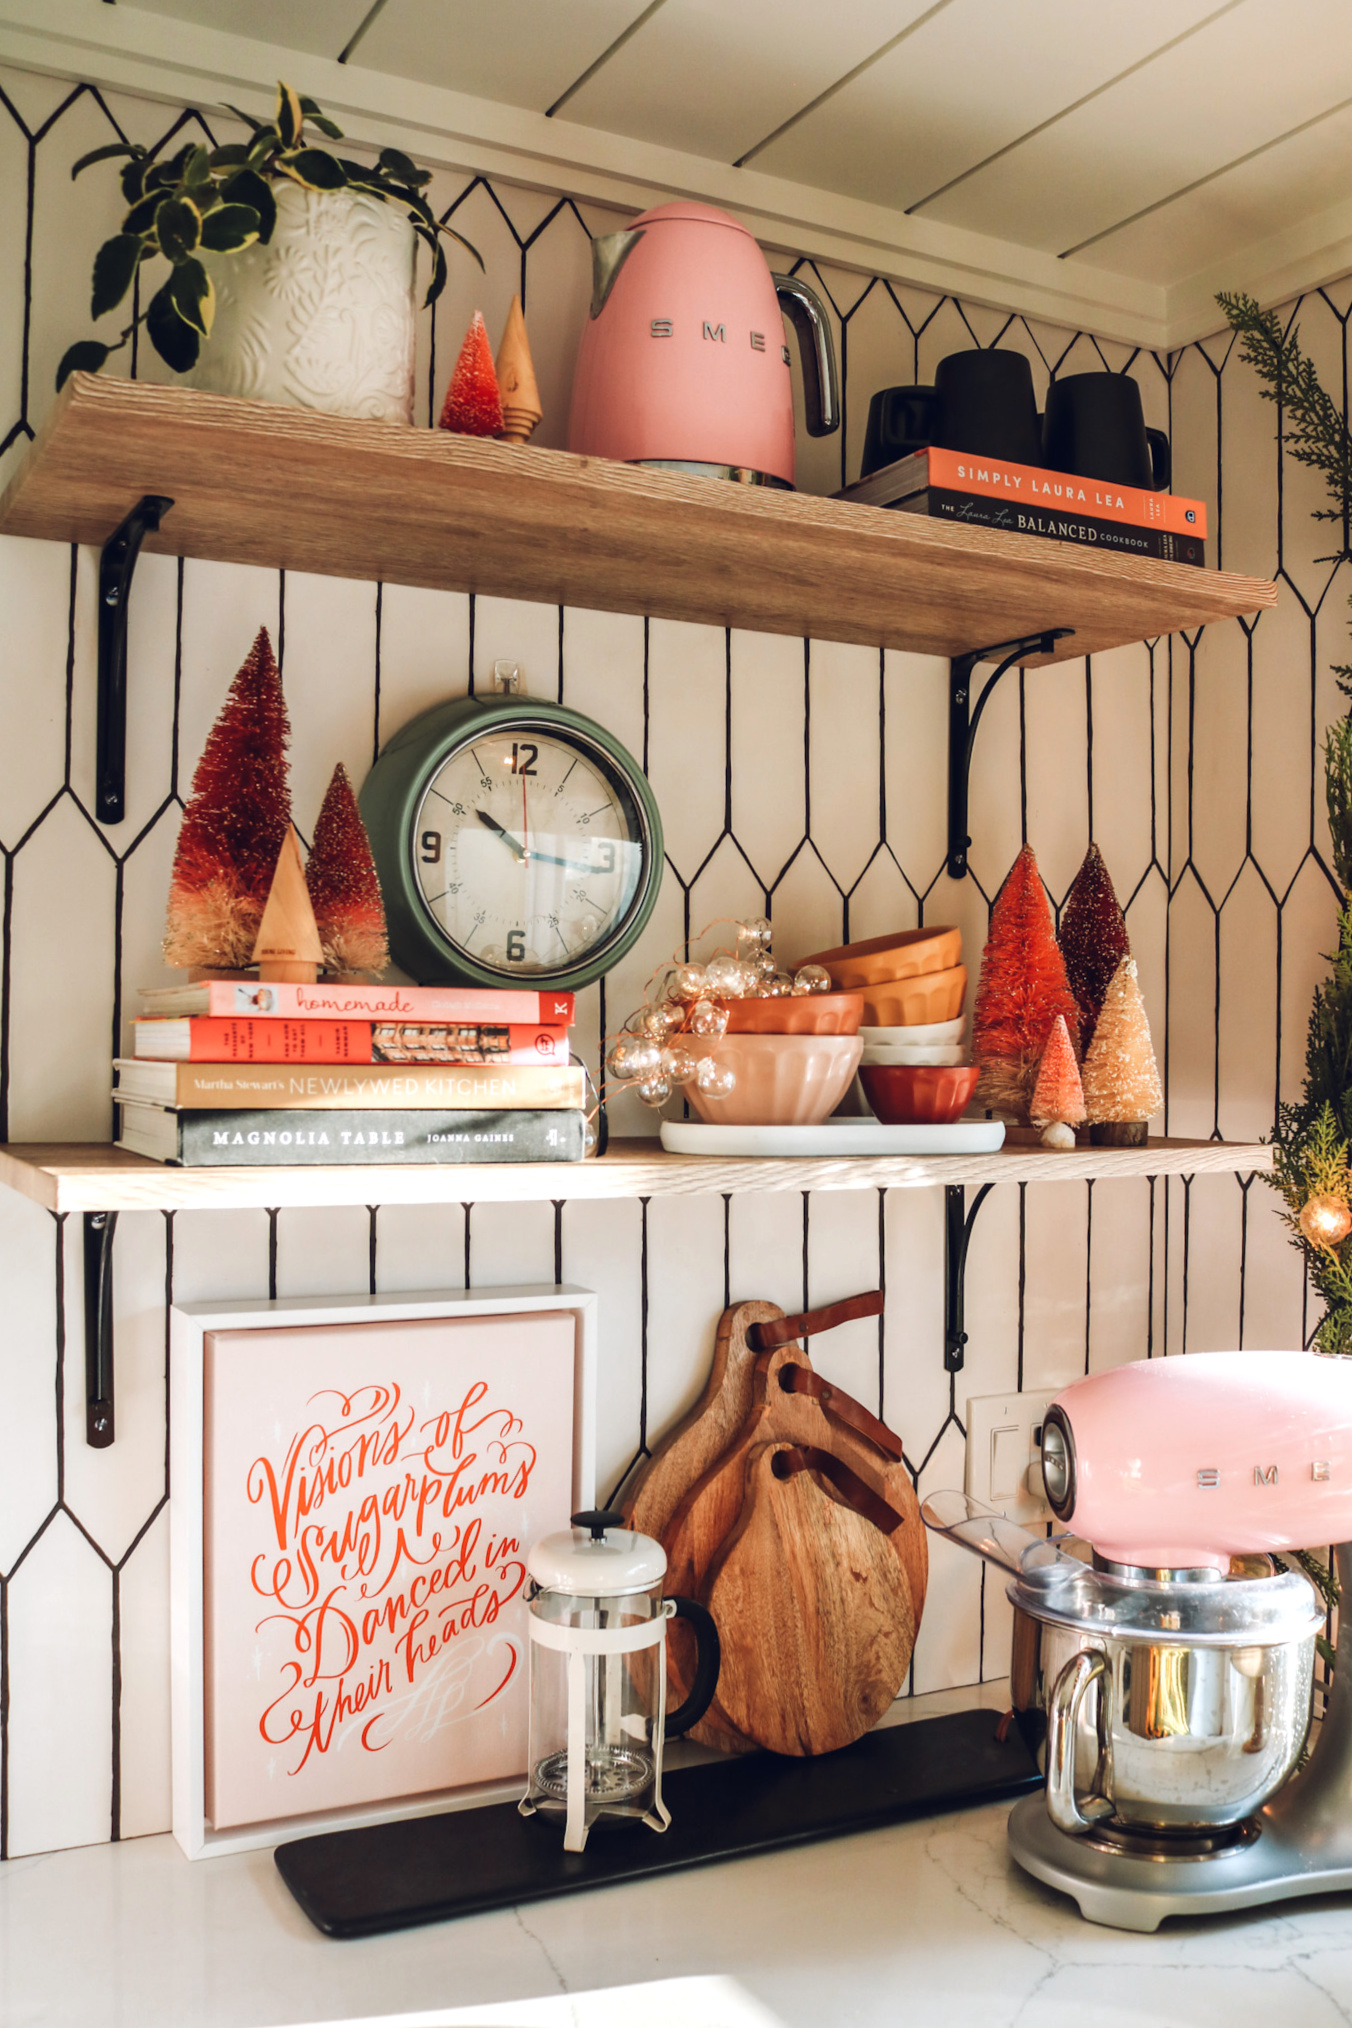
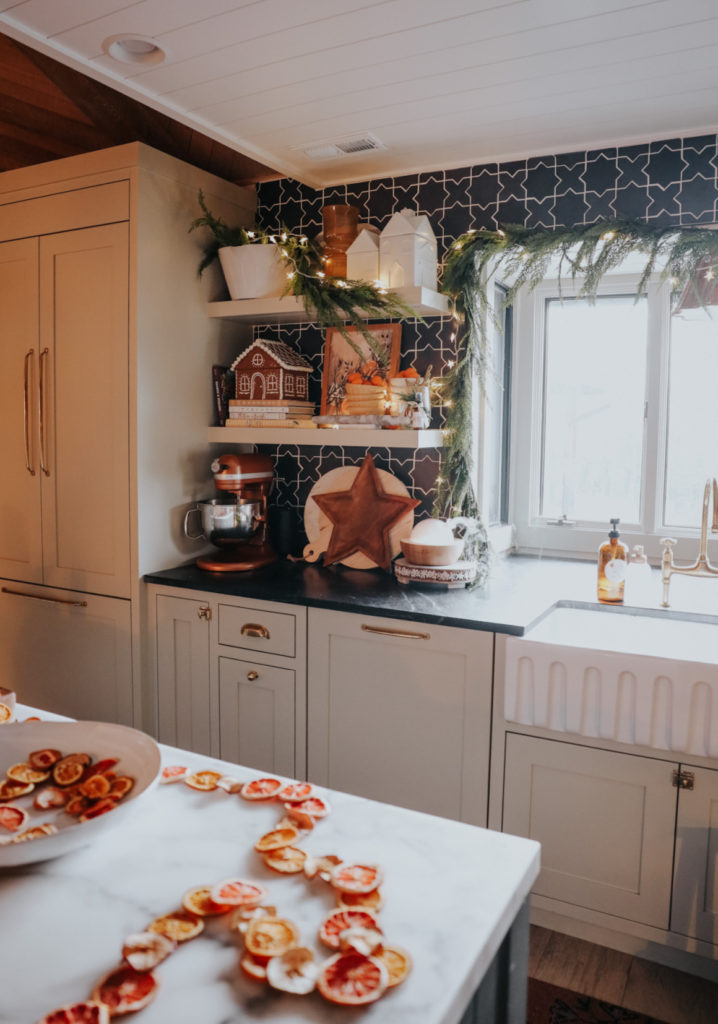
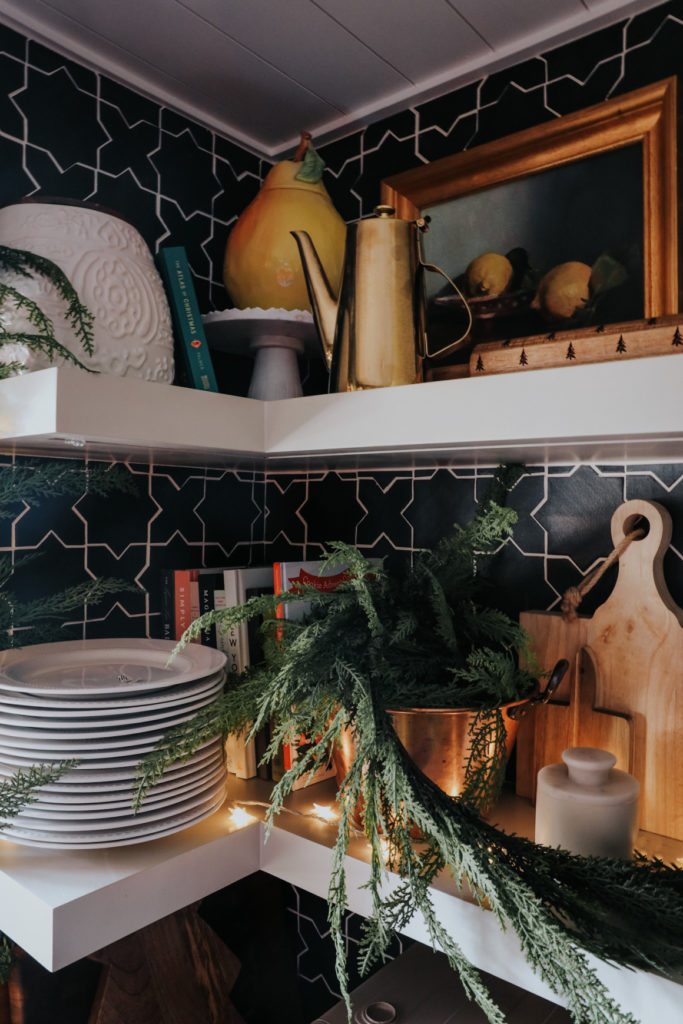
I added some of the cedar garland to bowls on my shelf too, it tells a complete story through my kitchen. Best tip when style is decorate with similar colors and textures. I pulled out my mustard bowls for the shelves too! The gingerbread house repeats the natural wood tones too.
I repeated the same colors and textures on this side of the kitchen! Shopped my house for golds, whites, and natural textures.

Added a low bowl of oranges to our kitchen island, simple and pulls in the colors. PS- get details on our kitchen HERE. PSS- still obsessed with this light over our island.
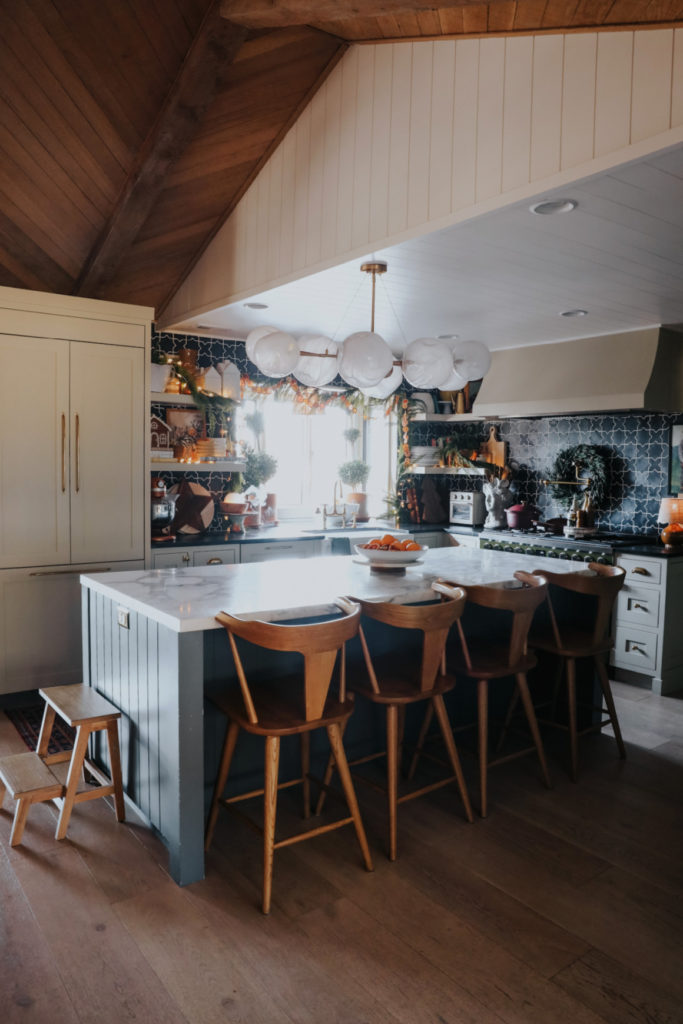
Festive kitchen ready for all the holiday parties and yummy baking!
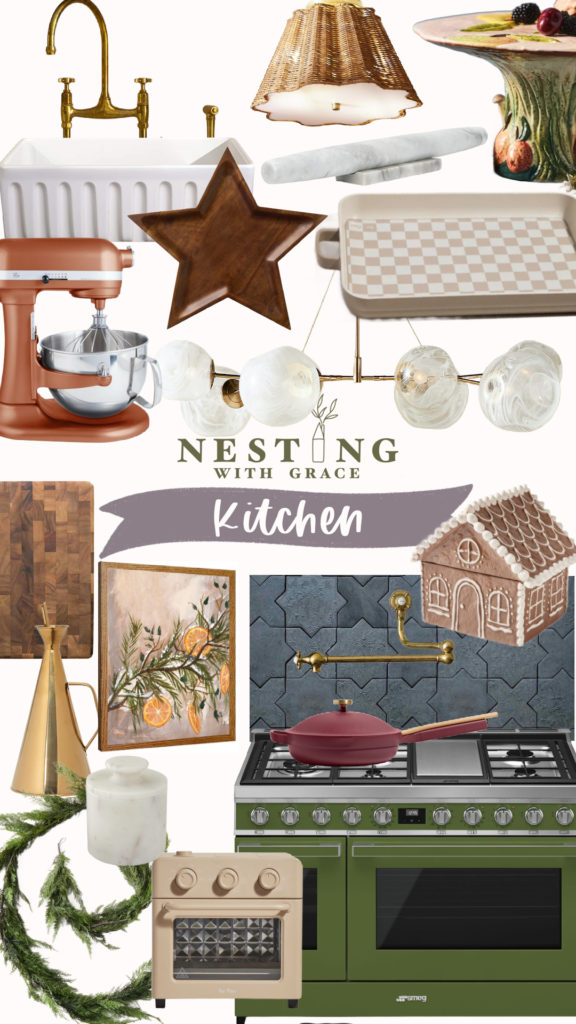
Aged Brass Faucet with Rinse // Fireclay Sink // Star // Rattan Light // Marble Rolling Pin // Cake Stand
Oven Pan // 6 Quart Copper Mixer // Light Fixture // Gold Oil Cruet // Butter Nest // Cutting Board
Fruit Art // Tile Backsplash // Brass Pot Filler // Dual Fuel Range // Favorite Pan // Favorite Pot
Wonder Mini Oven // Gingerbread House
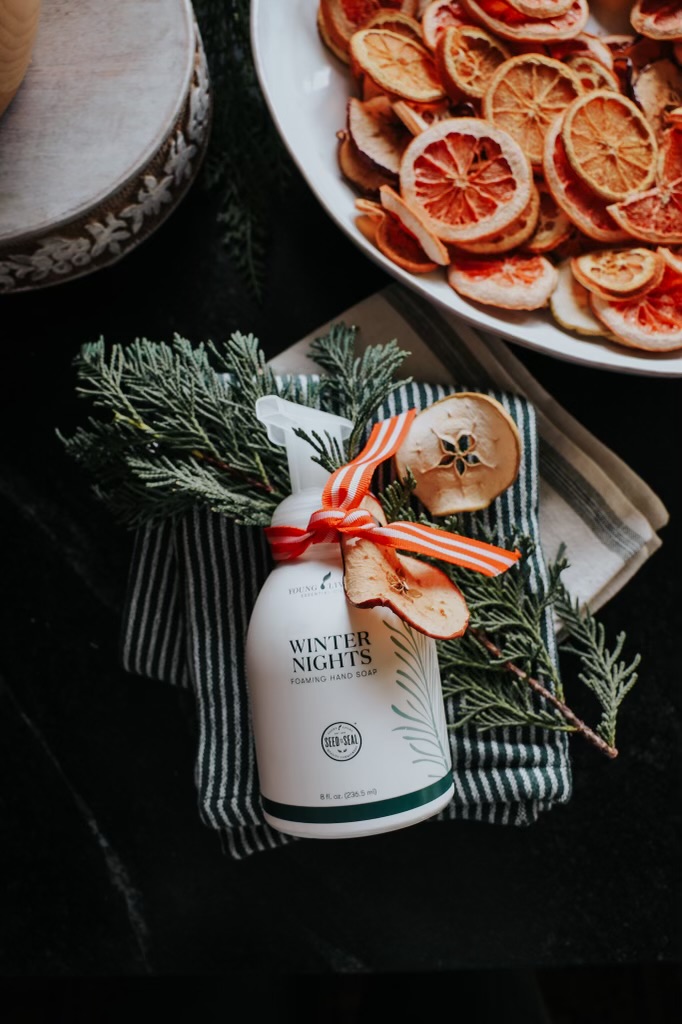
We have extra dried fruit, that we will use for gifts! So cute! (Find green dishtowels HERE).