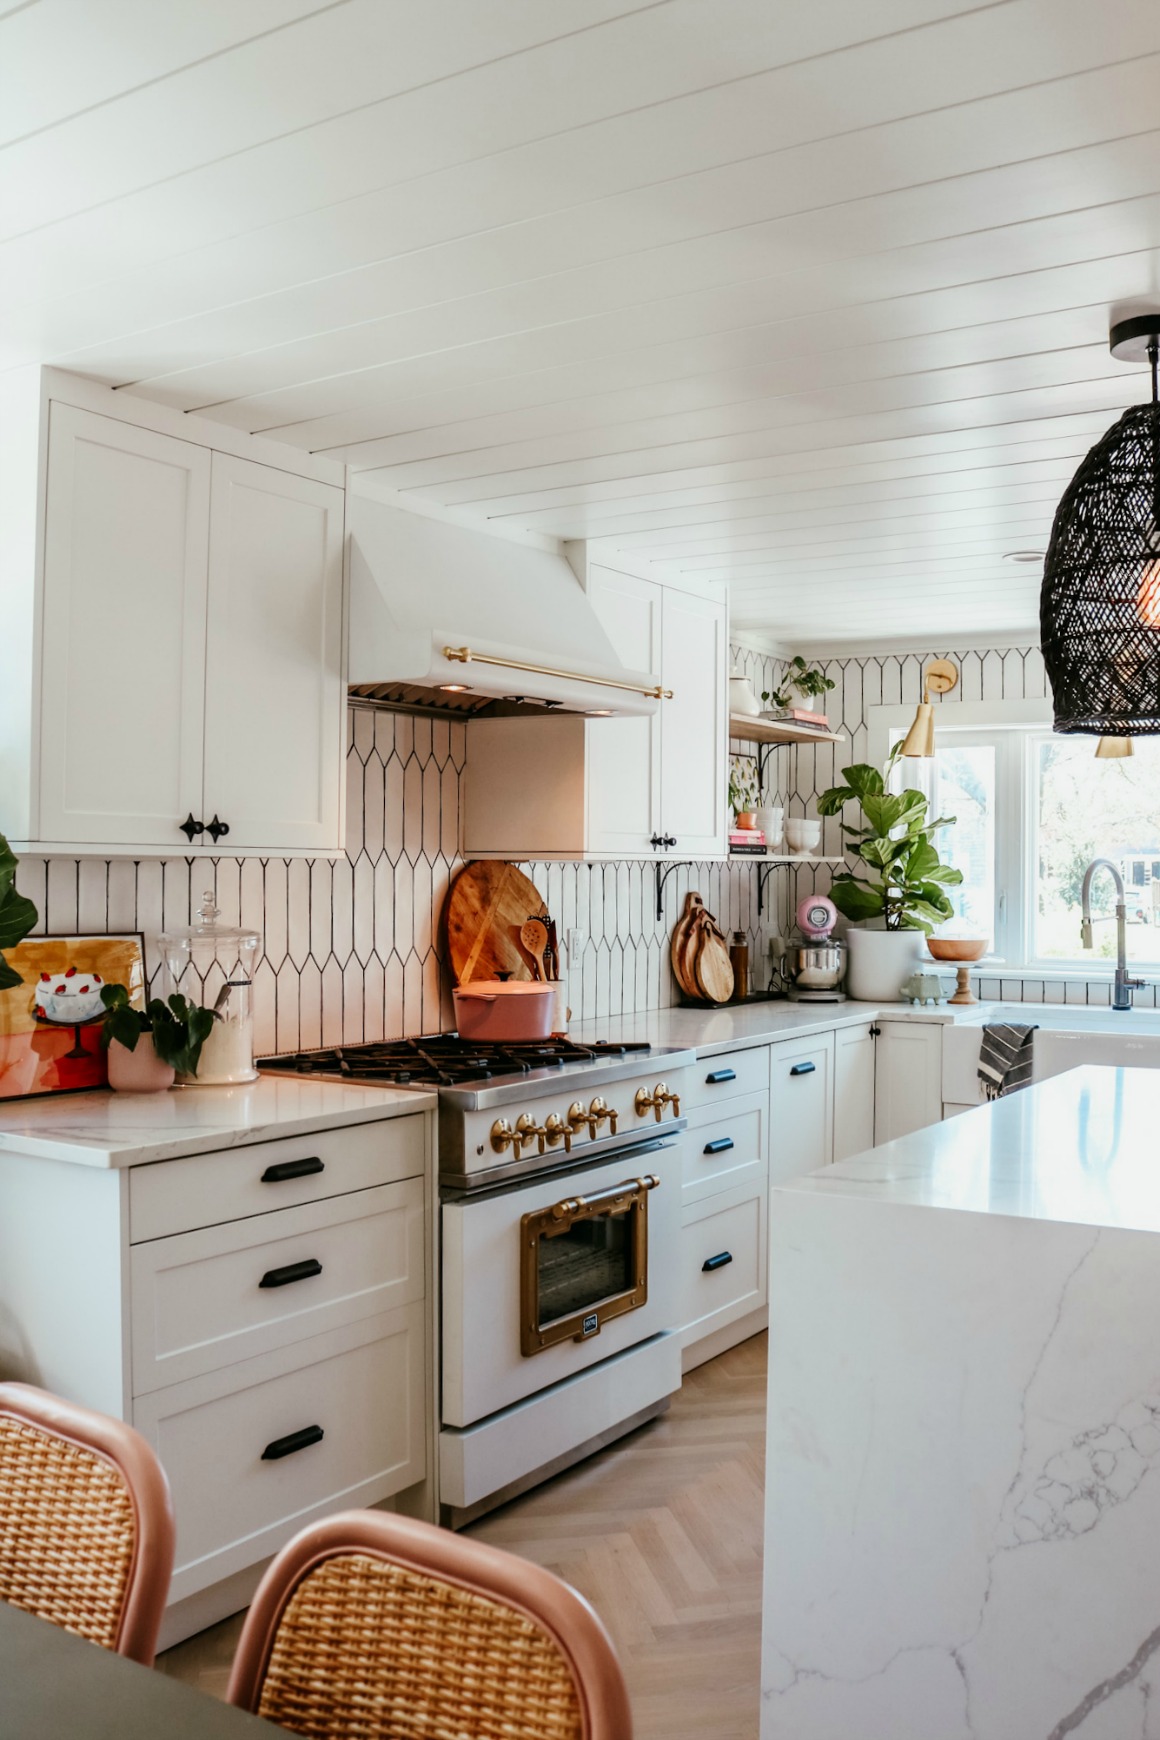
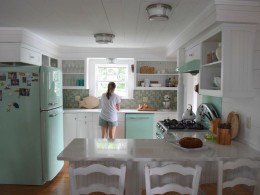
We added about 125 square feet to our kitchen. It is now full of glorious storage for plates and dishes and food! However, sometimes when we get more space (whether from moving or de-cluttering or renovating), it can be tempting to start filling that space right back up with things. Anyone else? I have learned so much from living in our small home about staying on top of the “stuff” that we have and keeping things organized and tidy, that I was determined to put our kitchen back together in an organized and efficient way. We didn’t add more- just can now put things in cupboards that was spread in our basement and in storage in other spots. Nice to not run from one area to the next grabbing what you need to make dinner (I feel you- small space dwellers).
Today I am sharing how I organized our new kitchen, but the same steps could be taken whether or not you have changed a space! You may even feel like you got a new kitchen just by re-organizing it!
Tips to an Organized Kitchen
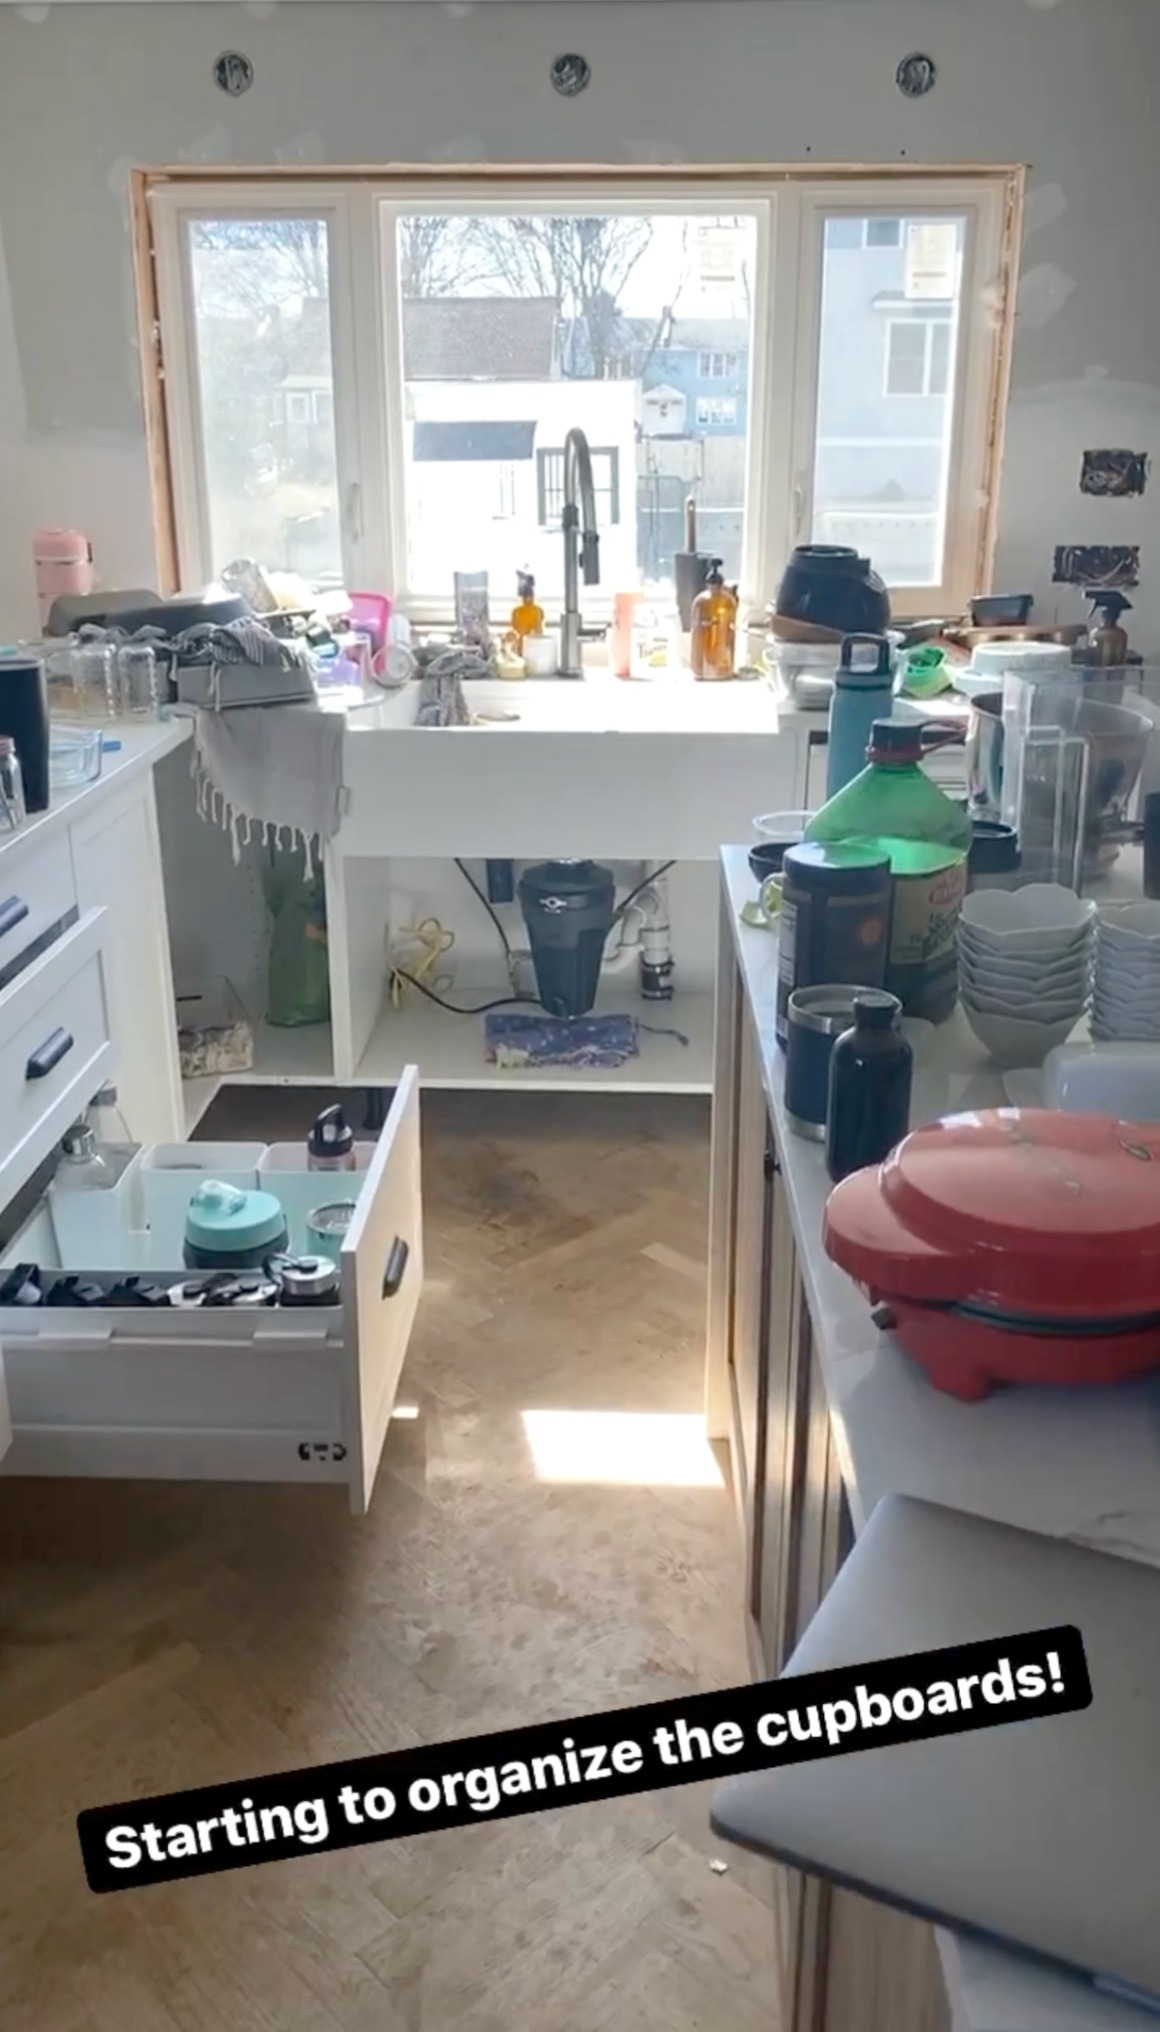
First, empty EVERYTHING. This is the “It always gets worse before it gets better”–phase. It may feel unnecessary if you think you know where you want to put everything back, but clearing the shelves will help you get to a starting point and give you a fresh start. Plus, it makes step two much easier. Below was when I started organizing our kitchen. CRAZY to see how far we have come! But having some sense of order is invaluable!
Kitchen Organizing Tip #1: If new storage containers and baskets are in your budget, take a moment to measure the space so you can buy what you need in the right size. If not, just use a box or what you have until you get get the exact right thing.
Kitchen Organizing Tip #2: Make sure all cabinets and storage areas are wiped down and clean before you start putting things in them. … Shelf liner is a good option if the inside of your cabinets are wood. If the cabinets have a laminated surface, shelf liner is not necessary.
Kitchen Organizing Tip #3: If you aren’t ready to say goodbye to something forever, try putting it away in a “donate” box for a little while and see if you missed it. Check that donate box once a month or so and you may find that those items are easier to part with.
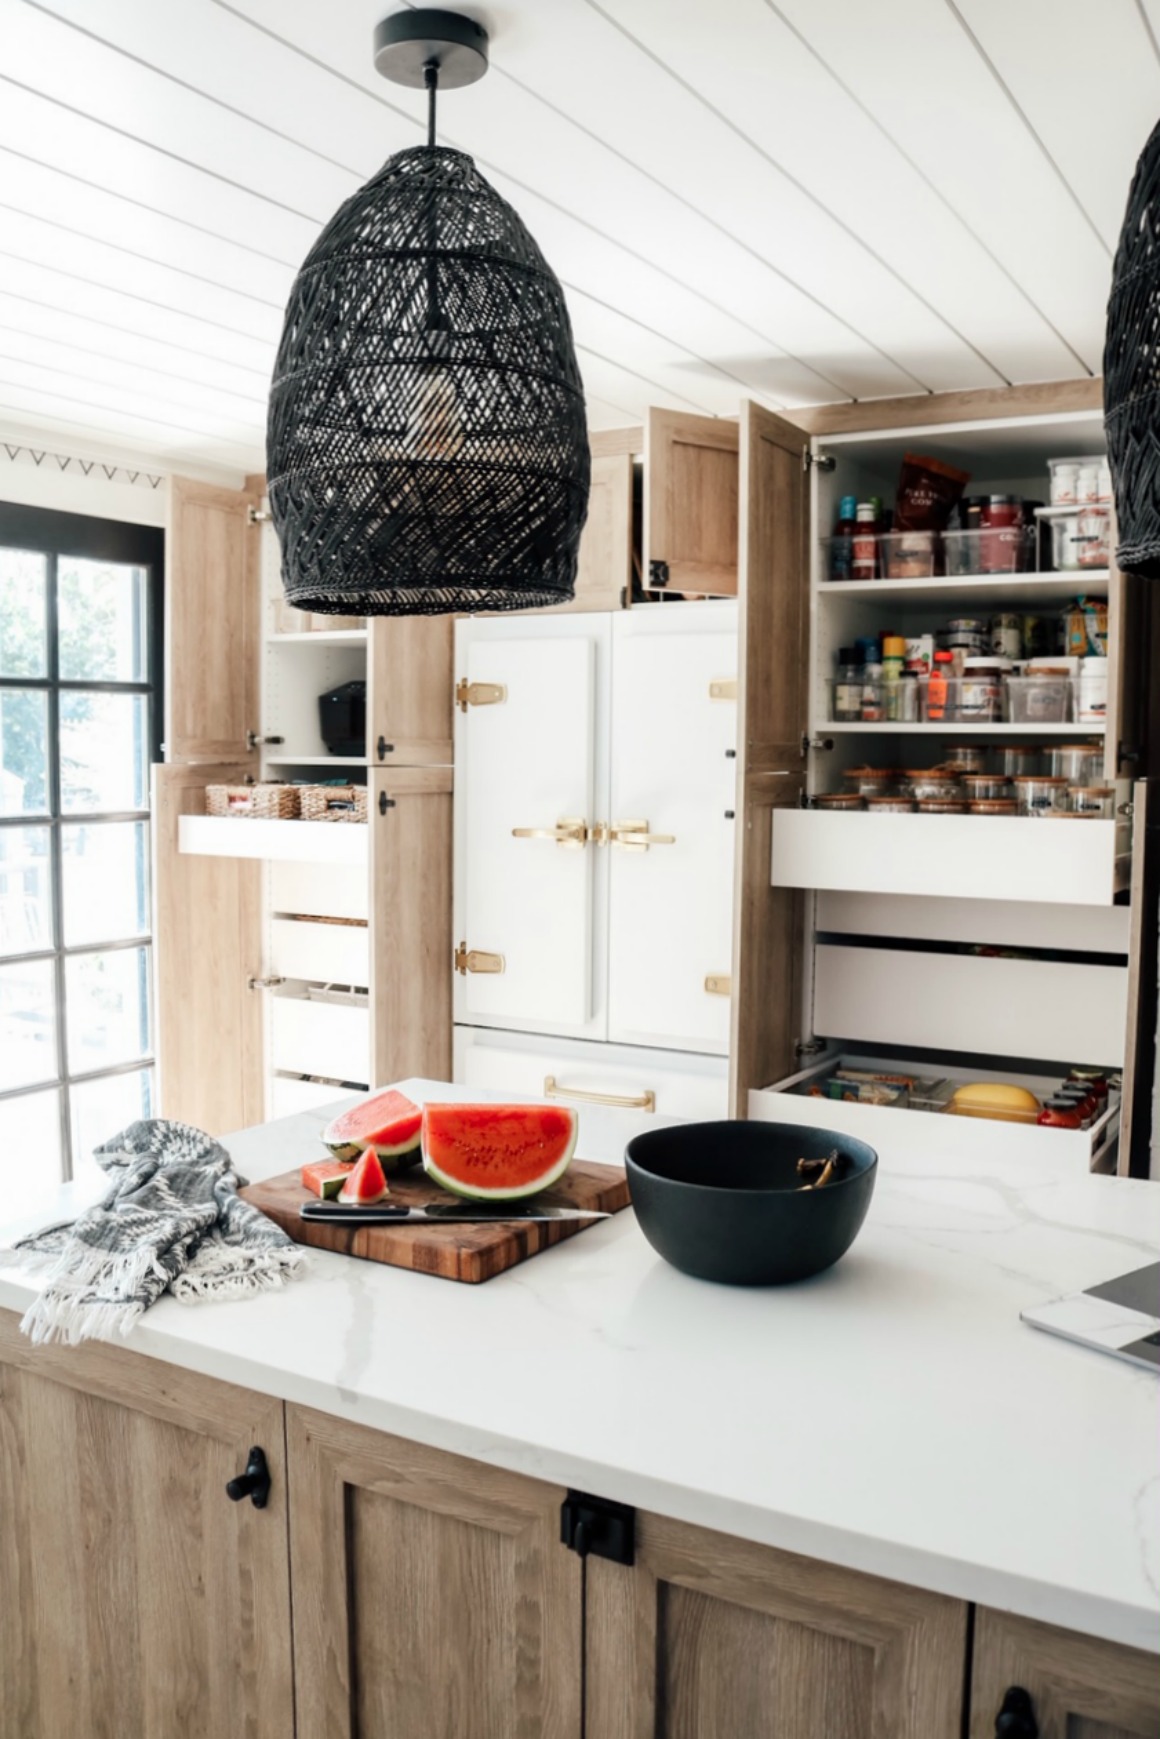
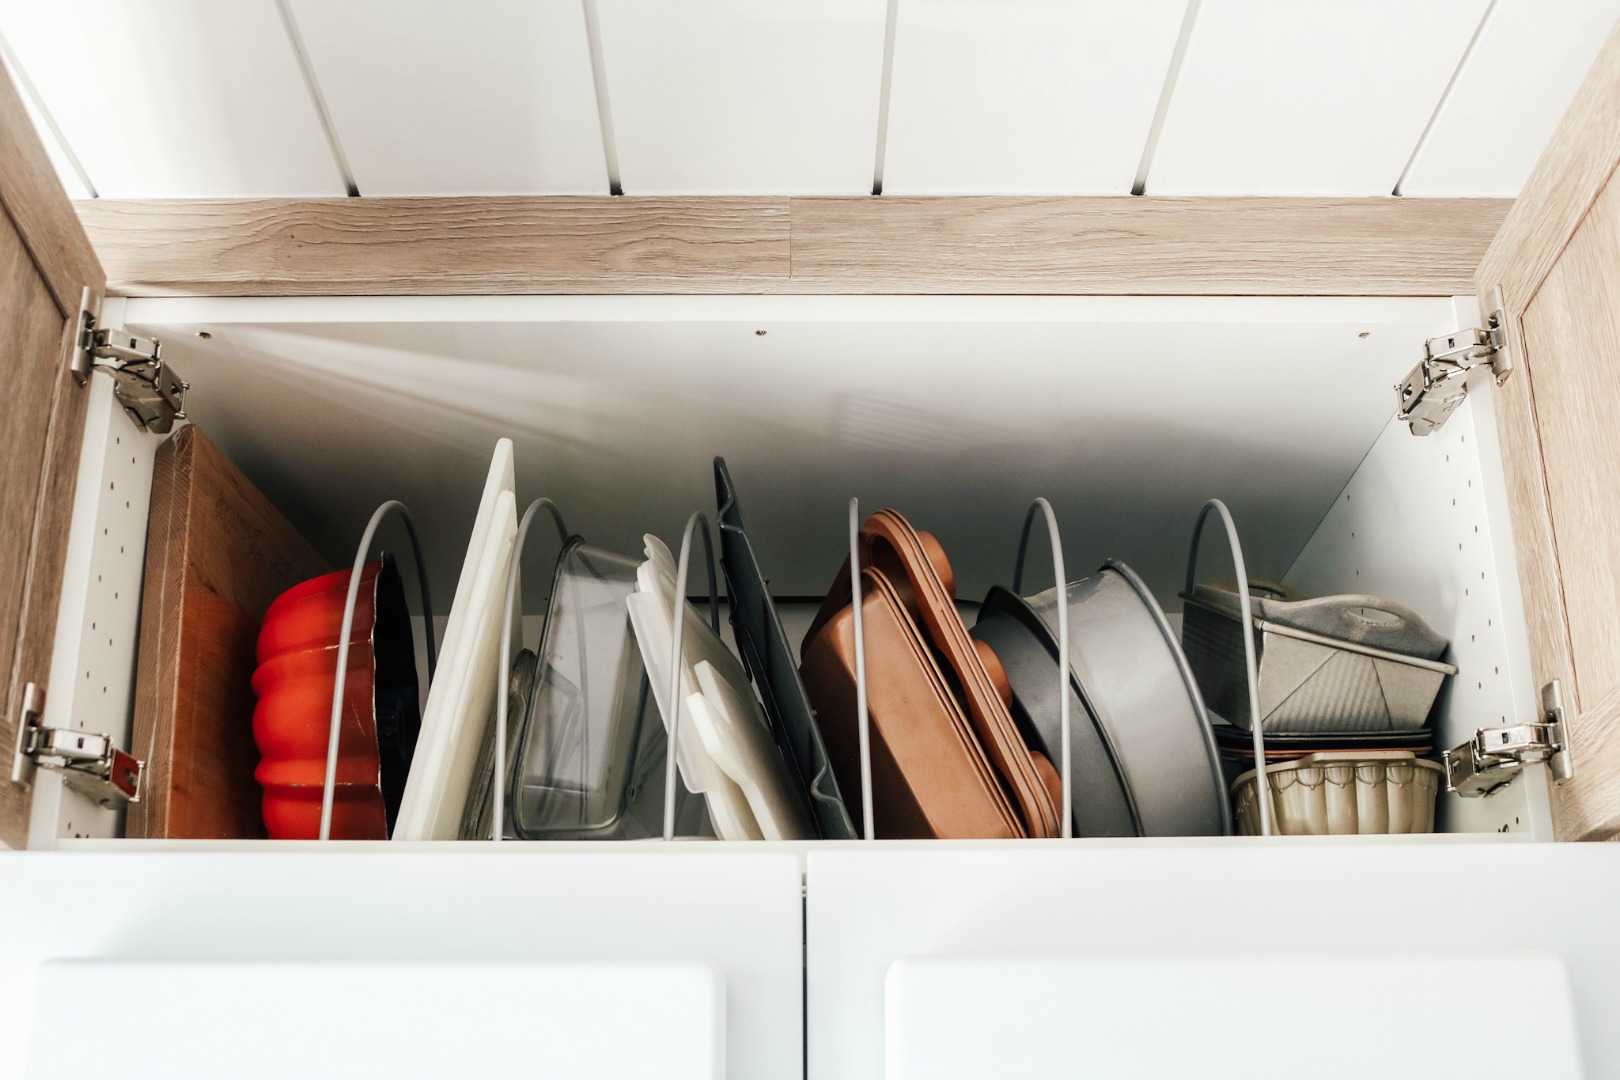
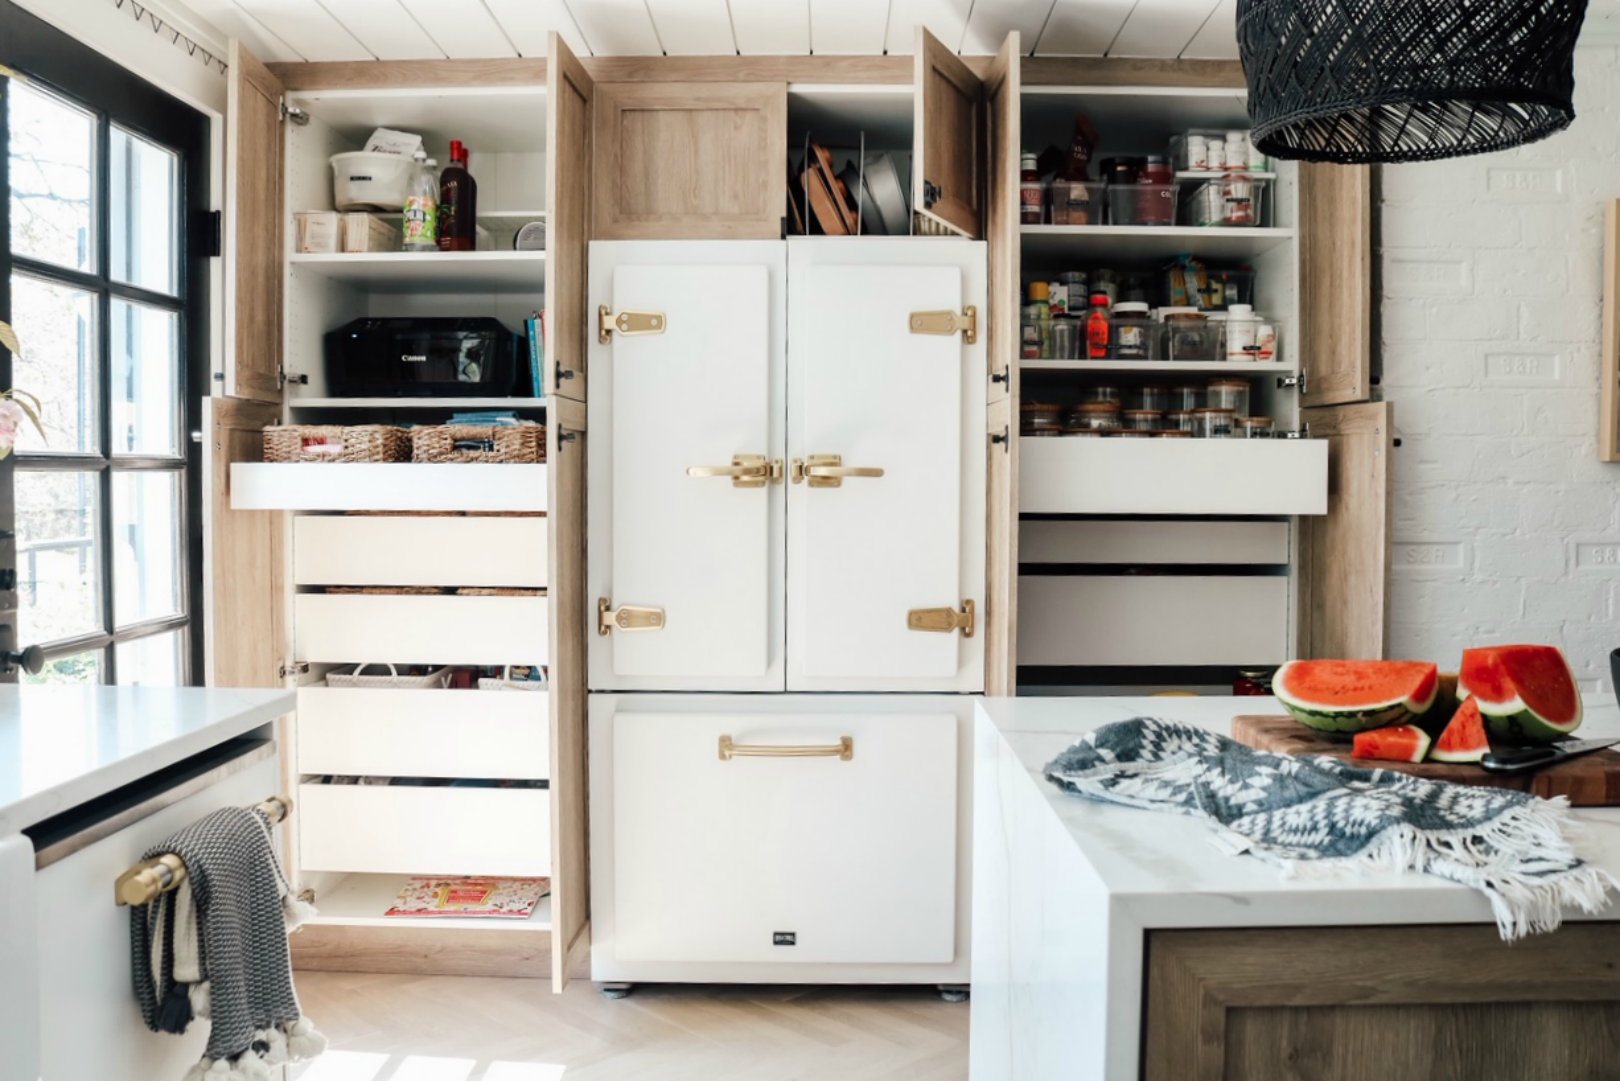
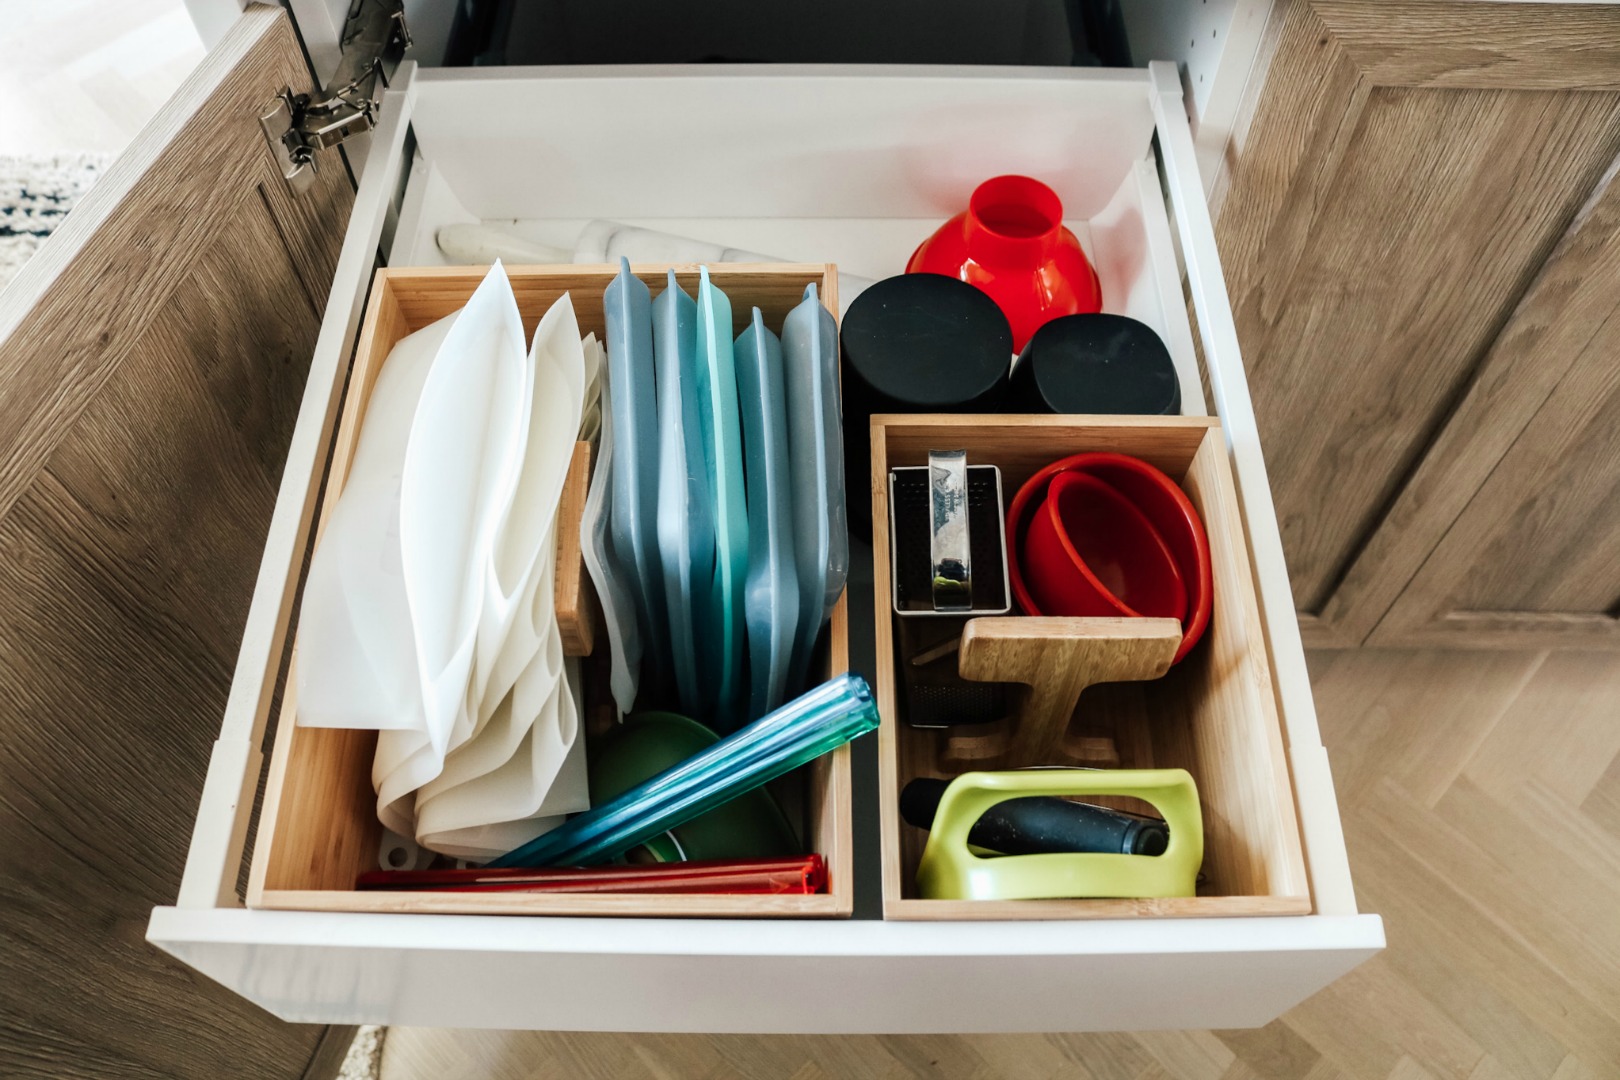
Kitchen Organizing Tip #4: As I load up the cupboards, I like to keep the things that are used most often close-at-hand. Items that you want to keep in the kitchen, but are not used daily can be stored in the higher spaces of the kitchen. Organizing pots and pans and lids can be a chore. To organize baking sheets and cutting boards we used these dividers that we screwed into the cabinets. I found THIS is similar on Amazon or THIS. Great spot for this is the area above your fridge where things can get lost.
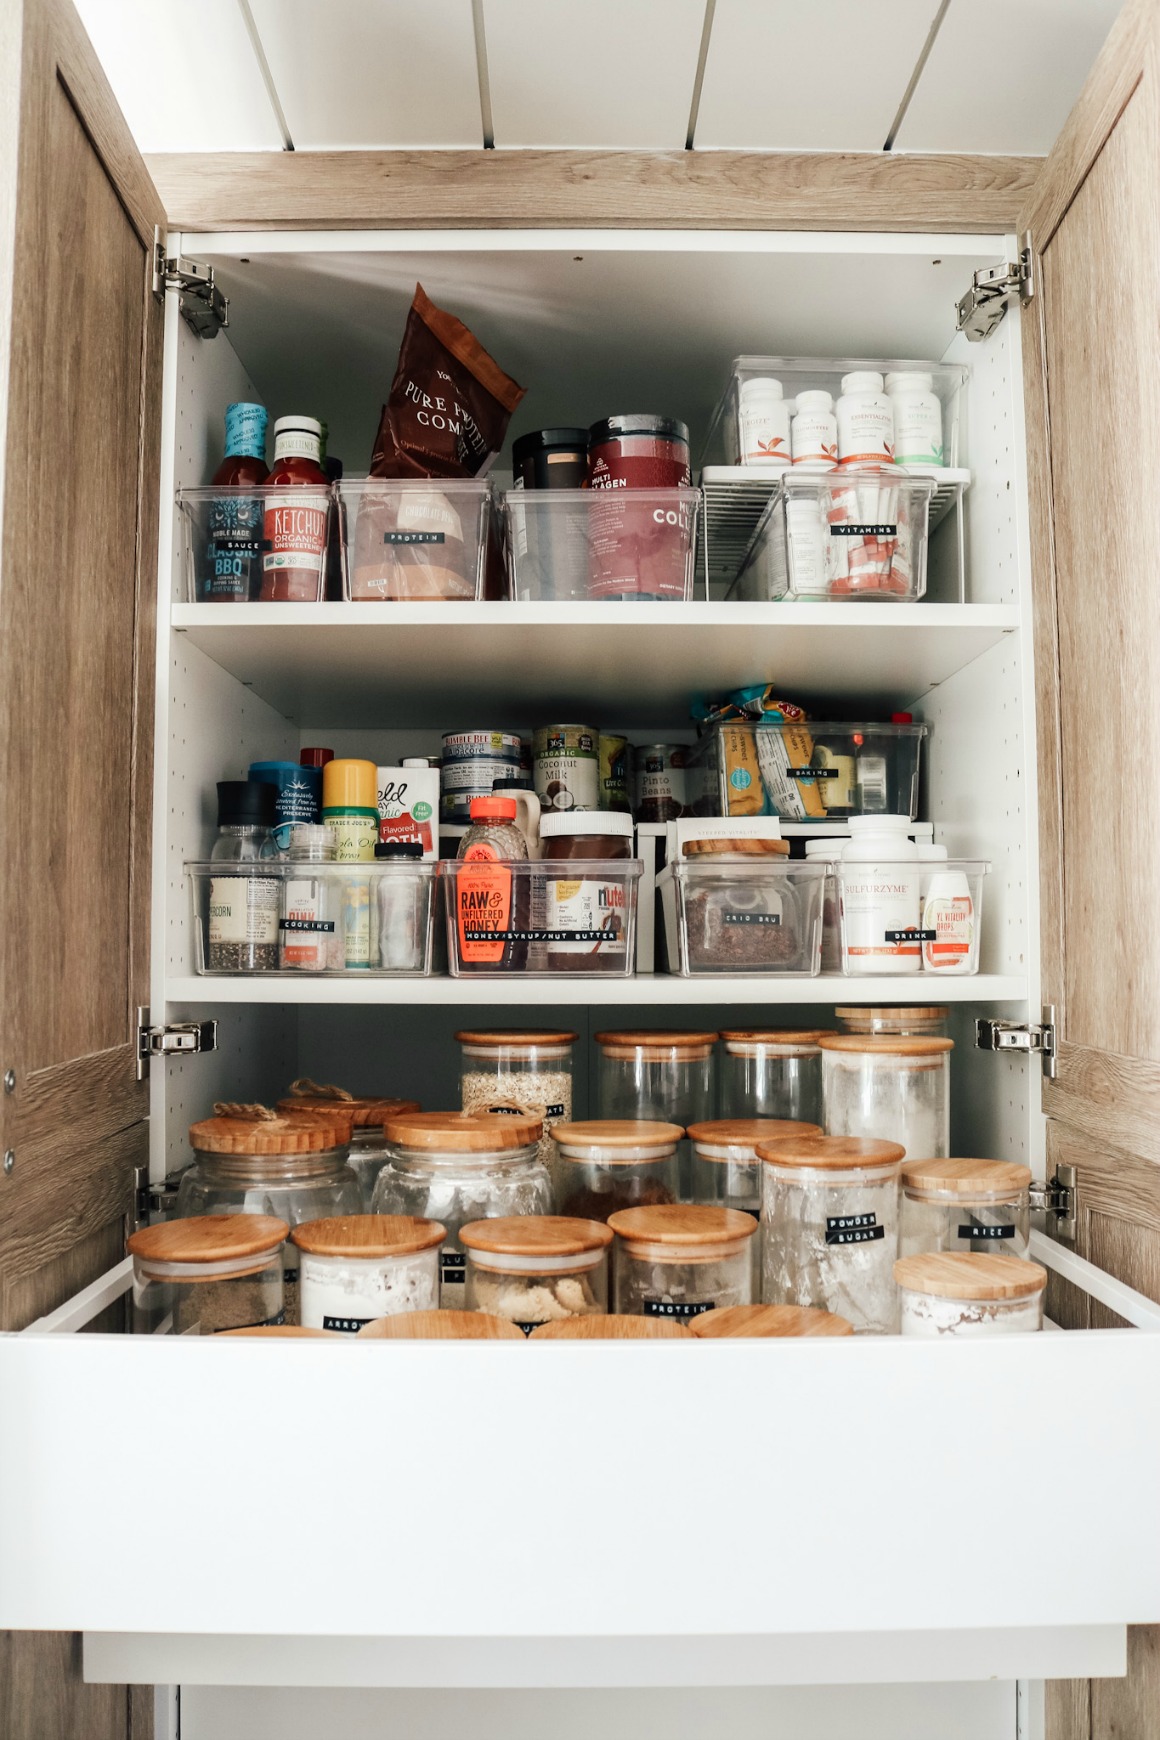
Kitchen Organizing Tip #5: Containers can make or break the ongoing order you are trying to create. I love to store everything in CLEAR containers so that I can easily identify what is in there and how much I have left. I also love to label everything. (I use THIS label maker and THESE clear bins). And risers are really great for tall deep drawers!
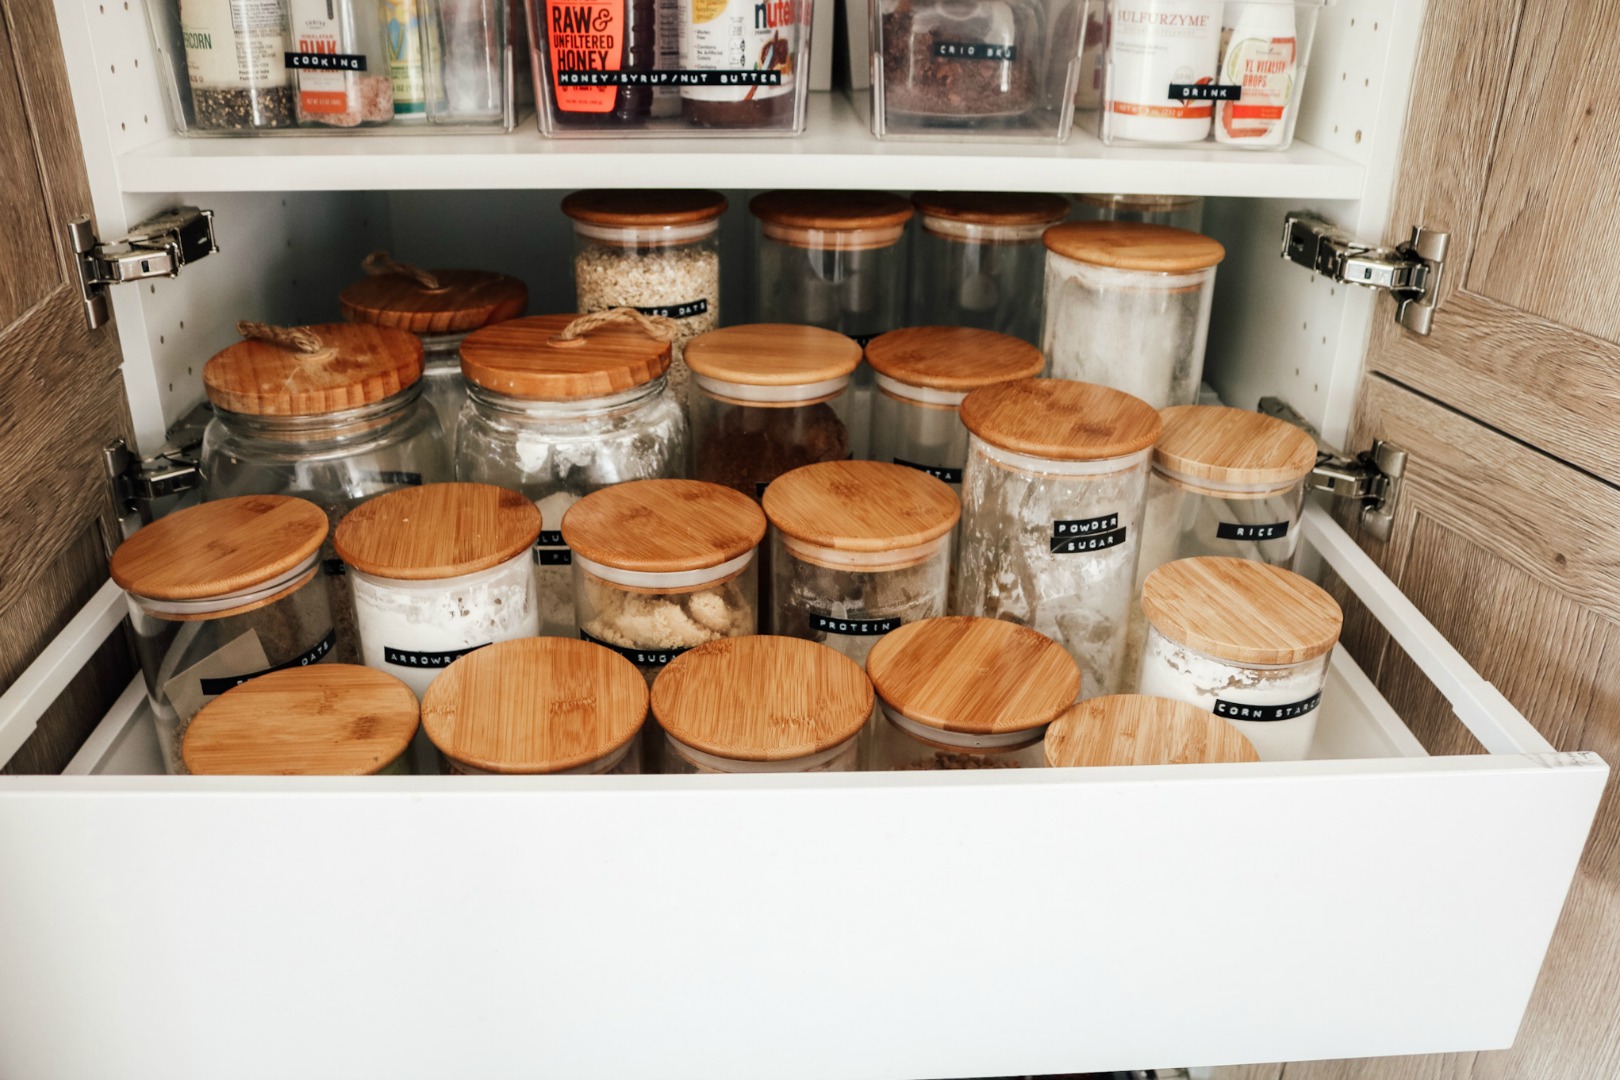
I have had THESE and THESE glass jars with the bamboo lids for awhile and really like them. They seal well and are great to store dry goods for baking.
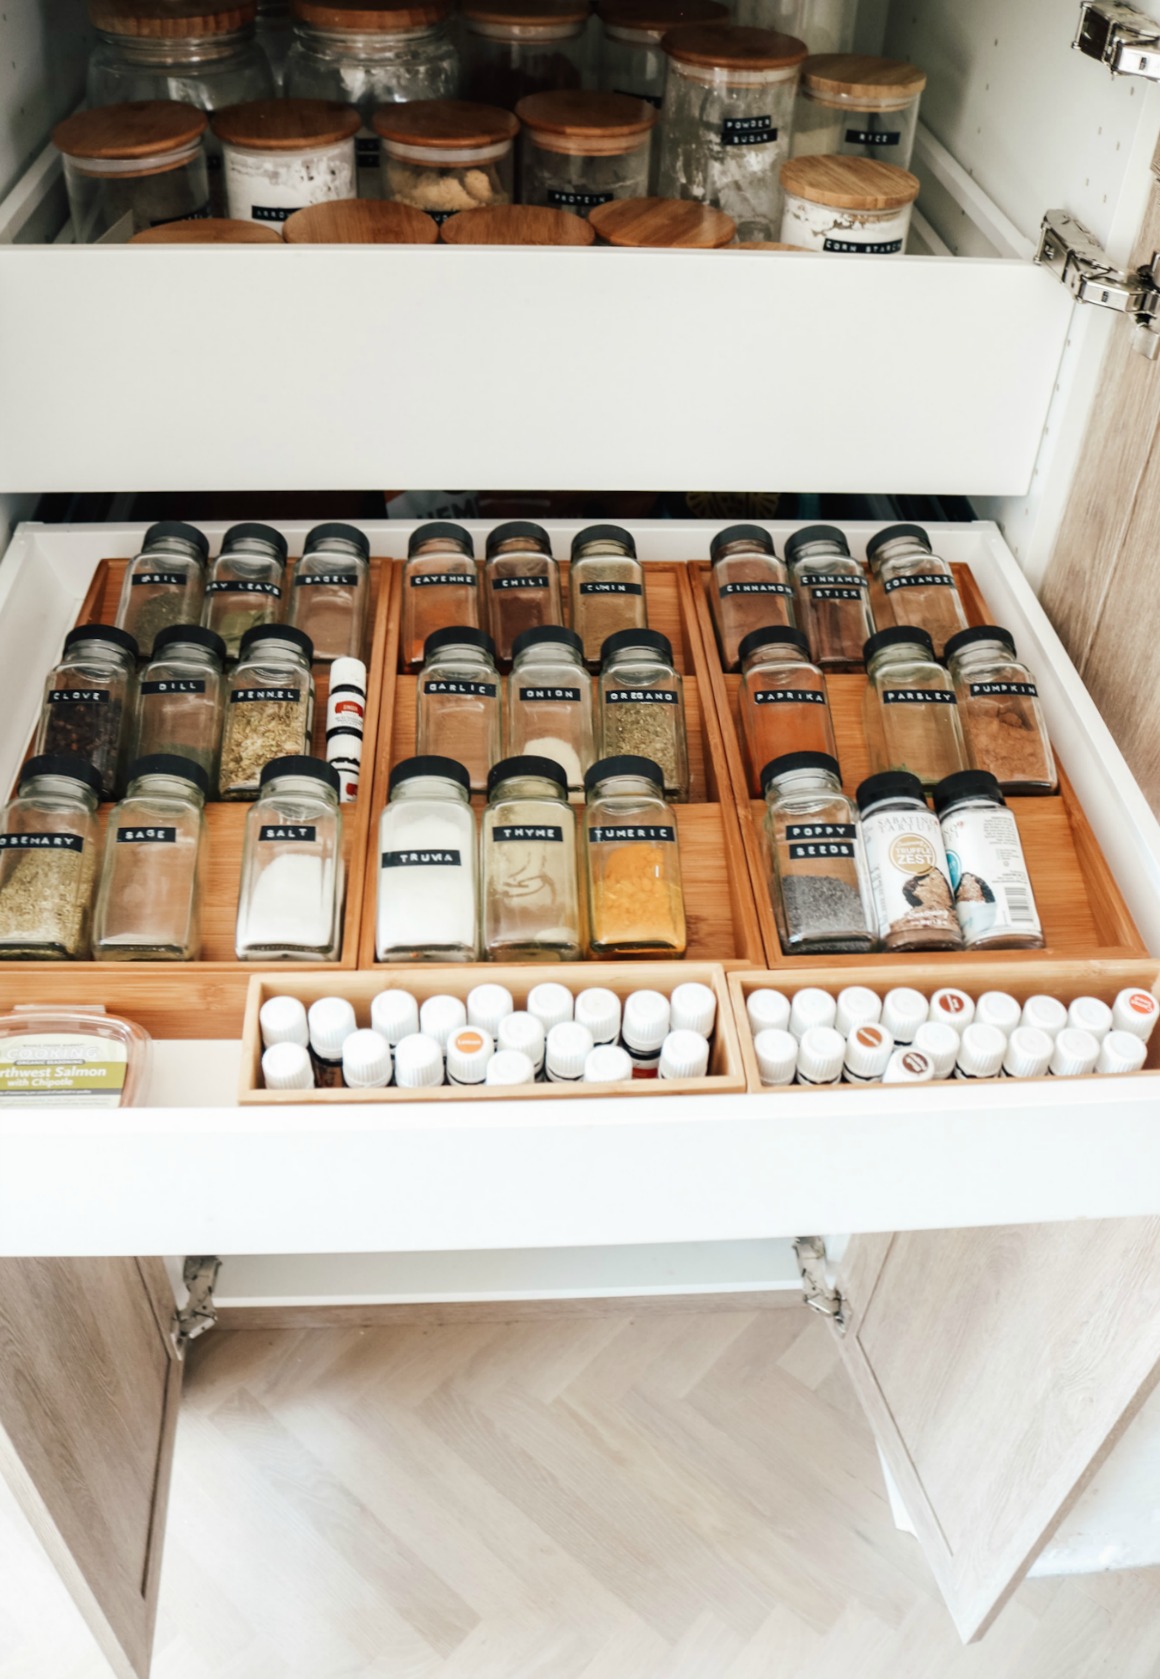
I used THESE jars to organize our spices and labeled them all with THIS label maker. And THIS spice rack fit perfectly in the smaller IKEA drawer! I do have our Vitality Essential Oils mixed in that we use in the kitchen.
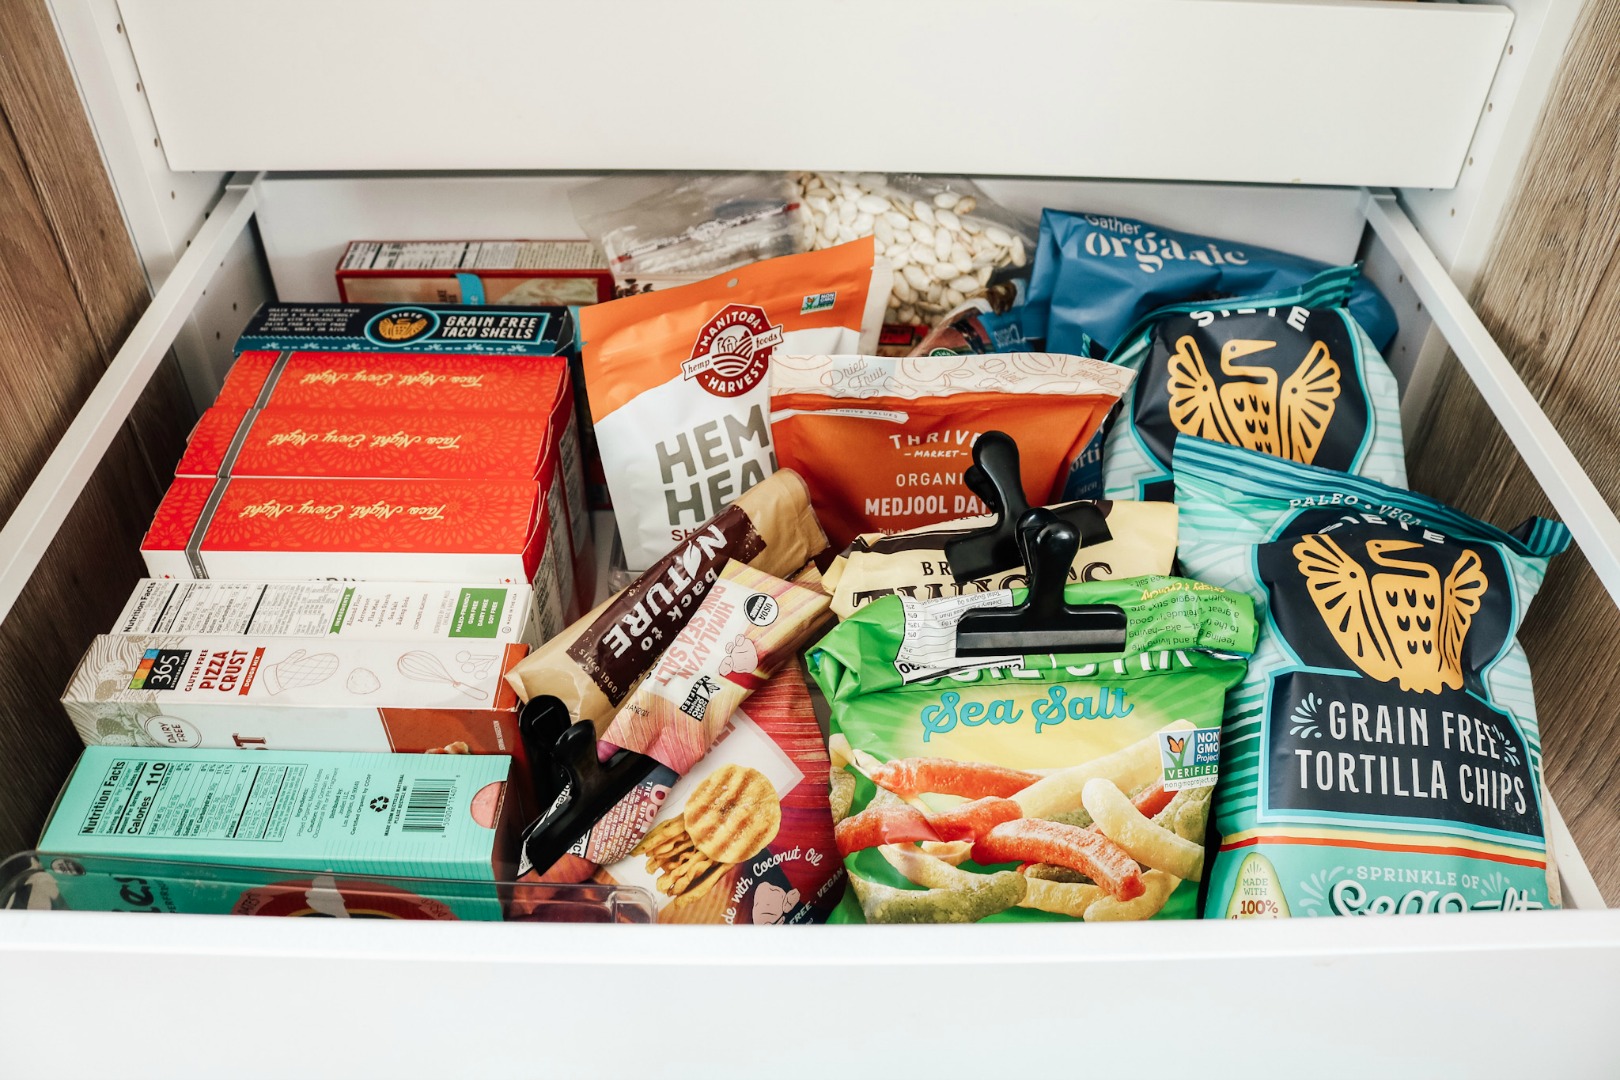
Drawer or chips and snacks (I use THIS black chip clip).
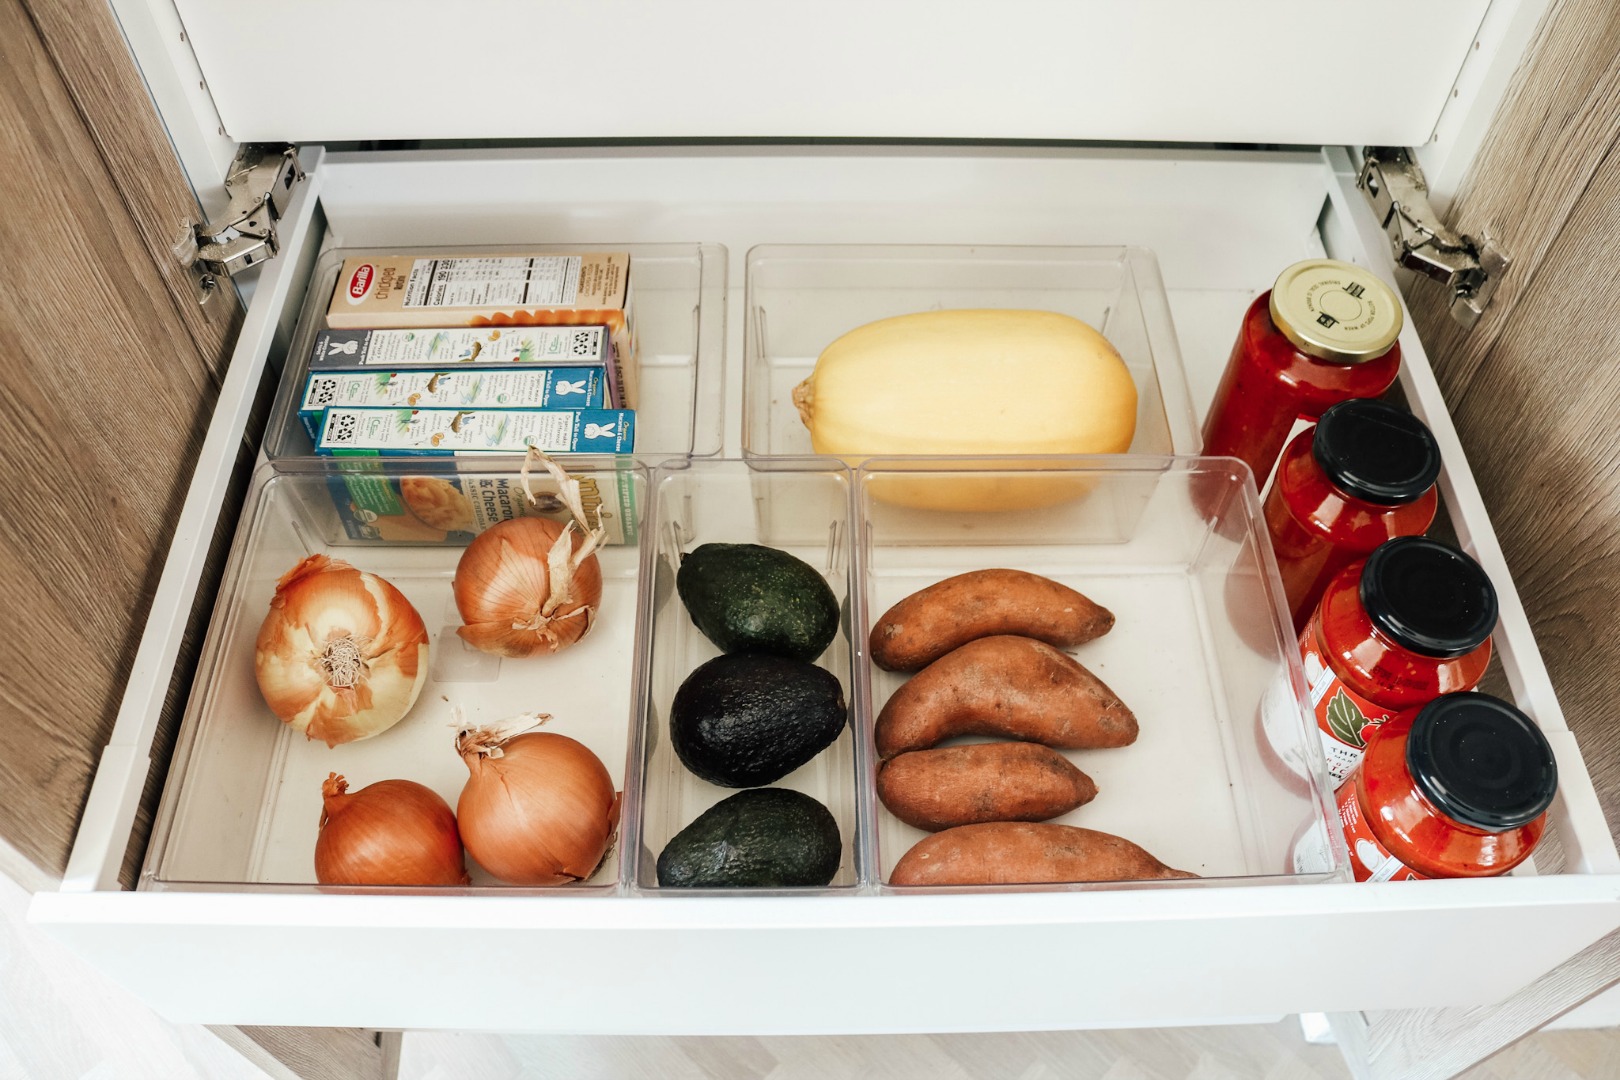
And a space for produce! I used THESE clear bins again to separate everything.
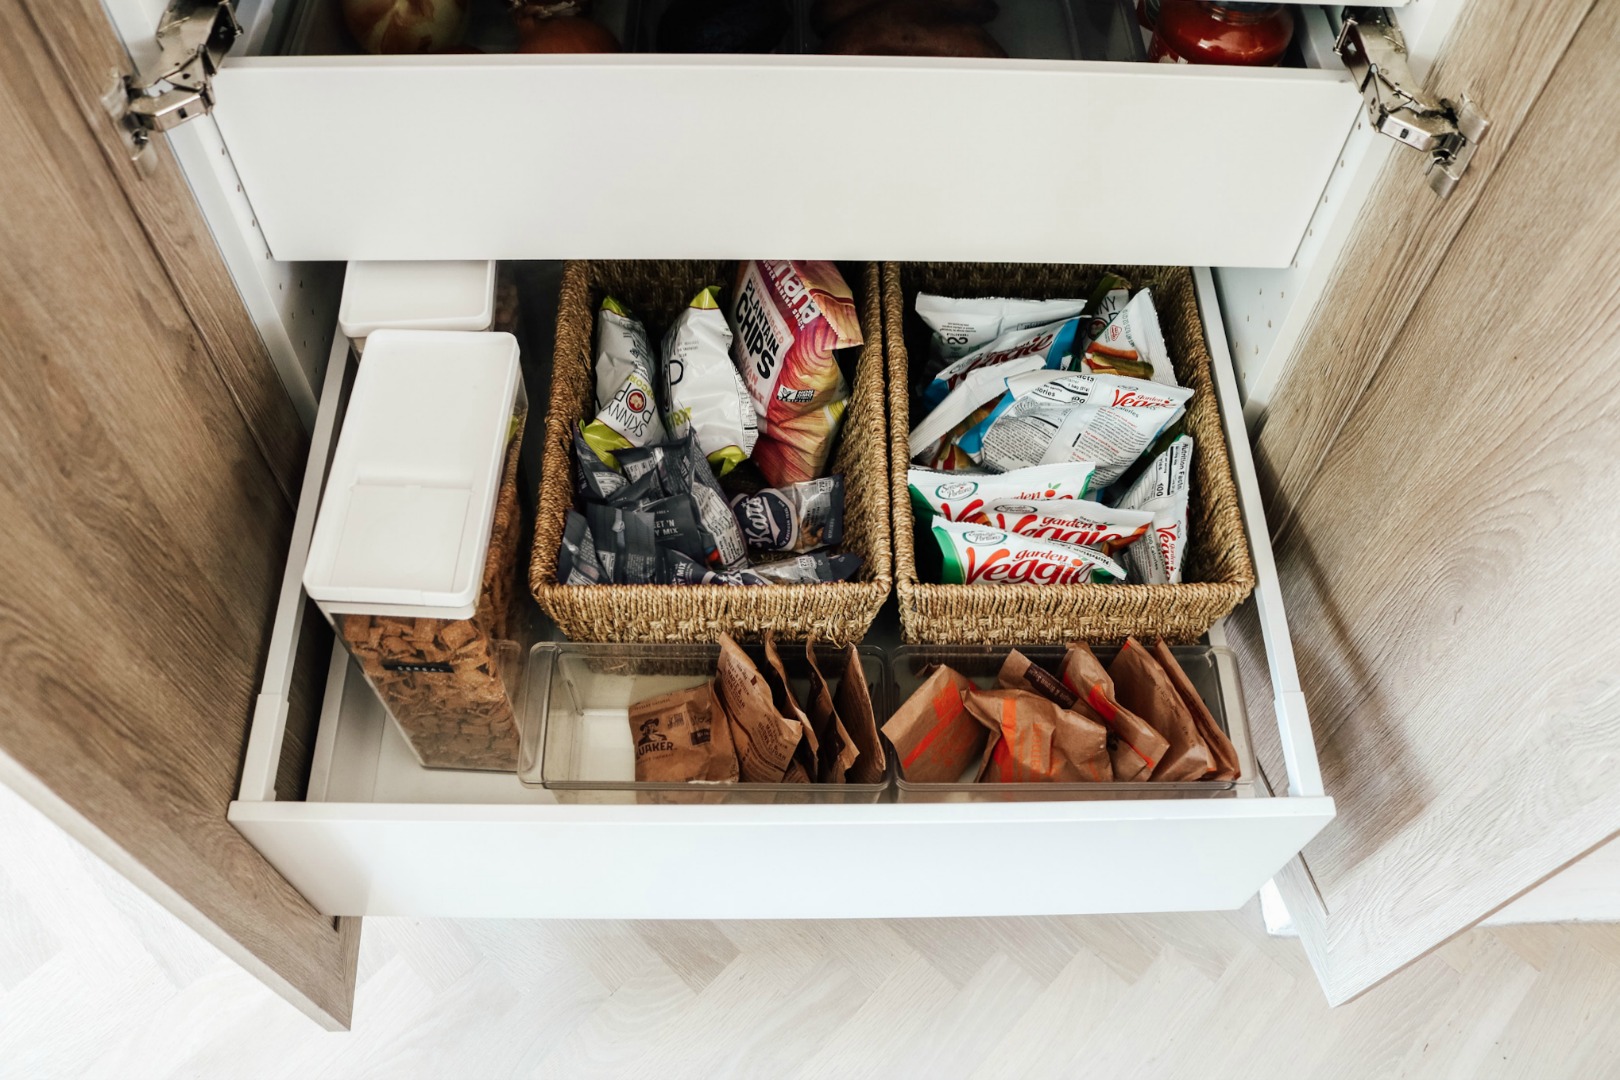
And the bottom drawer has cereal, so Finn can even get it out. And snacks that are our to-go snacks.
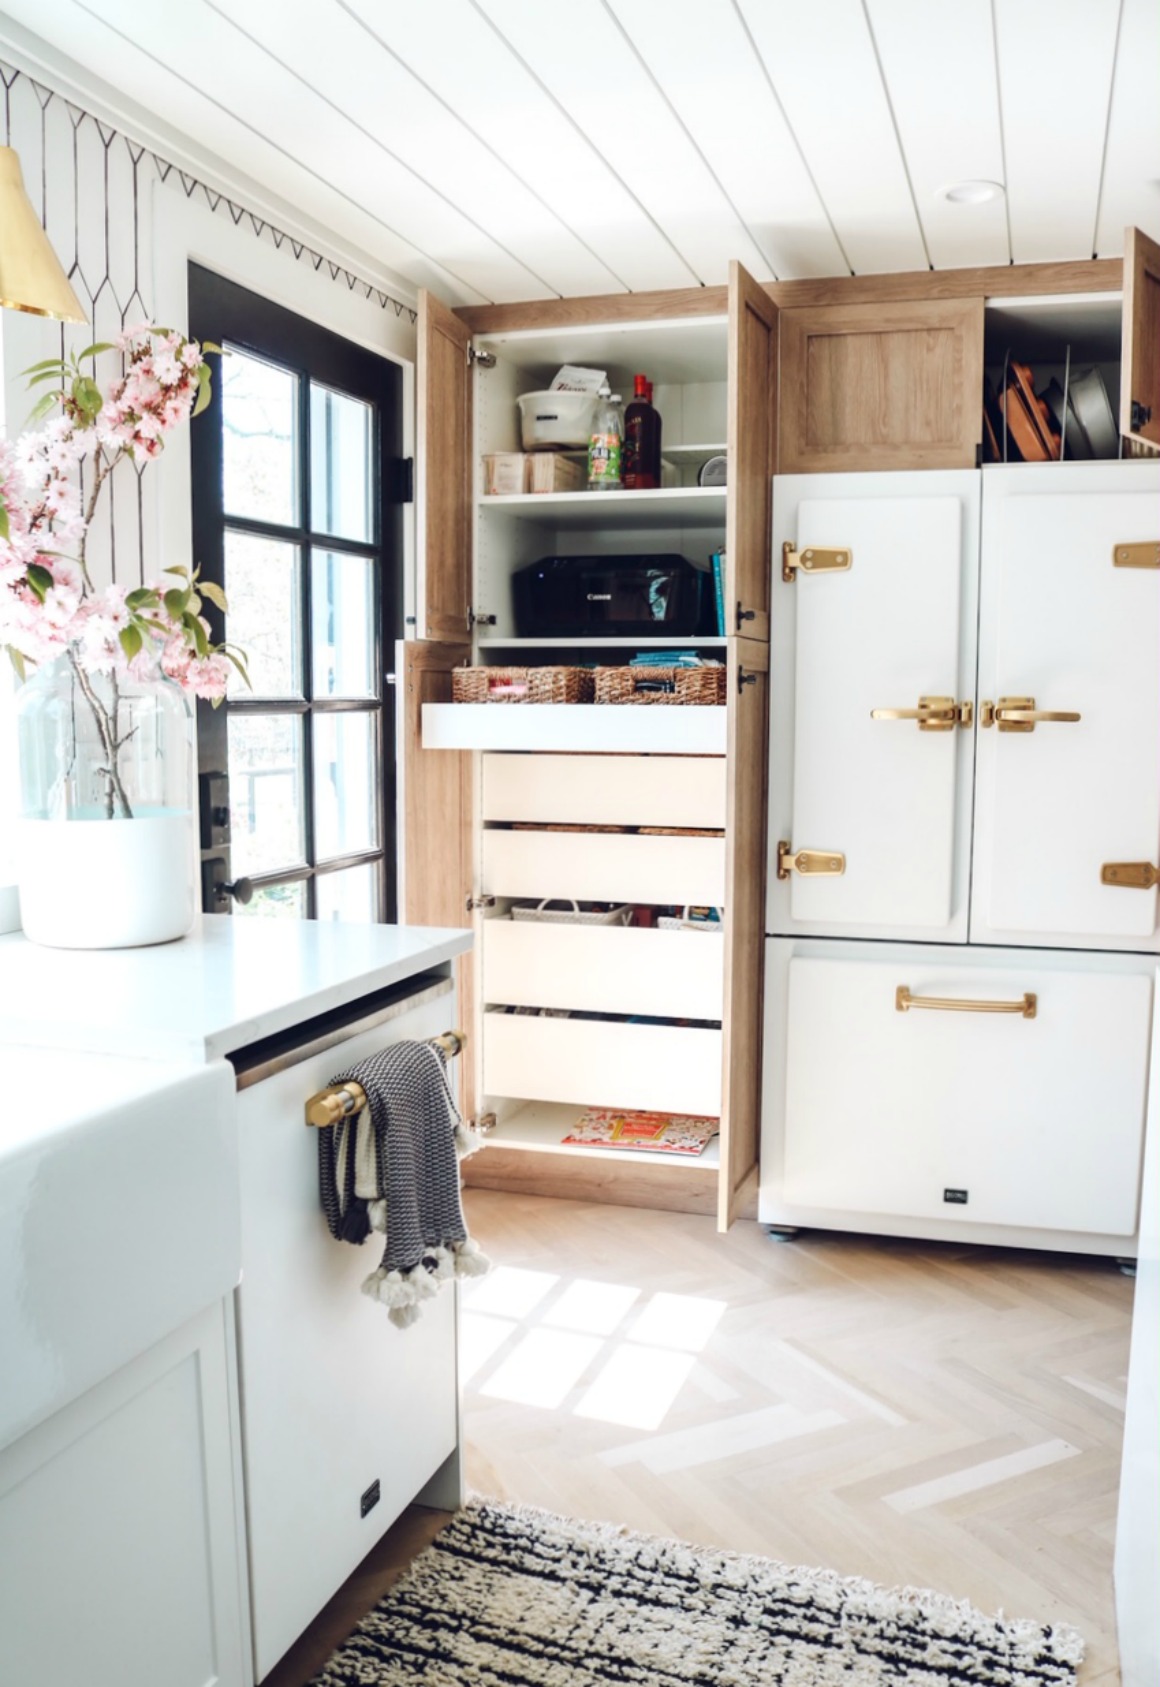
My goal was to have this be a multi-purpose room, so I opted to add our wireless printer and art supplies, etc to our cupboards as well. It makes it so much easier to get things done like schoolwork or art projects. We have the large version of THIS printer, which we don’t necessarily need all that it offers (now with all that phones can do) so I would suggest the smaller one. But it has worked SO well for us for about 4 years.
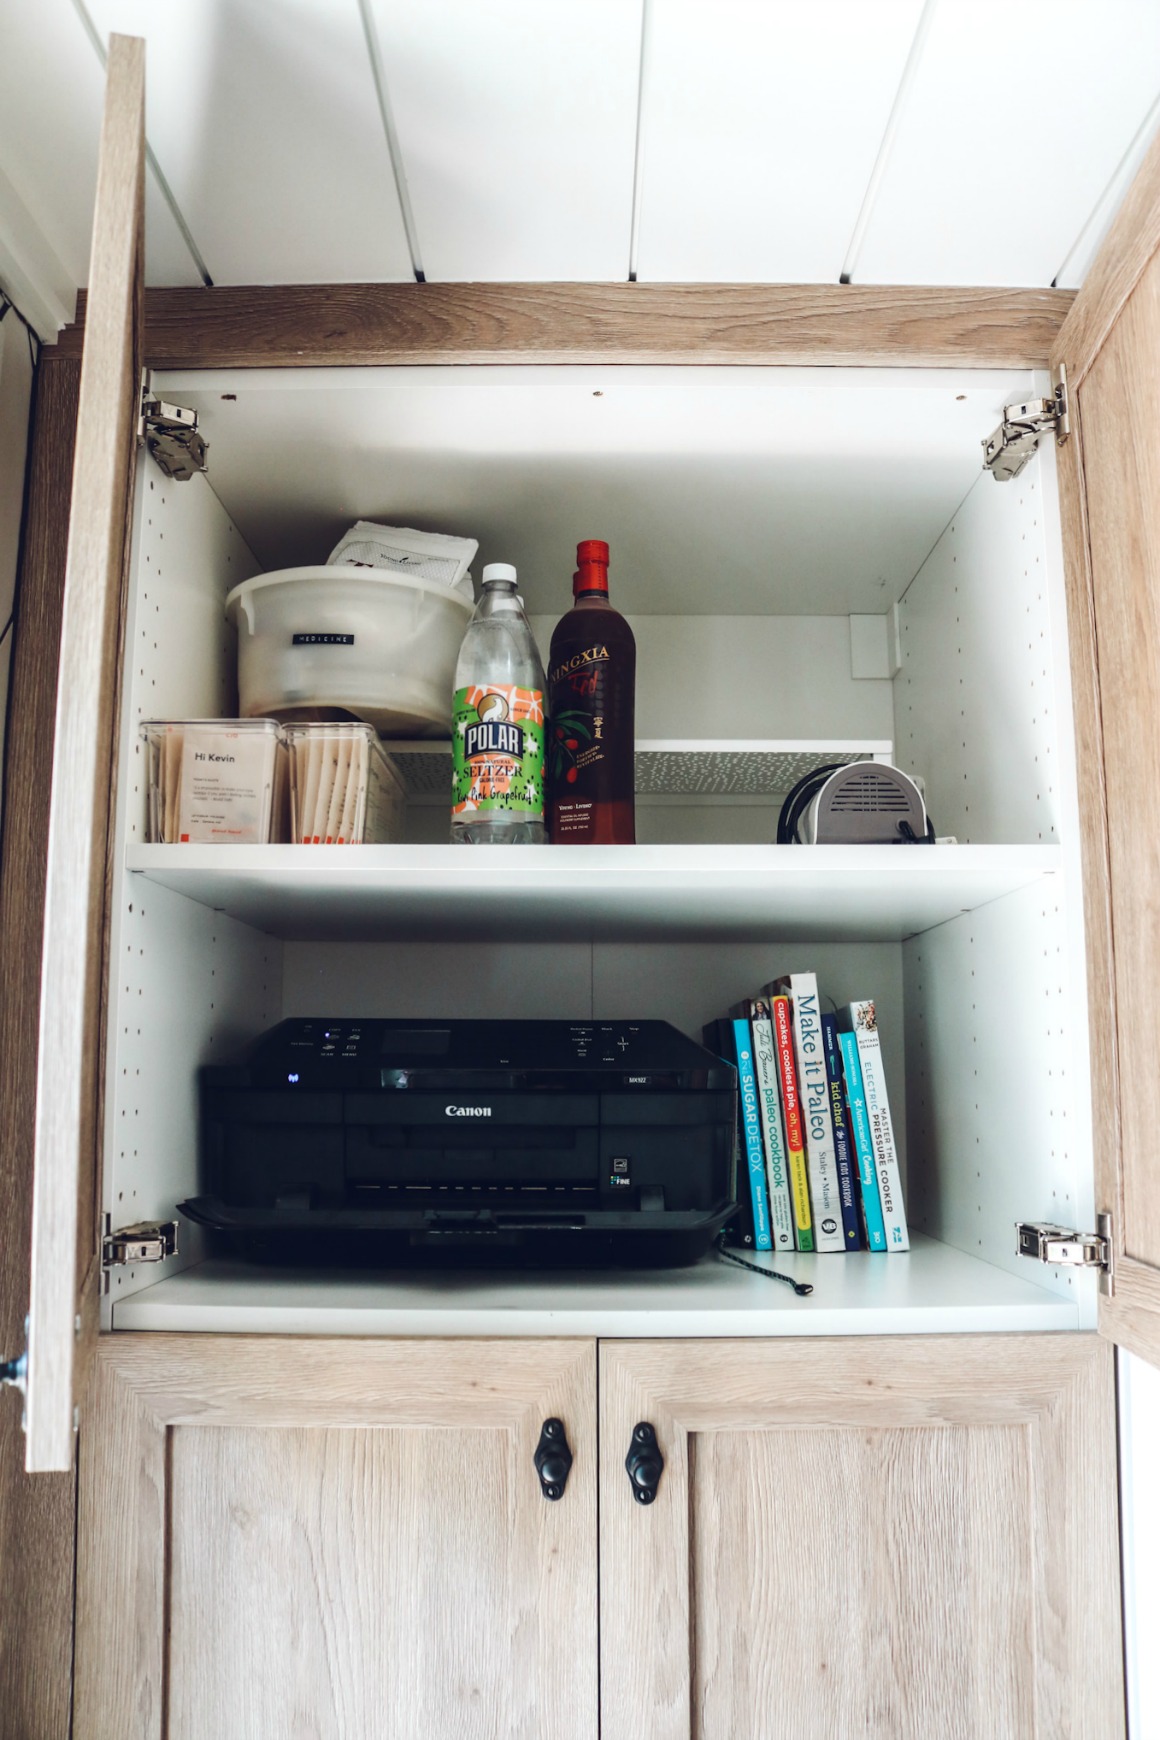
It feels so good to have some empty shelves! We have our medicine on the top riser, vitamins, drinks, laminator and the printer in this cupboard. I also have an extra long phone charger plugged in here as well. I like that I can tuck my phone away to charge if needed!
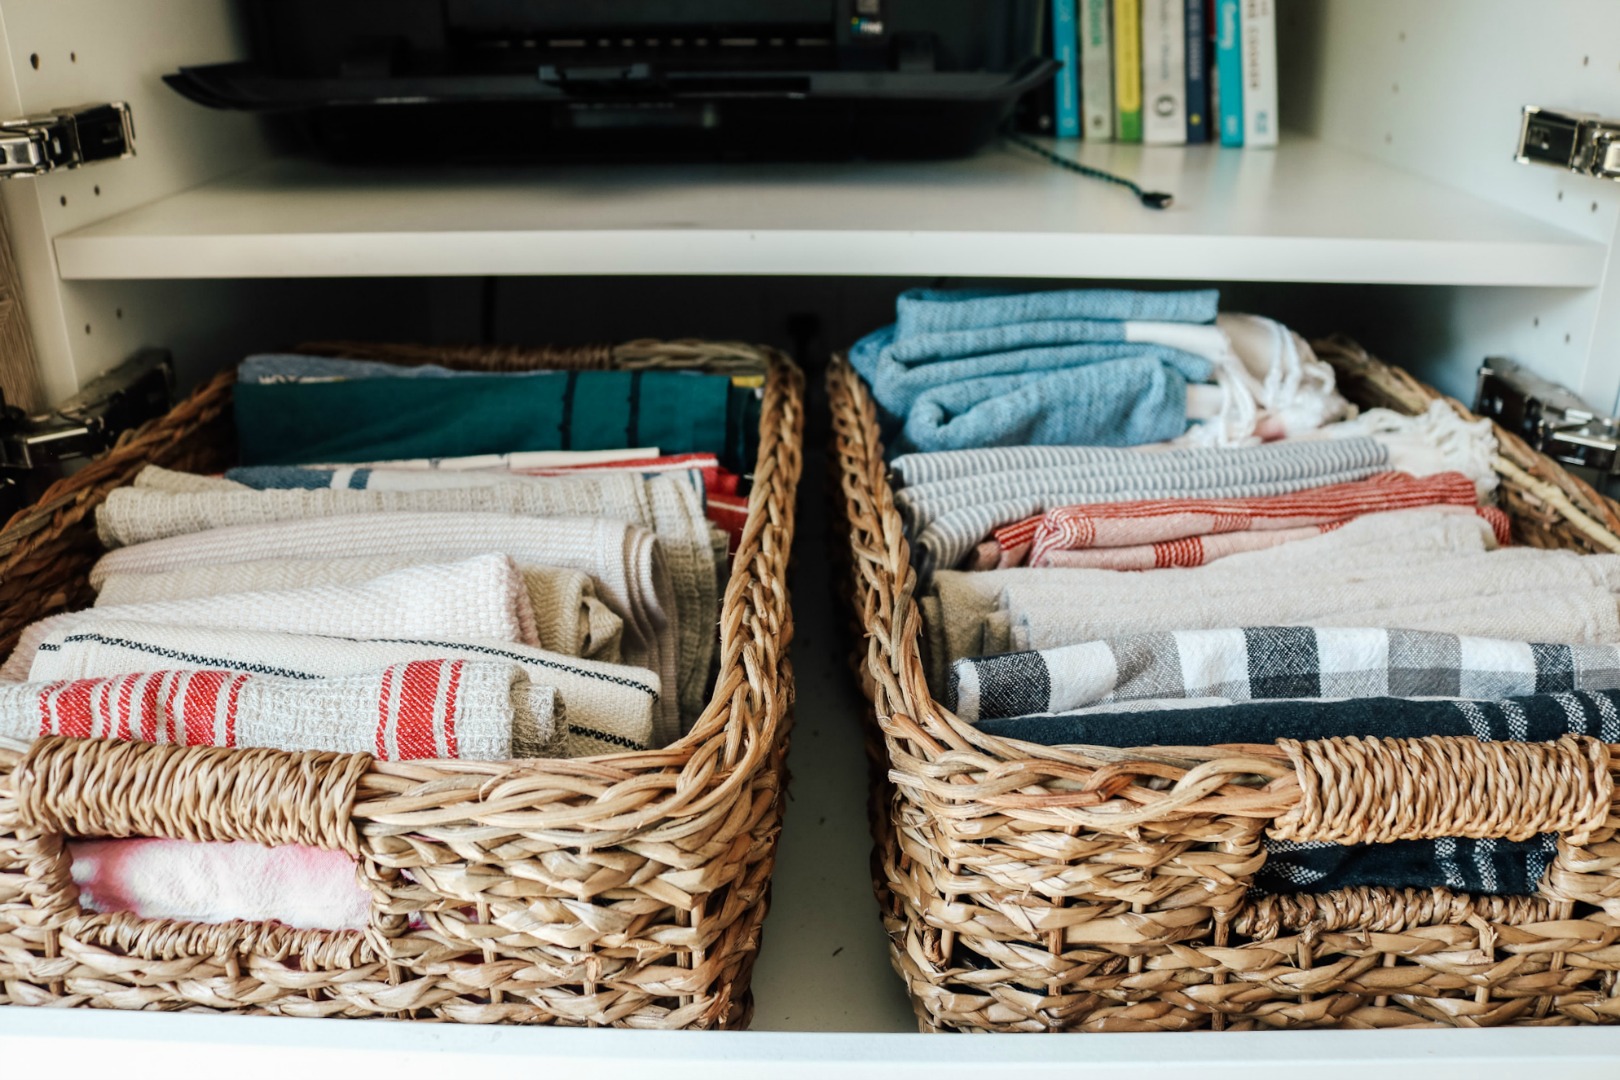
LOVE how perfectly THESE baskets fit in the IKEA drawers. I have all of our cloth napkins, and turkish towels folded here. As well as old towels that I cut (so I everyone knows they are rags), scrub brushes, scoops and one basket for papers or projects I am working on.
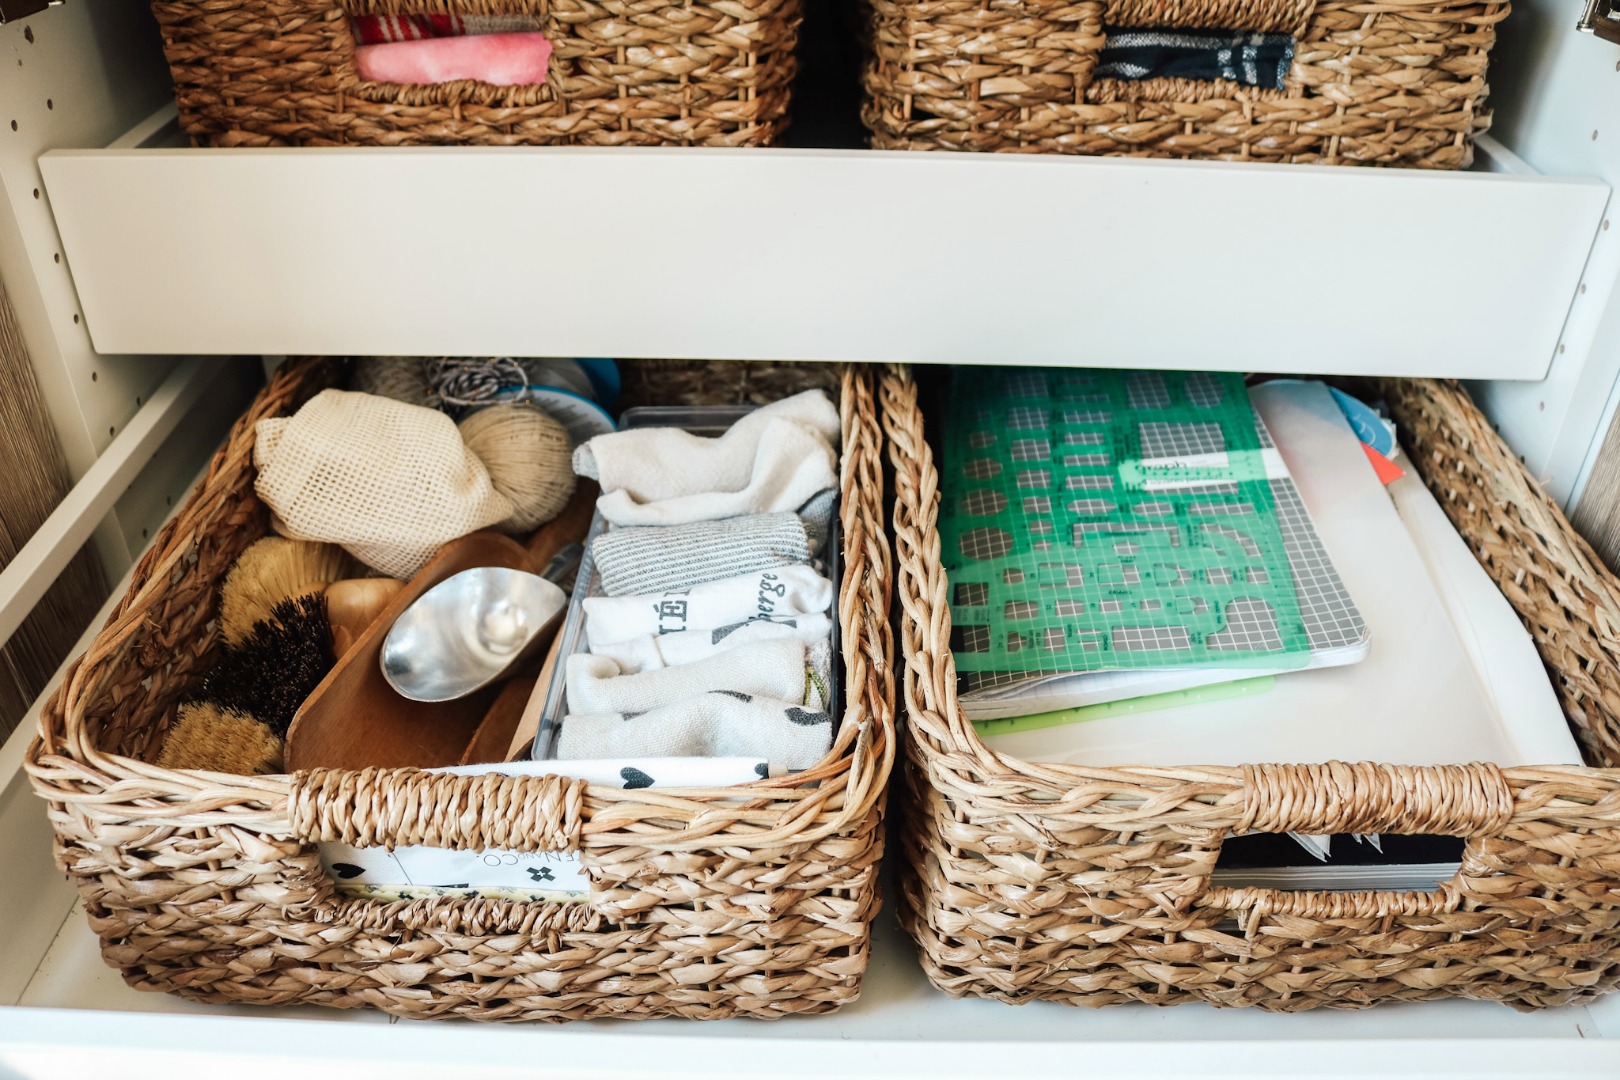

I also use the extra little empty space below the IKEA pantry drawers for larger coloring books!
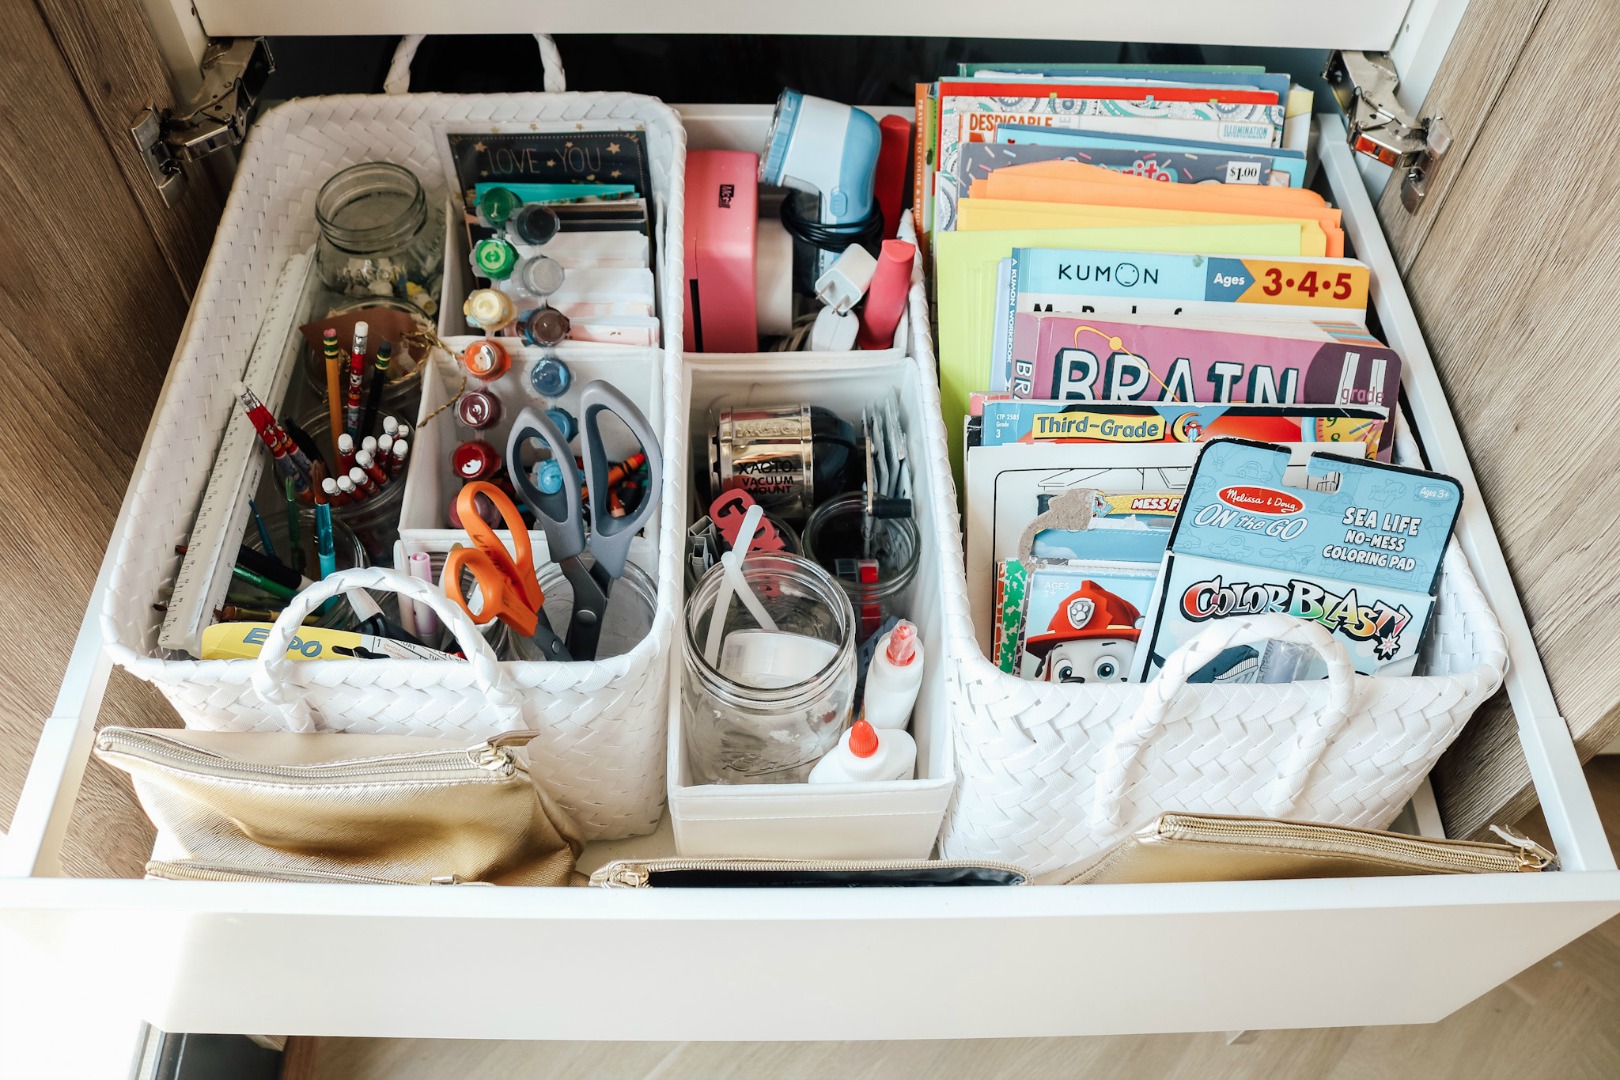
This is our glorified craft drawer. Pencils, scissors, coloring books, thank you cards, glue, tape….all of it is here! I even bought a bunch of the gold zip pouches at Target dollar spot for different type of markers, that way the kids can grab them and go and sit and color or take them on the road with us.
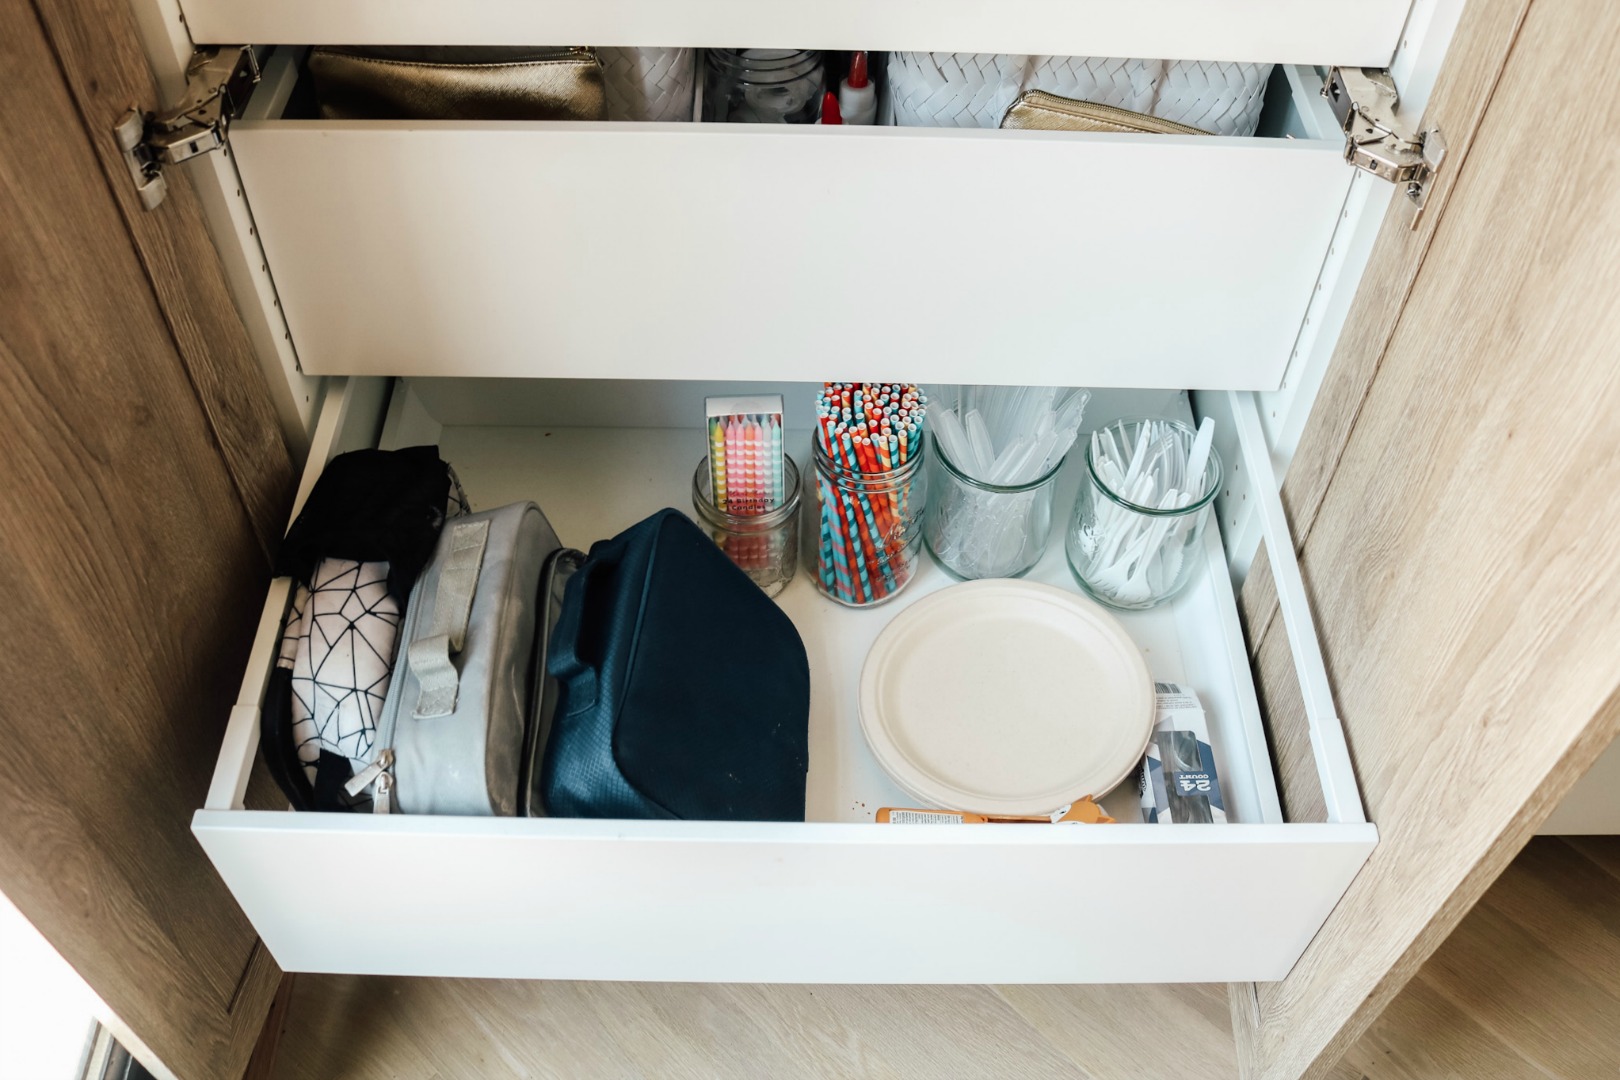
Bottom drawer has school lunch boxes, and paper goods (which we don’t really use much, but nice to have).
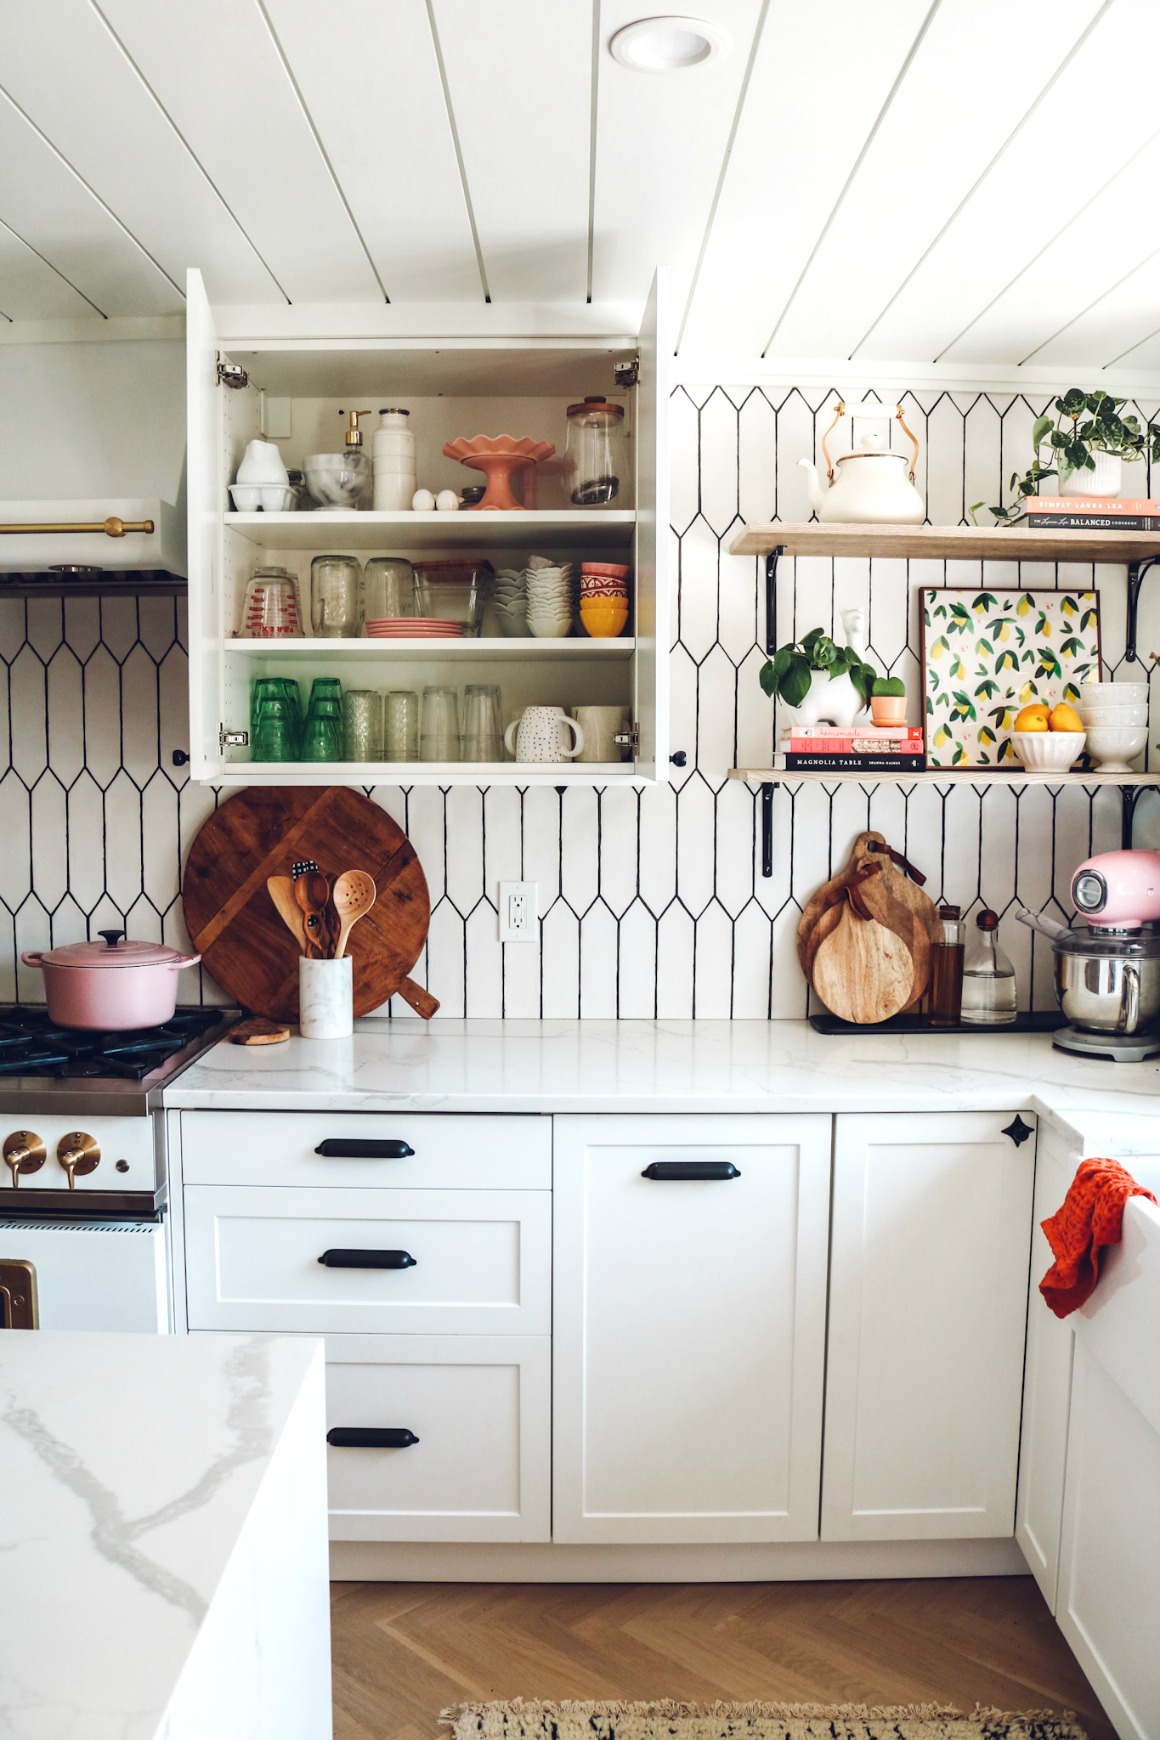
This side of the kitchen we mainly have cups in the top cupboard and more decorative or serving type pieces, not everyday use items. I have like 6 mugs, and I do need to get more cups! They have slowly broken over time. (I just got THESE new glass cups and need to order some more).
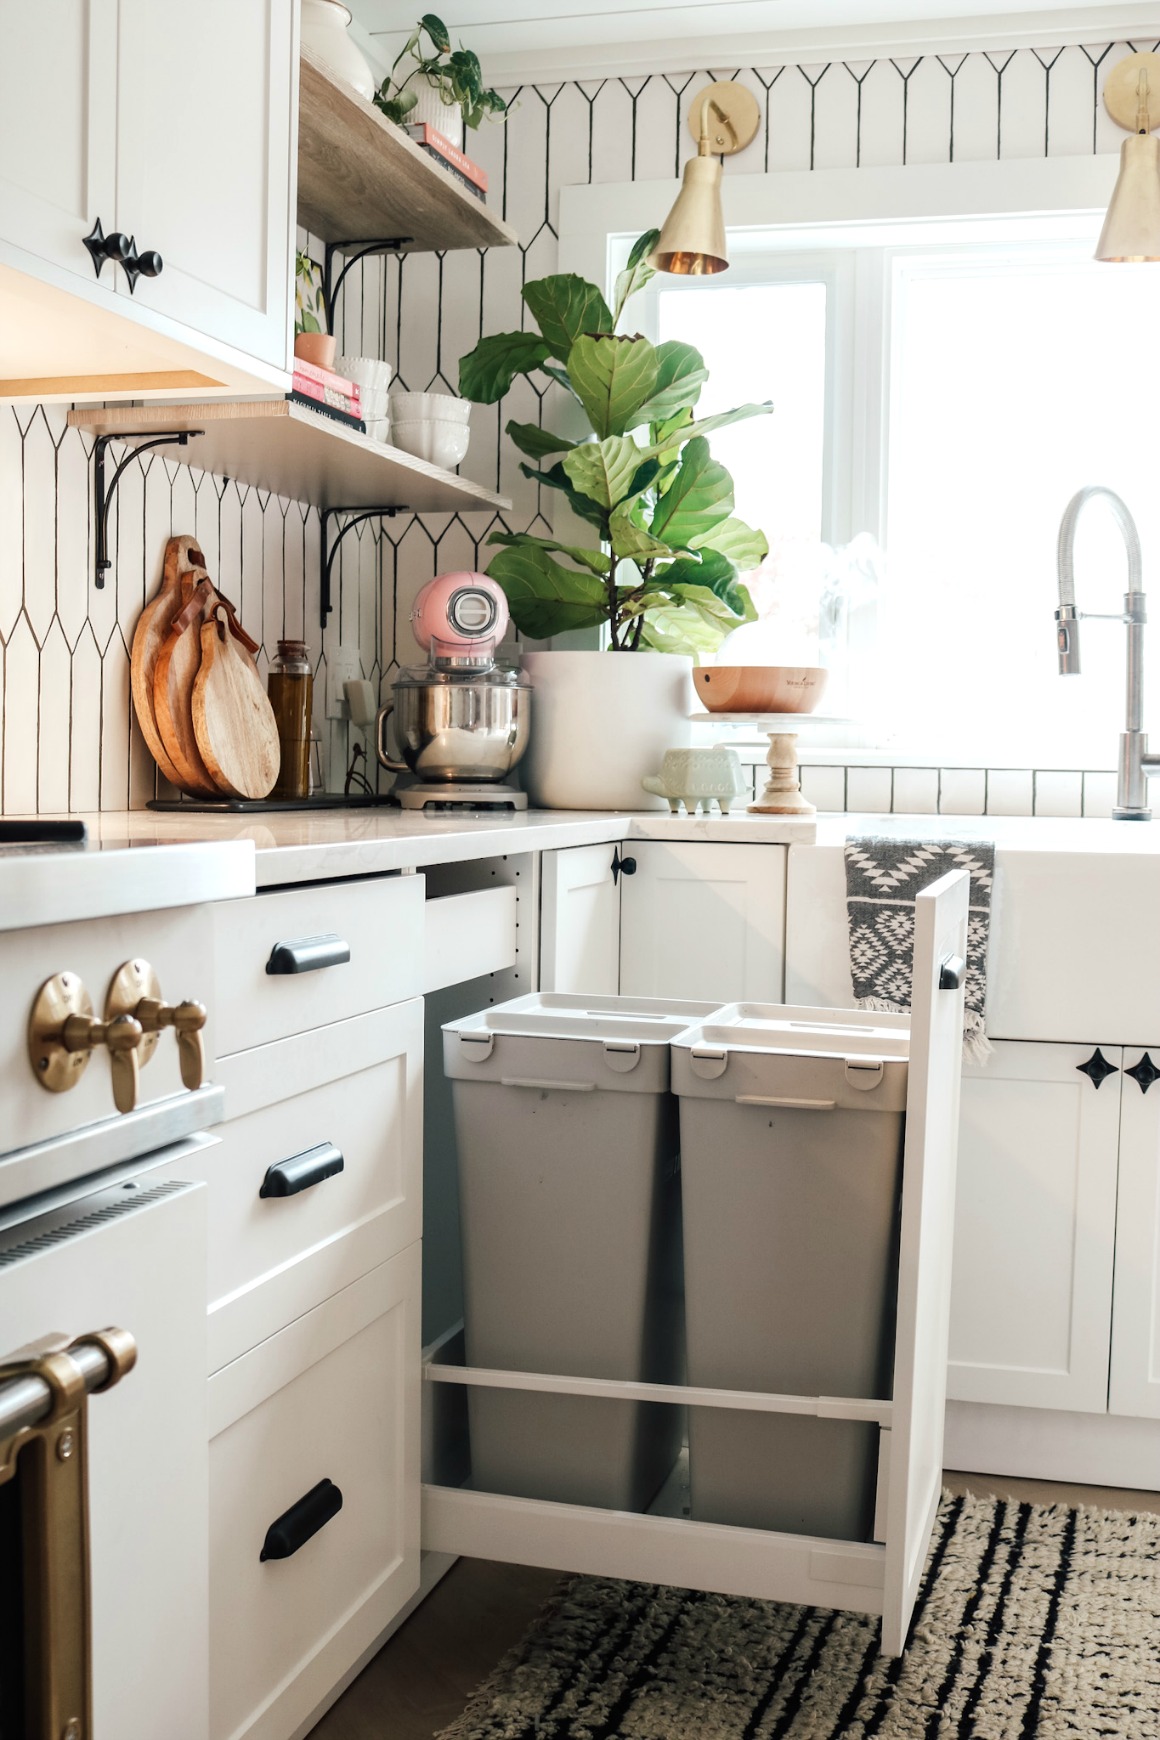
The best part (in my opinion) is the pull-out trash bins! We sure missed this in our smaller kitchen. We had a trash under the sink, but recycle was always in some random bag by the door. The trash bins are IKEA are 15″x 10″x 22″ H you can find them HERE.
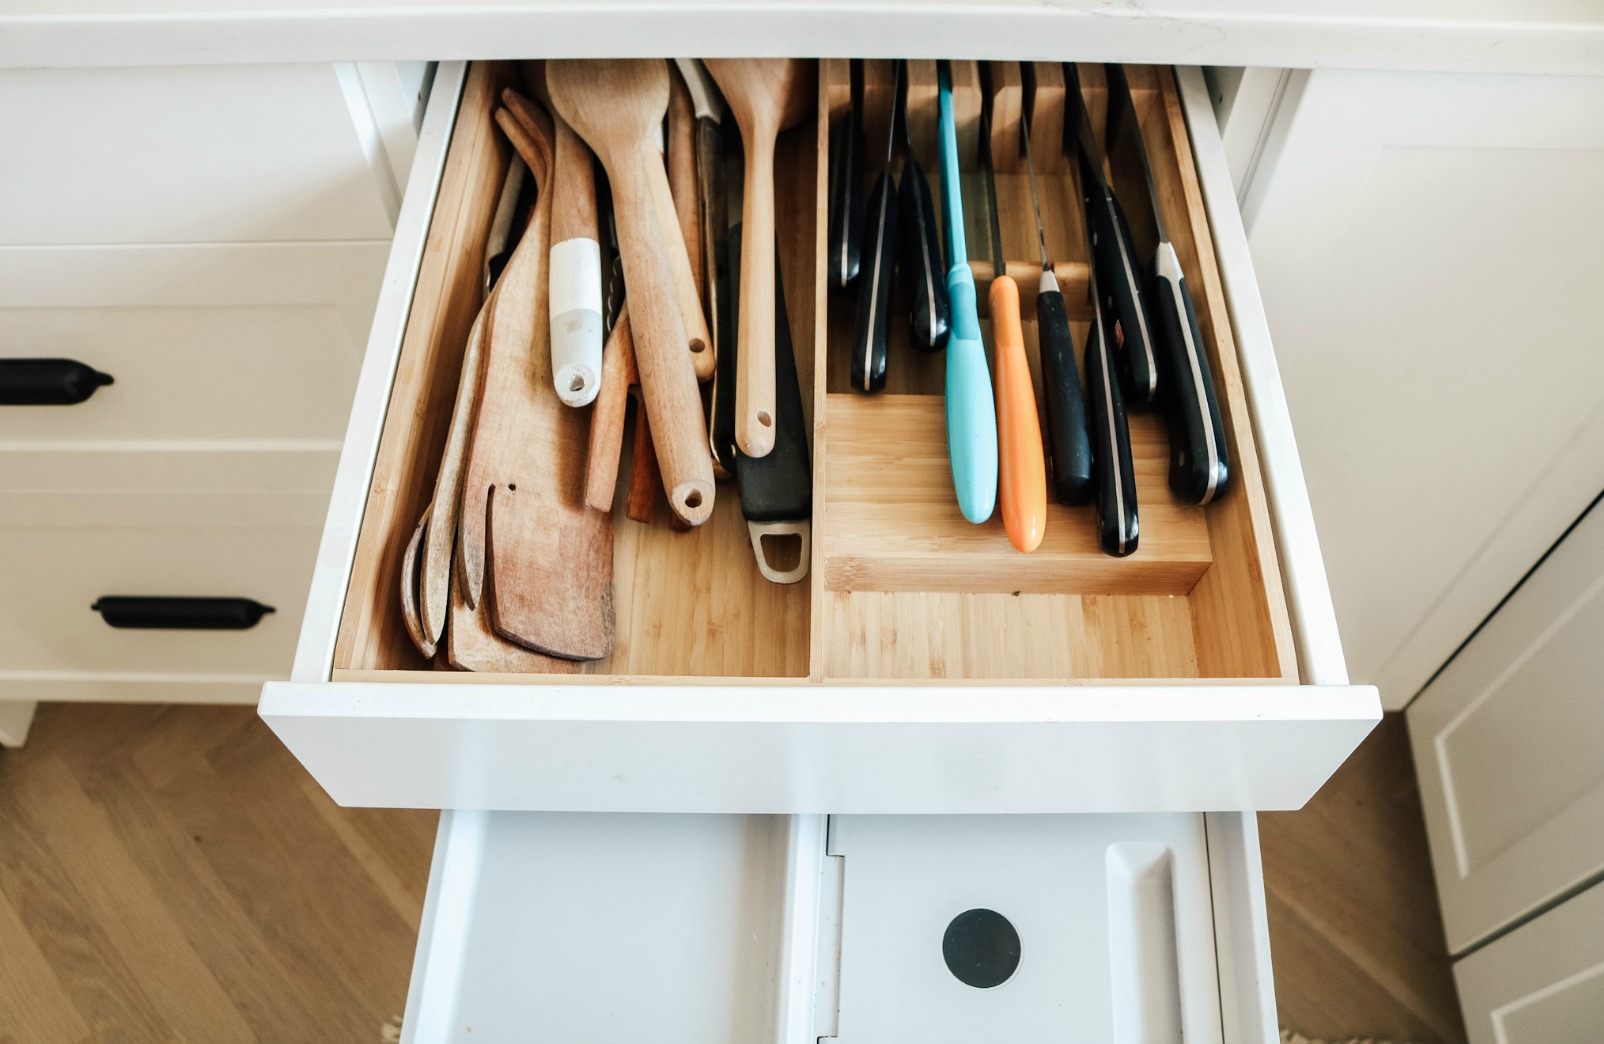
And the secret knife drawer over the trash bins are an awesome use of space!
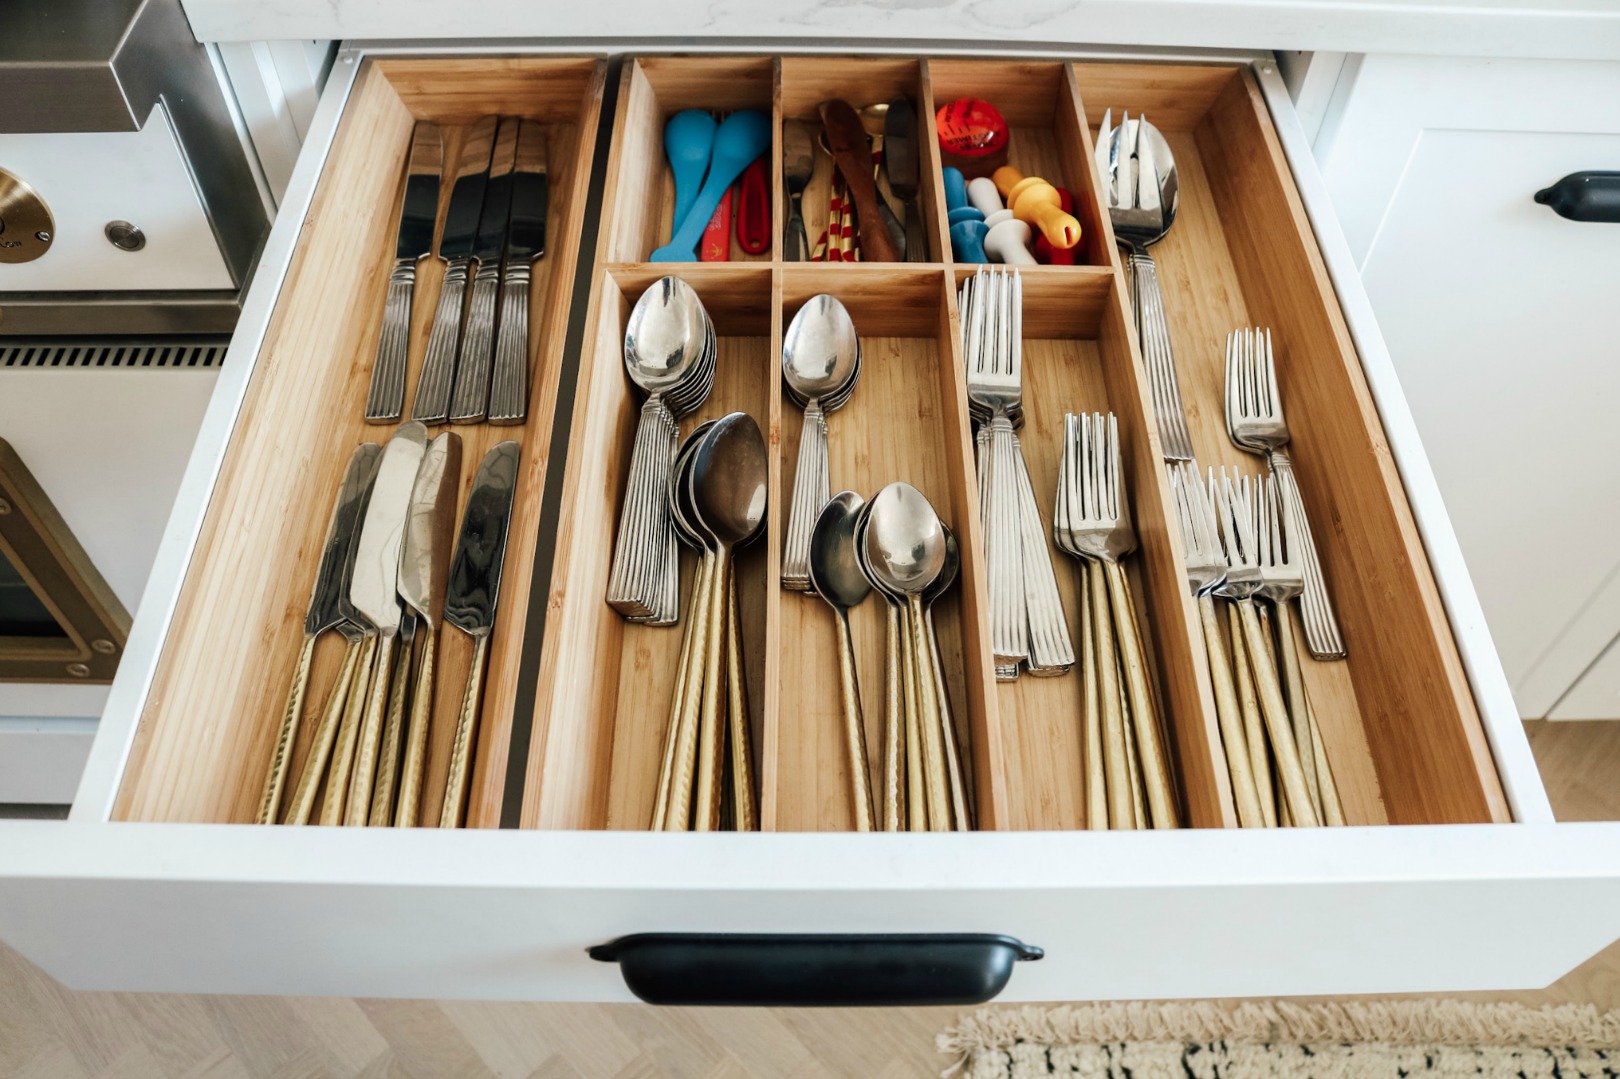
All the bamboo holders are from IKEA and fit the drawers perfectly!
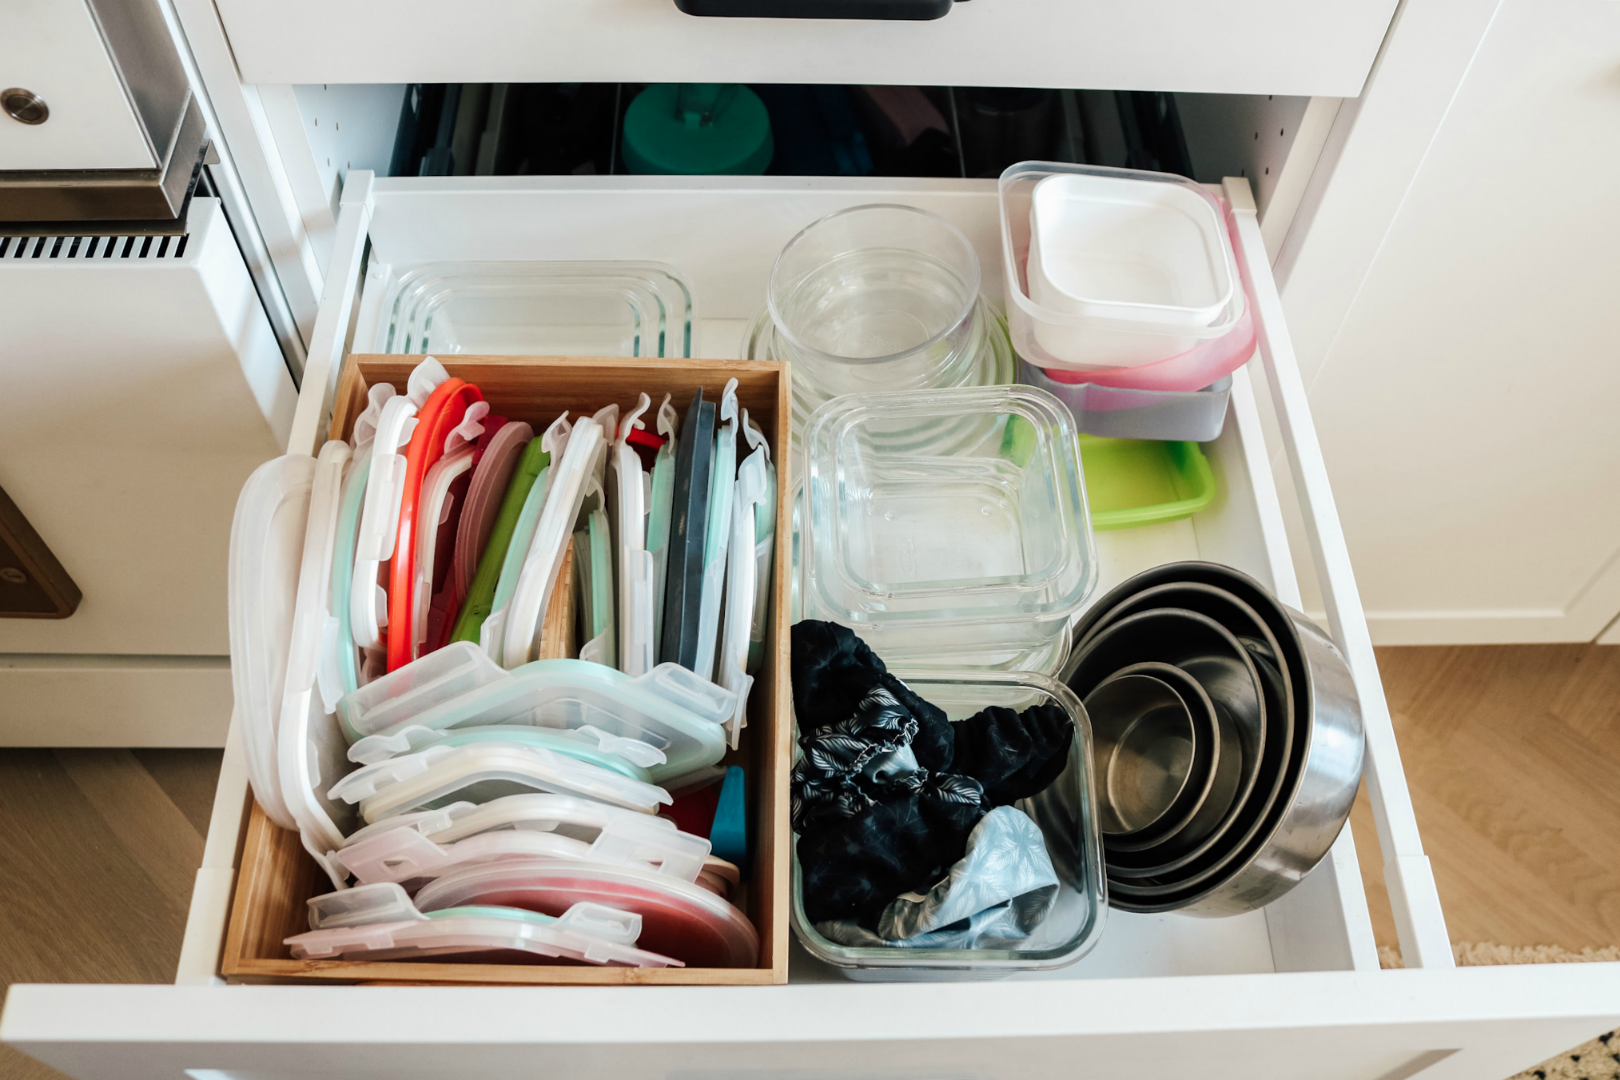
Glass storage containers and I really love THESE reusable bowl covers.
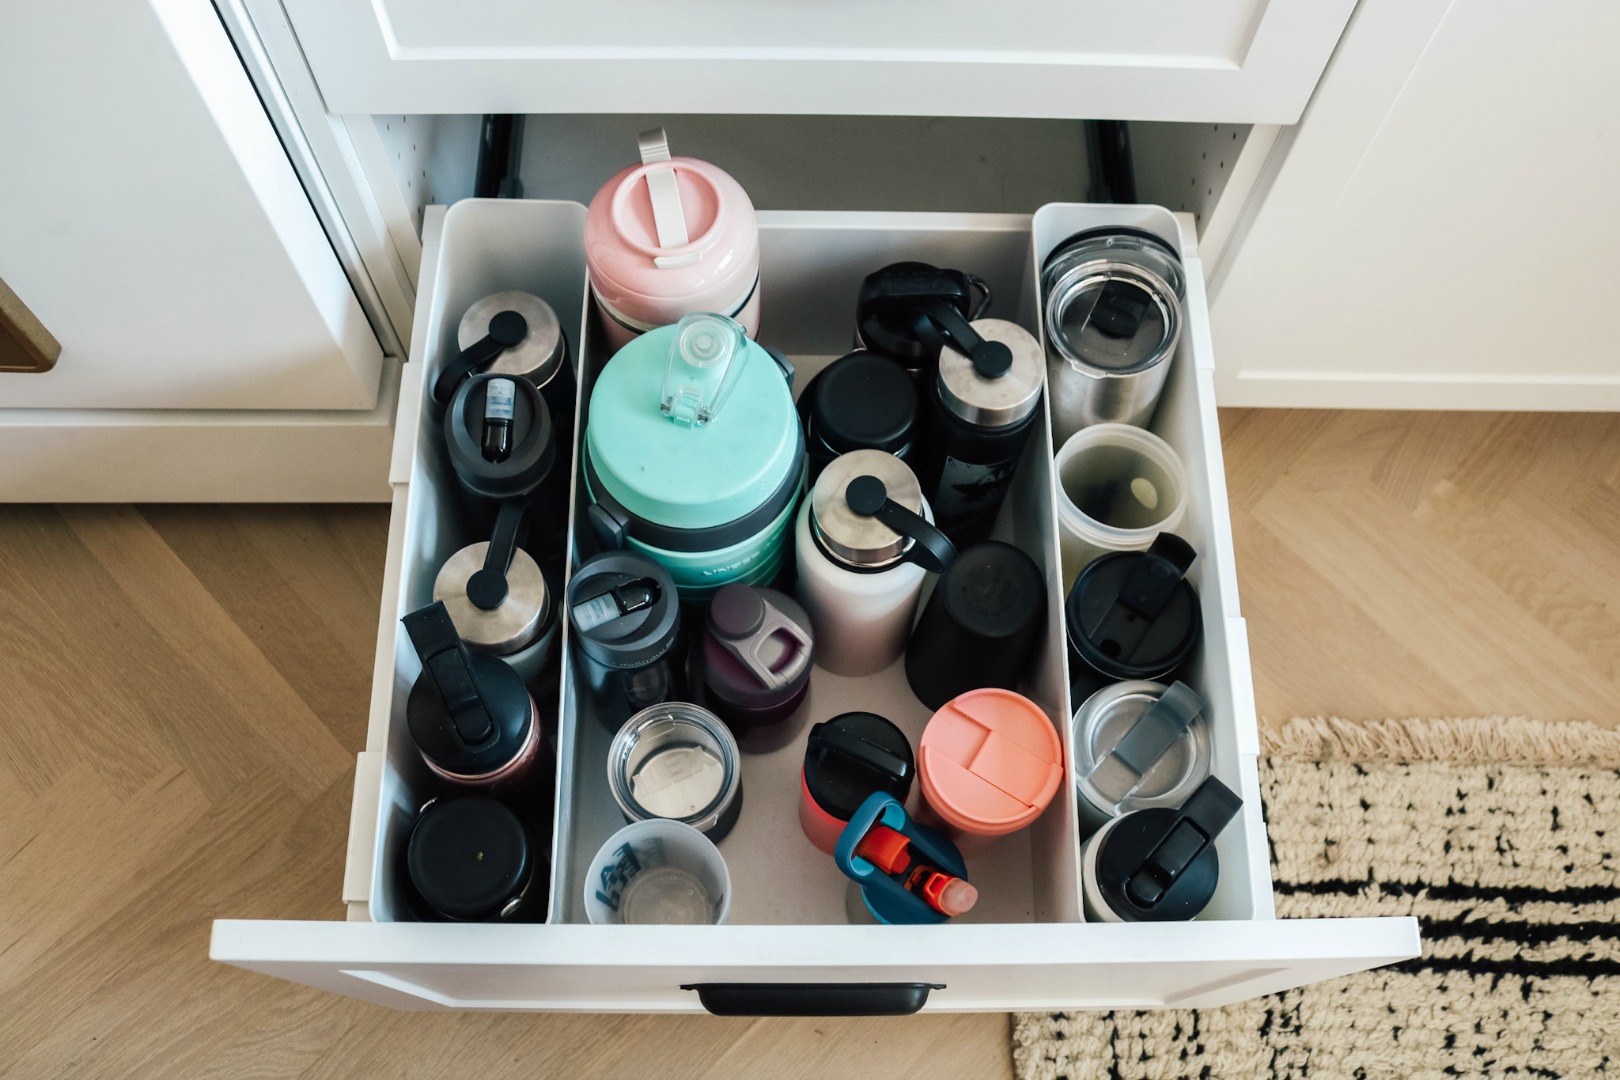
We put all our reusable water bottles and cups down low so the kids can easily grab them!
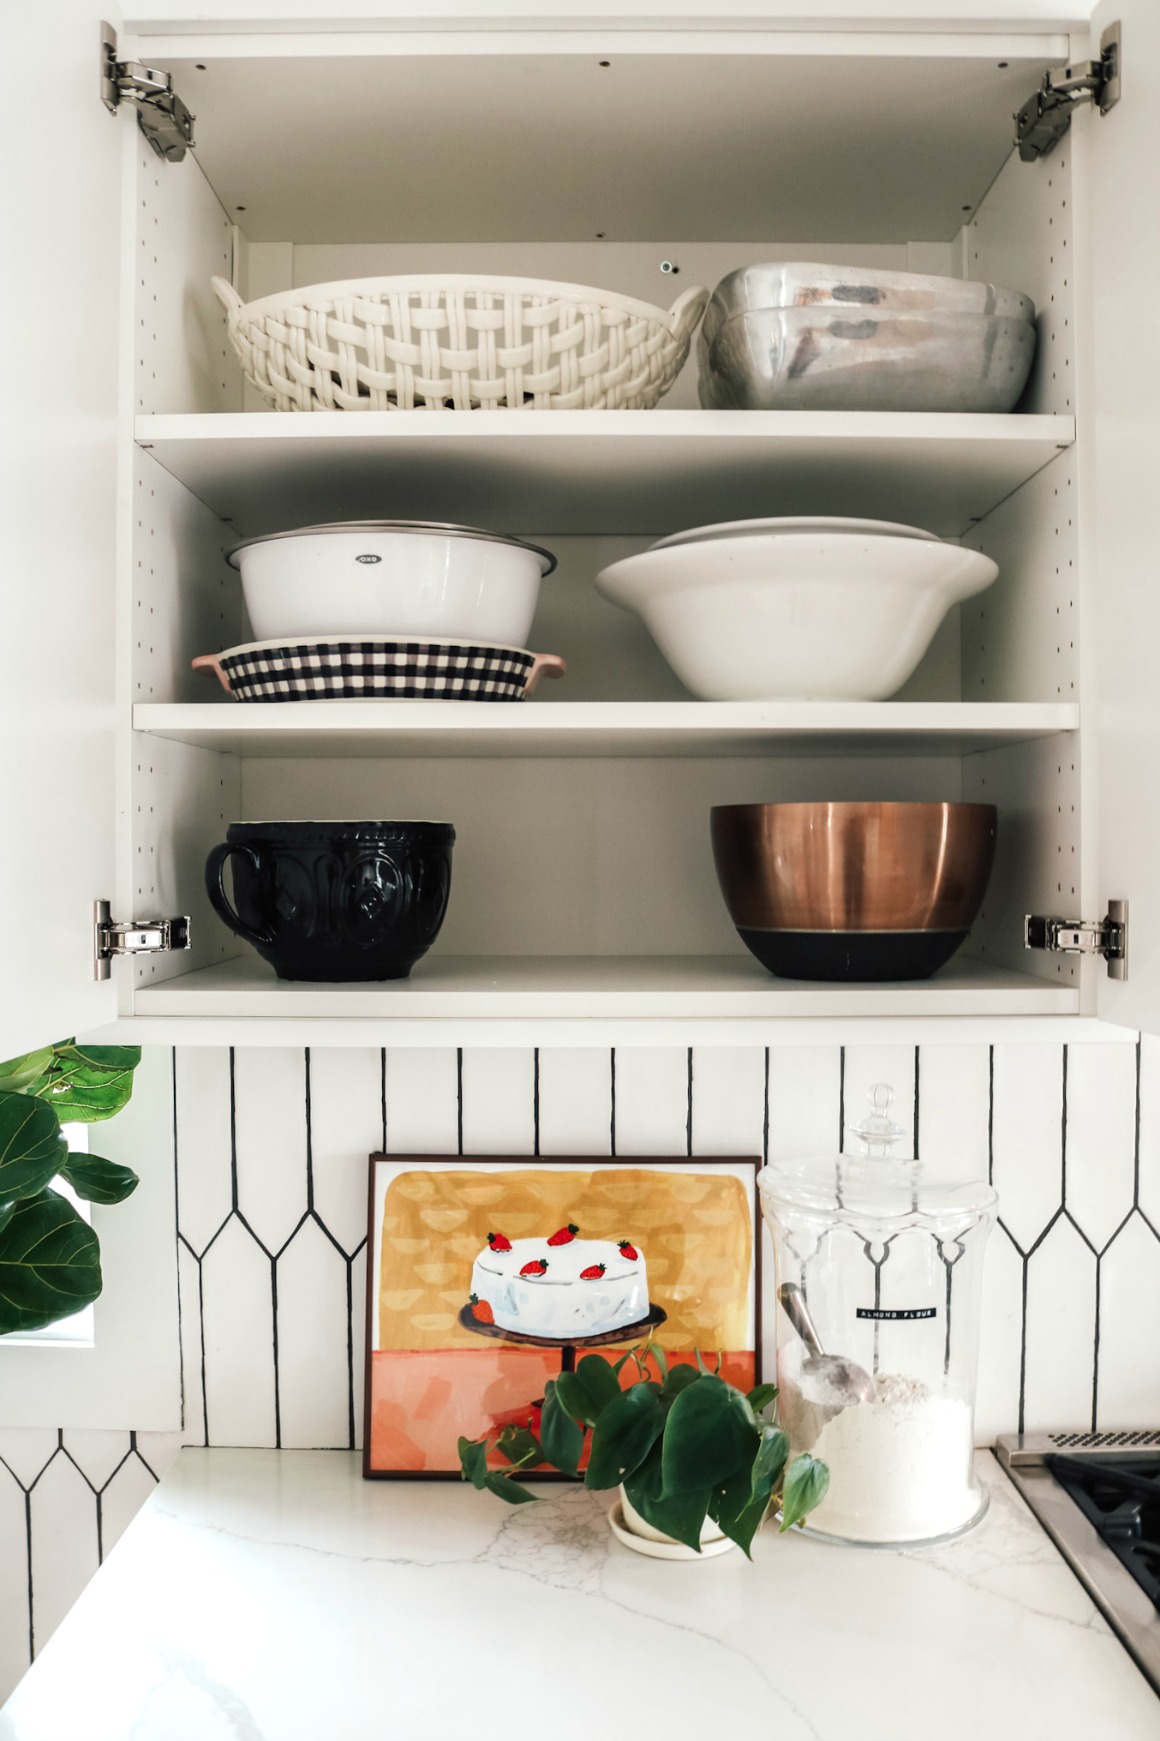
Over on the left I have all our bowls and serving dishes.
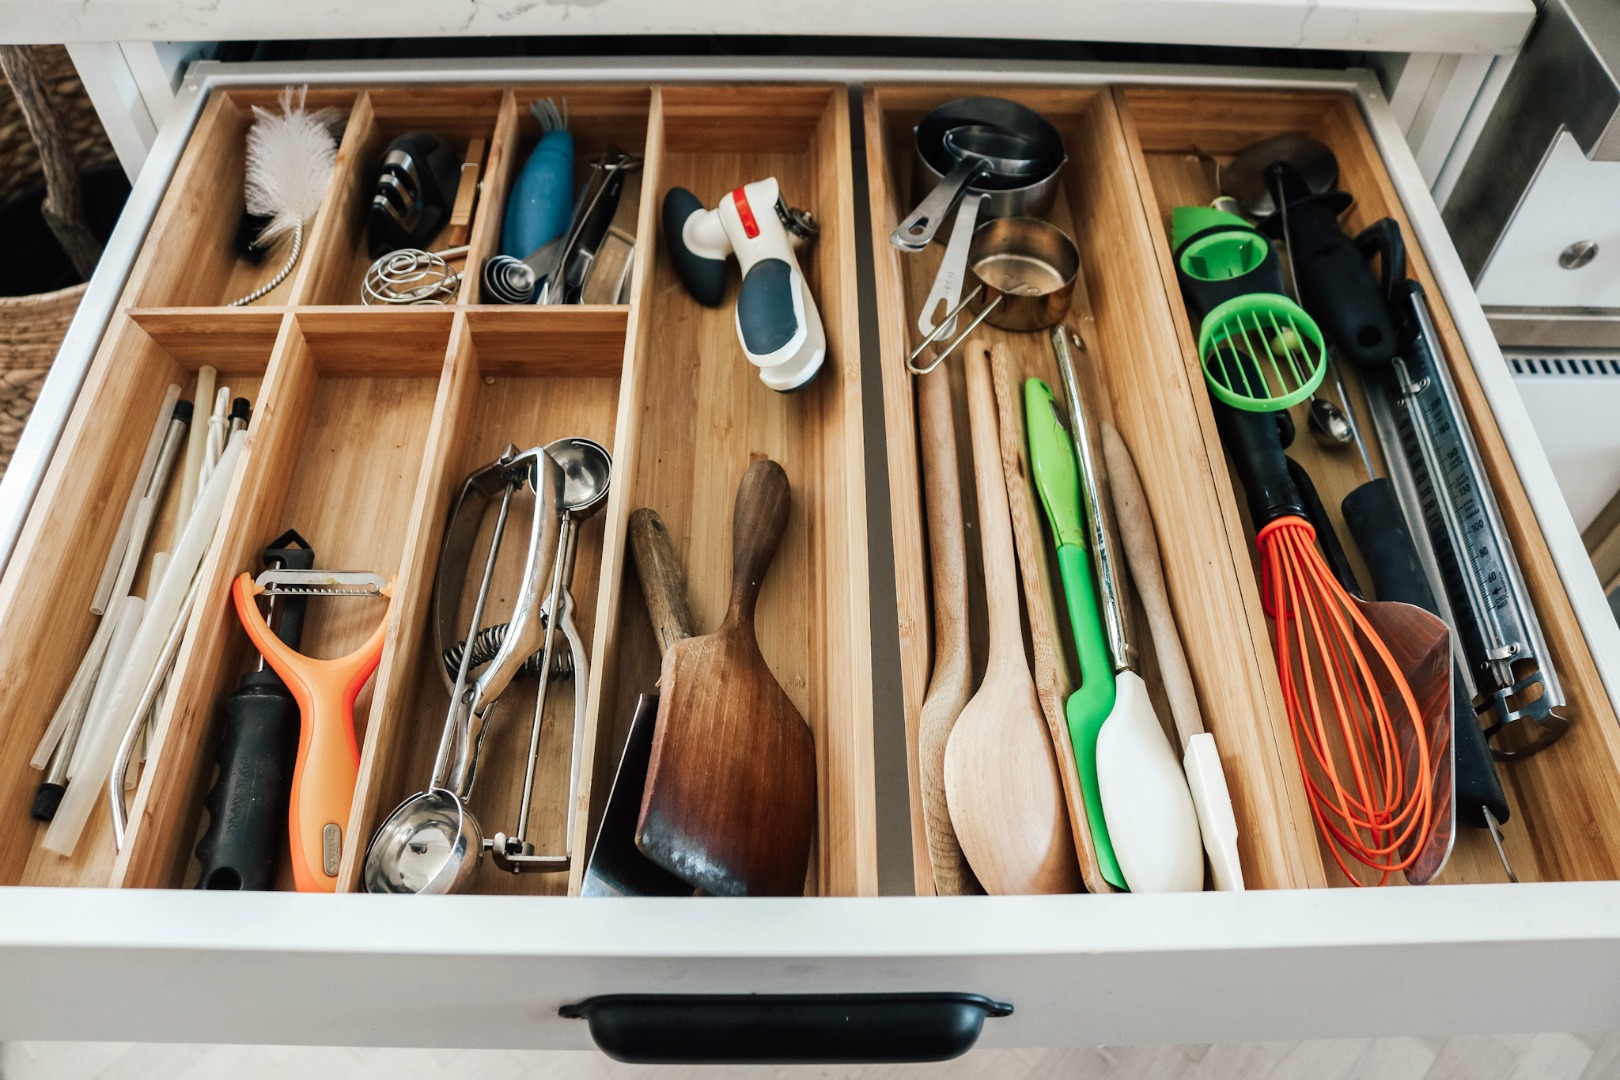
Still deciding if I want to move the spoons, forks and knives over the plates and bowls and swap the cooking gadgets over to the other side. Now writing this I think it makes more sense!
Kitchen Organizing Tip #6: Organize LIKE items. This may be different for everyone, but really think about how you use the items in your cupboards. Baking supplies may need to be stored together, keep snacks central and not spread out, etc. I like to group the things that will be going back into the cupboards before placing anything back in. This way, I can know what I should place where.
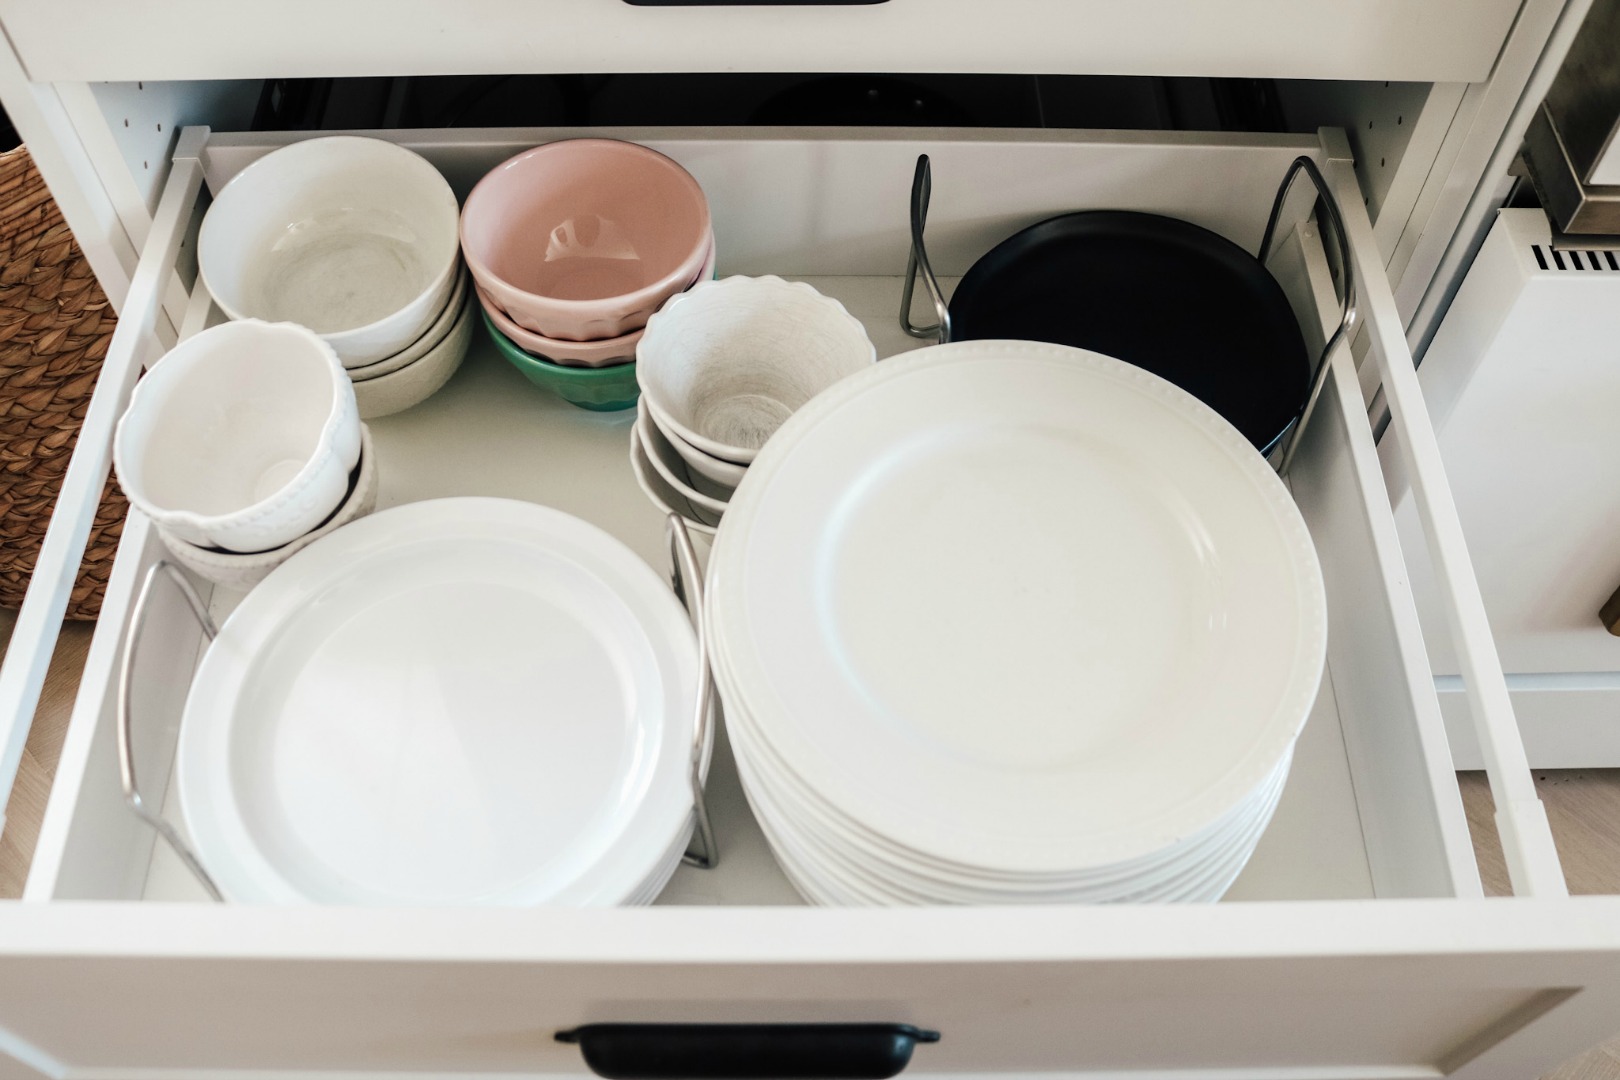
Really like THIS plate holder to stack plates inside drawers! Another way kids can easily get things for themselves (safely).
Kitchen Organizing Tip #7: take a critical eye to the stuff you removed from your cabinets. What do you use most often? What do you hardly use at all? When we moved from Utah to Connecticut, I brought what felt like, two hundred dishes. When I lived in a bigger home, I began collecting specialty dishes and vintage dishes. I loved to use and display them. I thought they were all my favorite and didn’t want to part with them. When we began to unpack into our small cape, I realized that I needed to be a little pickier with what I kept. Over the years, I have become better at acquiring things that get used all the time. When items aren’t used often, I donate them or gift them! During this step, let go of things that aren’t really serving your family or your space. Someone else may get more use out of it and you will love having the freed up space.
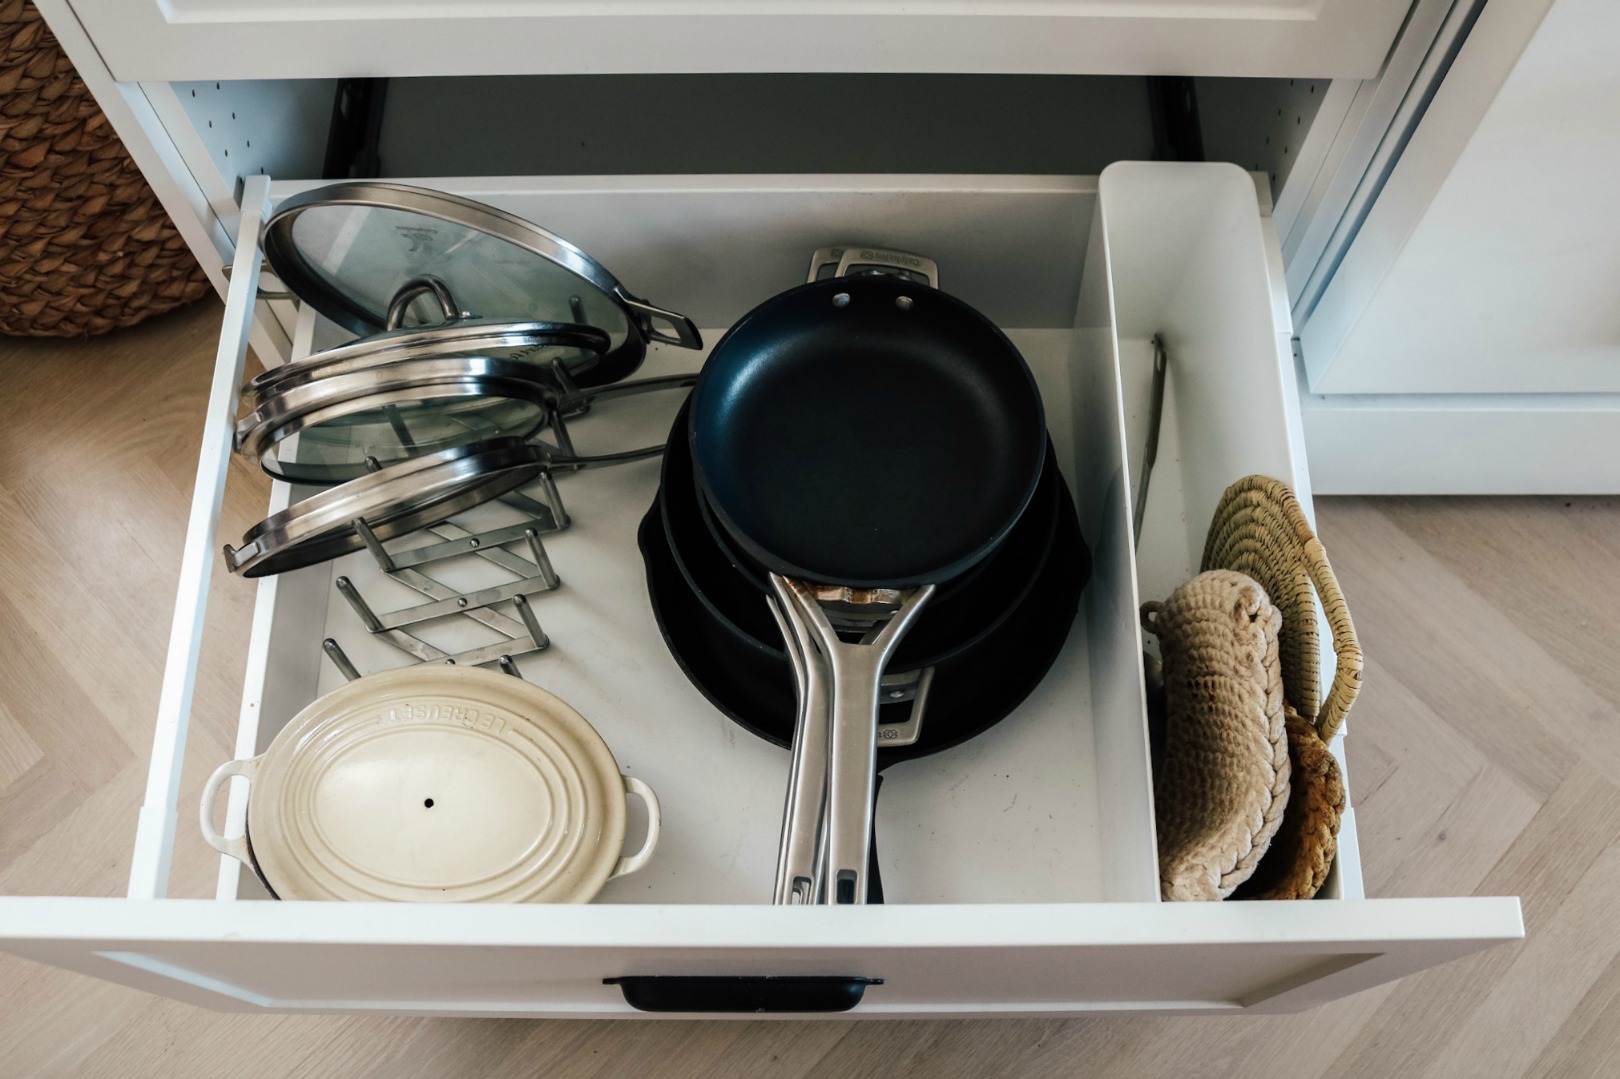
We did get THESE new pans- Calphalon Space Saving Hard-Anodized Nonstick Cookware Set. We have been using them for about a month and they are amazing. Plus how they all stack so well is the best thing!
IKEA Island Storage-
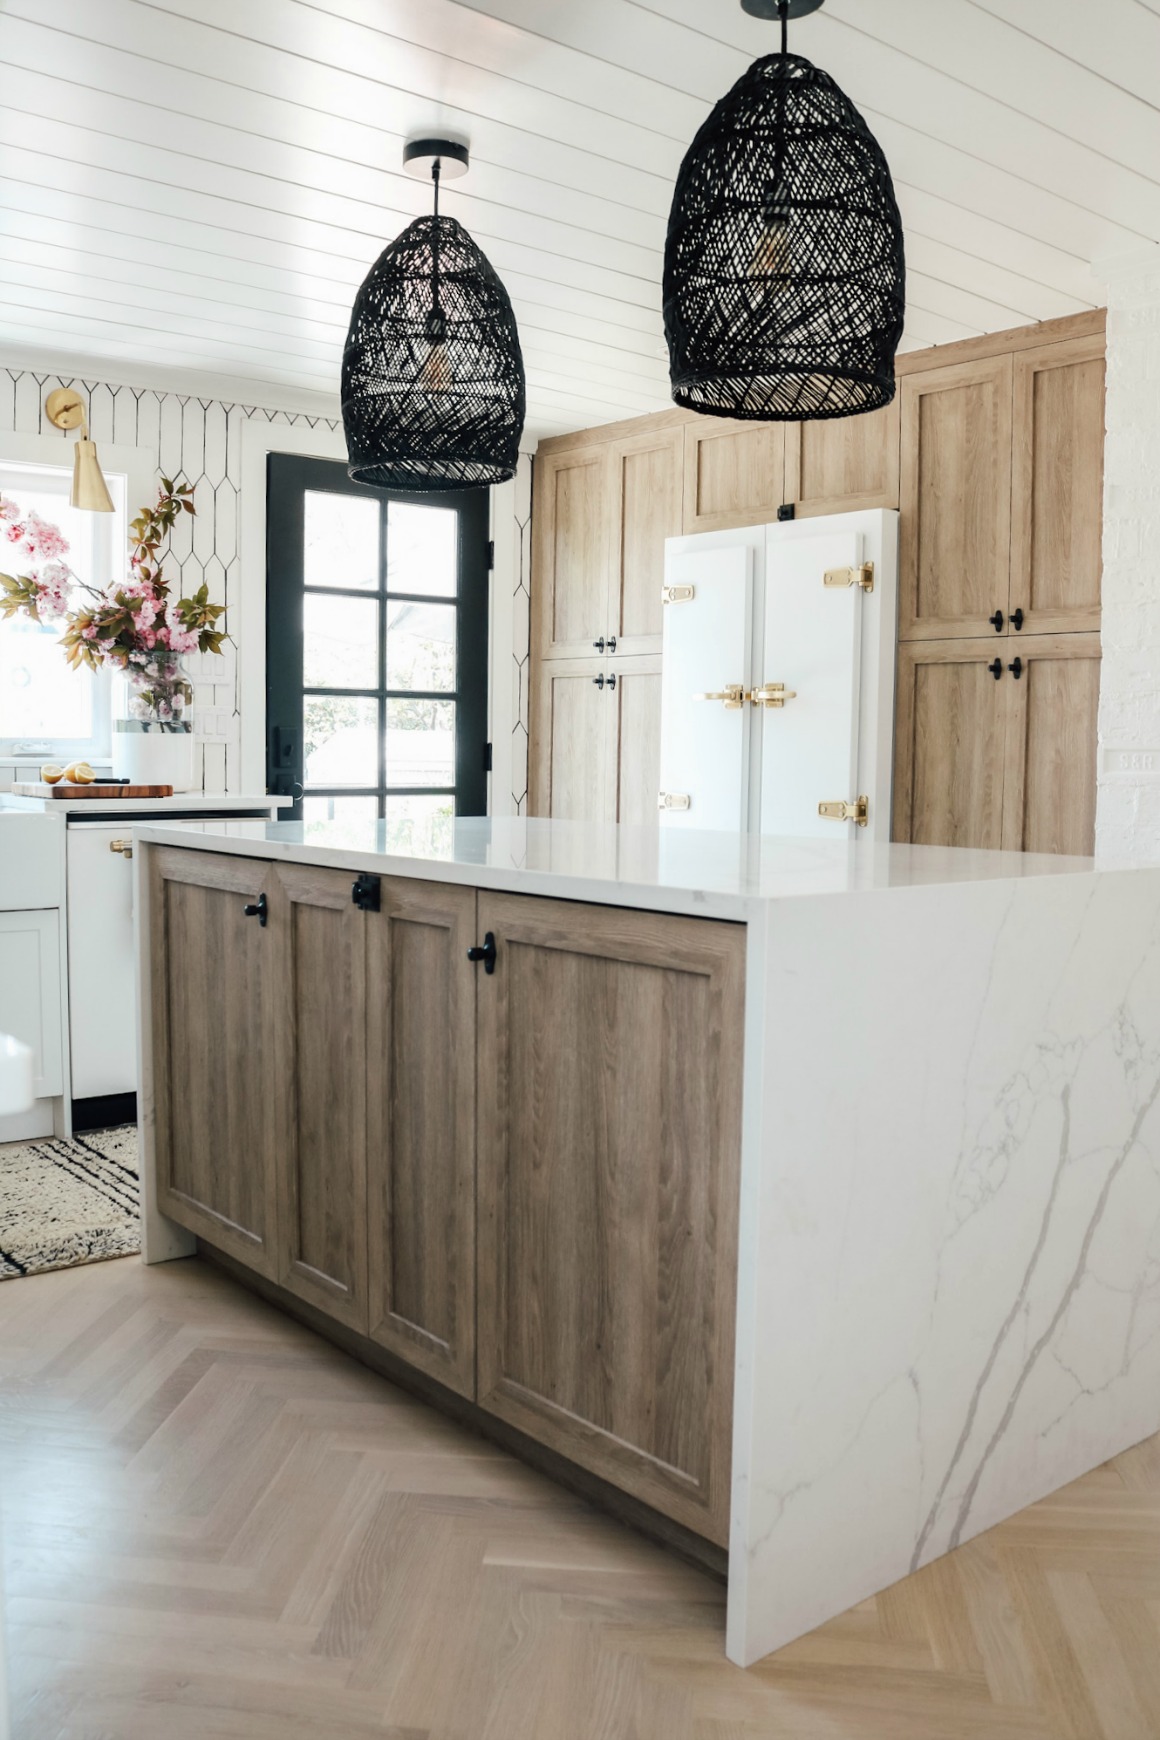
We gained so much storage out of this island! It does have a plug on the opposite side, making it easy to pull something out and plug it in to use!
The bamboo bins are all from IKEA. I keep our reusable bags in here, and some random kitchen gadgets. (I use THESE reusable bags and THESE).
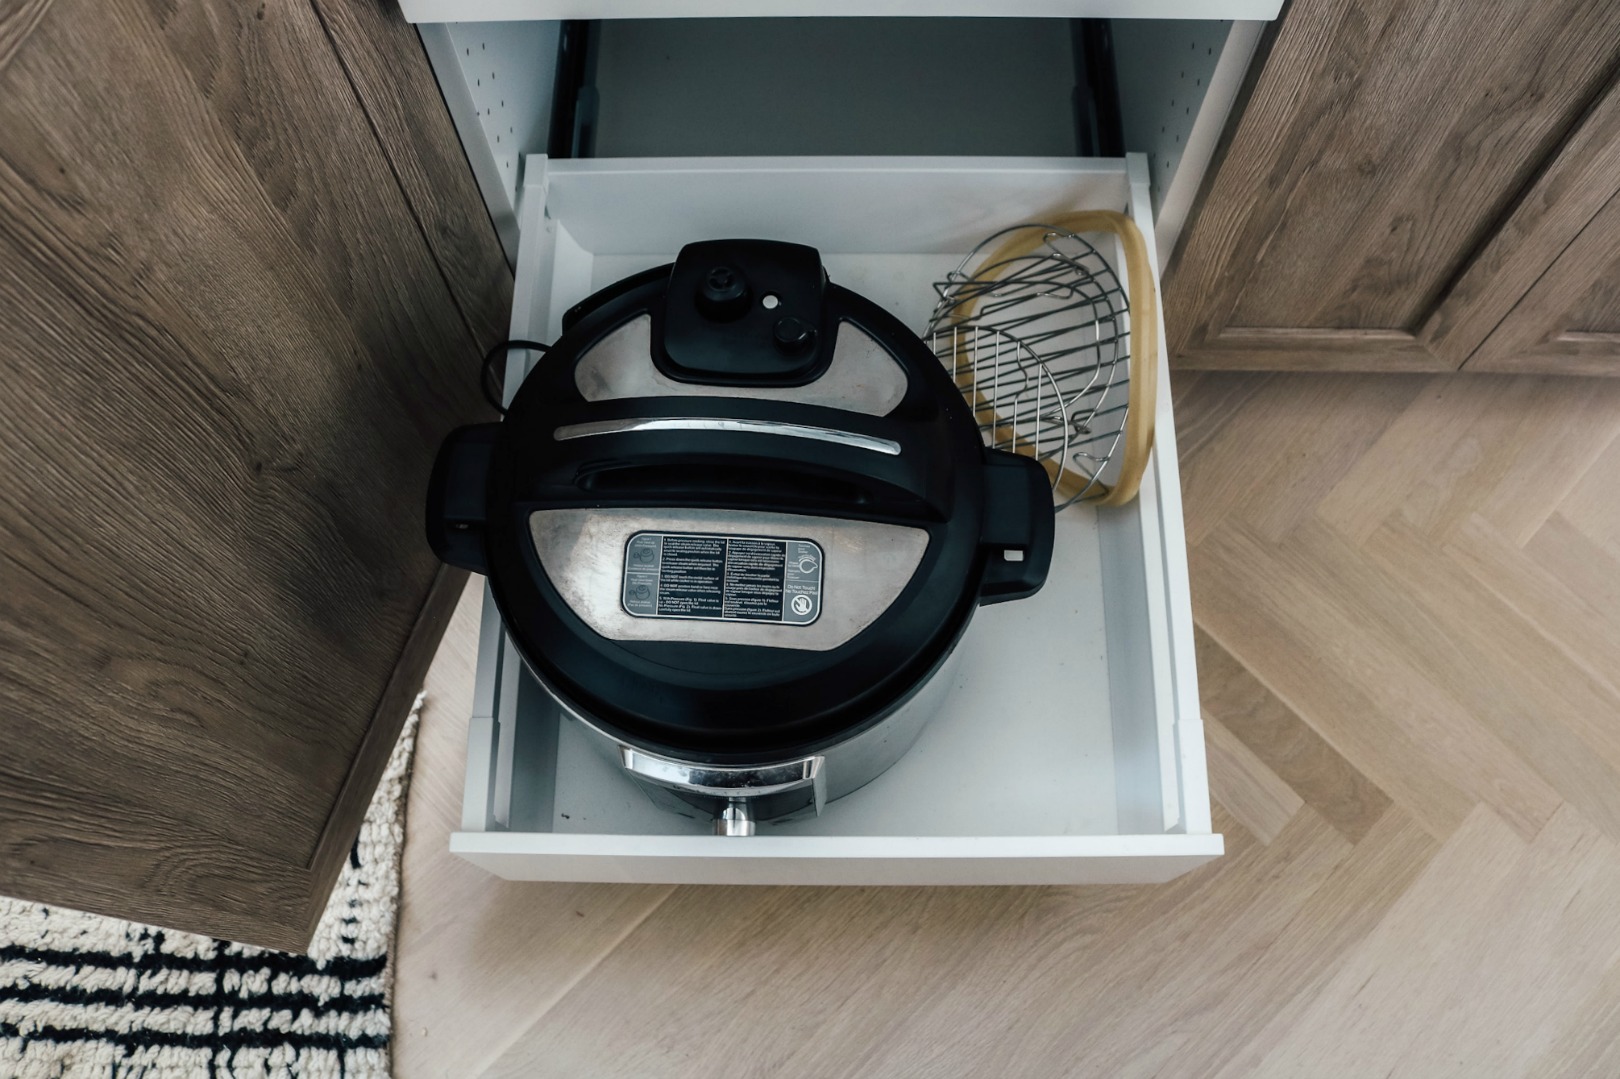
Can’t believe we have a spot to put our pressure cooker in the kitchen! It is a miracle!

And instead of a microwave we made a spot for our Power AirFryer. We use this mostly for rotisserie chicken and to quickly air fry things like pot stickers and things that we don’t want to use oil.
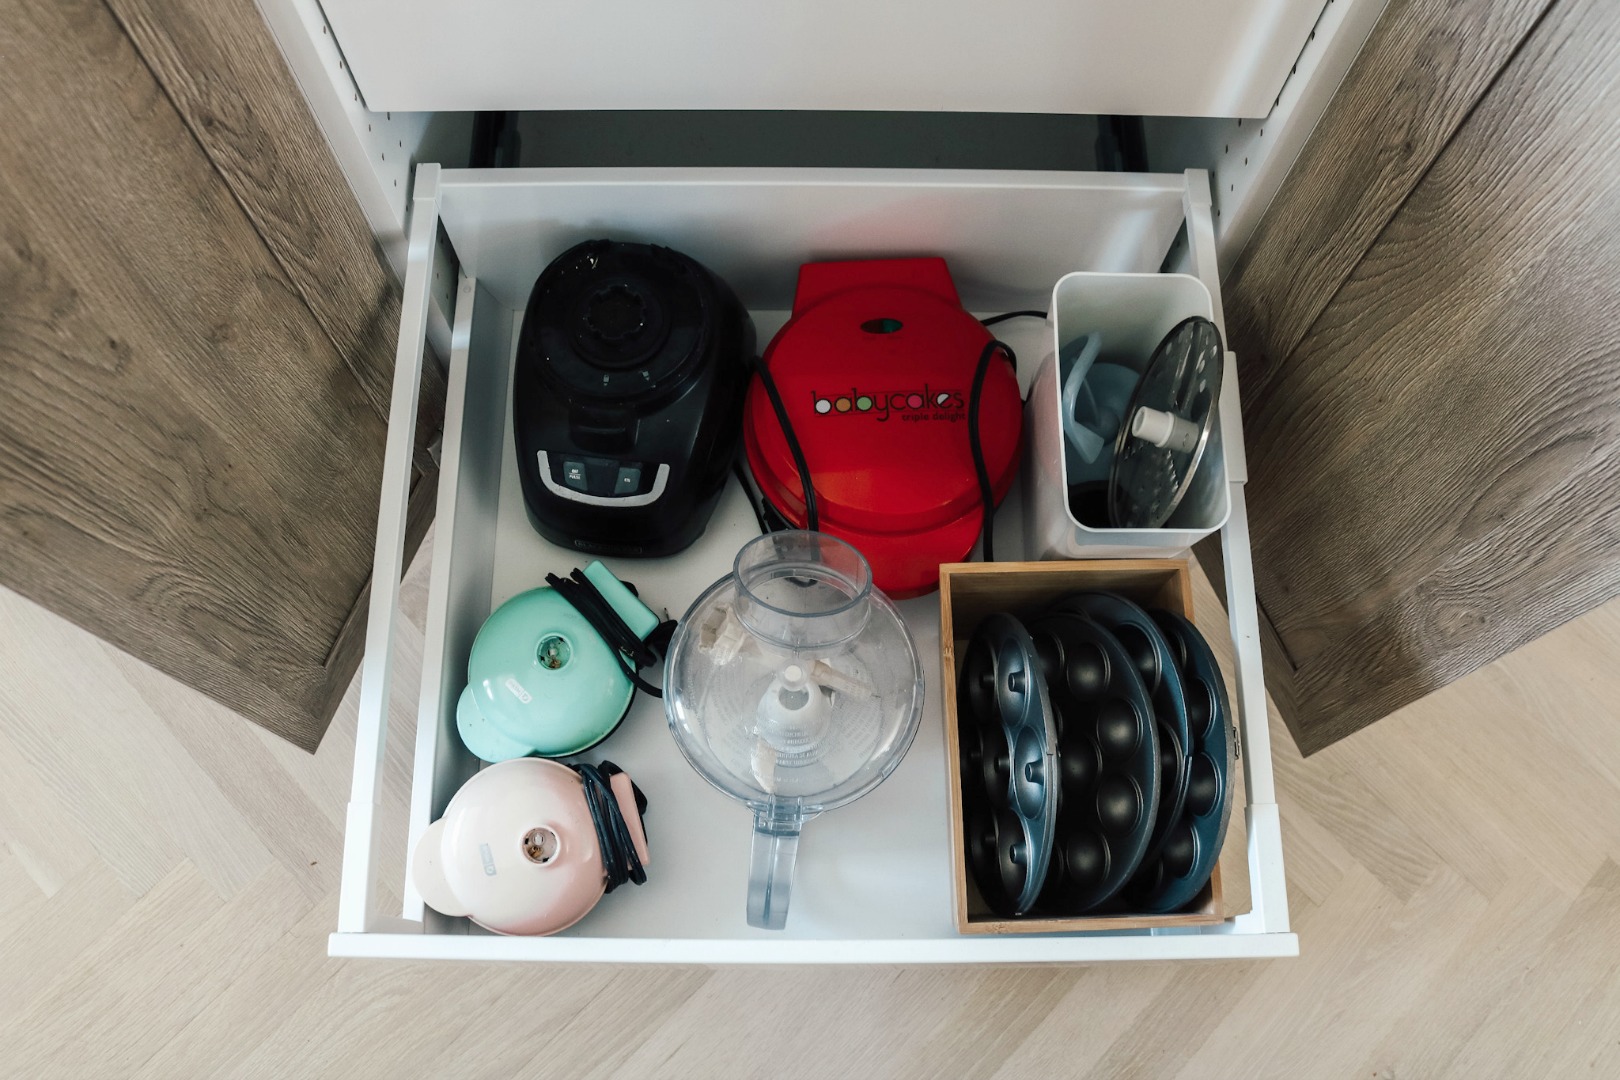
Mini waffle makers, food processor, and baby cakes maker. All in here.
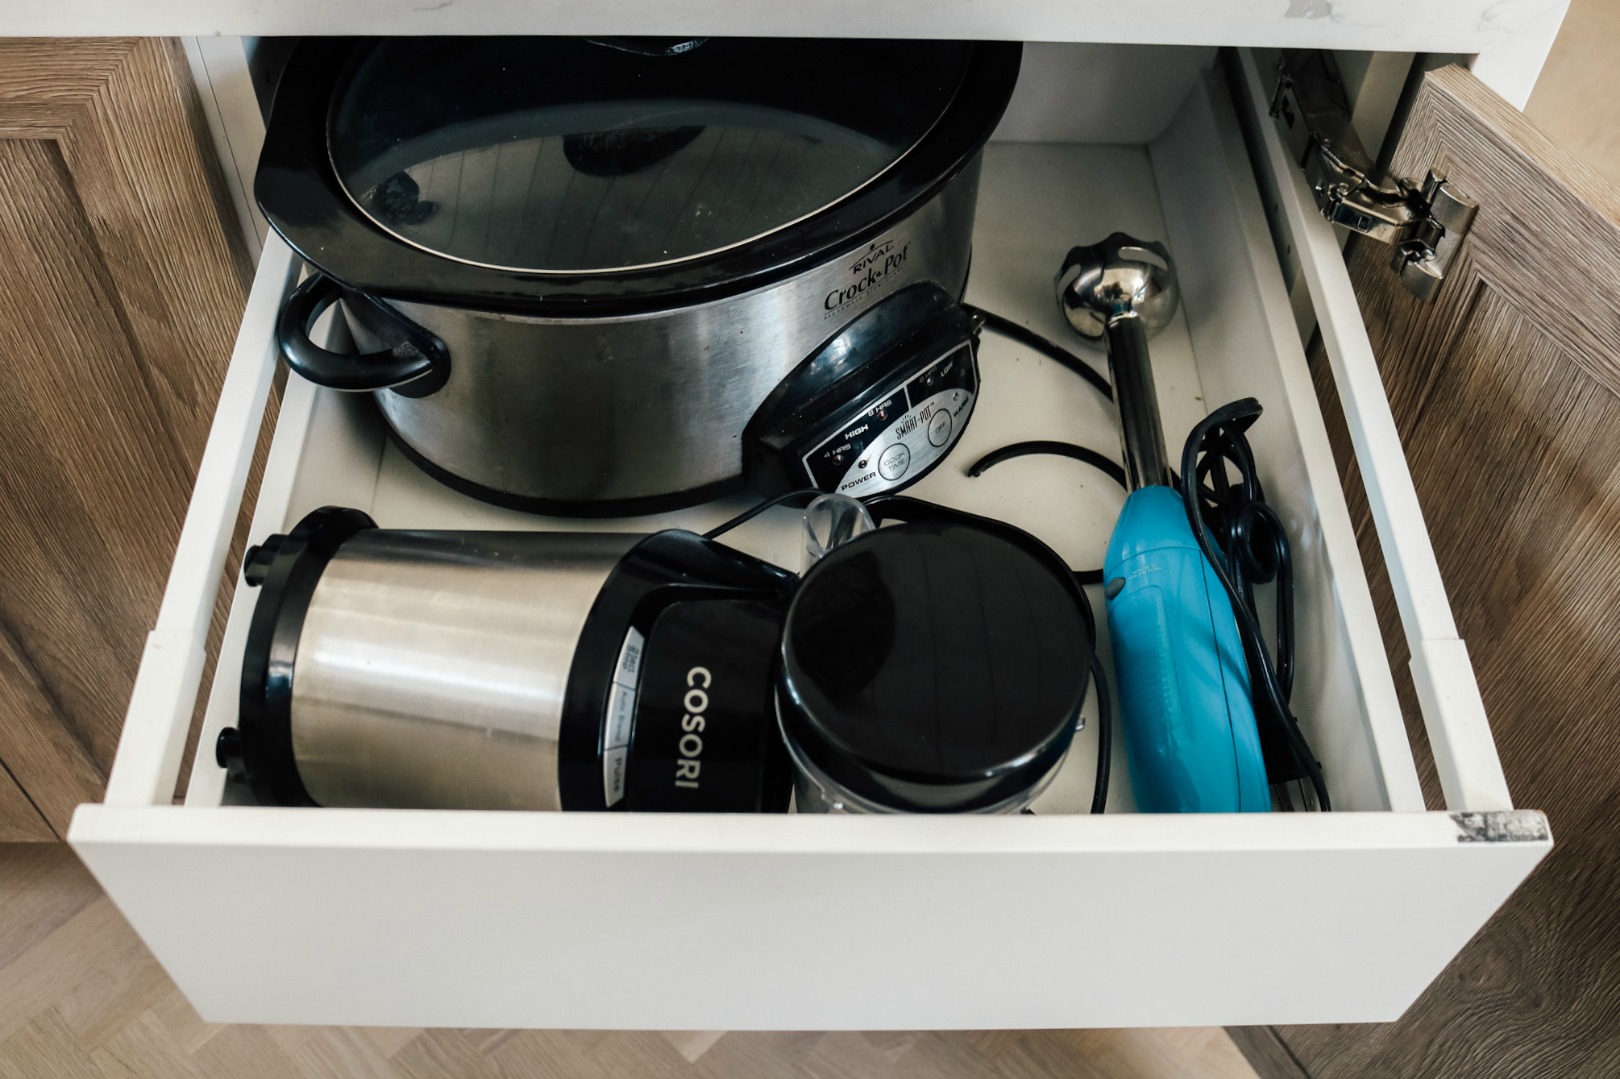
Crock pot, single-serve blender (Kevin loves that thing- I would be fine with just our Vitamix, but he likes to blend it in the same cup he then drinks out of.
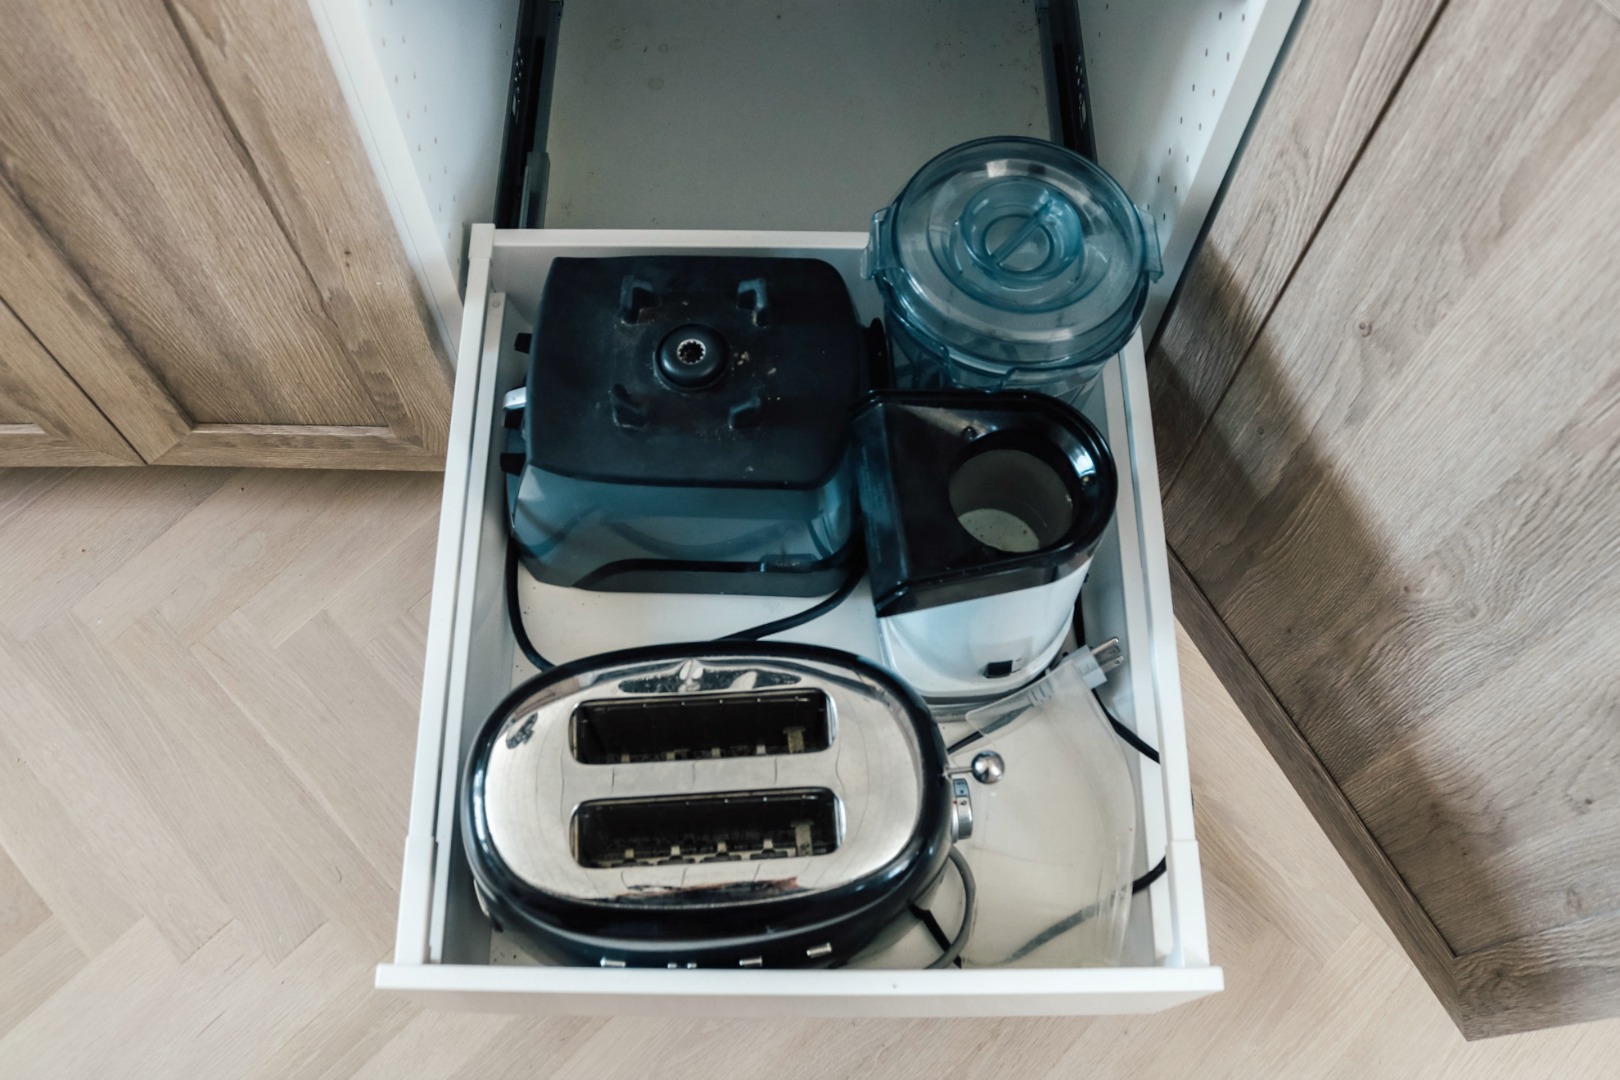
Toaster, Vitamix and popcorn maker! Super easy to pull out and use with the IKEA slide out drawers!
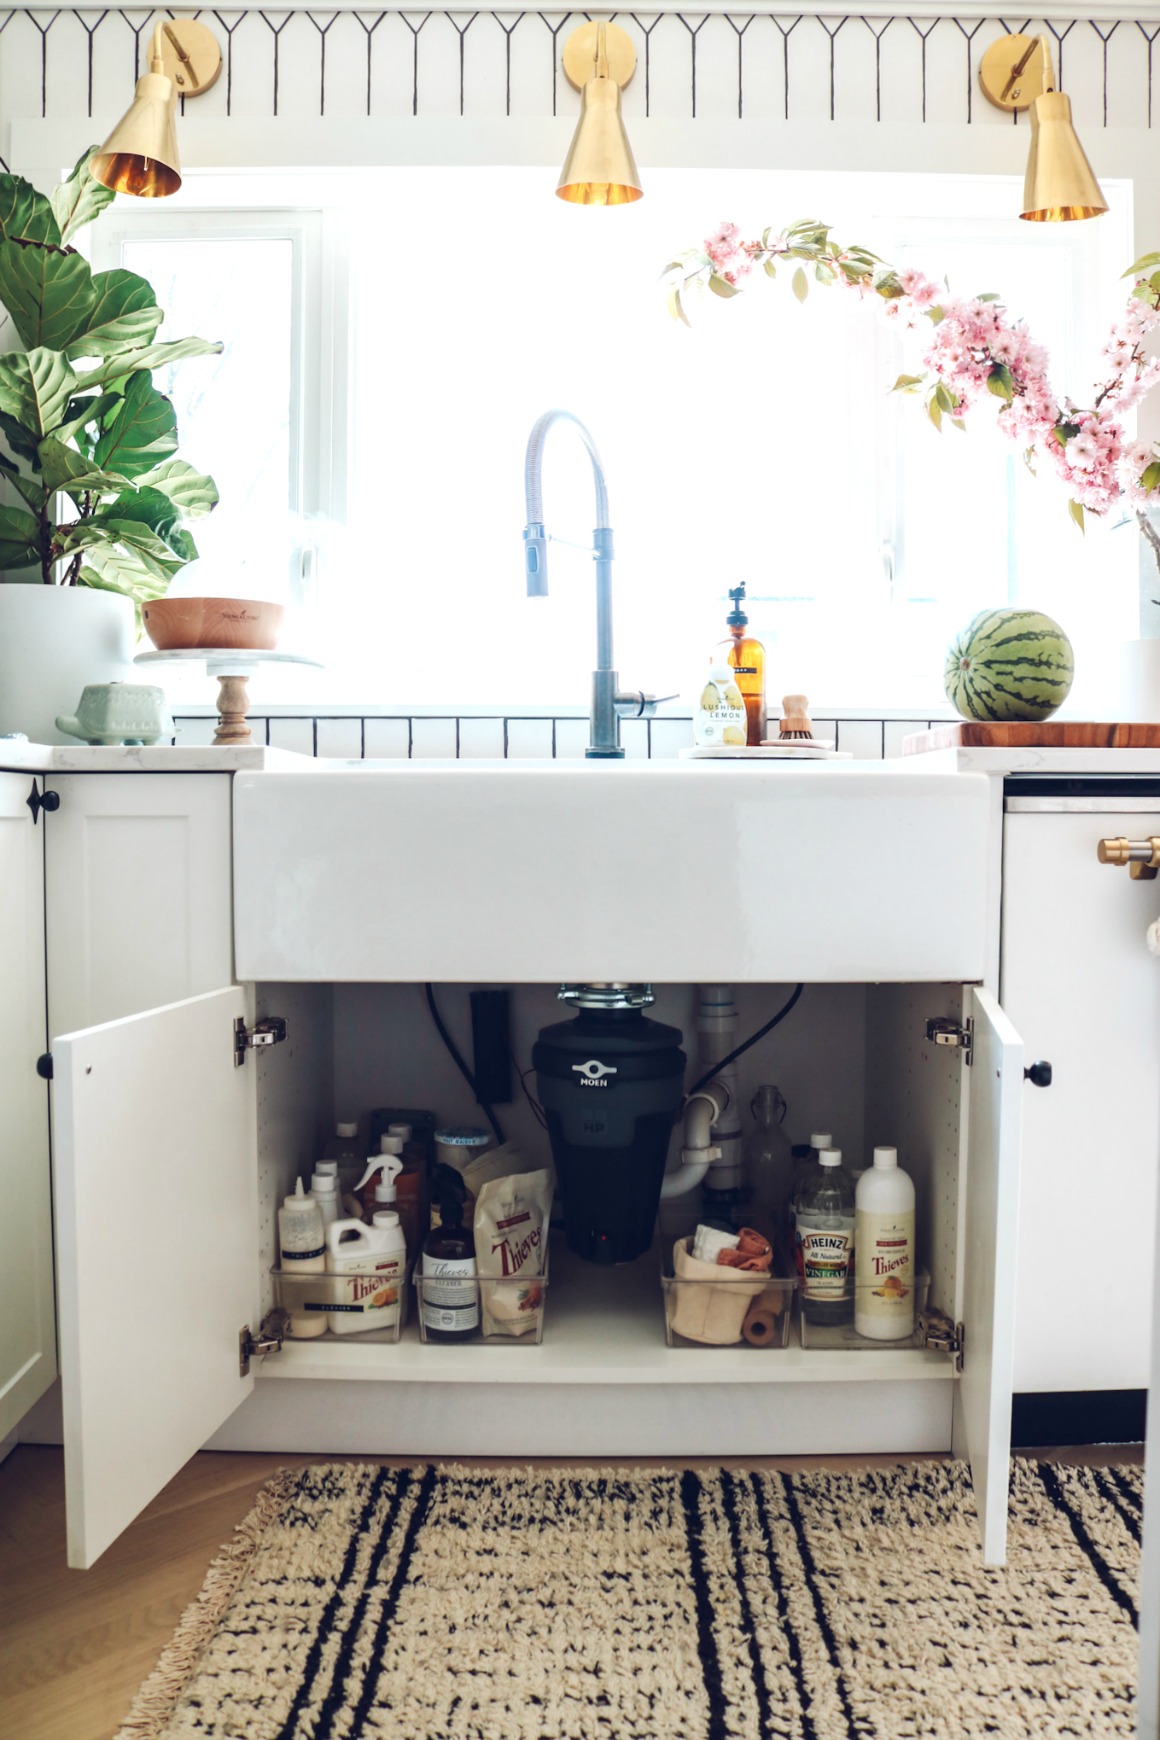
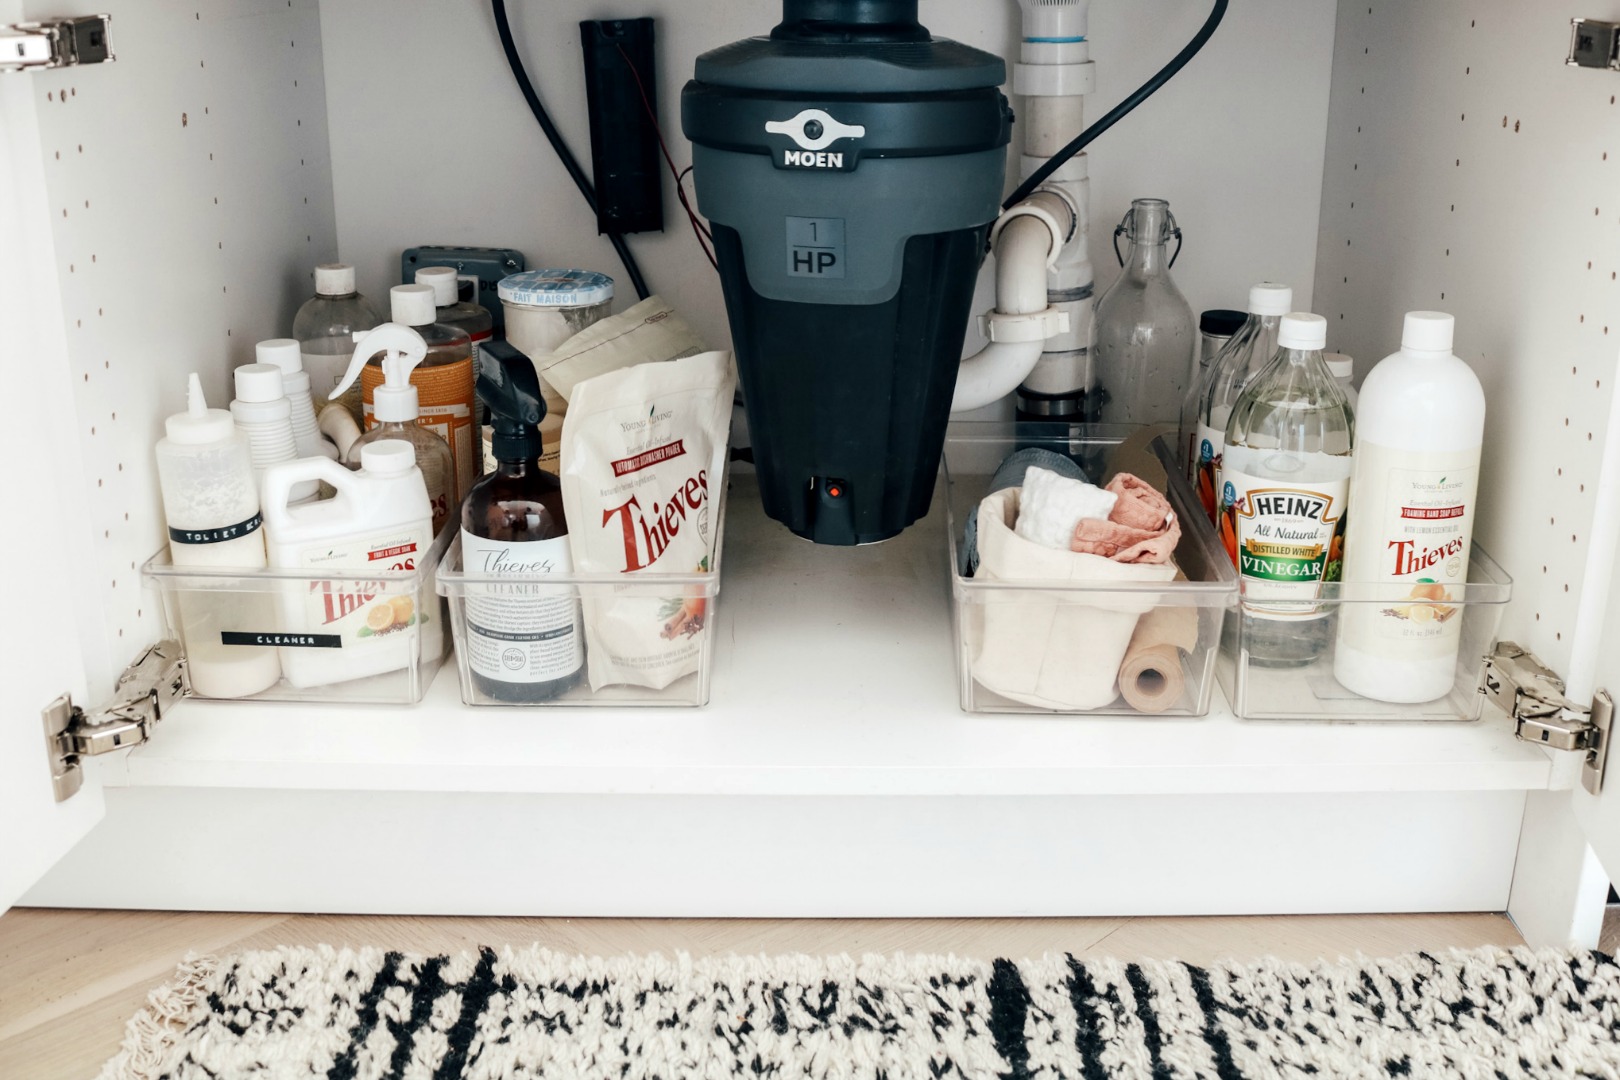
Under the sink we have all our cleaning supplies. Nothing is toxic, so we don’t worry about Finn getting into it (he is old enough now to know better). But I like keeping evening in THESE clear bins so we can easily pull-out if we need to take in the bathroom to clean. (I only use THIEVES to clean- read more about that HERE).
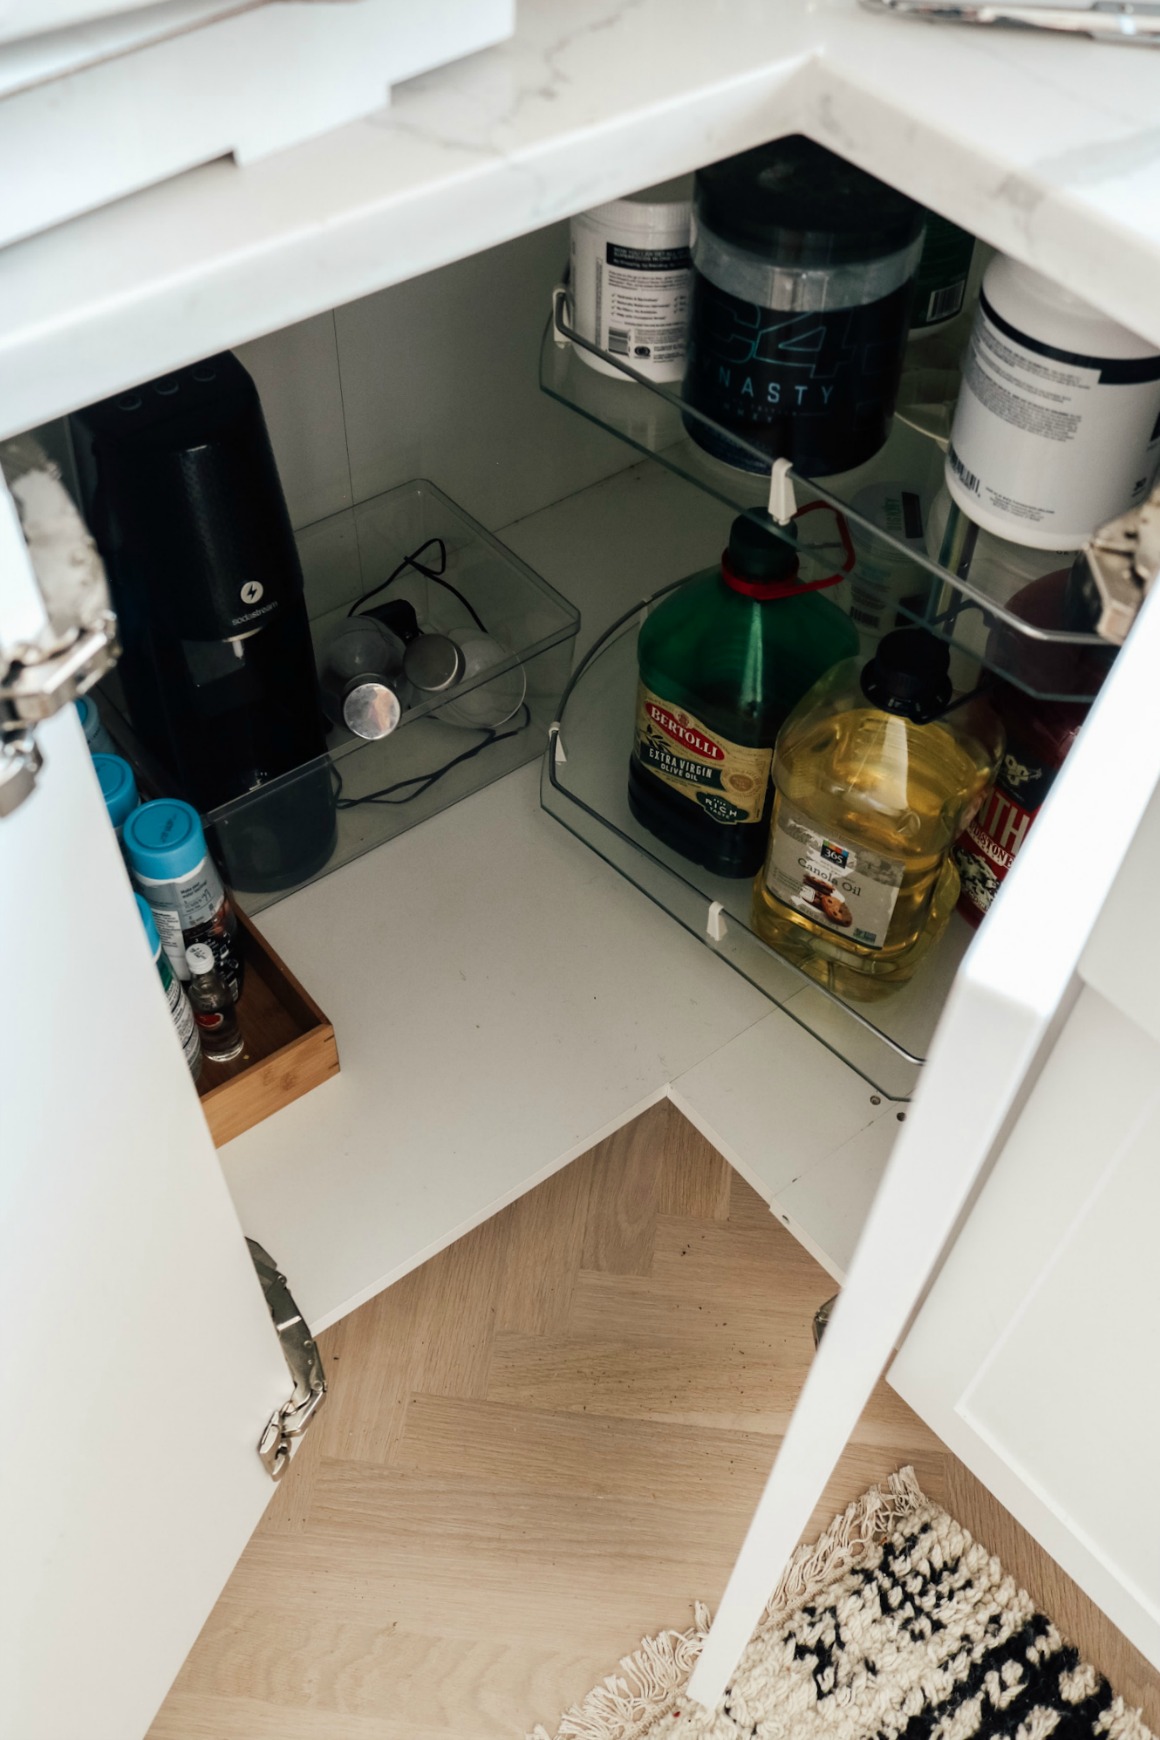
Funny little corner cabinet, that we were able to fit a lazy susan in holds all our large oils- coconut oils, olive oil etc. Also our Soda Stream (which we love!).
Frequently Asked Questions:
Why did we not do storage in our new banquet? Although it was an amazing way to maximize the space in our old kitchen, we found that moving the cushions and pillows to get into that storage wasn’t easy enough. We largely just didn’t use the stuff we had stored there. Also, we knew we didn’t need the added space with our new kitchen.
Where is our Microwave? We don’t use a microwave. When we bought this house, there wasn’t one and I didn’t want to take up counter space with a large appliance so we opted against it. We haven’t minded it at all. We reheat in the over of our air fryer.
How big is our island? All of the sizing and details for our new kitchen (including the way we saved thousands of dollars on our renovation) can be found on this post.
Shop our kitchen HERE and find out about our IKEA cabinets with Semihandmade HERE
See how I organized our much-smaller kitchen in this post
Want to see how I organized our fridge?? See it HERE
Kitchen Organizing Links-
-
- THIS plate holder to stack plates inside drawers
- To organize baking lids THIS or THIS for baking sheets and cutting boards
- Cereal Containers
- Glass Jars with bamboo lid HERE
- Label Maker HERE
- Our Printer HERE
- Spice Jars HERE
- Drawer Baskets for cloth napkins HERE and napkins HERE
- Glass Cups HERE
- THIS plate holder to stack plates inside drawers (Find our white plates HERE)
- I have THESE space saving pans


I’m so addicted to posts like this! haha! I love how organized everything is.
Thanks so much Ashley!!!
I really love your new kitchen, for me it is the perfect size and LOVE the styling! So pretty!
Love your style! Just finished remodeling my kitchen and I need something decorative on my hood. Where did you get the towel bar on your hood? Thanks
it came on the hood! from big chill