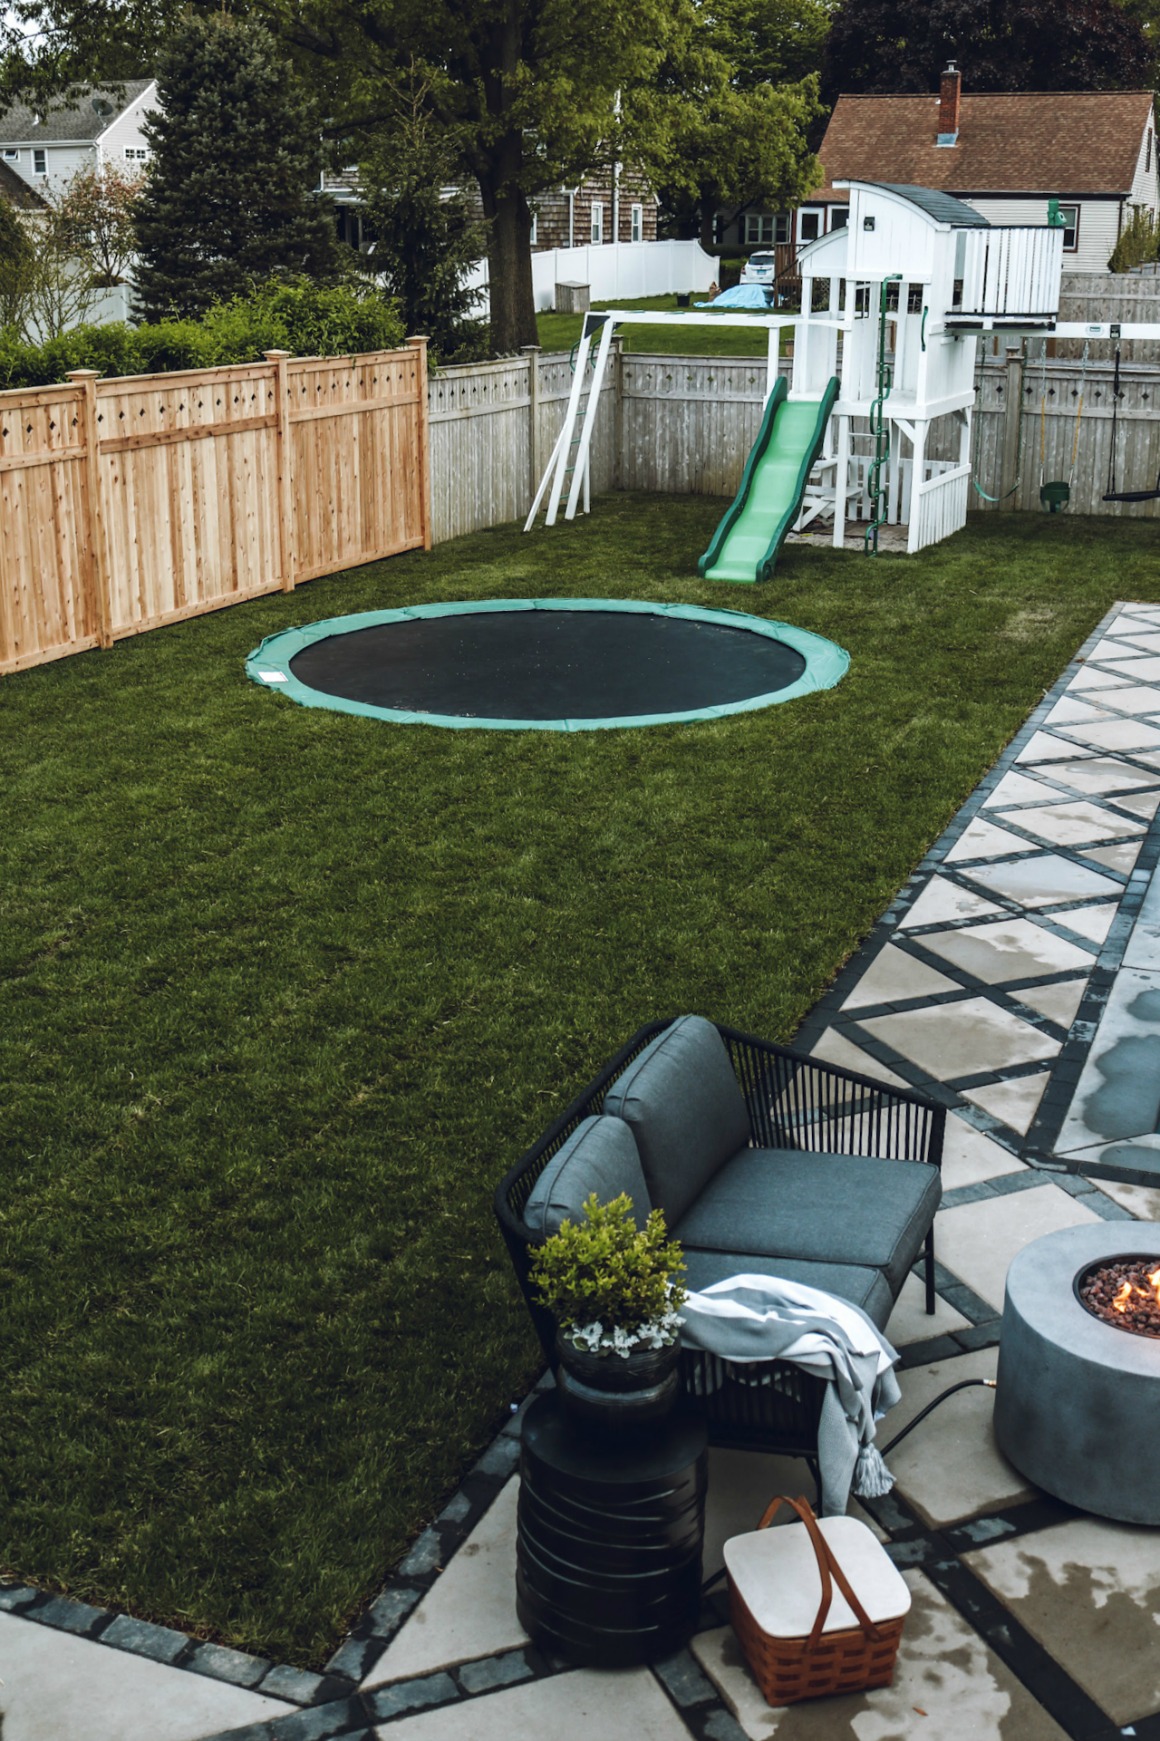
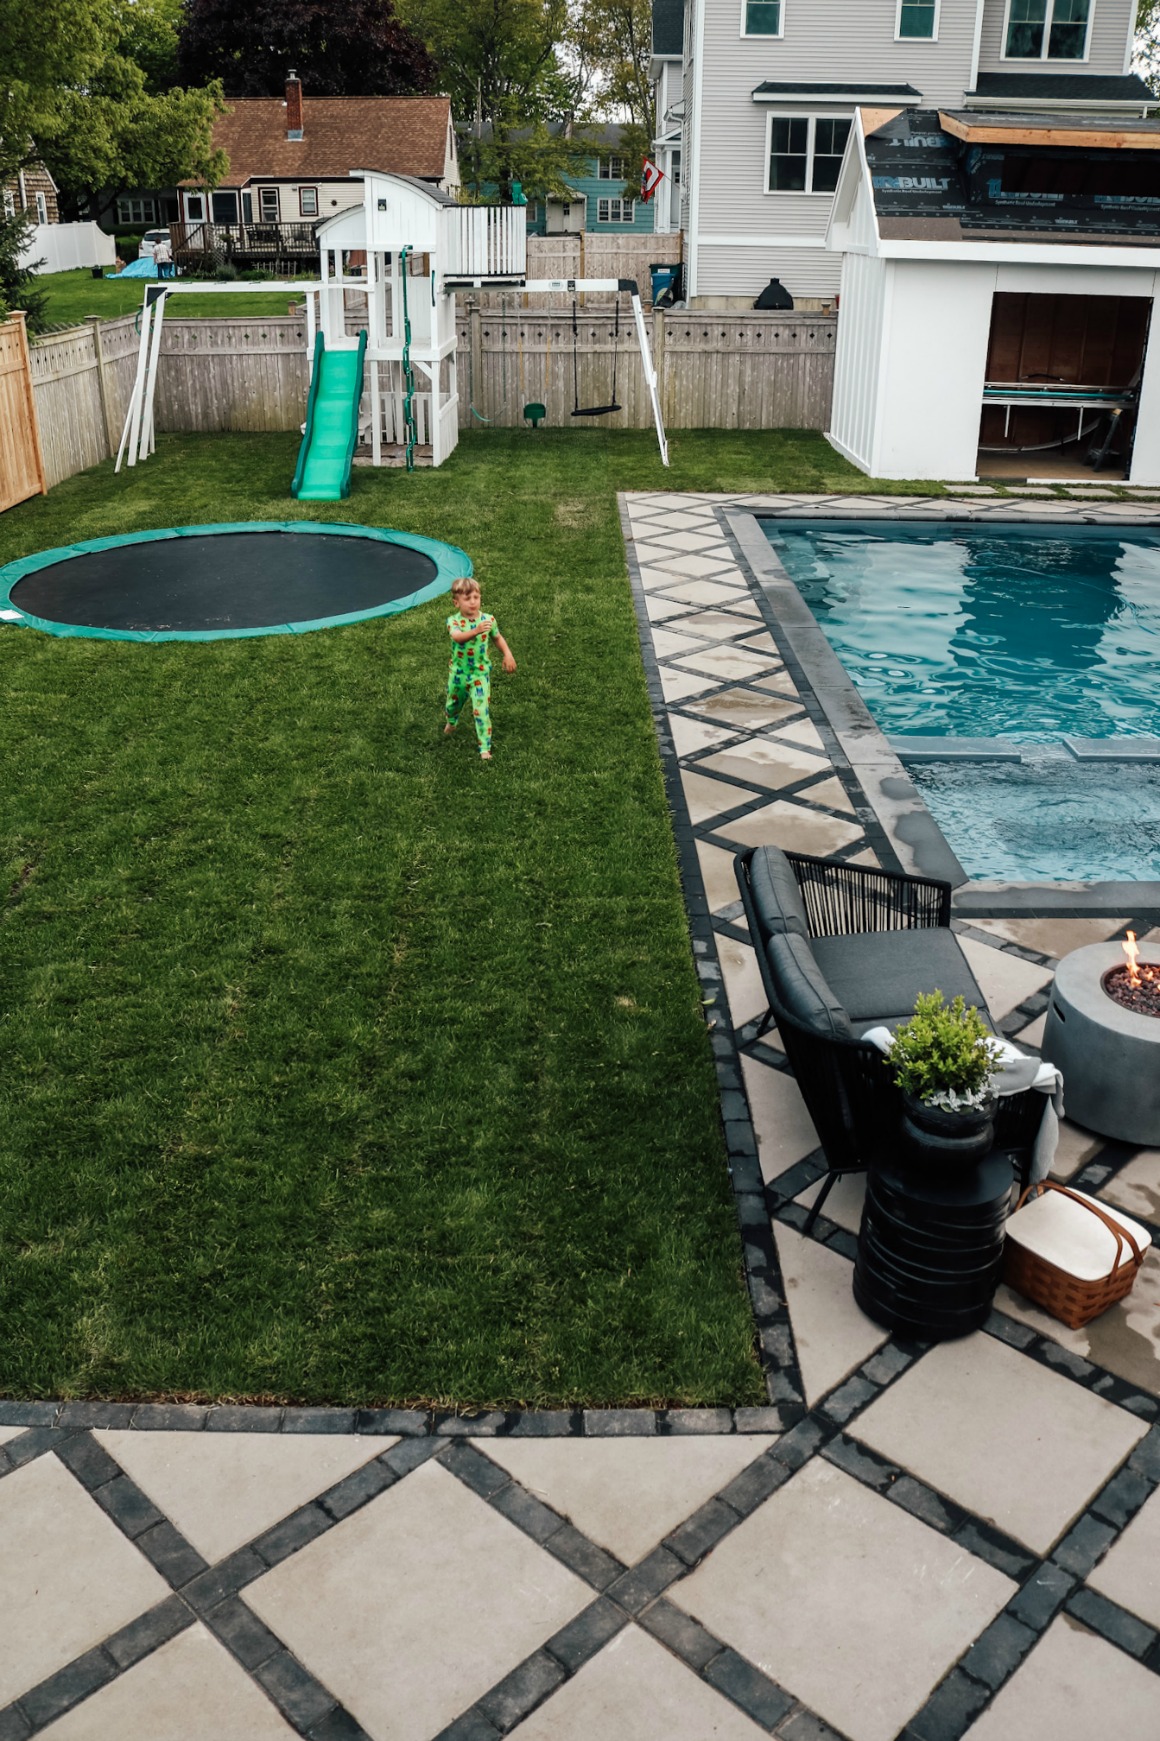
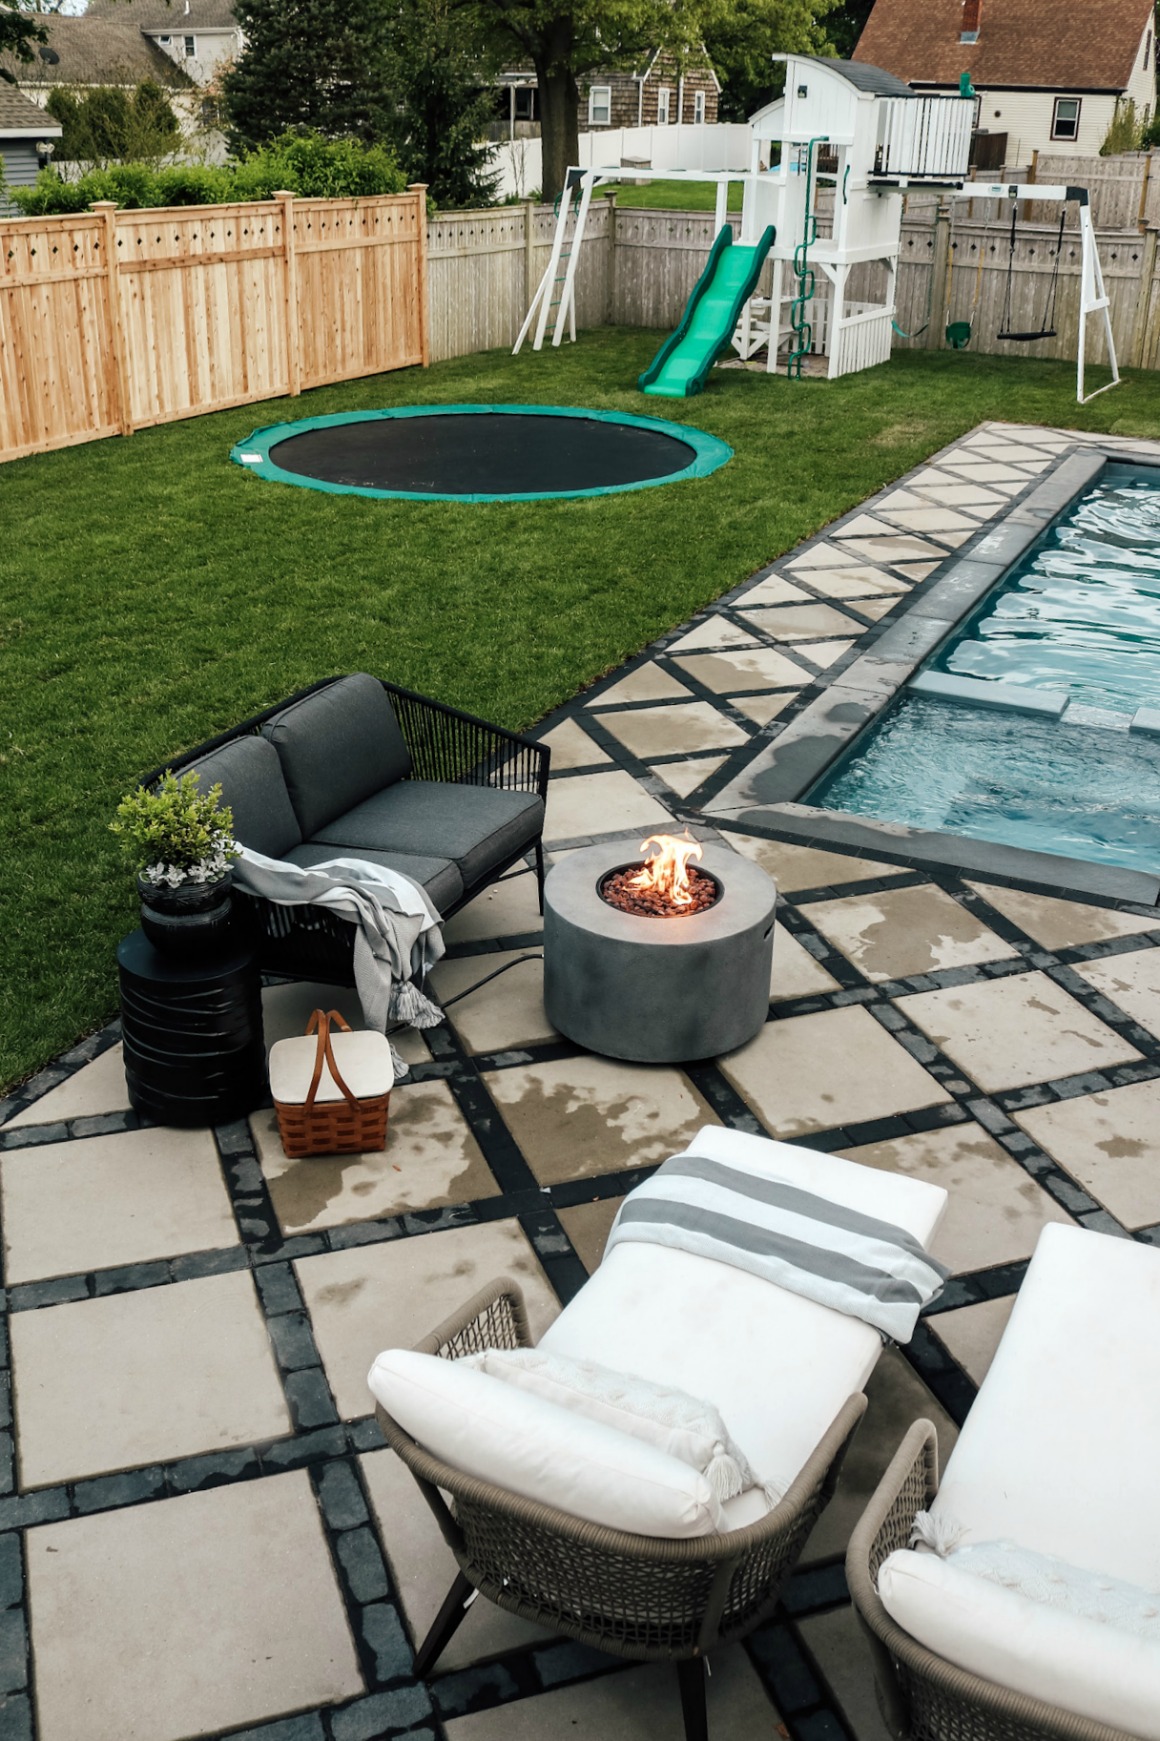
I love finding any way that I can to encourage outdoor play! One of the things in our backyard that gets daily use is our trampoline. We’ve had it several years and the kids never seem to tire of it. Listening to them be active and having fun together will never get old for me either! It was a must for us to keep it when we started our backyard remodel and we decided to make our yard not feel crowded by putting our trampoline in-ground.
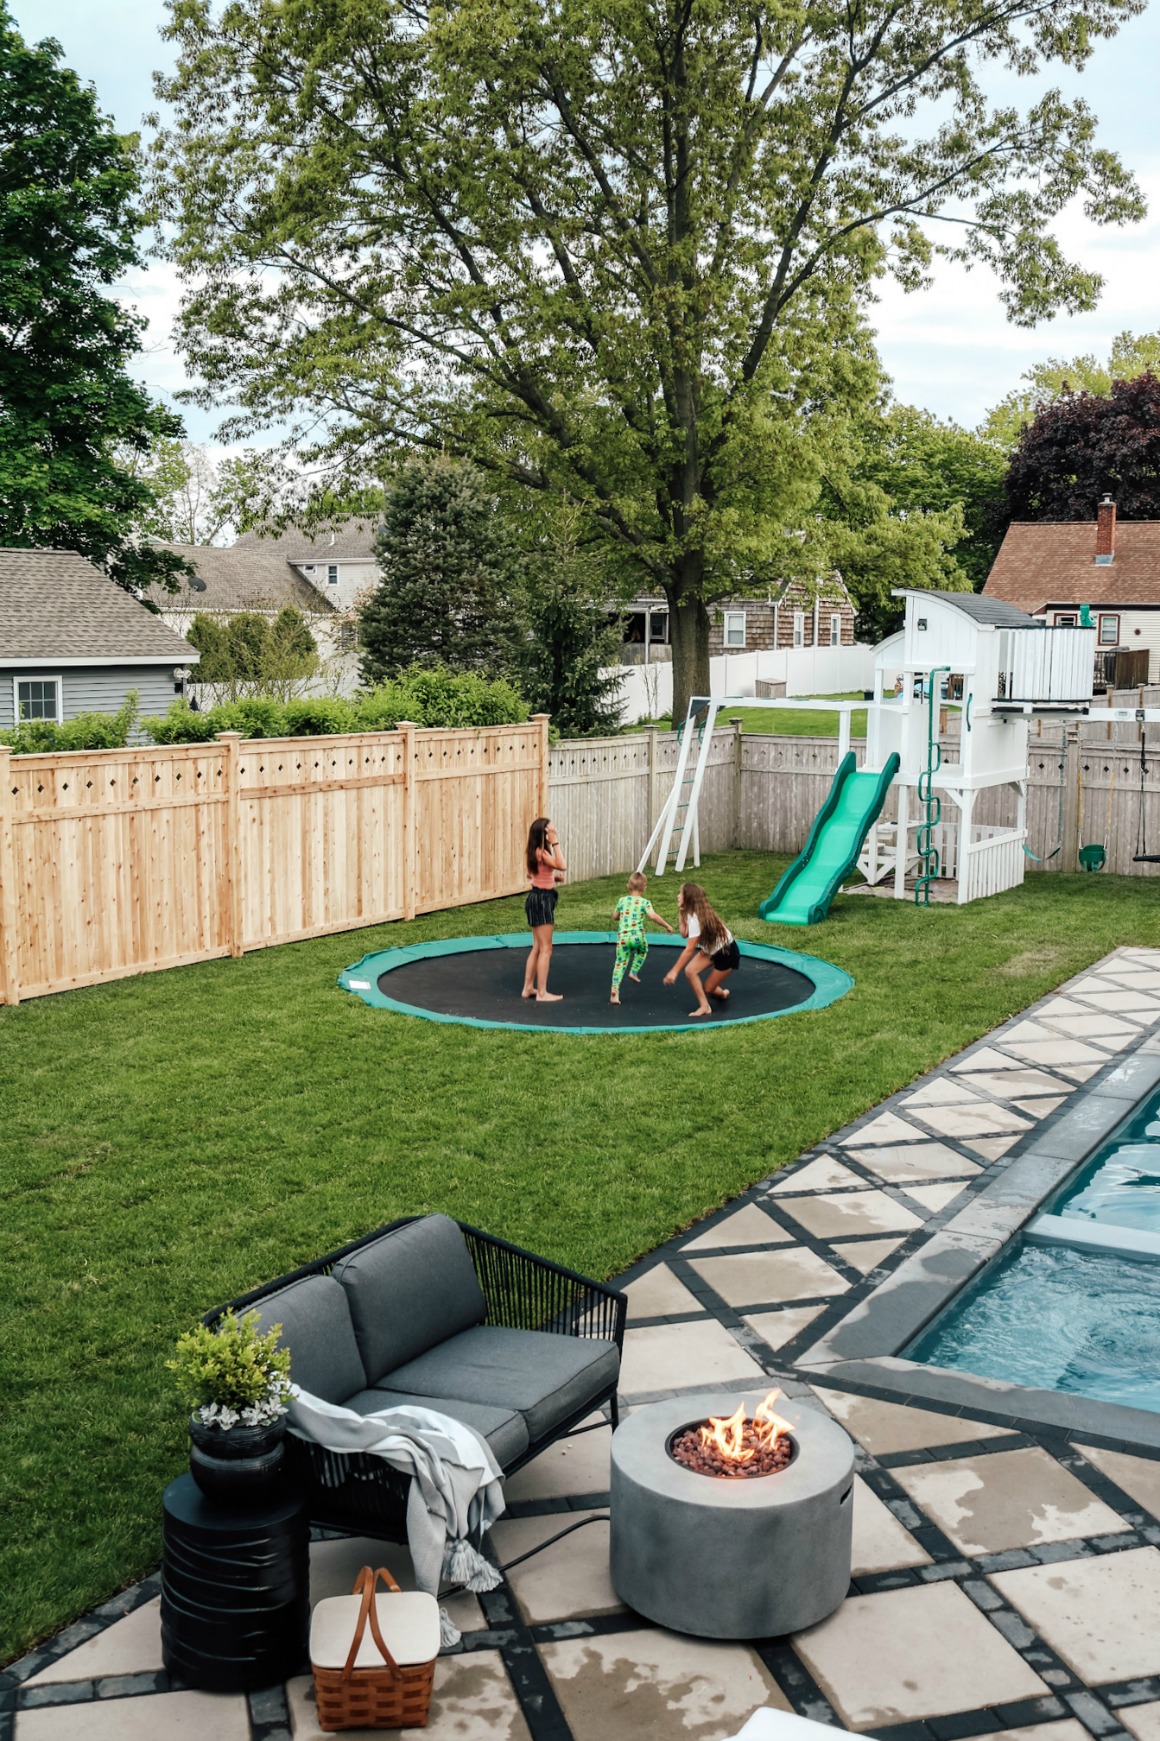
When we made a swimming pool part of our renovation plans, it meant re-imagining our entire backyard space. Since the back hoe was here anyway, it was the perfect time to bury our trampoline!
Reasons we buried the trampoline:
- Visual Appeal. All the fun of a trampoline, without a broken up view.
- Accessibility. My kids have always loved the trampoline, but now that they can just run on and off of it, it is in constant use!
- Safety. Although our trampoline had a net, there are always concerns about someone falling off the tramp! I also love that we don’t have a net for the access and aesthetic reasons, too!
- Not to mention as a parent it is so much easier to get on and off to play with our kids!
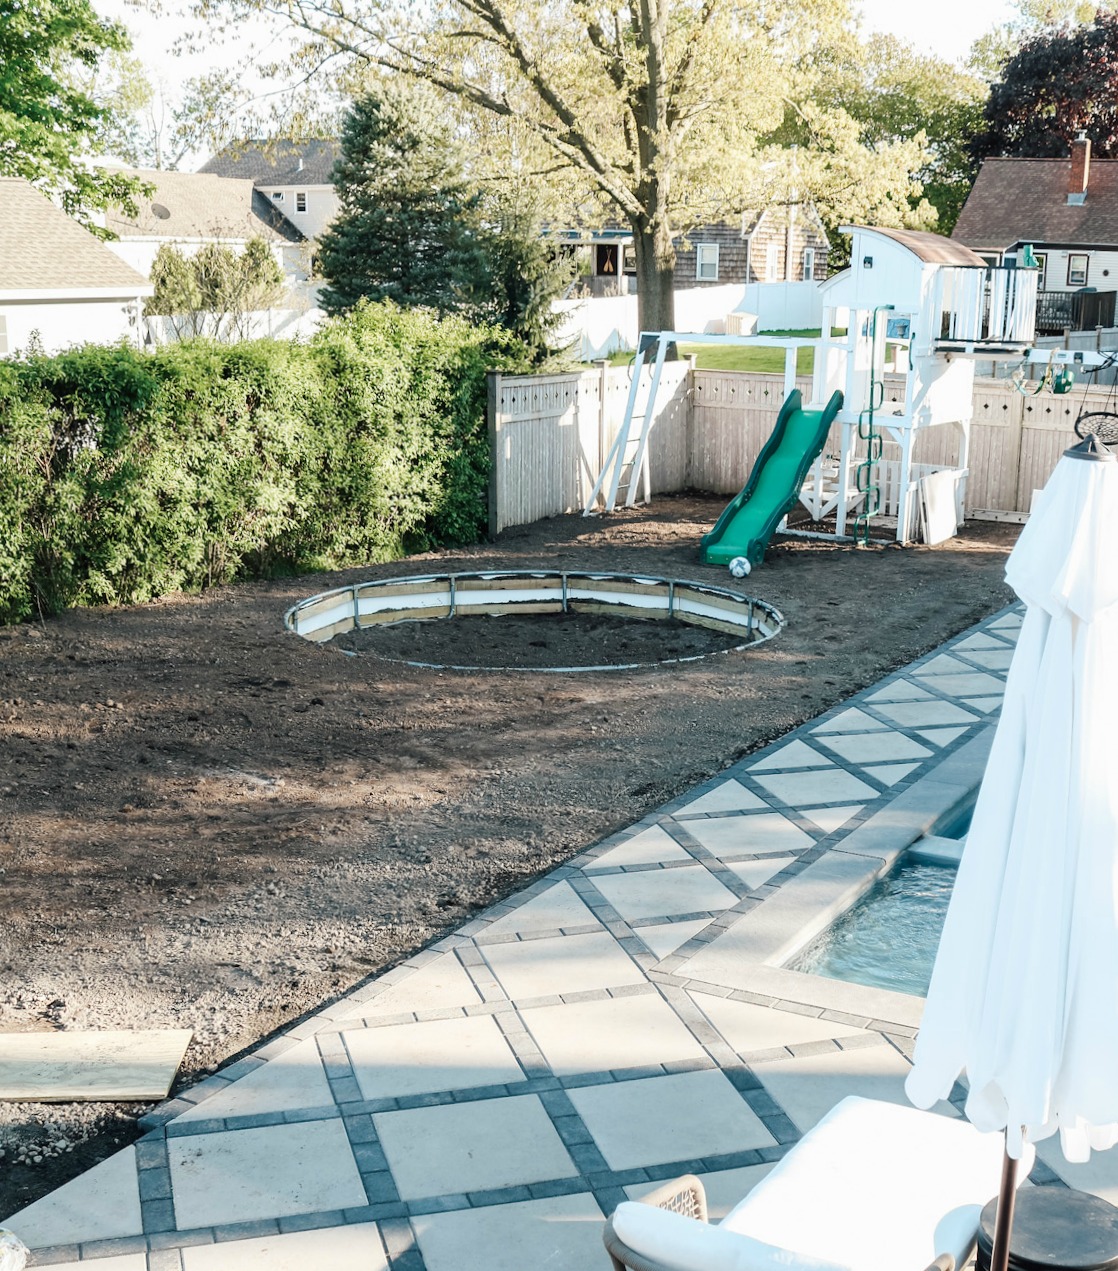
How We Buried the Trampoline
I had seen trampolines buried (it is really common in Utah, where we are from), so I figured that it was as simple as digging a hole and plopping the trampoline inside, boom! Done. Upon further research, we learned that you have to reinforce the trampoline to withstand the pressure of the dirt, rocks and water that want to move and shift over time. Without proper dirt retention, the hole will sooner or later fill with dirt or rocks and the trampoline will become un-jumpable!
You can buy in-ground trampolines that are specially made for burial. We priced out these systems, and they can cost thousands. We figured that we would work with what we already owned!
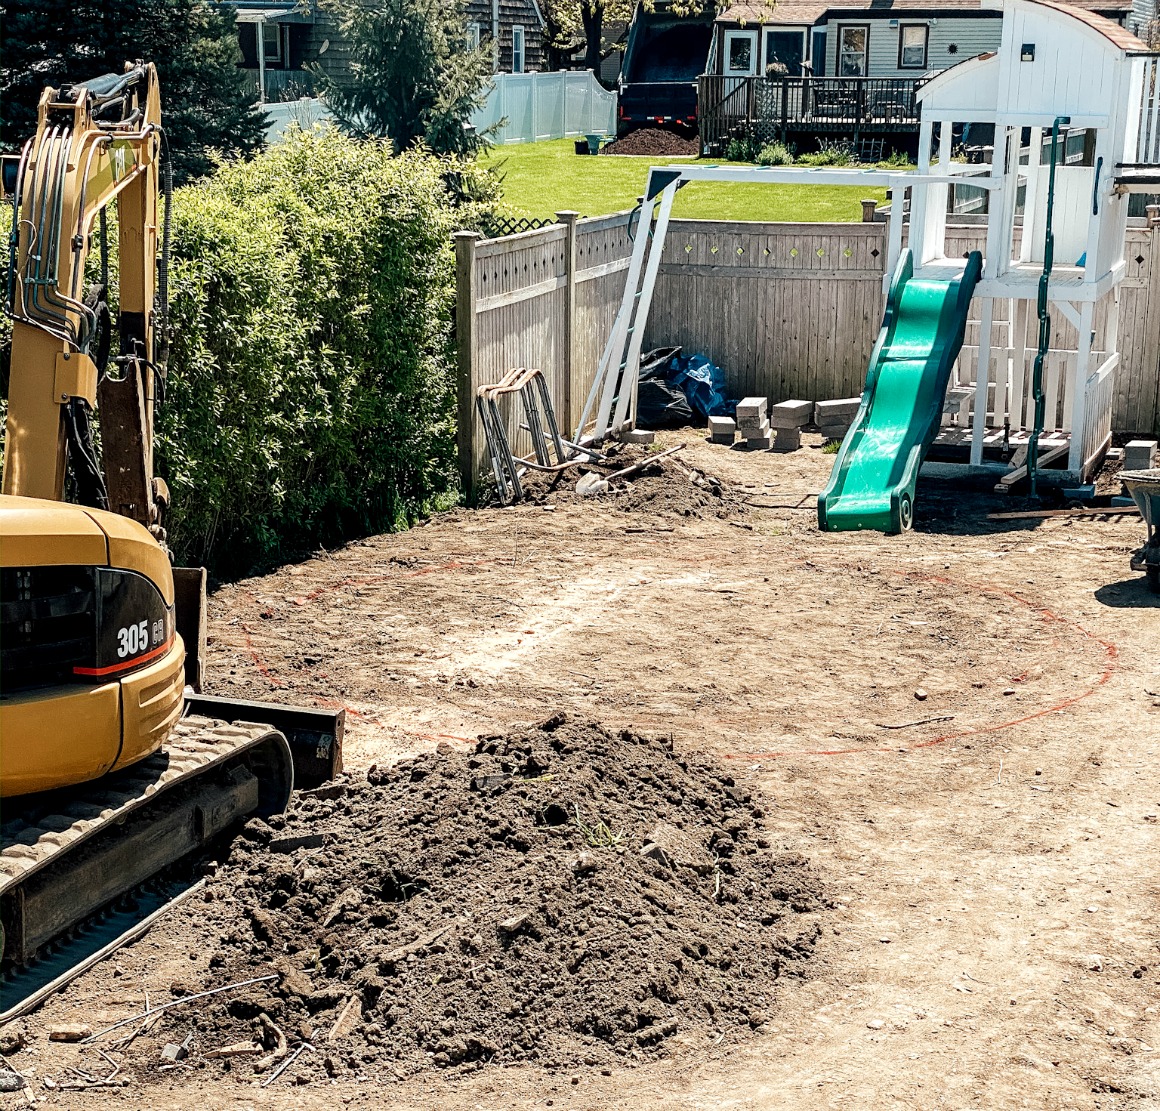
1. Dig a Hole. Seems obvious, enough, but there are some tricks to making sure that you have the right size and placement! Kevin put our trampoline back together and we placed it where the hole would be. We spray painted the ground as a guide for digging and then moved the frame out of the way. It is best to give yourself an extra foot or so, so that you aren’t stuck with a hole that is too small.
Our trampoline had the option of lowering the legs so we went to the shortest setting (about three feet), but dug the hole a little deeper in the center.
TIP: After the fact, we learned that another way we could have done this is to take the diameter of the trampoline (typical sizing is anywhere from 12-15 foot), and measured from there. You can drive a stake into the ground at the center point, cut a rope to the radius (MATH! radius is half the diameter, so 6-7.5′ but remember to add that extra foot) and then spray painted a circle like a make-shift compass.
TIP: It was convenient that we already had a back hoe in the yard to do that work for us. They also had a dumpster for hauling away the dirt– make a plan for that before you start, there is so much dirt!
2. Assemble the trampoline frame. If you are using a trampoline that is already together, this will go more quickly if you remove the jumping mat.
3. Attach treated 2X4 to the frame of the tramp. We had twelve sides to cover and we used two boards per side. We ended up with twenty-four 2x4s that we attached to the frame. Ours were cut to 40 inches, but yours will need to be cut to the size of your legs. We used self-taping 2″ sheet metal screws to attach the wood.
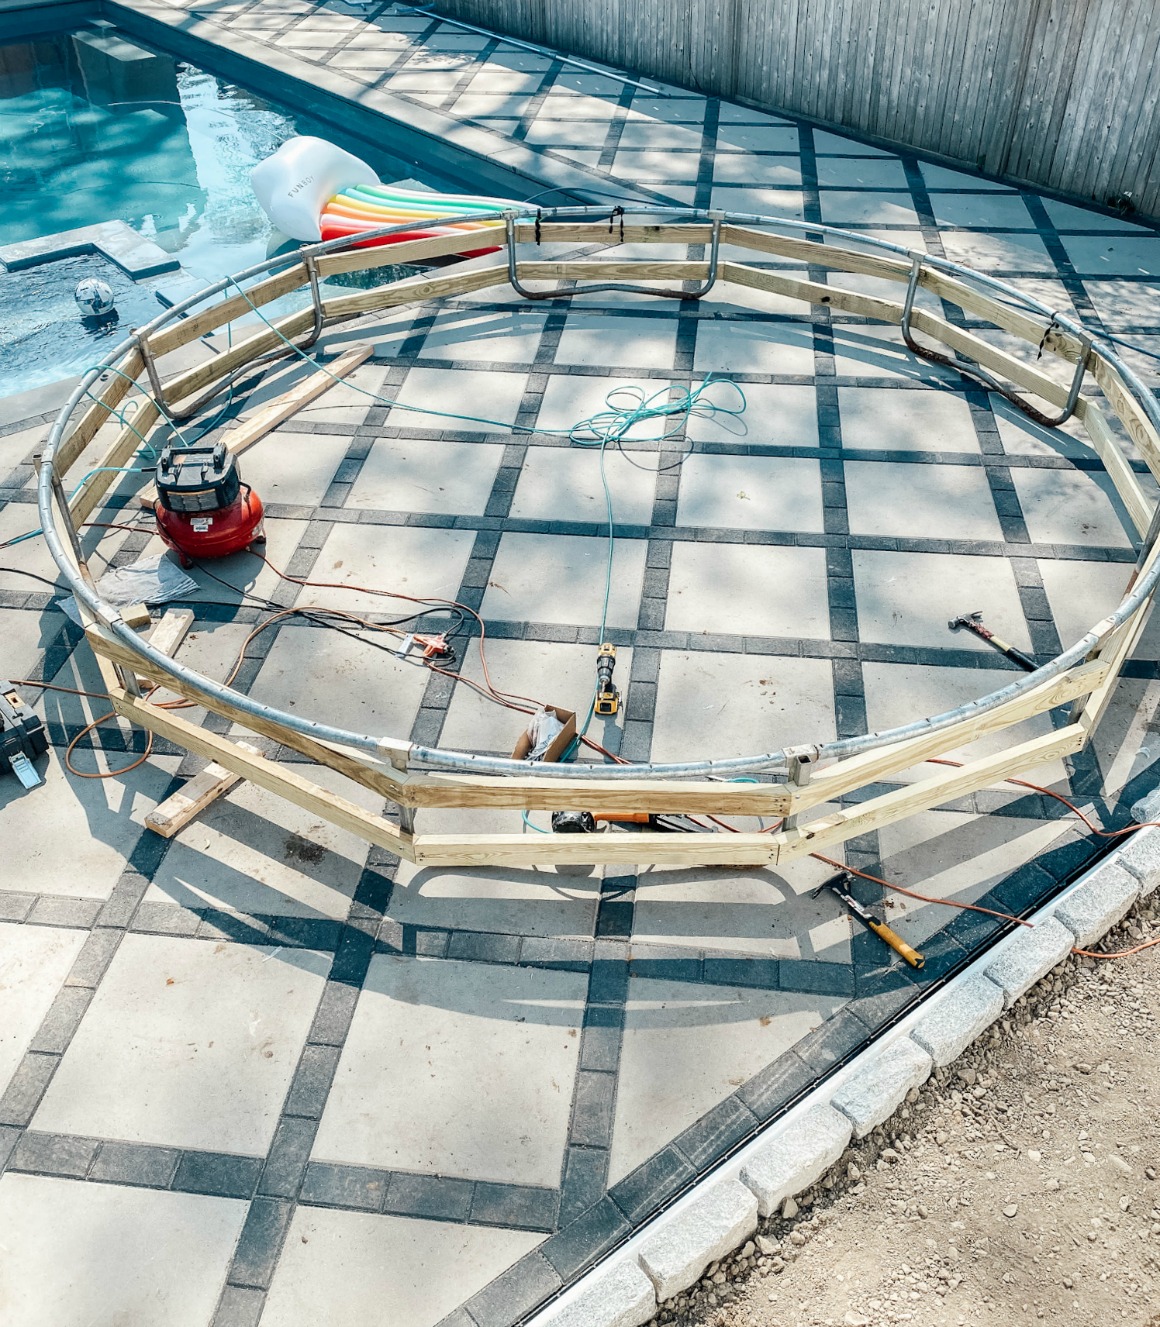
4. Attach Retaining Wall. We used AZEK as our retaining material as it is heavy duty, weather-resistant, water proof, and we had extra from wrapping the bottom of our deck! These sheets were cut to size and screwed directly into the 2X4s already attached to the frame. The AZEK was really pliable (I have seen people wrap around the 2×4’s with sheet metal too).
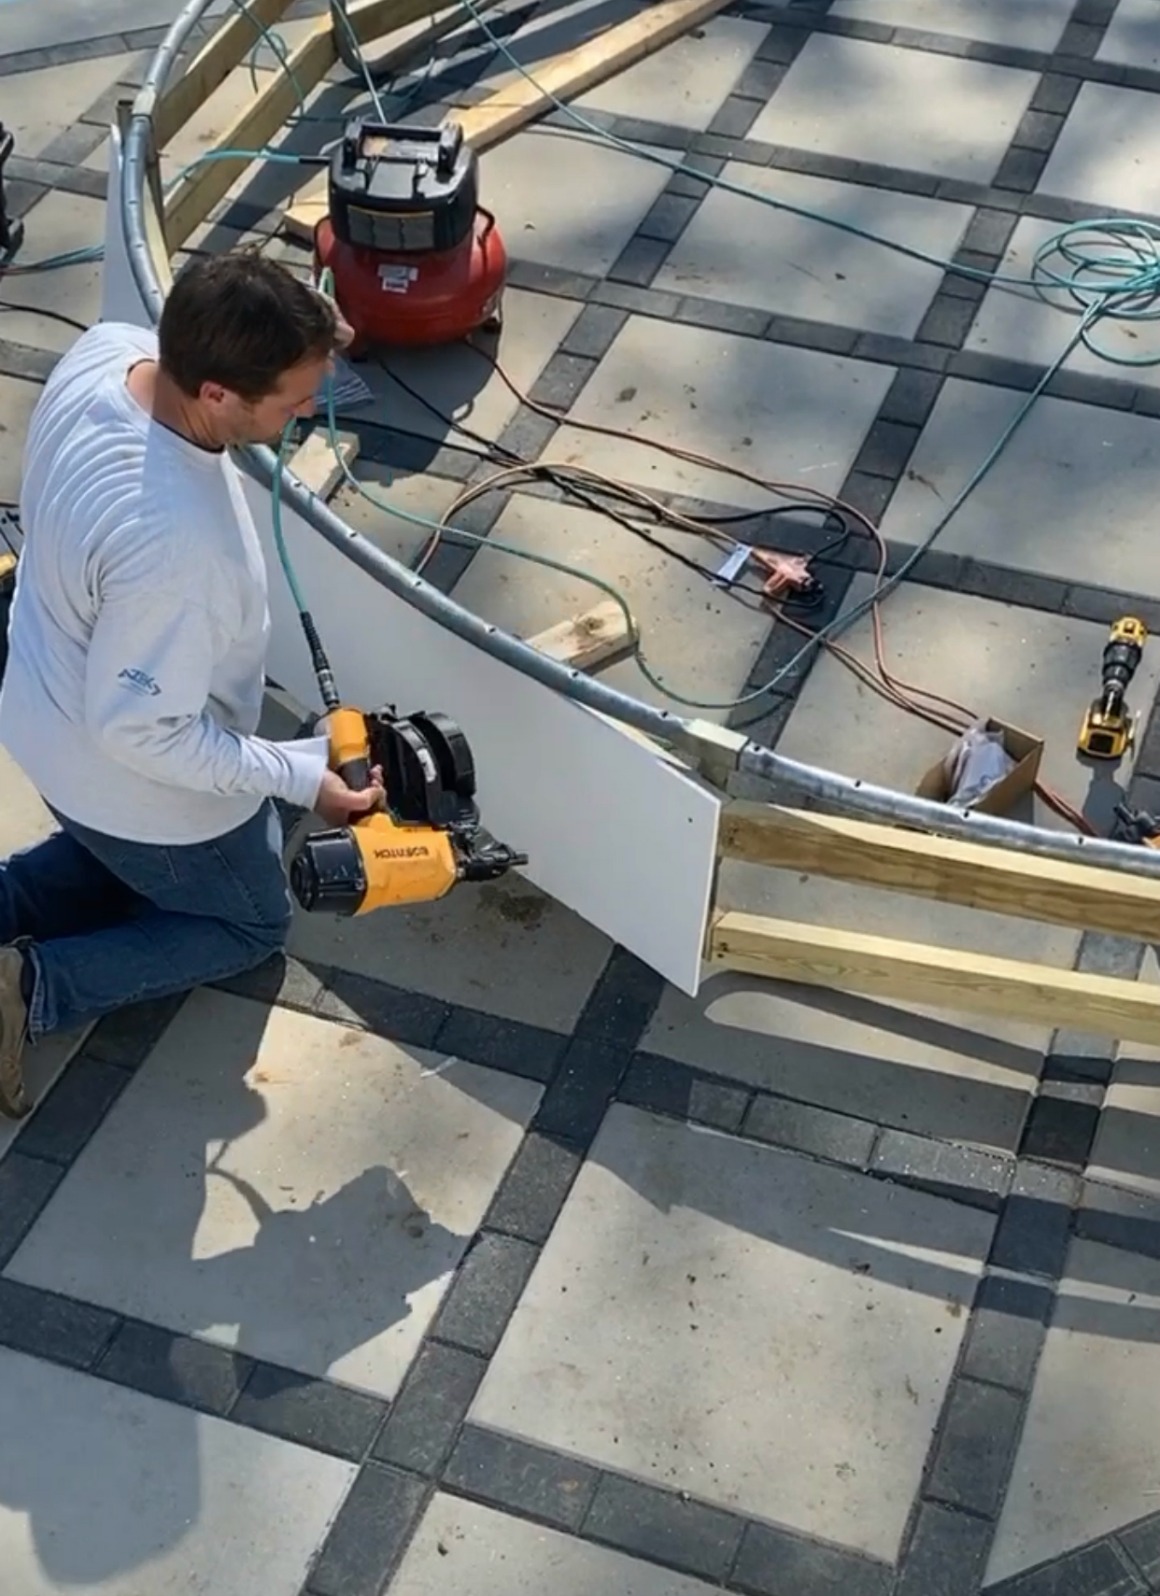
Our contractor Jon, helped us with the trampoline since he was already here helping with the yard and leveling everything out after our addition and the pool.
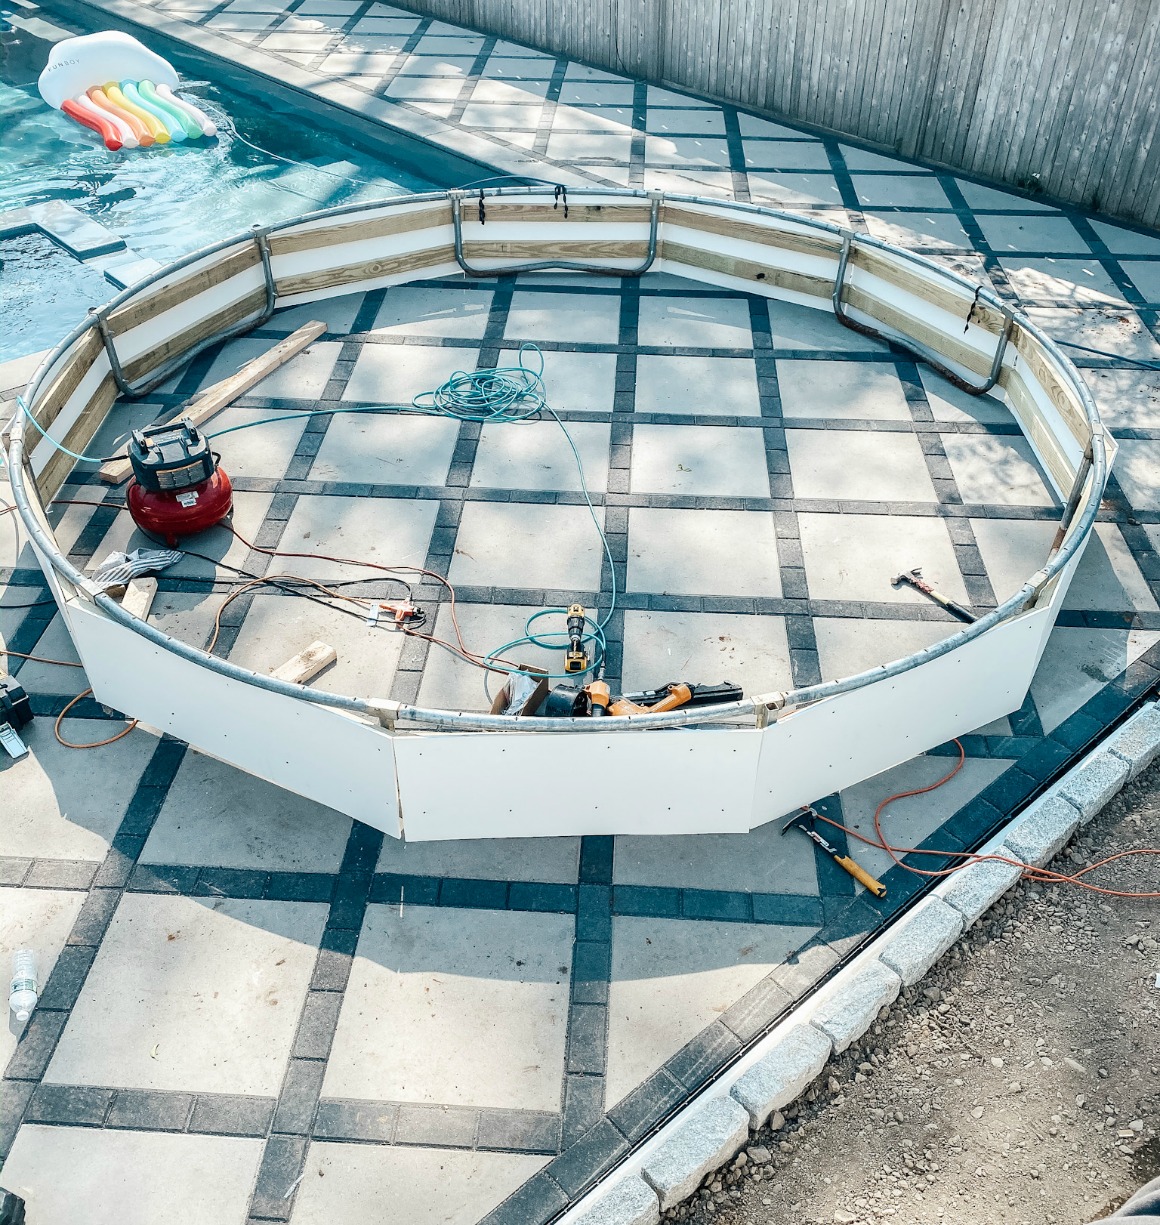
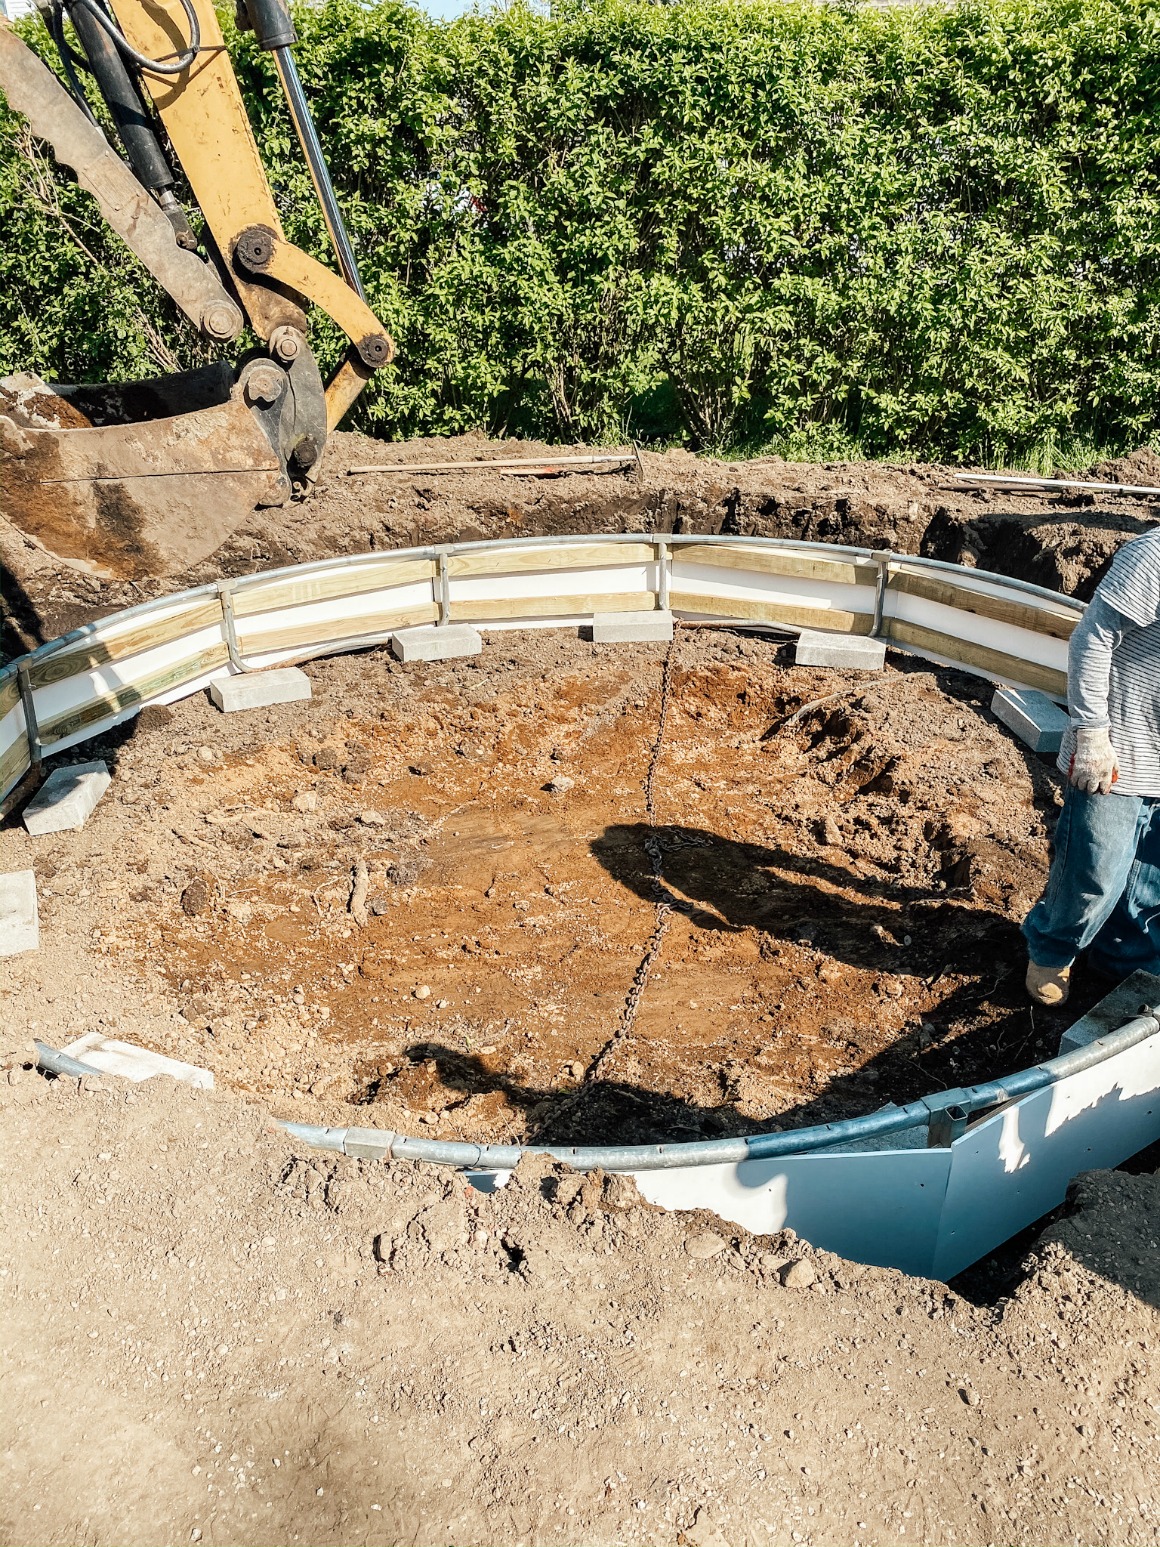
5. Cinder Block Footings. Using what we had, we cut leftover pavers to size and laid them along the bottom of the hole. Place the trampoline on the footings and use a level to make sure it all in line. You may need to make dirt/paver changes to get it all level. You can also fill the bottom with gravel for drainage.
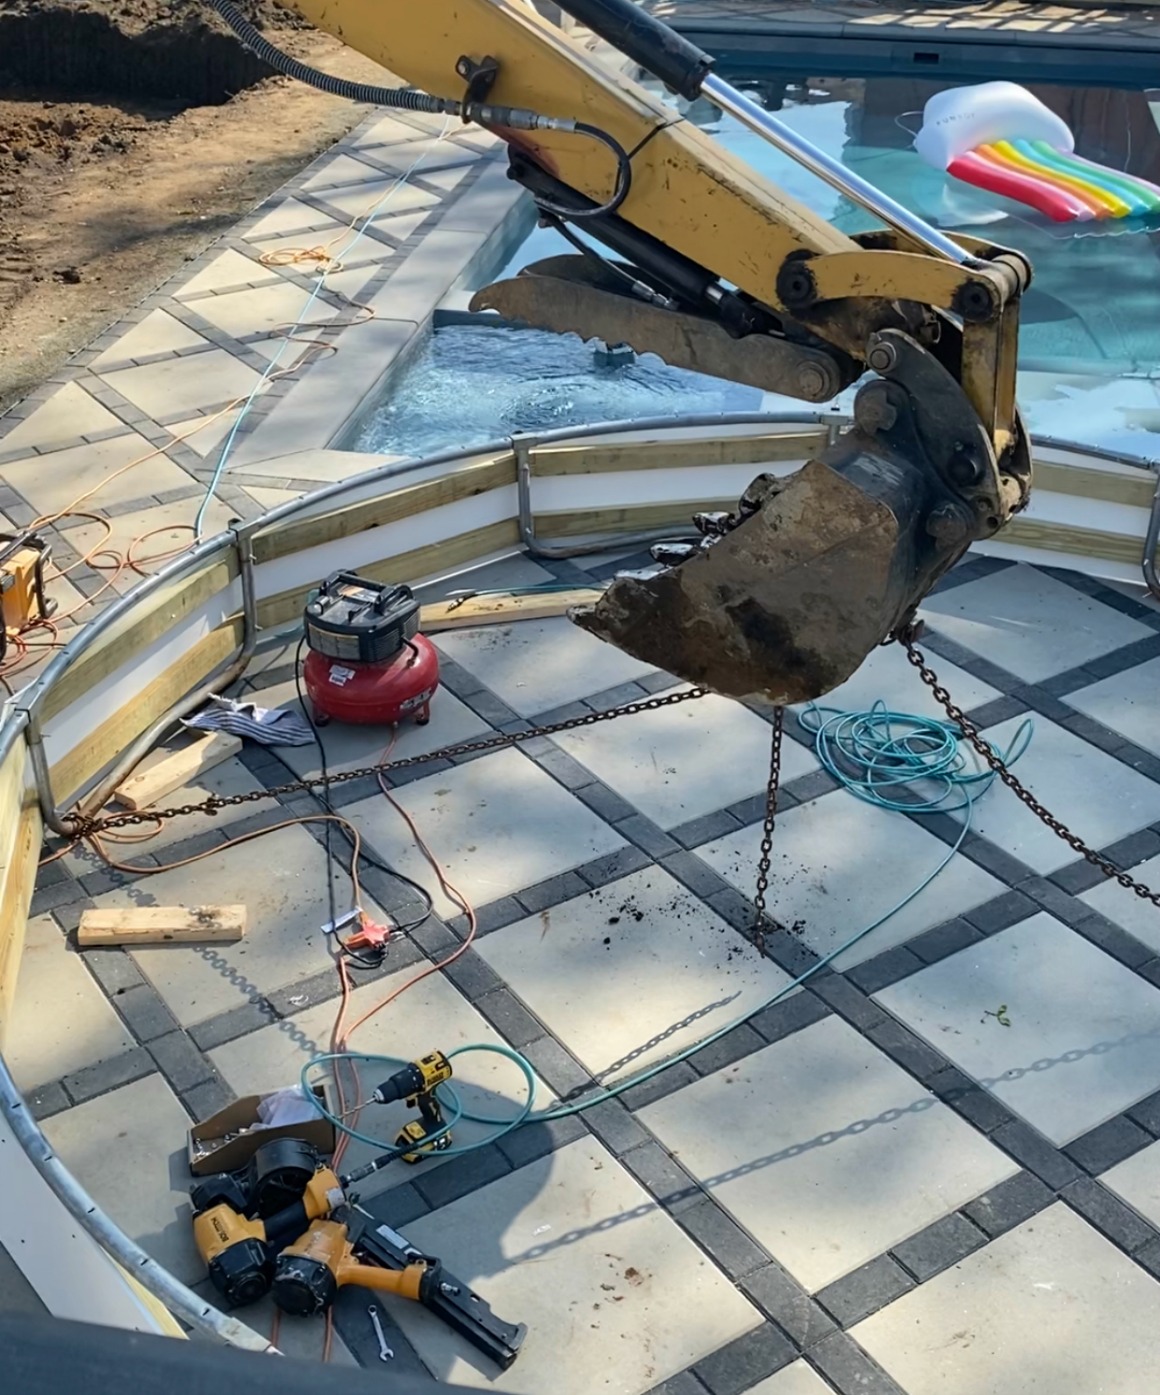
We could have had a couple of people walk the trampoline into the hole, but our pool was in the way. So we attached a chain to the trampoline and lifted it over the pool and into the hole.

Thank you for following along with our entire renovation! Stay tuned for a complete pool area update soon. (Read what type of pool we have HERE)
Links-
THIS Trampoline Spring Pull makes it easy to put the trampoline back together
Trampoline with adjustable legs- ours is 14′ (ours did have a safety net that we no longer needed after it went in the ground) **** I would recommend looking on your local Facebook Marketplace where people post local items for sale or for free! I see trampolines on there often. You can buy replacement parts, like springs and a new pad.


This is a good idea to save garden area. My yard is smaller and has no swimming pool, only a small area to play. I will share your ideas with my children, hope they will enjoy it. Thanks so much.
Wow! I had no idea there is so much behind it! It looks like so much fun though! It’s something I’ve been thinking about doing at our house. Your yard turned out fantastic, so beautiful 🙂