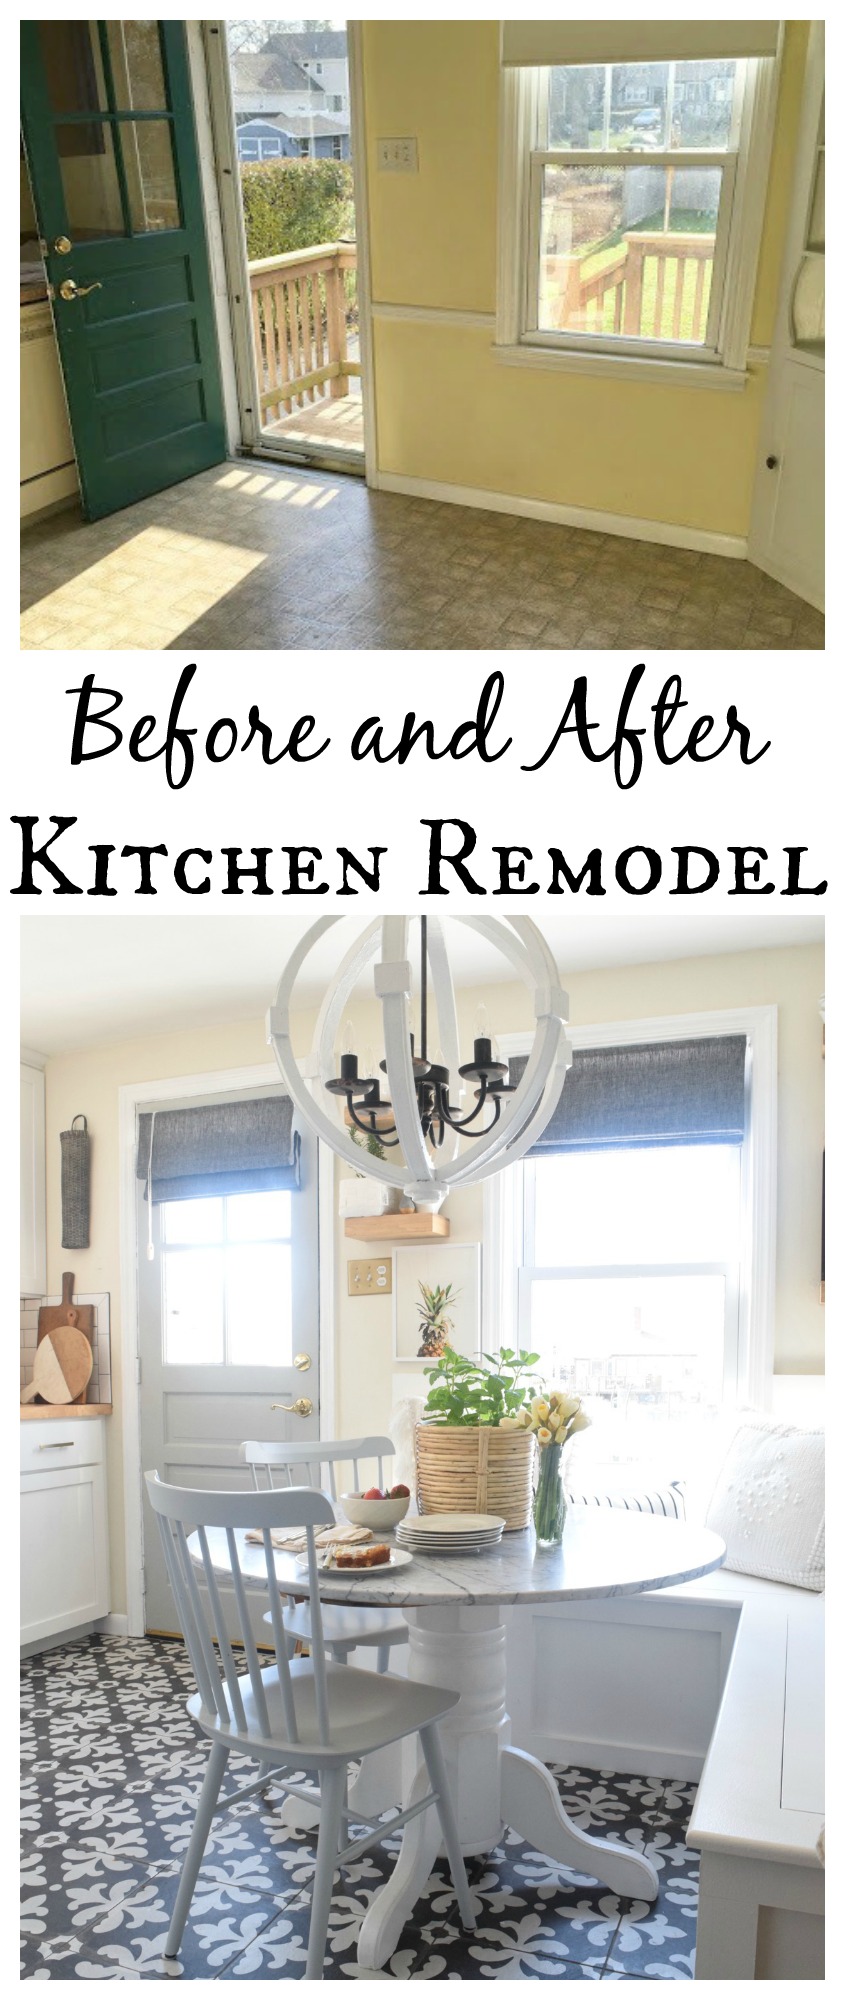
We have so much more, space in our kitchen now! Does everyone hang out the most in their kitchens? We sure do! Maybe it’s because it doubles as my office and Kevin is often making something delicious…and our kids like to be where we are. It’s basically a multi-purpose room in our small home!
The fun part about renovating a home that you have already lived in, is that you know how your family already likes to use the space and you can plan accordingly. Because of the way our family uses this space, I KNEW we needed to keep a banquet in our eating area and we also decided to wire the brick wall for a Frame TV since the Banquette would basically be a giant sectional.
Benefits of Banquette-
- Allow more seating around a table
- Maximize space by pushing your seating all the way to a wall
- Can add additional storage
- Double has a sectional/sofa in your kitchen!
- A fun way to add pillows and fabrics to an eating area
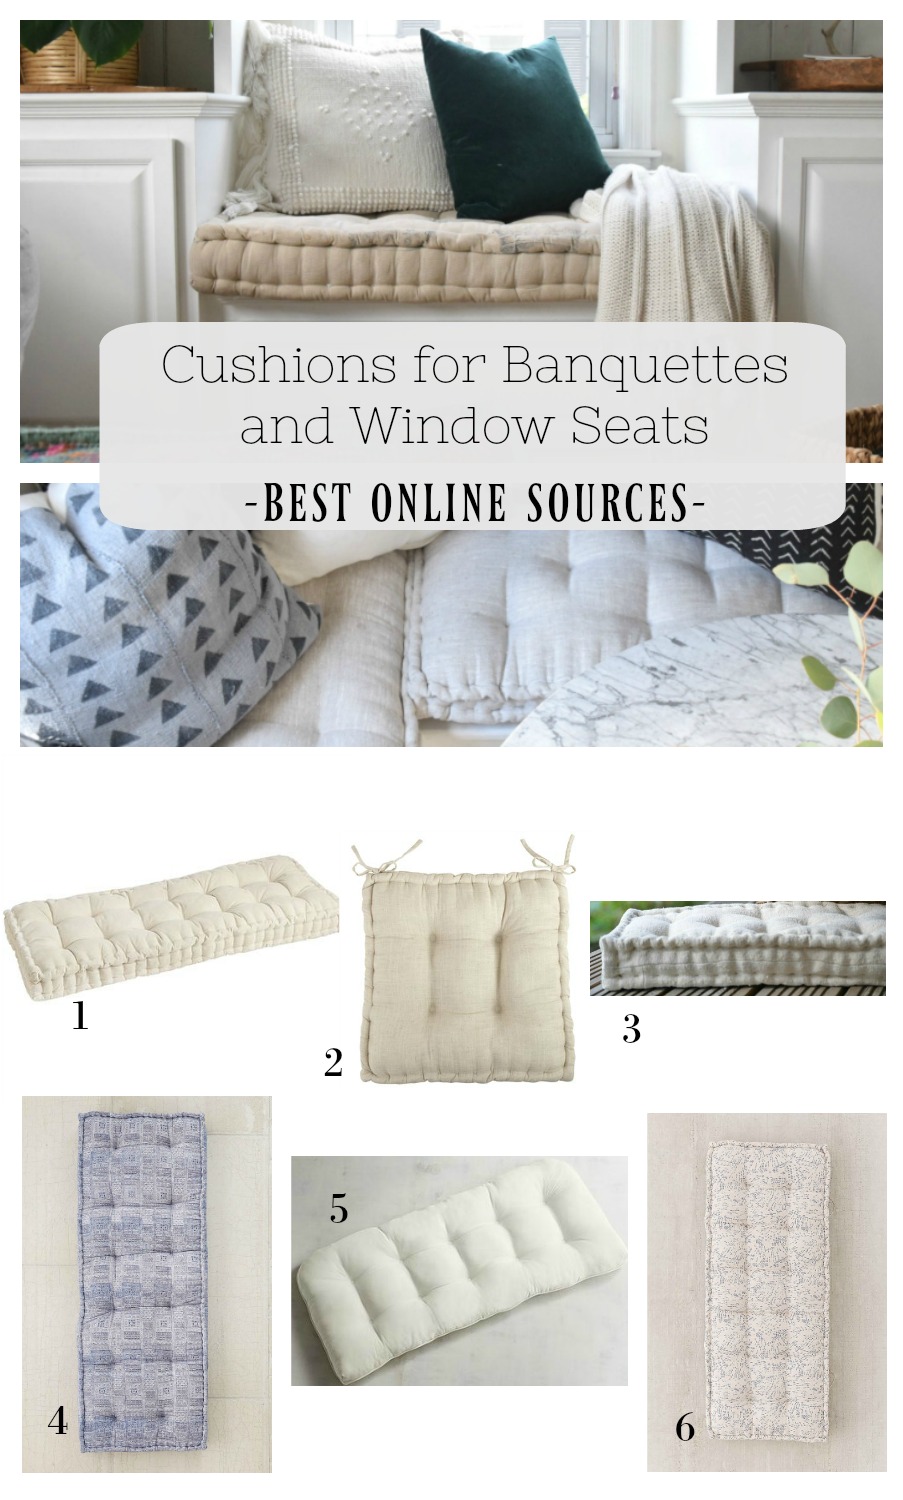
This time around, we made a few changes. First, we decided not to do storage. With our new cabinetry, we didn’t need it and it was actually hard to have to move cushions, etc each time we needed something (if you do want storage, I would put things in it that you rarely use). Second, we started with our cushion. These thick, affordable, french-tufted cushions were our jumping off point. This isn’t always on option, but definitely worth considering. It was nice to start with a cushion in mind because having one custom made can get pricey. (Here is a link with some of my favorite cushion resources). The other change we made was the seat height. I felt like our last one sat a little too high once the cushion was on (another reason to start with the cushion), so we factored the height of the cushion into our measurements. For a complete list of all of our tools that we used for this project and others, see this post.
TIP: A typical seat height is 18′ off the ground- so minus the height of your cushion from the banquette height
HOW TO BUILD YOUR OWN BANQUETTE (after photo below)
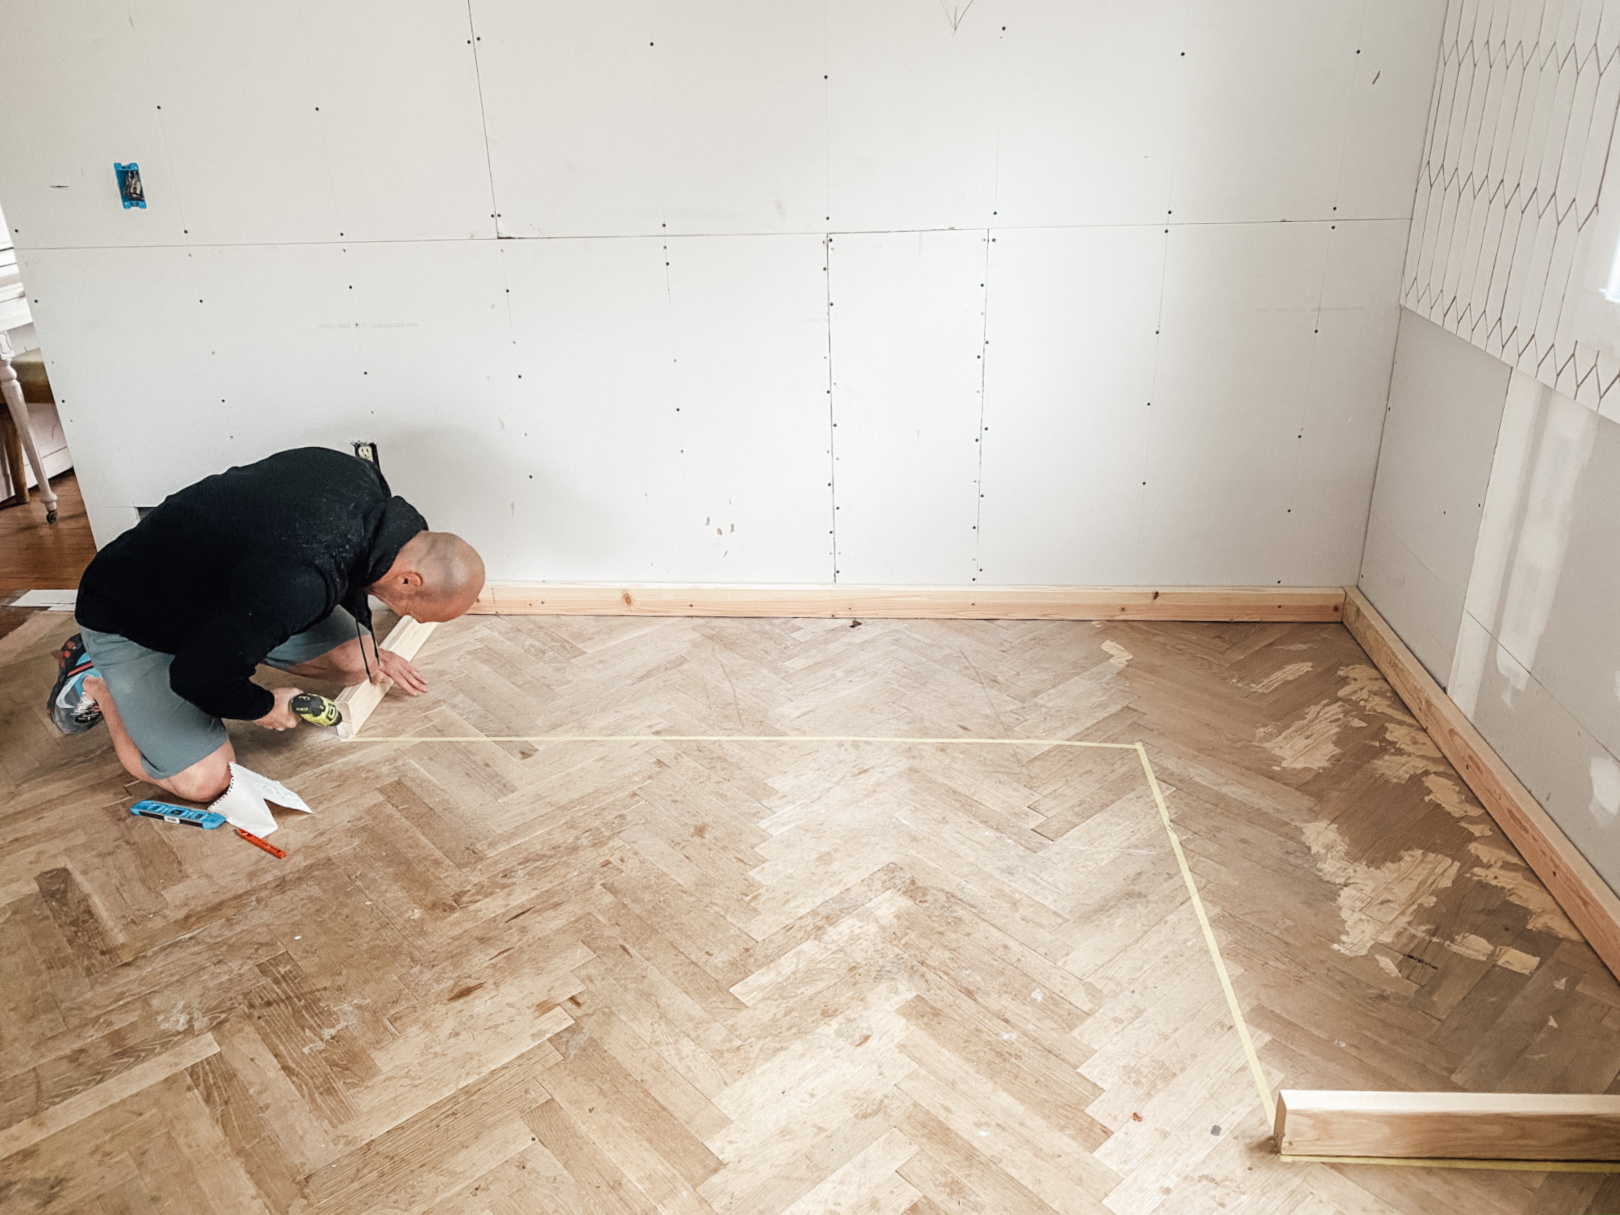
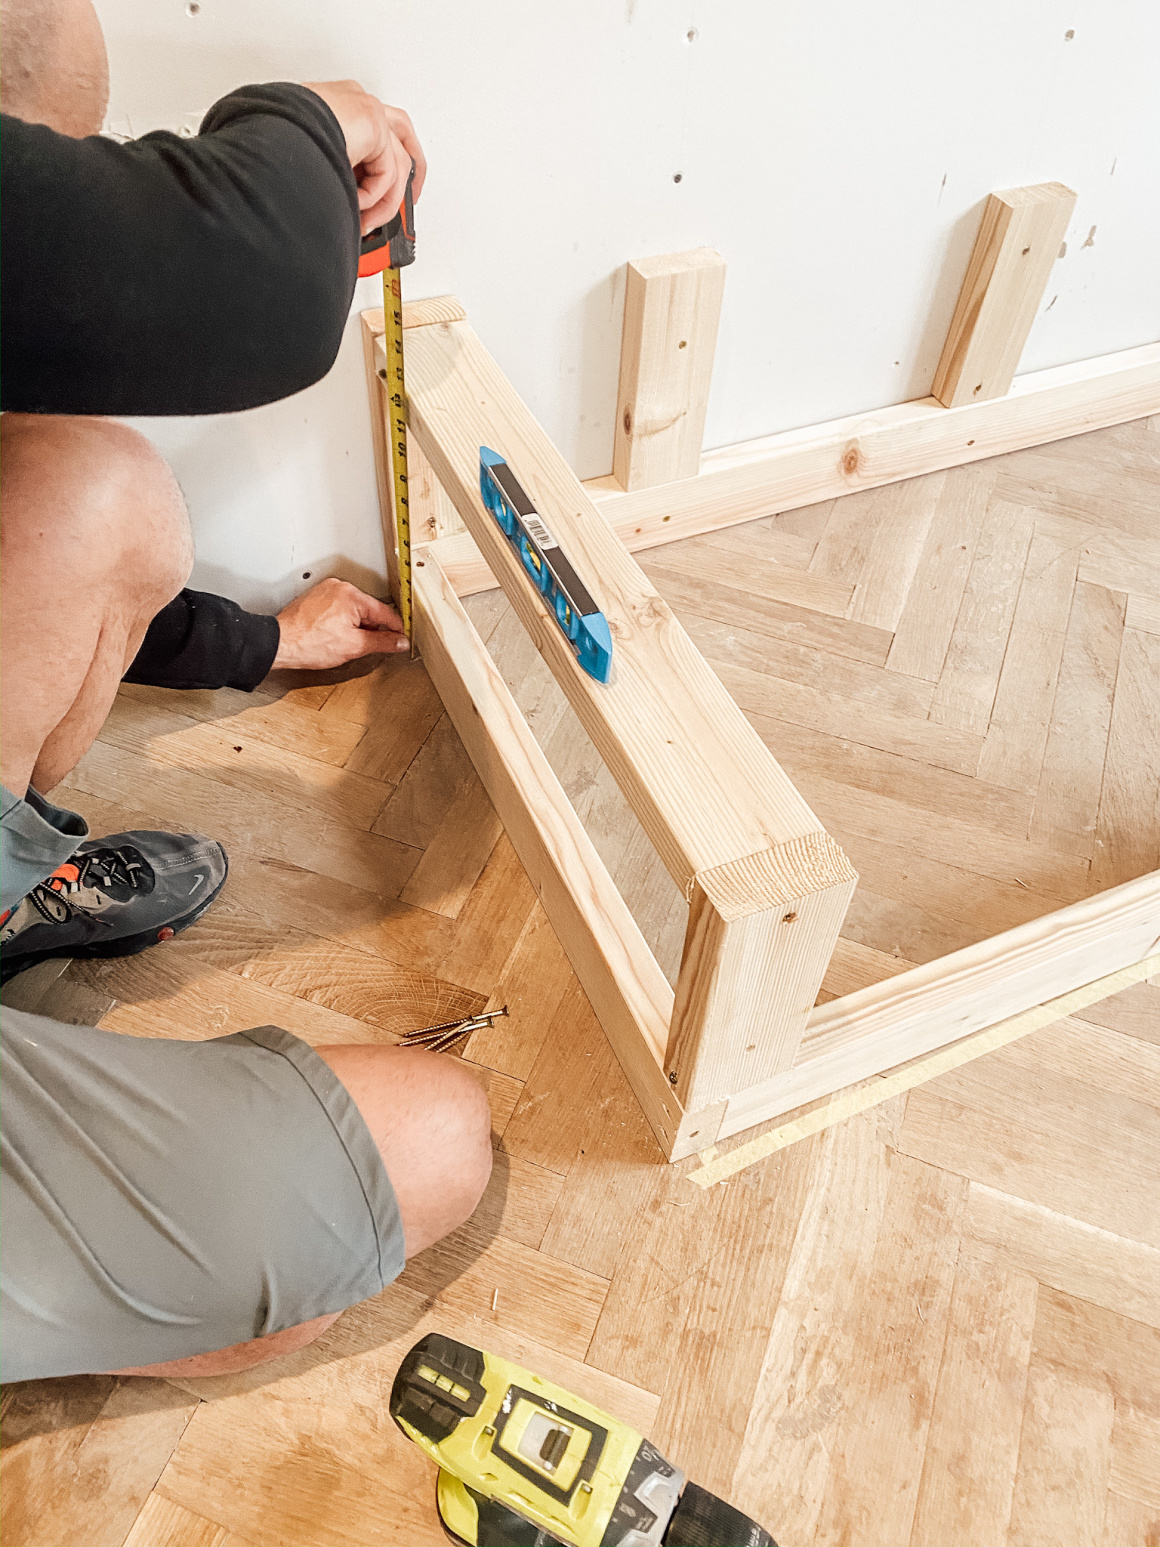
Build the Frame
- To start we measured out the dimensions and marked it with masking tape to get an idea of how the layout would look, once we were happy with the size we built the base of the banquette. For ours we were building 101″ and 74″ long our cushions were 74 inches long PLUS the 27″ width of the other cushion since they will be butt up against each other at the corner. (Our Dimensions: 74″L x 27″W x 13″ H x 101″L x 27″ W x 13″H (the height once sat on was 4.5″ so we subtracted that amount from the 18″ seat height).
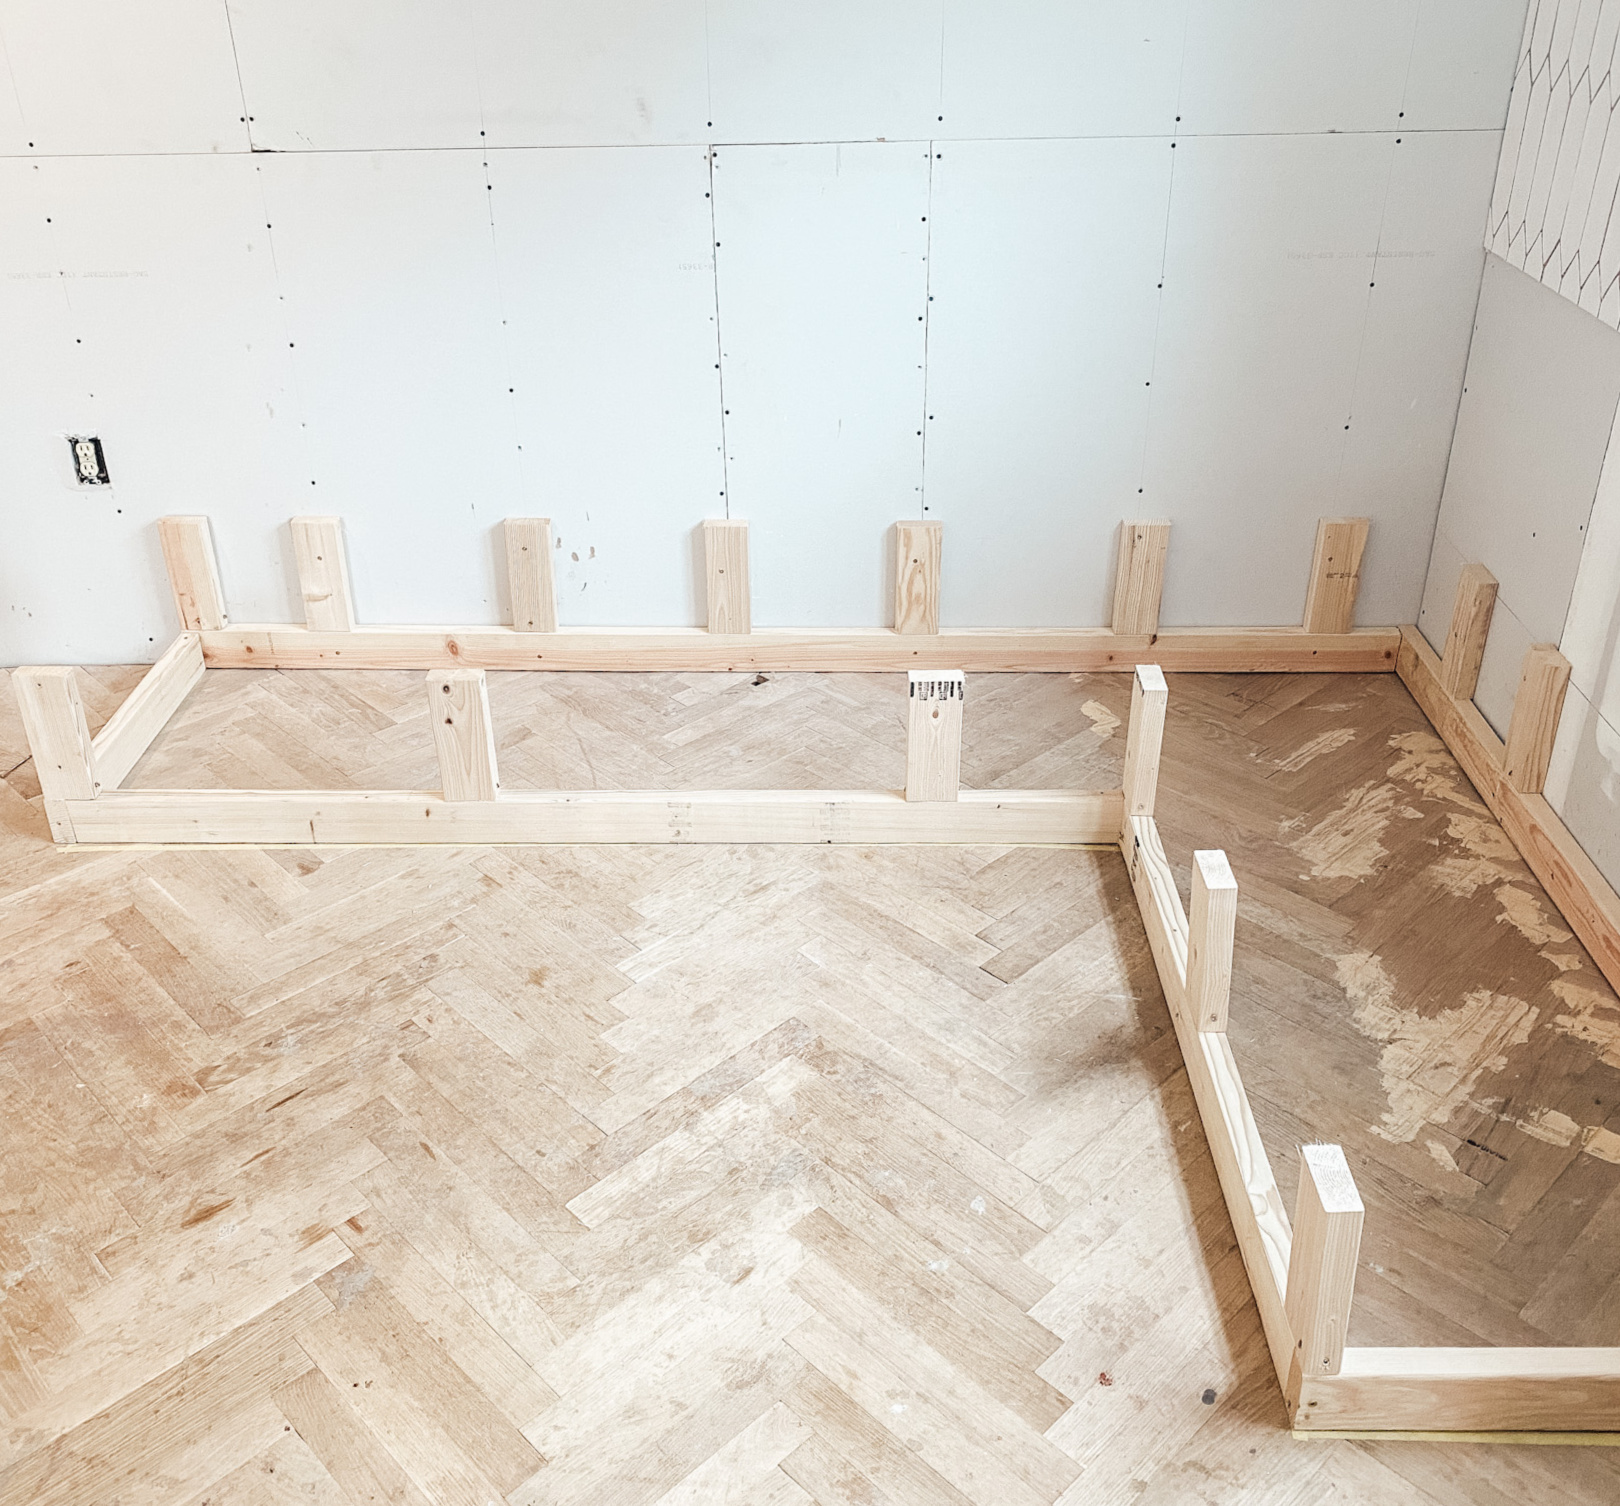
- 2X4 attached to the studs along the base of the walls, we screwed ours in, but you can use a nail gun as well.
- Cut to the 2X4s to jut out from the wall. To get this measurement, make sure to take into account the back/base 2×4 runner that you just installed. (2x4s are actually 1.5″ wide so you will need to that amount form the width measurement of your cushion). In our case, 25.5″.
- Then cut to size the inner runner. To find this measurement, consider the depth of the cushion for where they will meet at the 90 degree corner and subtract that from the total length of the outer runner. For the short end, ours is 47″ (74″minus 27″) and for the long end, 74″.
- Using #8 3″ counter sinking wood screws and a power drill or driver, attach all the pieces of the frame together. You will now have the base of your banquette.
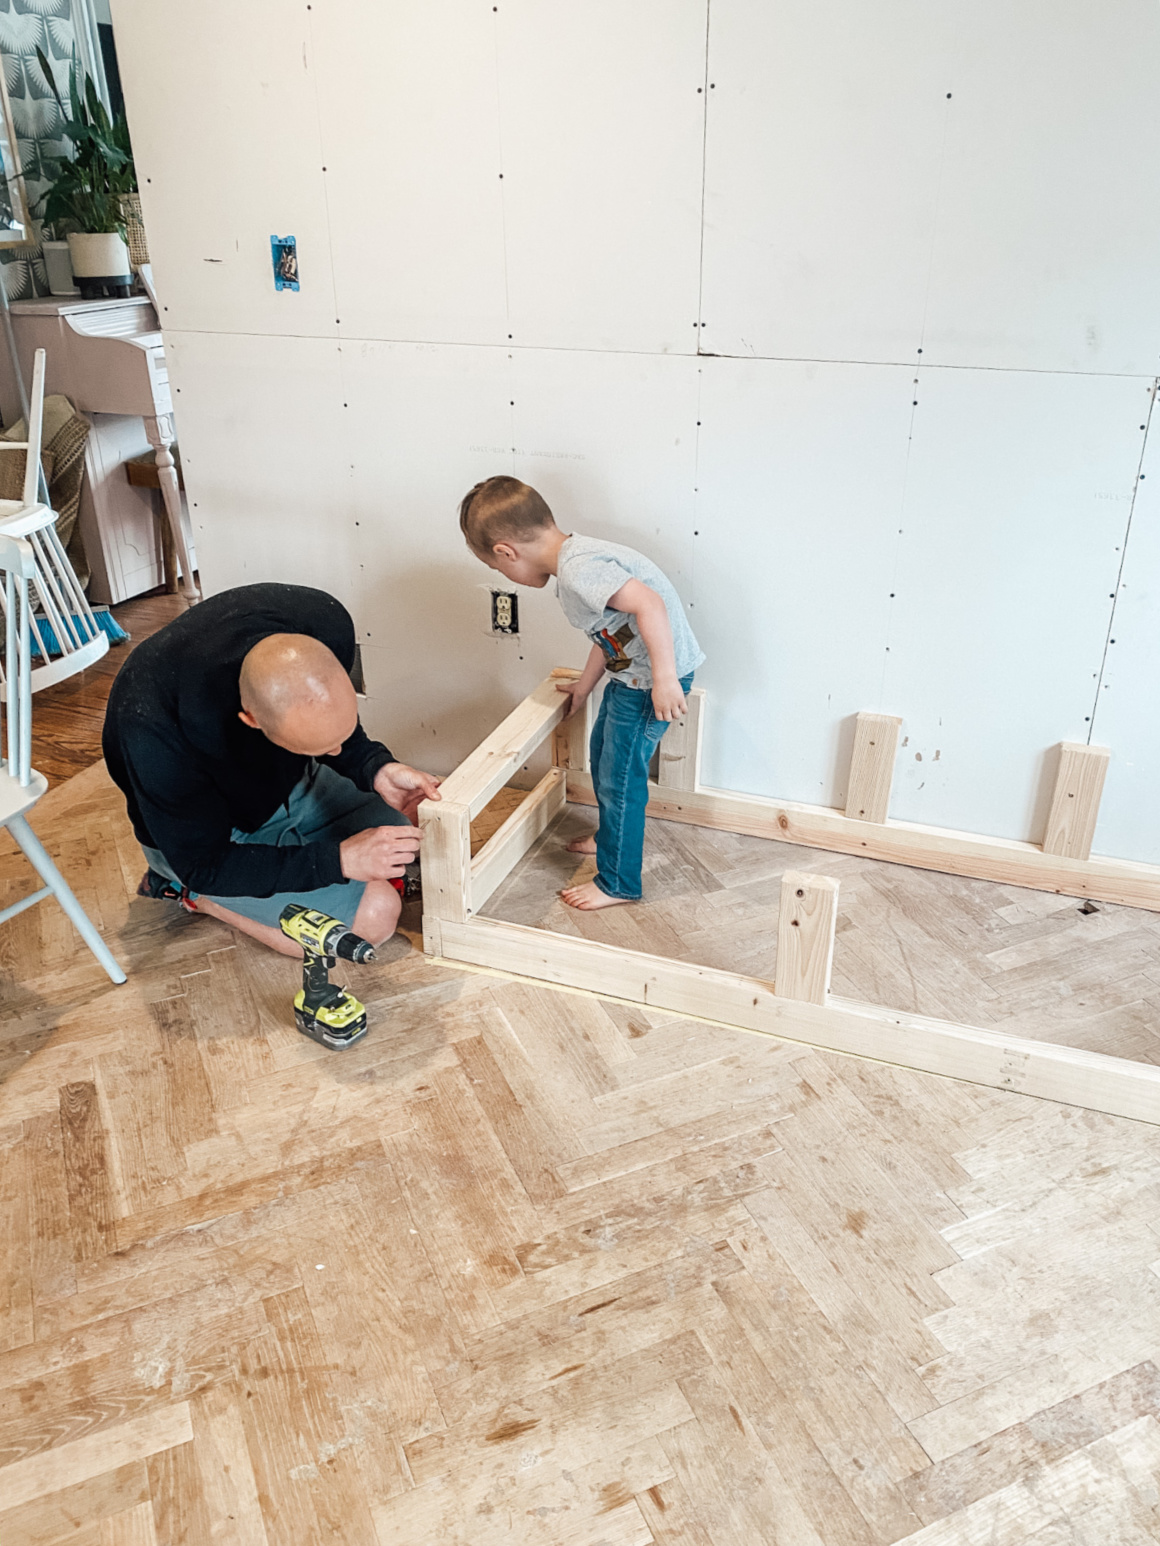
Cut and Install Supports
- Using more 2X4, cut the support pieces. Ours were cut taking into account the 1.5″ of the already-installed runner and the .5″ plywood we would top the bench with. Remember that we have 4.5″ from the cushion to also take into account.
- 18″- Total seat height
- Minus 4.5″- cushion height
- Minus .5″ plywood cap
- Minus 1.5 base 2×4
- 18-6.5″ gives us our support height of 11.5″
- Install the supports by attaching them to the stud along the back wall every 16″. For the front supports, you can skip a stud, so you can do them every 32″ if you desire. These are installed by drilling at an angle into the base 2X4 runner.
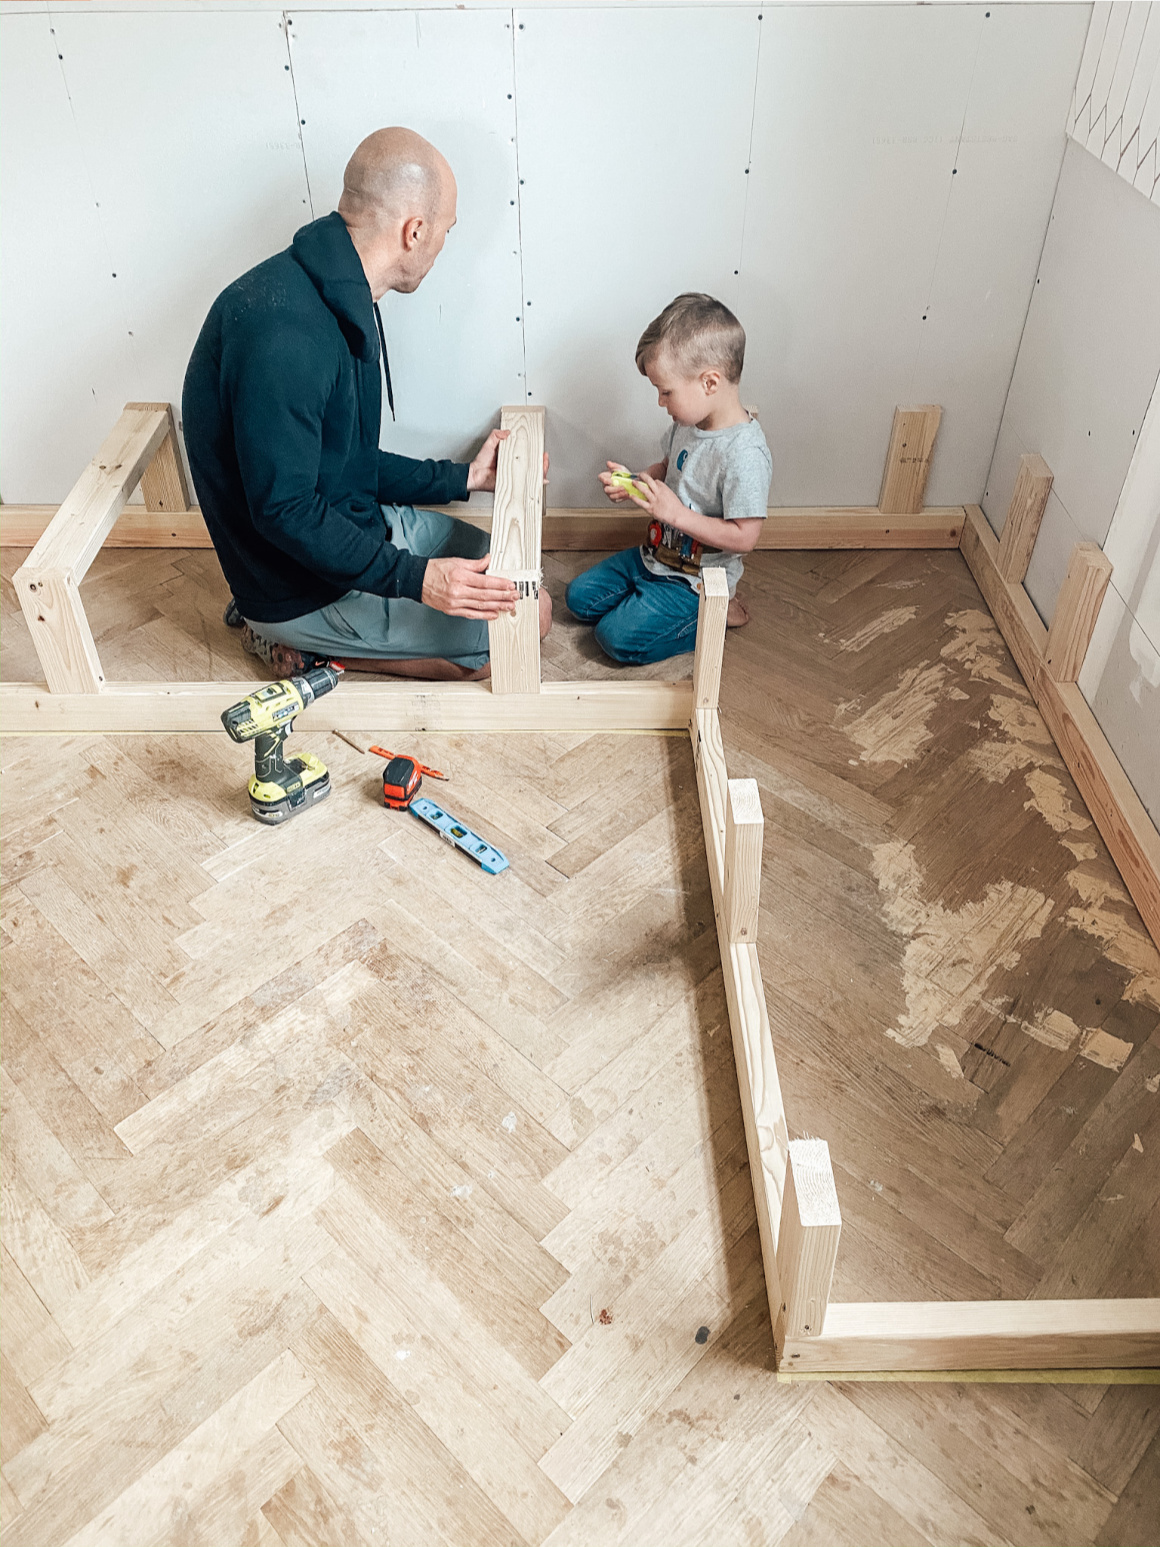
Cut and install Braces
- The braces connect the supports and will give the seat added support. They run perpendicular to the runners. I recommend measuring these as you go as walls aren’t always perfectly straight.
Cut and Install top runners
- These should also be cut to size and installed the same way as the rest of the frame. They will run in between the supports and be parallel to the floor runners. It’s personal preference on how you want to run these supports, you could cut the support braces shorter and place the runners across and screw from the top down. Make sure you keep your runners and braces level, so double check your measurements and use a level to insure that your braces and runners stay level.
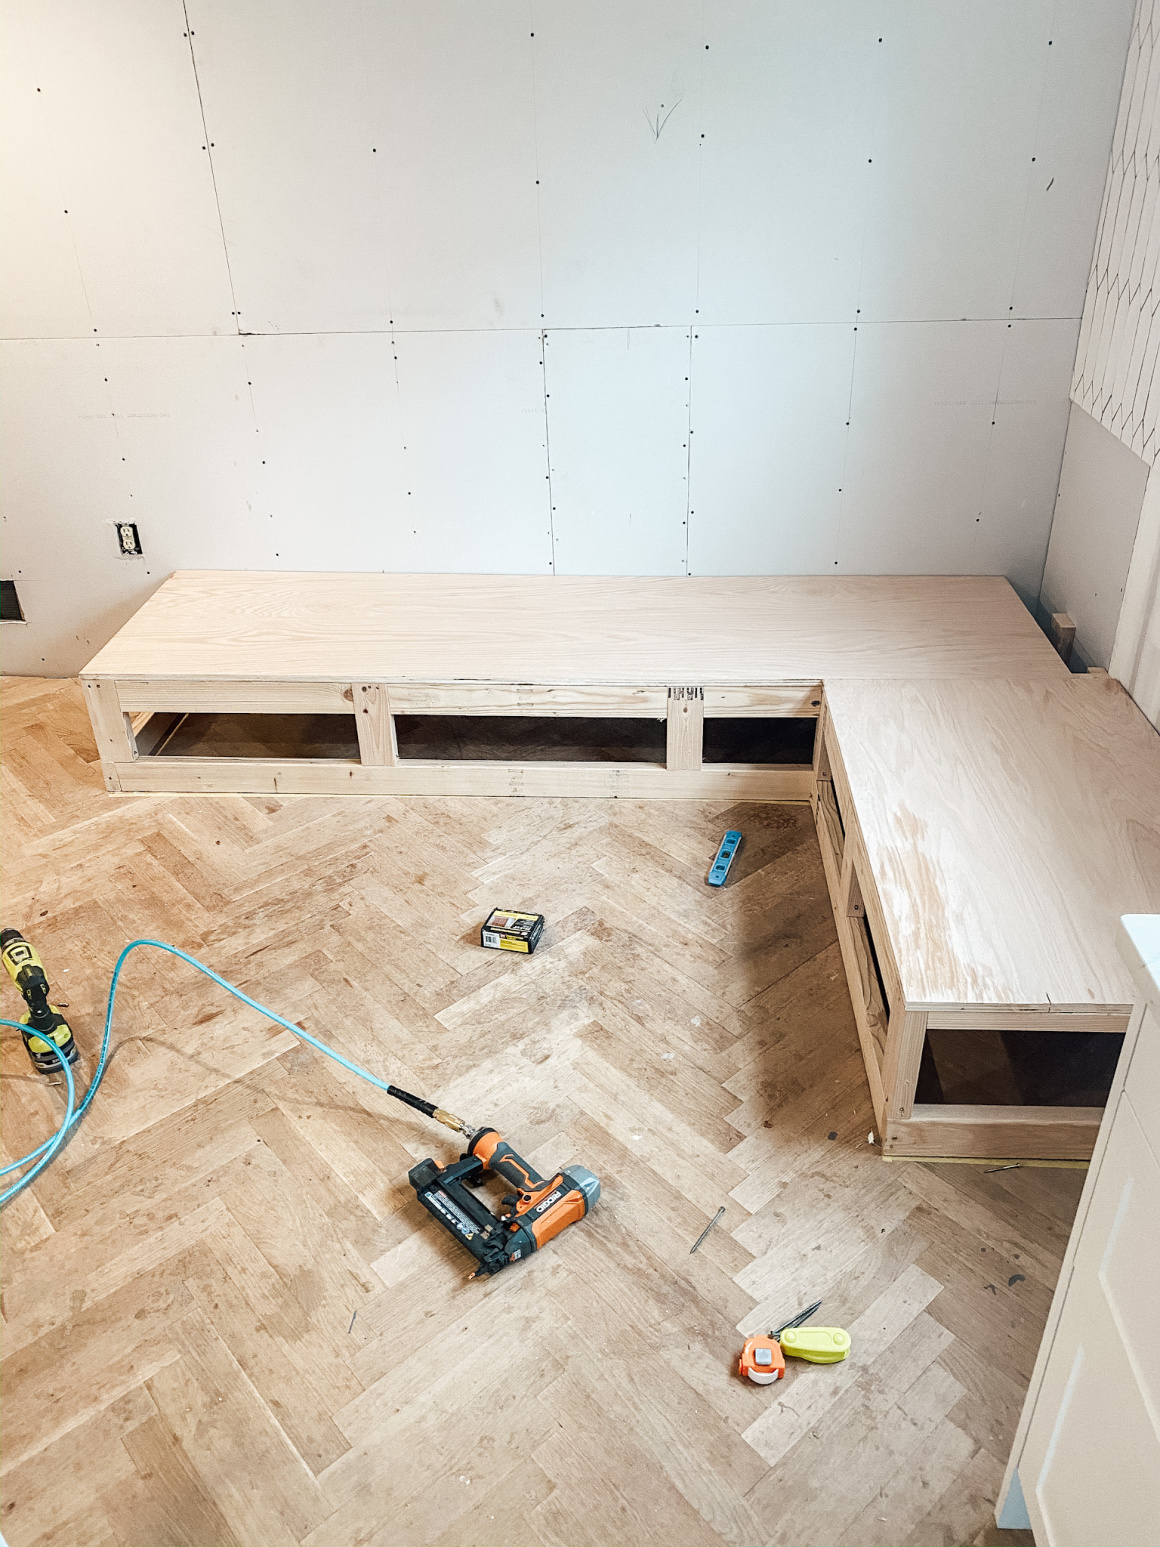
Cut and install Plywood
- We used 12mm – Sande Plywood ( 1/2 in. Category x 4 ft. x 8 ft.; Actual: 0.472 in. x 48 in. x 96 in.) using a circular saw and table saw, cut to size to fit on top and sides of the frame you’ve built. It should be the exact size of your cushions (with one long side).
- Attach this to the frame with a nail gun (if you don’t have one, either use a hammer and nails, or same wood screws you’ve been using).

“Skin it”
- We used 6″ MDF primed shiplap to “skin” our bench (you can get at Home Depot or Lowes 9×5 is about $5). We installed it vertically and used the same material to add a back rest to the seat. We then added a 4″ trim piece to frame the shiplap in. This step is Decorative and you can use any wall treatment or design you want!

Fill the nail holes and Paint
- We like DAP plastic wood for filling crack and nail holes.
TIP: Always do TWO/THREE coats of the wood filler before you sand. This will eliminate gaps and low spots.
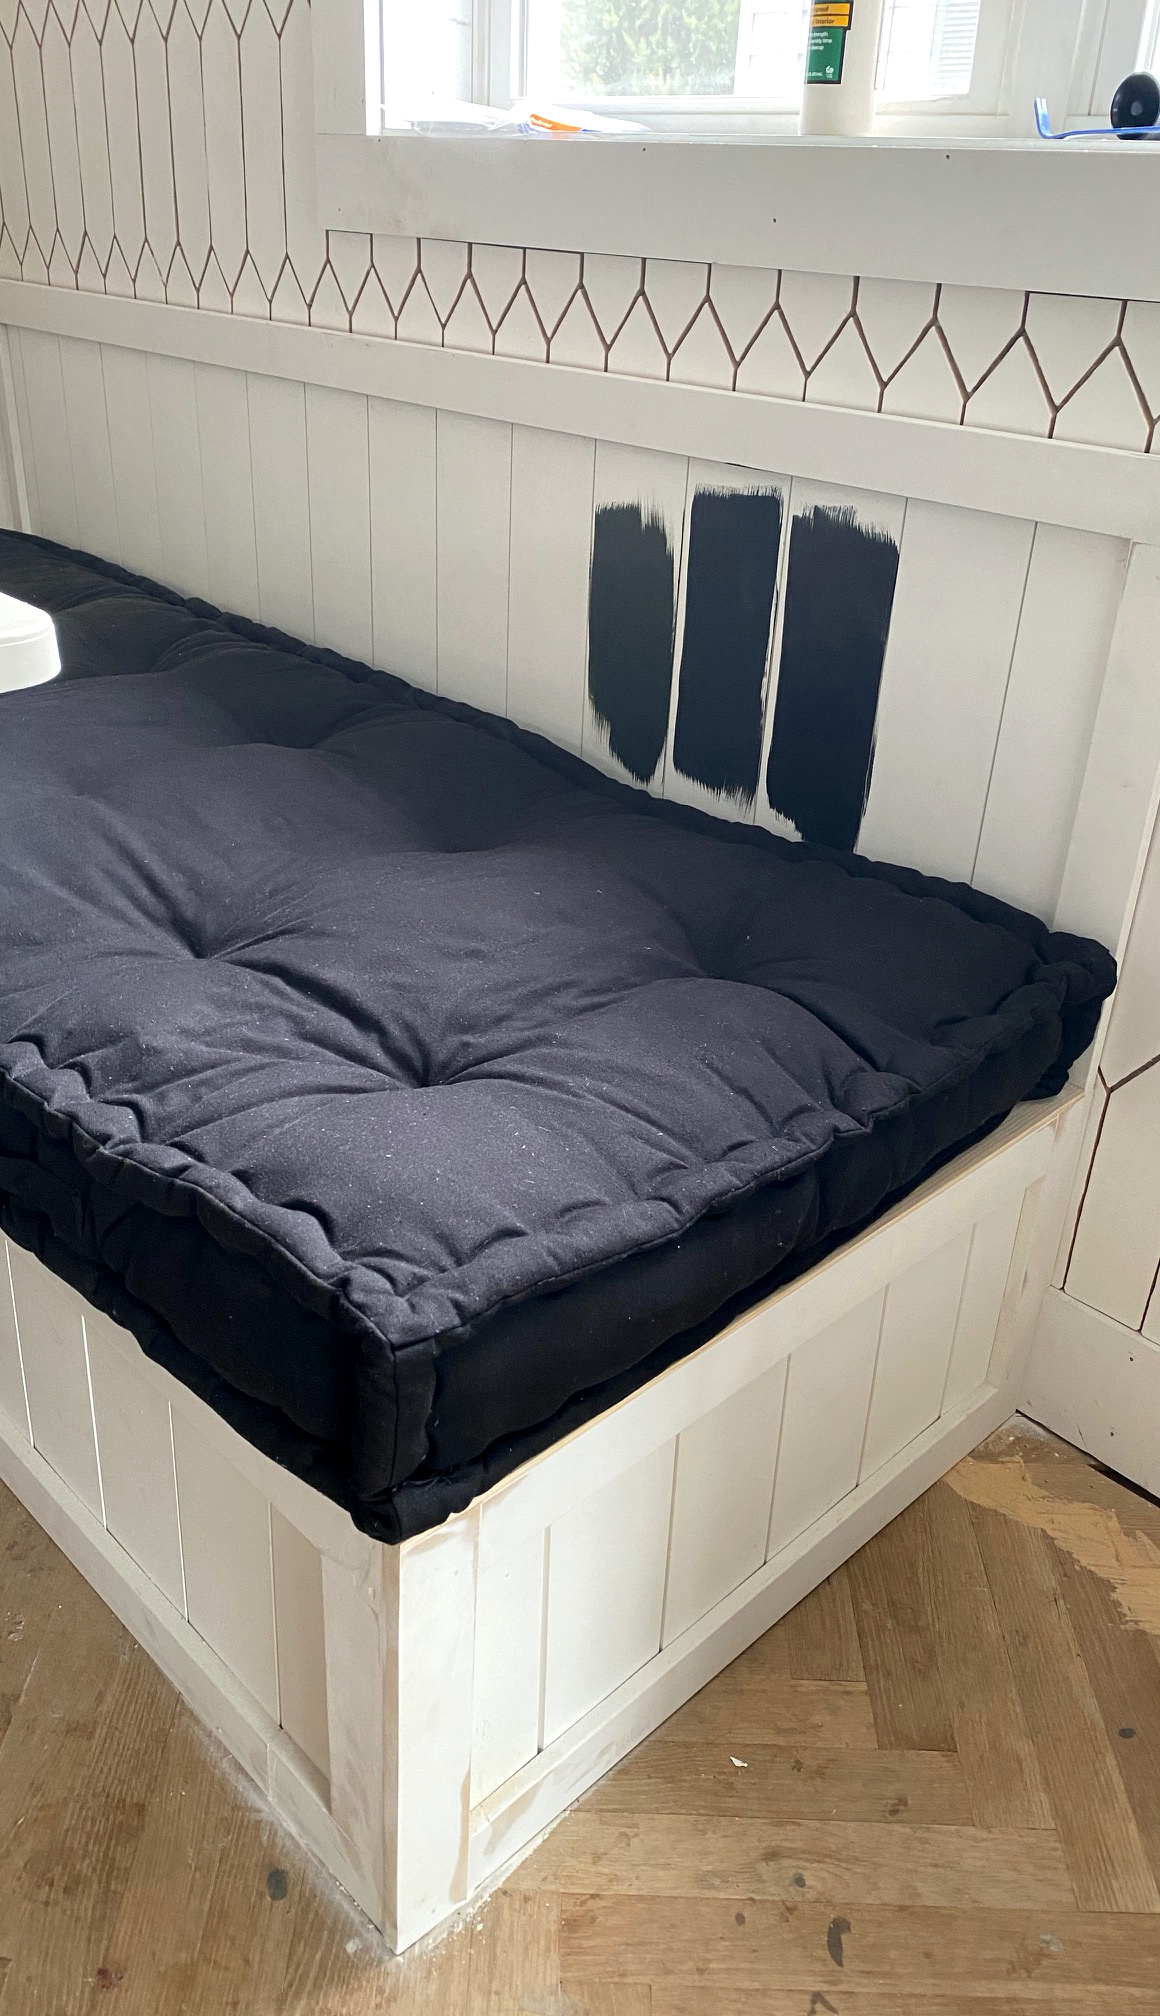
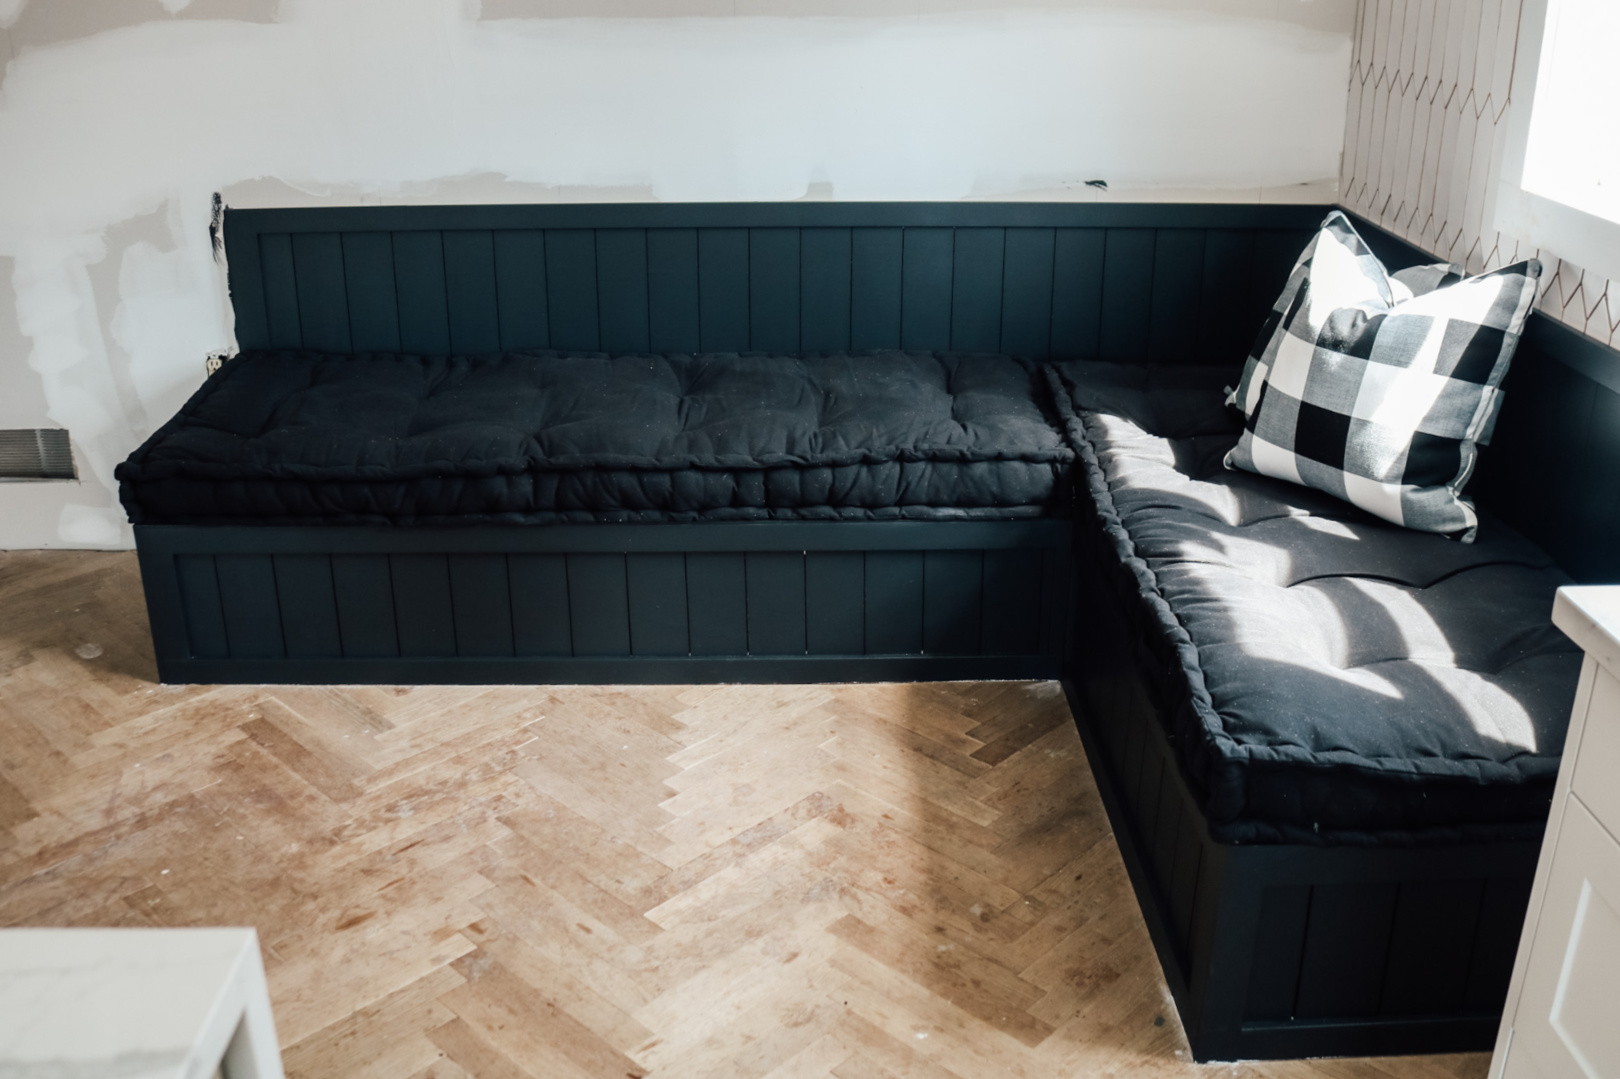
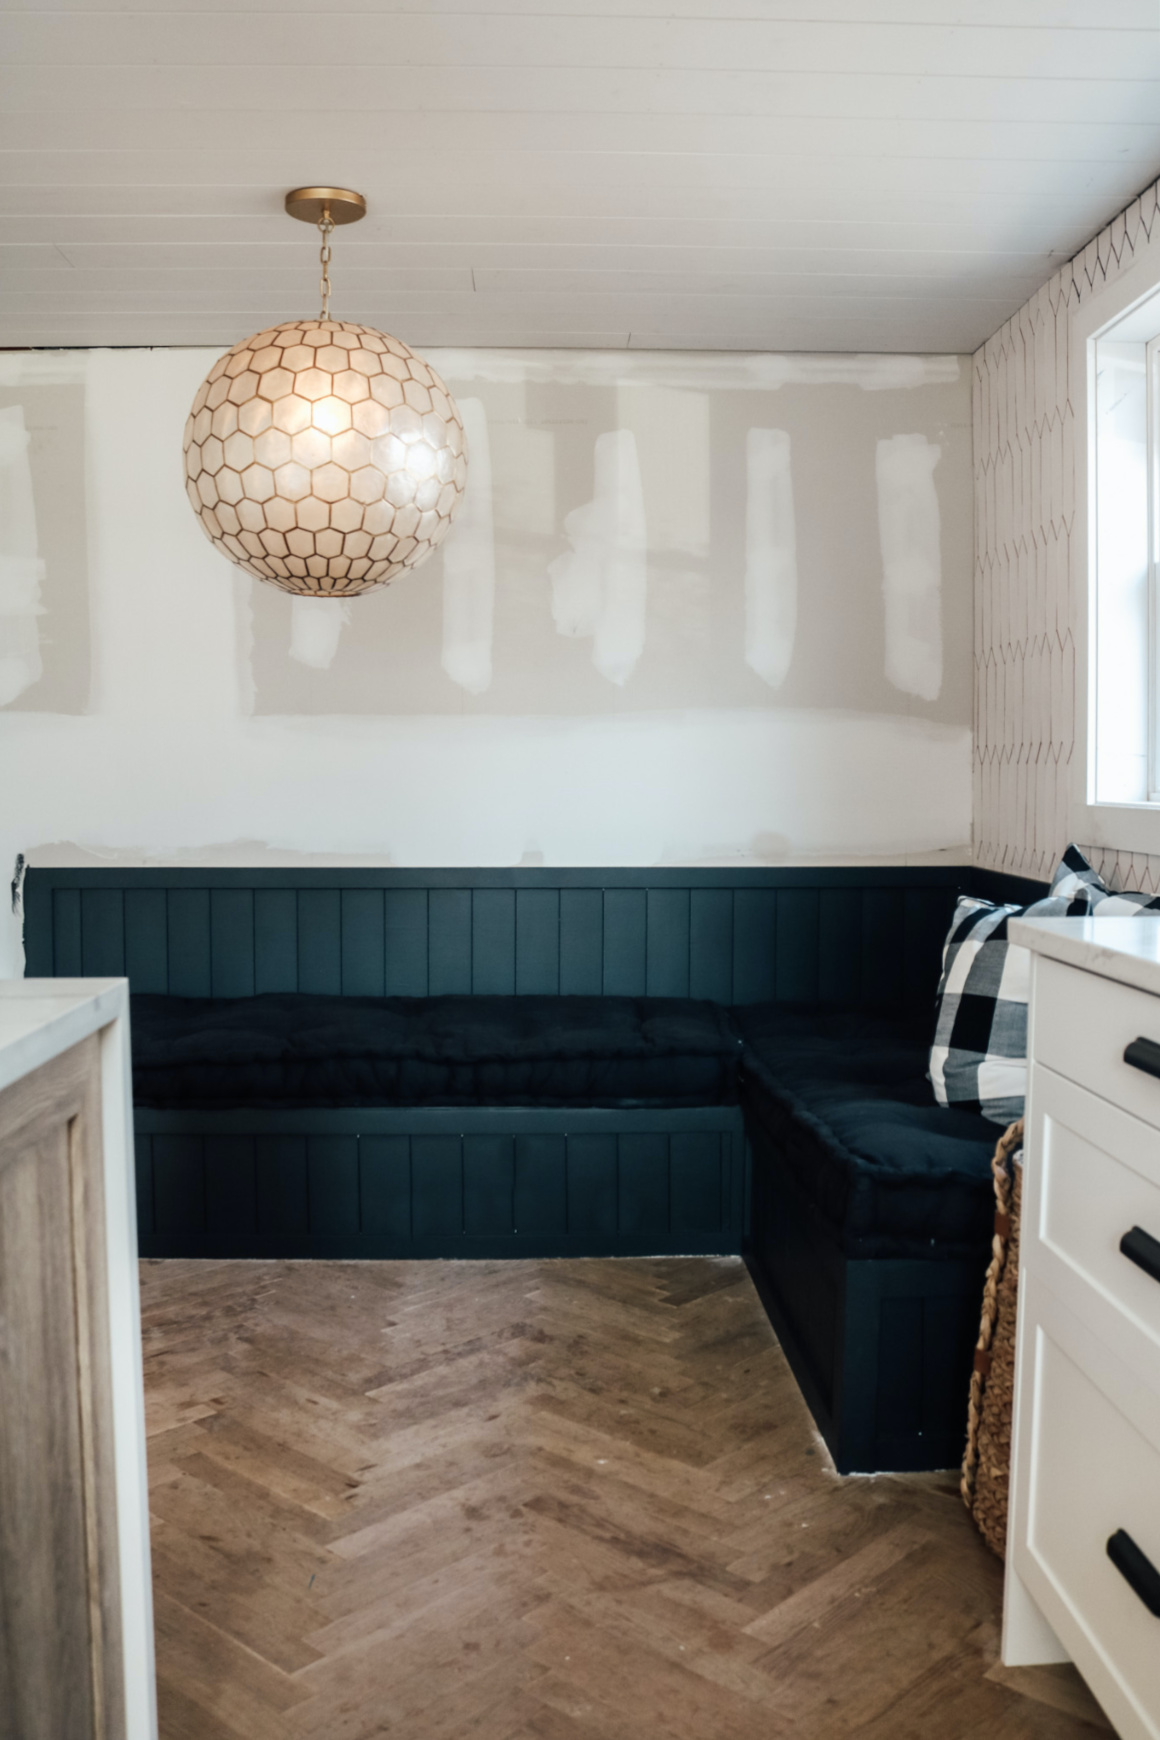
- Sand, prime, paint and apply a polyurethane. (We used primed shiplap boards, so we only had to prime the exposed plywood seat). We were trying to decide what color to go with. Honestly all along I knew I wanted to do black. I was on the edge of doing a really dark green, but wanted something that looked good with any season. So it was really either black or white. Surprised that majority of you voted for white! But I went with my gut and did Tricorn Black from Sherwin Willams in Eggshell. Then Kevin applied an interior polyurethane, which I HIGHLY recommend.
And here it is all painted! PS- we still need to have our floors finished, trim added, ceiling and walls painted. So make sure to come back to see the FULL after!
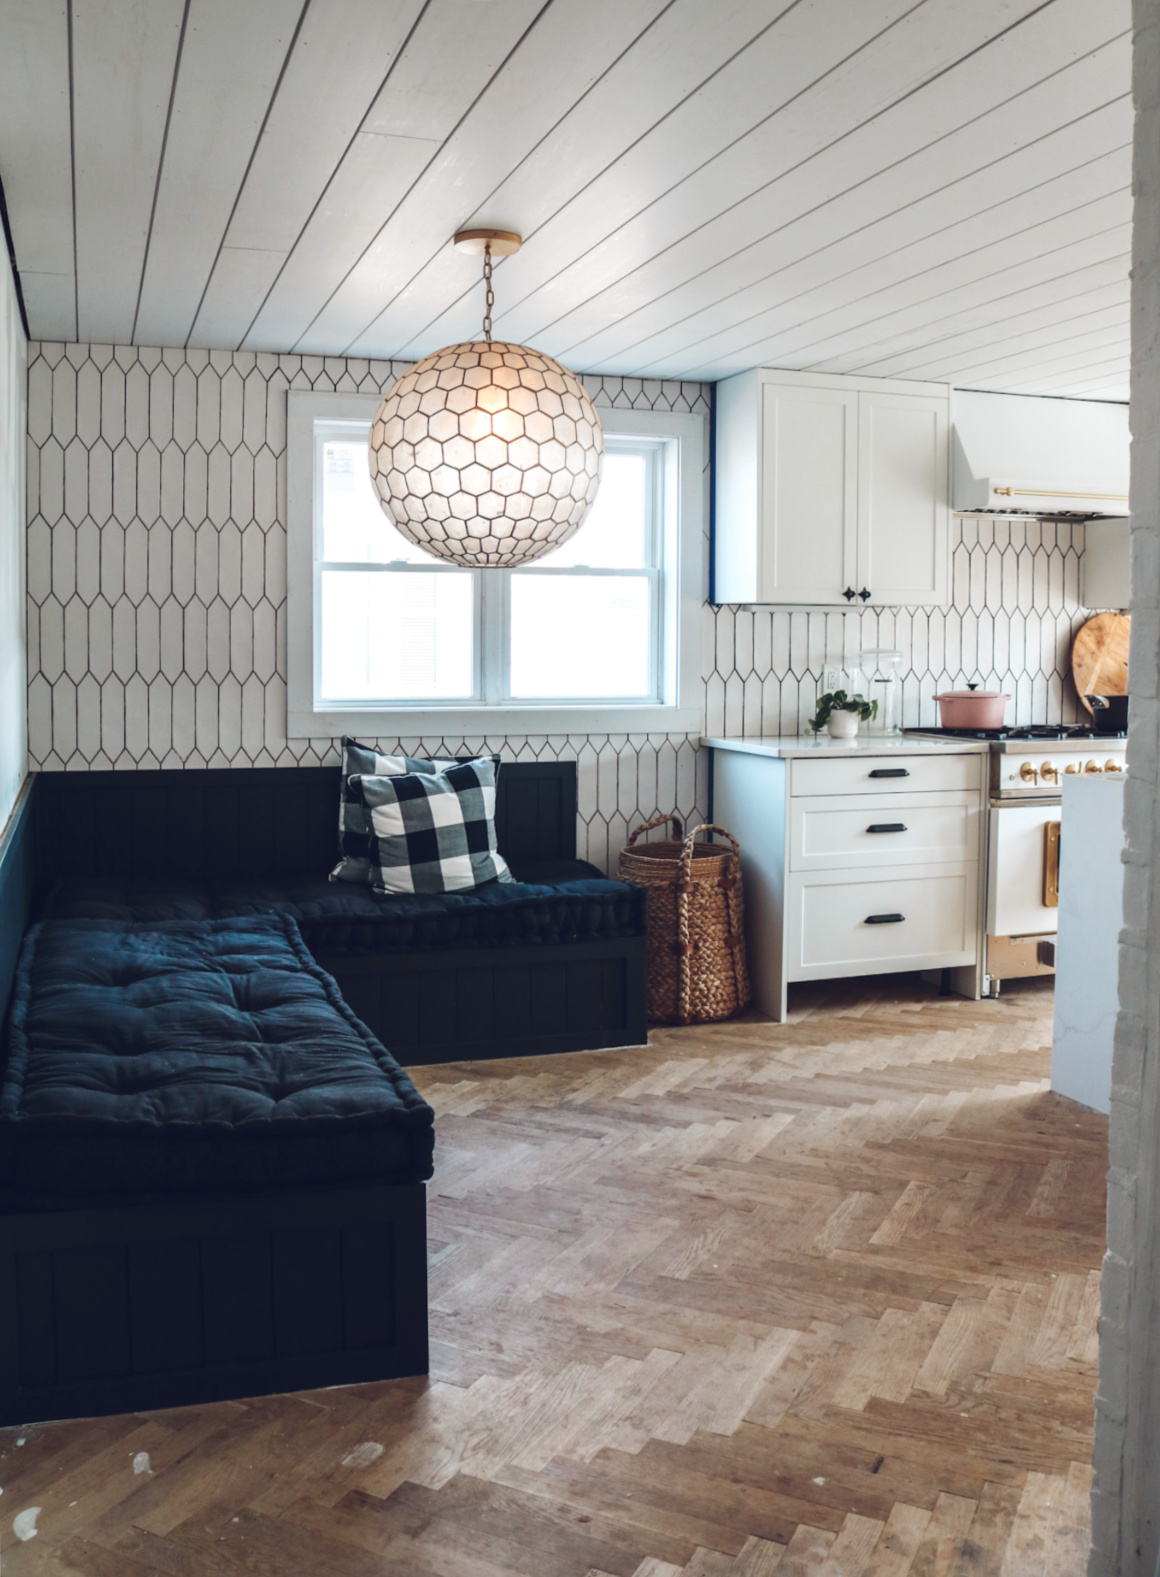
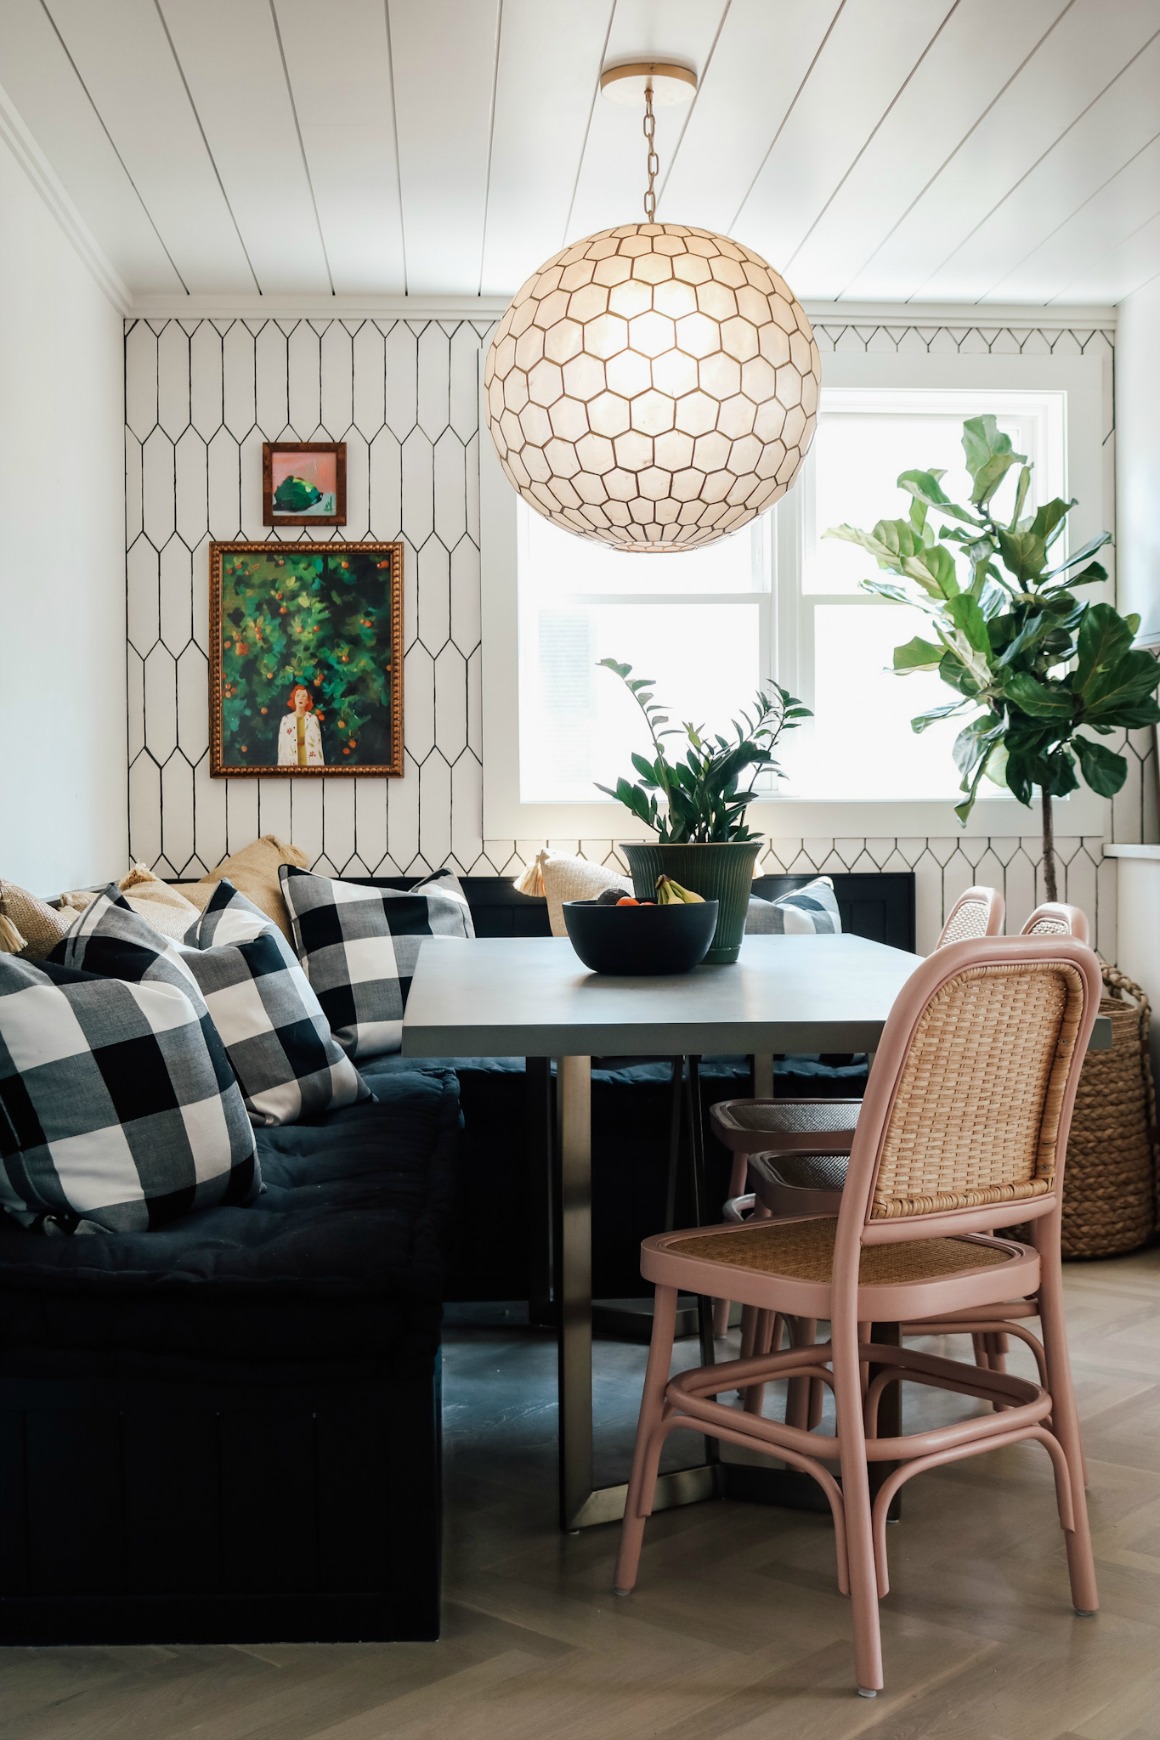
Find our cushions HERE // Buffalo-check pillows HERE //
Light Fixture HERE (in small) // Wall tile HERE //Tall Basket HERE (for a future tree)
UPDATE!!! You can see the full after of our banquette HERE
PS- you can see how our other kitchen banquette looked HERE and how to build it with storage, just like a window seat HERE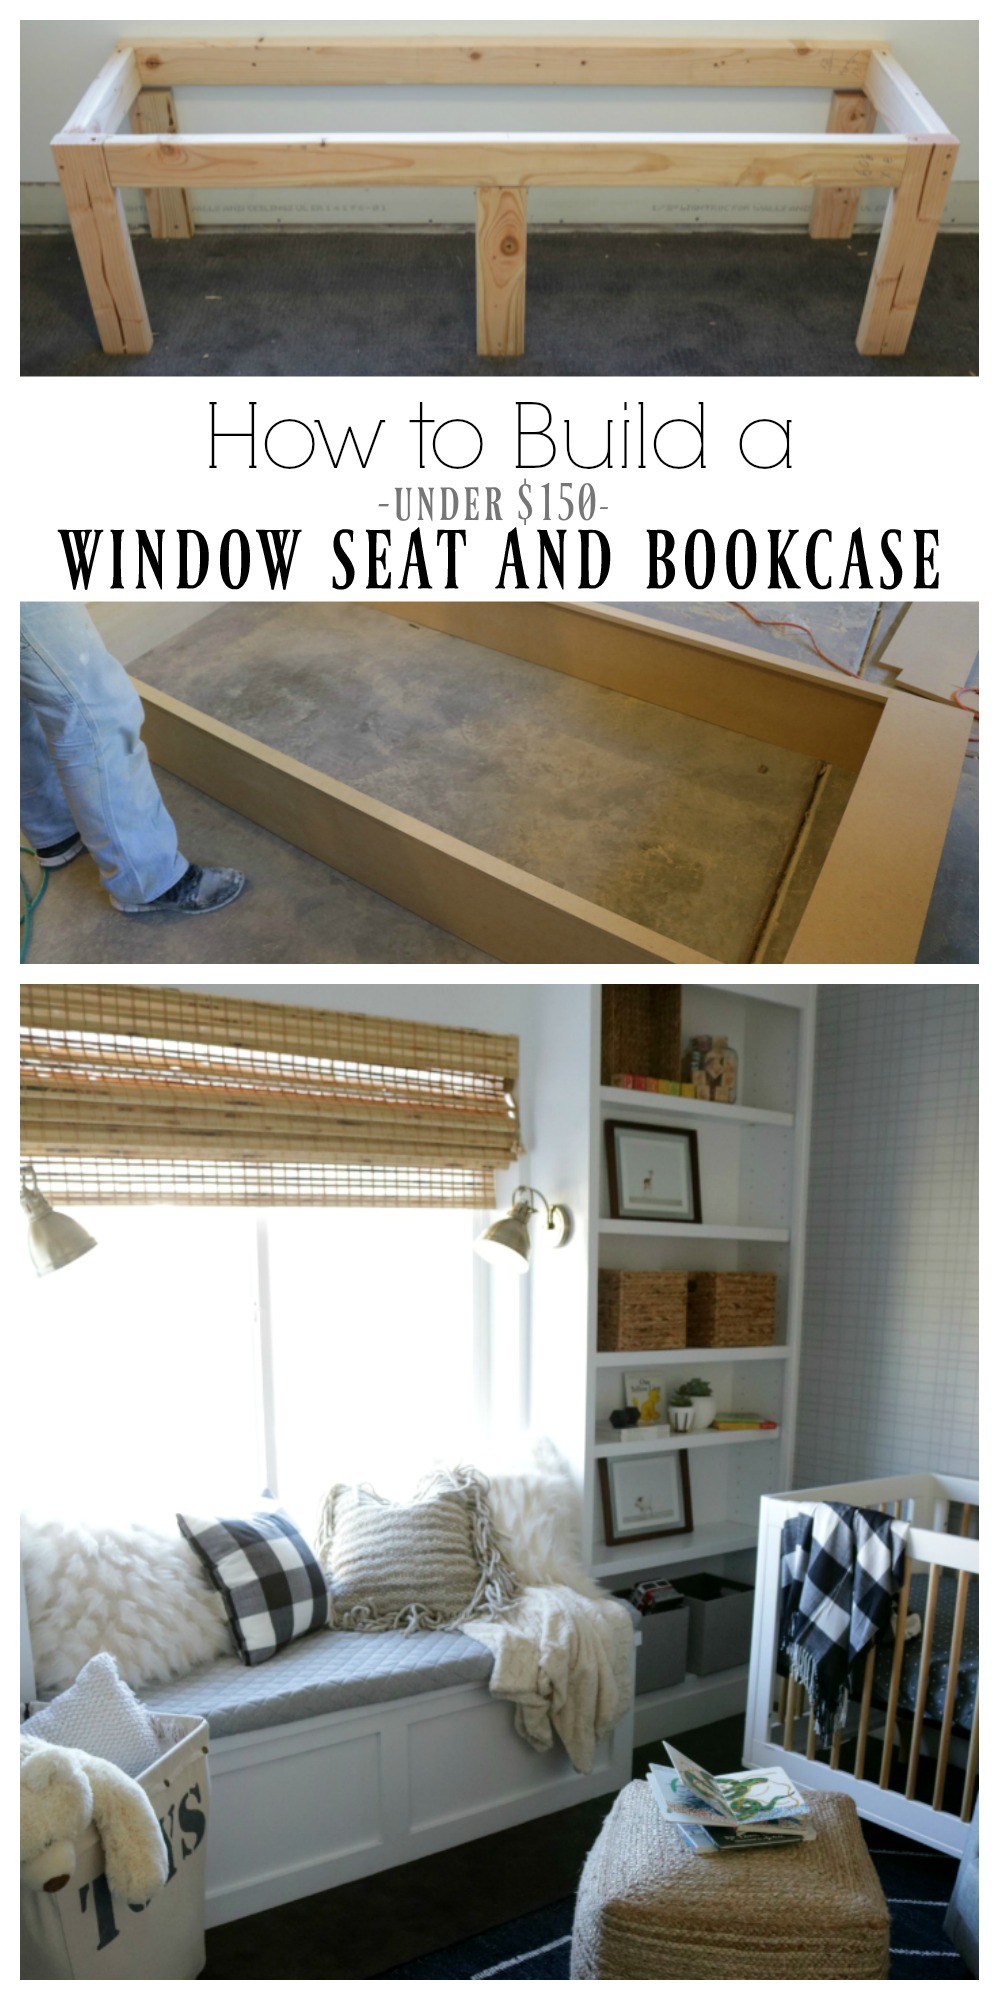


So grateful for this tutorial!!! Excited to try it! Your new banquette is bigger than your old one right? Any chance you have the dimensions of your old one available? Wondering how small is too small to try and fit it in?! I have a small space! Thanks so much again! Looks amazing!
yes my old one is linked here- https://nestingwithgrace.com/built-in-banquette-in-our-kitchen/
Hi! Everything is looking so beautiful!! Do you know of a a more budget friendly option for the buffalo check pillow? I was going to use them as my bookend pillows on my couch’s (unless you think that’s a terrible idea!!). So I need 4 of them and do not want to spend $400+
Thanks!! Jaime
love that idea! I found some on Etsy HERE
hey girl- love the new seating! so cool- Y’all have a great Easter Weekend!
What size inserts and what size covers did you use for the throw pillows in the kitchen?
we are doing 22″ pillows and 20″ and I am using these 26″ target inserts that are actually pretty flat here
Love this! I live in CT too and we have a small house and no dining room. I would love to do a banquette in our kitchen but we have baseboard heat throughout that corner. Any ideas of how to build one over it so it wouldn’t obstruct the heat?
I would do it more like a ledge over the heat! With wood type brackets
If I wanted to incorporate storage, how would you recommend adding it into the seating?
you can see how on this post- https://nestingwithgrace.com/how-to-build-a-window-seat-and-built-in-bookcase-tutorial/
How do you secure the cushion so it doesn’t move? Is there a lip on the bench to secure it or do you use double sized tape?
It is just heavy enough that it doesn’t move at all, neither did our other cushions in our old kitchen