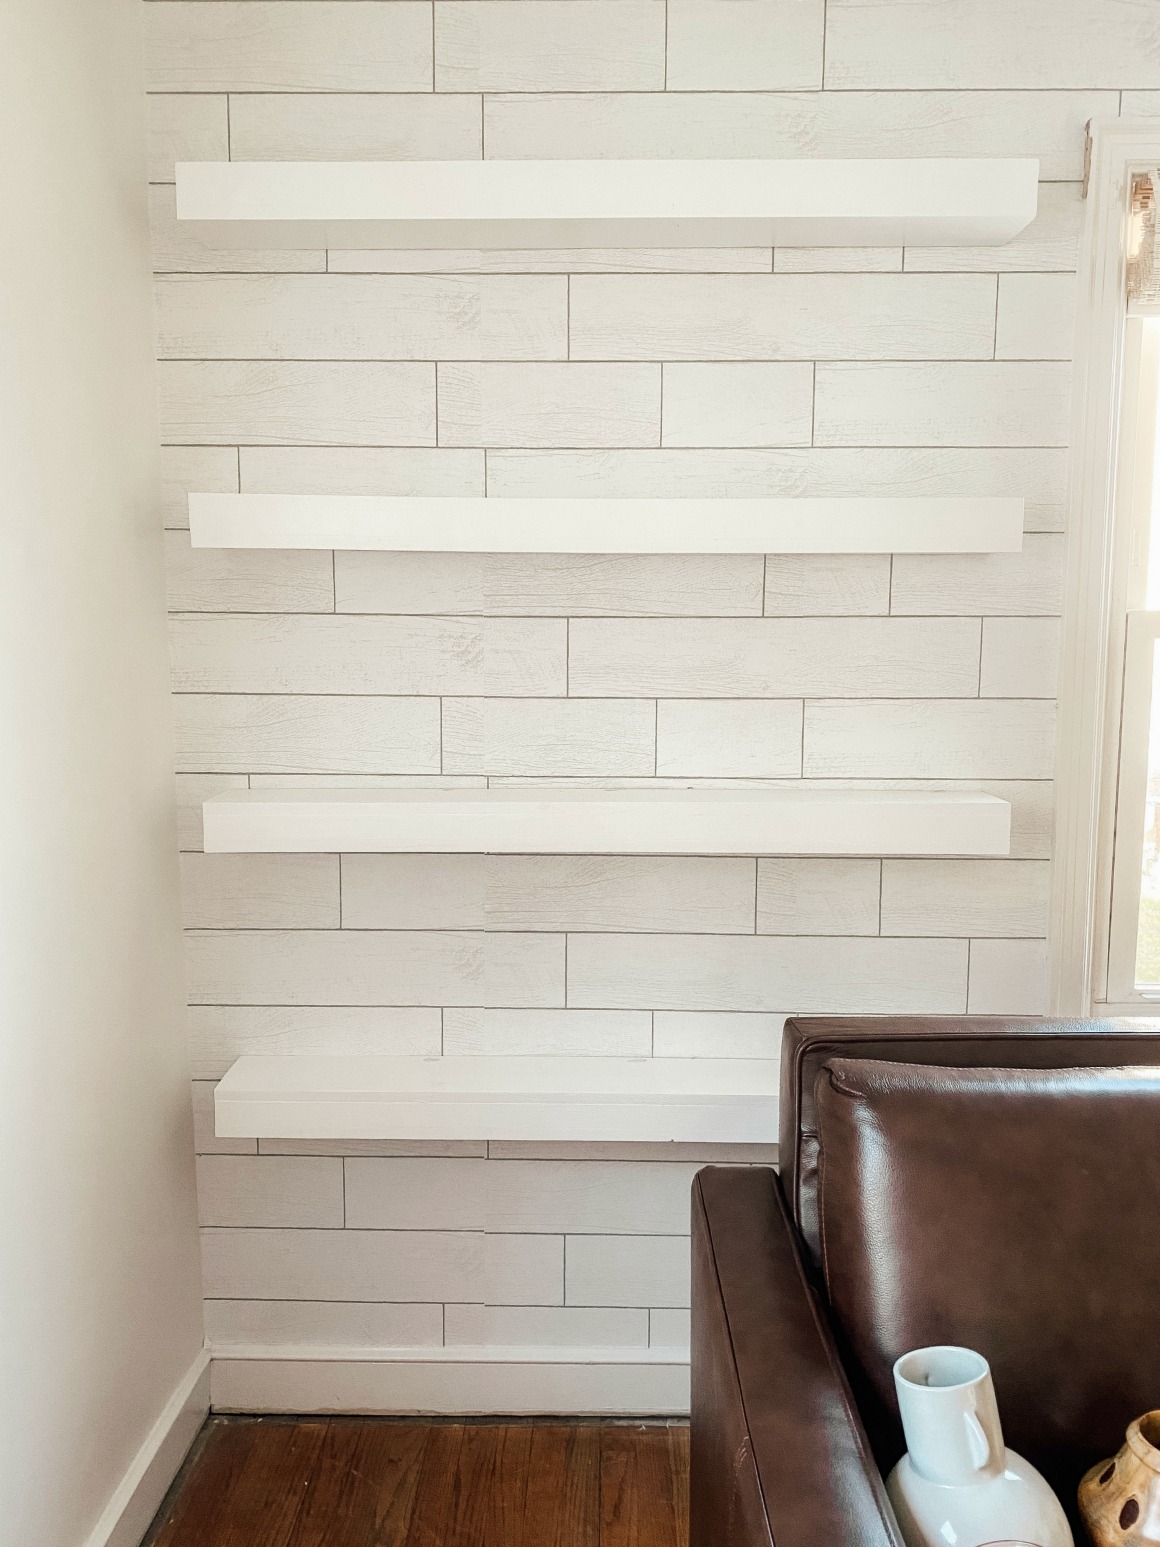
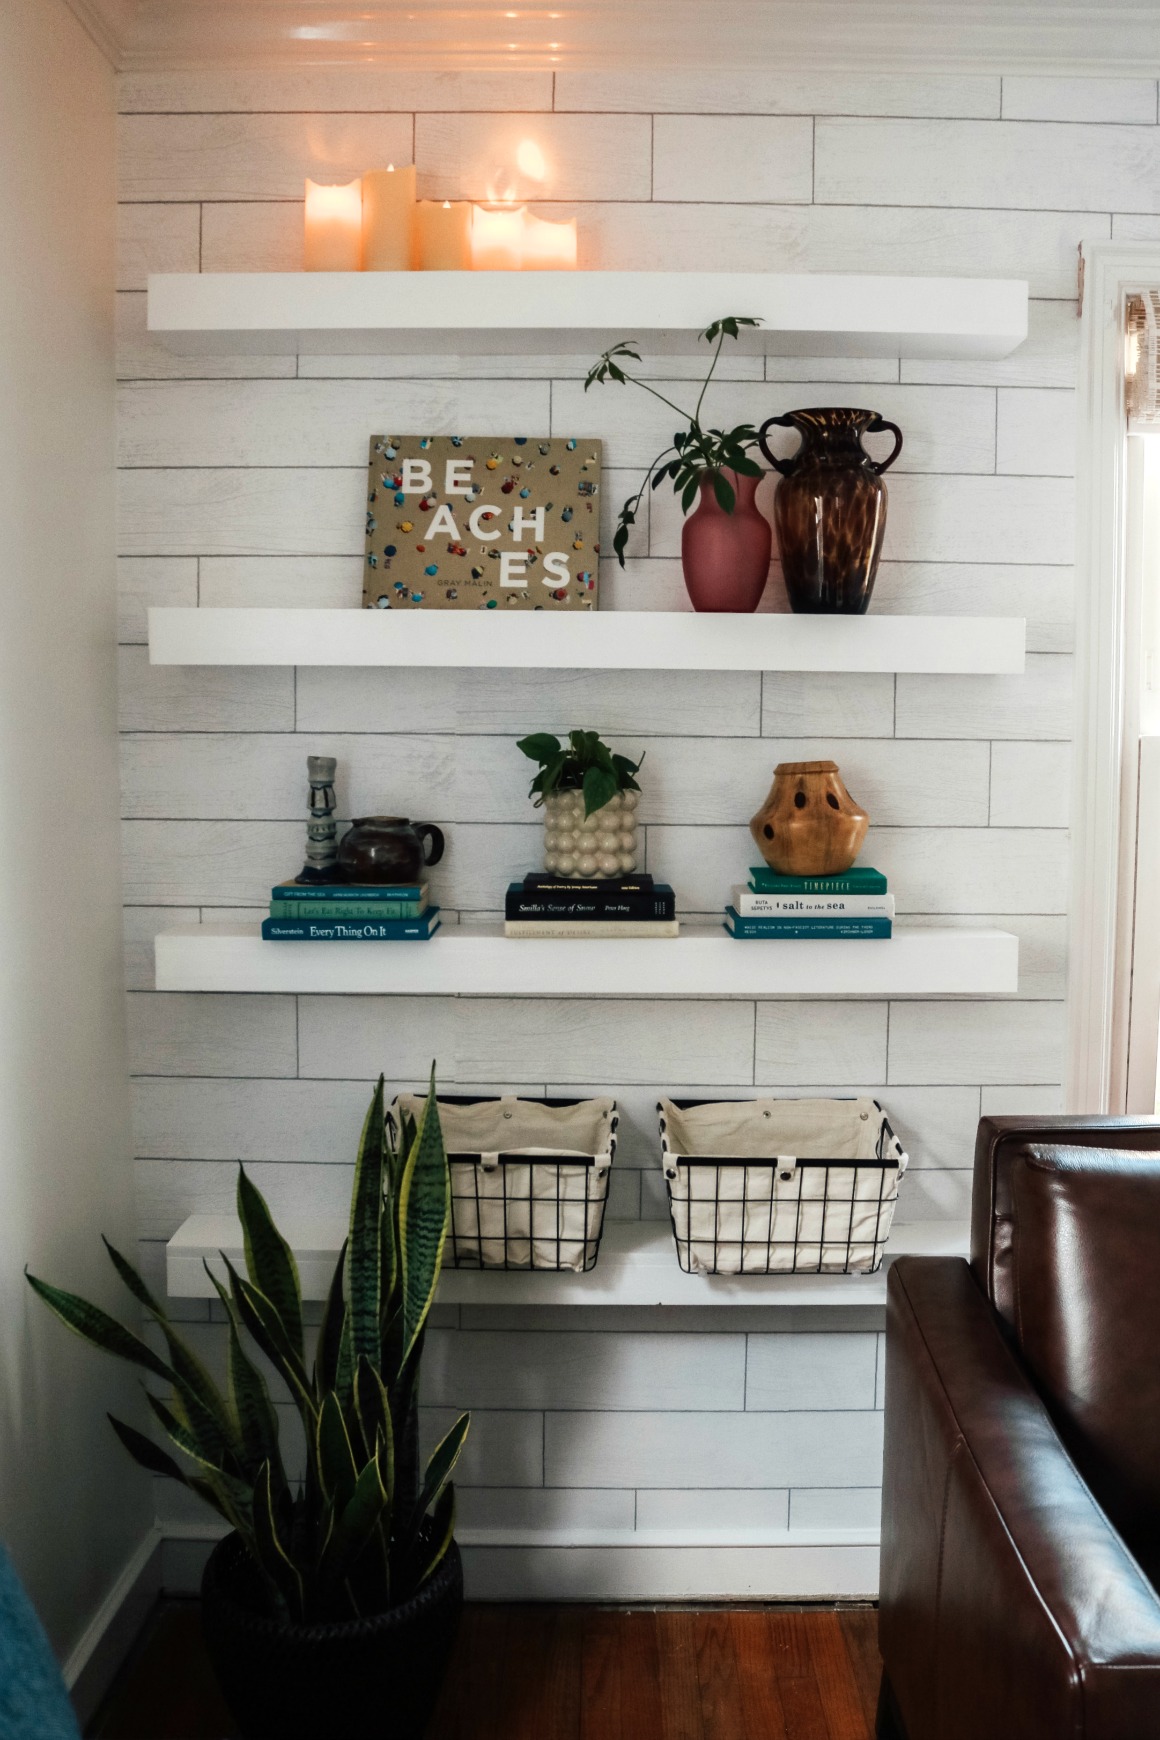
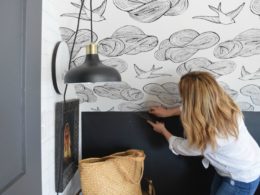
We wanted to give a blank wall the recent makeover room we have been working on some charm and character. Initially I thought of doing a built-in bookcase, like we did for my sister-in-laws nursery. Kevin was game for it. But when we built those bookcases we had two people working on it (Kevin and his brother) and it took about two days. So with that math, it would take him A LOT of time, that we really don’t have. After much thought I came up with the idea to do floating shelves. And DIY the floating shelves with some wallpaper, to make a statement wall and give the feeling and look of a built-in bookcase.
Below is what we came up with. I love how it turned out. We will share the simple tips on how to install removable wallpaper and the easy DIY for the floating shelves.
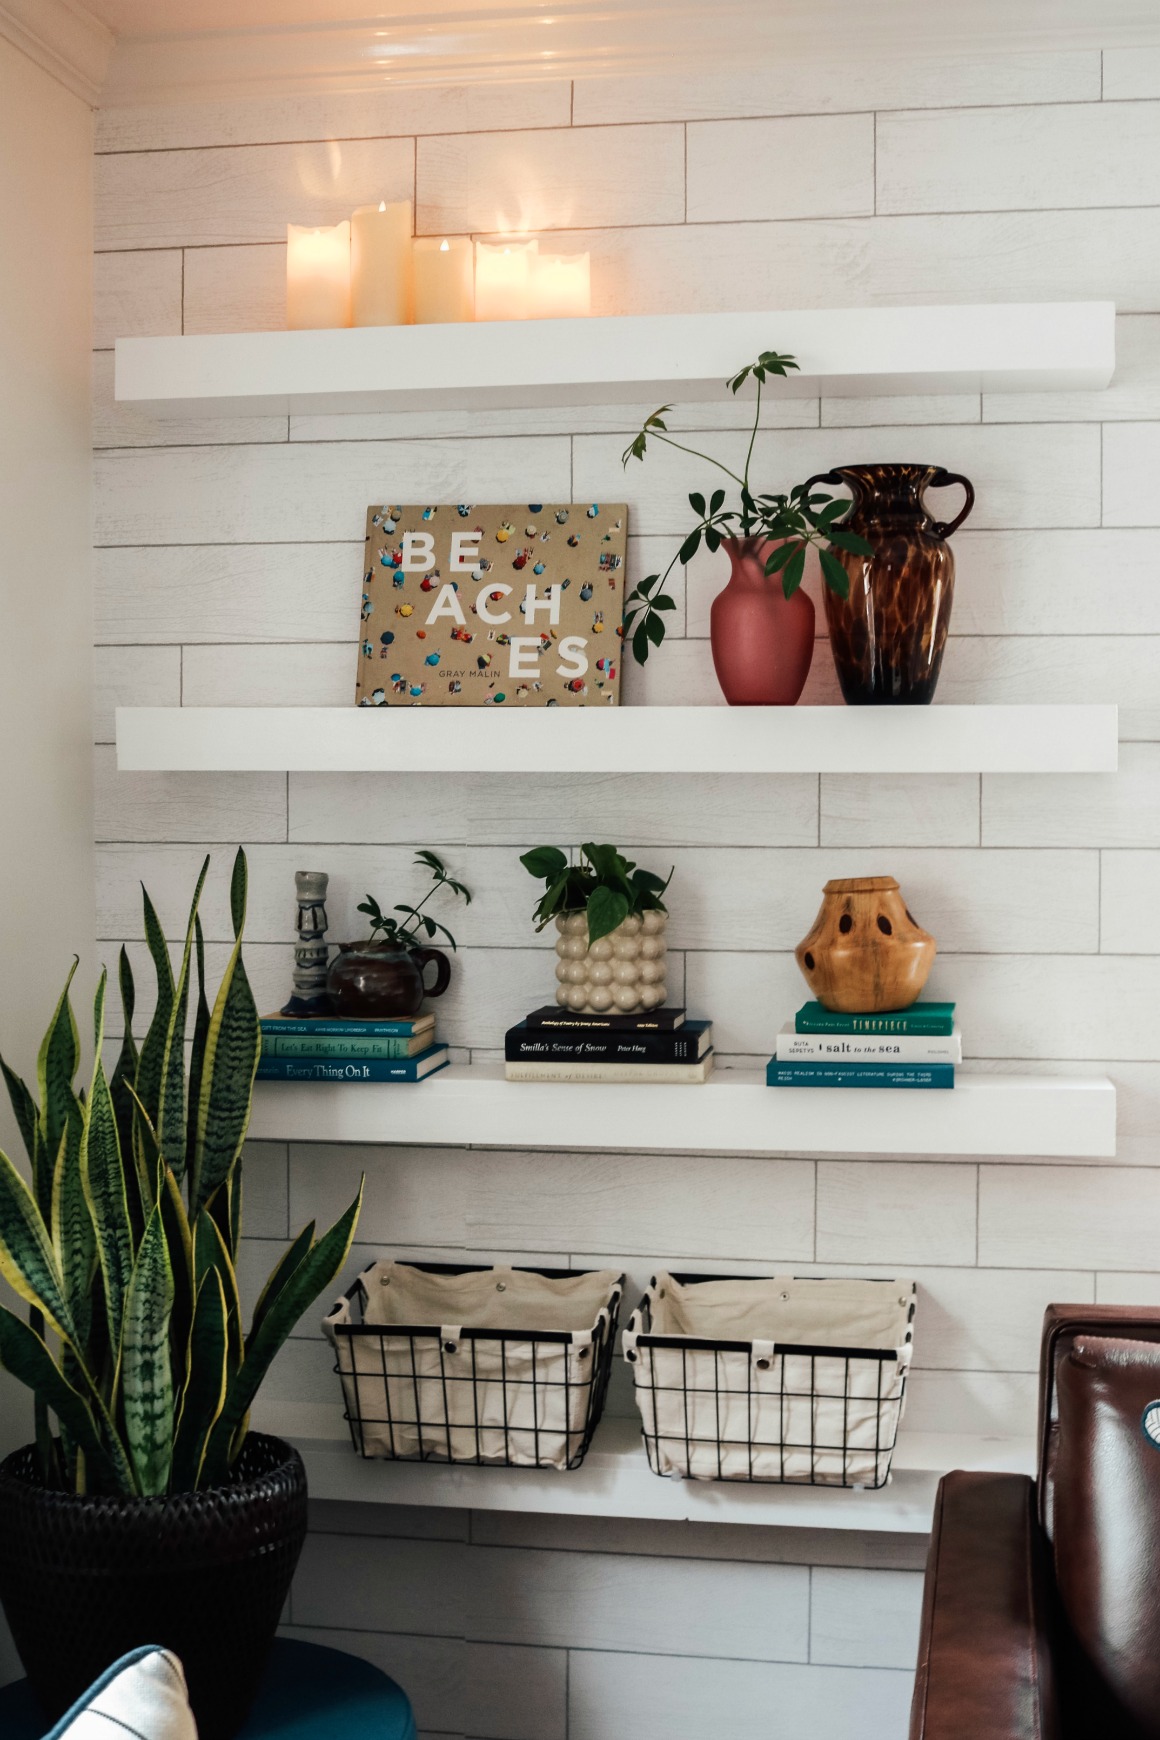
We aren’t aways pro-DIY if we can just buy the same thing. But after pricing some 4 foot floating shelves, they were at least $60. We knew we could make them for a lot less. They ended up costing $20 each. And really easy to make, if you have the right tools.
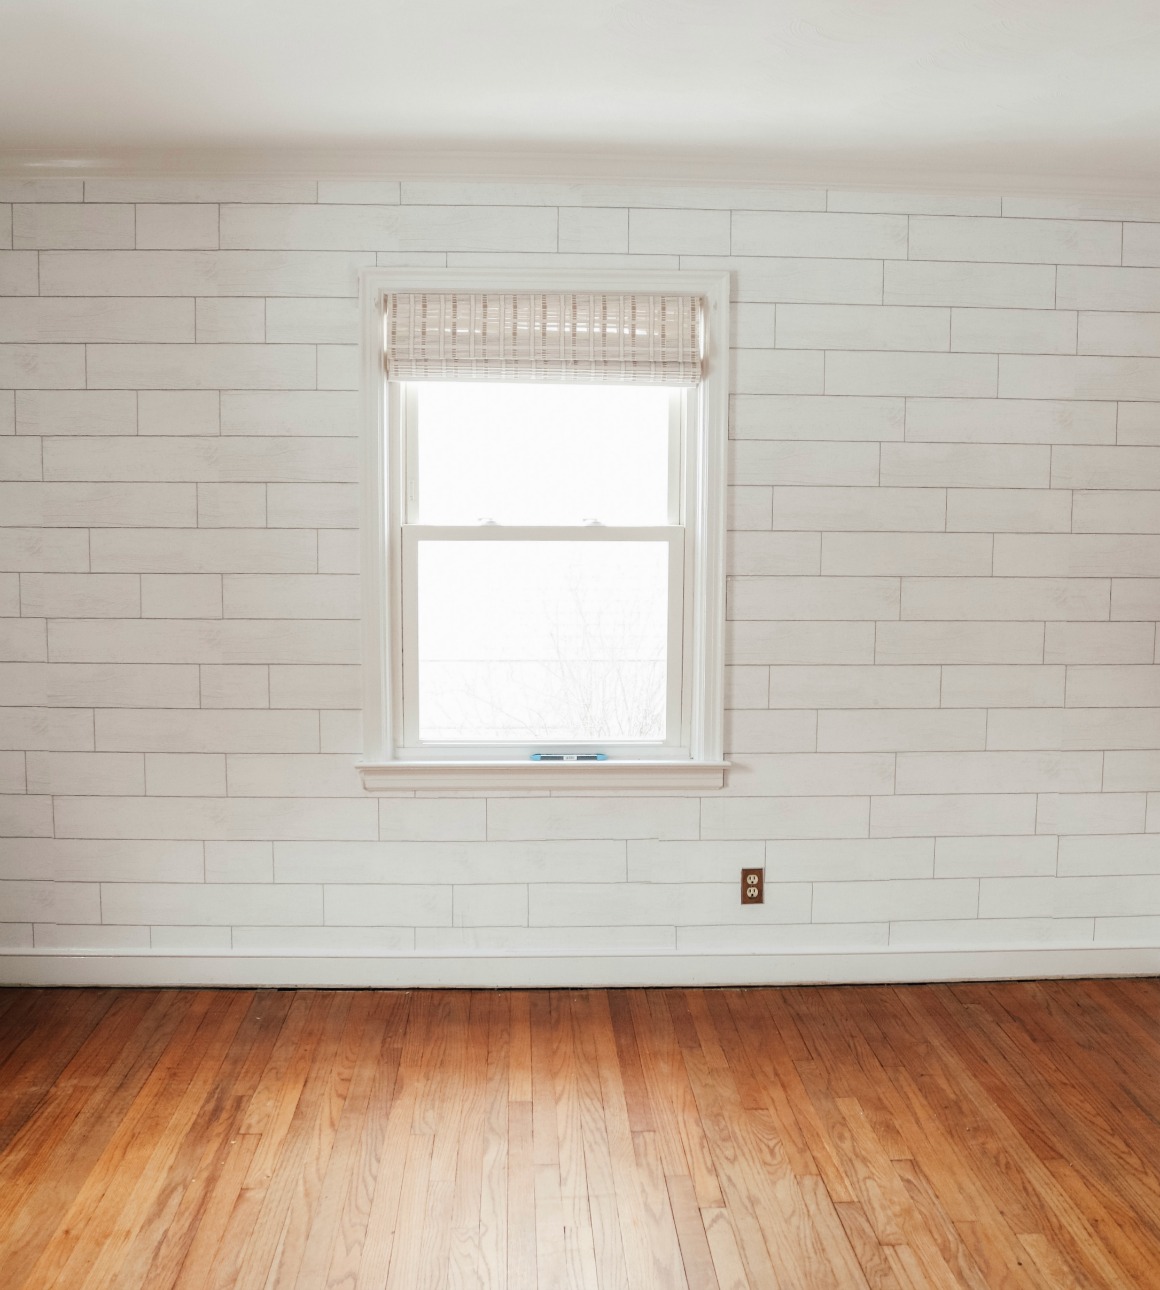
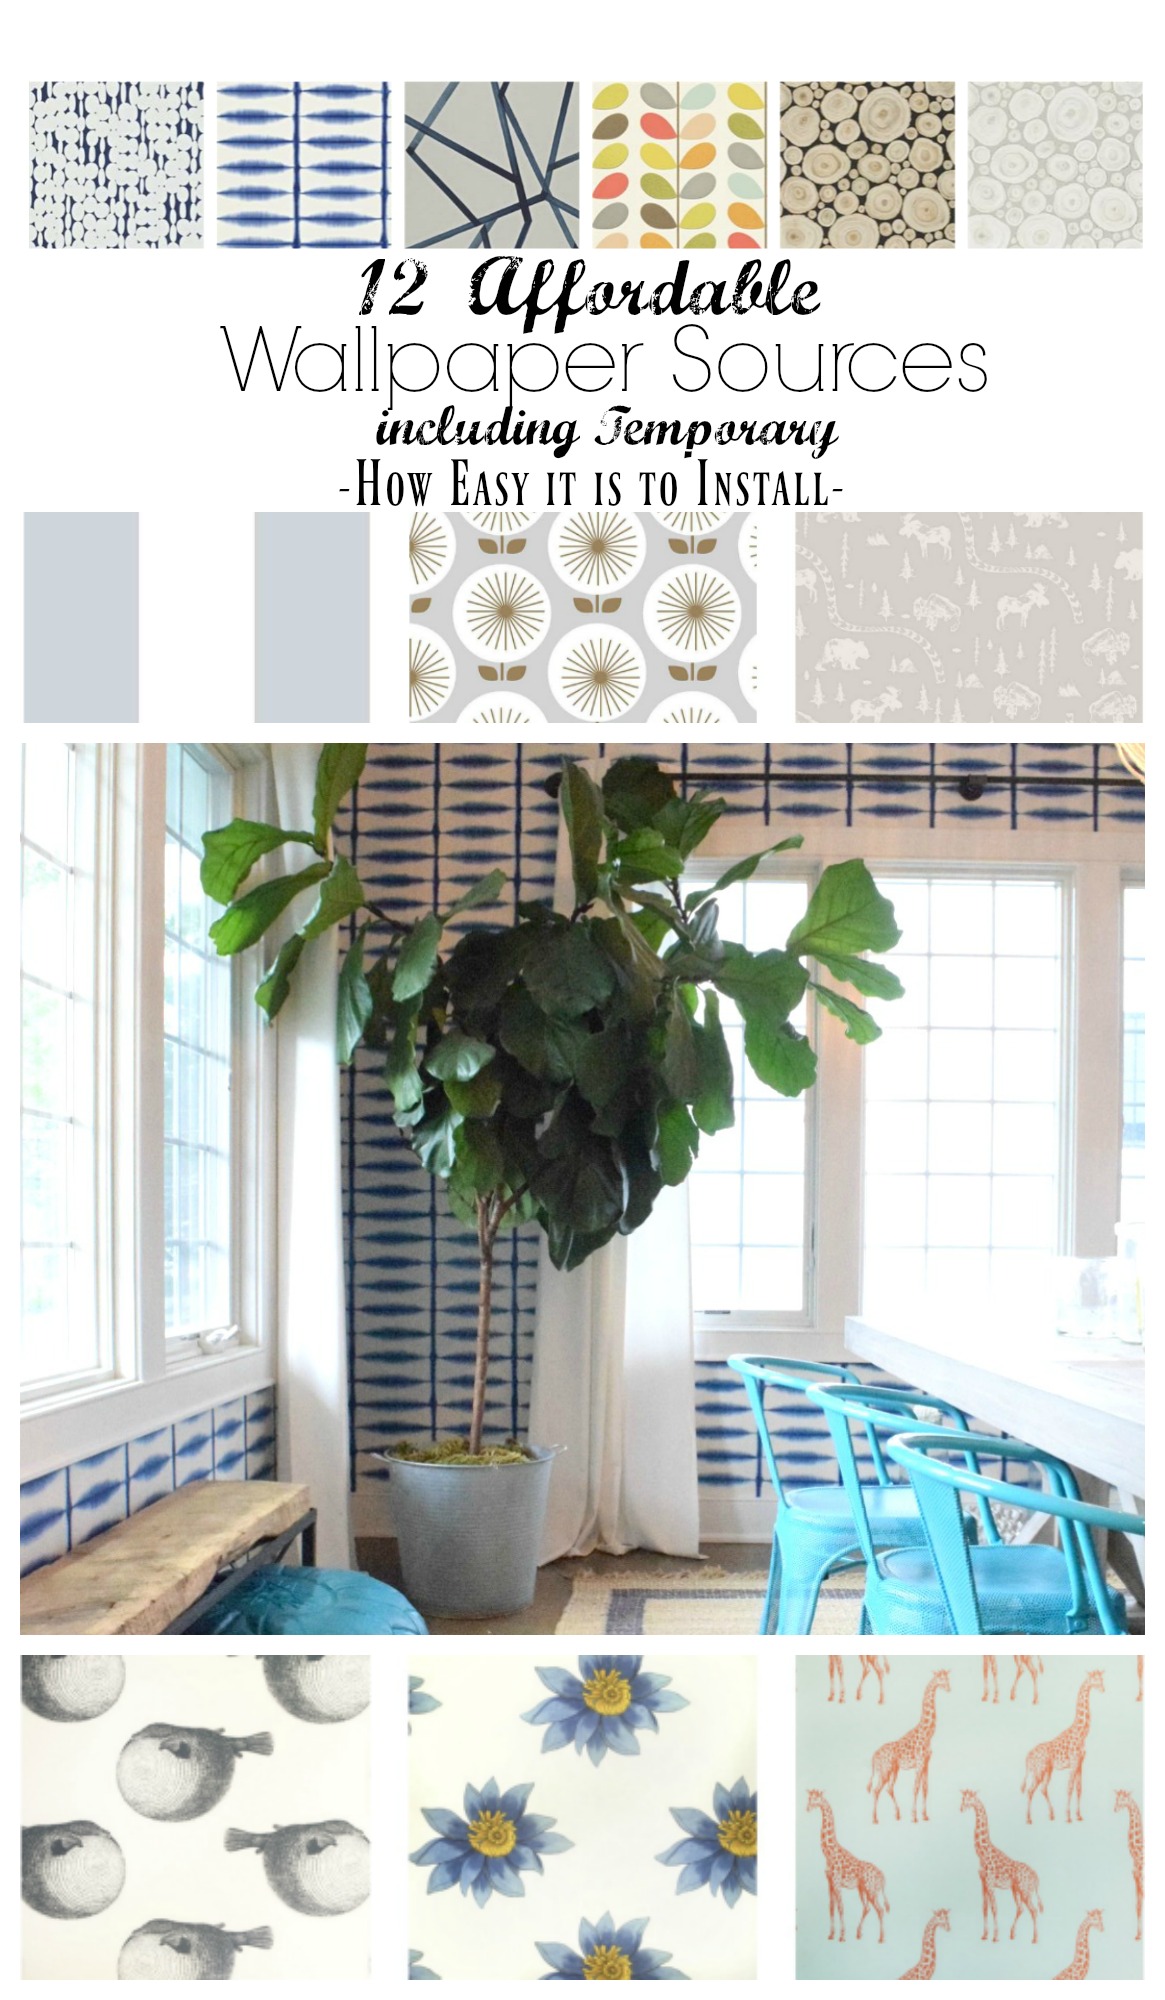
First we added wallpaper to give more of illusion of a built-in bookcase. It took about two hours to hang 3 rolls of wallpaper on this 12 foot wall. One of my favorite sources for removable wallpaper is Tempaper Designs. I have used this shiplap wallpaper on several projects and always LOVE it!!!
I have written out some of my tips on installing removable wallpaper below. But first I will quickly answer some FAQ’s…
FAQ on Removable Wallpaper-
1- Does removable wallpaper damage your walls? I have not had any damage- I have removed temporary wallpaper that has been up for a couple years and it peeled right off!
2- Can you apply removable wallpaper to textured walls? Tempaper recommends- Nothing more than an orange peel texture.
3- How do I know how much wallpaper to get? Go HERE for a FREE wallpaper calculator!
4- Is it hard to install? NOOOOO!!! You can also watch a super helpful video on how to install removable wallpaper HERE
Removable Wallpaper Tips
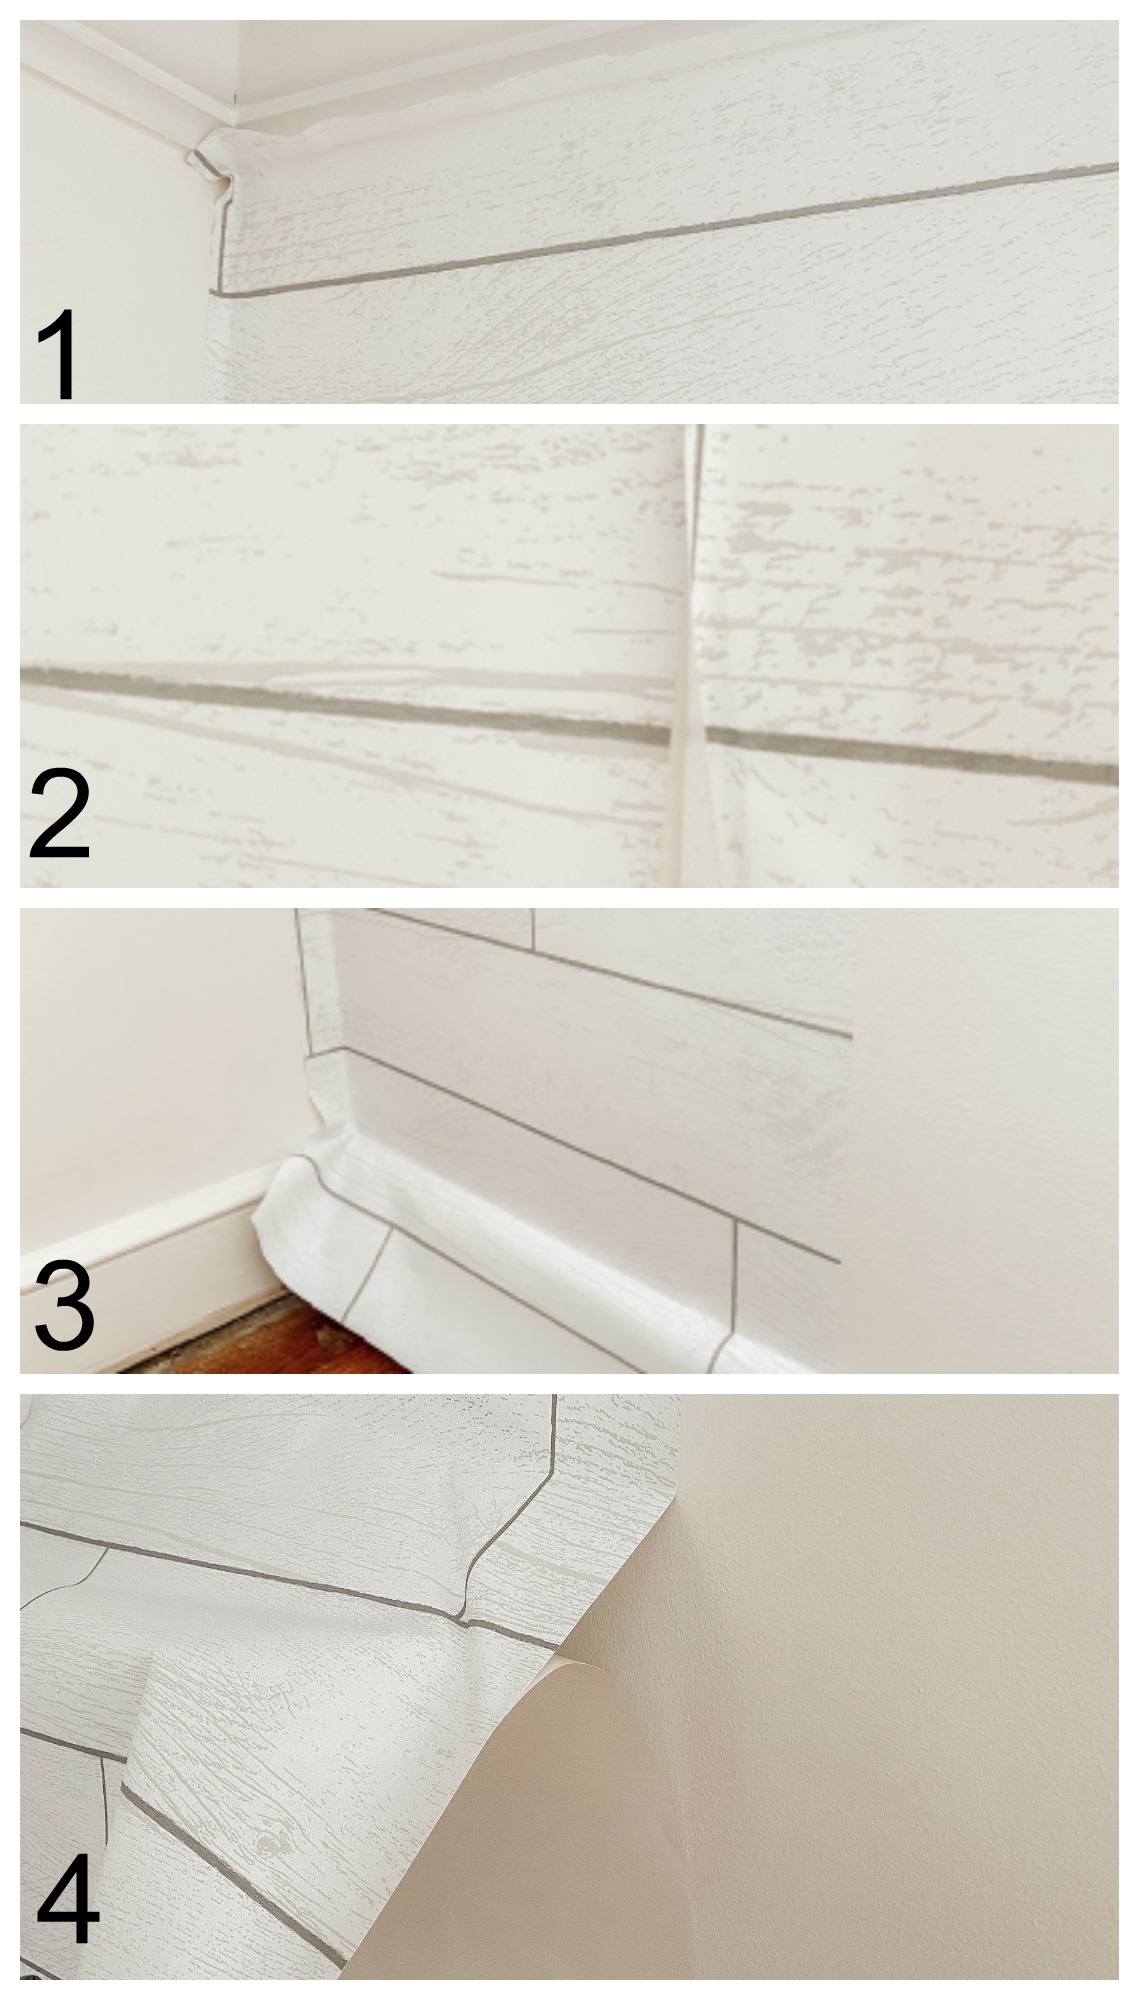
Removable Wallpaper Tip #1– On the very first piece of wallpaper you hang make sure to have some overhang- don’t go flush to the wall or the ceiling. Walls are not straight. This step will save you a lot of frustration!
Removable Wallpaper Tip #2- Use a smoothing tool and work outward (towards the seams) instead of up and down.
Removable Wallpaper Tip #3 & 4- Cut as you go. I find it much faster to do it this way. So I start at the top and drop the roll down. Attach the removable wallpaper to the wall then I cut it- leaving extra on the bottom (to avoid cutting into the wall).
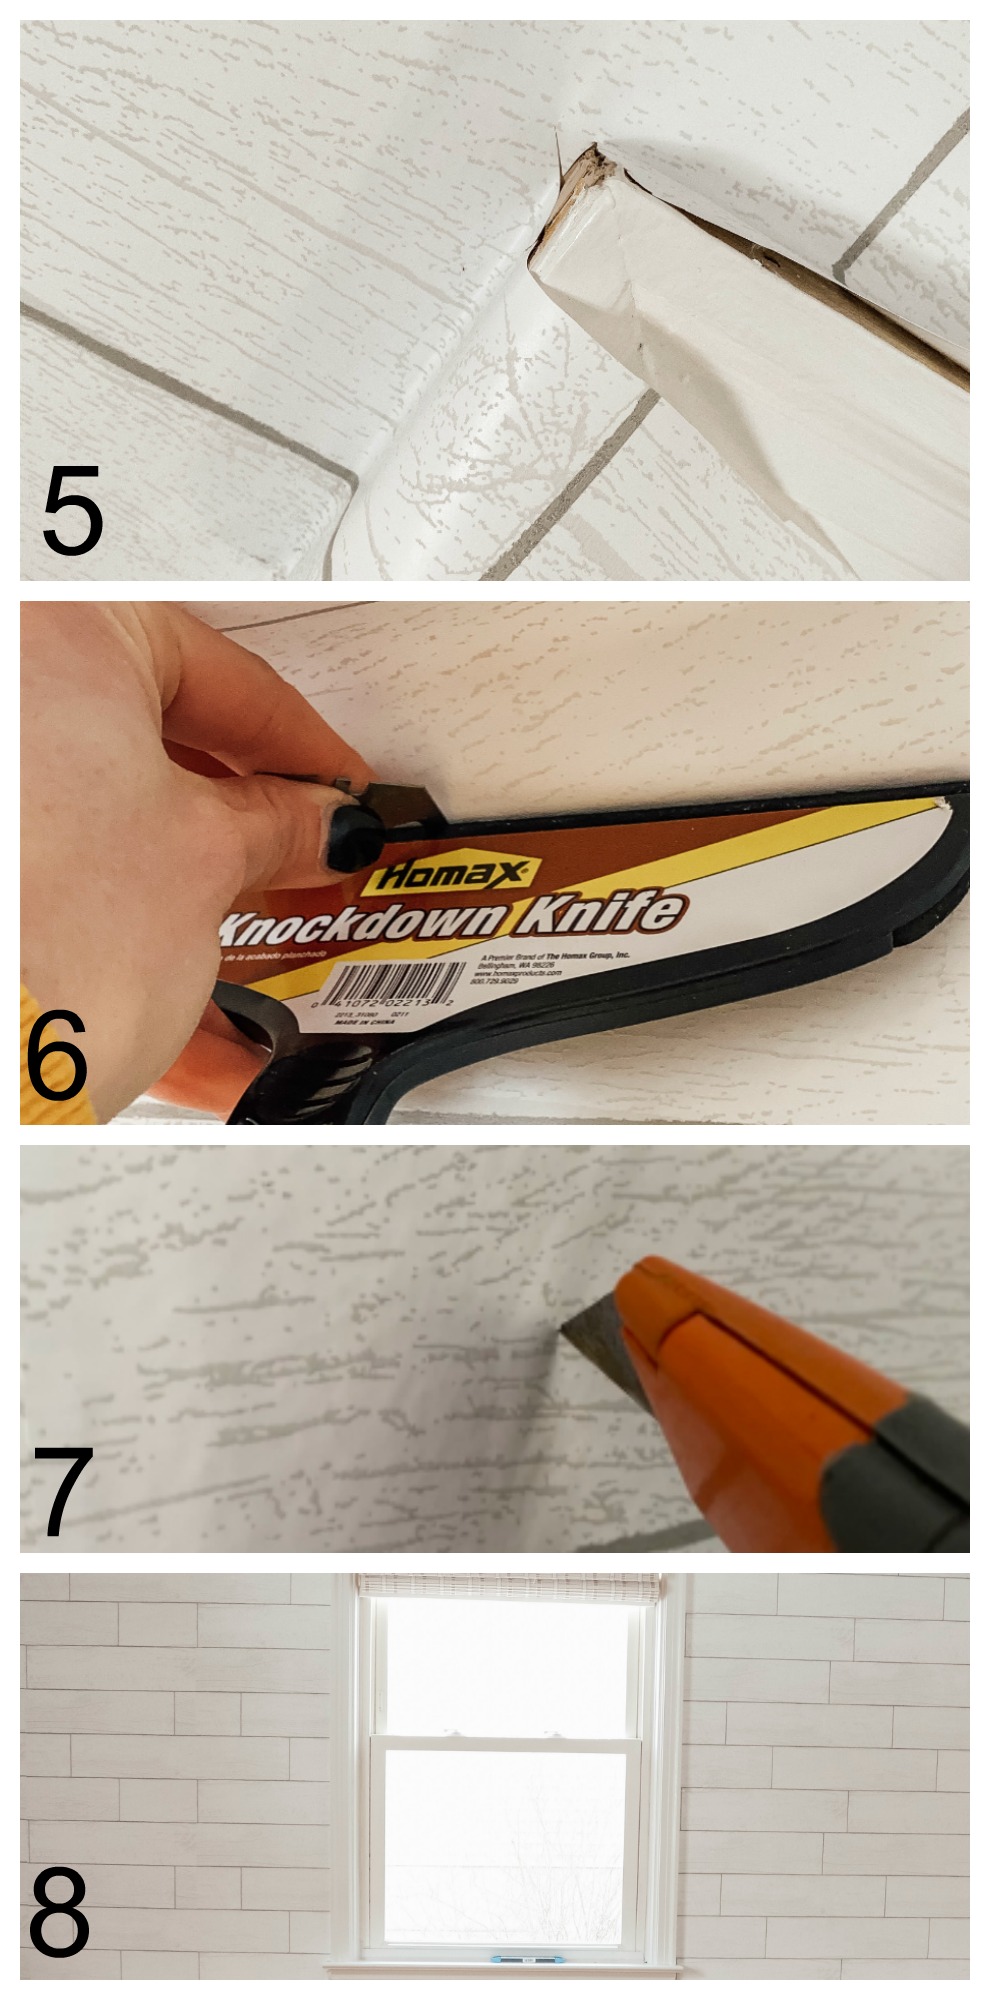
Removable Wallpaper Tip #5- I like to basically go over a window with my paper then cut around the frame as I go. Super simple process.
Removable Wallpaper Tip #6- When you trim off the excess wallpaper make sure to use a guard so you don’t cut into your wallpaper.
Removable Wallpaper Tip #7- If you can’t get out a bubble with your smoothing tool, simply pop the bubbles and press the wallpaper down! You will not even see the prick!!
Removable Wallpaper Tip #8- Really not a step. Just showing how awesome this shiplap wallpaper turned out!!! I have used a different brand that looked similar and hands-down Tempaper is my FAVORITE! Find it HERE.
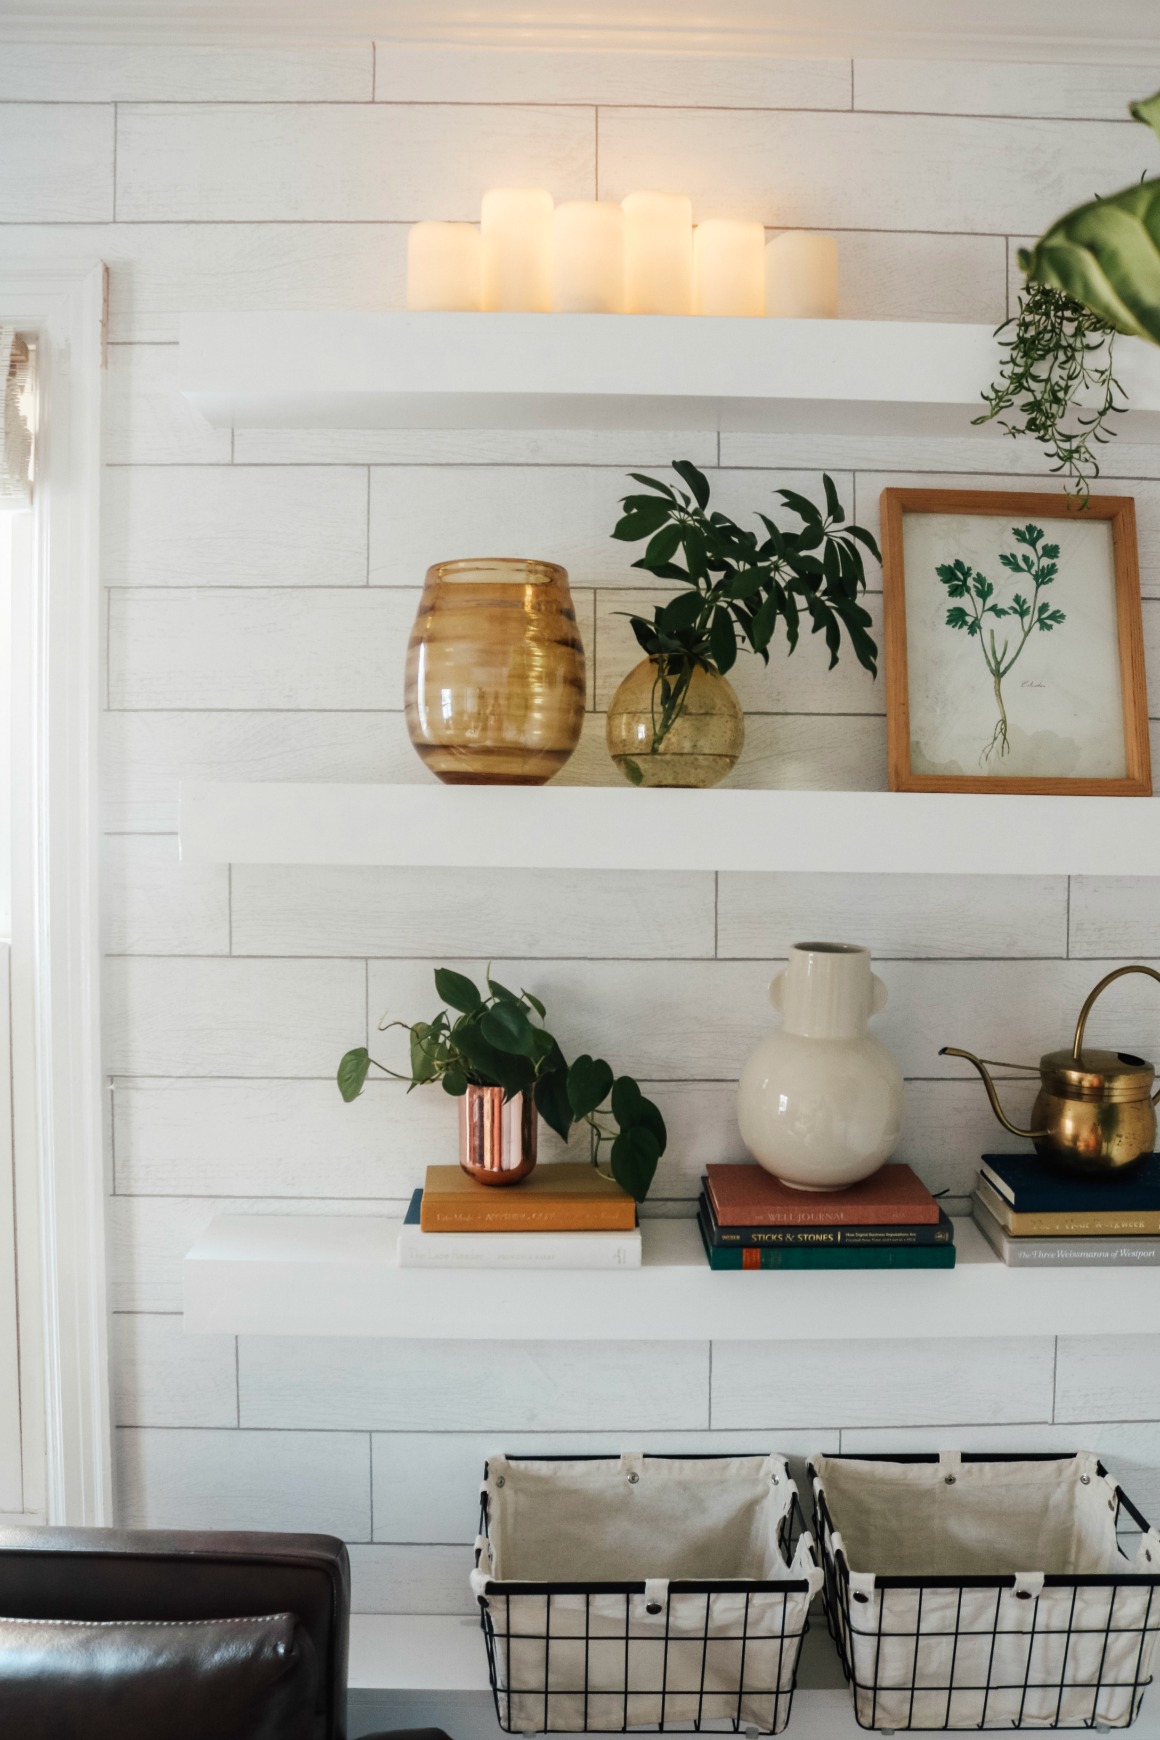
I used a lot of thrifted accessories to decorate the shelves. It doesn’t have to be new to be beautiful. Just find accessories in the colors of your room!
DIY Floating Shelf Tutorial
Supplies-
- 1″x6″x10′ Common Board or the size you want your shelves to be *Home Depot 914-789
- 1″x2″x8′ Common Board or larger if you want them to be taller *Home Depot #914-584
- 2″x2″x8′ Strip Wood *this is what you use to attach the mantle to the wall- if you make your shelf bigger than this would need to be bigger
- Miter Saw (or have your boards all cut down at Home Depot or Lowes- where you buy the wood)
- Nail Gun
- Sand Paper
- Plastic Wood (wood filler)
- Paint or Stain
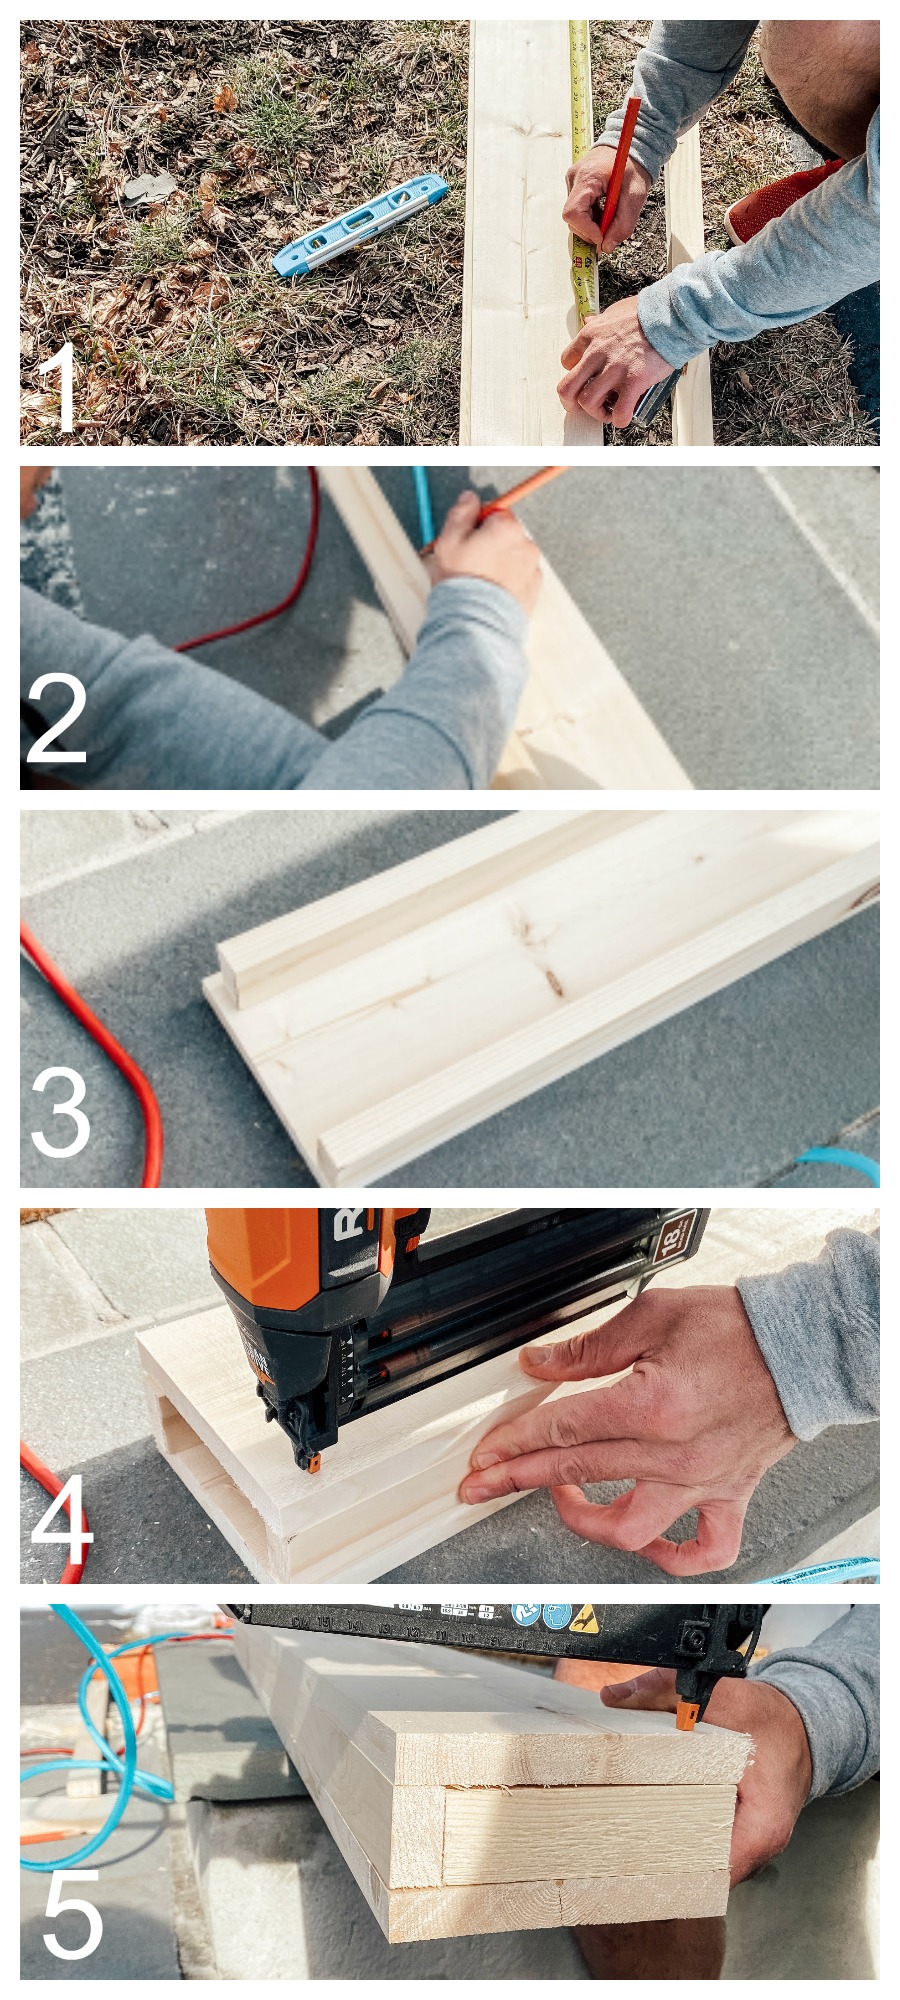
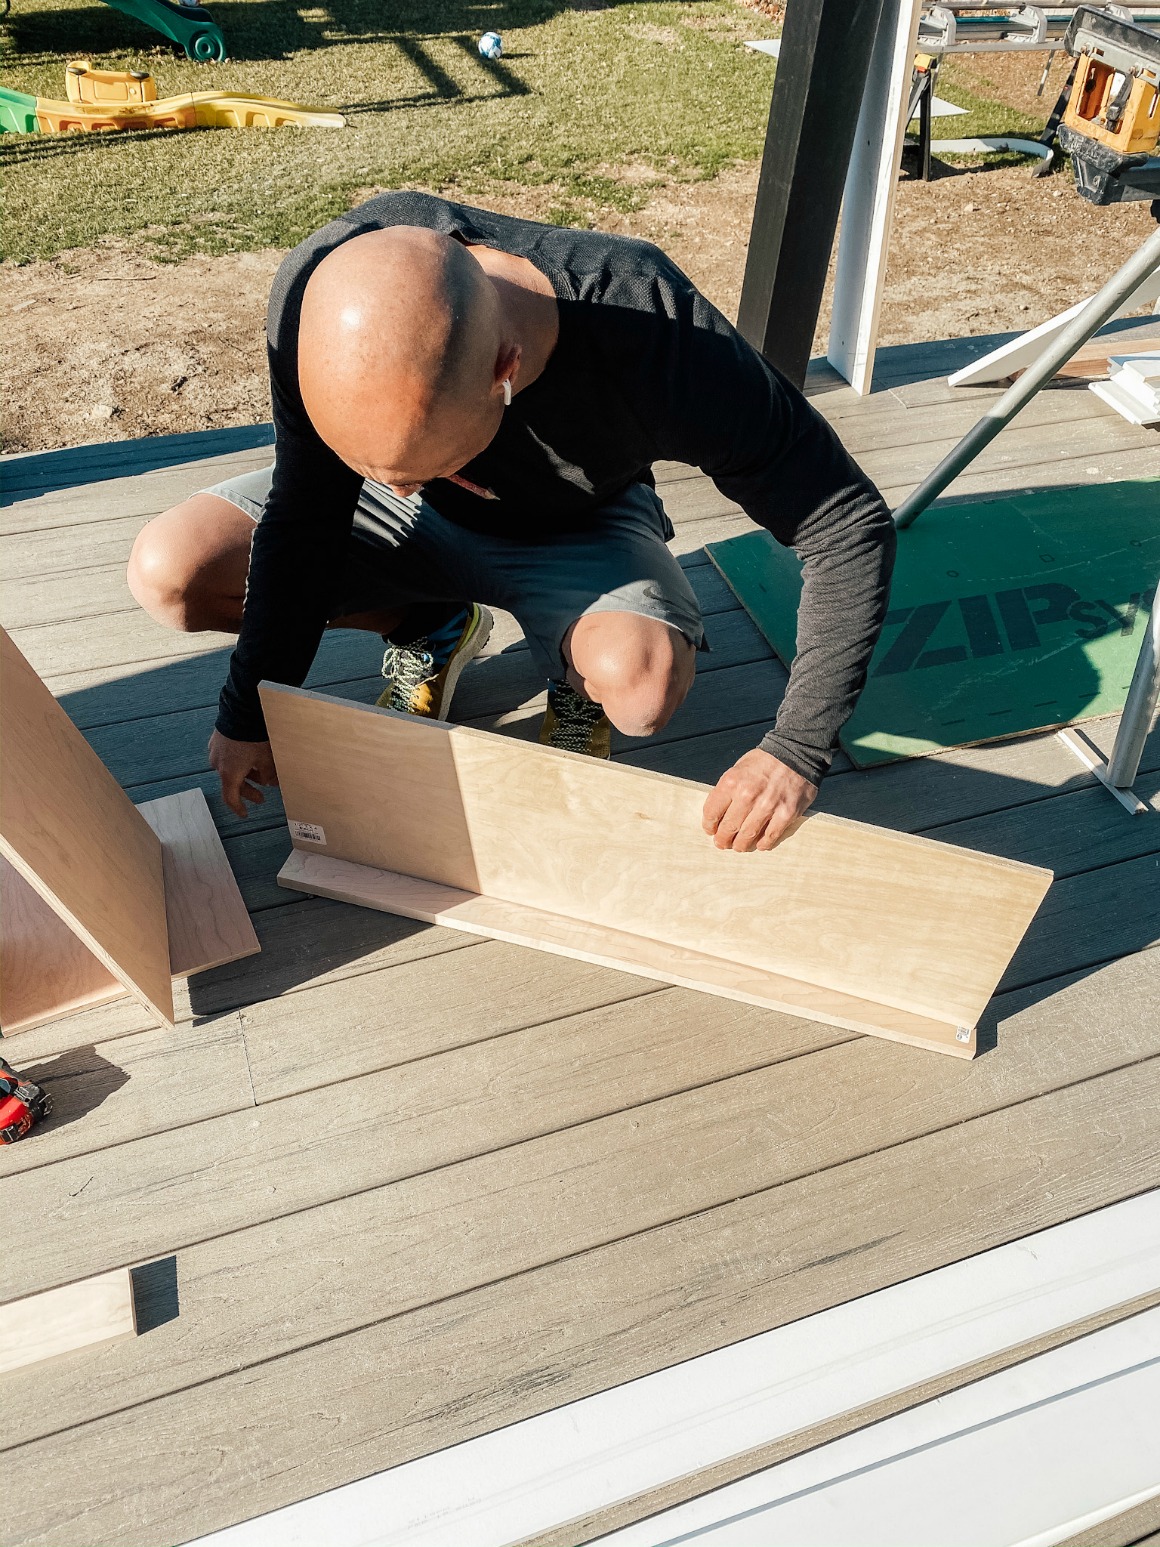
Step #1- We used 10ft long x 6in wide Common Board and cut them down to 4′. Kevin used our Miter Saw to cut the boards, if you don’t have a saw you could have them cut down at Home Depot or Lowes. You will use two of these- top and bottom.
Step #2– Next we cut down the 1″x2″ by 8′ strip wood to 4 feet to use as the center that supports the top and bottom piece.
Step #3– We used a second piece of the 1″x2″ just to stabilize the top and bottom common boards.
Step #4– Take a nail gun and nail one of the 1×2 to the 4 foot long board.
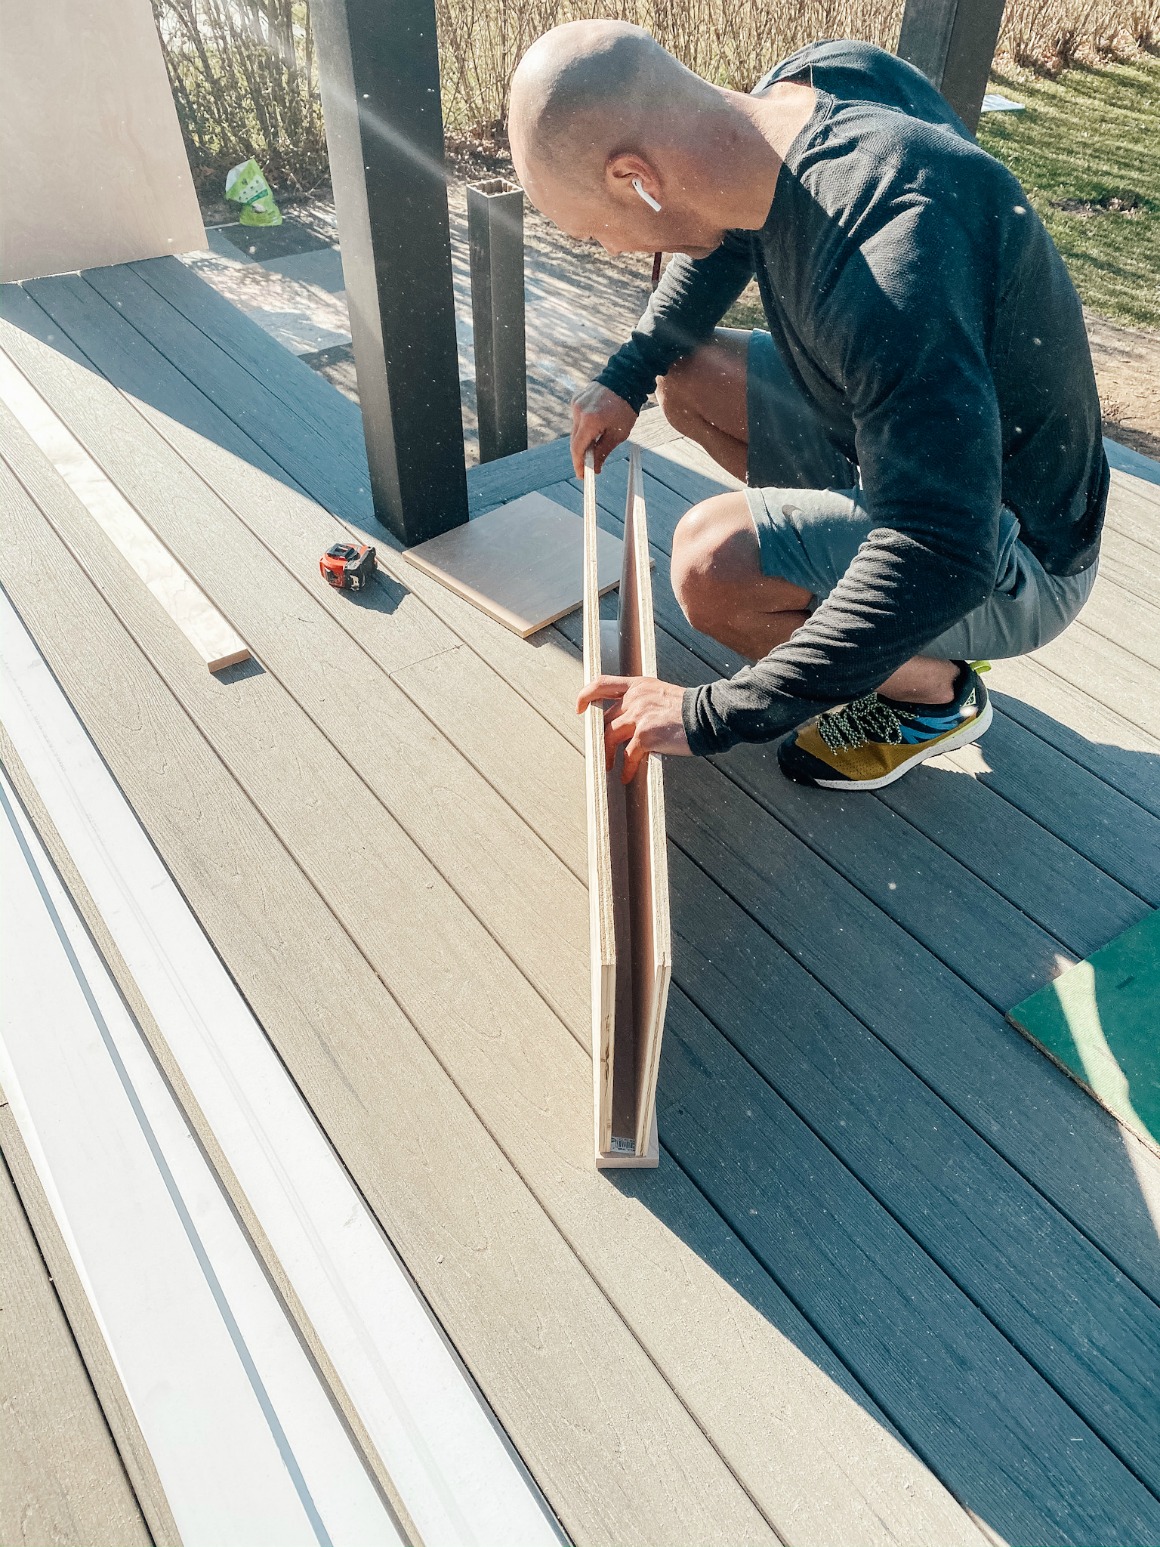
Step #5- Cut down a piece to fit on the ends, (between the top and Botton of the common board shelf)
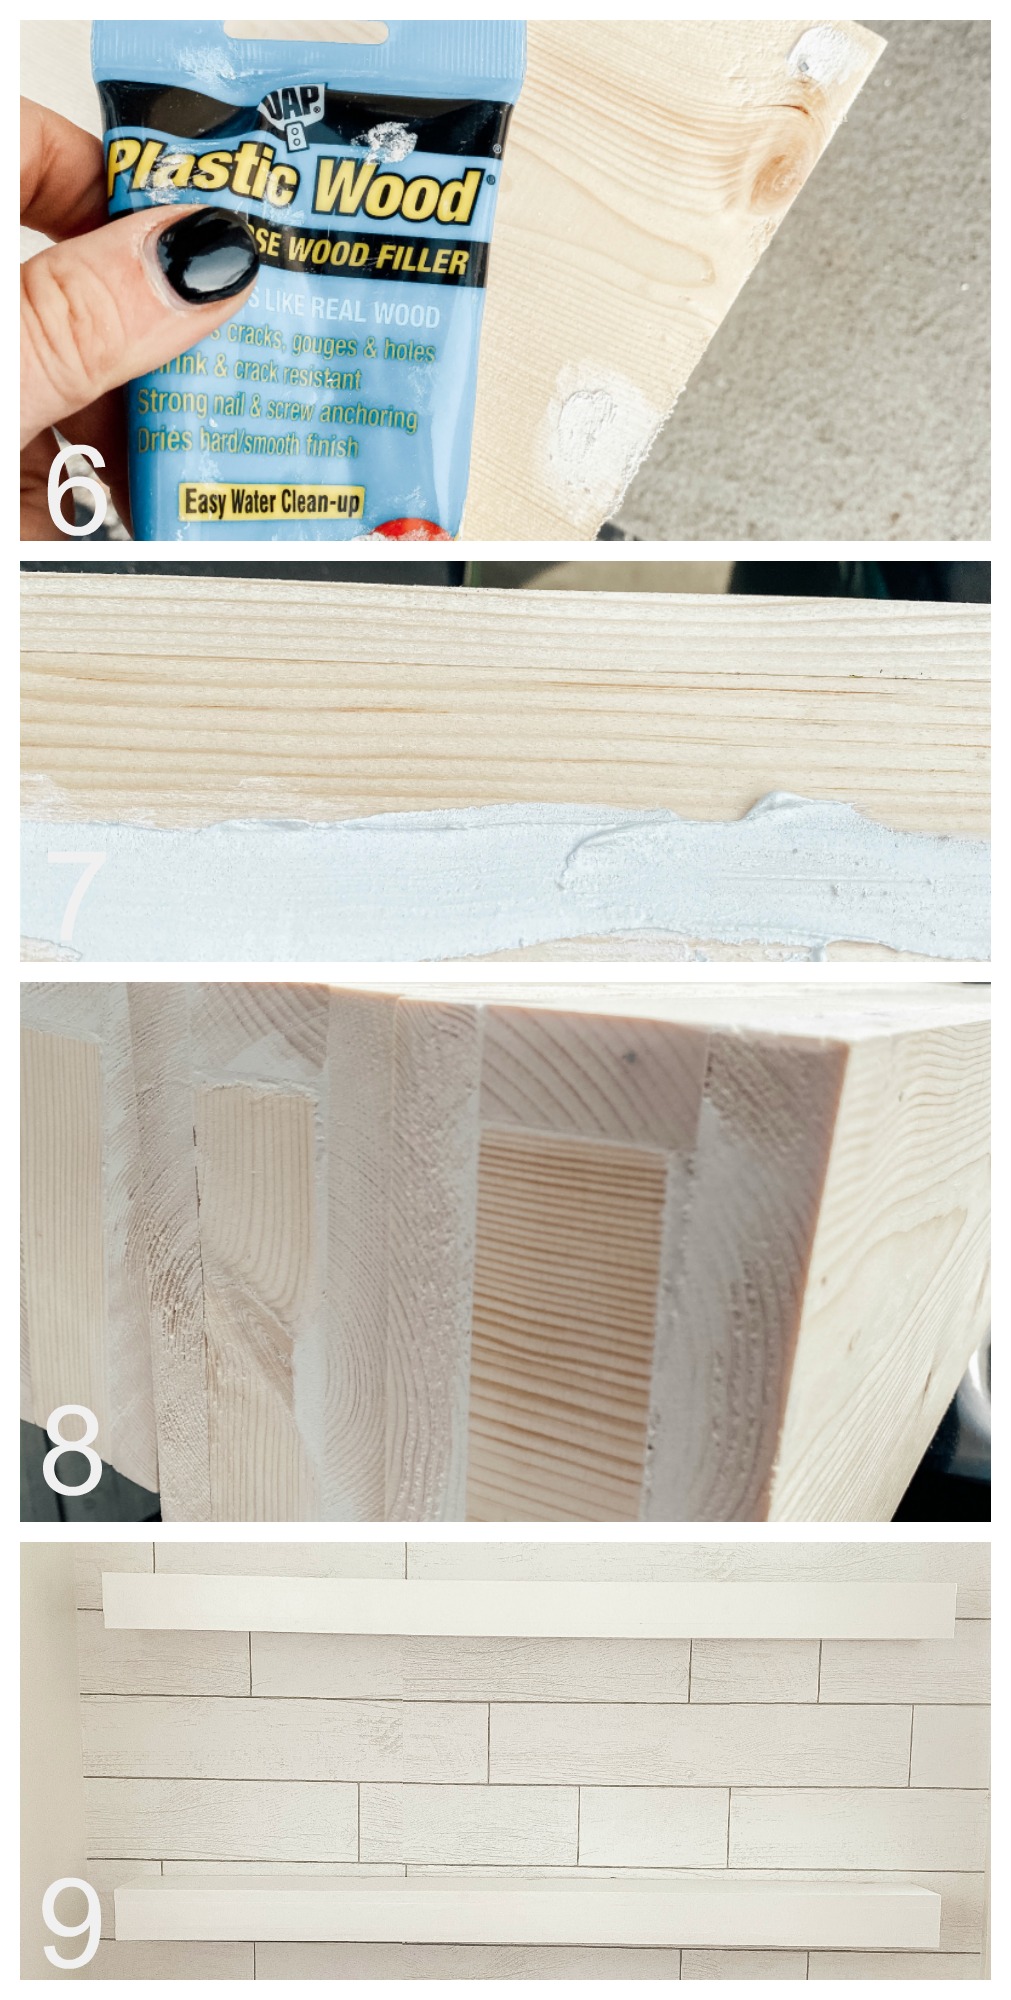
Step #6 & 7– Fill in all the nail holes and the gap between the boards with Plastic Wood (you can just use your finger or a rag)
Step #8– Give the Plastic Wood about 30 minutes to an hour to dry, then sand it down with a fine grit sand paper (like 200 grit).
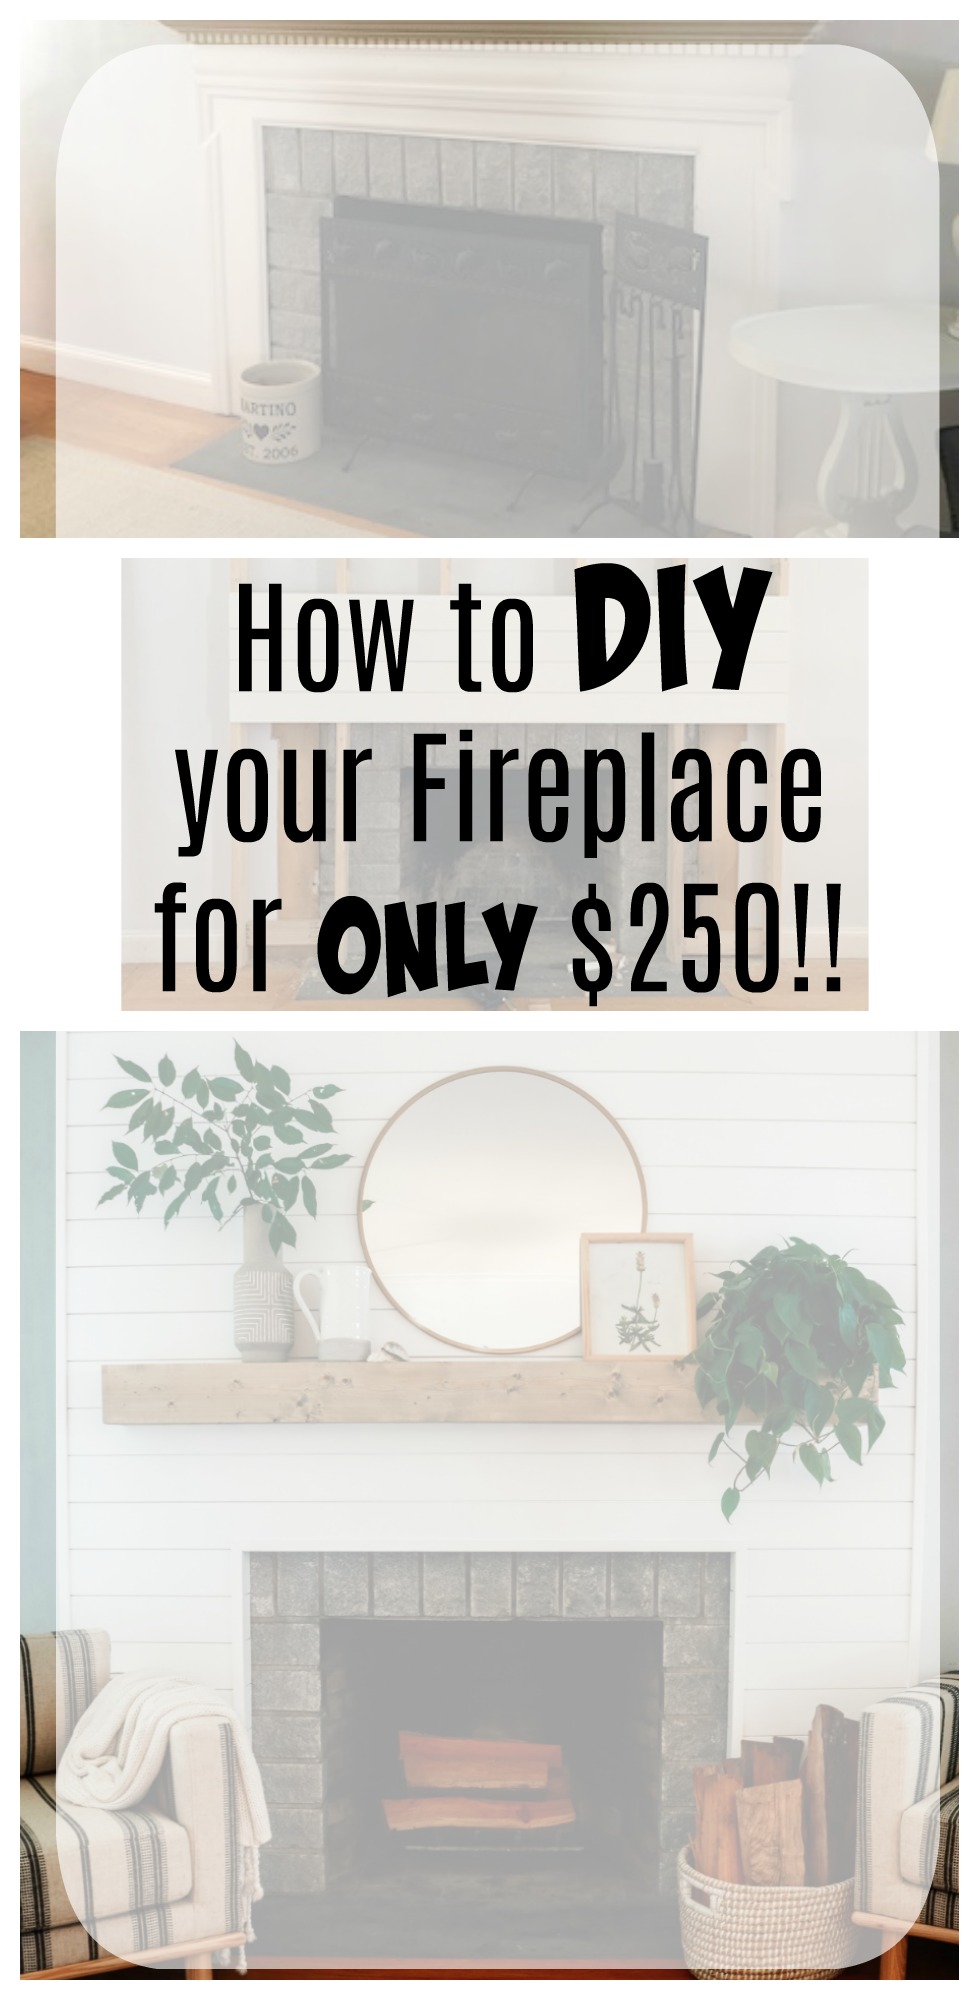
Step #9- Paint or stain! We painted these floating shelves in Pure White (you can see on this blog post how we built the same thing for a fireplace and stained the wood)
*****UPDATE- we made these again and you can see the photos below how we did a larger piece of wood in the front so you don’t have to use as much wood filler. So photo number #5 is different than what we did below….
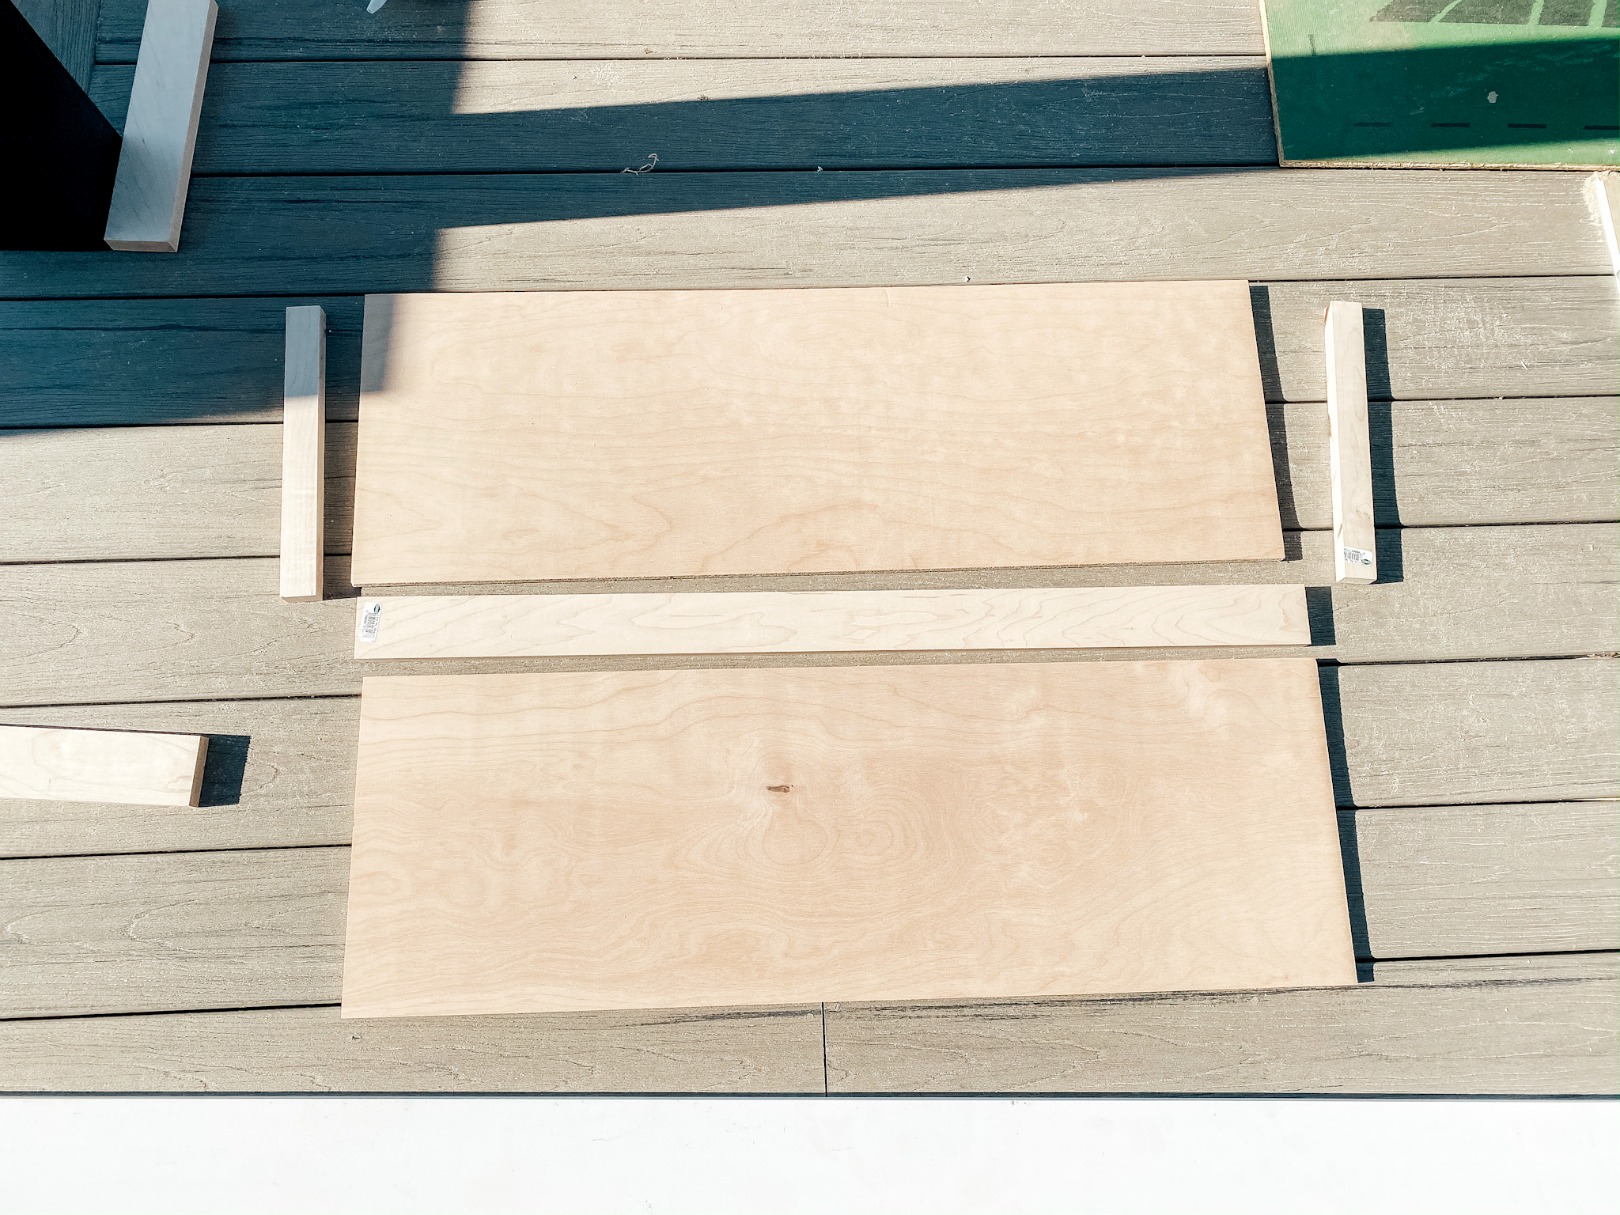
Above you can see we did a larger piece in the front and nailed it in the front rather than on the sides!
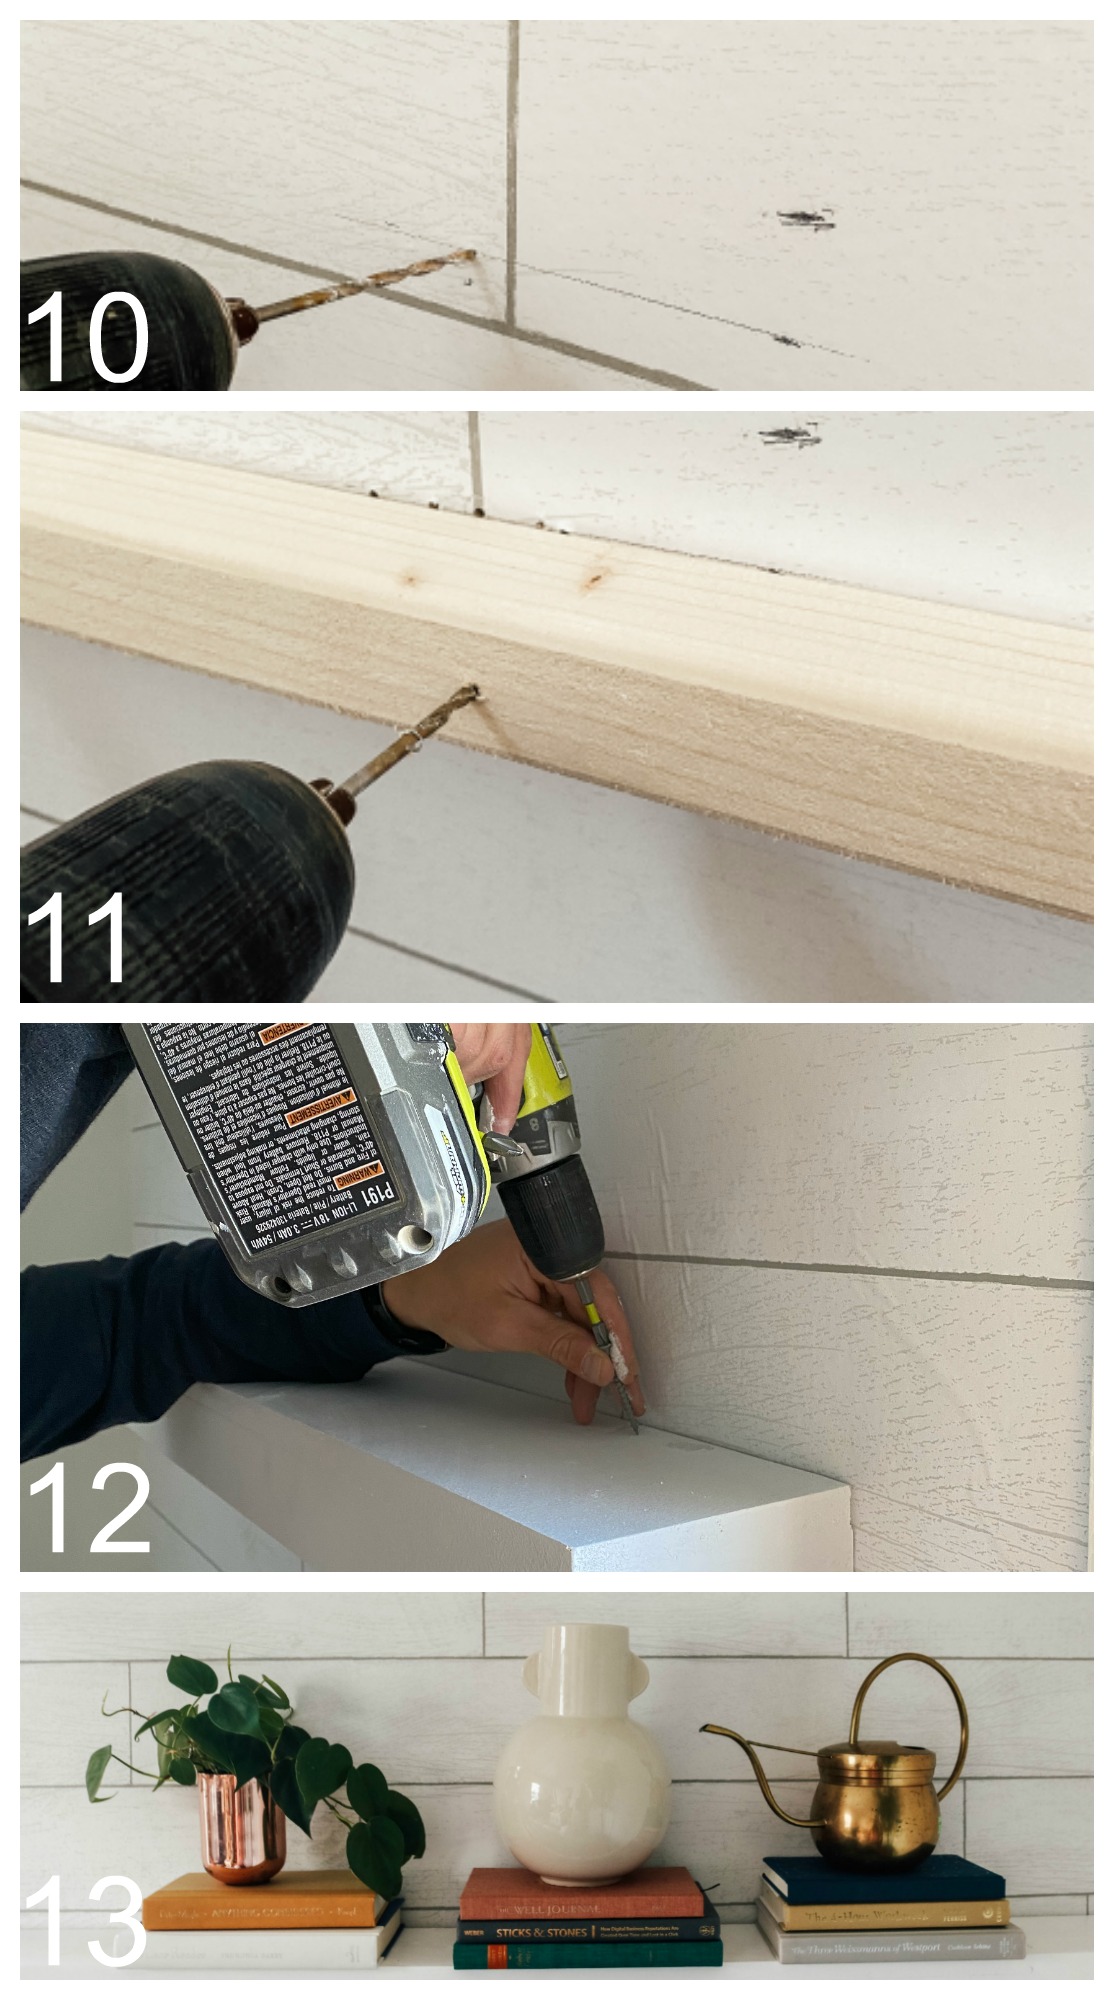
Step #10- To hang the shelves find a STUD (I don’t have a picture of that- but use a stud finder). Then drill into the wall with a drill bit (long enough to go thru the wood strip and to the wall) to make a pilot hole.
Step #11– Then drill thru your 2×2-8FT Strip to the wall making a pillow hole in the strip (he cut the 2×2 Strips down to 3 feet), to make a spot for your screw to go in. (No picture, but then drive the screw in thru the 2×2 to attach the 2×2 strip to the wall).
Step #12– Last drive in a screw in about 3 spots (depending on the length of your shelf) right where the 2×2 is- so close to the wall.
Step #13– Decorate! (Favorite part!)
Similar Posts-

LOVE THIS!!! Kevin is too funny to watch in stories!! You two are the perfect pair and you create such beautiful spaces!!
Thank you so much!!!
i thought this wallpaper was tile when I first saw this post. It turned out very well–nice job.
thanks!!!
Brooke, you and Kevin are the A-team of decorating. Beautiful work!
Thank you!!!