I was SO excited about the idea of floating shelves in our kitchen that I couldn’t wait to implement it. But it wasn’t as easy as I thought it would be! Is that the case with most DIY projects? Ha! We didn’t want to do open shelves instead of cabinets, while I love the look it just really wasn’t practical, since our home is still only 1300 square feet (with our addition) we could use any cupboard and drawer we could get our hands on! So we left a small area in our kitchen for open shelves. The dilemma was what to make the shelves out of?!
We were trying to decide between wood shelves to match our island and to match our cabinets on either side if the fridge. All of our cabinets are from IKEA with Semihandmade fronts. I will do a full blog post next week on our cabinets and the entire kitchen! But spoiler- we LOVE them so much. Basically you order your IKEA kitchen without the doors and you do Semihandmade doors, kick plates and cover the sides of the cabinets all with Semihandmade product. It saves you a lot of money and you get to use IKEA as the base, which has tons of organizational perks with the look and quality of a custom cabinet from Semihandmade.
Semihandmade does have floating shelves, but they aren’t in the same finish as the wood that we had everywhere else, and not in the same white.
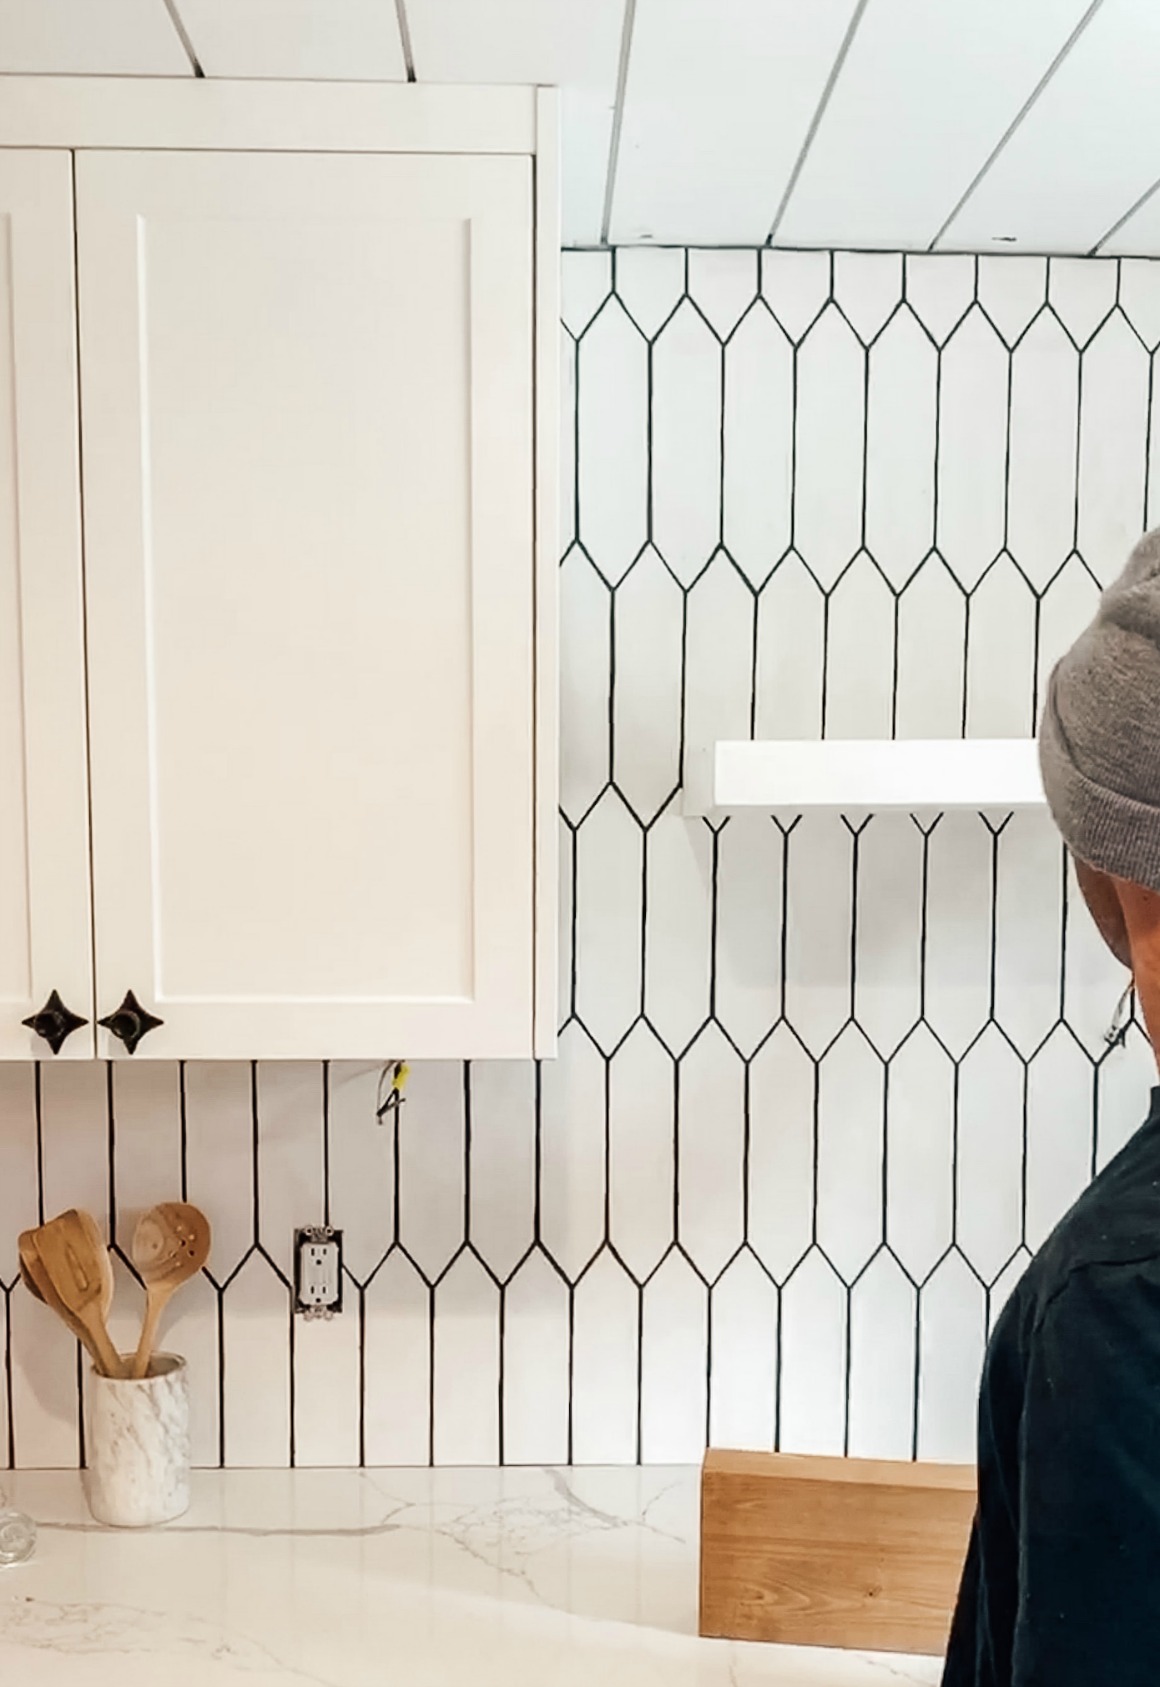
We decided to DIY our own floating shelves. Kevin made the first round of shelves out of select pine that we painted white. We have a full DIY tutorial on that HERE (they are super easy to make!). Unfortunately that is the only photo I got of the white floating shelves. Because immediately I didn’t like them. First of all the white on the shelf didn’t match our cabinets (and that would have been hard to get exactly right). And even if I did match the white, it felt like too much white to me. Also the shelf felt too bulky, I wanted it to be thin and not so heavy. I really wanted to pull in the wood we had in the other spots in our kitchen, that was my vision from day one, but didn’t know how to pull it off until…..
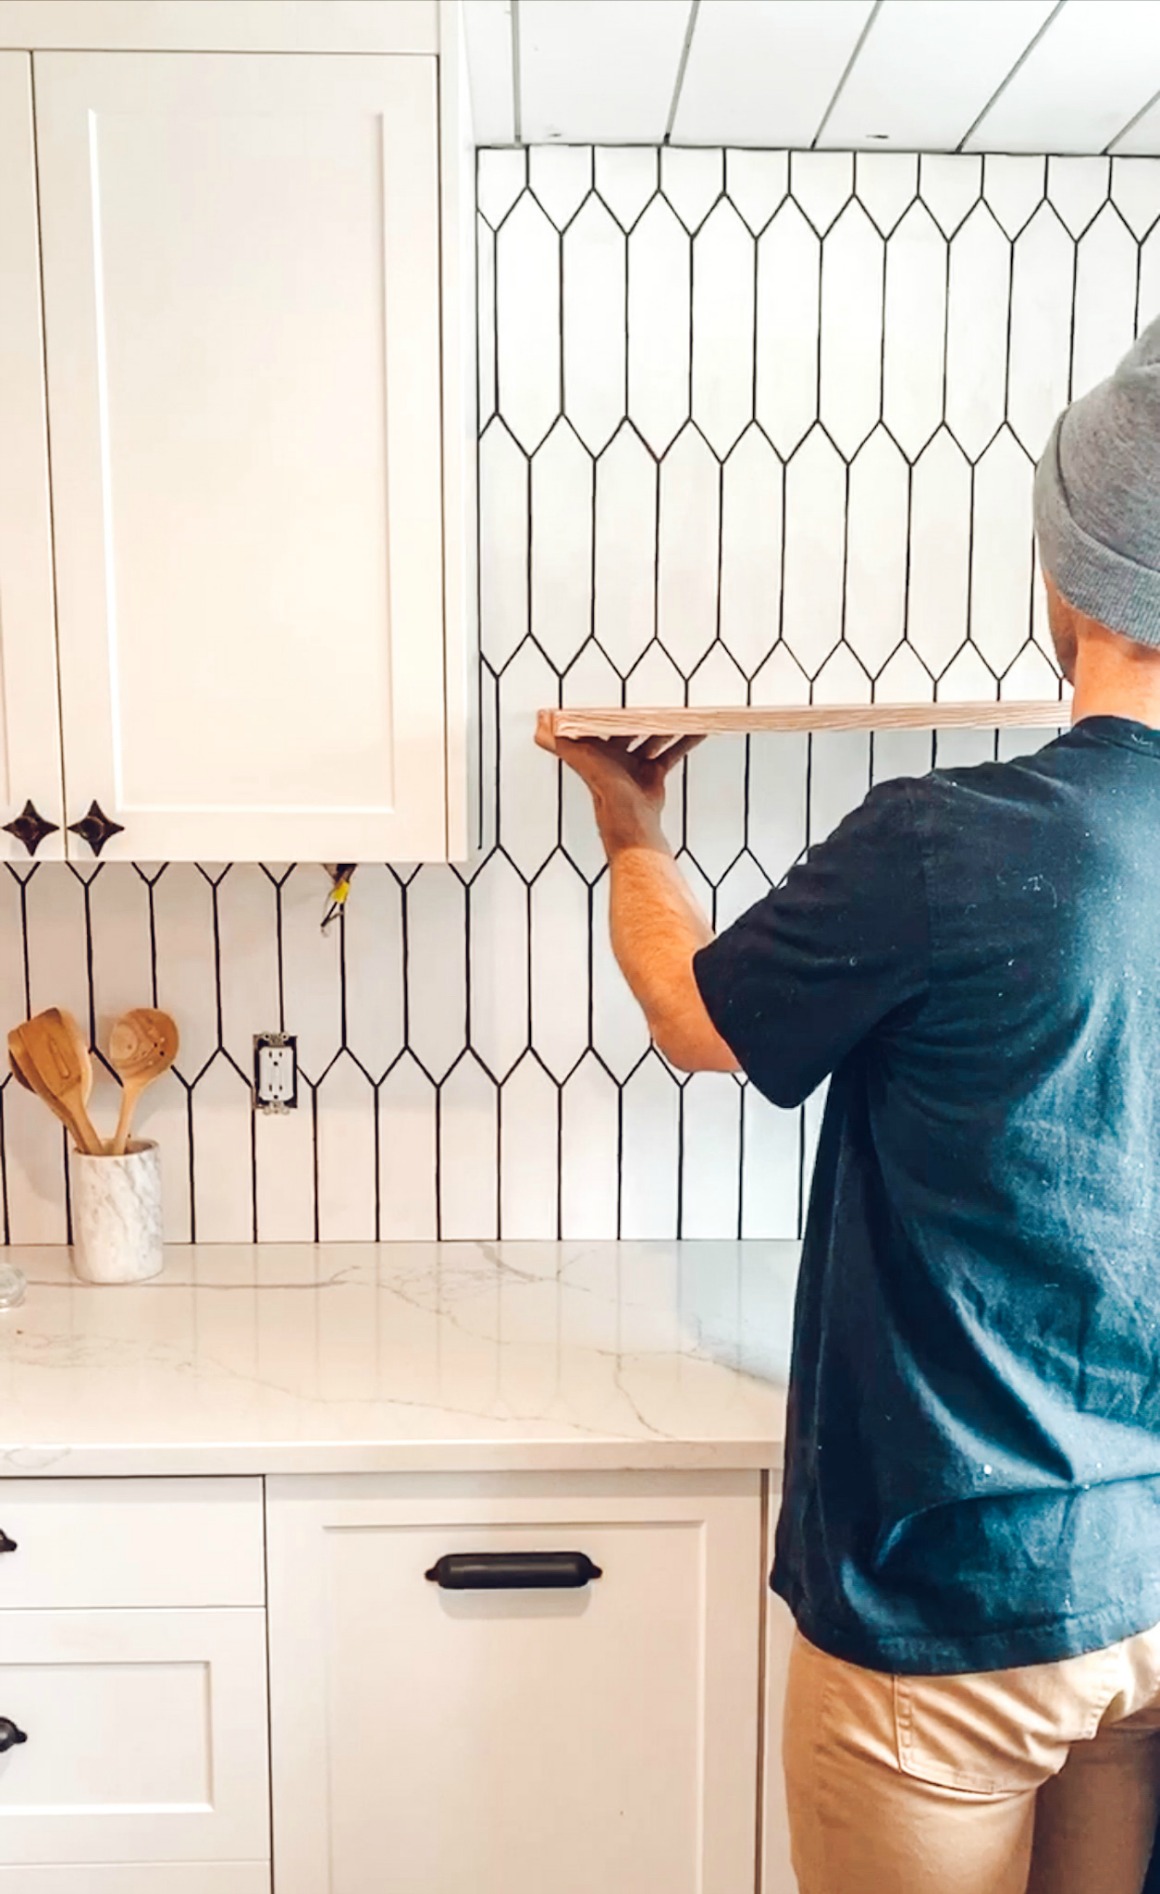
We ended up having a piece of wood leftover from our island that we weren’t going to use, (because we did a waterfall island in quartz instead). The slab of wood matched our pantry and island, in the Cove finish from Semihandmade. You can just order a slab of wood HERE. (So we could have done that in white to match our cabinets…but again it felt like too much white). We cut the slab in half and instantly had a shelf- SIZE- 12″x36″. (See how much better the wood contrast looks vs the white??)

This route of ordering just a slab of wood worked out great and was WAY more affordable than any other shelf I saw on the market. I had looked at Rejuvenation and they are all at least $250 (with the hardware). We used THESE brackets that are $7 each (I used them HERE too and spray painted them gold). Total these shelves cost us $81 each. You can make them for less just by cutting a piece of pine, if you aren’t trying to match a wood finish like we were.
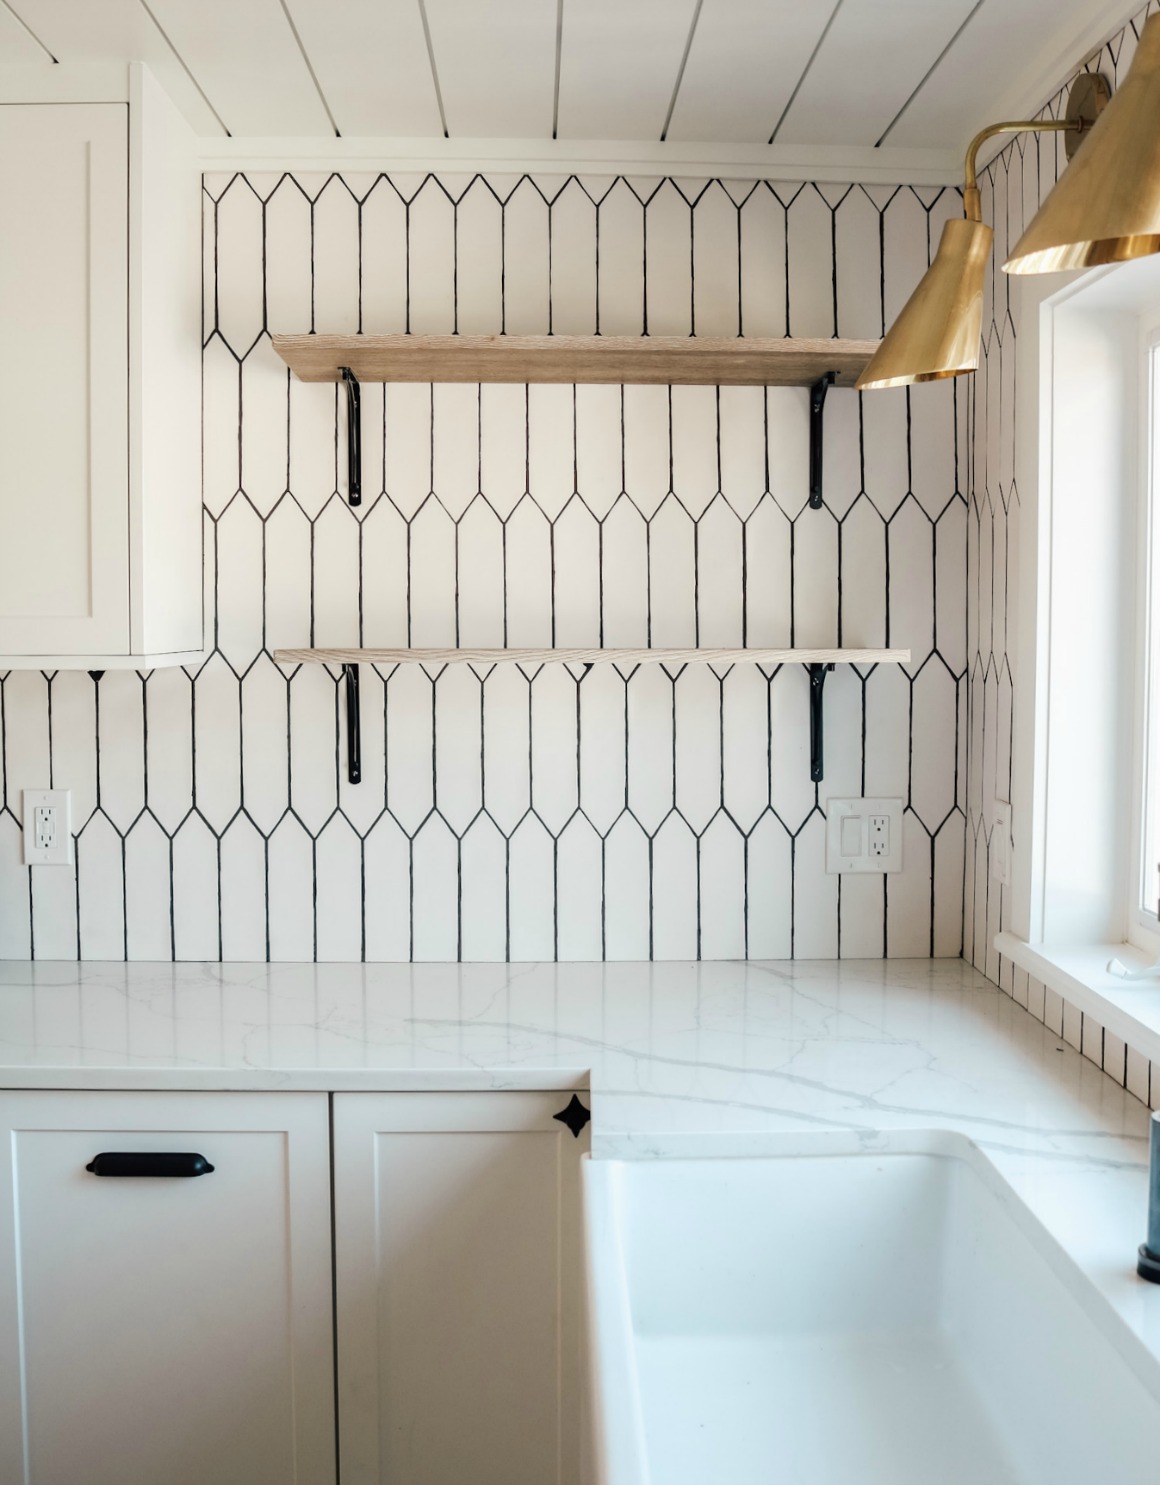
Since we cut the slab of wood that only had one finished side, we put the top shelf upside down so we could see the finished side from below (you can’t see the top of it). Also when hanging the shelves we kept the bottom one the same height as the cabinets. And the second shelf I wanted to make sure I could lean a larger piece of art on the shelf. Knowing what you want to put on your shelves does help! We made sure a plate could sit on the shelf and it wasn’t deeper than the trim around the window.
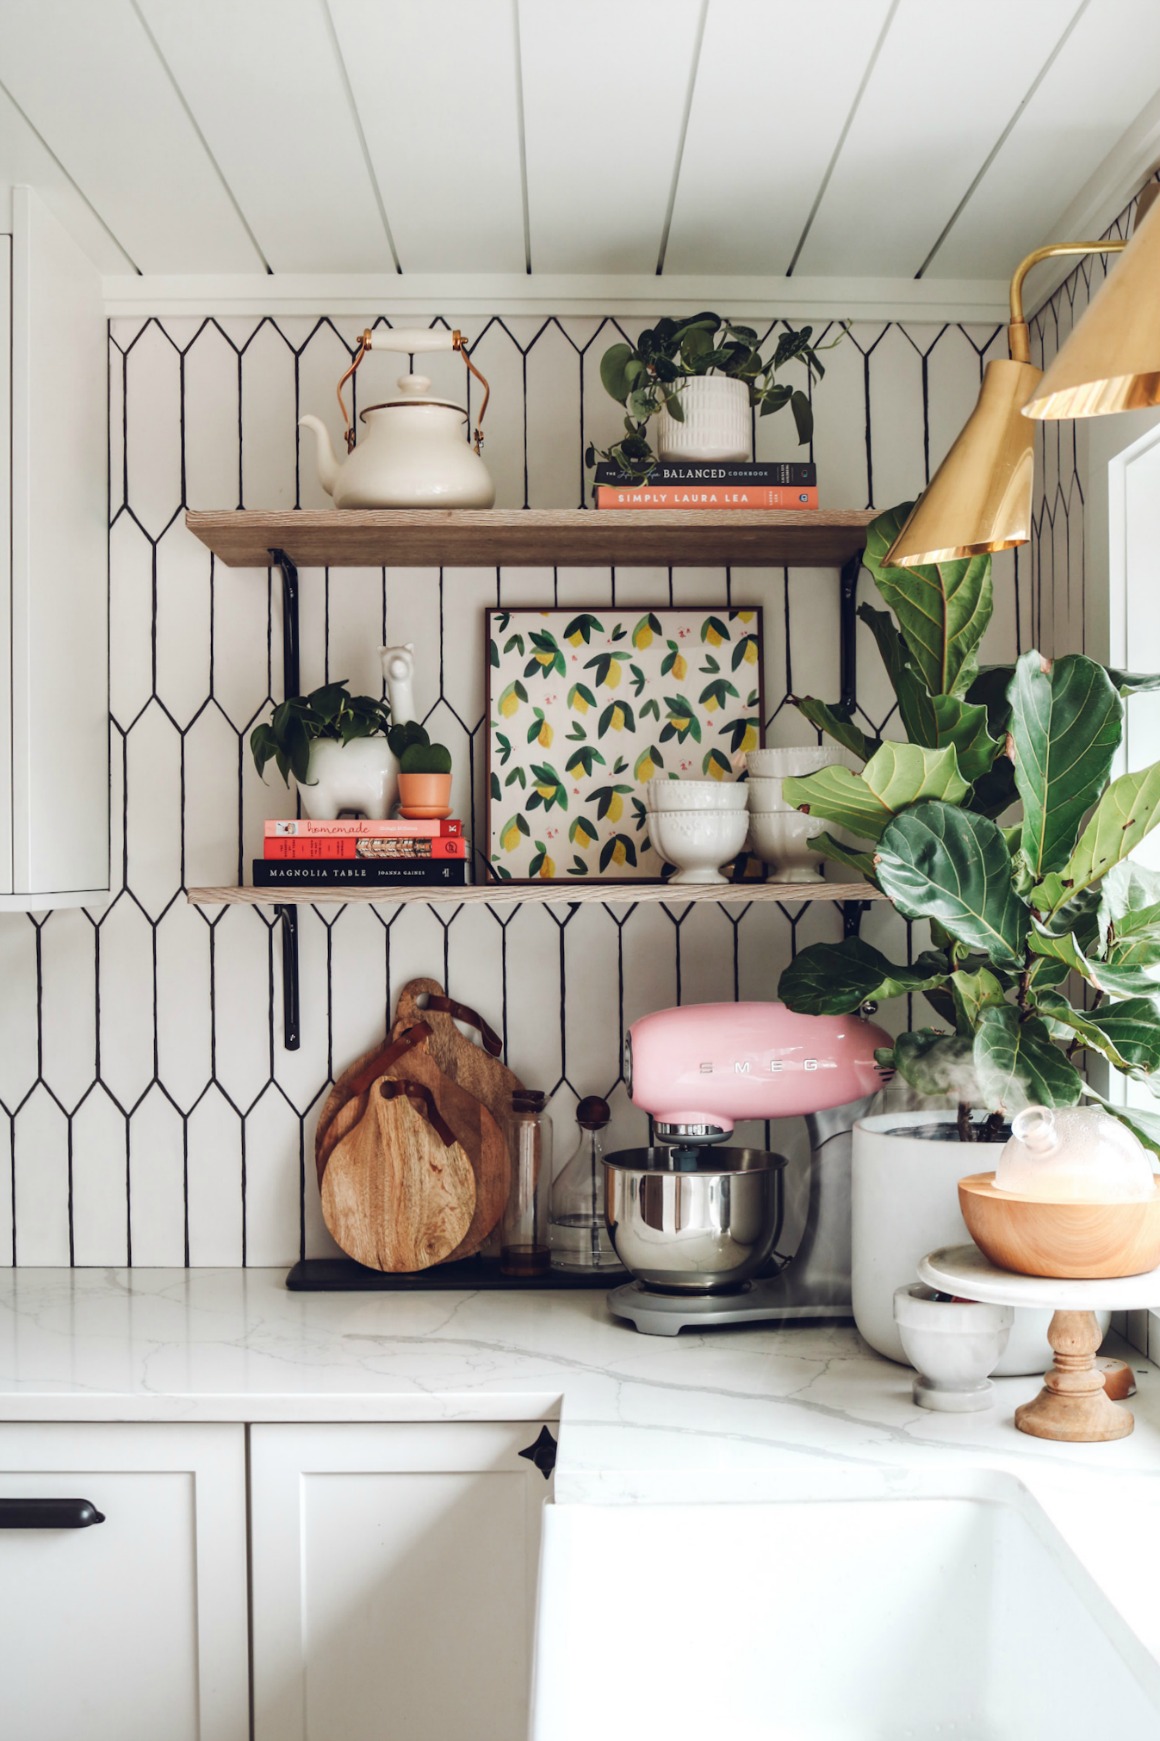
And here they are all styled! When I style shelves I start with the largest piece first. In this case I started with THIS lemon art. And I balanced the shelves out by doing books on each shelf, so it felt somewhat cohesive.
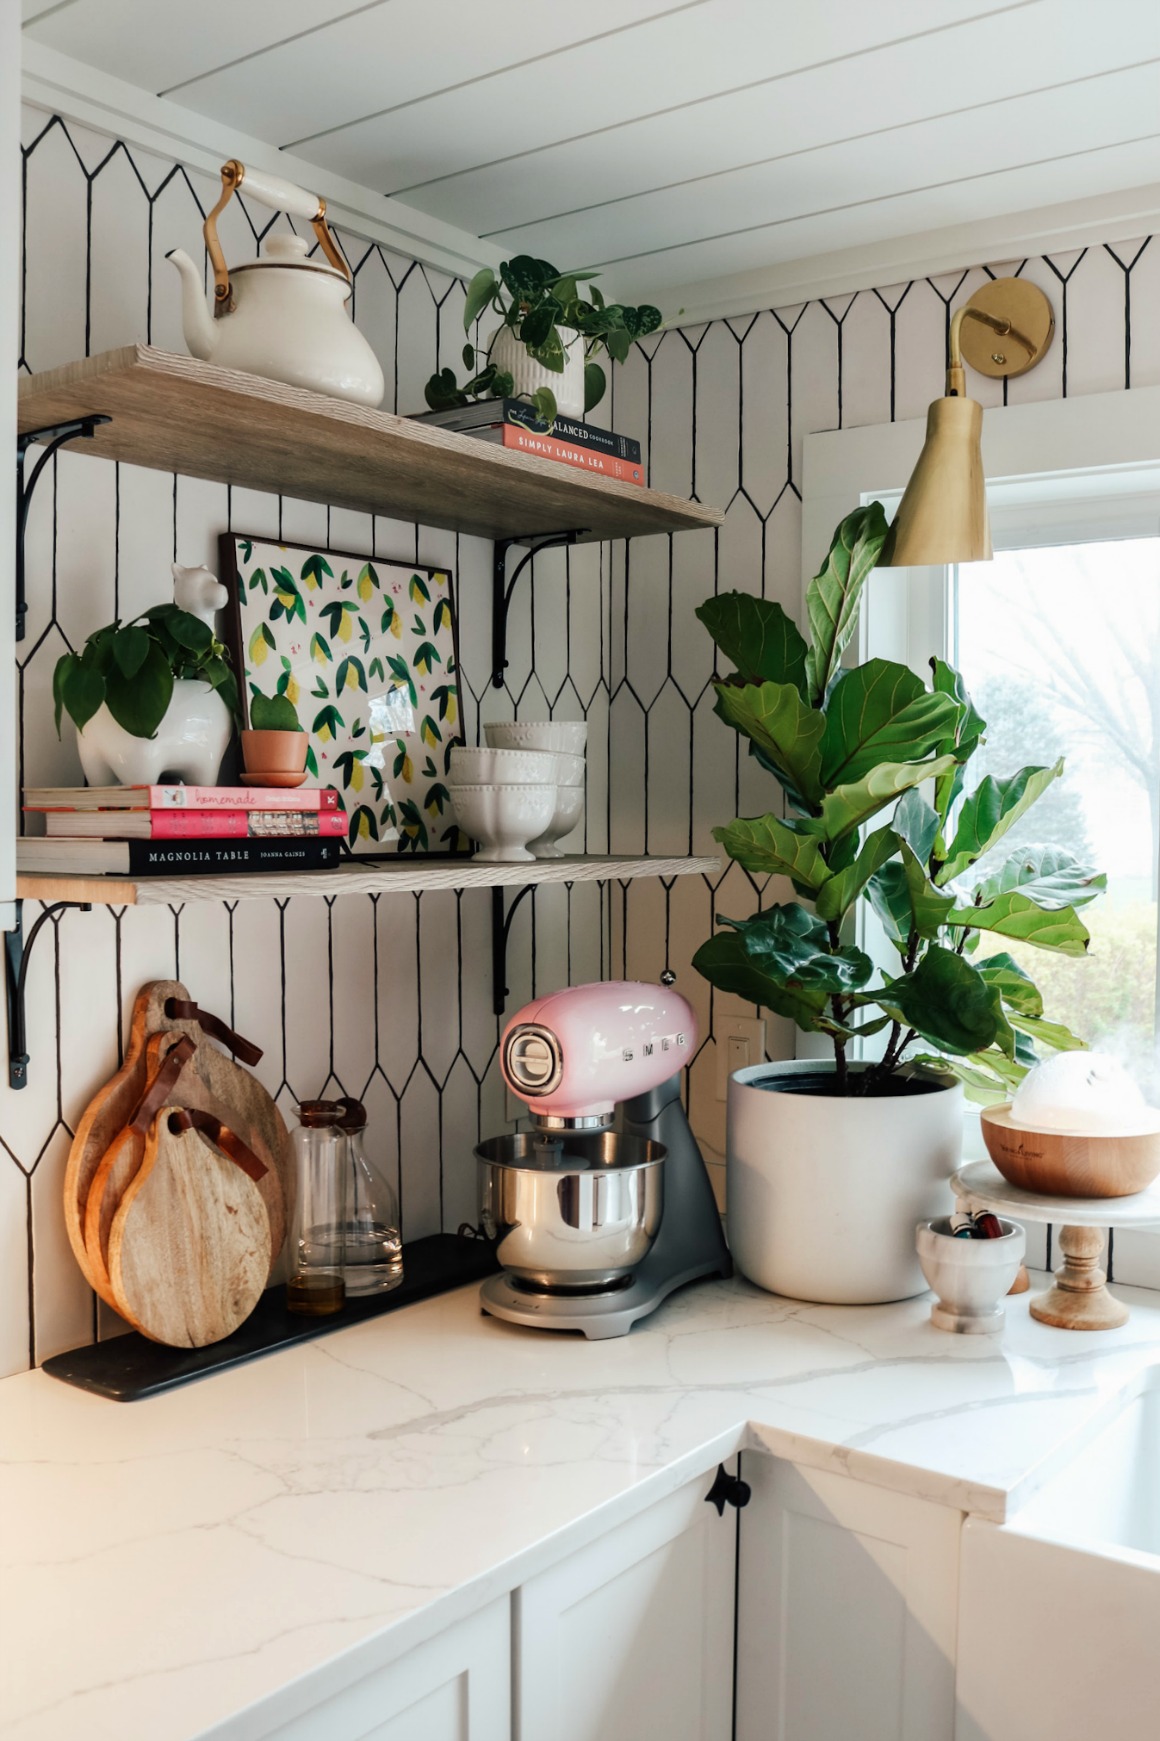
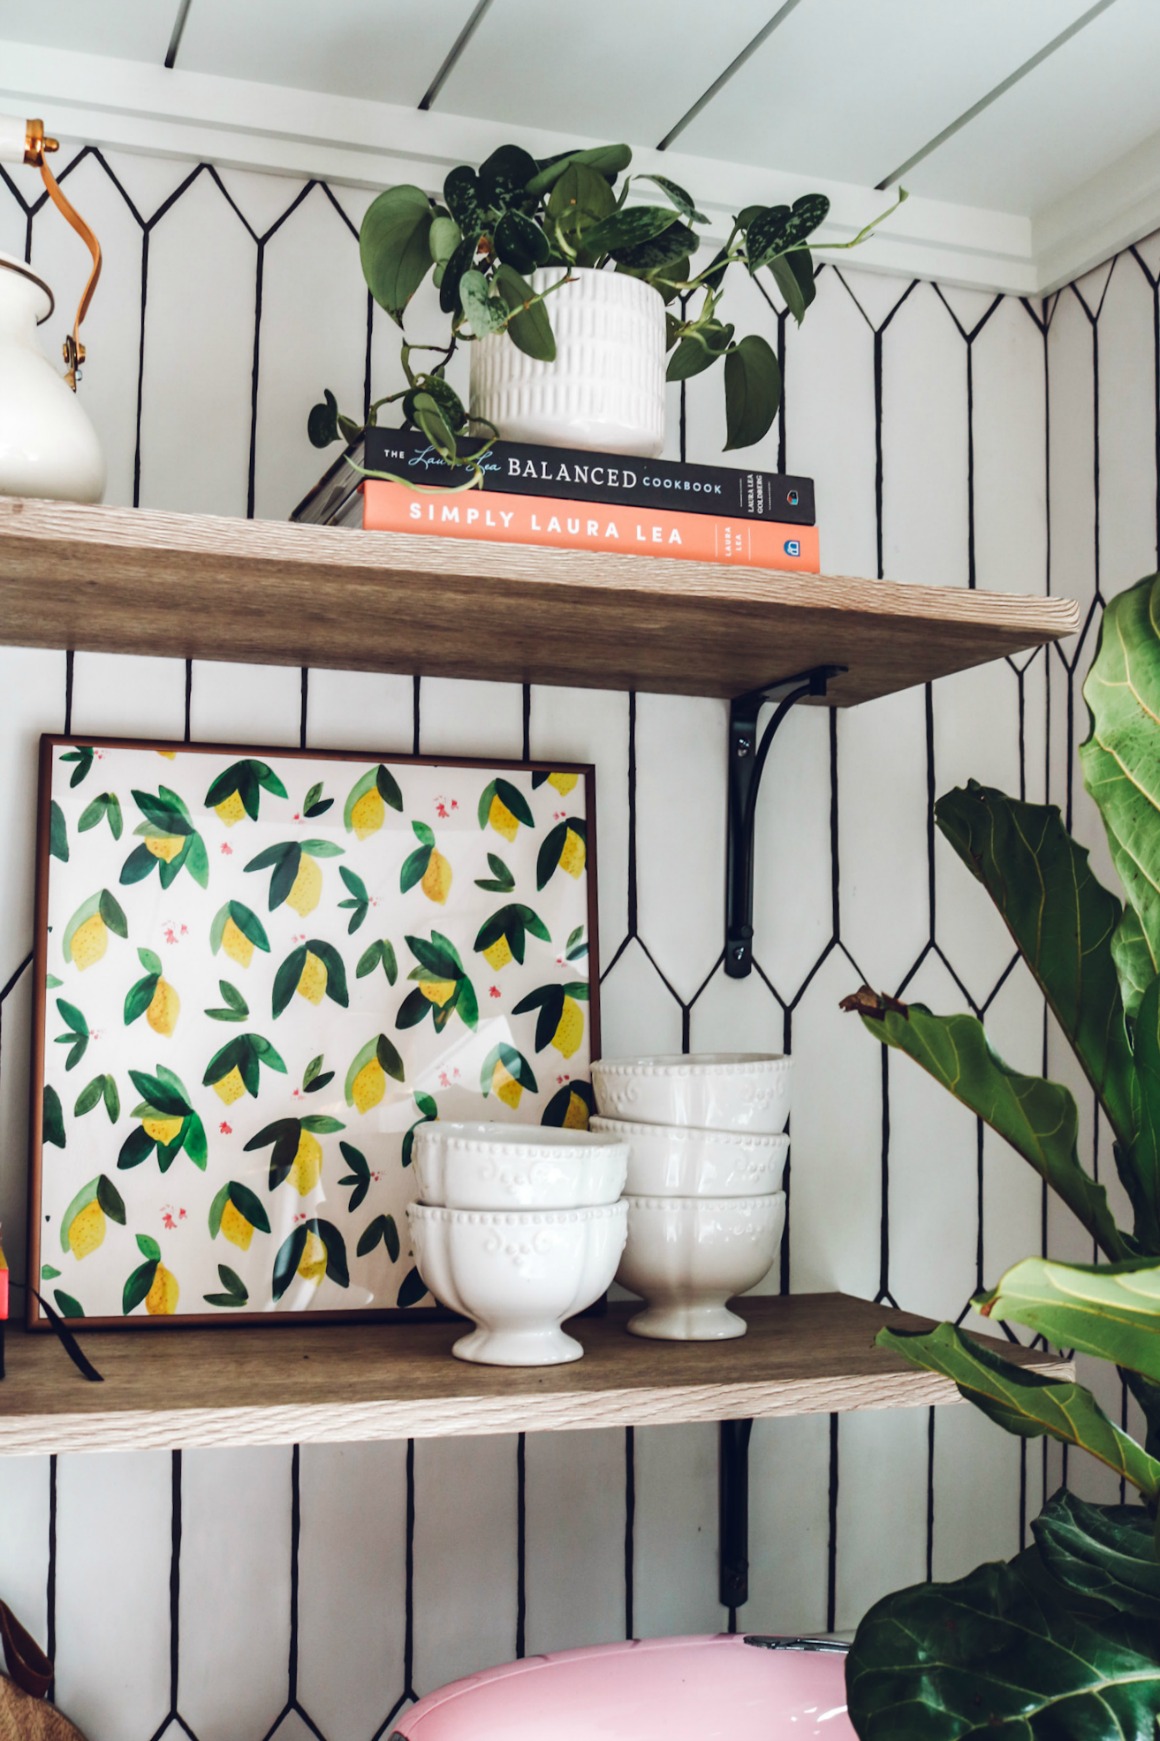
Plants are always a good idea on shelves! I had THIS Silver Philodendron I put on the top shelf, it will hang down, which I love the layered look that plants add.
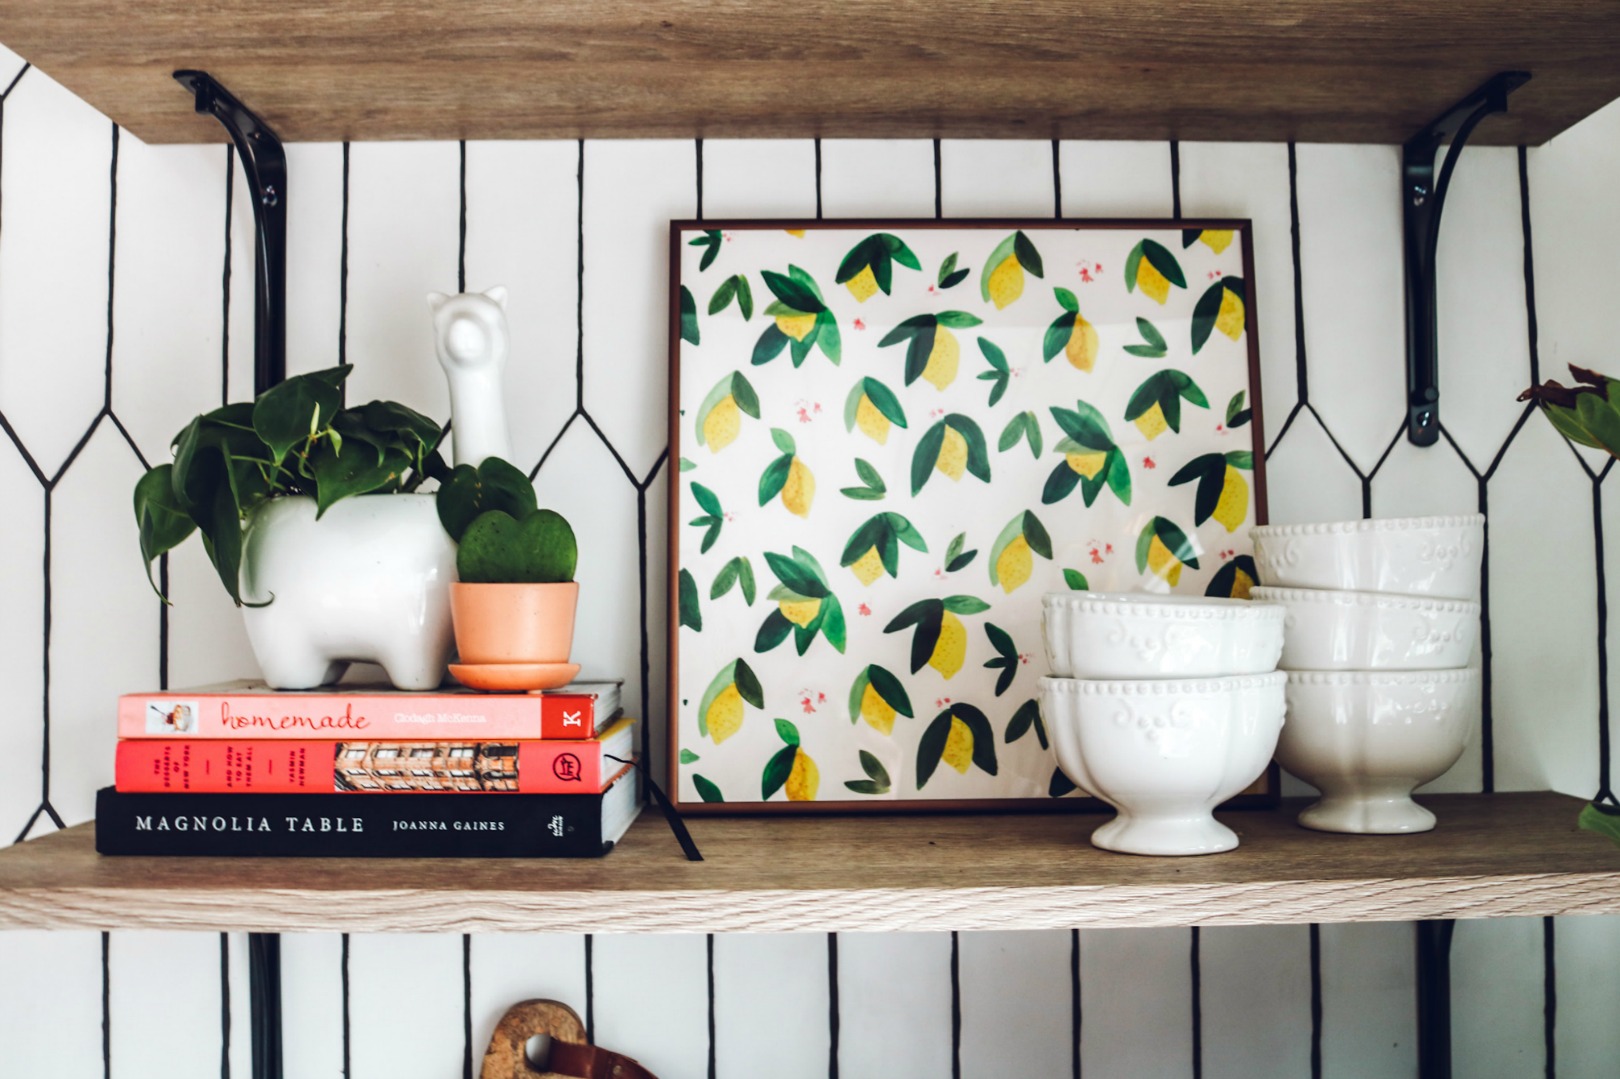
I had that little Llama planter that I put another Philodendron in, and this Hoya Heart Plant. The white bowls I have had a long time, but THESE are kind of similar. Mixing in practical things you use everyday as decor, always looks best and less staged. Like the cookbooks we use, but they also look good as decor. Same with THIS kettle!
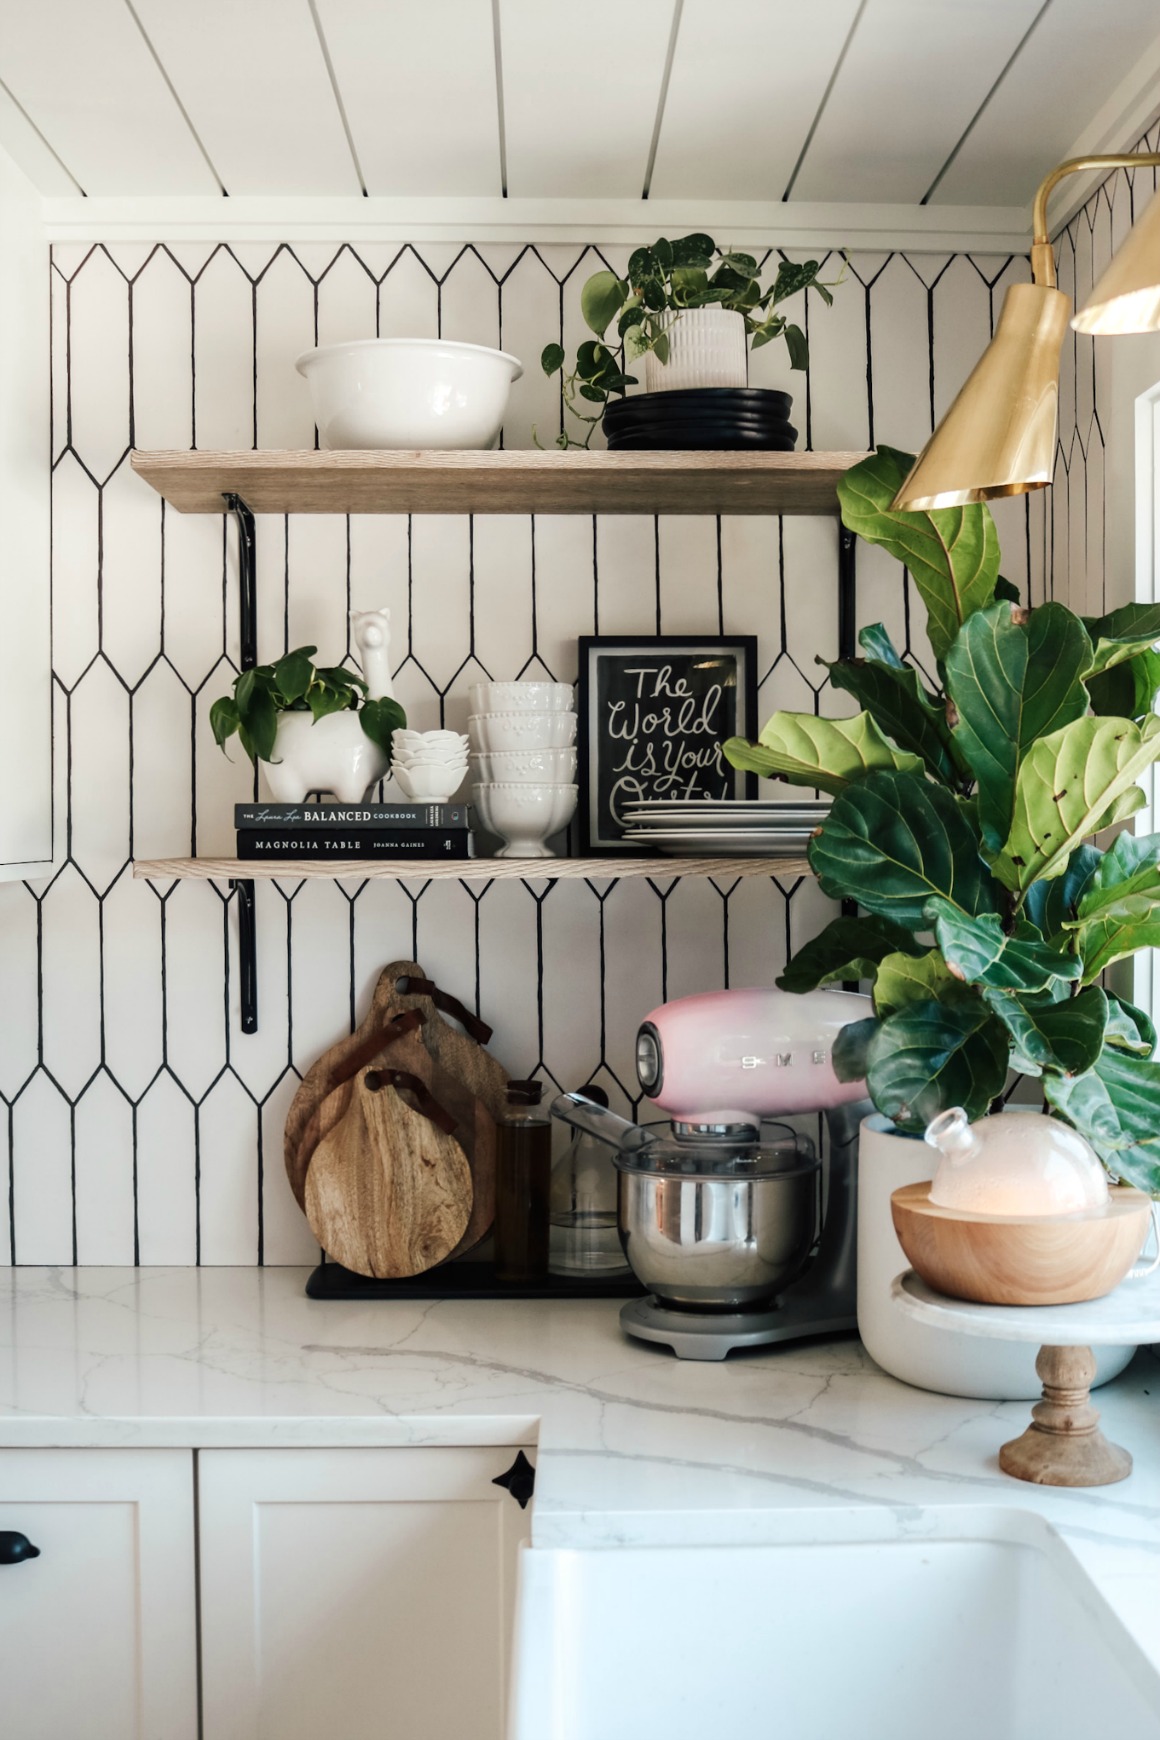
I did try decorating the shelves more monochromatic in black and white to try two looks! What look is your favorite? I just think it is fun to see that there is no right way to do something! Home decor is all subjective to the eye of the beholder!
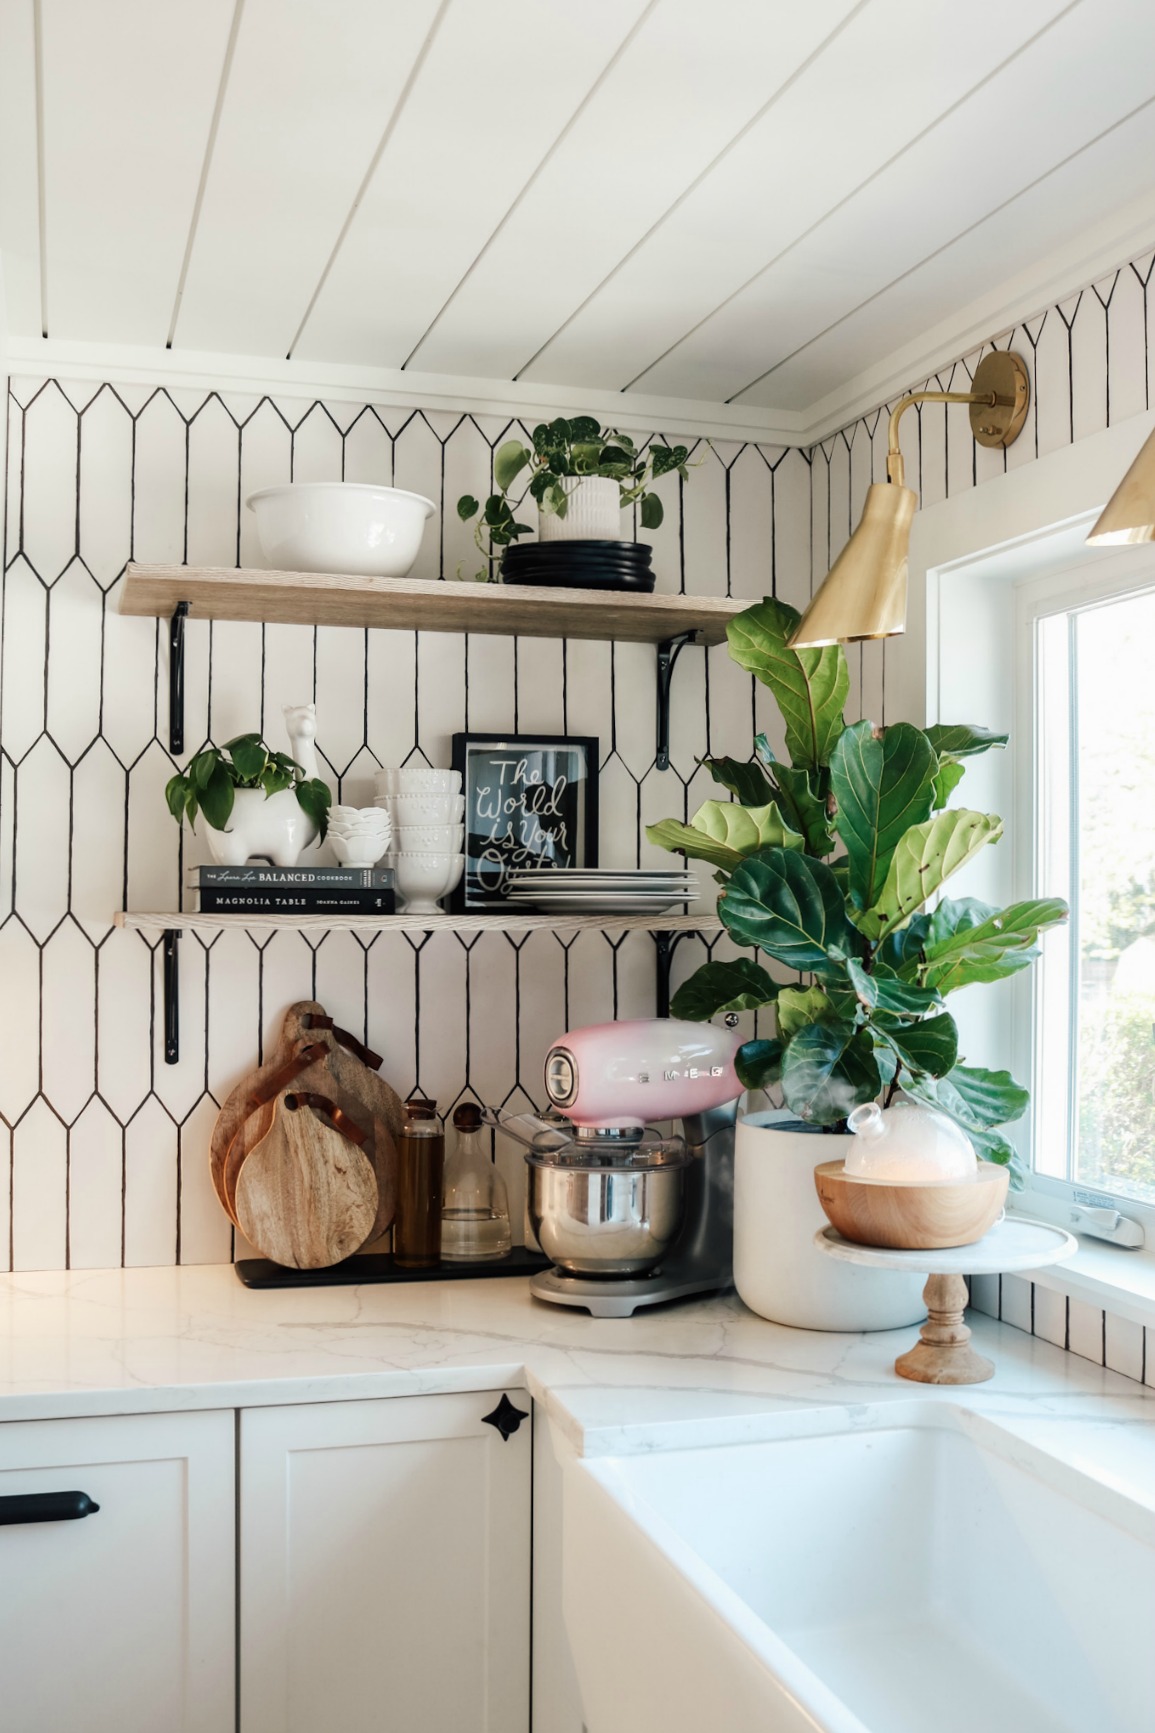

I had the large fiddle leaf fig from Home Depot on our piano and decided this was a better spot for it, by the window! And I always have a diffuser by my kitchen sink to bring in amazing smells and also make me happy as I do the dishes! (Find my favorite diffusers HERE).
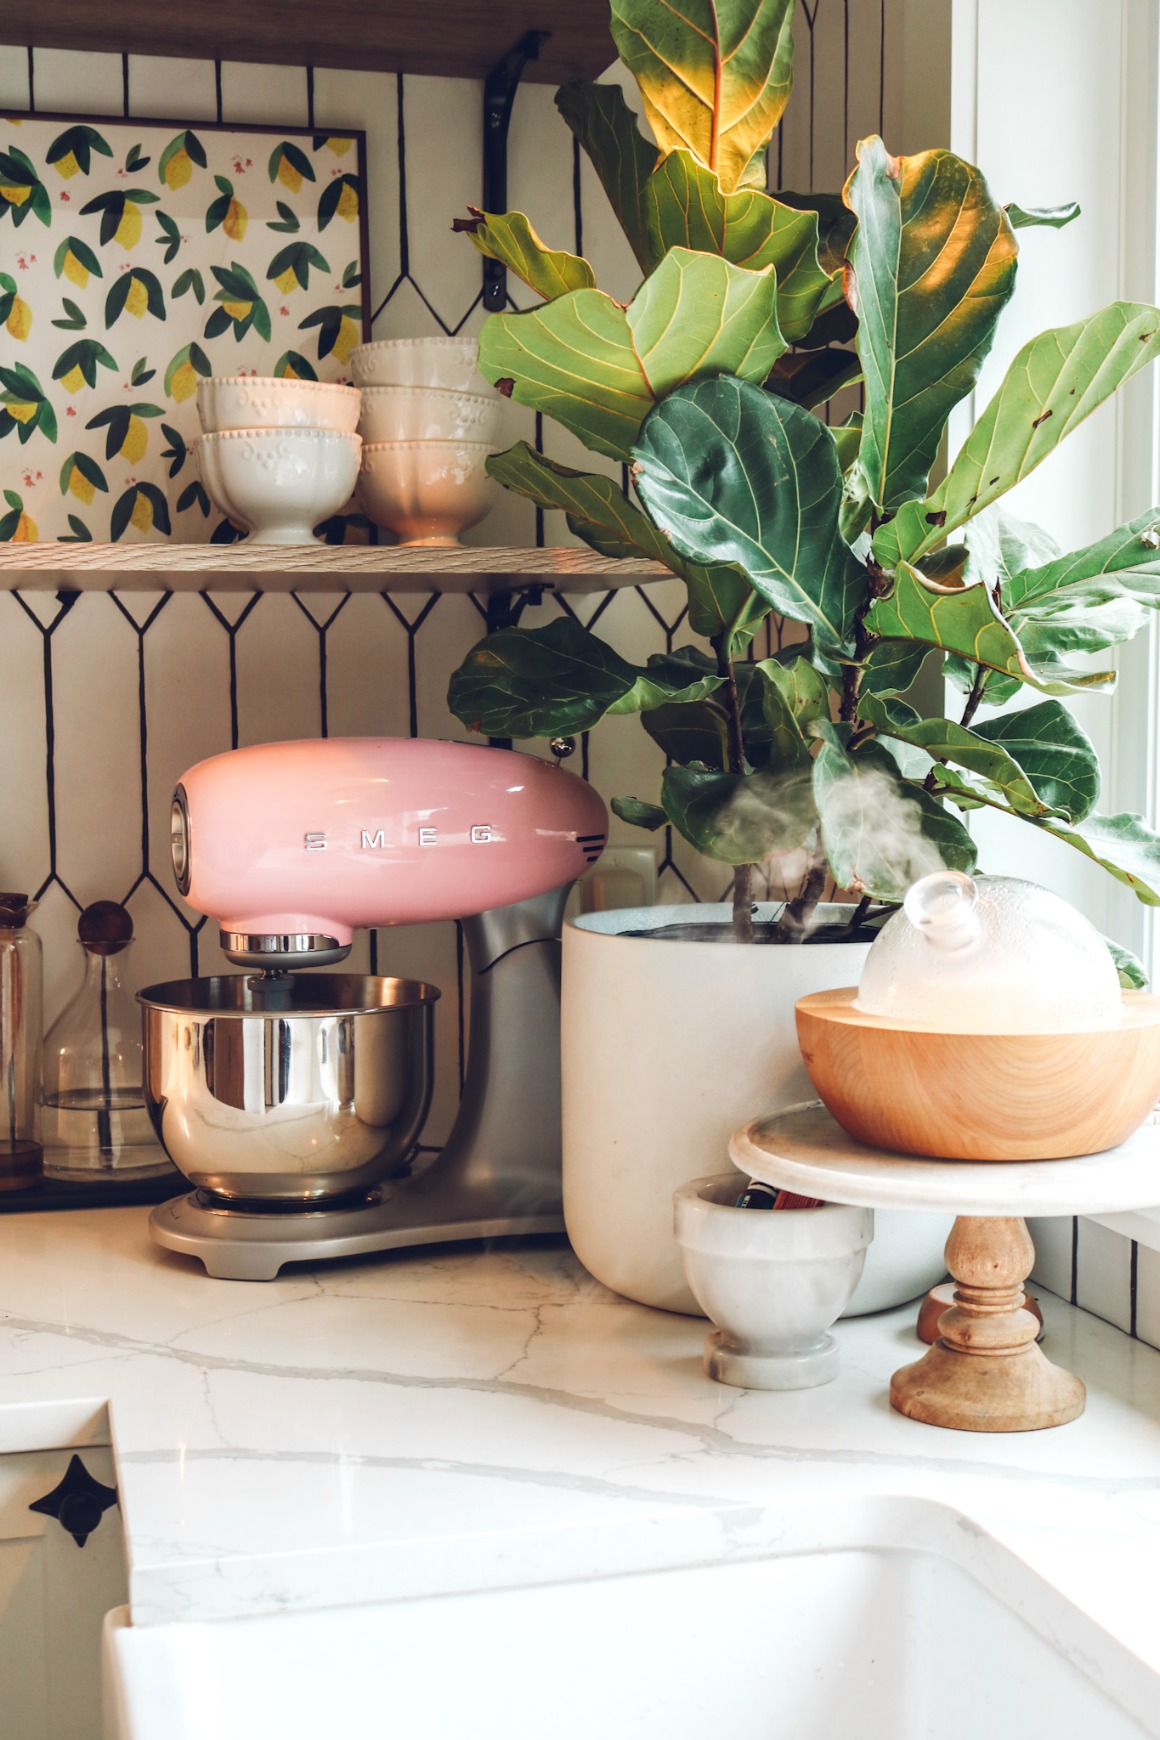
I got the SMEG mixer as an early mothers day gift! I wanted a pink SMEG fridge, but decided against the pink for the large appliance and am just going to accent with some fun pink pieces!
Check back next week to see all the kitchen! Click on an image below to shop the post-


Love the shelves! We are going to do something similar… any tips on mounting them on the tiled wall?! Makes me nervous.
It is actually really easy. I am going to show on my Instagram stories soon when we do the bathroom!
yippee! thank you
It’s all SO good! You must be so happy with how it all turned out! It has to feel like waking up to a new house! Enjoy & thanks for all of the eye candy & inspiration! 💗
Beautiful! I am soooo anxious to see the whole kitchen. Can’t wait!!